|
|

|
Porsche, and the Porsche crest are registered trademarks of Dr. Ing. h.c. F. Porsche AG.
This site is not affiliated with Porsche in any way. Its only purpose is to provide an online forum for car enthusiasts. All other trademarks are property of their respective owners. |
|
|
  |
| brant |
 Aug 14 2012, 08:35 AM Aug 14 2012, 08:35 AM
Post
#81
|
|
914 Wizard           Group: Members Posts: 12,092 Joined: 30-December 02 From: Colorado Member No.: 47 Region Association: Rocky Mountains 

|
Nice shot DEC
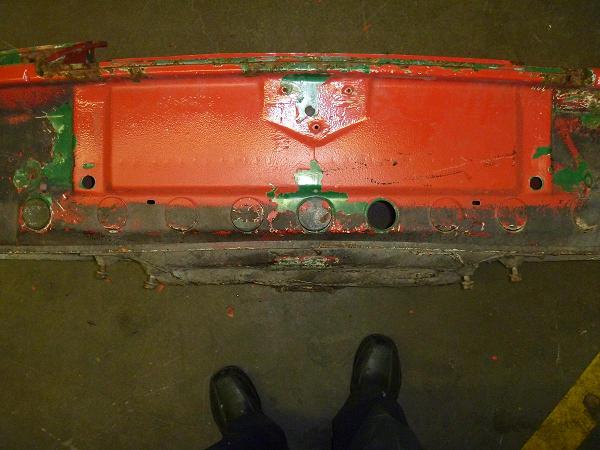
does anyone have a frontal shot showing the flatness? |
| peteyd |
 Aug 14 2012, 03:12 PM Aug 14 2012, 03:12 PM
Post
#82
|
|
Senior Member    Group: Members Posts: 740 Joined: 27-March 08 From: Elora, Ontario, Canada Member No.: 8,858 Region Association: Canada |
Heres a pic...
 |
| sixnotfour |
 Aug 14 2012, 04:07 PM Aug 14 2012, 04:07 PM
Post
#83
|
|
914 Wizard           Group: Members Posts: 11,017 Joined: 12-September 04 From: Life Elevated..planet UT. Member No.: 2,744 Region Association: Rocky Mountains 

|
Pete's looks pushed up in the center also.
Attached image(s) 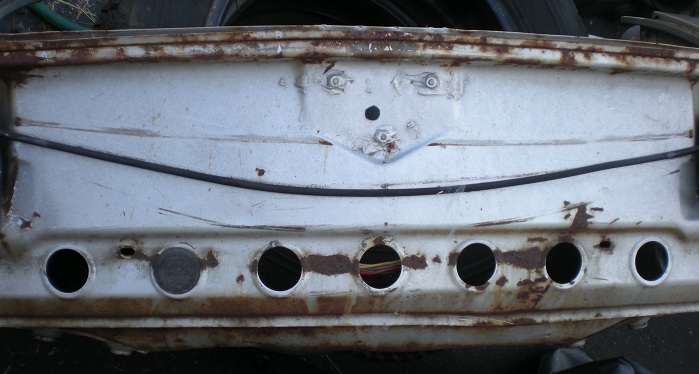 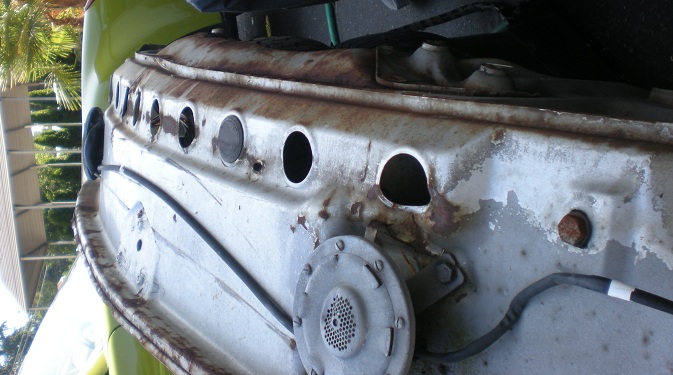
|
| Katmanken |
 Aug 14 2012, 06:03 PM Aug 14 2012, 06:03 PM
Post
#84
|
|
You haven't seen me if anybody asks...     Group: Members Posts: 4,738 Joined: 14-June 03 From: USA Member No.: 819 Region Association: Upper MidWest |
Dang, I wonder if the PO used the flat of the front floor pan as a jacking point. (IMG:style_emoticons/default/blink.gif)
All those little dings coud be from zooming into the pit, jamming a jack under there, and jacking away. The dents at the scraped and dented areas along the bend in the front also make me wonder if the PO finally noticed the dents and caved in floor, and switched to the front bend area which has more stiffness. Attached image(s) 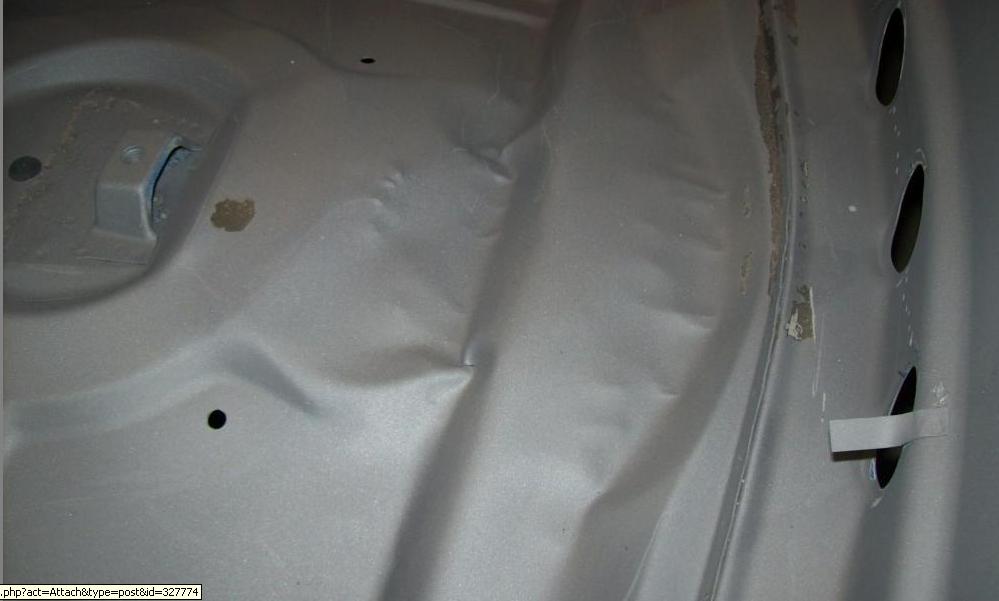 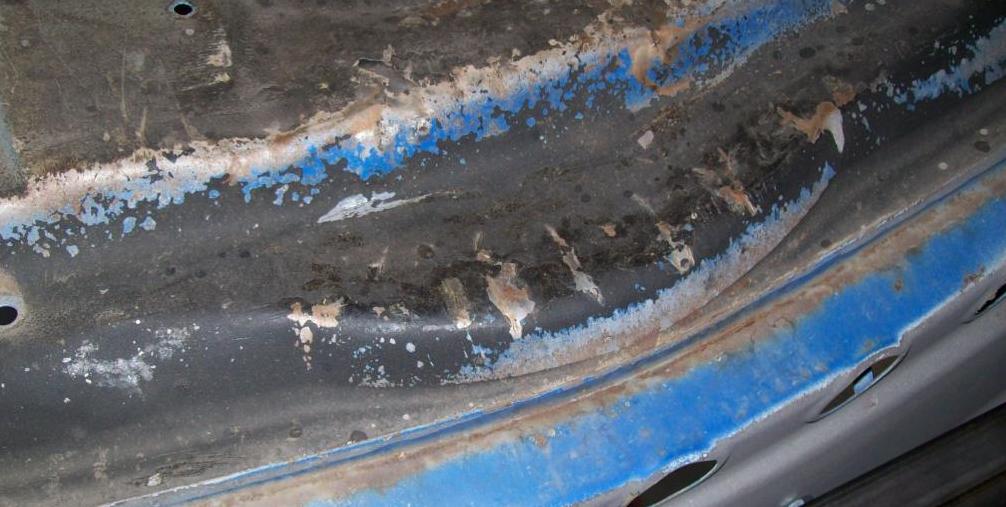
|
| seanery |
 Aug 14 2012, 06:27 PM Aug 14 2012, 06:27 PM
Post
#85
|
|
waiting to rebuild whitey!                Group: Retired Admin Posts: 15,857 Joined: 7-January 03 From: Indy Member No.: 100 Region Association: None |
I like where you're going with that ken.
|
| Speedo |
 Aug 19 2012, 07:10 PM Aug 19 2012, 07:10 PM
Post
#86
|
|
Senior Member    Group: Members Posts: 559 Joined: 7-November 06 From: Boulder Member No.: 7,170 Region Association: Rocky Mountains 
|
I was going to start hammering on the front end to bring the arch down...using a jack and a 6x6 timber on end to act as a bucking block...but when I applied pressure to the pan with the jack, it wanted to lift the front half of the rotisserie off the ground. Plan B...wait until the car is rotated rightside up and hammer down against the bucking block. Brant offered to let me come out to see the underside of his black car as he was going to remove the front bumper. I decided to get the welding going instead. So I decided to launch into the welding...here
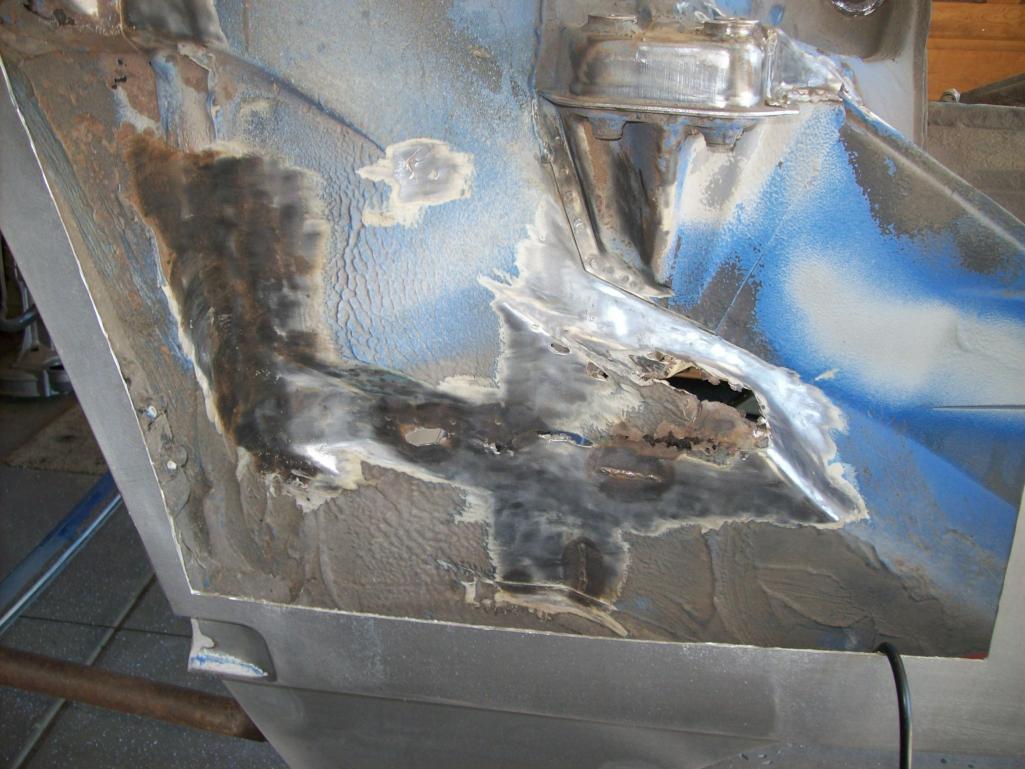 I need to get the wire brush out to see where the rust starts and ends... 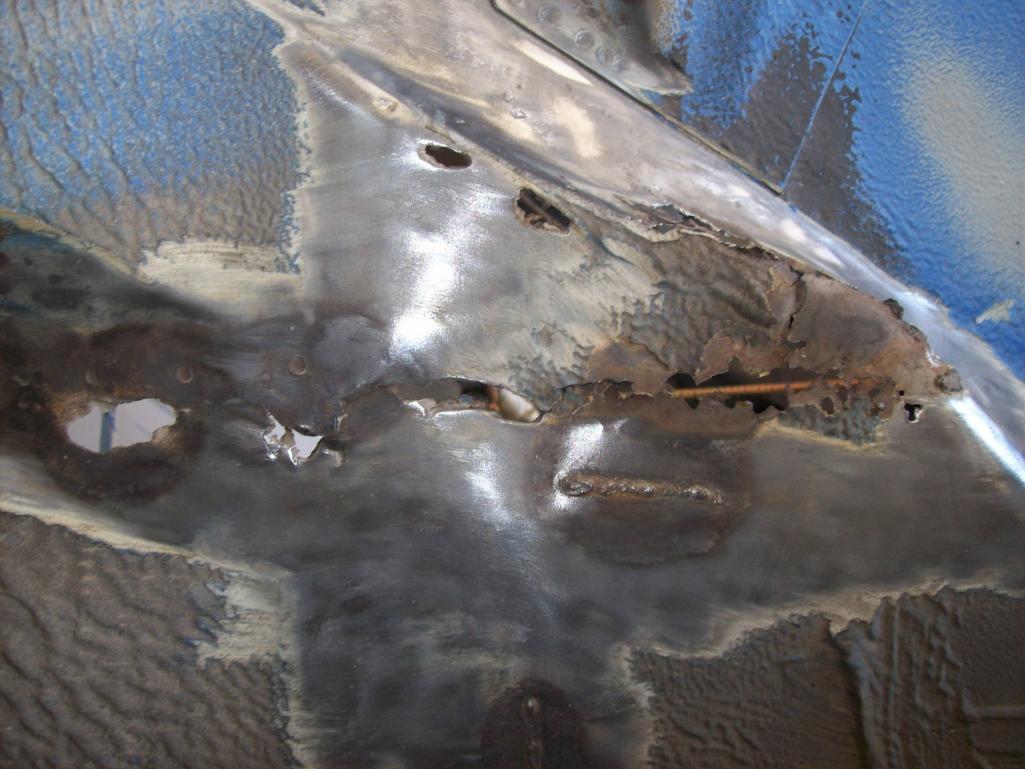 So this is the nice resto design replacement outer longitudinal...but I don't think I need this much. 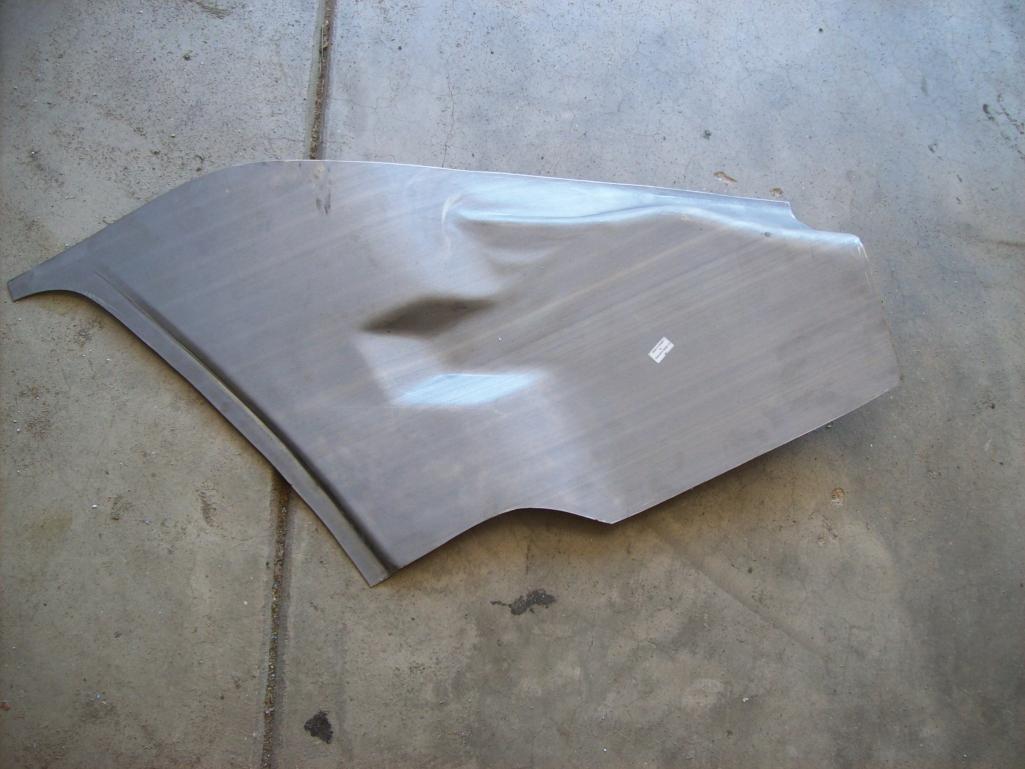 I only need to replace a decent size area, and up here a bit also needs to be scabbed in... 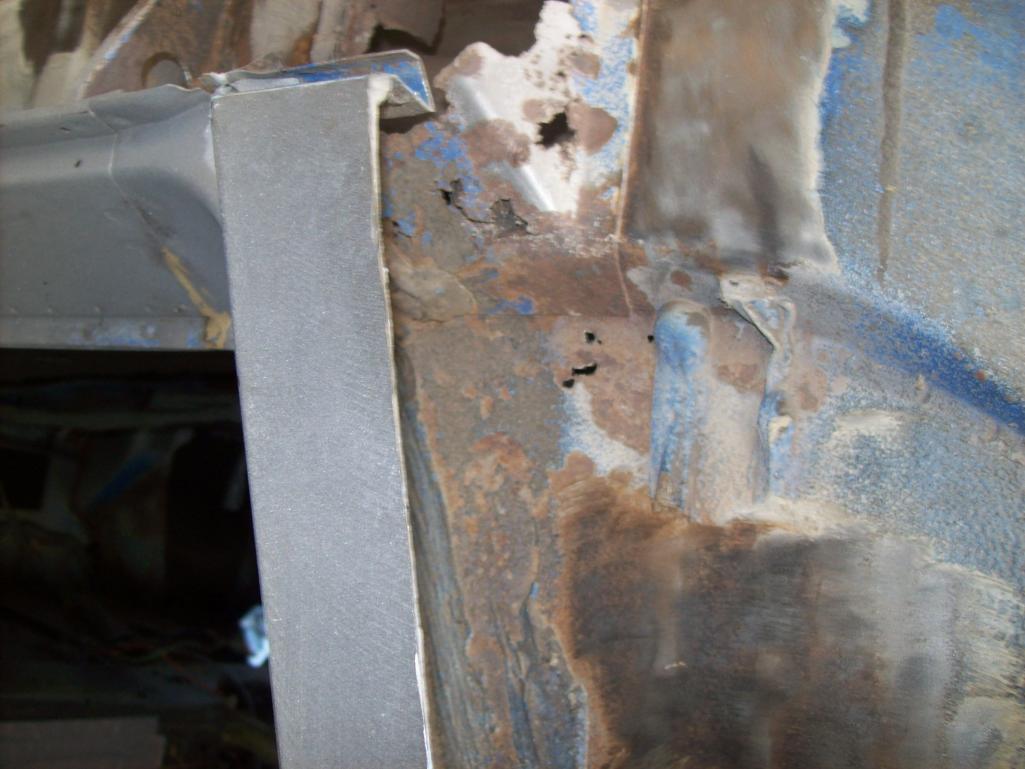 I think I will save this nice peice and patch this area myself. What I have to work with... 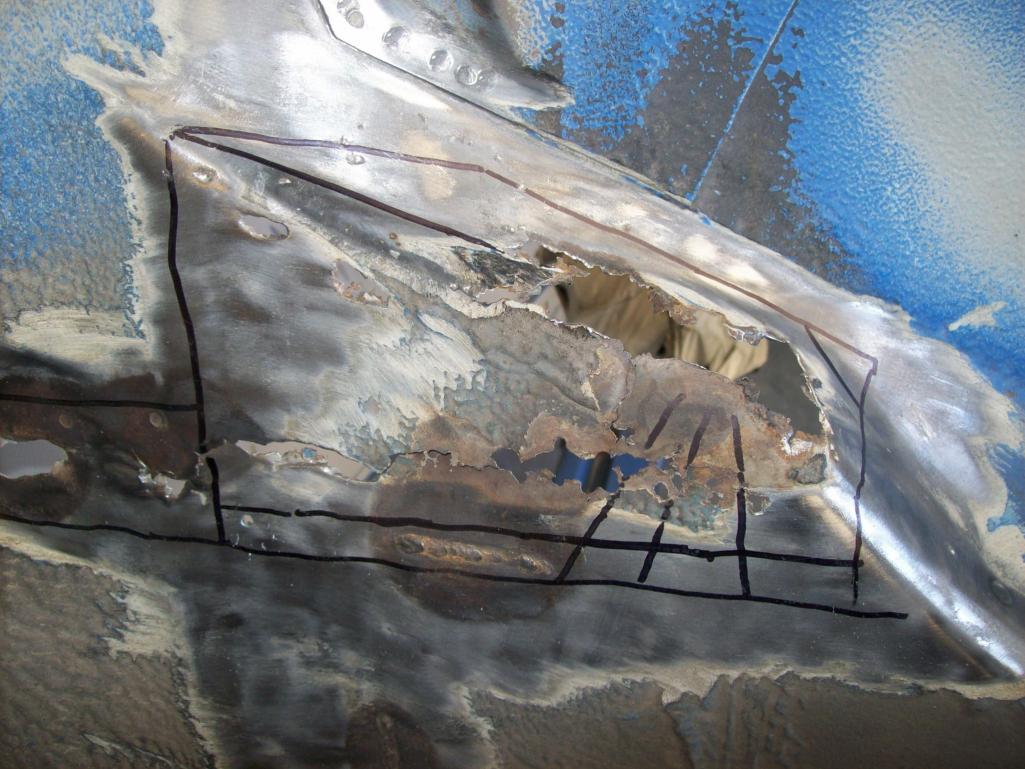 I will try to visualize how the steel needs to be shaped to fit the replacement area. |
| Speedo |
 Aug 19 2012, 07:18 PM Aug 19 2012, 07:18 PM
Post
#87
|
|
Senior Member    Group: Members Posts: 559 Joined: 7-November 06 From: Boulder Member No.: 7,170 Region Association: Rocky Mountains 
|
|
| Ferg |
 Aug 20 2012, 02:43 PM Aug 20 2012, 02:43 PM
Post
#88
|
|
914 Guru      Group: Members Posts: 5,948 Joined: 8-January 03 From: Boulder CO Member No.: 116 Region Association: None 
|
Nice Lars (IMG:style_emoticons/default/welder.gif)
|
| Speedo |
 Aug 20 2012, 08:11 PM Aug 20 2012, 08:11 PM
Post
#89
|
|
Senior Member    Group: Members Posts: 559 Joined: 7-November 06 From: Boulder Member No.: 7,170 Region Association: Rocky Mountains 
|
|
| Speedo |
 Aug 20 2012, 08:46 PM Aug 20 2012, 08:46 PM
Post
#90
|
|
Senior Member    Group: Members Posts: 559 Joined: 7-November 06 From: Boulder Member No.: 7,170 Region Association: Rocky Mountains 
|
My front A-arms didn't want to give up the t-bars...so I drilled a hole in the forward end and liberally applied penetrating fluid. After a couple days, they agreed to come out. Now the holes need to be sealed (not caulked) (IMG:style_emoticons/default/screwy.gif)
The engine tin that was bent and cracked also was going to be too expensive to replace...so while the welder was out, thin welding repairs occurred. Finally the front cracked A-arm cover was due. The before... 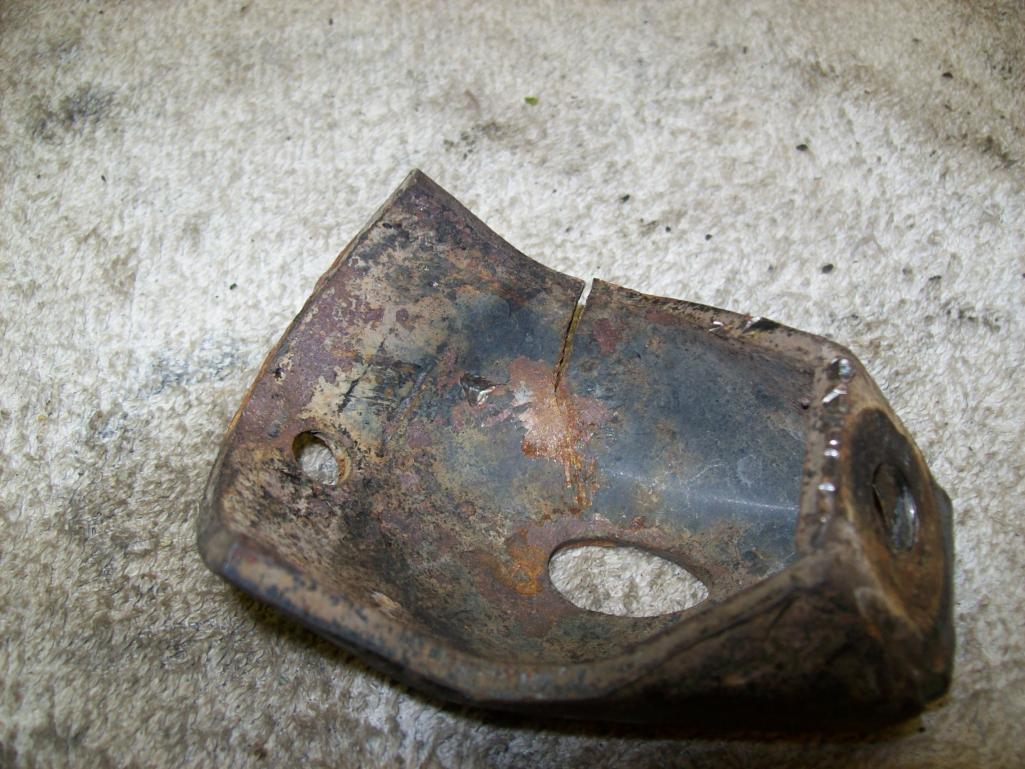 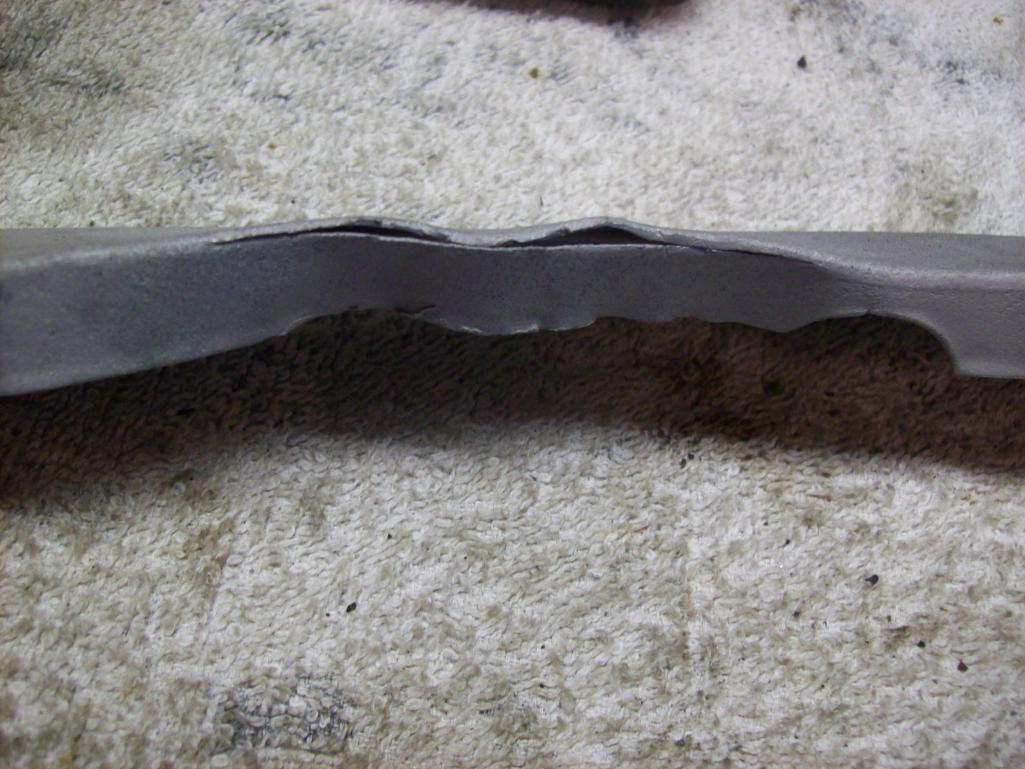 The after... 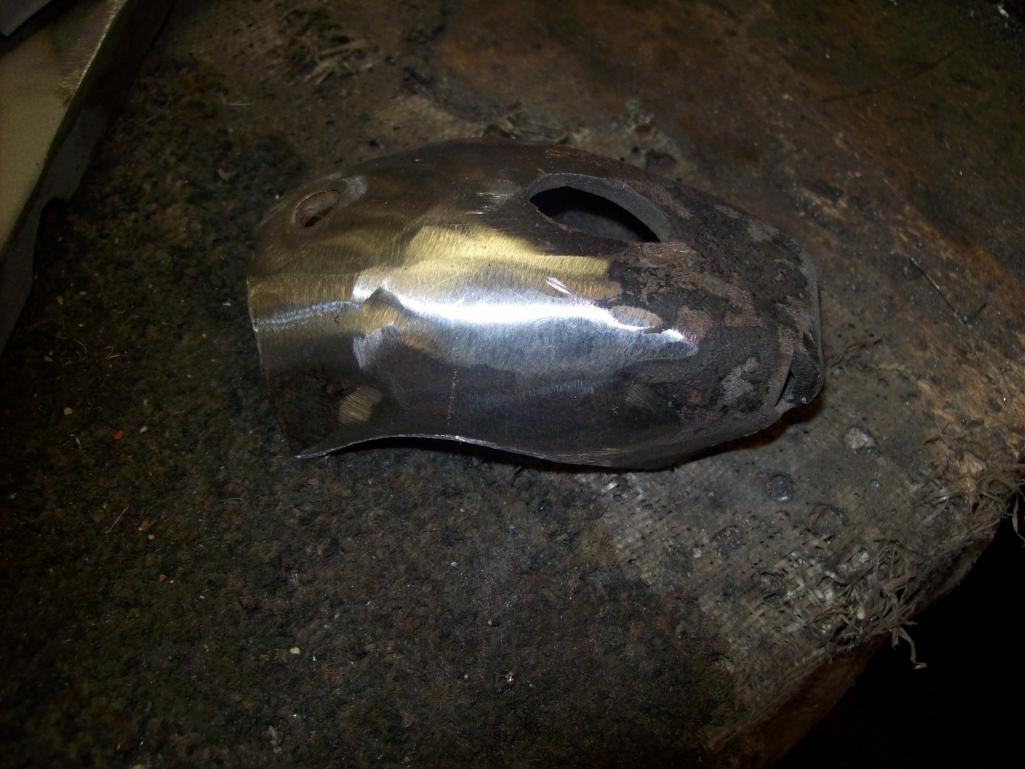 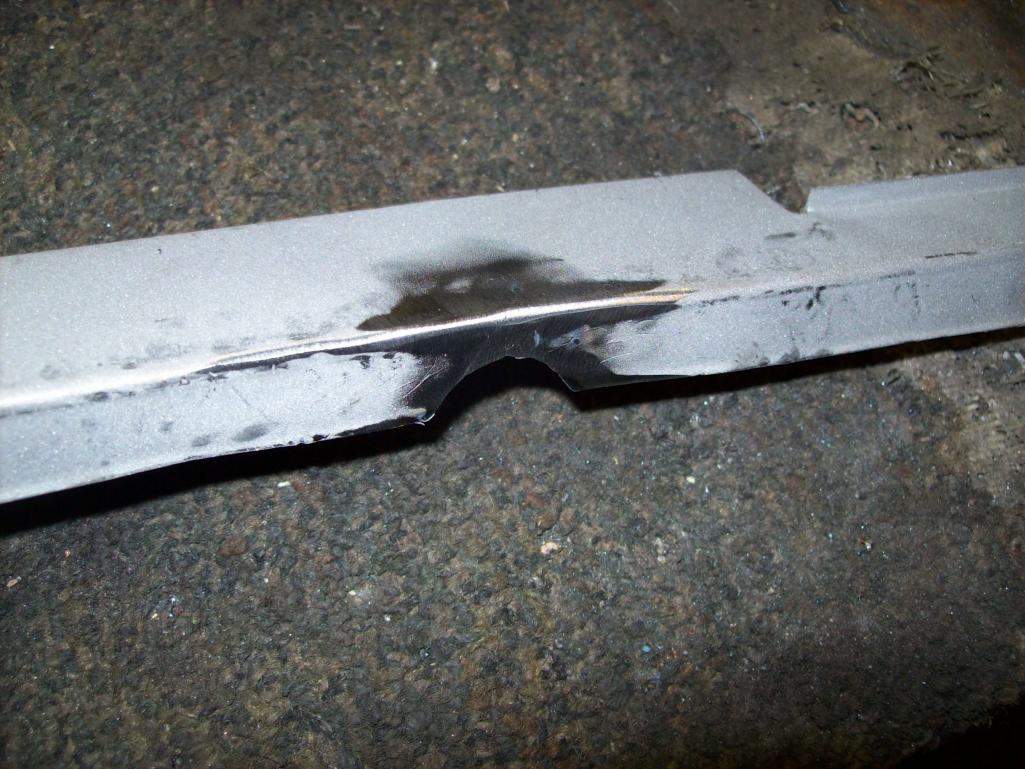 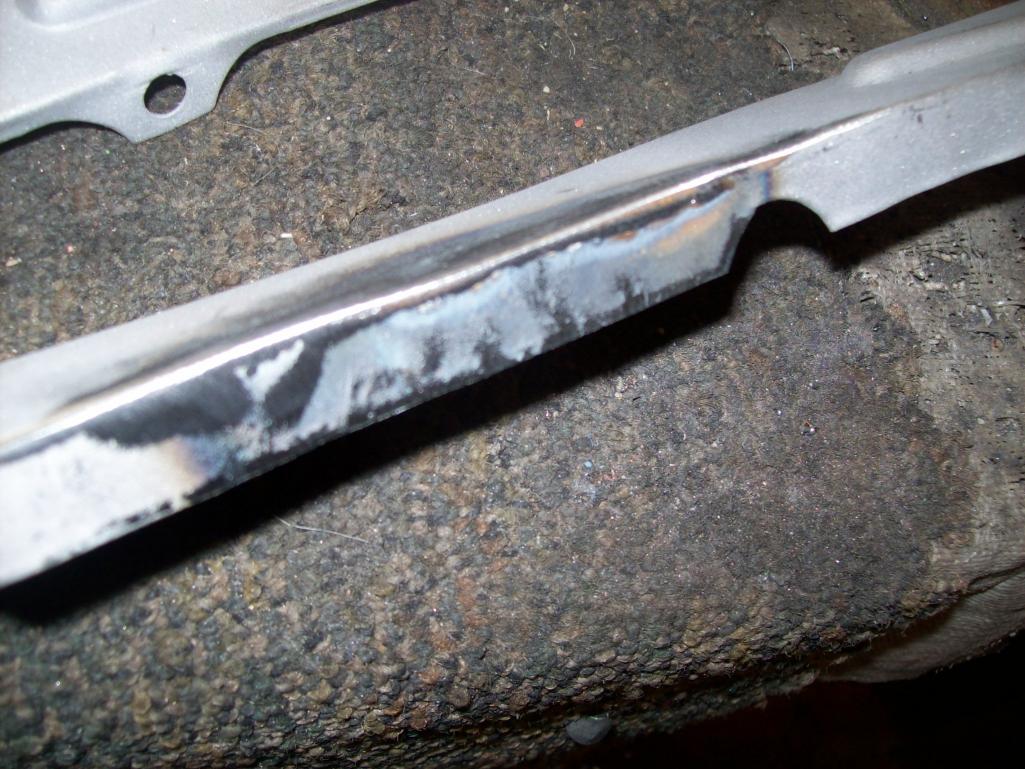 I am about to send more parts to be powdercoated...anybody have a color for me for the "grey" Boge front struts? And the front t-bars...the bars and through the body brackets...black or yellow zinc? Thanks guys. |
| Gint |
 Aug 21 2012, 06:13 AM Aug 21 2012, 06:13 AM
Post
#91
|
|
Mike Ginter                Group: Admin Posts: 16,105 Joined: 26-December 02 From: Denver CO. Member No.: 20 Region Association: Rocky Mountains  |
you're moving much too fast to be a real 914 guy... all this in 2 weeks and the thing isn't on jack stands yet you need to slow down for a year or two if you want to be a true teener fan.... Hey, I resemble that remark... Been working all summer and hadn't seen this thread until today. Nice work Lars! Who blasted your tub? |
| wachospeedo |
 Aug 27 2012, 05:24 PM Aug 27 2012, 05:24 PM
Post
#92
|
|
Unregistered |
I needed to beat on something this weekend. As it has been suggested (by people far smarter than me)...that the front pan is beyond repair, I decided to tackle it. My first problem was how to create a bucking block. No sense in pushing or hammering awy at the pan without something behind , or on the other side of the force. With the floor jack on the concrete pushing up on the pan using a 6x6, all I accomplished was to lift both the car and the rotisserie up into the air. Not exactly what I wanted to accomplish. So my plan B was to create a platform across the two legs of the rotisserie on which I could place the jack. Now as I force the 6x6 pole up into the floor pan...either the car was going to give (floor pan move), or the rotisserie was going to explode. Fortunately the former happened. Here was my rig...sorry, couldn't get the pic to stay rightside up.
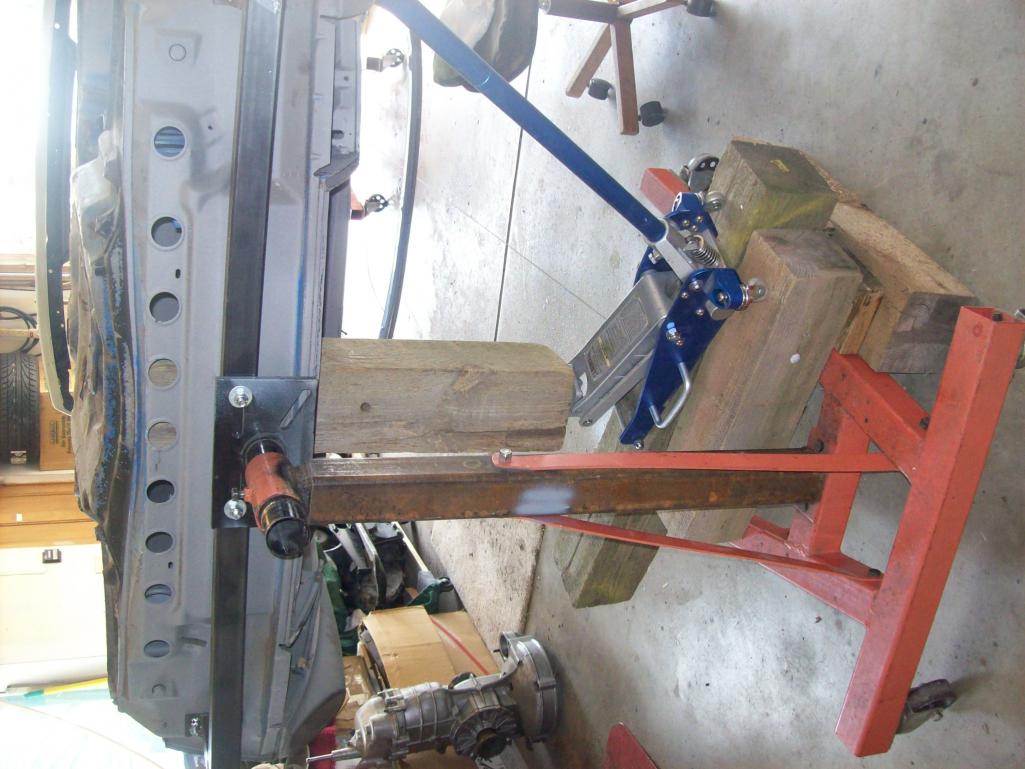 I will go to work on the front lip first. You guys have convinced me that the lip was originally straight, not arched. I don't want to believe, but the pics posted don't lie. This area will be hidden behind the bumper...but it needs to be made right. So this needs to be massaged...note also how badly dented down/in the pan behind the lip...tow hook can hardly be seen 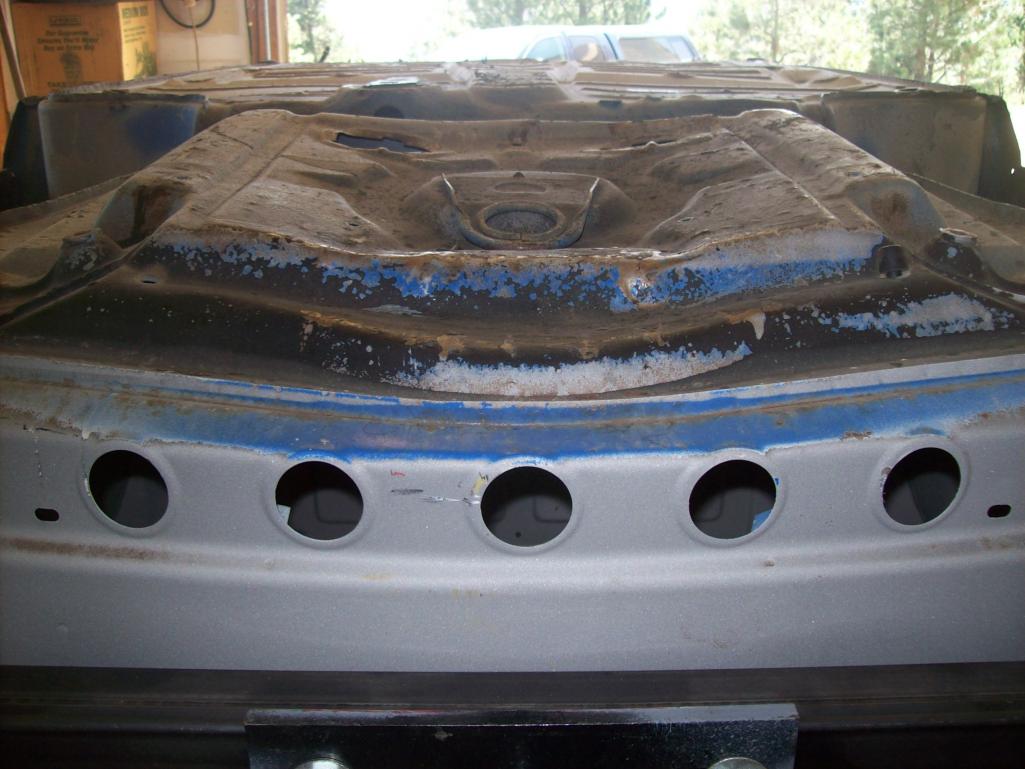 I worked in small segments, using my mallet to relieve the steel as I went along. It was slow work, but it worked. Nothing broke, not sheet metal tearage...I'm quite pleased. 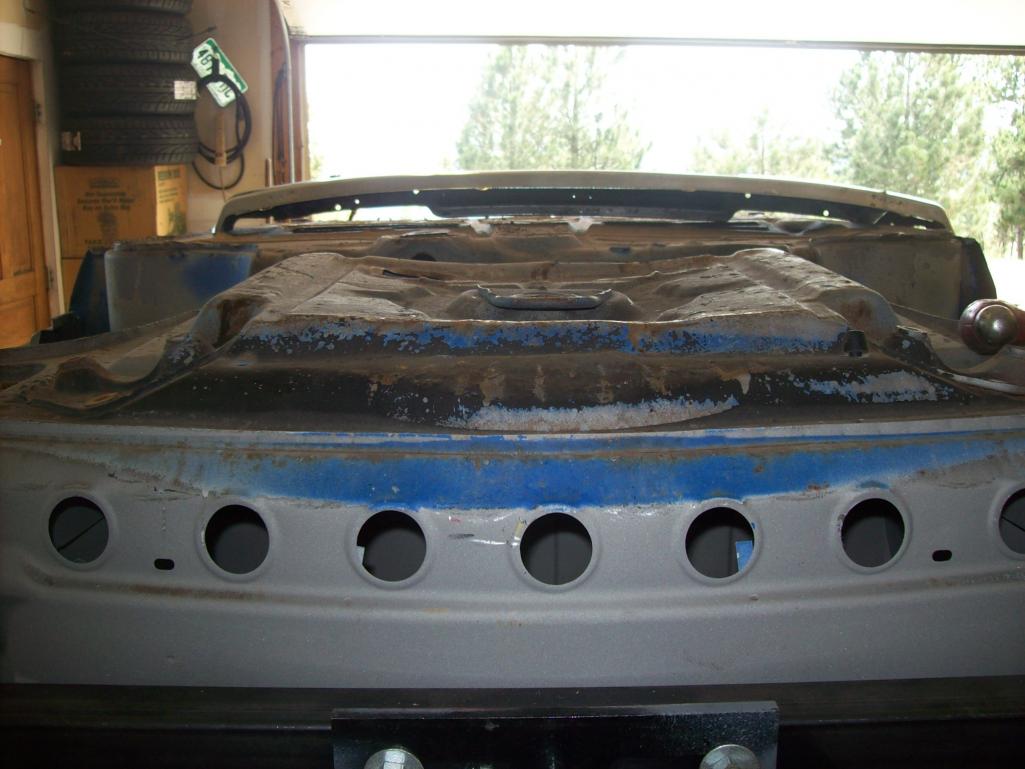 Side view... 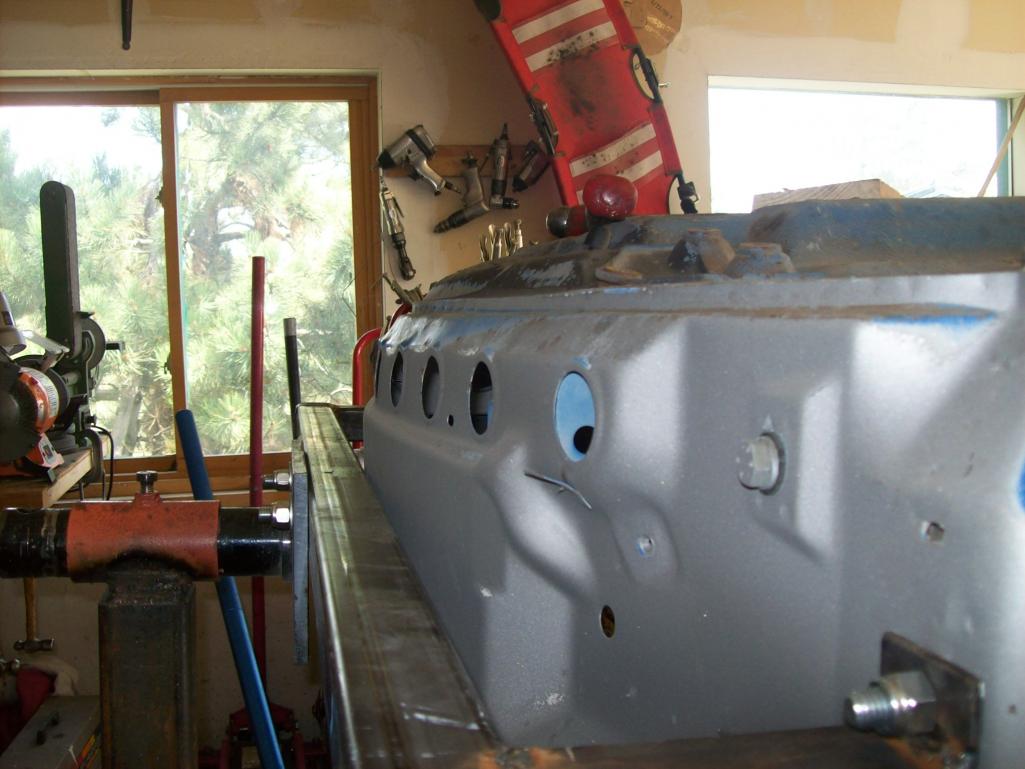 So now I bring the tow hook back to life and start to work on the front pan. I thought initially that the pan was so stretched that I'd have to slice it lengthwise and reweld it flat. Or, as Peter at RD suggested...just replace it. I'm optimistic. 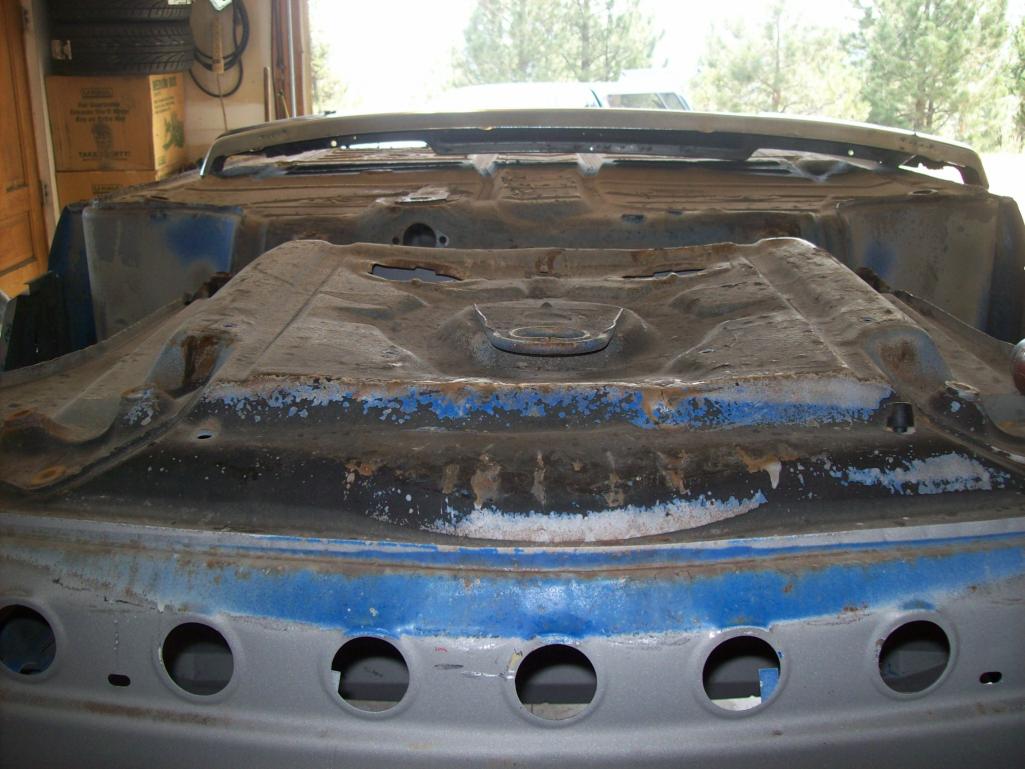 |
| wachospeedo |
 Aug 27 2012, 05:35 PM Aug 27 2012, 05:35 PM
Post
#93
|
|
Unregistered |
This is going to take some time...lots of big damage, and lots of dings too. I would use the flat surface of the top of the 6x6 as my bucking block as I worked the steel. The jack forces the floor up pas the neutral position and I would work with the hammed to compress/shrink the steel. Then I would release the jack and the floor would settle. Press repeat 100 times. Here is what I used to work the dings out...same process but focused on much smaller ares (like a square inch)
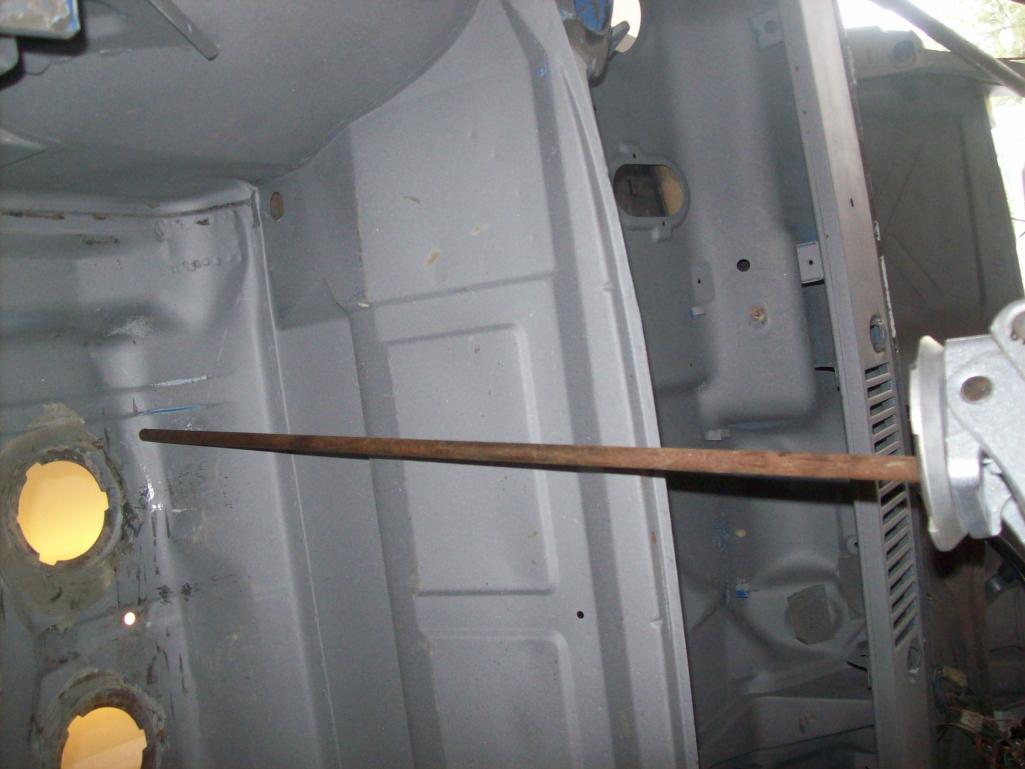 Slowly she is coming back 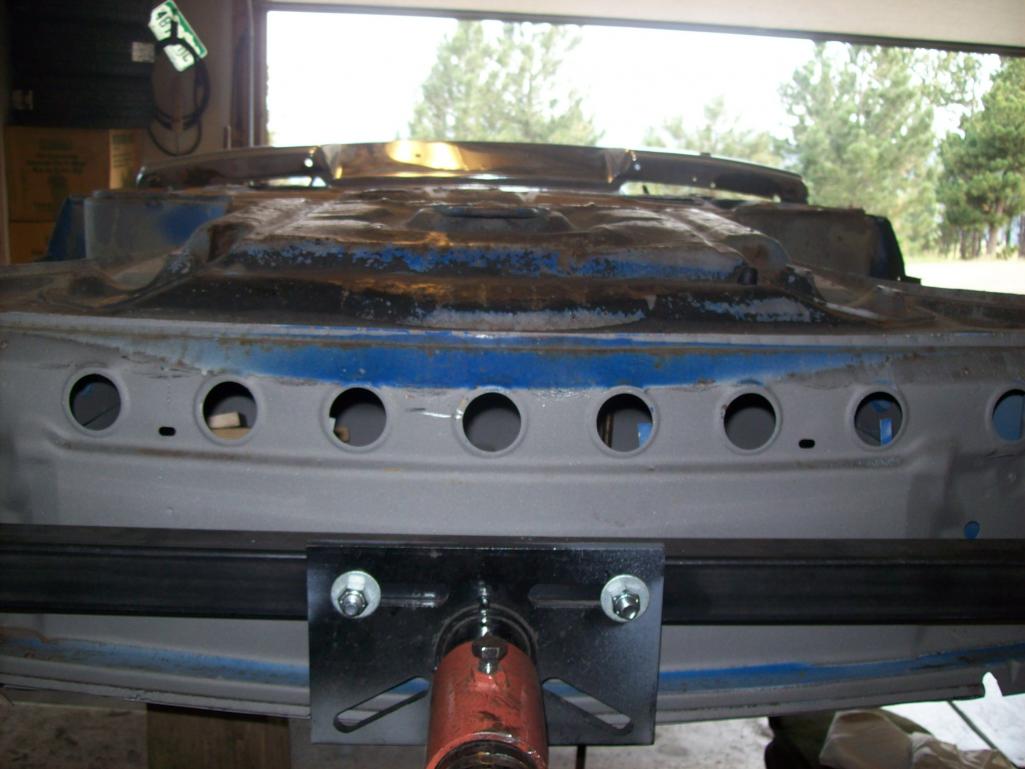 Side to side and front to back 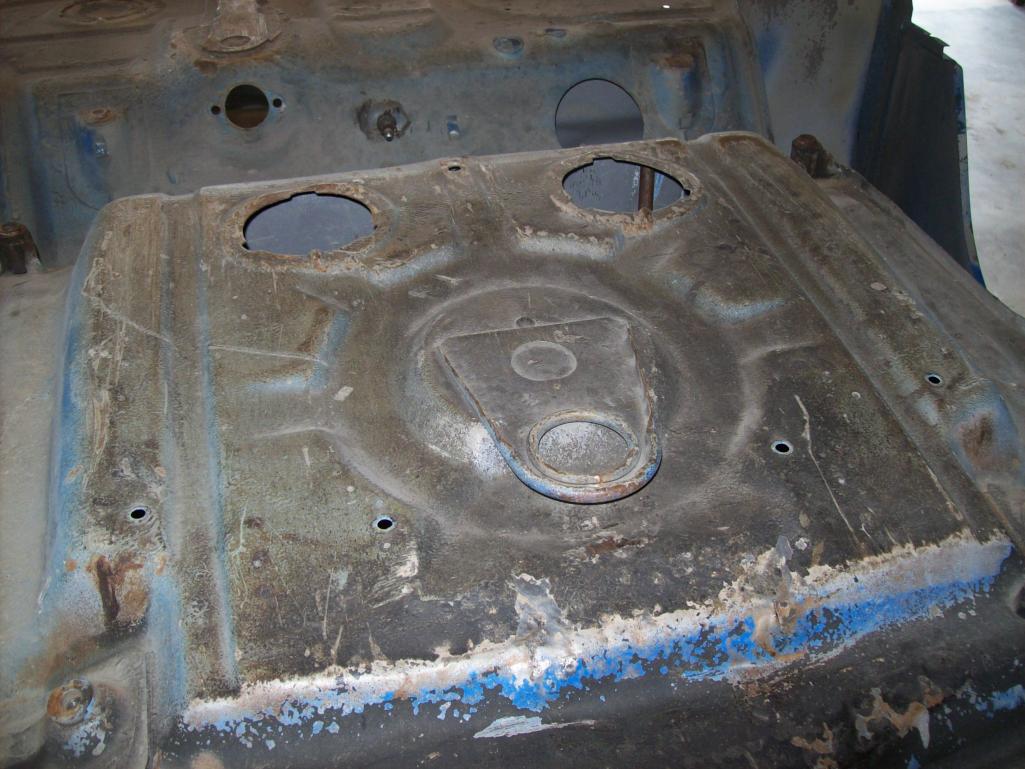 This would have been a lot easier with two people 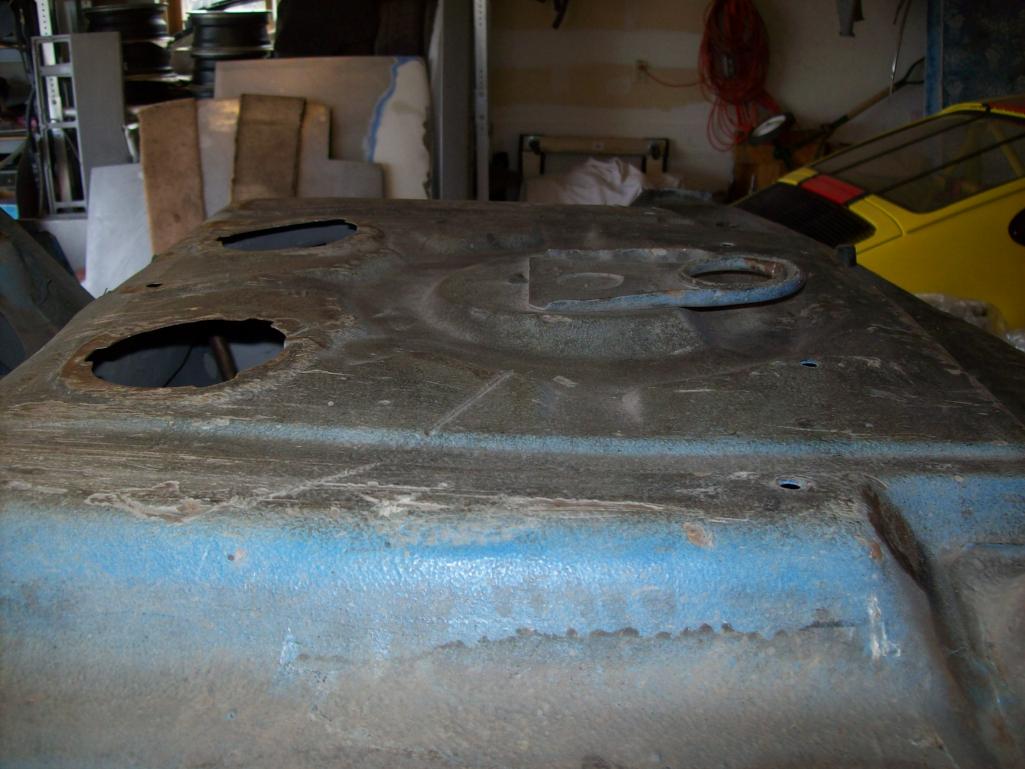 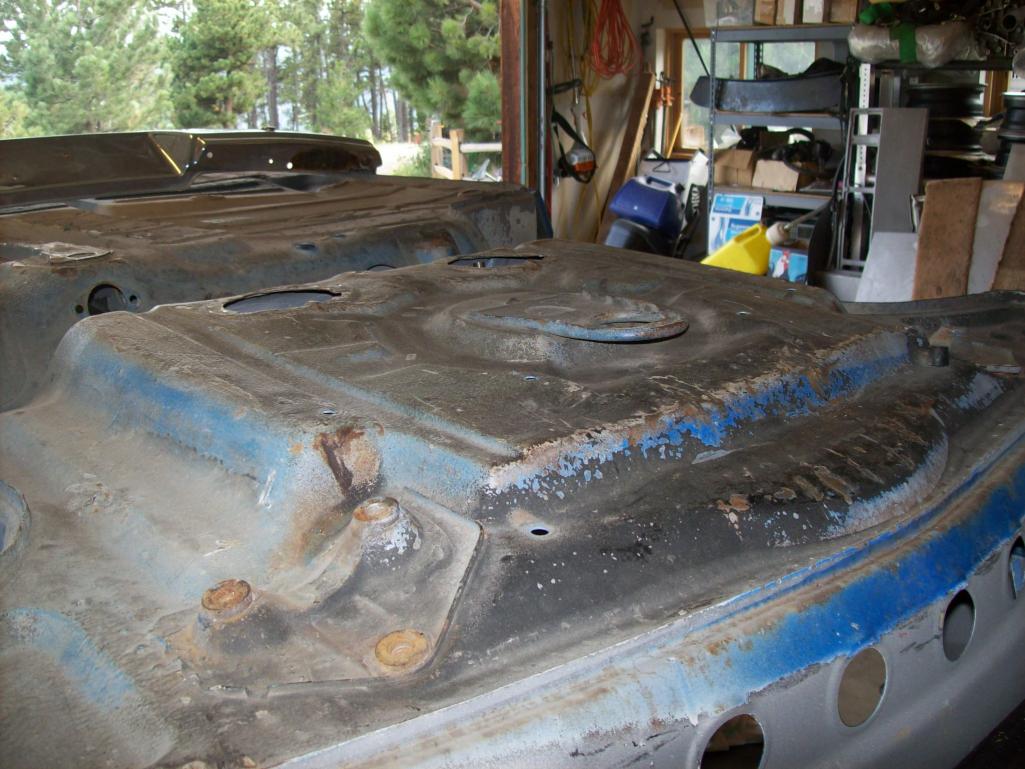 |
| Scott S |
 Aug 27 2012, 05:40 PM Aug 27 2012, 05:40 PM
Post
#94
|
|
Small Member    Group: Members Posts: 1,698 Joined: 30-April 03 From: Colorado Member No.: 633 |
Wow Lars - looks fantastic.
You guys should see his 911R that he built........ (IMG:style_emoticons/default/pray.gif) |
| wachospeedo |
 Aug 27 2012, 06:09 PM Aug 27 2012, 06:09 PM
Post
#95
|
|
Unregistered |
And the finished product...
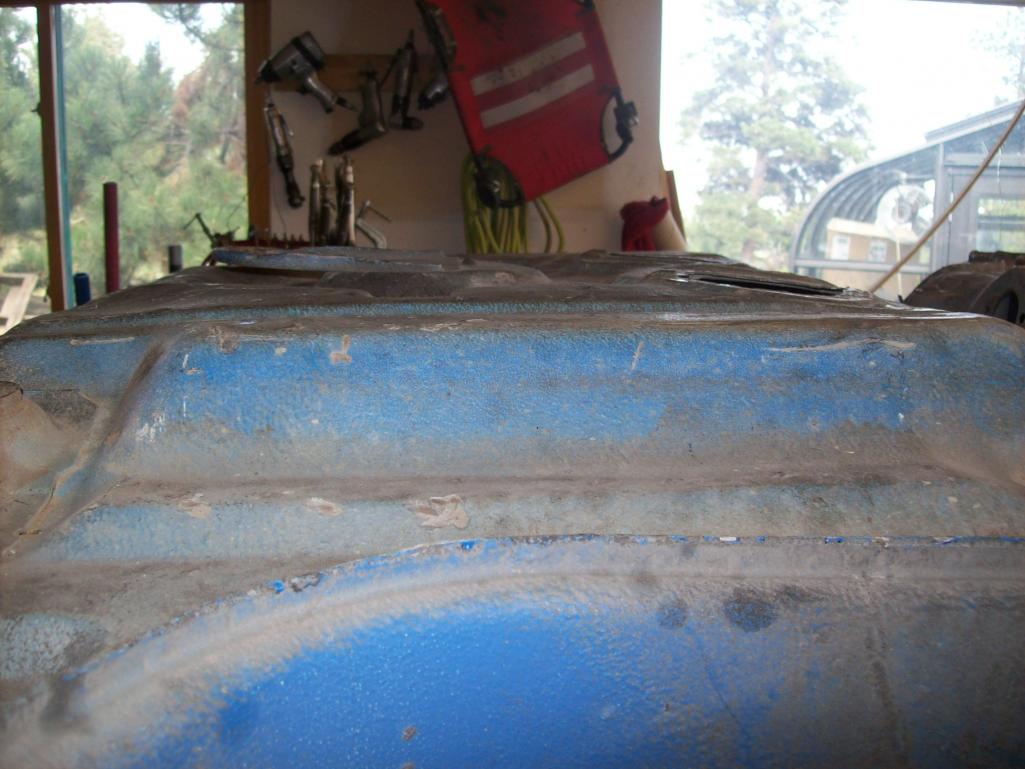 Beats replacing the entire pan. This is in better shape than most pans I have seen (granted that would only be a few) and after it gts wire brushed and sealed up, the Wurth undercoating will hide any minor imperfections that remain. There are some dings in the center floor pan, but I think they will best be addressed when the car is back upright. The bottom lip,flange of the floor pan was trashed from "errors in jacpoint decisions" in many places, so I spent some time circling the car, bringing these seams back to vertical. Next step is to attack the passenger rocker and jackpoint. I get to drill out some spotwelds in preparation. 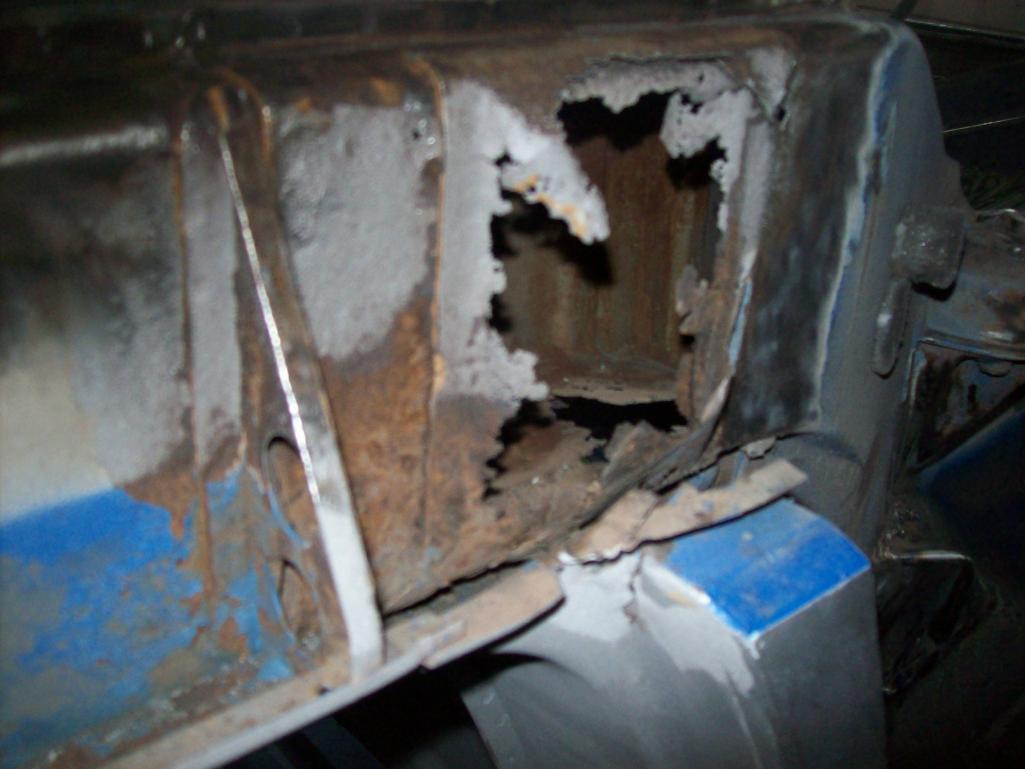 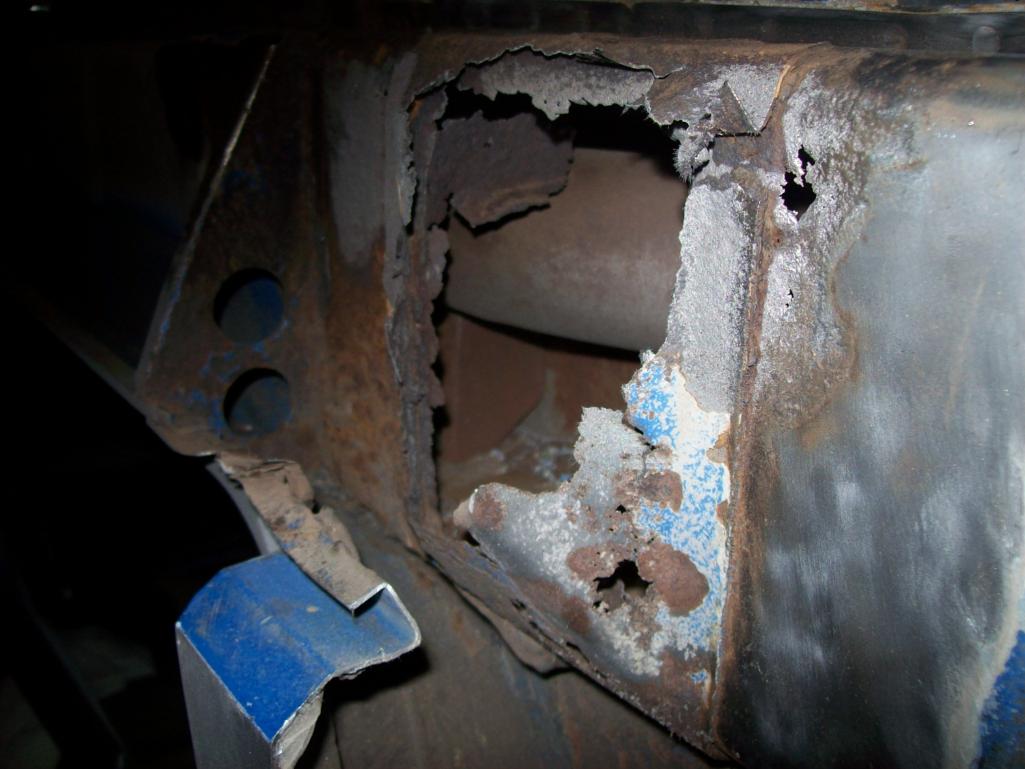 What are the supports called that hold the sill in place...sill supports? I may need to remove the lower 8 inches of the lockpost to get good access to this area. 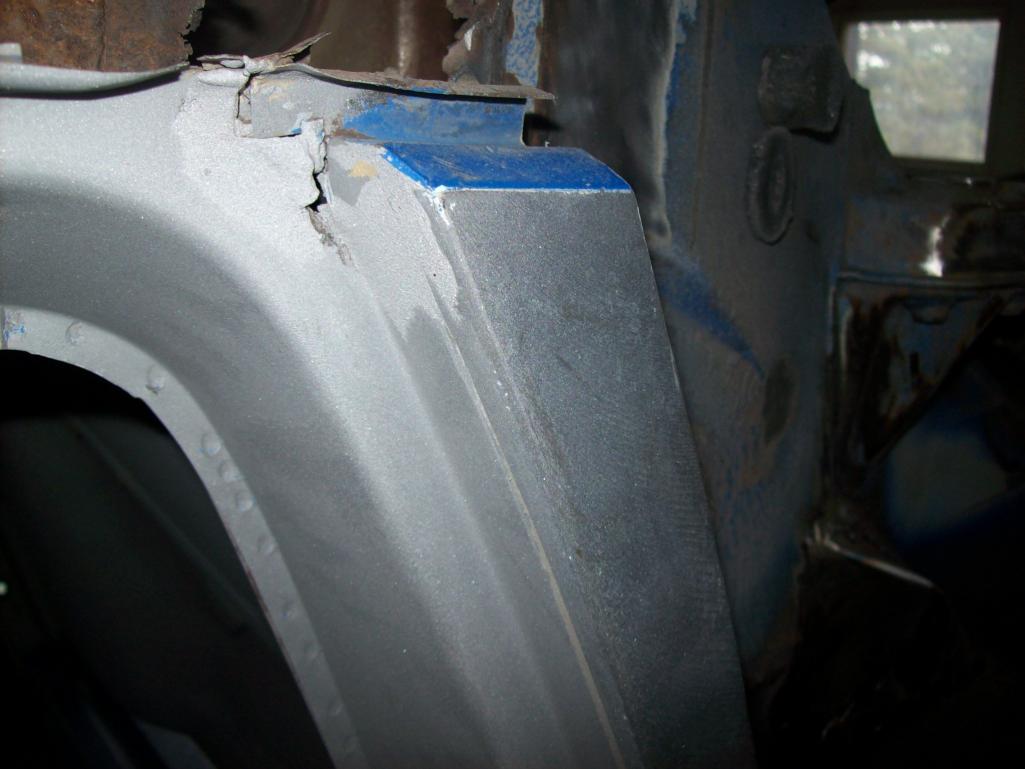 I am actually looking forward to this area as it is totally different than repairs on 911s in the same area. |
| RON S. |
 Aug 27 2012, 06:20 PM Aug 27 2012, 06:20 PM
Post
#96
|
|
9140430841, FINALLY RUNNING    Group: Members Posts: 1,216 Joined: 22-May 03 From: WALTERBORO,S.C. Member No.: 724 Region Association: South East States |
Lars, If your mindset is like mine the only reason your investing so much time, talent, and money is the Serial# right up there on the right side inner fender well. Keep up the good work. (IMG:style_emoticons/default/smash.gif) (IMG:style_emoticons/default/welder.gif) I've BTDT. 2-3 years worth of rust repair. In the end, when you are riding down the road, you and you alone will know the sacrifices, and you'll smaile at the results.. Ron (IMG:style_emoticons/default/beerchug.gif) |
| wachospeedo |
 Sep 3 2012, 07:51 AM Sep 3 2012, 07:51 AM
Post
#97
|
|
Unregistered |
It is going to get worse before it gets better...so I invested in some 1/4 inch cobalt bits for the spots I am going to drill out. Hard to see how much is bad, and how much access I will need to create...but I have to start somewhere. first pass at the passenger side rocker (upsidedown). Still not sure why the picture wants to lay down when the file on my computer has been rotated 90 clockwise...good excercise for our necks...
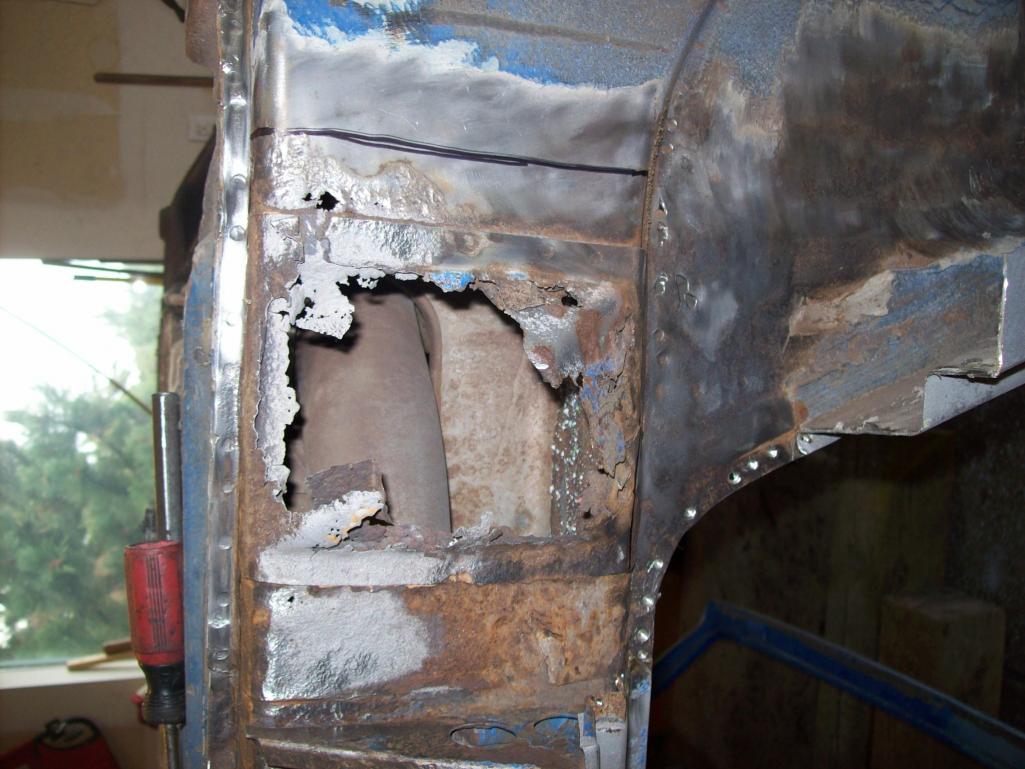 And we end up with.... 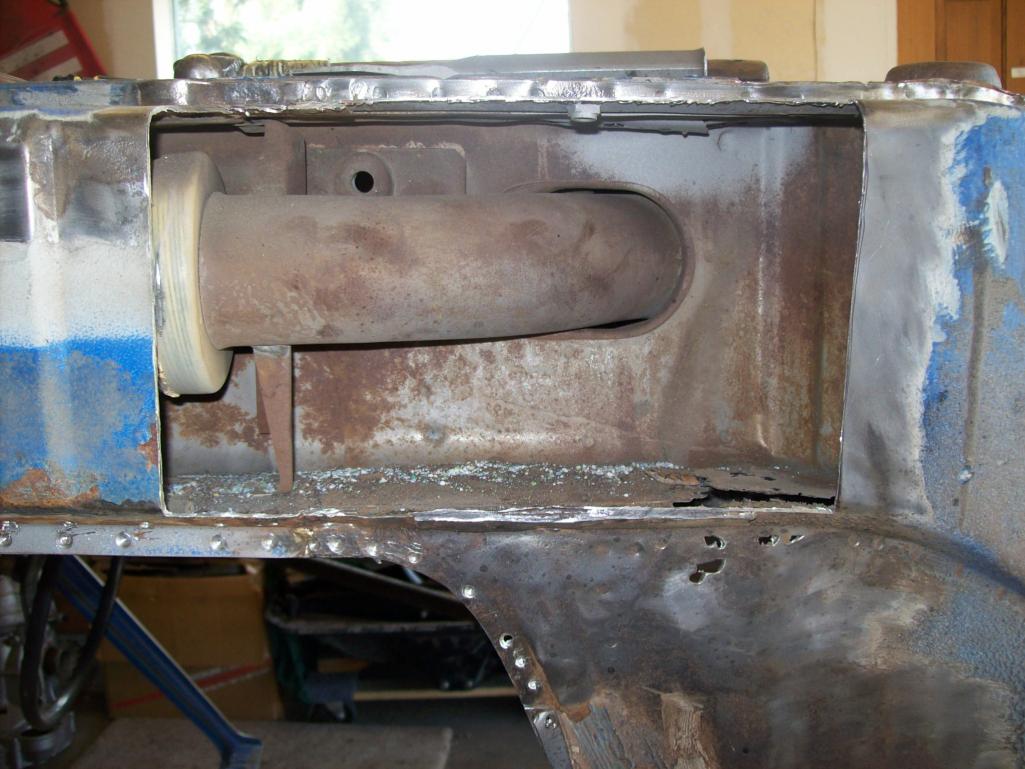 Something here caught my eye....so I started digging 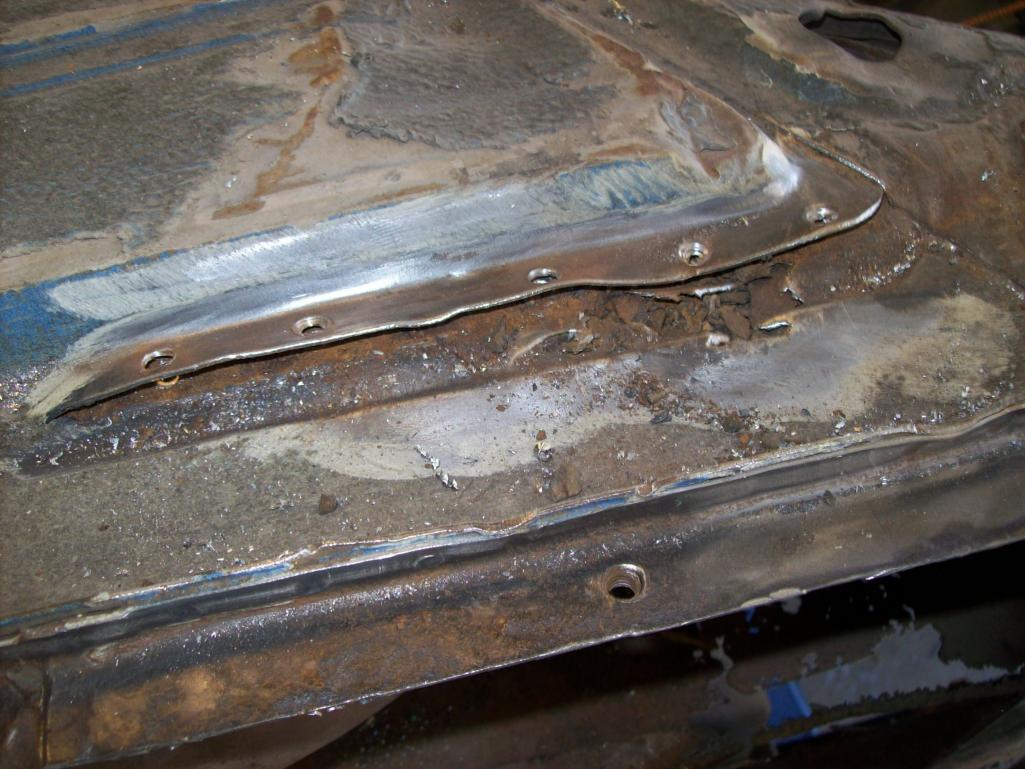 This is a doubler on the bottom of the longitudinal. It was created in the over lap from the inner side of the longitudinal overlapping the outer. and there is a tiny channel that is created. Anywhere a cavity exists, moisture (can) gets in and the reaction begins. This is looking at the overlap area from the inside of the longitudinal which would be the top of the channel Really hard to see, but the area is about 2-3 inches long, an inch wide and very weak. 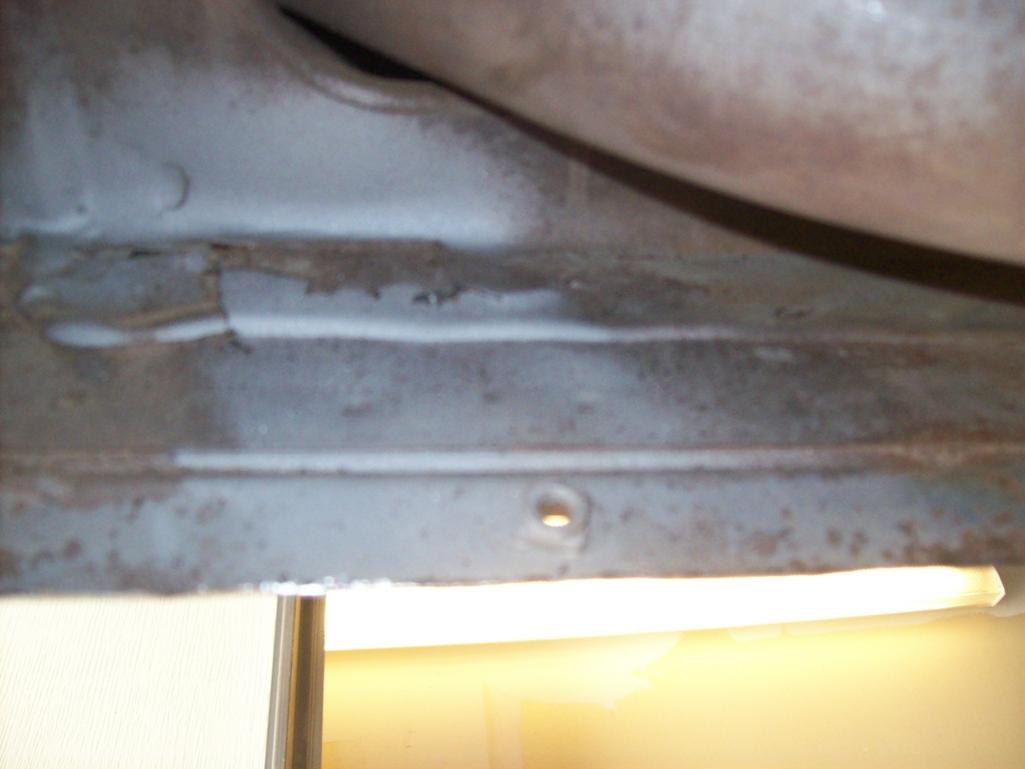 I will dig into it repairing the underside first, then do the other layer from inside the longitudinal. Start to create some room. There is a lot going on back here. Have to approach it like peeling back the layers of the onion...and sometimes you do feel like crying (IMG:style_emoticons/default/hissyfit.gif) 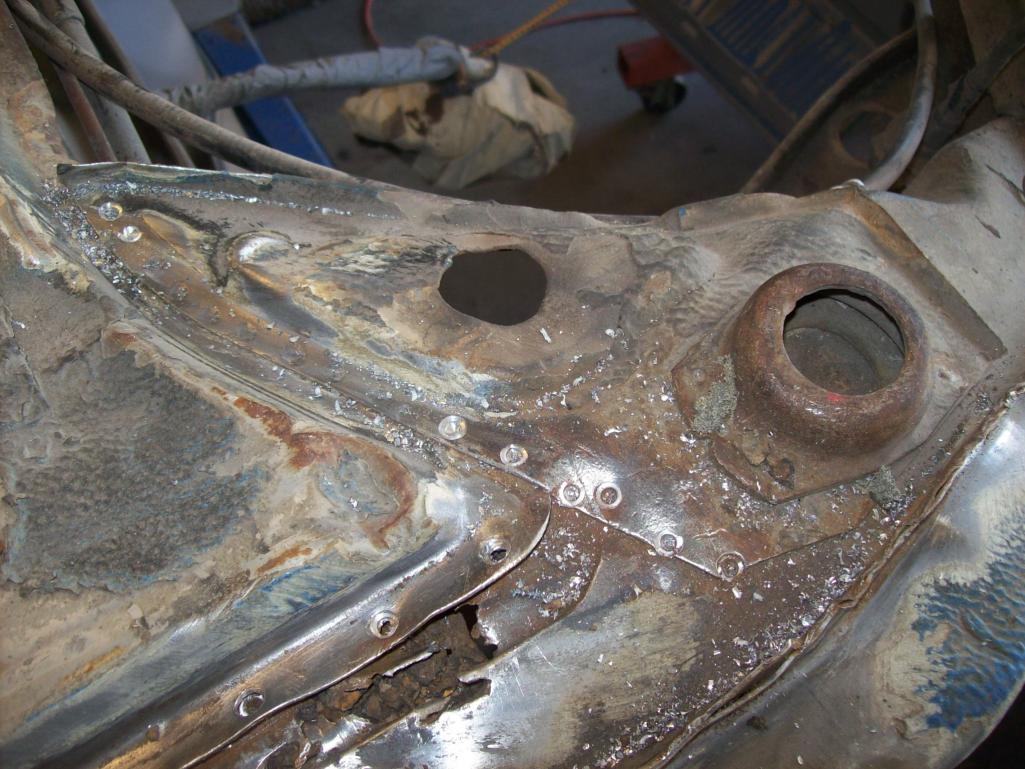 |
| wachospeedo |
 Sep 3 2012, 08:10 AM Sep 3 2012, 08:10 AM
Post
#98
|
|
Unregistered |
It is what it is.....I am going to just open this up
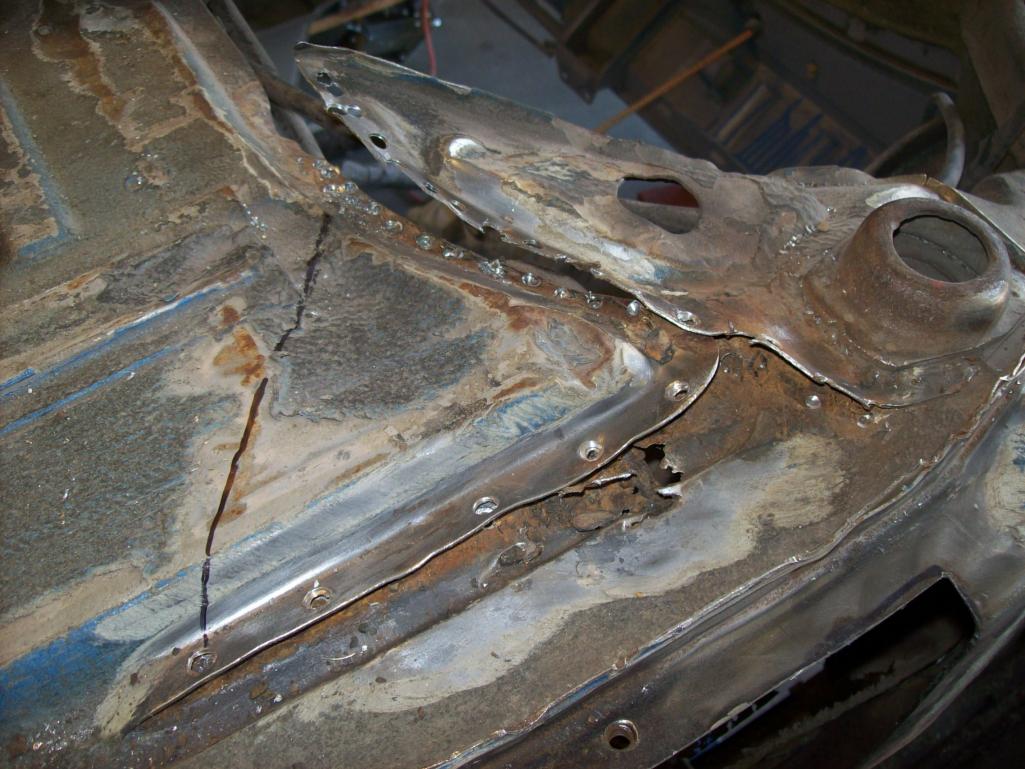 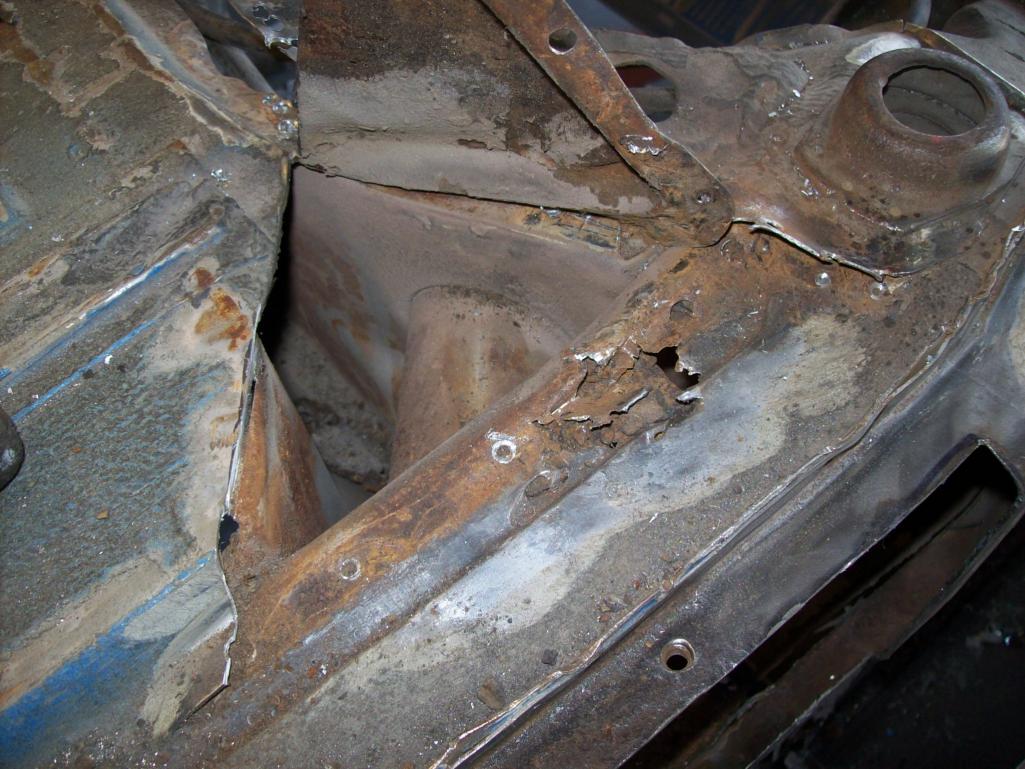 Could be worse. I will section out the bad and weld in the good and that will take care of the bottom. Top will get done from the inside. The small pile of the good the bad and the ugly. 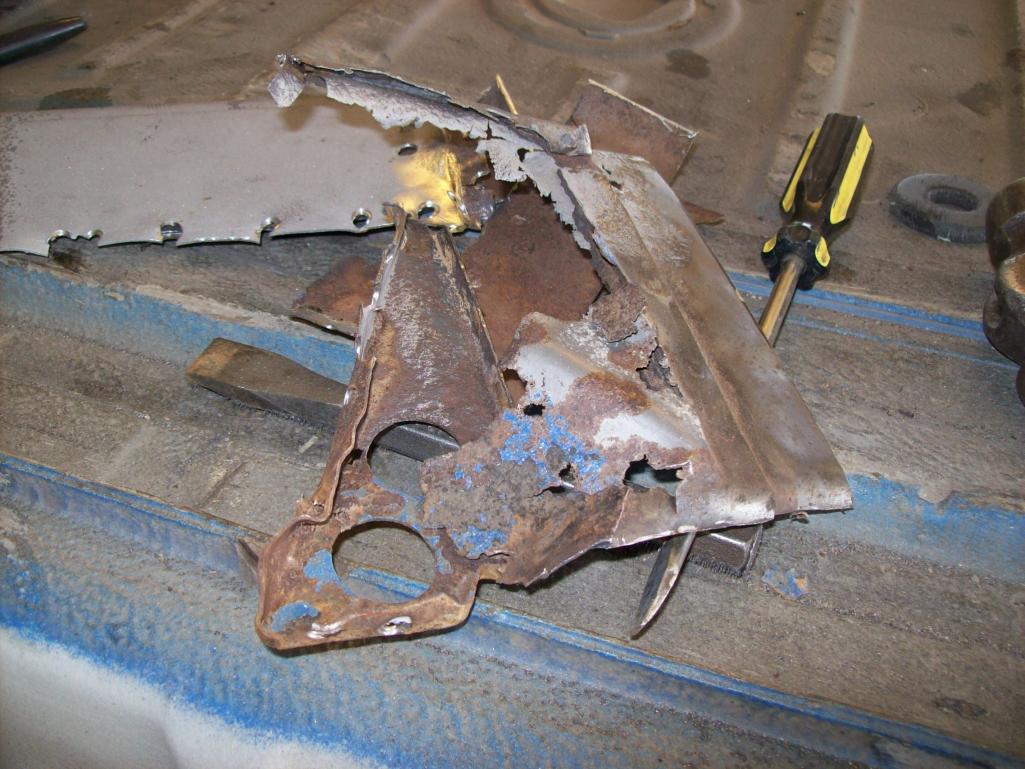 I can treat this area and get ready to close it back up. 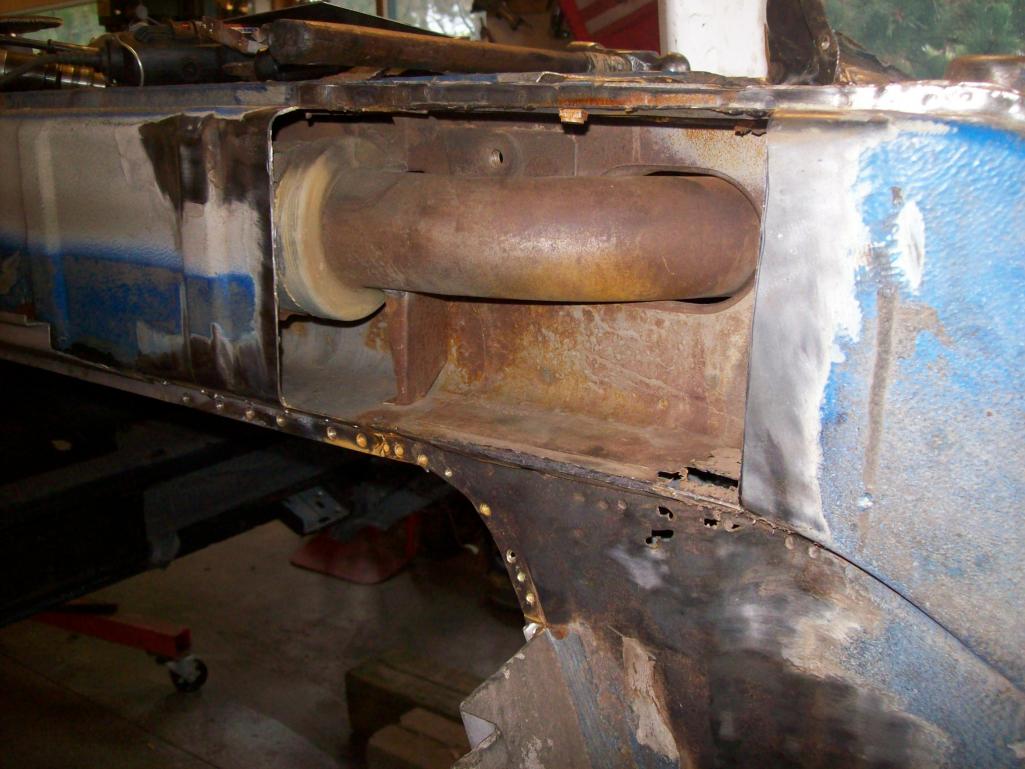 Just found out that my mig wire ran out. Helped a buddy weld the rear door on his old jeep back together. Thought I had an extra roll, but it turned out to be flux core gassless .030 and I run .023 with gas so it is off to the hardware store at 5 pm on a Sunay afternoon if I want to do any welding tomorrow. On my bumper run to Denver (gathering up my cores to drop off for rechroming) on Friday, I spied this beauty "barney" in S. Denver. Seriously...a right hand drive fiberglass 959 convertible...really? I had anything to eat yet...fortunately. (IMG:style_emoticons/default/lol-2.gif) 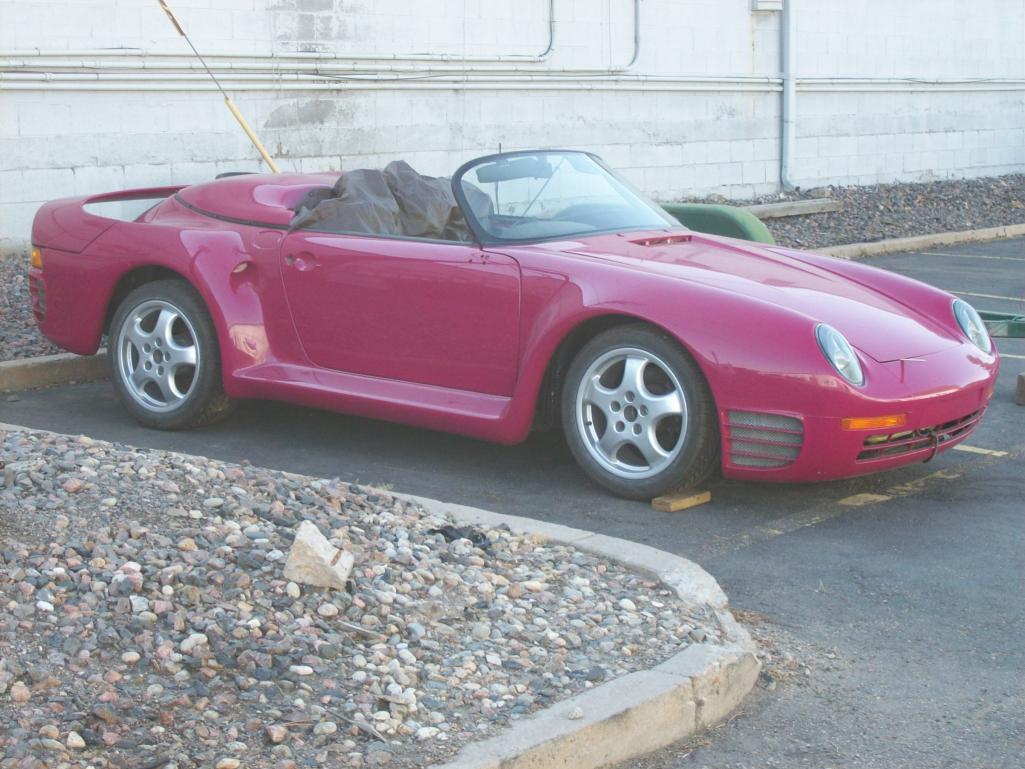 |
| Ferg |
 Sep 25 2012, 04:31 PM Sep 25 2012, 04:31 PM
Post
#99
|
|
914 Guru      Group: Members Posts: 5,948 Joined: 8-January 03 From: Boulder CO Member No.: 116 Region Association: None 
|
|
| Speedo |
 Oct 9 2012, 06:37 PM Oct 9 2012, 06:37 PM
Post
#100
|
|
Senior Member    Group: Members Posts: 559 Joined: 7-November 06 From: Boulder Member No.: 7,170 Region Association: Rocky Mountains 
|
Alright alright.
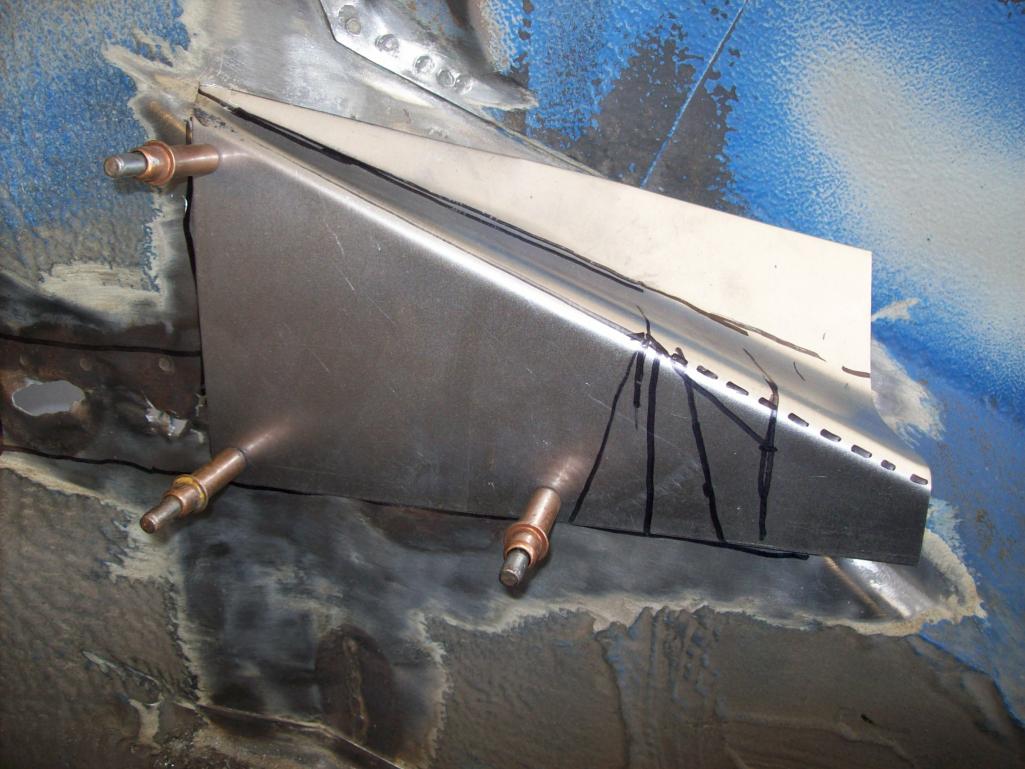
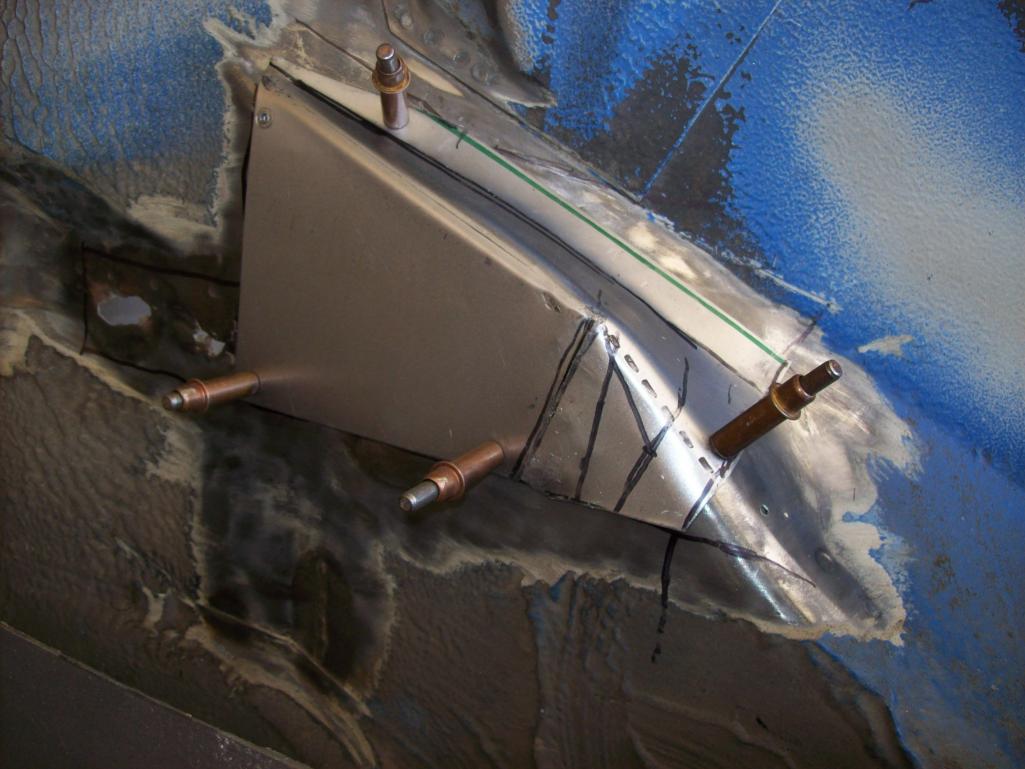
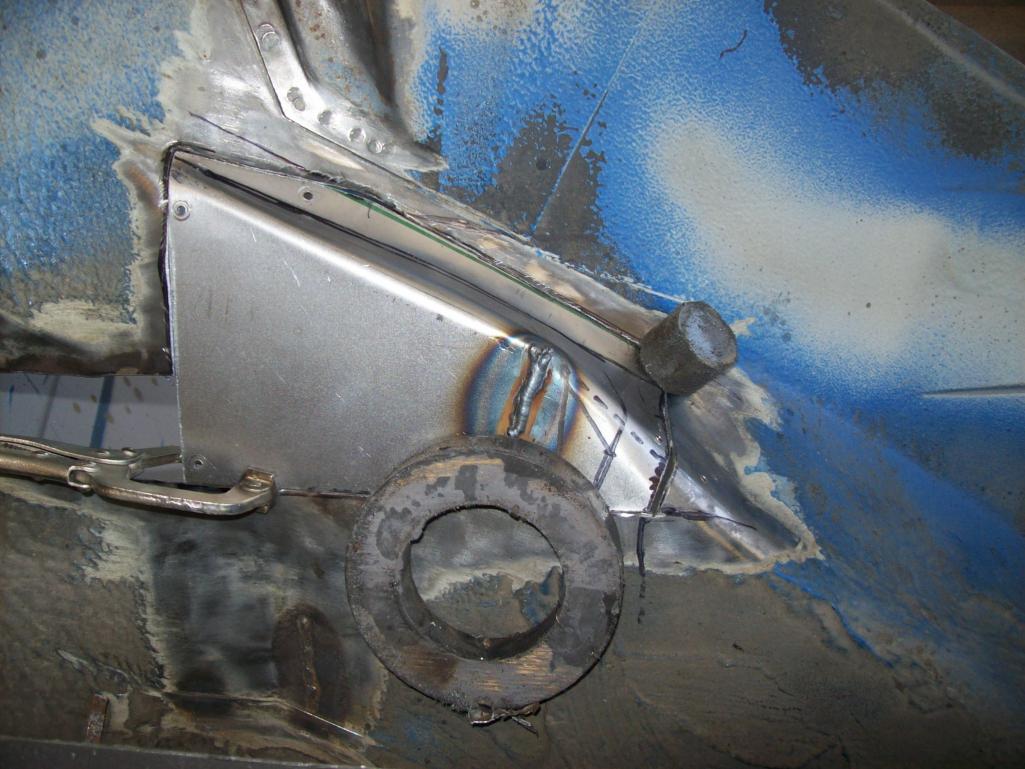
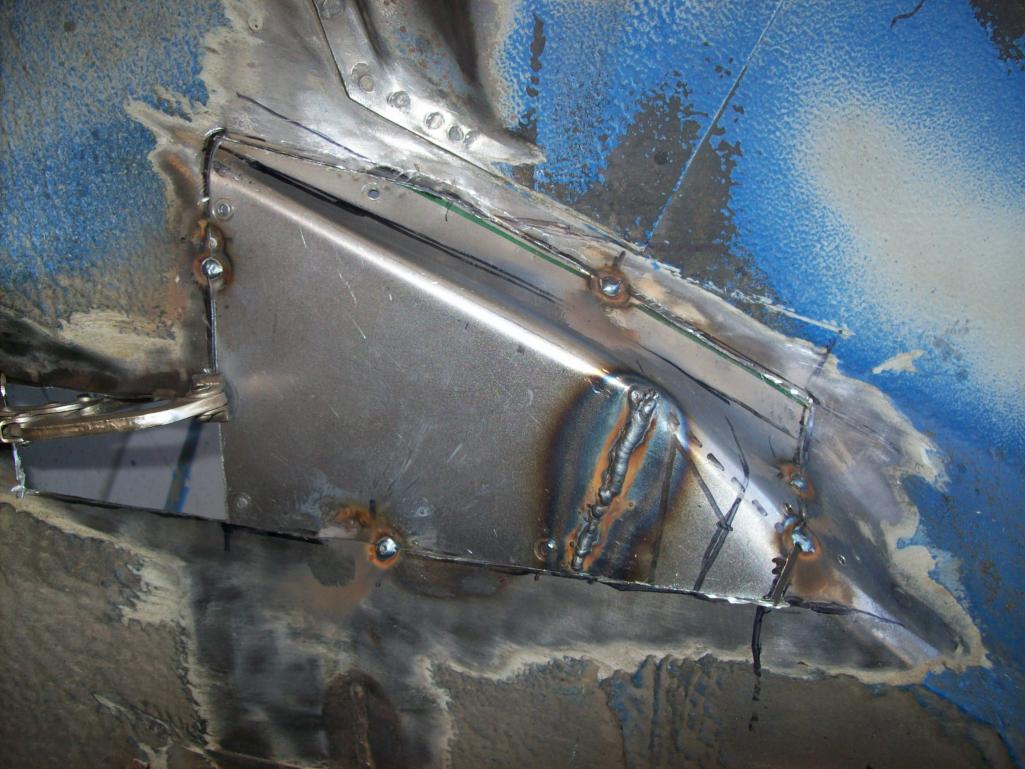
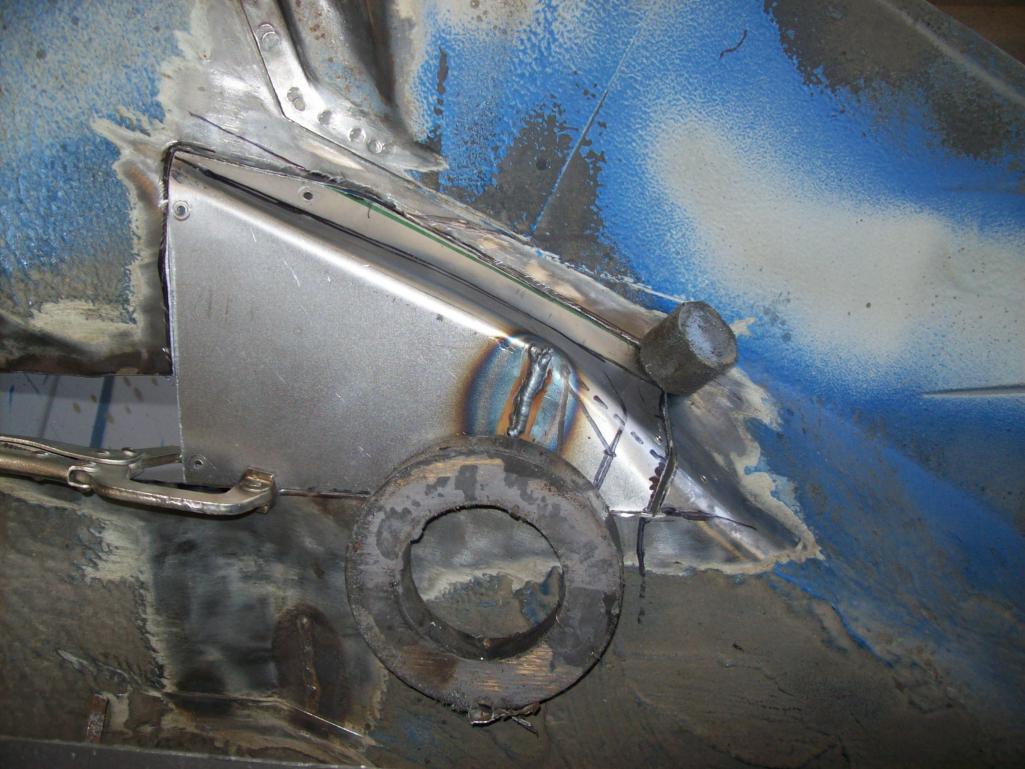
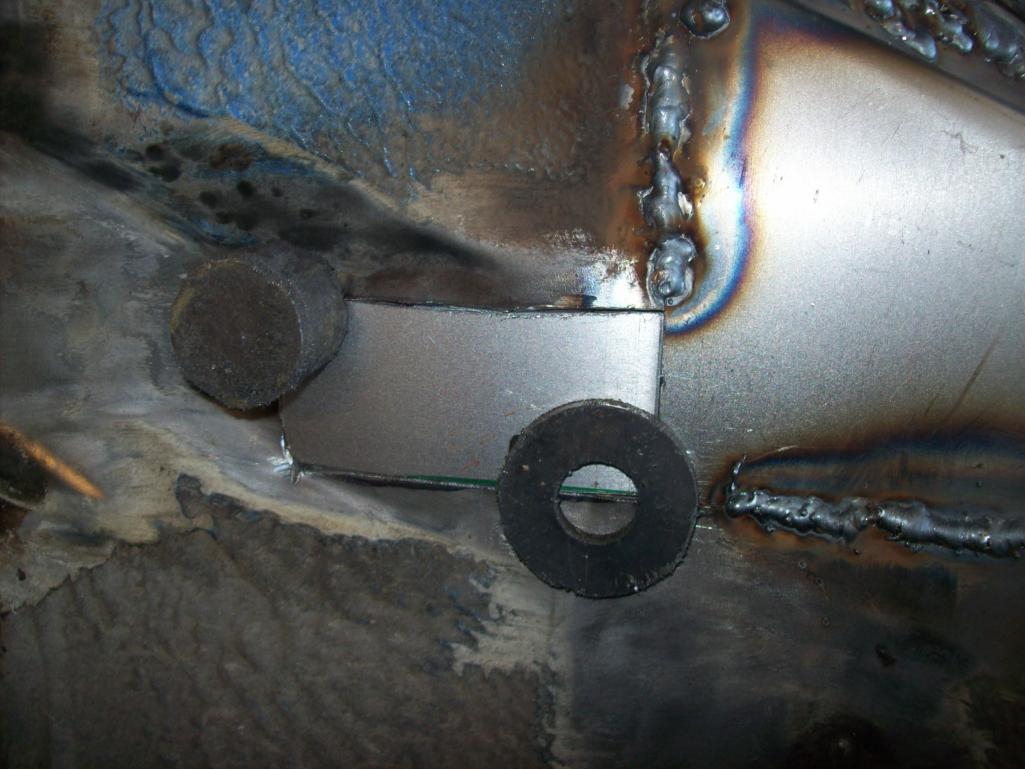
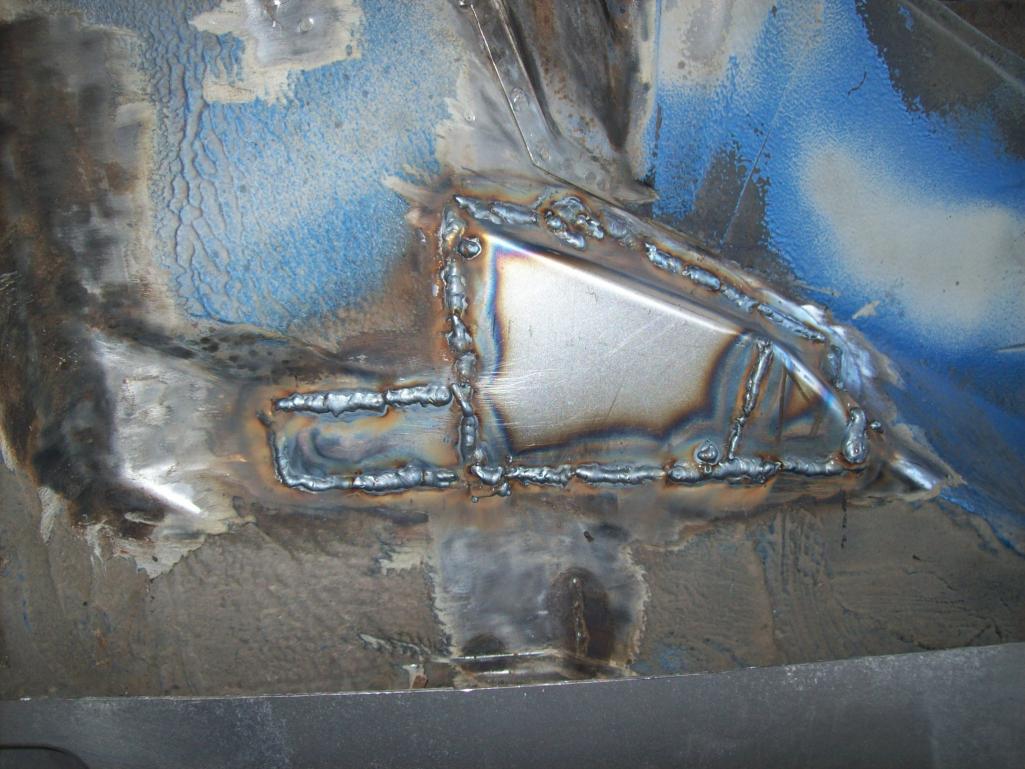
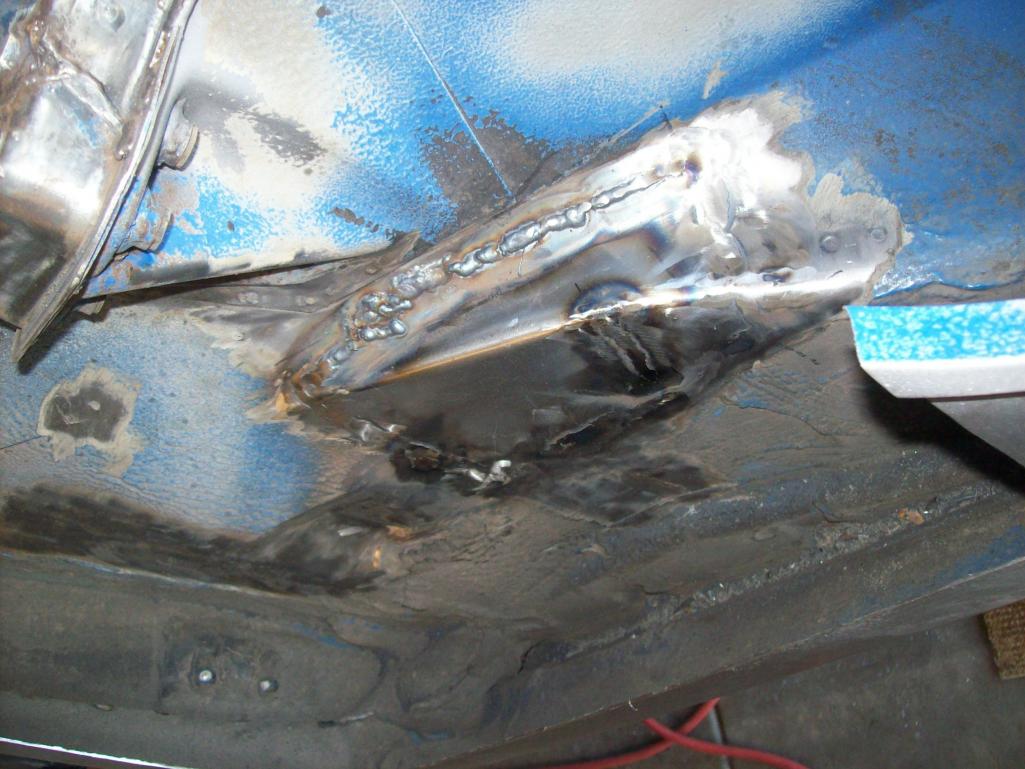
I've made progress, but an not as comfortable posting on this board (familiarity) as I am on PP so...forgive me. Last posts were of the underside of the passenger rear floor corner. Going to have to go at this from the bottom, and then because it is a sandwich, from the top...inside the longitudinal. Bad metal removed and cavity treated... 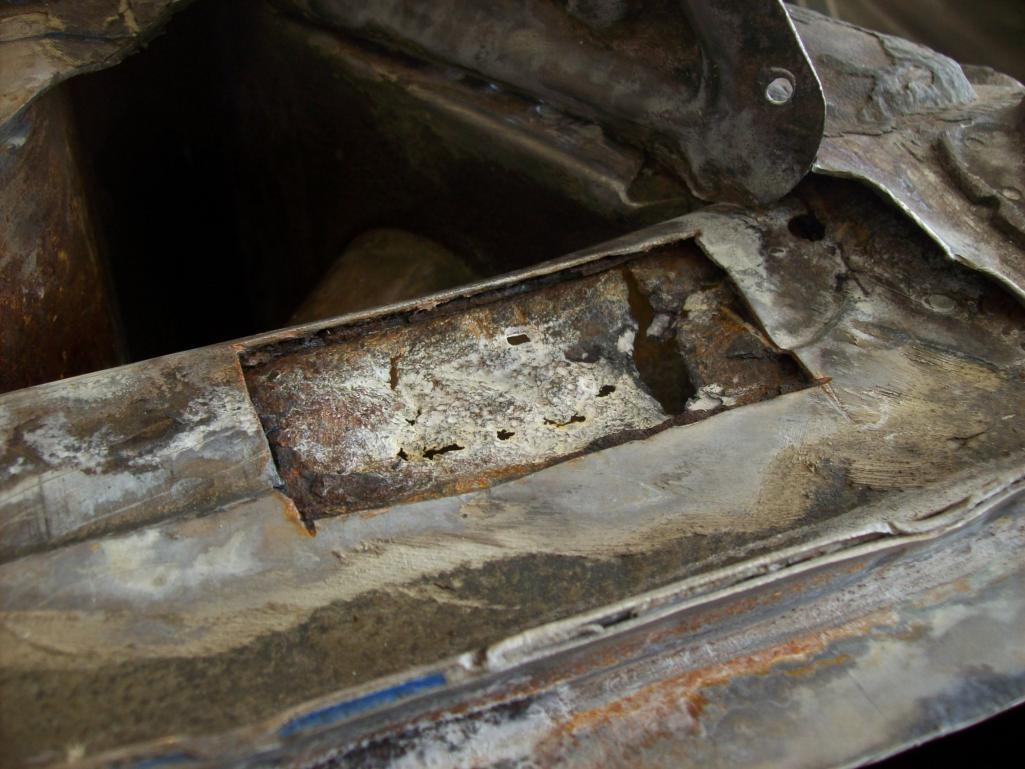 The replacement patch 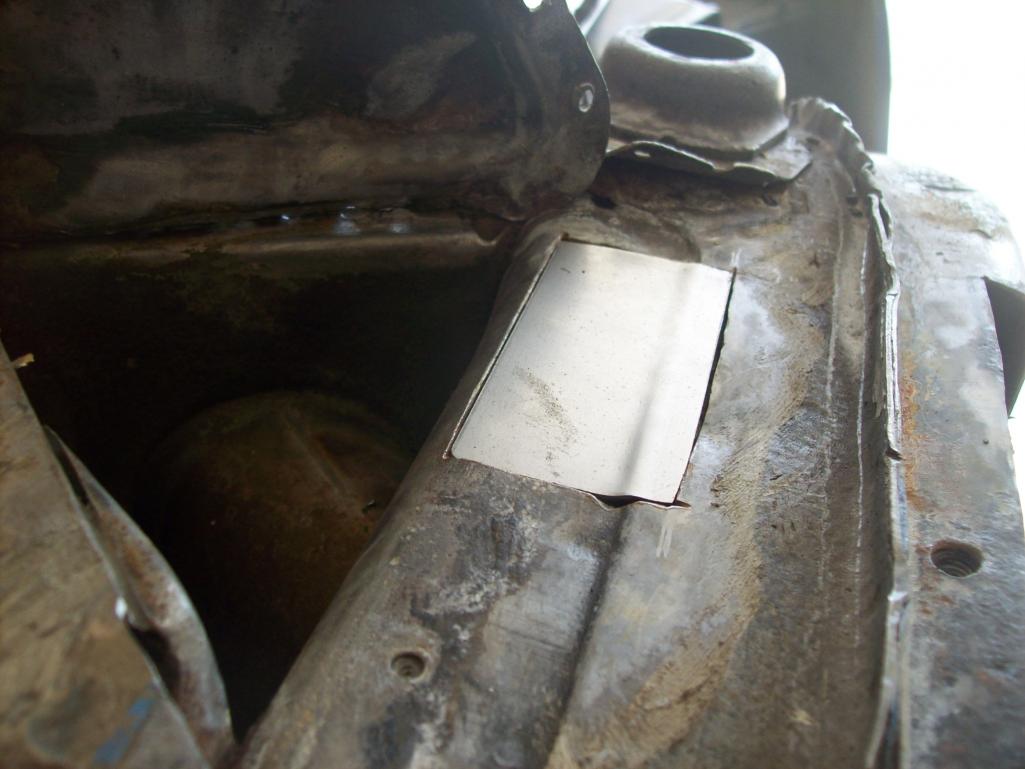 Closing things back up 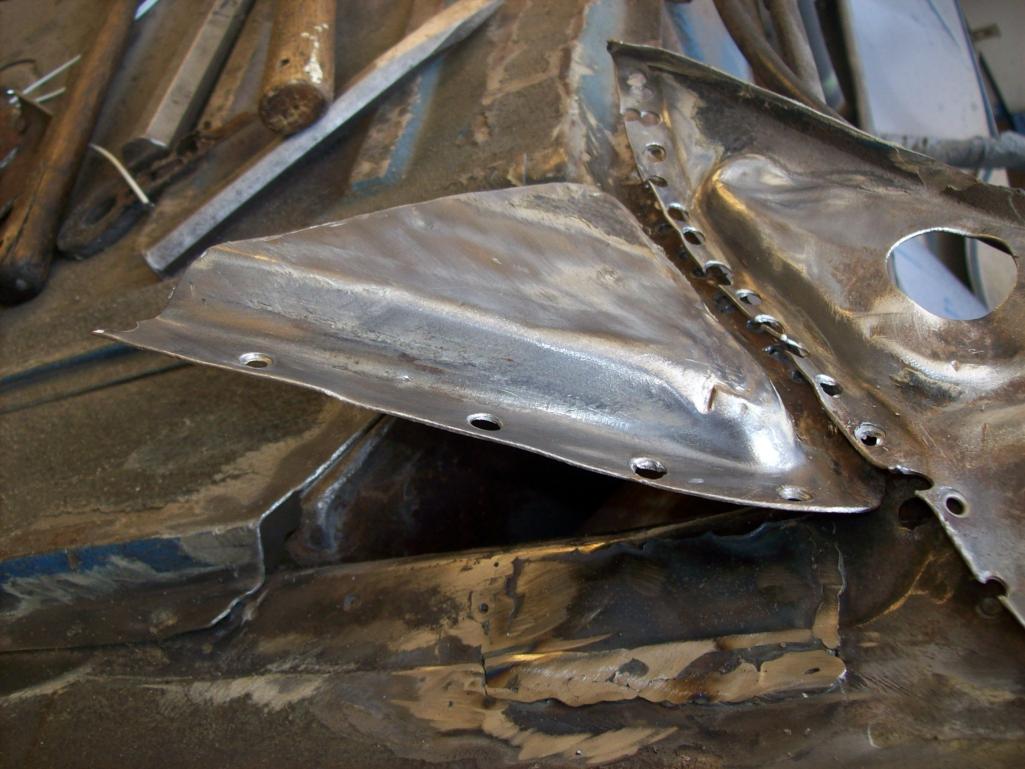 This jack/corner support was totally mangled and needs to be reworked 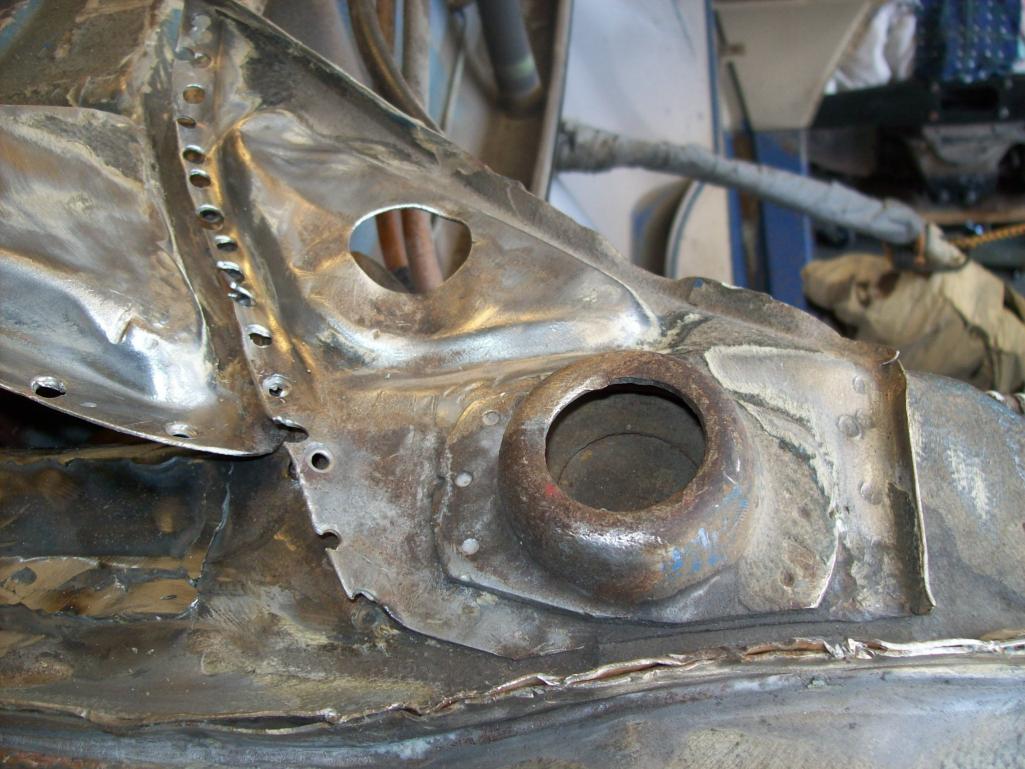 And done...came out nice but big difference between the two pics 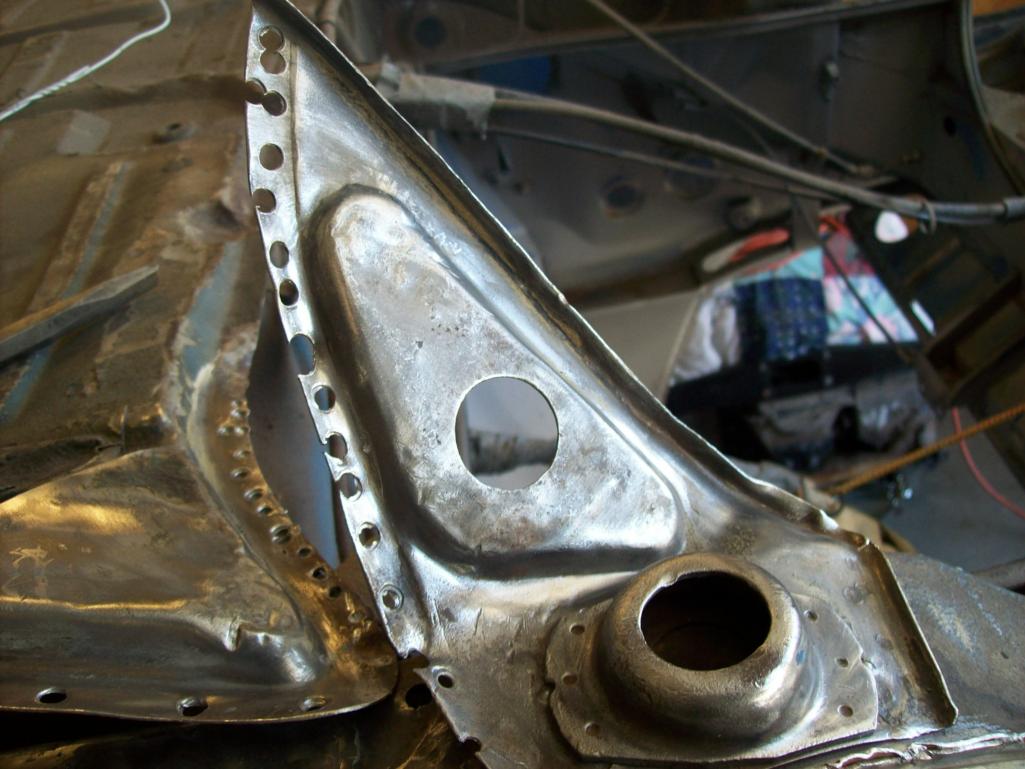 |
  |
2 User(s) are reading this topic (2 Guests and 0 Anonymous Users)
0 Members:

|
Lo-Fi Version | Time is now: 6th November 2025 - 11:18 AM |
Invision Power Board
v9.1.4 © 2025 IPS, Inc.


