|
|
|
Porsche, and the Porsche crest are registered trademarks of Dr. Ing. h.c. F. Porsche AG.
This site is not affiliated with Porsche in any way. Its only purpose is to provide an online forum for car enthusiasts. All other trademarks are property of their respective owners. |
|
|


| Bob L. |
 Jul 4 2012, 02:39 PM Jul 4 2012, 02:39 PM
Post
#1
|
|
Senior Member  Group: Members Posts: 847 Joined: 7-August 11 From: Austin TX Member No.: 13,411 Region Association: Southwest Region |
In the interest of a clean, therefor, cooler running engine, I'm taking mine apart. It's a good thing too.
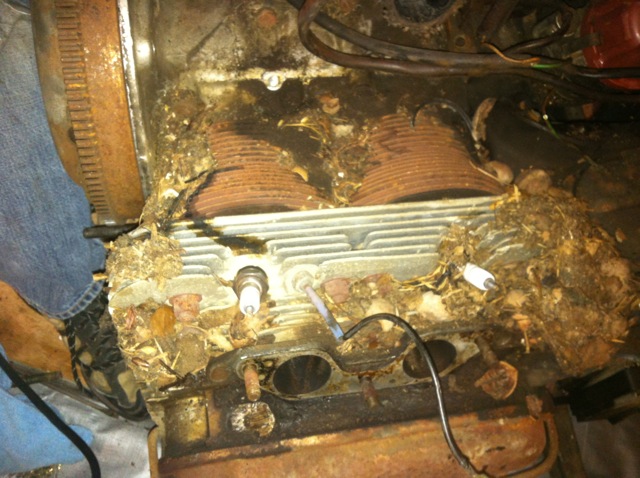 I'm going as far as pulling the heads so I can get to the tins under the cylinders. that's where all the grease and gunk has collected and I don't know a better way to clean under there. Also, I want to seal up the ports where the EGR was plugged into the head. In my procrastinating about pulling the heads I have come up with a few random questions. Here we go, Where does the EGR come out inside the head? In the runner to the intake valve or the combustion chamber itself? Is it possible to weld up the EGR ports or is tapping and filling with a screw pretty much it? If the oil drains back through the push rod tubes, how does it get to the heads in the first place? Should I loosen the heads in reverse order of the installation torque sequence? Loosen in steps, or all at once? are there any particular issues with the heads on a '76 2.0 I should look for? I'll leave it there for now. O.K... Discuss P.S. Thanks. (IMG:style_emoticons/default/beer.gif) |
   |

 
|
  |
Replies(1 - 19)
| VaccaRabite |
Jul 4 2012, 02:50 PM
Post
#2
|
|
En Garde! Group: Admin Posts: 13,444 Joined: 15-December 03 From: Dallastown, PA Member No.: 1,435 Region Association: MidAtlantic Region |
Hah! wow! I bet that was running bit warm.
to get the tin under the cylinders - you have to take that off BEFORE you pull the heads. Aside from that, the heads are easy to remove. 1) Pull the rockers 2) pull the pushrods (you need to mark them to remember what hole they came out of.) 3) pull the pushrod tubes. They come out through the heads. 4) unscrew and remove the tin between the push rod tubes and the cylinders. 5) Unbolt the heads. Pull them. You do not need to do this in any special order. EGR goes into the exhaust port. They can be welded shut - but why? Only do this if you are having the heads rebuilt. Otherwise, cap them. Future owner (or future you) may need to hook up all that 76 stuff again and caps are way easier to undo. |
|
|
|
| Bob L. |
Jul 4 2012, 03:34 PM
Post
#3
|
|
Senior Member Group: Members Posts: 847 Joined: 7-August 11 From: Austin TX Member No.: 13,411 Region Association: Southwest Region |
It's new too me, But I was guessing it ran hot too.
This is pretty much why I think I need to re-tap the holes. I think the threads in the head are compromised. 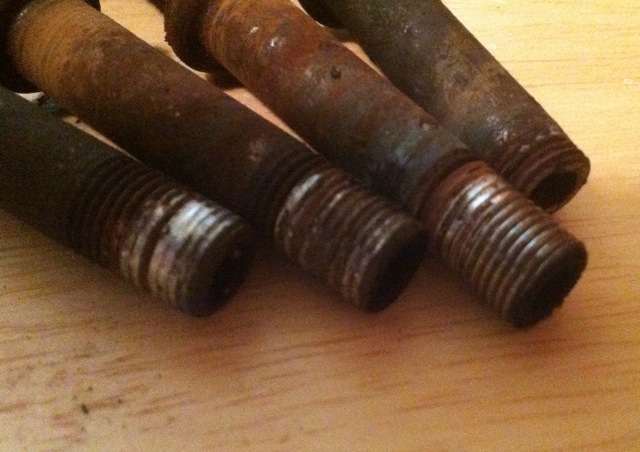 Notice that one of the tubes threads are shorter. About a 3/8 inch of it is still in the hole. So something needs to be done. Right? Like I said, I don't wanna. Can I re-tap it while it's on? I don't want shavings down in there. Would shavings just blow out the exhaust? |
|
|
|
| TheCabinetmaker |
Jul 4 2012, 03:56 PM
Post
#4
|
|
I drive my car everyday Group: Members Posts: 8,300 Joined: 8-May 03 From: Tulsa, Ok. Member No.: 666 |
The one in the back of the pic looks broken. Is part of it still in the head?
Shoot! next time I'll read the entire post! |
|
|
|
| ape914 |
Jul 4 2012, 04:12 PM
Post
#5
|
|
red locktite Group: Retired Members Posts: 240 Joined: 7-February 11 From: In front of a computer Member No.: 12,676 Region Association: None |
You do not need to pull a head to plug an EGR port, can be done in place
you should be able to clean the tin pieces in place with hot water, maybe a pressure wash, soak in Simple Green or some solvent over night. Blast the hot water around and thru the fins. |
|
|
|
| TheCabinetmaker |
Jul 4 2012, 05:20 PM
Post
#6
|
|
I drive my car everyday Group: Members Posts: 8,300 Joined: 8-May 03 From: Tulsa, Ok. Member No.: 666 |
Personally, I would not pressure wash a built engine. Too many ways for water to get in.
I do agree with everyone that its unnecessary to remove the heads for cleaning and egr port plugging. It looks like those cylinders have been there for a long time. I might consider having the cylinders honed and a ring replacement as long as the engine is out. Cheap way to get a few ponies back. |
|
|
|
| jmill |
Jul 4 2012, 05:31 PM
Post
#7
|
|
Green Hornet Group: Members Posts: 2,449 Joined: 9-May 08 From: Racine, Wisconsin Member No.: 9,038 Region Association: Upper MidWest |
Oil gets into the head via the lifter through the pushrod.
|
|
|
|
| Bob L. |
Jul 4 2012, 05:48 PM
Post
#8
|
|
Senior Member Group: Members Posts: 847 Joined: 7-August 11 From: Austin TX Member No.: 13,411 Region Association: Southwest Region |
This was/is a running engine. I don't want to take off any more than I have to. New oil tube seals and valve cover gaskets will be ordered along with some other seals and grommets and hoses.
So how do I plug the EGR holes. Do I just need the right tap to open it up to the next size? Do I need to worry about the shavings or will they go out the tailpipe. Can anyone confirm the size of the original threads for the EGR tubes? I think they are M10 1.0 pitch. |
|
|
|
| TheCabinetmaker |
Jul 4 2012, 06:07 PM
Post
#9
|
|
I drive my car everyday Group: Members Posts: 8,300 Joined: 8-May 03 From: Tulsa, Ok. Member No.: 666 |
You are correct on the thread size. I use a 40mm bolt. Getting the broken part of the tube out is gonna be the bitch. I would not tap bigger. They are very close to the intake port.
|
|
|
|
| Bob L. |
Jul 4 2012, 07:08 PM
Post
#10
|
|
Senior Member Group: Members Posts: 847 Joined: 7-August 11 From: Austin TX Member No.: 13,411 Region Association: Southwest Region |
I'm thinking about starting with a smaller tap to open up the lumen until it's big enough to use the M-10 tap and just chase the threads till they're clean, along with the others. Sound reasonable? That way I could just replace the tube seals and heads can stay put.
For now, now I'm going to eat some BBq down the block. Happy fourth (IMG:style_emoticons/default/flag.gif) |
|
|
|
| TheCabinetmaker |
Jul 4 2012, 07:13 PM
Post
#11
|
|
I drive my car everyday Group: Members Posts: 8,300 Joined: 8-May 03 From: Tulsa, Ok. Member No.: 666 |
BBQ. Goooood!!!!!!
|
|
|
|
| Tom |
Jul 4 2012, 08:39 PM
Post
#12
|
|
Advanced Member Group: Members Posts: 2,139 Joined: 21-August 05 From: Port Orchard, WA 98367 Member No.: 4,626 Region Association: None |
When I had mine out to clean and put in cppler seals, I used Dawn Power Disolver in the blus pump bottle. Comes out like a jell. I used several different paint brushes to swish the jell around and just the water hose pressure to rinse off. I was amazed at how clean the engine came out. Wish the trans had come out as well. I had pics somewhere, just can't find them right now. here is a pic of the bottom of the engine 6 years later. The top and cylinders looked just a shiny as the oil pan area. Sure wish I had paid more attention to the trans.
I just used ductape to seal up the openings to keep water out. I was successful and had no water get inside. Yay ductape!! Tom Attached thumbnail(s) 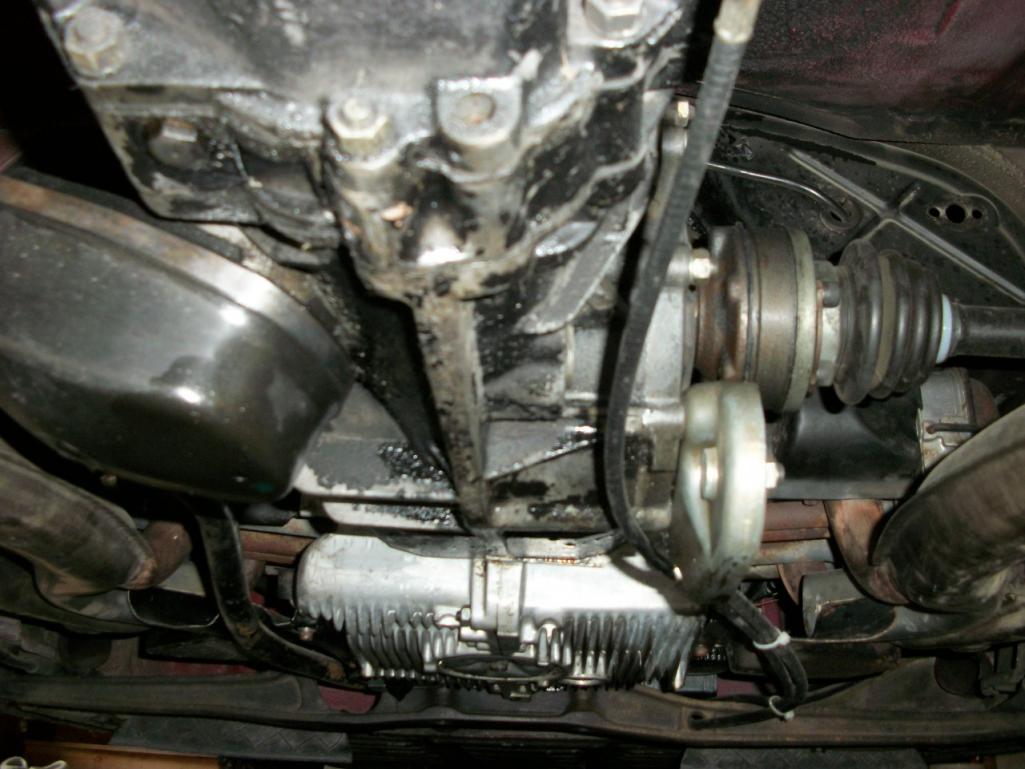
|
|
|
|
| Tom |
Jul 4 2012, 09:23 PM
Post
#13
|
|
Advanced Member Group: Members Posts: 2,139 Joined: 21-August 05 From: Port Orchard, WA 98367 Member No.: 4,626 Region Association: None |
Found the pics of washing the engine. I had left the short exhaust pipes on.
Tom Attached thumbnail(s) 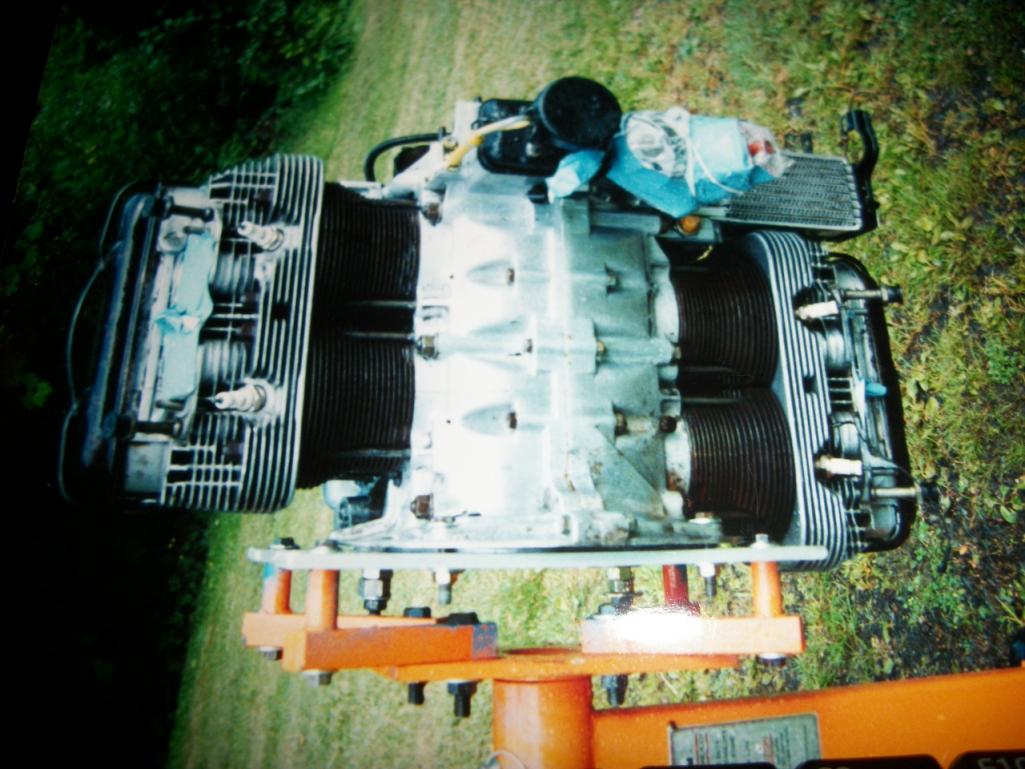 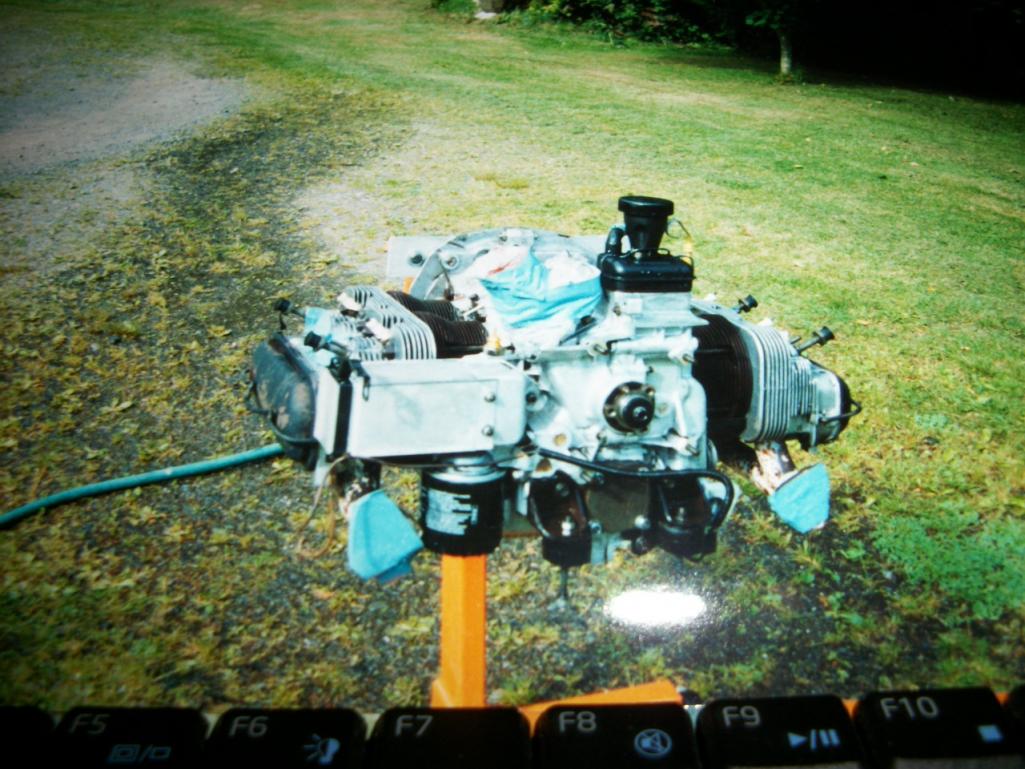
|
|
|
|
| Cap'n Krusty |
Jul 4 2012, 09:45 PM
Post
#14
|
|
Cap'n Krusty Group: Members Posts: 10,794 Joined: 24-June 04 From: Santa Maria, CA Member No.: 2,246 Region Association: Central California |
First of all, the lower tin can easily removed with the heads installed. Just remove the pushrod tubes and the 3 screws holding each tin in place.
Second: The system you call the "EGR" is actually the air injection system, and has NOTHING to do with exhaust gas recirculation. AIS pumps air into the exhaust to dilute the exhaust gasses. The Exhaust Gas Recirculation system routes exhaust gasses into the intake system, in this case directly into the air cleaner, through a vacuum controlled valve. The EGR system serves to reduce combustion chamber temperatures, prolonging the life of lean running (and consequently HOT running, engines. Unfortunately, Porsche chose to pick up the exhaust gasses AFTER the catalyst. Failing cats can allow ceramic particles into the intake, resulting in rapid and severe cylinder wall wear. Kinda like running a K&N air "filter". |
|
|
|
| Bob L. |
Jul 28 2012, 12:15 PM
Post
#15
|
|
Senior Member Group: Members Posts: 847 Joined: 7-August 11 From: Austin TX Member No.: 13,411 Region Association: Southwest Region |
After some thought I have decided to leave the heads in place. I will Tap out the threads to clean them out and just plug the holes with a bolt. Then I will remove the rocker arms and the tubes to get the bottom cleaned.
Once I start to put it all back together I'll adjust the valves. I have done some searching on how to find TDC. Since my motor is out of the car I can easily see the mark on the flywheel. I can rotate it by hand. My understanding is that if the mark is straight up then 1&3 are at TDC, if it is straight down then TDC for 2&4. I remember reading something about putting the cylinder at TDC before reinstalling the rocker arms. sounds reasonable. Anybody?? |
|
|
|
| Dave_Darling |
Jul 28 2012, 01:32 PM
Post
#16
|
|
914 Idiot Group: Members Posts: 14,986 Joined: 9-January 03 From: Silicon Valley / Kailua-Kona Member No.: 121 Region Association: Northern California |
That's the way I do it. Set the cylinder at TDC, install the rocker arms, set the valve clearances on that cylinder.
Others might tell you to set it to TDC, install the rockers, and then go back and use the Cap'n's method for adjusting the valves. --DD |
|
|
|
| Bob L. |
Jul 29 2012, 08:35 PM
Post
#17
|
|
Senior Member Group: Members Posts: 847 Joined: 7-August 11 From: Austin TX Member No.: 13,411 Region Association: Southwest Region |
Cabinetmaker: 40mm is too short for me. (IMG:style_emoticons/default/confused24.gif) They don't reach the threads in the head. I measured the egr tube and the flair that rests on the tins is 13/4" (45mm)from the end.
After more reading about valve adjustments... a question... Does it mater where the distributor rotor is (as it indicates cam position) when you do the valves? It's a matter of TDC between compression/power or TDC between exhaust/intake. |
|
|
|
| Dave_Darling |
Jul 29 2012, 08:39 PM
Post
#18
|
|
914 Idiot Group: Members Posts: 14,986 Joined: 9-January 03 From: Silicon Valley / Kailua-Kona Member No.: 121 Region Association: Northern California |
TDC between compression and power. Both valves (intake and exhaust) for that cylinder should have some slack.
--DD |
|
|
|
| Bob L. |
Jul 30 2012, 08:05 AM
Post
#19
|
|
Senior Member Group: Members Posts: 847 Joined: 7-August 11 From: Austin TX Member No.: 13,411 Region Association: Southwest Region |
(IMG:style_emoticons/default/smile.gif) Thanks Dave!
|
|
|
|
| Bob L. |
Aug 10 2012, 03:07 PM
Post
#20
|
|
Senior Member Group: Members Posts: 847 Joined: 7-August 11 From: Austin TX Member No.: 13,411 Region Association: Southwest Region |
Well it's time to start putting it all back together. I'm about to put the rockers back on and I don't know if I should use a thread locker.
I would assume a high heat formulation if I need it, But do I? I would also like to confirm 10 lb/ft torque on those rocker studs. ? Here's some progress pics... Dirty 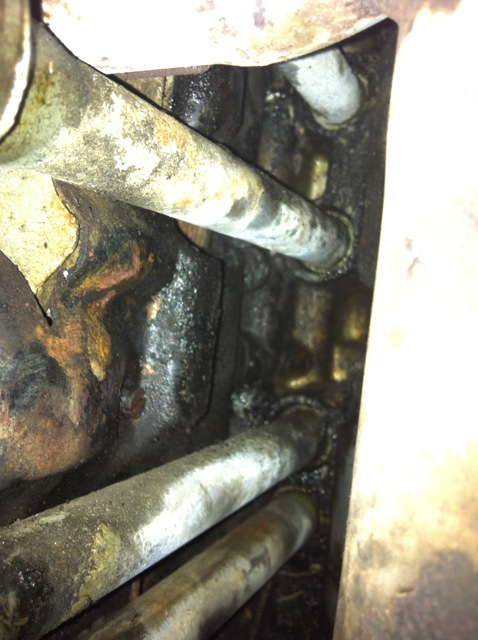 Getting clean 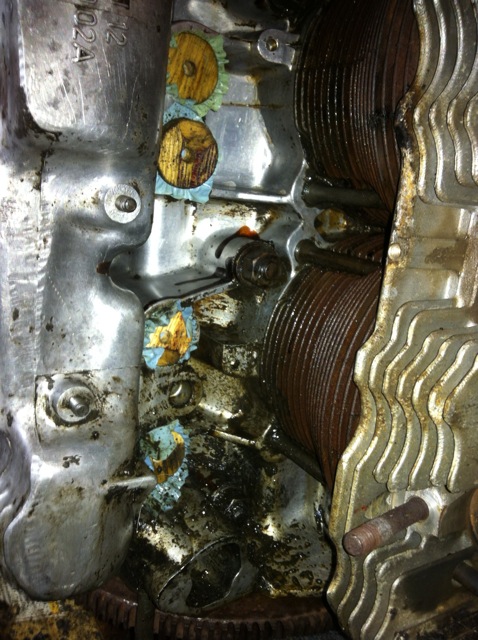 And clean(er) 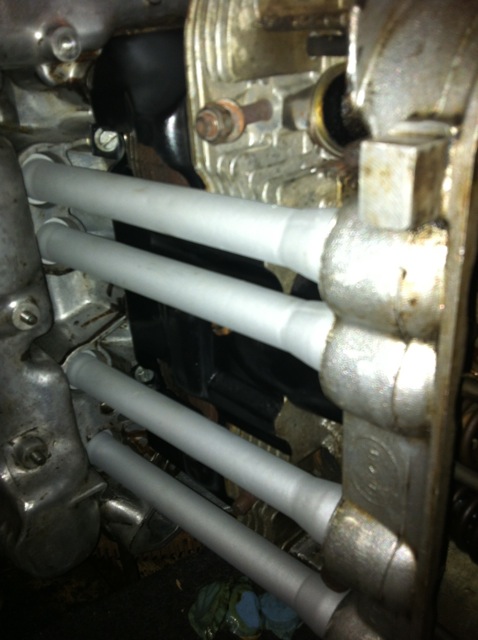 |
|
|
|
|
1 User(s) are reading this topic (1 Guests and 0 Anonymous Users)
0 Members:

|
Lo-Fi Version | Time is now: 19th May 2024 - 10:21 AM |
Invision Power Board
v9.1.4 © 2024 IPS, Inc.