|
|
|
Porsche, and the Porsche crest are registered trademarks of Dr. Ing. h.c. F. Porsche AG.
This site is not affiliated with Porsche in any way. Its only purpose is to provide an online forum for car enthusiasts. All other trademarks are property of their respective owners. |
|
|


| Krieger |
 Jul 7 2012, 09:51 AM Jul 7 2012, 09:51 AM
Post
#1
|
|
Advanced Member  Group: Members Posts: 4,707 Joined: 24-May 04 From: Santa Rosa CA Member No.: 2,104 Region Association: None |
Yes I have done a search. The neo 914's hellas are about $700. I do not plan on driving this car at night and I have removed the factory headlight buckets . I would like some light to come on when I flip the switch so they appear legal.
|
   |

 
|
  |
Replies(20 - 39)
| Krieger |
Jul 17 2012, 09:01 PM
Post
#21
|
|
Advanced Member Group: Members Posts: 4,707 Joined: 24-May 04 From: Santa Rosa CA Member No.: 2,104 Region Association: None |
I ground down the back side just enough so that it barely sticks out past the horizontal plane of the outside of the bucket. Yes flat lexan will be coming my way. They are snug in there.
Attached thumbnail(s) 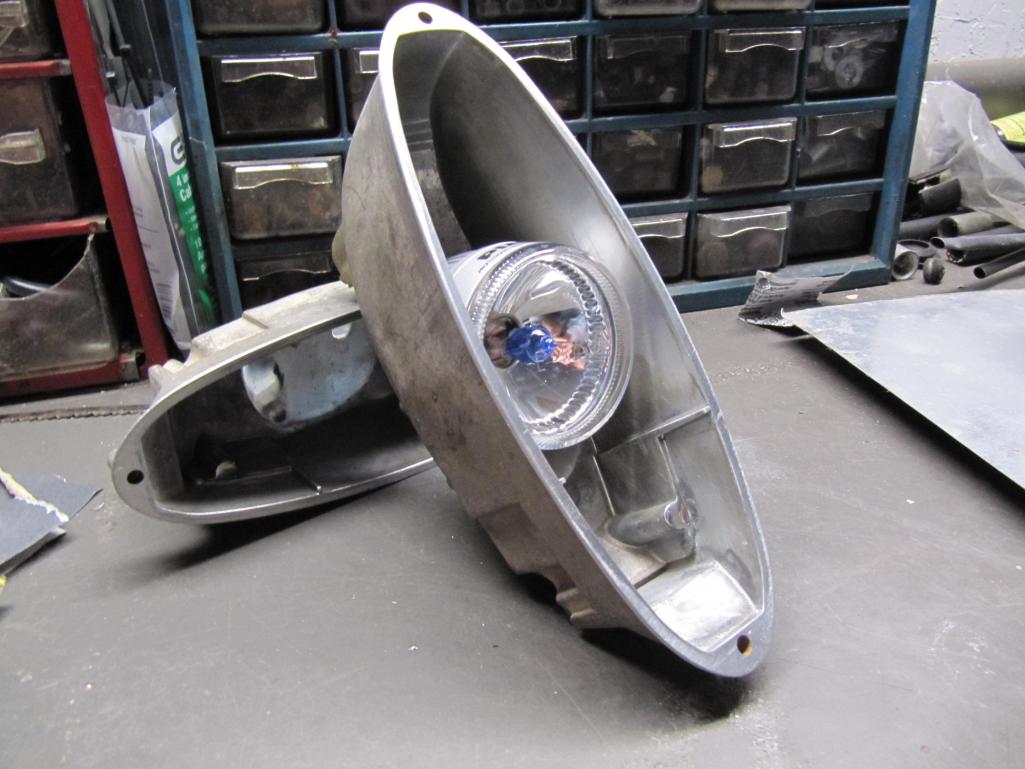
|
|
|
|
| Krieger |
Jul 17 2012, 09:18 PM
Post
#22
|
|
Advanced Member Group: Members Posts: 4,707 Joined: 24-May 04 From: Santa Rosa CA Member No.: 2,104 Region Association: None |
I was planning on running one of those yellow bulbs for a running/turn light. I was thinking for "headlight" adjustment another small hole on the bottom of the bucket directly below the new lights housing. One long screw coming in from outside the bucket housing and a couple of small screws on the "light" housing....or just point them where I want them (by hand with the lexan cover off) and squirt some seam sealer under the light to hold them. Probably good enough for a track car!
Attached thumbnail(s) 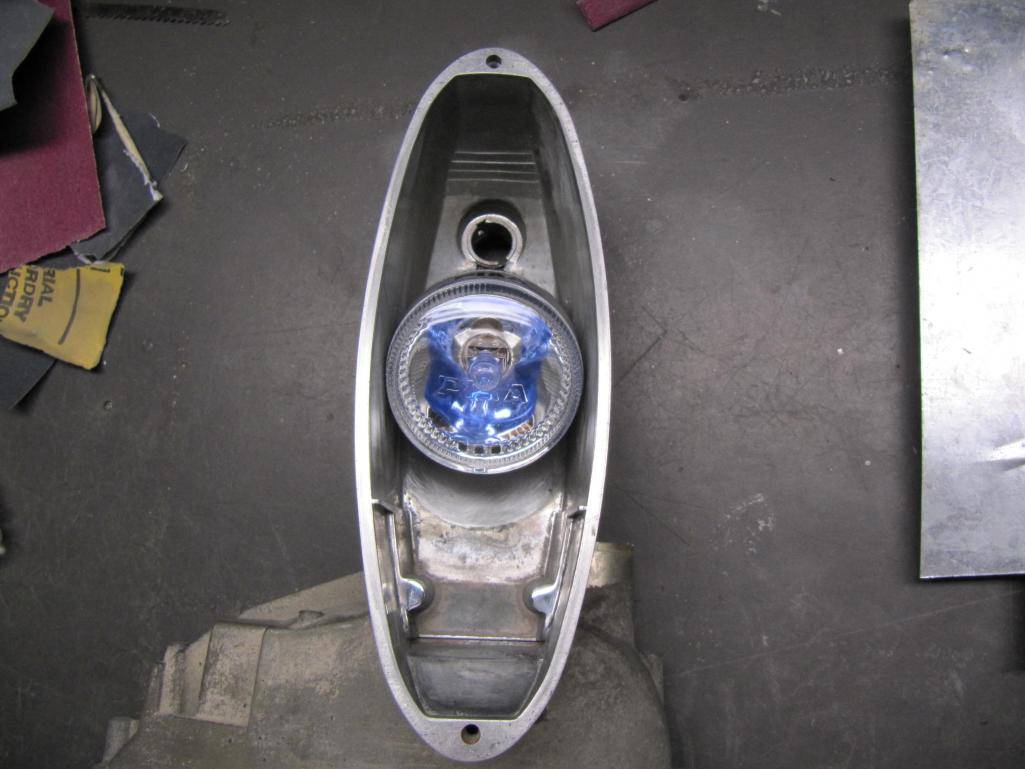
|
|
|
|
| edwin |
Jul 18 2012, 08:31 AM
Post
#23
|
|
Member Group: Members Posts: 321 Joined: 20-May 09 From: Australia Member No.: 10,384 Region Association: Australia and New Zealand |
What do you plan to do for indicators? Still as normal?
I wouldn't want to intrude much into the space they occupy on a road car |
|
|
|
| McMark |
Jul 18 2012, 10:38 AM
Post
#24
|
|
914 Freak! Group: Retired Admin Posts: 20,179 Joined: 13-March 03 From: Grand Rapids, MI Member No.: 419 Region Association: None |
Cool! Looks like it's coming together.
Before you put a bunch of work into forming Lexan covers, I'd place a piece over the top and leave the light on for an hour or so to confirm that the heat production of the lamp doesn't damage the lexan. You may want to add some 'breather' holes on the top and bottom. |
|
|
|
| jimsfolly |
Jul 18 2012, 12:57 PM
Post
#25
|
|
Newbie Group: Members Posts: 17 Joined: 15-June 08 From: Renton, WA Member No.: 9,174 Region Association: None |
QUOTE(Krieger @ Jul 17 2012, 08:18 PM)  I was planning on running one of those yellow bulbs for a running/turn light. I was thinking for "headlight" adjustment another small hole on the bottom of the bucket directly below the new lights housing. One long screw coming in from outside the bucket housing and a couple of small screws on the "light" housing....or just point them where I want them (by hand with the lexan cover off) and squirt some seam sealer under the light to hold them. Probably good enough for a track car! http://www.ebay.com/itm/LED-MINI-STALK-MOT...09938%26ps%3D54 how about something like this for the turn signals? maybe remove/modify the housing to allow the lens to be jammed up near the top edge... how are you going to shape the lexan? I've been looking into using a pair of 60mm Hella Hi/Lo projectors in the buckets, modifying the lift to halfway, but I'd rather go with the turn signal mounting location instead... keep us updated.. |
|
|
|
| Krieger |
Jul 18 2012, 07:01 PM
Post
#26
|
|
Advanced Member Group: Members Posts: 4,707 Joined: 24-May 04 From: Santa Rosa CA Member No.: 2,104 Region Association: None |
Thanks Mark. Its good to be almost done. I think I am going to stick with flat pieces of Lexan for now. That is some good advice to see if this stuff melts. I asked the techs at PIAA how hot these lights will be. Of course the bulb burns at something like 4000 kelvin. The best I could get from these guys is under 200* F. Most people mount them 1/2" below a plastic bumper with no issues. I plan on using the stock location for turn indicators, but with yellow bulbs. I was at Napa auto parts and I saw some that looked correct.
|
|
|
|
| euro911 |
Aug 2 2012, 01:00 PM
Post
#27
|
|
Retired & living the dream. God help me if I wake up! Group: Members Posts: 8,849 Joined: 2-December 06 From: So.Cal. & No.AZ (USA) Member No.: 7,300 Region Association: Southern California |
Any updates? (IMG:style_emoticons/default/popcorn[1].gif)
|
|
|
|
| Krieger |
Nov 29 2012, 08:23 PM
Post
#28
|
|
Advanced Member Group: Members Posts: 4,707 Joined: 24-May 04 From: Santa Rosa CA Member No.: 2,104 Region Association: None |
This has been done for a while. Buckets polished out and clear coated with a POR 15 Glisten PC clearcoat.
Attached thumbnail(s) 
|
|
|
|
| Krieger |
Nov 29 2012, 08:31 PM
Post
#29
|
|
Advanced Member Group: Members Posts: 4,707 Joined: 24-May 04 From: Santa Rosa CA Member No.: 2,104 Region Association: None |
The headlight is snug in there. If I wanted it to adjust I could drill a hole through both housings with a long screw from outside and two nuts on the lens assembly. NAPA autoparts orange bulb.
Attached thumbnail(s) 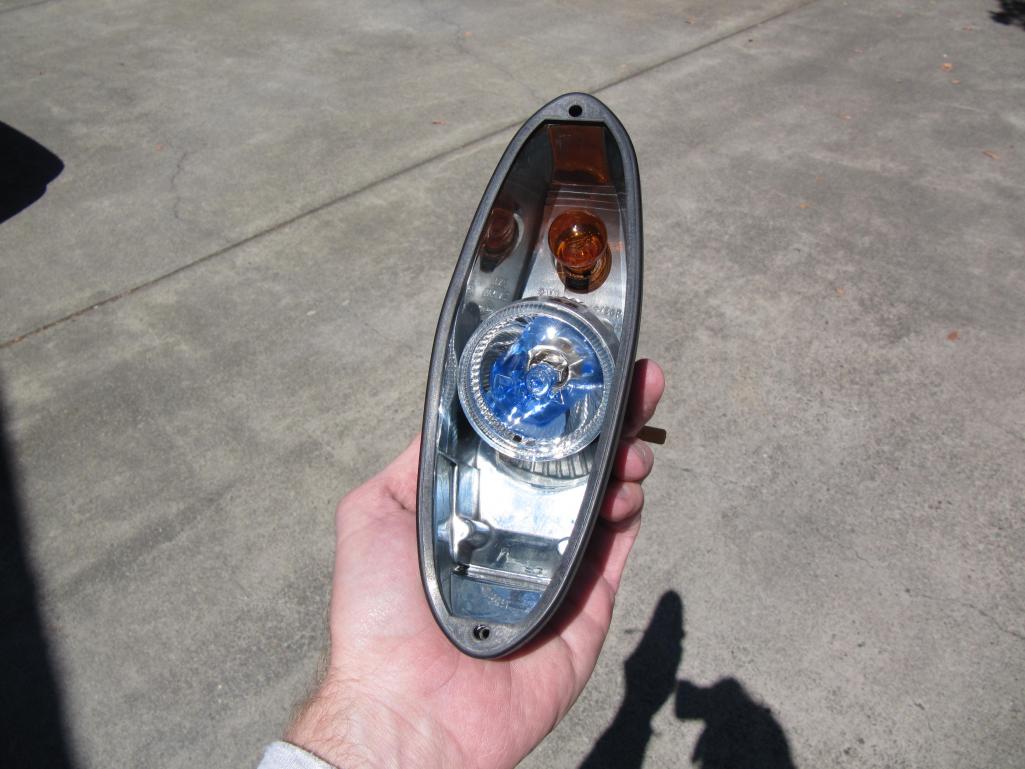
|
|
|
|
| Krieger |
Nov 29 2012, 08:33 PM
Post
#30
|
|
Advanced Member Group: Members Posts: 4,707 Joined: 24-May 04 From: Santa Rosa CA Member No.: 2,104 Region Association: None |
Flat Lexan cover, cut on band saw. Belt and hand sanded for final shape. One of AA repro seal. It's a nice fit and reasonably priced, just like the repro rubber elbo for the backside.
Attached thumbnail(s) 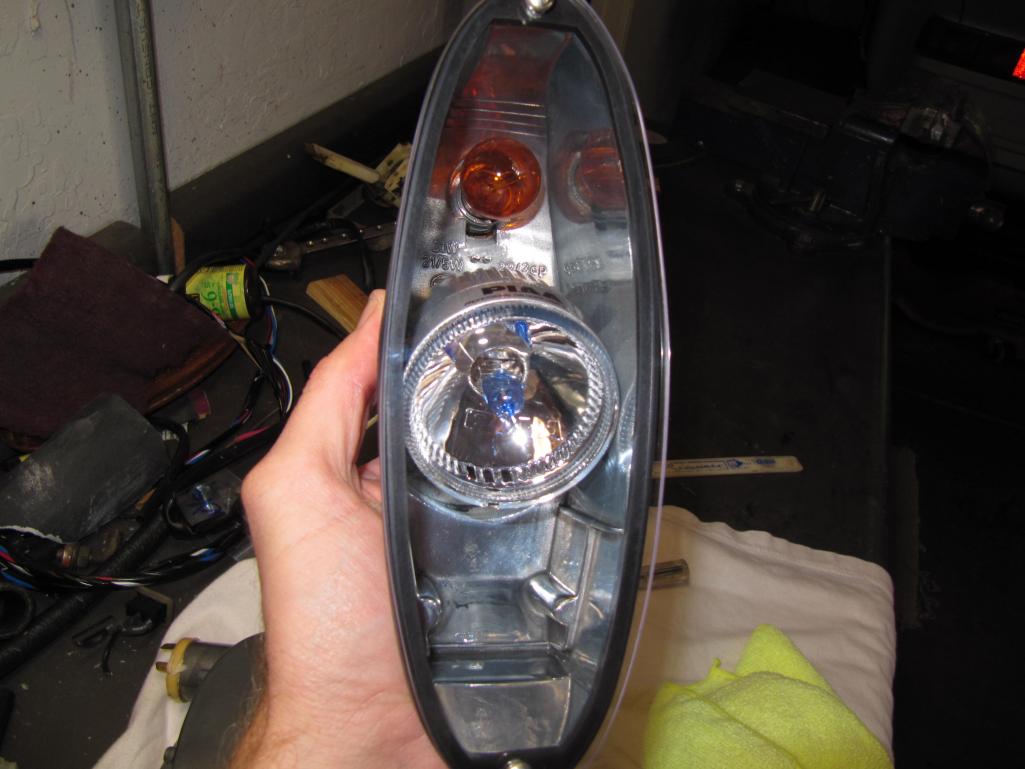
|
|
|
|
| Krieger |
Nov 29 2012, 08:41 PM
Post
#31
|
|
Advanced Member Group: Members Posts: 4,707 Joined: 24-May 04 From: Santa Rosa CA Member No.: 2,104 Region Association: None |
Oops double post. (IMG:style_emoticons/default/beer3.gif)
Attached thumbnail(s) 
|
|
|
|
| Krieger |
Nov 29 2012, 08:44 PM
Post
#32
|
|
Advanced Member Group: Members Posts: 4,707 Joined: 24-May 04 From: Santa Rosa CA Member No.: 2,104 Region Association: None |
I used the rubber grommet from the PIAA lights on the back of the turn bucket. I glued the electric covers back on with 3M seam sealer.
Attached thumbnail(s) 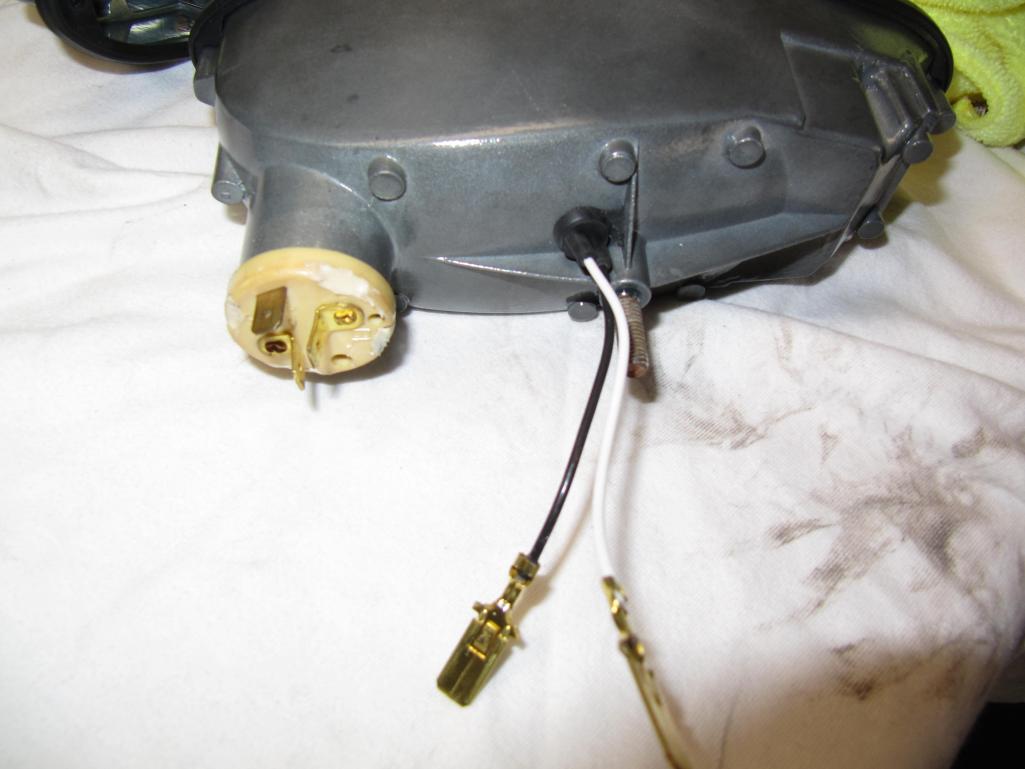
|
|
|
|
| Krieger |
Nov 29 2012, 08:45 PM
Post
#33
|
|
Advanced Member Group: Members Posts: 4,707 Joined: 24-May 04 From: Santa Rosa CA Member No.: 2,104 Region Association: None |
I put some of the original PIAA plastic tubing and plug back on the wire ends and wrapped it with silicon tape.
Attached thumbnail(s) 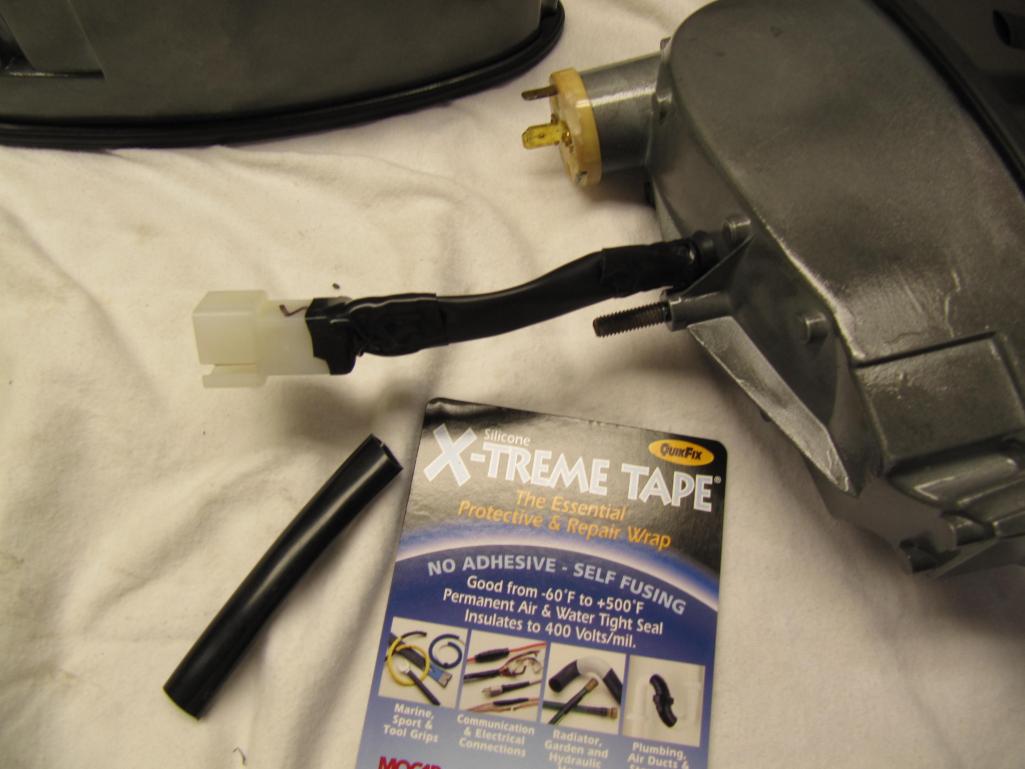
|
|
|
|
| Krieger |
Nov 29 2012, 09:01 PM
Post
#34
|
|
Advanced Member Group: Members Posts: 4,707 Joined: 24-May 04 From: Santa Rosa CA Member No.: 2,104 Region Association: None |
The front!
Attached thumbnail(s) 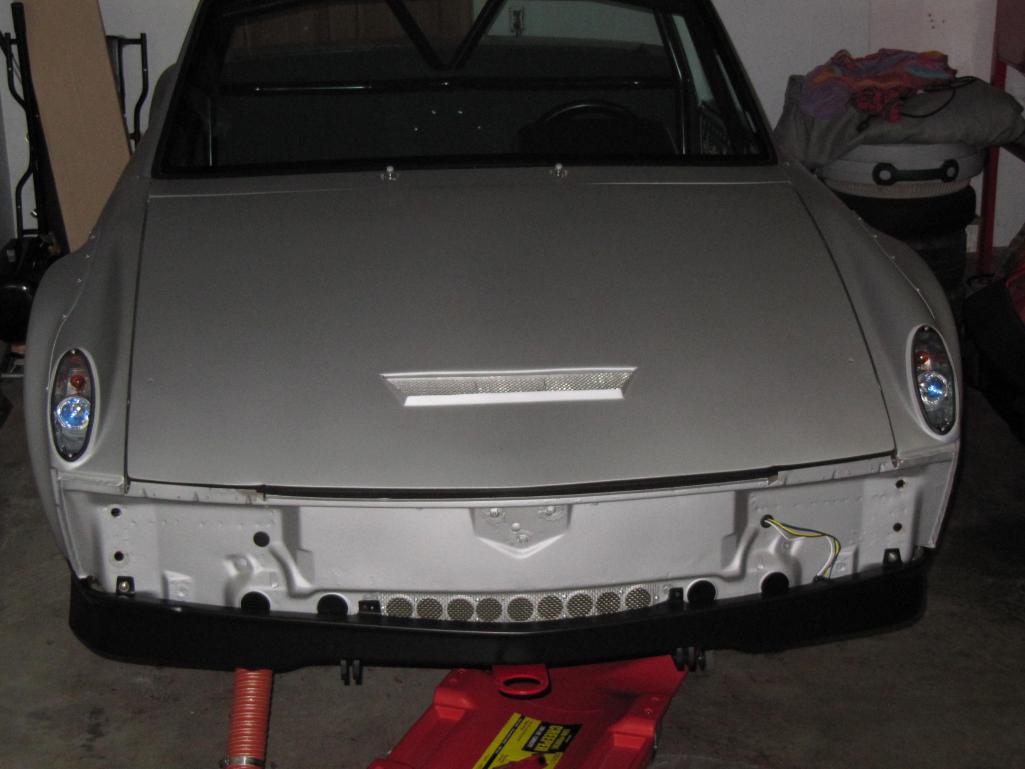
|
|
|
|
| Krieger |
Nov 29 2012, 09:02 PM
Post
#35
|
|
Advanced Member Group: Members Posts: 4,707 Joined: 24-May 04 From: Santa Rosa CA Member No.: 2,104 Region Association: None |
Look out!! (IMG:style_emoticons/default/piratenanner.gif) (IMG:style_emoticons/default/piratenanner.gif)
Attached thumbnail(s) 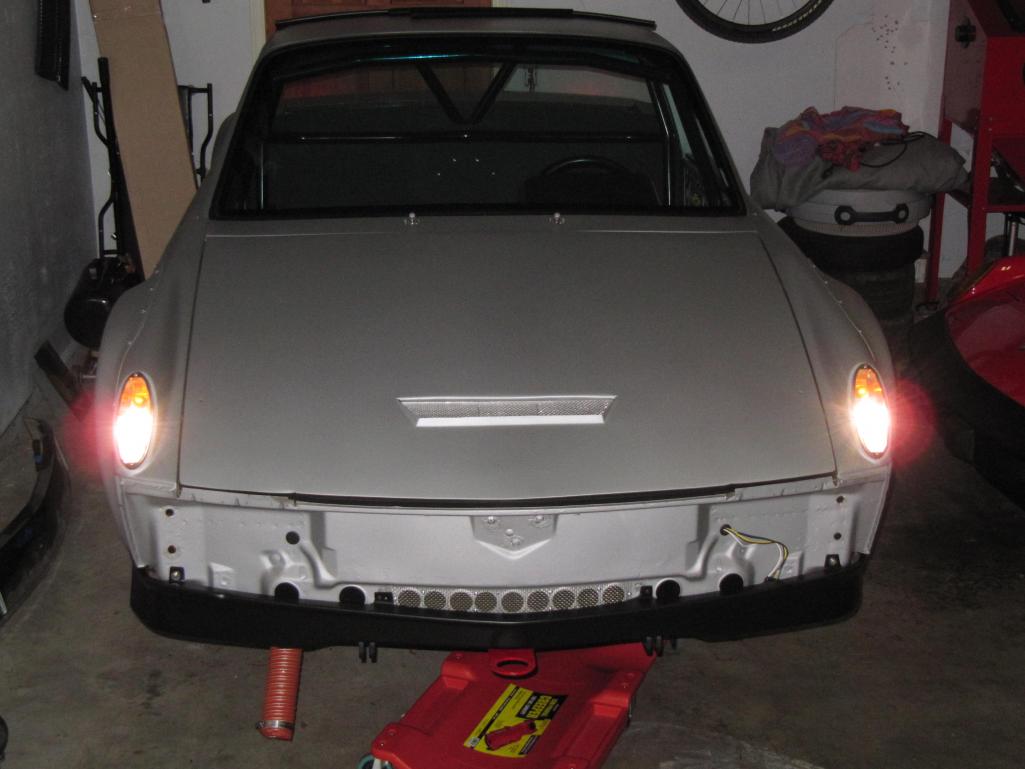
|
|
|
|
| Mike Bellis |
Nov 29 2012, 09:07 PM
Post
#36
|
|
Resident Electrician Group: Members Posts: 8,345 Joined: 22-June 09 From: Midlothian TX Member No.: 10,496 Region Association: None |
Are the lights bolted or just wedged into the housing? A few miles down the road they may be pointing at the sky... (IMG:style_emoticons/default/sad.gif)
|
|
|
|
| Krieger |
Nov 29 2012, 09:18 PM
Post
#37
|
|
Advanced Member Group: Members Posts: 4,707 Joined: 24-May 04 From: Santa Rosa CA Member No.: 2,104 Region Association: None |
They couldn't go very far they would hit the outer cover. I do not plan on driving this at night.
|
|
|
|
| Rand |
Nov 29 2012, 09:24 PM
Post
#38
|
|
Cross Member Group: Members Posts: 7,409 Joined: 8-February 05 From: OR Member No.: 3,573 Region Association: None |
Wait, what?
Q. Are they bolted in or just wedged into the housing? A. They couldn't go very far they would hit the outer cover. I do not plan on driving this at night. I guess I missed the point. How are they mounted / adjusted? |
|
|
|
| Krieger |
Nov 29 2012, 09:39 PM
Post
#39
|
|
Advanced Member Group: Members Posts: 4,707 Joined: 24-May 04 From: Santa Rosa CA Member No.: 2,104 Region Association: None |
You need lights to legally drive on the road. I meet that requirement. I mentioned in a previous post that with a little more work they could be made to adjust with a long thin screw through both housings and a nut on either side of the PIAA. I got tired of this project and it is enough for now and can be revisited later.
|
|
|
|
| Jeff Hail |
Nov 30 2012, 02:21 PM
Post
#40
|
|
Senior Member Group: Members Posts: 1,141 Joined: 3-May 07 From: LA/ CA Member No.: 7,712 |
Vent the lamp housing with a 1/16th inch hole at the lower rear of the bucket. It will keep the lexan lense from leaking and heat crazing.
|
|
|
|
|
1 User(s) are reading this topic (1 Guests and 0 Anonymous Users)
0 Members:

|
Lo-Fi Version | Time is now: 13th May 2024 - 06:41 PM |
Invision Power Board
v9.1.4 © 2024 IPS, Inc.