|
|
|
Porsche, and the Porsche crest are registered trademarks of Dr. Ing. h.c. F. Porsche AG.
This site is not affiliated with Porsche in any way. Its only purpose is to provide an online forum for car enthusiasts. All other trademarks are property of their respective owners. |
|
|


| smj |
 Aug 16 2012, 04:14 AM Aug 16 2012, 04:14 AM
Post
#1
|
|
"Dude, Steve from Berkeley."  Group: Members Posts: 591 Joined: 28-August 05 From: Berkeley, CA Member No.: 4,691 Region Association: Northern California |
Just thought I'd share what I was up to Wednesday night. The tach in my -6 finally quit after being intermittent for a while. I asked Tom Amon to have a look at it last time he was out, he bypassed the wiring harness and said the gauge was the problem. So, after waiting for the right part to show up at a reasonable price I was ready to proceed.
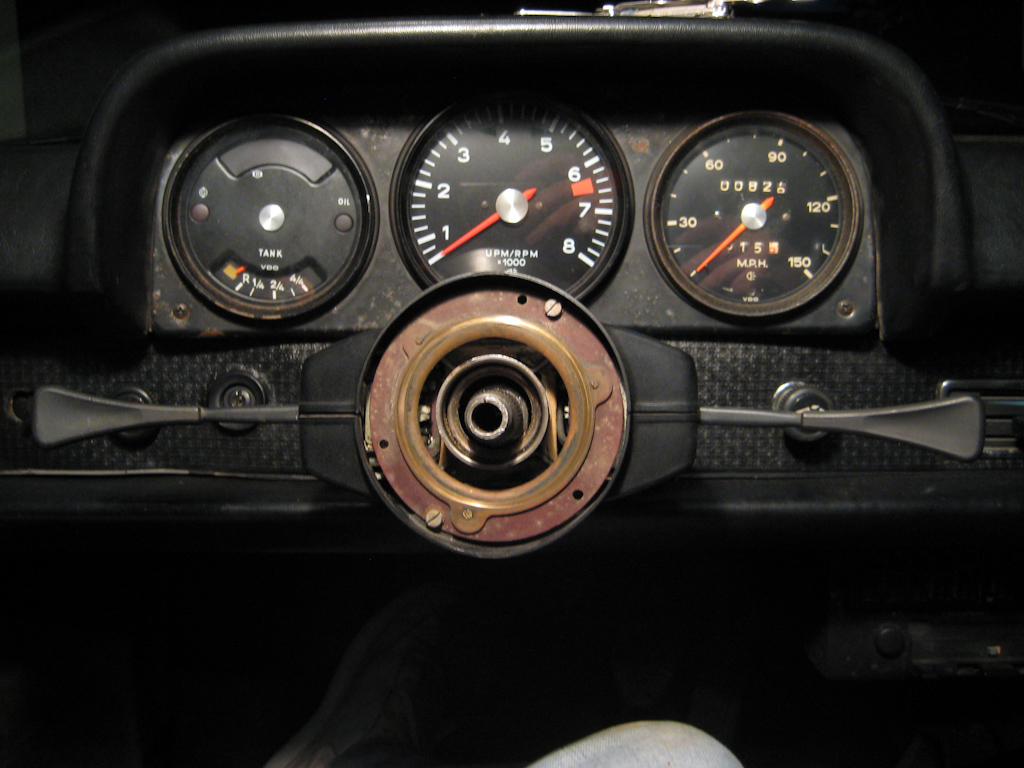
You may want to disconnect the battery before doing this, just in case. And for the record, if you try anything like this on your own you do so at your own risk. You can pop the tach out of the panel by wiggling it a bit. You can do so without removing the steering wheel, but you won't have a lot of room to maneuver with the steering column covers on a -6. I couldn't quite get mine all the way out without scratching up the cover, so I wanted to remove it. Well, to do that you've got to remove the steering wheel... Let's assume you've gotten your steering wheel off - that's documented here. I had a scarred 27mm nut holding on an adapter for a small Lecarra wheel, but under that everything should be stock. Here's what you should see: 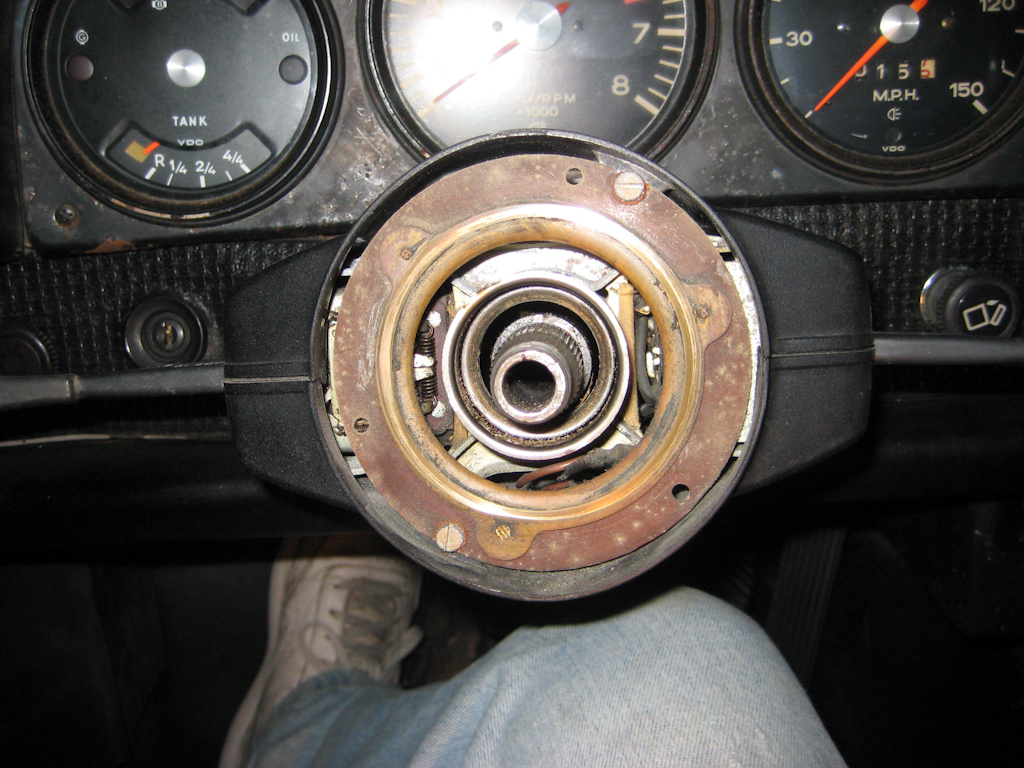 That's the horn ring staring at you, with two screws that you need to remove to get to this: 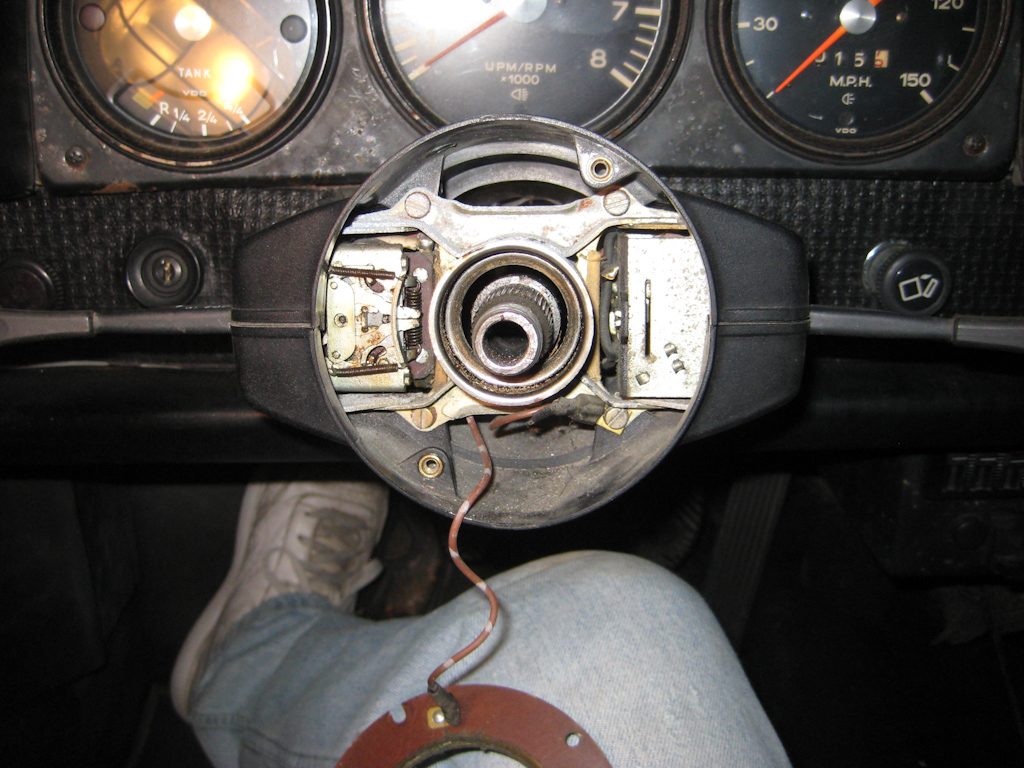 Ah ha, that explains why I couldn't get the "clamshell" steering column covers to move -- four more screws, two for each half. I left the horn ring alone, but you can disconnect the wire from the horn ring to get it out of the way. Remove the two bottom screws, paying attention to that spade lug on the right-hand screw in the photo, and you can remove the lower cover: 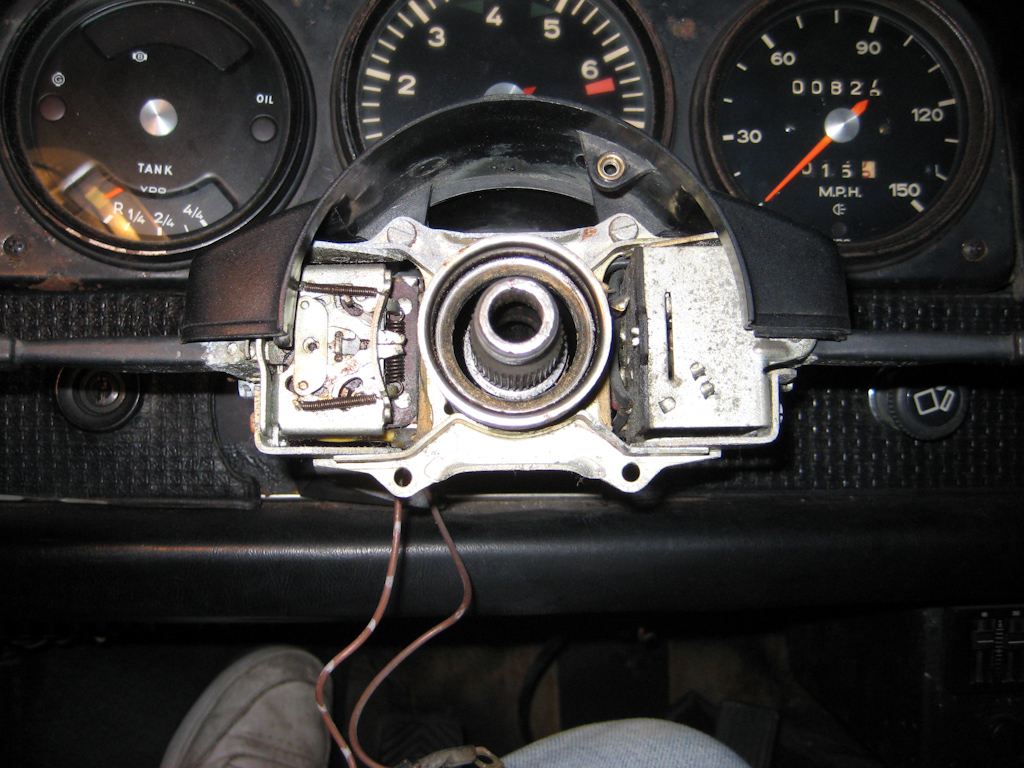 I suppose we could've skipped that since it's the upper half that's keeping us from replacing the tach. Well, here's what it all looks like with the clamshell removed: 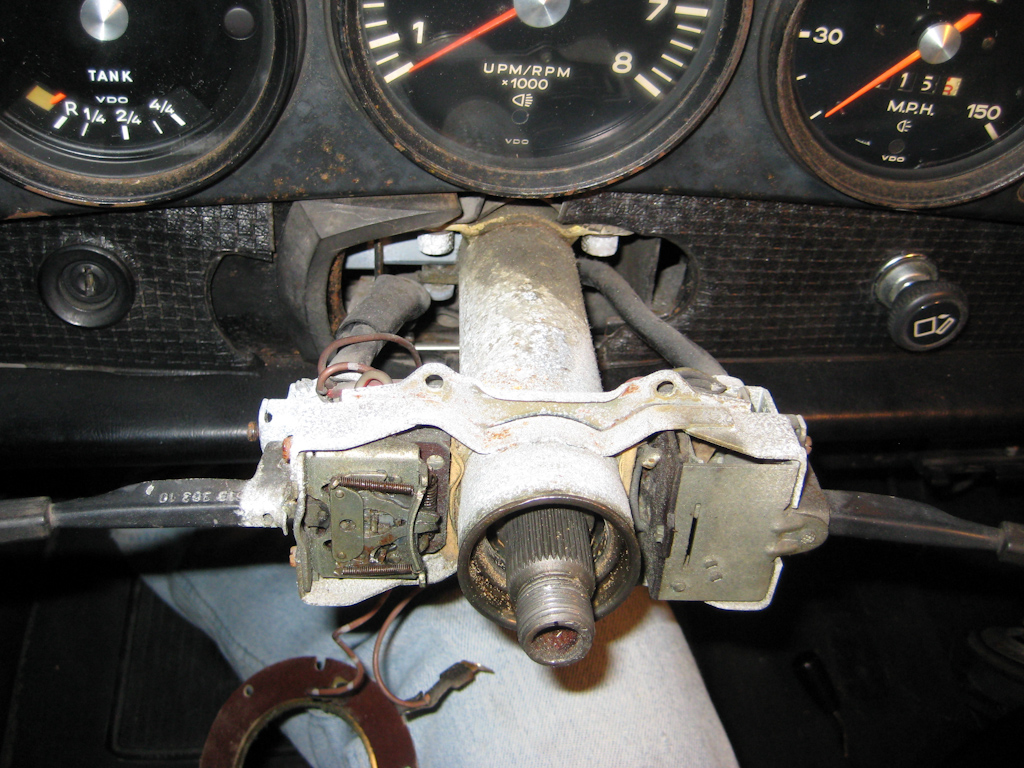 Next I put something over the bare steering column to protect the tach as I gently pulled it out. There should be 8 different wires/lights connected to the back - they are very old and likely brittle, and some may not have much slack at all, so be careful! I chose to grab a label printer (Brother P-Touch) and label each wire before or as I disconnected it. I know I'm going to be in and out of the instrument cluster over the next year, so this should be useful. But the wires are color coded and you can figure them out from the current flow diagrams here.  So here's what it looks like with all the wires disconnected and the tach removed: 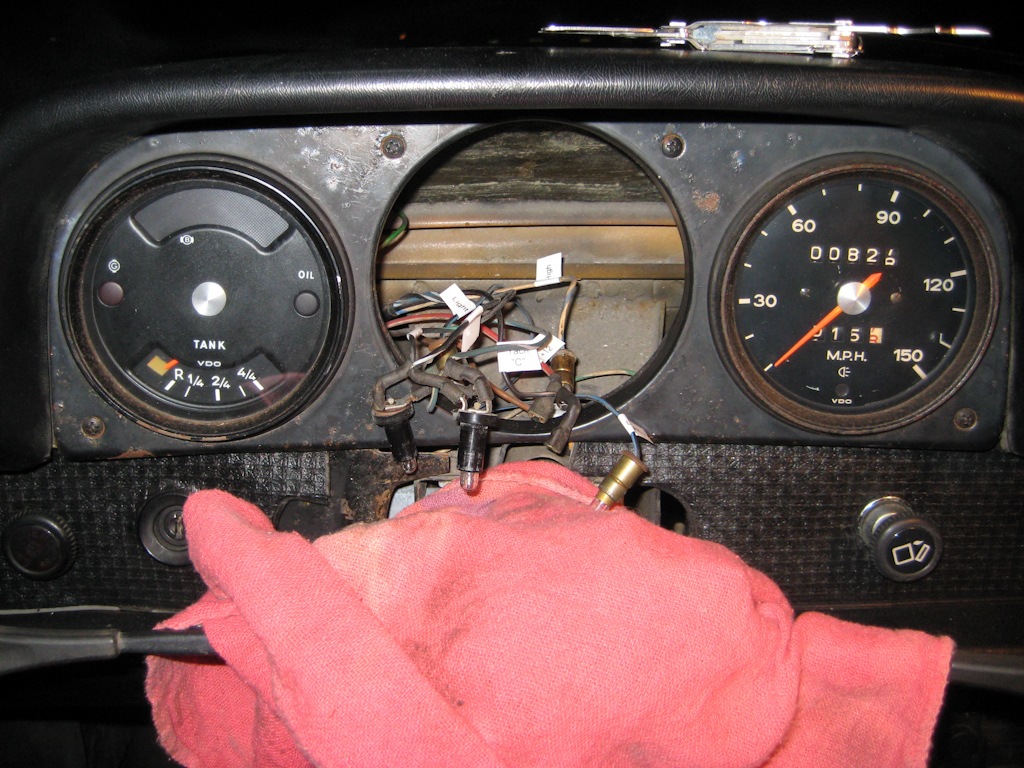 I took a moment to compare the two units side by side. The original is part number 914.641.301.10 on the left, and my replacement is p/n 911.641.301.01. My original was stamped with a manufacture date of 3/70, and the replacement was stamped with a date of 5/72. 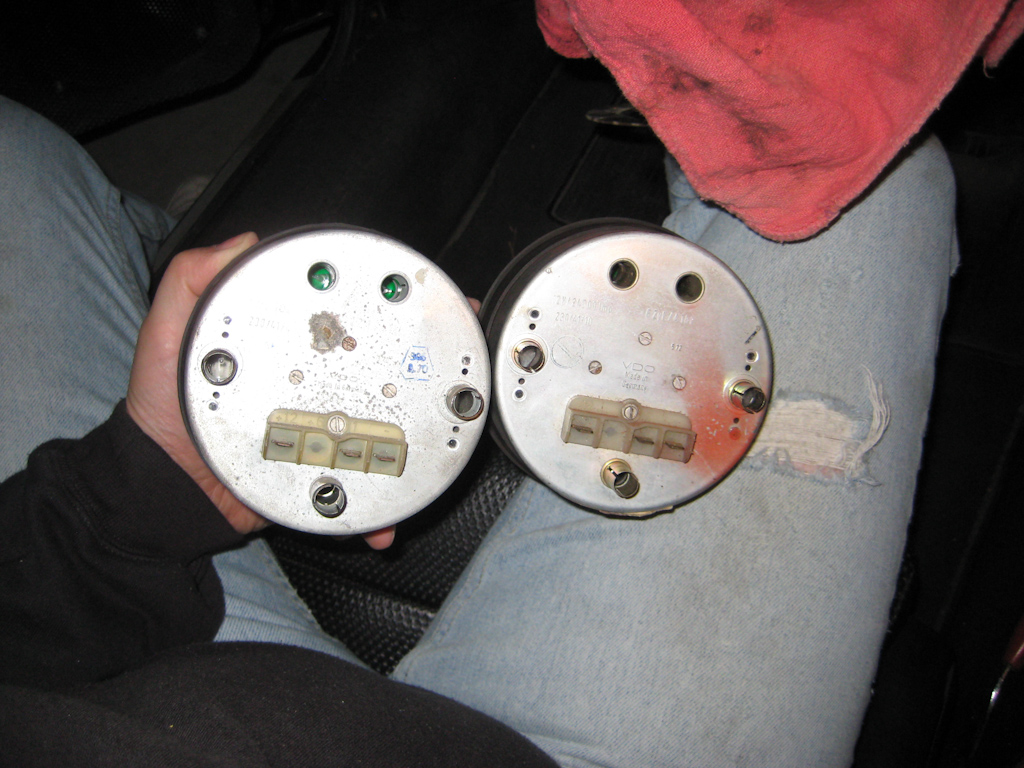 Despite the different part numbers all the lights and indicators are in the same position and the redline is the same to my eye. Here's a better view of the back of the replacement tach - top center you can see the engraved "6 Zyl" which I believe indicates this is designed for the signal off of a six cylinder motor. It won't function properly with the signal off of a four cylinder, and vice versa. Just below that marking and to the right of the top screw you can see the manufacture date of 5/72. Openings at the top are for the turn signal lamps. The two tubes below and outside are for illumination lamps. The tube on the bottom takes the high beam indicator lamp. And the small terminal strip has three connections marked "+12" "C" and "-" from left to right. (On the original tach the "C" terminal is marked "1" and the position missing a terminal is marked "+6") 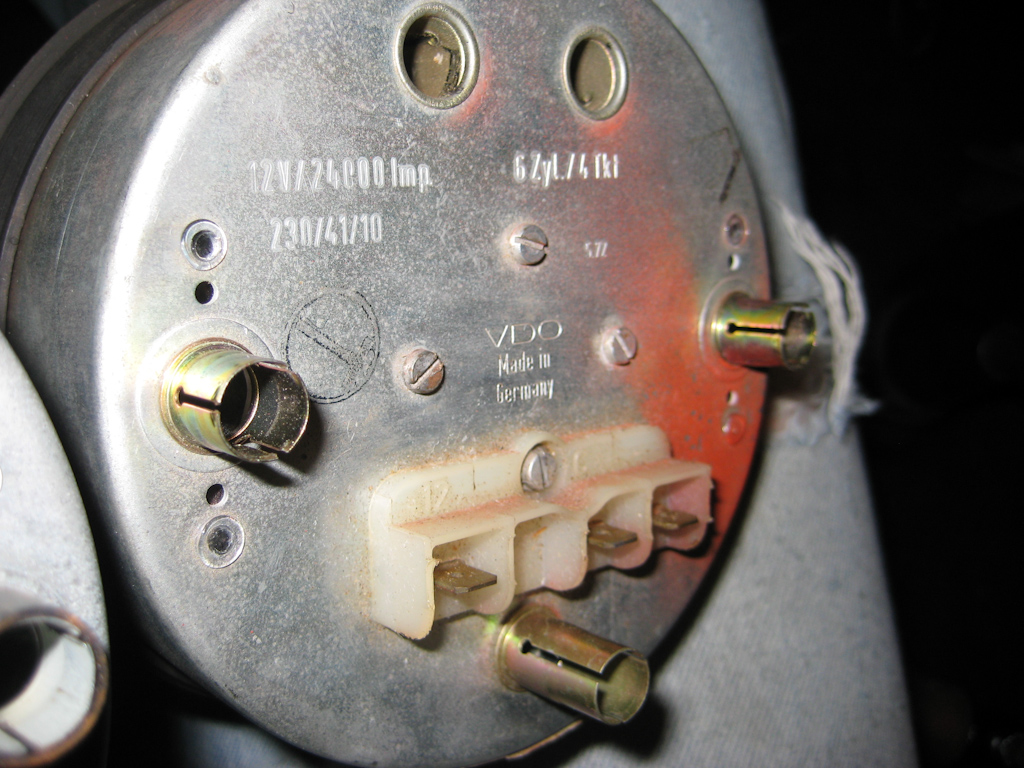 Carefully connect the wires you disconnected earlier to the replacement tach. Remember to keep the tach as close to the dash as possible to avoid stressing your 40+ year old wiring harness. With all connections, it will look like this: When all connections are secure, orient the tach and gently insert it into the instrument panel. Then reverse the steps dealing with the steering column clam shell, horn ring, etc. |
   |

 
|
  |
Replies(1 - 2)
| smj |
Aug 16 2012, 04:18 AM
Post
#2
|
|
"Dude, Steve from Berkeley." Group: Members Posts: 591 Joined: 28-August 05 From: Berkeley, CA Member No.: 4,691 Region Association: Northern California |
When I finished, but before I put my steering wheel adapter back on, this is what I saw. You may be able to spot the difference in the brightness of the gauge face lettering on the replacement tach versus the old speedo.
 I didn't really hit any gotchas, but keep in mind that the wiring and plastic are all very old and therefore brittle. Enjoy, --Steve. |
|
|
|
| edwin |
Aug 16 2012, 05:09 AM
Post
#3
|
|
Member Group: Members Posts: 321 Joined: 20-May 09 From: Australia Member No.: 10,384 Region Association: Australia and New Zealand |
Quick question out of interest
Is the tacho in the six different in terms of operation than a normal 4? Obviously different amount of pulses but does the cdi used on some motors change anything? Edwin |
|
|
|
|
1 User(s) are reading this topic (1 Guests and 0 Anonymous Users)
0 Members:

|
Lo-Fi Version | Time is now: 19th May 2024 - 11:19 AM |
Invision Power Board
v9.1.4 © 2024 IPS, Inc.