|
|
|
Porsche, and the Porsche crest are registered trademarks of Dr. Ing. h.c. F. Porsche AG.
This site is not affiliated with Porsche in any way. Its only purpose is to provide an online forum for car enthusiasts. All other trademarks are property of their respective owners. |
|
|

  |

| zambezi |
 Aug 23 2012, 10:09 PM Aug 23 2012, 10:09 PM
Post
#41
|
|
Senior Member  Group: Members Posts: 711 Joined: 14-April 08 From: Lafayette, LA Member No.: 8,920 Region Association: South East States |
These pictures have been posted on this forum before but I thought I should post them here again so we can keep this info all together. This thread is going to be a good place for all the information to be in one place. I am sure all this info will help someone.
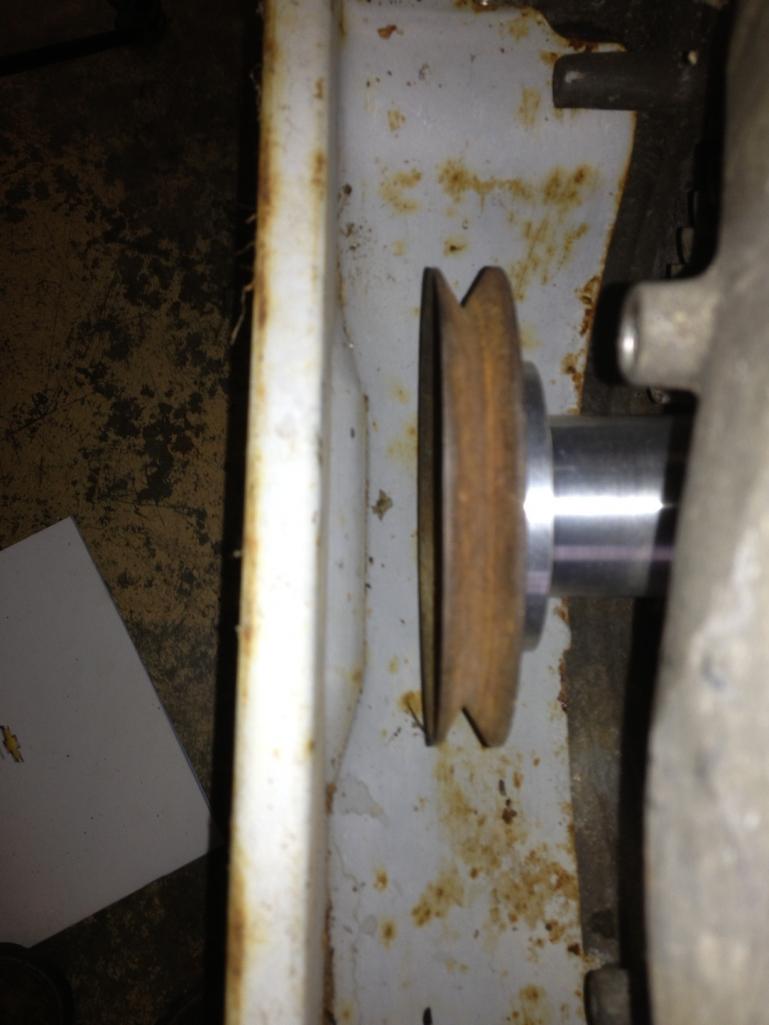
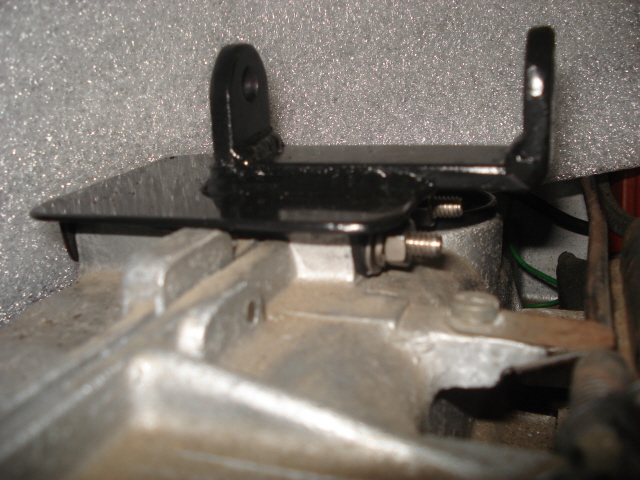 Here is my bracket. 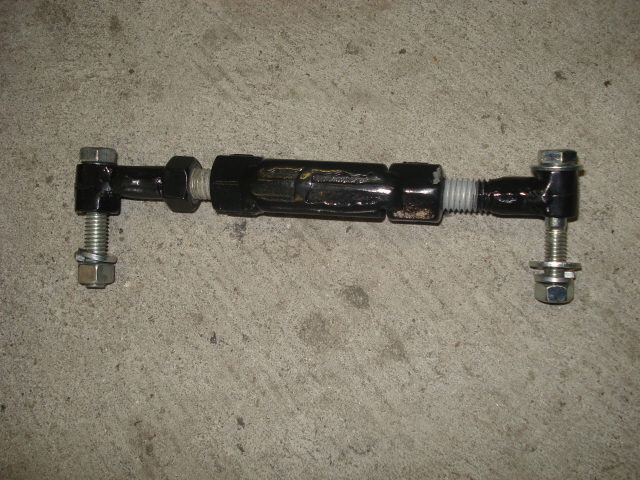 Here is my turnbuckle adjuster (left and right hand threads).  Here is the turnbuckle mounted 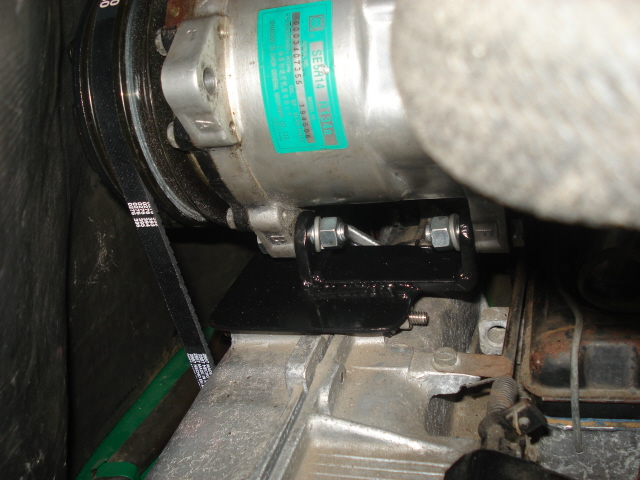 The other side of the mount 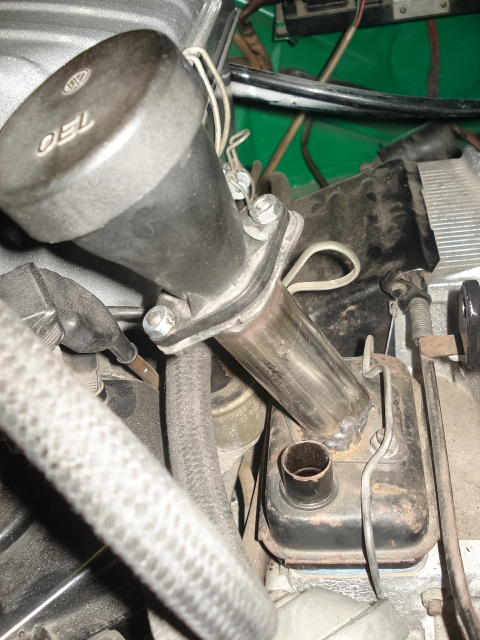 My oil filler modification. |
   |

 
|
| dlee6204 |
Aug 24 2012, 08:17 AM
Post
#42
|
|
Howdy Group: Members Posts: 2,162 Joined: 30-April 06 From: Burnsville, NC Member No.: 5,956 |
Thanks for the pictures. I think my setup is a little closer to the firewall than yours. I have a little more clearance between the belt and fan shroud.
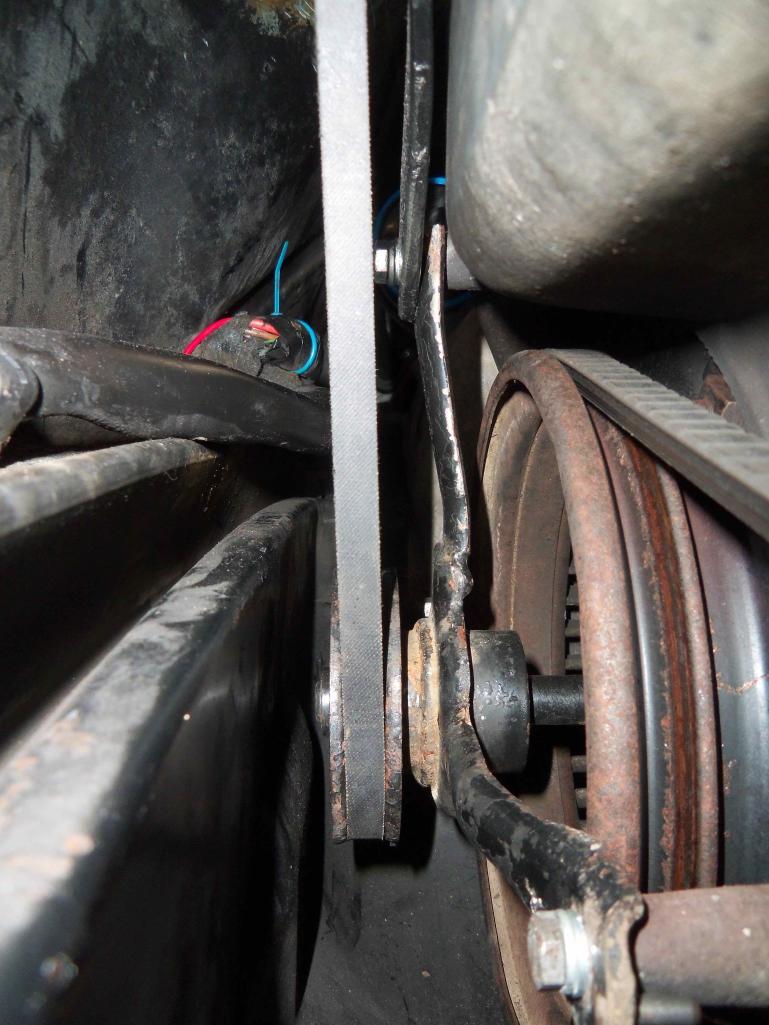 I have a little under 2 inches to the firewall 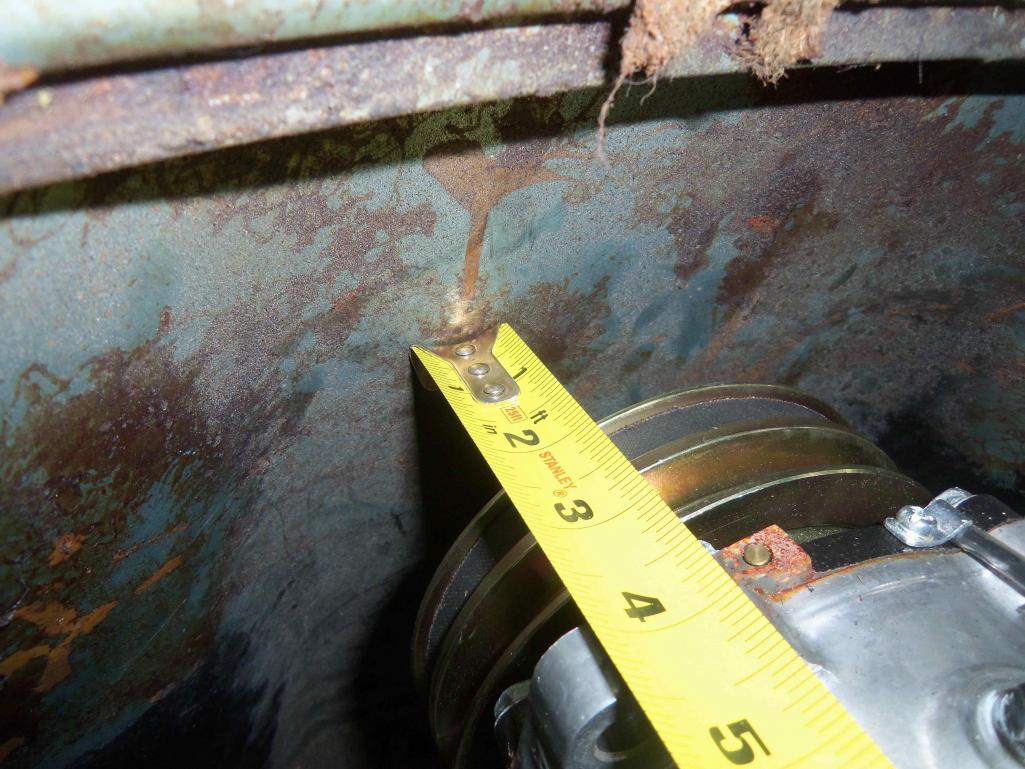  |
|
|
|
| Cohibra45 |
Aug 24 2012, 08:46 AM
Post
#43
|
|
Newbie Group: Members Posts: 34 Joined: 12-January 08 From: Melbourne, Florida Member No.: 8,564 |
Definitely needs to be in the tech articles when complete!!! (IMG:style_emoticons/default/first.gif) (IMG:style_emoticons/default/first.gif) (IMG:style_emoticons/default/first.gif)
|
|
|
|
| andys |
Aug 24 2012, 09:59 AM
Post
#44
|
|
Advanced Member Group: Members Posts: 2,165 Joined: 21-May 03 From: Valencia, CA Member No.: 721 Region Association: None |
I know I'm delinquent with posting photos of my AC install, so meanwhile I'll describe how I routed my hoses as it differs from most. I ran my #6 and #8 hose from the front trunk low on the passenger side through the bulkhead, under the fuel tasnk, then into the foot well which give me a direct shot with the #6 hose to the expansion valve on the evaporator. The #8 and the #10 (suction side from the evap) travel along passenger side floor Adel clamped to the corner at the floor/long intersection. The hoses are hidden by the carpet, and are un-noticeable (I know, I need to post some photos). The #8 and #10 continue to the firewall where I have 90 degree hose ends with charge ports coupled to two bulkhead fittings. These are positioned such that they enter the engine bay below the tin just under the hell hole area. The one photo I do have is durring the mock-up stage.....the charge ports are no longer where you see them in the pic.....This gives you an idea of the routing to the LS1 compressor.
The reason I did it as described above, is I wanted to avoid running the AC hoses in the wheelwell (wide front tires there), as well as minimize the number of holes punched through the various panels, etc. Andys Attached thumbnail(s) 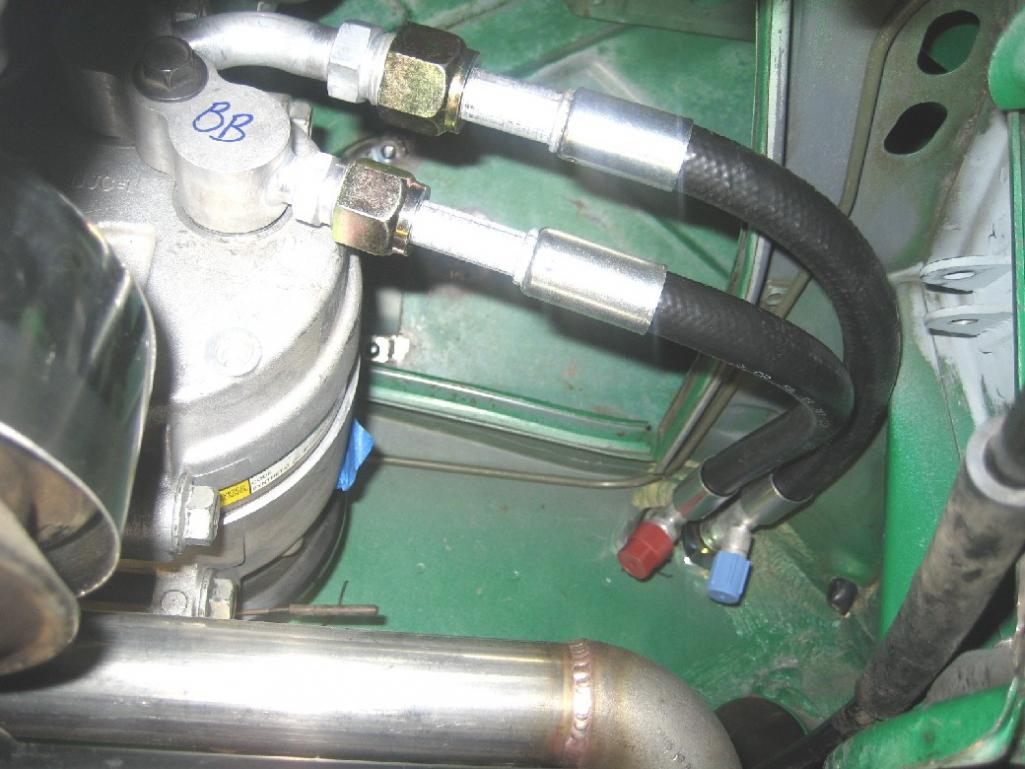
|
|
|
|
| dlee6204 |
Aug 26 2012, 08:12 PM
Post
#45
|
|
Howdy Group: Members Posts: 2,162 Joined: 30-April 06 From: Burnsville, NC Member No.: 5,956 |
I thought I would share some additional information... The weight of stuff! (IMG:style_emoticons/default/chowtime.gif)
York Compressor w/ mount- 29.6 LBS (IMG:style_emoticons/default/yikes.gif) Sanden 507 Compressor- 14.4 Evaporator Unit- 13.2 Condenser Unit- 20.4 Receiver Drier- 1.4 |
|
|
|
| 76-914 |
Nov 7 2012, 08:58 PM
Post
#46
|
|
Repeat Offender & Resident Subaru Antagonist Group: Members Posts: 13,883 Joined: 23-January 09 From: Temecula, CA Member No.: 9,964 Region Association: Southern California |
Any new developments?
|
|
|
|
| dlee6204 |
Nov 7 2012, 09:20 PM
Post
#47
|
|
Howdy Group: Members Posts: 2,162 Joined: 30-April 06 From: Burnsville, NC Member No.: 5,956 |
I ran into a few small issues dealing with the smog pulley... due to the small pulley size on the smog setup, it creates a a few issues when trying to run an A/C compressor... low compressor rpms at idle and a large drop in rpms when idling and engaging compressor. This was a concern I had from the beginning but I wanted to test it out and see how much it would affect the operation. I currently have another solution in the works and I was going to update this thread once I get the pieces together. My next setup utilizes a stock A/C pulley offset a couple inches in front of the engine. Hopefully I will have more to add soon.
|
|
|
|
| dlee6204 |
Nov 7 2012, 09:27 PM
Post
#48
|
|
Howdy Group: Members Posts: 2,162 Joined: 30-April 06 From: Burnsville, NC Member No.: 5,956 |
I also have a few more changes to make to the system before next summer. Not really necessary but just for fun. (IMG:style_emoticons/default/smile.gif)
-I will likely be changing the front condenser setup most likely by a better condenser, better fans, and hopefully still fitting in the space in the trunk. -I will probably update the compressor mount. |
|
|
|
| dlee6204 |
Nov 7 2012, 09:27 PM
Post
#49
|
|
Howdy Group: Members Posts: 2,162 Joined: 30-April 06 From: Burnsville, NC Member No.: 5,956 |
Oh and here is a thread by andys on a different approach to hose routing.
http://www.914world.com/bbs2/index.php?sho...=193697&hl= |
|
|
|
| 76-914 |
Nov 8 2012, 08:25 AM
Post
#50
|
|
Repeat Offender & Resident Subaru Antagonist Group: Members Posts: 13,883 Joined: 23-January 09 From: Temecula, CA Member No.: 9,964 Region Association: Southern California |
Just wondered. I will be doing a Suby conversion soon and will want to add A/C. I think I can mimic your install to some degree and hopefully have A/C, also. Thanks for the write up. (IMG:style_emoticons/default/popcorn[1].gif)
|
|
|
|
| dlee6204 |
Nov 25 2012, 04:12 PM
Post
#51
|
|
Howdy Group: Members Posts: 2,162 Joined: 30-April 06 From: Burnsville, NC Member No.: 5,956 |
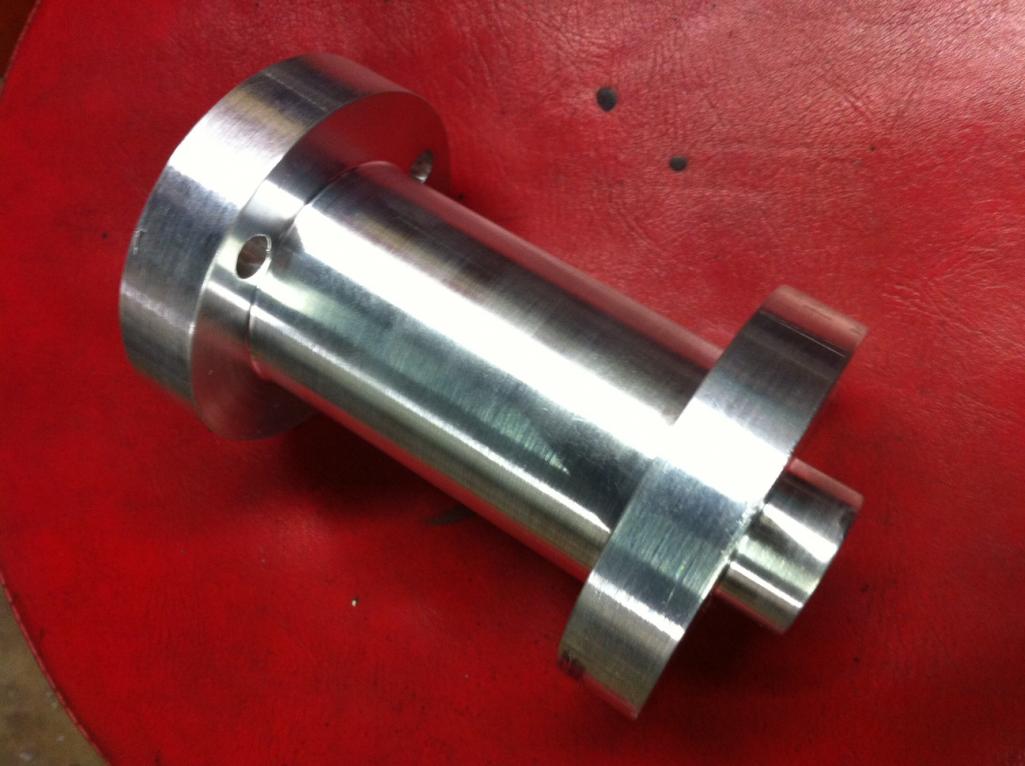
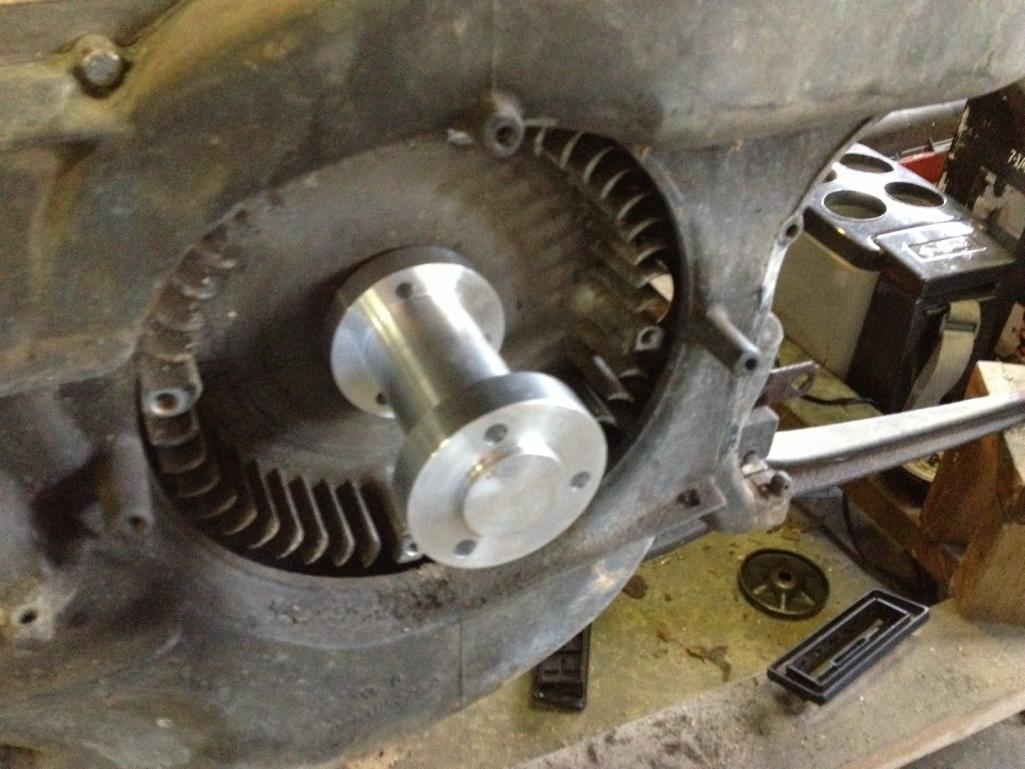
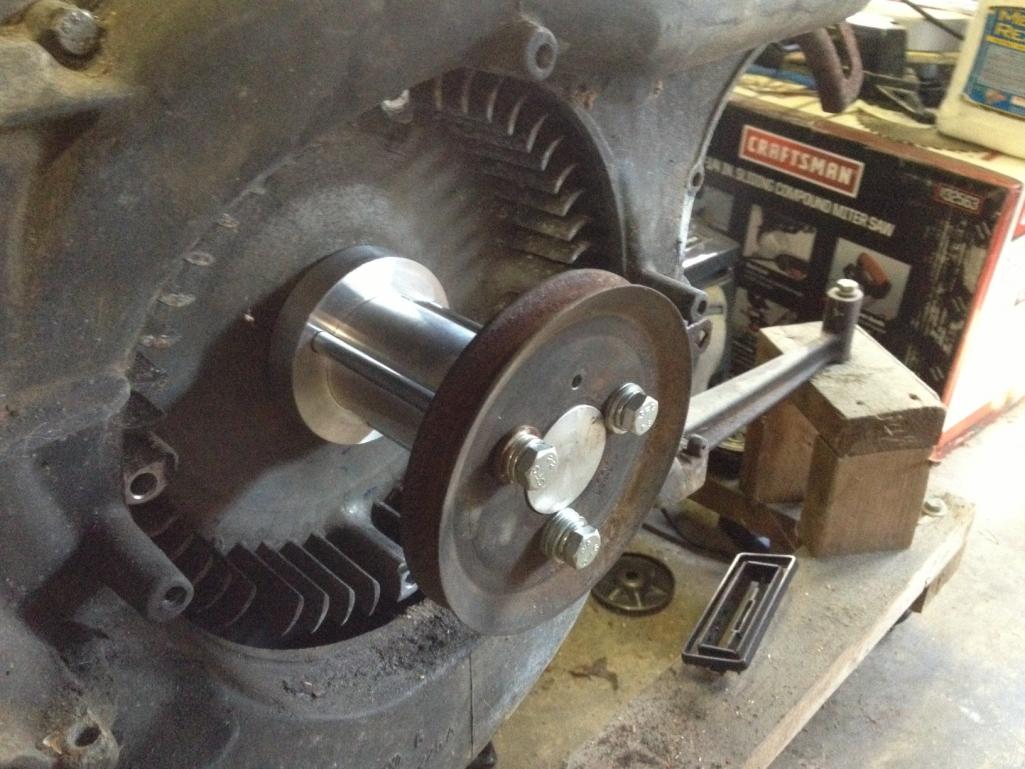
I made some progress on my A/C pulley. As I stated earlier, I wanted to use a stock a/c pulley mounted a couple inches off the front of the crank. My solution was to machine an adapter which can be seen below. It's machined on both ends so the pulley and adapter are both centered. Right now it's just a prototype. It has plenty of clearance and I tried to bring it in as close as possible leaving enough clearance for the belt against the shroud. I want to try and improve this design and eliminate the need for 7"+ through bolts and also to make it as light as possible.
     |
|
|
|
| zambezi |
Nov 25 2012, 05:09 PM
Post
#52
|
|
Senior Member Group: Members Posts: 711 Joined: 14-April 08 From: Lafayette, LA Member No.: 8,920 Region Association: South East States |
looks like a great design. very similar to my cast pulley but a lot lighter I'm sure. Why not use some short allen head bolts at the fan side and drill and tap for some independent bolts at the pulley side. No need to make a new piece just re-clock the three bolt holes in the outer end by the pulley. You may need to turn down the center section slightly to clear the heads of the allen head bolts though.
|
|
|
|
| stateofidleness |
Nov 25 2012, 07:05 PM
Post
#53
|
|
Senior Member Group: Members Posts: 810 Joined: 1-September 07 From: Canyon Lake, Texas! Member No.: 8,065 Region Association: None |
Cool Thread! Makes me appreciate my "factory" install even more. I have the passenger side, top-mounted compressor you talked about on mine. Nothing was cut or altered in the engine compartment. I think it was installed in Houston.
Is there a record of how many cars were "AC'ed" after delivery to the states? |
|
|
|
| dlee6204 |
Nov 25 2012, 07:40 PM
Post
#54
|
|
Howdy Group: Members Posts: 2,162 Joined: 30-April 06 From: Burnsville, NC Member No.: 5,956 |
QUOTE Cool Thread! Makes me appreciate my "factory" install even more. I have the passenger side, top-mounted compressor you talked about on mine. Nothing was cut or altered in the engine compartment. I think it was installed in Houston. Do you have any pictures of it? How is it driven off the front? |
|
|
|
| stateofidleness |
Nov 25 2012, 07:46 PM
Post
#55
|
|
Senior Member Group: Members Posts: 810 Joined: 1-September 07 From: Canyon Lake, Texas! Member No.: 8,065 Region Association: None |
I'll see if I can snap some pics of it. It's hard to see as it's pretty tightly crammed in there it seems.
|
|
|
|
| dlee6204 |
Nov 25 2012, 08:06 PM
Post
#56
|
|
Howdy Group: Members Posts: 2,162 Joined: 30-April 06 From: Burnsville, NC Member No.: 5,956 |
QUOTE(zambezi @ Nov 25 2012, 06:09 PM)  looks like a great design. very similar to my cast pulley but a lot lighter I'm sure. Why not use some short allen head bolts at the fan side and drill and tap for some independent bolts at the pulley side. No need to make a new piece just re-clock the three bolt holes in the outer end by the pulley. You may need to turn down the center section slightly to clear the heads of the allen head bolts though. That's essentially what I'm after. I'm also trying to get the weight down even more. Currently it's about 1.6lbs and could be less. I had a few people interested in these so the development continues. |
|
|
|
| ScoopLV |
Nov 26 2012, 02:12 AM
Post
#57
|
|
Senior Member Group: Members Posts: 545 Joined: 7-September 12 From: Las Vegas Member No.: 14,897 Region Association: Southwest Region |
Ugh... this is something I'd totally love to do. And I even have the motor out right now, getting a rebuild. But my wife has already told me that I should just call my car "Money Pit" instead of "Rocinante."
Considering I live in the Mojave desert, though, I should probably just have it installed now while I can. It's a shame that your custom mounts aren't available with the compressor, dryer, evaporator and the hoses in kit form. Maybe I'll just put a cooler of dry ice in the car for the months of July and August? Breathing is overrated, after all... |
|
|
|
| gothspeed |
Nov 27 2012, 06:43 PM
Post
#58
|
|
Senior Member Group: Members Posts: 1,539 Joined: 3-February 09 From: SoCal Member No.: 10,019 Region Association: None |
When I eventually get to the A/C ............ I was going to make a pulley adapter similar to the one you have prototyped ...... but as mentioned, try to have bolts on each end instead of the long versions. So judging from the progress you are making ....... looks like I will just get one from you, when the time comes ..... (IMG:style_emoticons/default/smile.gif)
|
|
|
|
| dlee6204 |
Dec 15 2012, 08:55 AM
Post
#59
|
|
Howdy Group: Members Posts: 2,162 Joined: 30-April 06 From: Burnsville, NC Member No.: 5,956 |
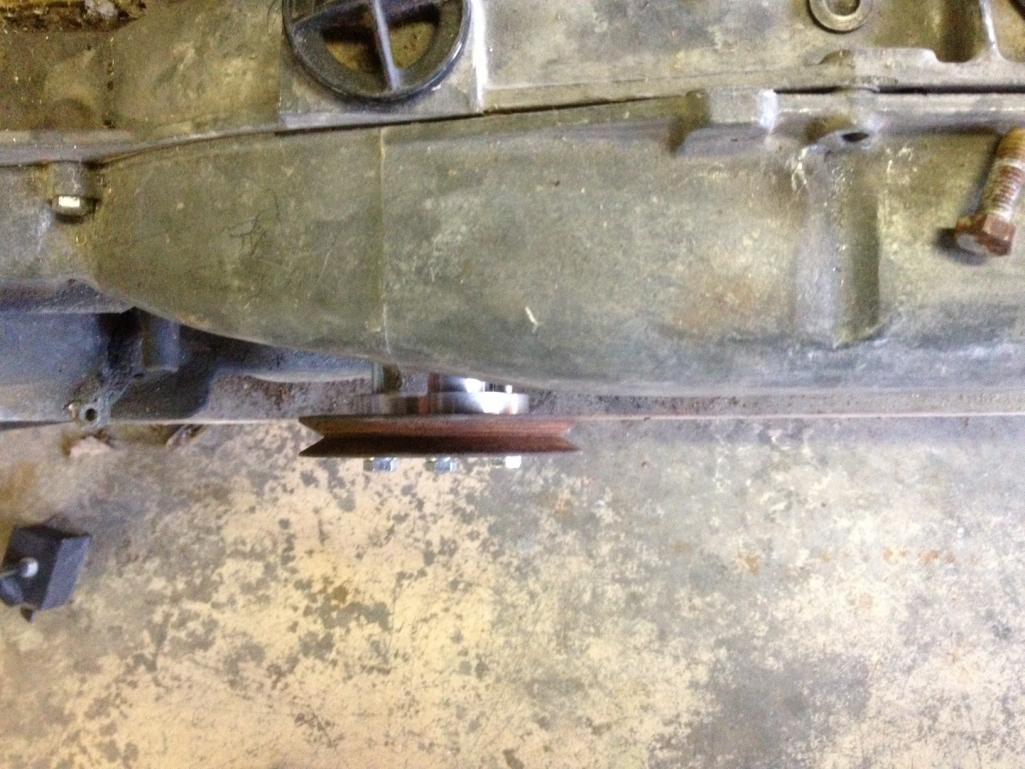
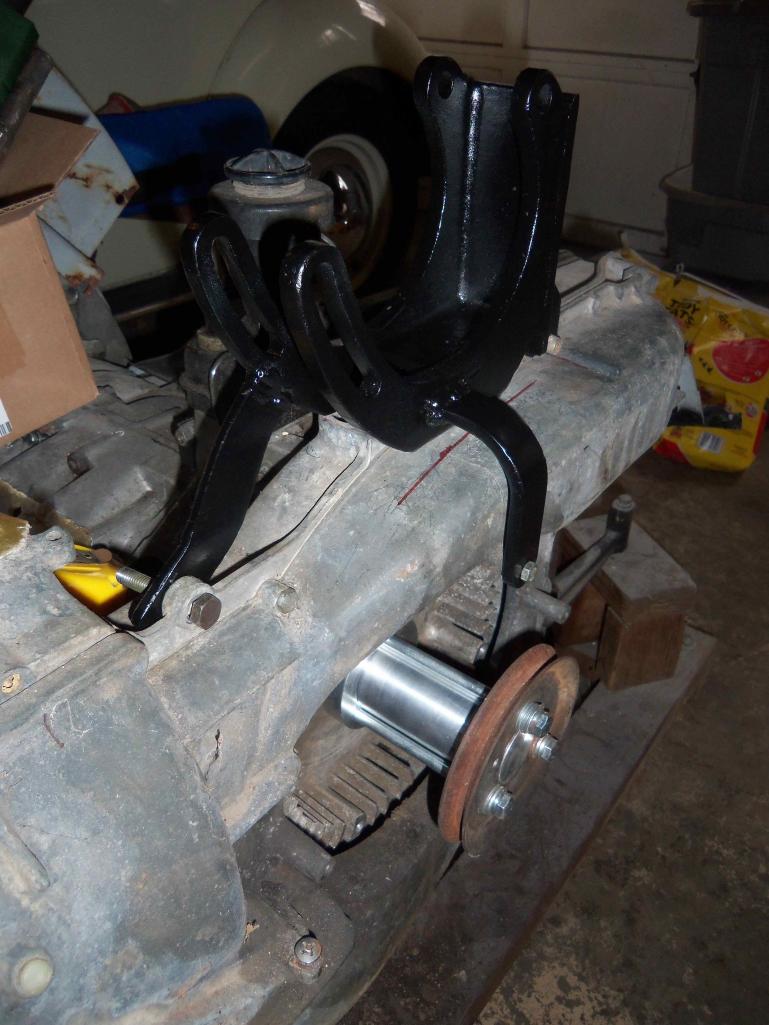
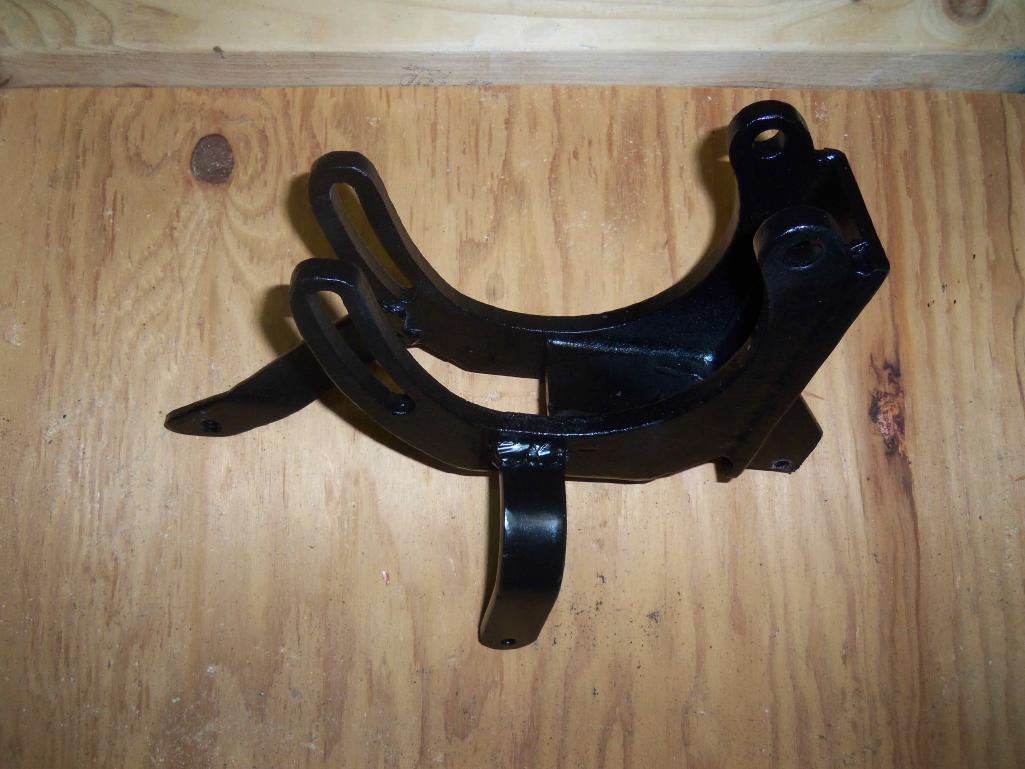
I just finished making a new mount. (IMG:style_emoticons/default/smile.gif) I'm a lot happier how this one turned out. I bought a universal mount (which doesn't fit the 507 too well (IMG:style_emoticons/default/dry.gif) ) which I modified to fit. The nice thing about this is the ease of adjustment since its all once piece.
 |
|
|
|
| dlee6204 |
Dec 15 2012, 08:56 AM
Post
#60
|
|
Howdy Group: Members Posts: 2,162 Joined: 30-April 06 From: Burnsville, NC Member No.: 5,956 |
  |
|
|
|
|
1 User(s) are reading this topic (1 Guests and 0 Anonymous Users)
0 Members:

|
Lo-Fi Version | Time is now: 17th May 2026 - 04:07 PM |
Invision Power Board
v9.1.4 © 2026 IPS, Inc.