|
|
|
Porsche, and the Porsche crest are registered trademarks of Dr. Ing. h.c. F. Porsche AG.
This site is not affiliated with Porsche in any way. Its only purpose is to provide an online forum for car enthusiasts. All other trademarks are property of their respective owners. |
|
|

  |

| partwerks |
 Nov 9 2012, 05:12 AM Nov 9 2012, 05:12 AM
Post
#41
|
|
Senior Member  Group: Members Posts: 1,593 Joined: 7-September 06 From: Grand Island, NE Member No.: 6,787 |
Don't know the the aluminum deck plate on the door and threshold was original?
|
   |

 
|
| nathansnathan |
Nov 9 2012, 09:31 AM
Post
#42
|
|
Senior Member Group: Members Posts: 1,052 Joined: 31-May 10 From: Laguna Beach, CA Member No.: 11,782 Region Association: None |
QUOTE(partwerks @ Nov 9 2012, 03:12 AM)  Don't know the the aluminum deck plate on the door and threshold was original? I don't think that is original. It looks like there is some trim on the edge of the outside of the driver door also that would have been added. The hood badge and the 'porsche' badge on the back, and can't tell, but the shift knob looks to be added also, and the muffler. The positive stripe porsche sticker on the rocker is different, but cool- the positive ones were applied at the dealer I've read, so they decided to put it there I guess instead of above where they usually are. That is a sweet 914 though. Have you checked in front of the computer for rust, like in front of the battery stand, down in the nook there? -that's where the real hell hole would be lurking. Pics of the motor? (IMG:style_emoticons/default/smile.gif) |
 |
|
| 914Eric |
Nov 9 2012, 11:41 AM
Post
#43
|
|
Member Group: Members Posts: 316 Joined: 7-November 12 From: Northern Idaho Member No.: 15,125 Region Association: Pacific Northwest |
QUOTE(nathansnathan @ Nov 9 2012, 07:31 AM) QUOTE(partwerks @ Nov 9 2012, 03:12 AM) Don't know the the aluminum deck plate on the door and threshold was original? I don't think that is original. It looks like there is some trim on the edge of the outside of the driver door also that would have been added. The hood badge and the 'porsche' badge on the back, and can't tell, but the shift knob looks to be added also, and the muffler. The positive stripe porsche sticker on the rocker is different, but cool- the positive ones were applied at the dealer I've read, so they decided to put it there I guess instead of above where they usually are. That is a sweet 914 though. Have you checked in front of the computer for rust, like in front of the battery stand, down in the nook there? -that's where the real hell hole would be lurking. Pics of the motor? (IMG:style_emoticons/default/smile.gif) The brushed aluminum kick plates on the doors and thresholds were added by the dealer (Greene in Norwalk Calif) as was the Porsche stripe. Since they were put on by the dealer before sale, I consider them original. I know all the front and rear badges are original and verify exactly with Dr. Johnson's authenticity guide. Yes there is an aftermarket muffler on it, but I still have the original as well. There is some rust on the battery tray, but I haven't gotten to the engine compartment yet. Patients...I'm getting there. (IMG:style_emoticons/default/wink.gif) I'm going to be dropping the engine in the next month or so, but I guess I can snap a couple through the engine lid just to get something of the engine. Haven't examined the hell hole yet...I'm afraid...Everything else has turned out better than I had hoped and I know that is my last hurdle...other than getting the engine purring again. 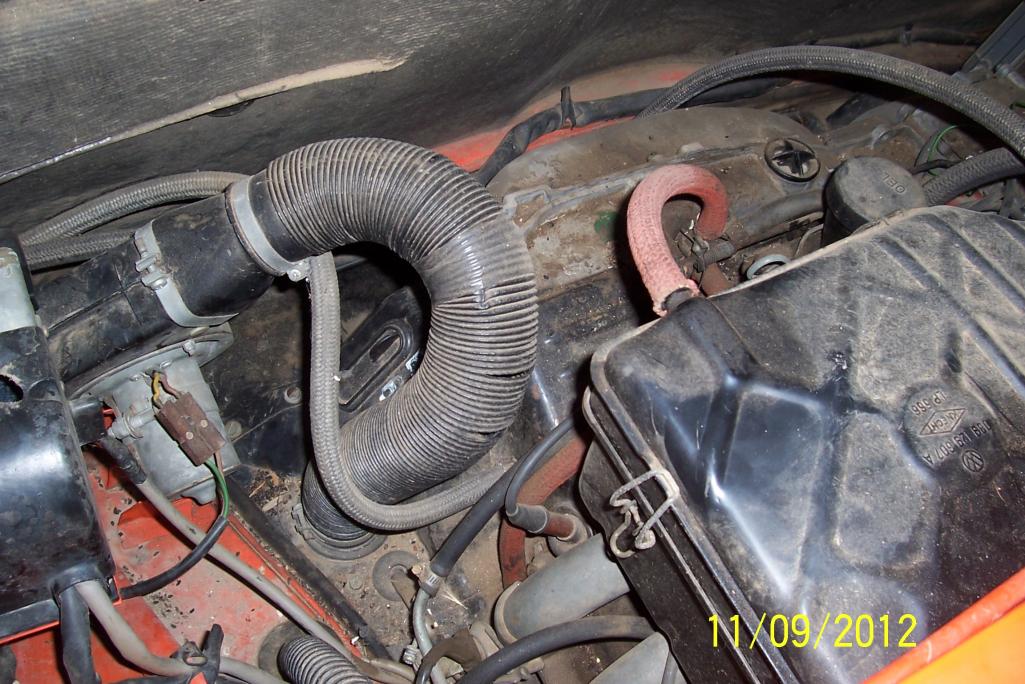 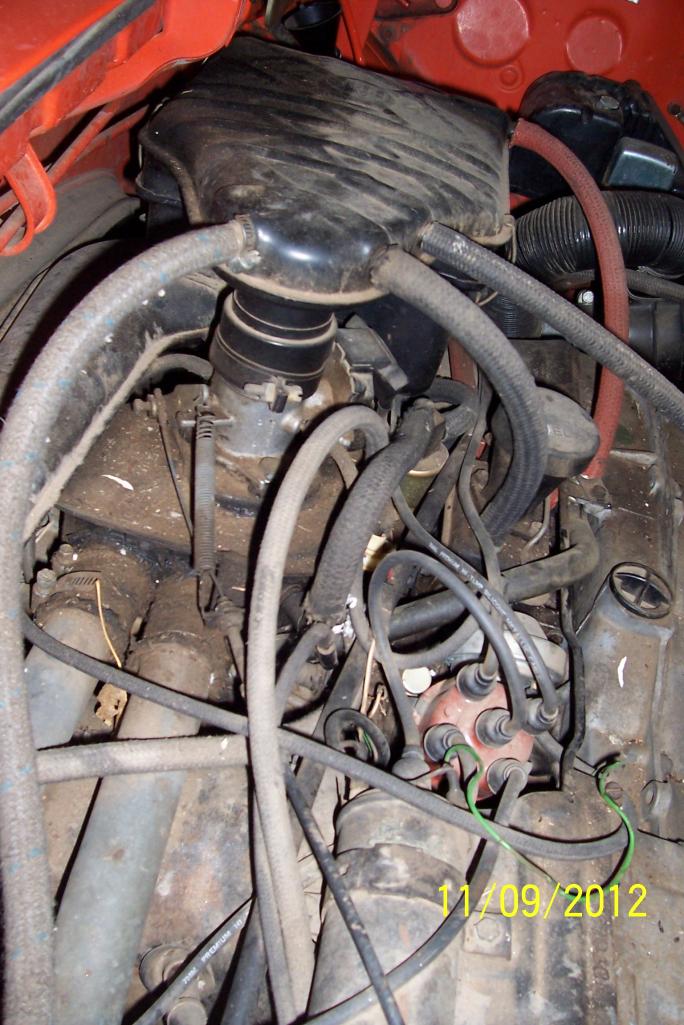 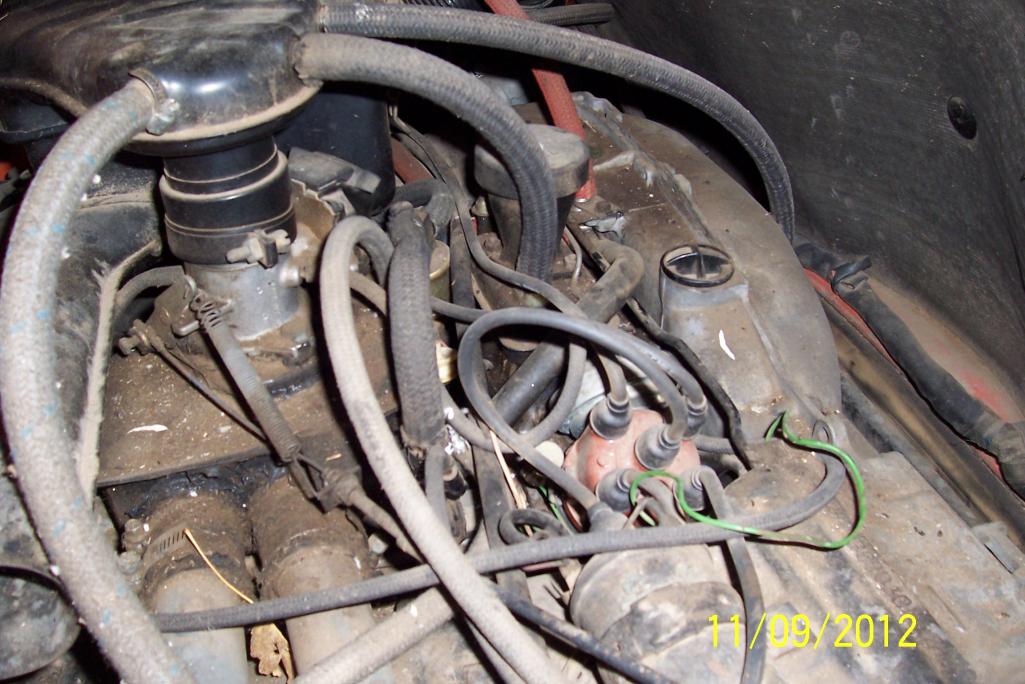 |
|
|
|
| nathansnathan |
Nov 9 2012, 02:10 PM
Post
#44
|
|
Senior Member Group: Members Posts: 1,052 Joined: 31-May 10 From: Laguna Beach, CA Member No.: 11,782 Region Association: None |
Looks like mice; they love the type 4 engine. (IMG:style_emoticons/default/biggrin.gif) They like to build a nest on top of the oil cooler, so you'll want to check that out when you drop the motor.
They still sell the 2 liter intake runner braided couplers. It's like a time capsule in there with those spark plug wires. Some say the soundmat in the engine compartment will trap moisture and rust behind. I haven't messed with later cars at all though. Yours looks pretty solid. The whole car looks well taken care of. (IMG:style_emoticons/default/wub.gif) |
|
|
|
| 914Eric |
Nov 9 2012, 02:43 PM
Post
#45
|
|
Member Group: Members Posts: 316 Joined: 7-November 12 From: Northern Idaho Member No.: 15,125 Region Association: Pacific Northwest |
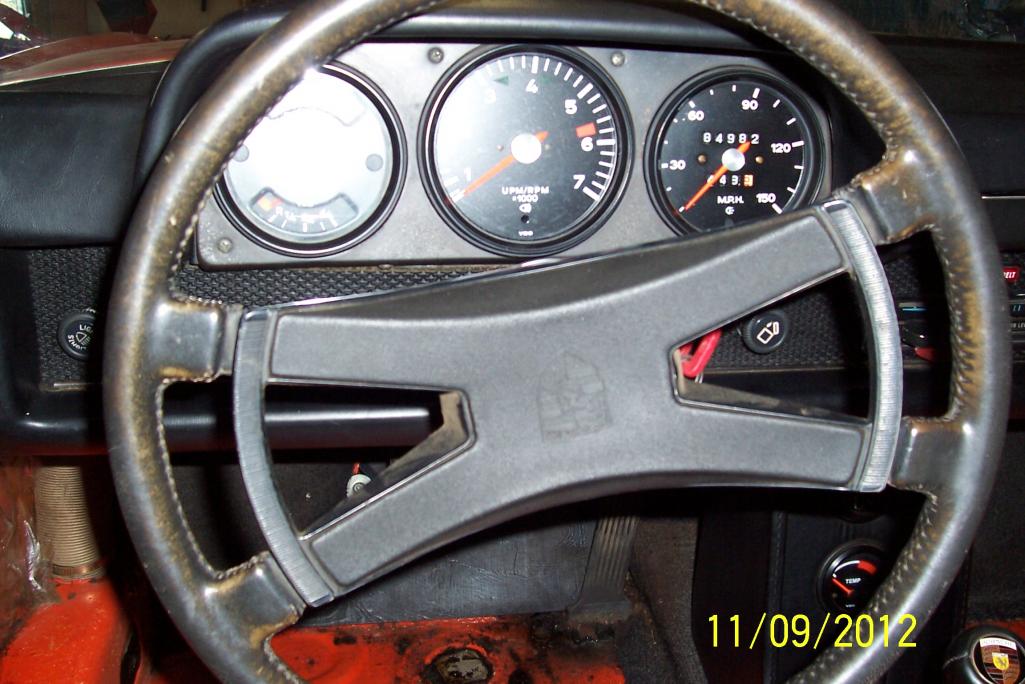
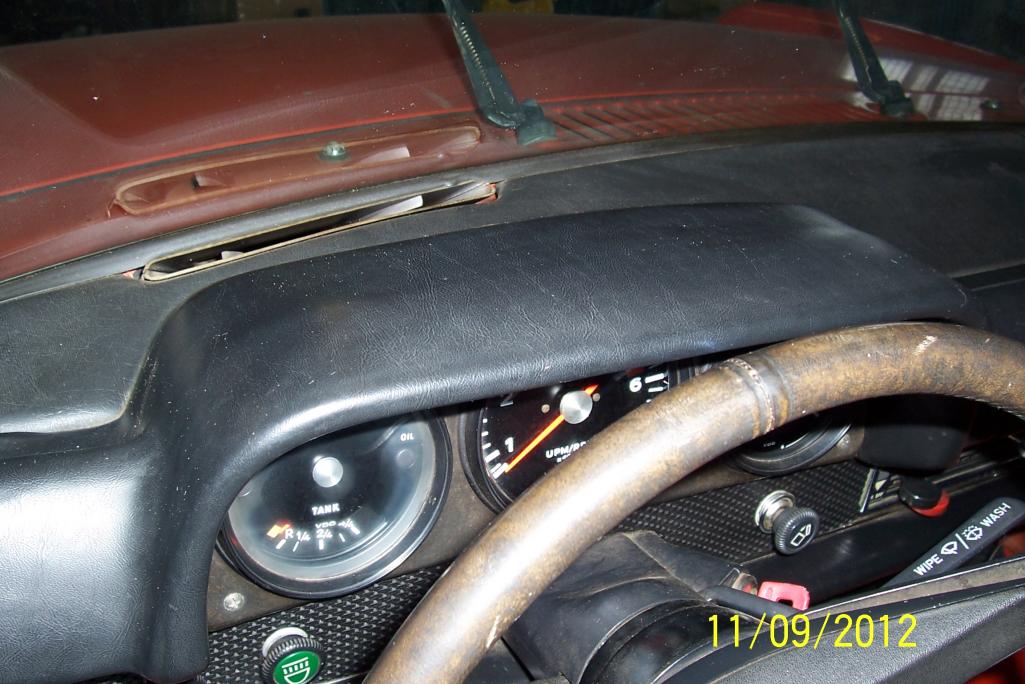
QUOTE(nathansnathan @ Nov 9 2012, 12:10 PM) They still sell the 2 liter intake runner braided couplers. It's like a time capsule in there with those spark plug wires. Dad was a stickler for keeping everything original. He went through several mechanics, because as soon as they started with the "You really should get rid of the FI and put carbs on"...They weren't his mechanic any longer. I appreciate it now. I swear he never fully forgave me for replacing the original crappy 8 track radio with something that would play decent tunes. Got most of the interior out and gave it a quick wipe down. Looks like the steering wheel and shifter boot are going to need a little dye and Neat’s-foot oil. 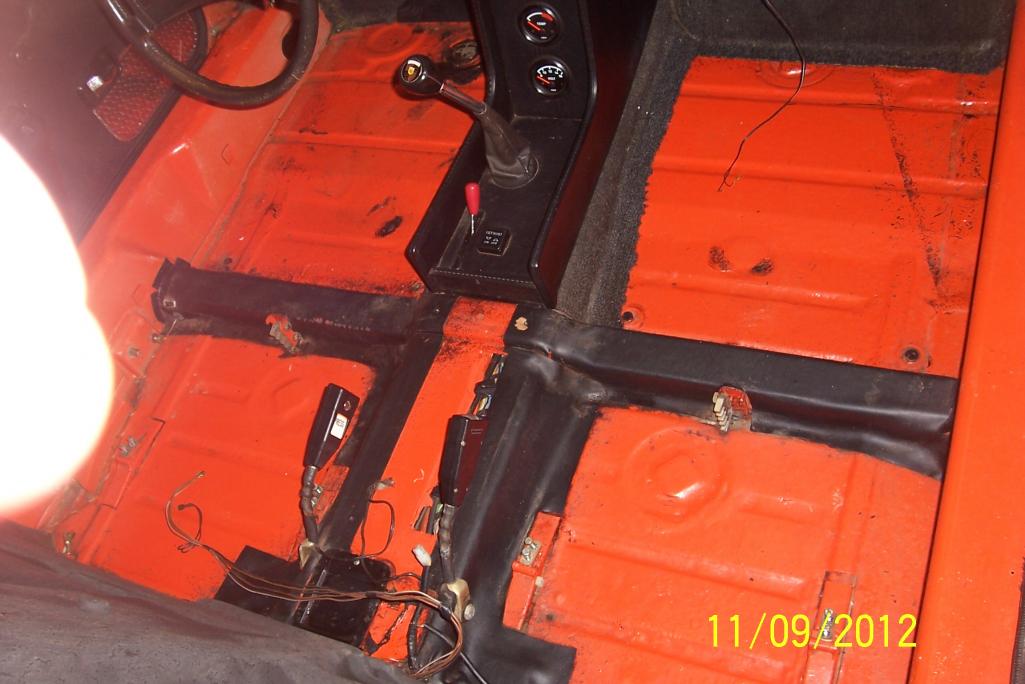 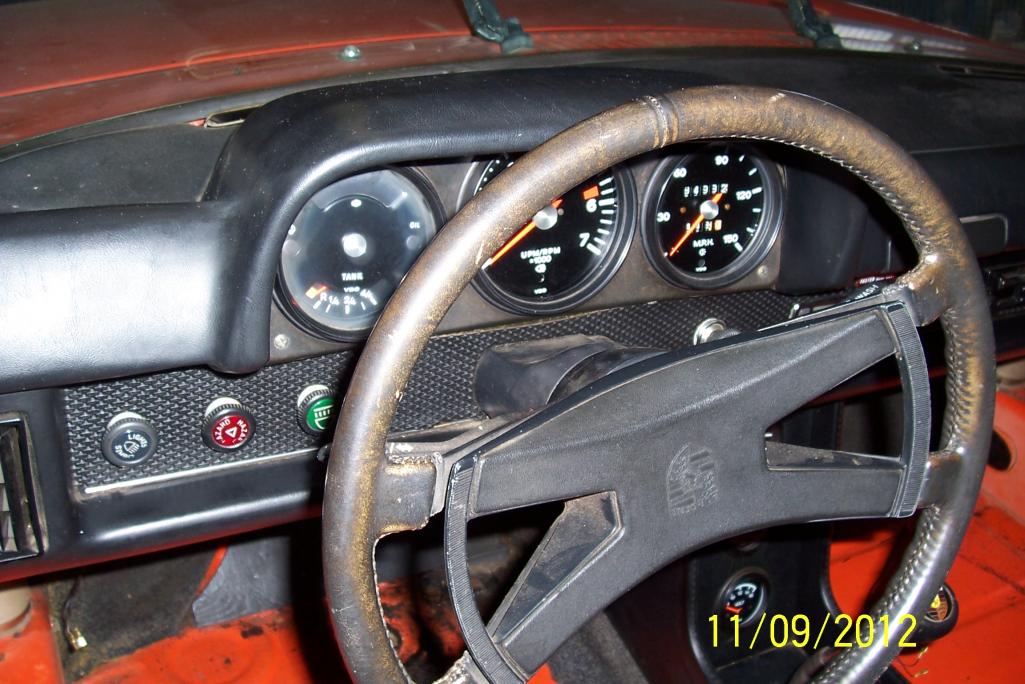  |
|
|
|
| 914Eric |
Nov 9 2012, 04:05 PM
Post
#46
|
|
Member Group: Members Posts: 316 Joined: 7-November 12 From: Northern Idaho Member No.: 15,125 Region Association: Pacific Northwest |
 |
|
|
|
| 914Eric |
Nov 9 2012, 05:43 PM
Post
#47
|
|
Member Group: Members Posts: 316 Joined: 7-November 12 From: Northern Idaho Member No.: 15,125 Region Association: Pacific Northwest |
Last couple of pics for the day.
  |
|
|
|
| 914Eric |
Nov 9 2012, 06:25 PM
Post
#48
|
|
Member Group: Members Posts: 316 Joined: 7-November 12 From: Northern Idaho Member No.: 15,125 Region Association: Pacific Northwest |
OK...I need some help on what I'm looking at in this picture please.
This is a little 4X4 hole with a little sheet metal access cover with one screw holding the cover. It is under the center console near the rear engine wall, between the seat belt connectors. There are 5 things in this access tunnel: A set of wires that can't be seen in the photo A big black tube which I determined was the shift linkage at the very bottom of the access hole and half of it can be seen in the photo some type of hydraulic fitting or connection that is ???? And the 2 red super heavy red duty wires that are ??? They are so heavy duty that they almost feel like steel bars painted the body color? 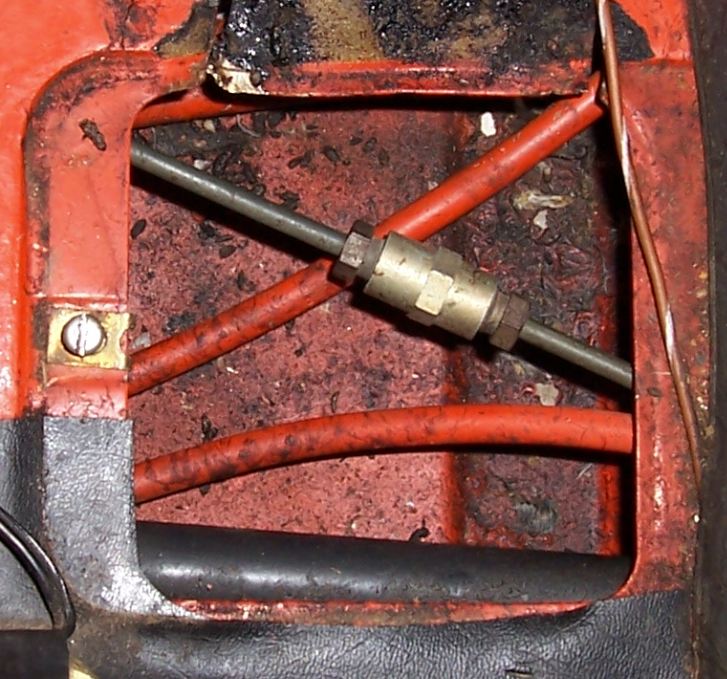 |
|
|
|
| Kirmizi |
Nov 9 2012, 06:36 PM
Post
#49
|
|
Senior Member Group: Members Posts: 836 Joined: 12-February 06 From: Wyoming, US Member No.: 5,568 Region Association: None |
Shift rod, speedometer cable and tubes for the clutch, accelerator and heater cables.
The "hydraulic" fitting as you called it is the brake line going to the rear firewall. (IMG:style_emoticons/default/biggrin.gif) Mike |
|
|
|
| bigkensteele |
Nov 9 2012, 06:45 PM
Post
#50
|
|
Major Member Group: Members Posts: 2,197 Joined: 30-August 04 From: Cincinnati, OH Member No.: 2,660 Region Association: South East States |
The two red tubes visible in the photo house the heater cable that open the valves on your heat exchangers. They are controlled by the lever in your console.
If you feel around down under the black shift rod, you will find tubes for your clutch and accelerator cables. If you feel around inside the area that is in the top of the picture, you will find that there are two more plastic tubes. These are your fuel lines, and they MUST be replaced if you want to safely drive the car. After 40 years, they become very brittle. Mine cracked in two when I removed them. If you look in the member vendor forum, you will find them available from Racer Chris and Rotary14. Both are great products at a reasonable price, and actually pretty easy to install. Rotary's thread has a youtube video of the installation. |
|
|
|
| 914Eric |
Nov 9 2012, 06:59 PM
Post
#51
|
|
Member Group: Members Posts: 316 Joined: 7-November 12 From: Northern Idaho Member No.: 15,125 Region Association: Pacific Northwest |
Thanks guys,
Well if the fuel lines are running down this channel, what are the two lines running down behind the driver's side rocker panel? I thought those were the fuel lines? |
|
|
|
| bigkensteele |
Nov 9 2012, 07:11 PM
Post
#52
|
|
Major Member Group: Members Posts: 2,197 Joined: 30-August 04 From: Cincinnati, OH Member No.: 2,660 Region Association: South East States |
I cant say for sure, since I have only owned later cars, but I think that those might be for the charcoal canister. Our fuel systems have a recirculation circuit that runs from the expansion tank on top of the gas tank back to a charcoal canister in the engine bay that filters the vapor, which is pumped back into the fuel system via pressure from the fan housing. Not sure if those lines are for this or not. I have never seen them before.
Post #30 on page 2 for those that might want to chime in. I completely missed those when I looked at that picture. |
|
|
|
| EdwardBlume |
Nov 9 2012, 07:14 PM
Post
#53
|
|
914 Wizard Group: Members Posts: 12,338 Joined: 2-January 03 From: SLO Member No.: 81 Region Association: Central California |
QUOTE(914Eric @ Nov 9 2012, 04:59 PM) Thanks guys, Well if the fuel lines are running down this channel, what are the two lines running down behind the driver's side rocker panel? I thought those were the fuel lines? Those are vacuum lines. The fuel lines run in the center channel. You need to change all the fuel lines and the fuel if the car has been sitting. Your FI seal are likely bad too. |
|
|
|
| EdwardBlume |
Nov 9 2012, 07:17 PM
Post
#54
|
|
914 Wizard Group: Members Posts: 12,338 Joined: 2-January 03 From: SLO Member No.: 81 Region Association: Central California |
In fact, your fuel lines are almost in your picture of the square center tunnel opening. If you feel underneath, two lines are fixed up in there.
|
|
|
|
| 914Eric |
Nov 9 2012, 07:21 PM
Post
#55
|
|
Member Group: Members Posts: 316 Joined: 7-November 12 From: Northern Idaho Member No.: 15,125 Region Association: Pacific Northwest |
Damn...they run the fuel lines through the cab??? (IMG:style_emoticons/default/WTF.gif)
I'm most definately going to change those to the strongest aircraft quality that exists. (IMG:style_emoticons/default/smile.gif) No wonder so many 914's burn up. Rob...Vacuem lines to what? Sorry just wondering. I'm sure I'll figure it out once I get the fuel tank and engine out. And yes...all the vacuum hoses are just falling off in my hands. I'm sure the FI seals are all toast as well. |
|
|
|
| jls914 |
Nov 9 2012, 09:51 PM
Post
#56
|
|
Newbie Group: Members Posts: 8 Joined: 23-August 12 From: wendell, NC Member No.: 14,842 Region Association: None |
I wouldn't exactly call them vacuum lines. They are as mentioned above, the fuel vapor lines. Look in front hood at the fuel tank and cannister near it. Then look into engine bay and you'll see them come through the divers side and run along the firewall to where they connect to fan hosing and engine. These are normally rigid plastic and should not need replacing. But, please do change out the fuel lines through the center tunnel.
Nice car, enjoy. Jim |
|
|
|
| dlkawashima |
Nov 9 2012, 11:01 PM
Post
#57
|
|
914 Guru Group: Members Posts: 9,749 Joined: 1-October 10 From: San Jose Member No.: 12,234 Region Association: Northern California |
QUOTE(914Eric @ Nov 9 2012, 09:41 AM) I know all the front and rear badges are original and verify exactly with Dr. Johnson's authenticity guide. I don't mean to bust your balls, but that "PORSCHE" badge on the back of the car really doesn't look right. I looked through the Doc Johnson book and can't find anything regarding that badge. I only mention this because it seems from your posts that you are trying to keep the car as original as possible. |
|
|
|
| 914Eric |
Nov 9 2012, 11:44 PM
Post
#58
|
|
Member Group: Members Posts: 316 Joined: 7-November 12 From: Northern Idaho Member No.: 15,125 Region Association: Pacific Northwest |
QUOTE(dlkawashima @ Nov 9 2012, 09:01 PM) QUOTE(914Eric @ Nov 9 2012, 09:41 AM) I know all the front and rear badges are original and verify exactly with Dr. Johnson's authenticity guide. I don't mean to bust your balls, but that "PORSCHE" badge on the back of the car really doesn't look right. I looked through the Doc Johnson book and can't find anything regarding that badge. I only mention this because it seems from your posts that you are trying to keep the car as original as possible. Dave...very interesting. I went back through the Doc Johnson book and it seems you are correct. I checked the engine cover lettering and the 914 2.0 lettering in the book, but seems I didn't check the PORSCHE lettering. Since the dealer added the aluminum kick plates and Porsche stripes on the rocker panels...Seems they also added the black anodized Porsche badge as well. Guess I'll chock it up to another "Dealer upgrade". That is the nice thing about being the original owner...I know for a fact that it was there when we brought it home. This is exactly why I wanted to do this restore on 914 World, because I knew there were a lot of people who know more than I. Thanks for your help. |
|
|
|
| 914Eric |
Nov 10 2012, 01:03 PM
Post
#59
|
|
Member Group: Members Posts: 316 Joined: 7-November 12 From: Northern Idaho Member No.: 15,125 Region Association: Pacific Northwest |
A couple of thoughts after my first week of disassembly.
I’m going to need to start putting together a long list of parts I need, and wasn’t sure the best way to do it in the thread. Since I will need input on what to include on my list I wanted to keep it in one place so it would be easy to see and track. I guess there are 2 ways to do it. I could keep editing my original post and adding parts there which would show up at the top of every page. Or I could start a different thread just for the list of parts. It just seems like it would be a little hard to track the list of parts through page after page of pictures and comments. Anyone have thoughts and suggestions? What have others done? Also, in my Haynes manual it said that when removing the rocker panels I would need to remove the plastic expansion rivets. Well, I don’t know about others, but mine weren’t plastic, they were real metal rivets. |
|
|
|
| 914Eric |
Nov 10 2012, 05:19 PM
Post
#60
|
|
Member Group: Members Posts: 316 Joined: 7-November 12 From: Northern Idaho Member No.: 15,125 Region Association: Pacific Northwest |
Well...I found my first minor problem. The backpad that is on the engine wall and mounted under the seat wells has 2 of the 4 metal tabs torn away from the cardboard.
Given that it is metal riveted to cardboard...I sure don't see an easy fix. I'm sure there must be a past thread on this topic? |
|
|
|
|
1 User(s) are reading this topic (1 Guests and 0 Anonymous Users)
0 Members:

|
Lo-Fi Version | Time is now: 24th April 2024 - 10:22 PM |
Invision Power Board
v9.1.4 © 2024 IPS, Inc.