|
|
|
Porsche, and the Porsche crest are registered trademarks of Dr. Ing. h.c. F. Porsche AG.
This site is not affiliated with Porsche in any way. Its only purpose is to provide an online forum for car enthusiasts. All other trademarks are property of their respective owners. |
|
|


| andys |
 Feb 21 2013, 12:43 PM Feb 21 2013, 12:43 PM
Post
#1
|
|
Advanced Member  Group: Members Posts: 2,165 Joined: 21-May 03 From: Valencia, CA Member No.: 721 Region Association: None |
Here's the start of a retrospective build thread of my LS1 conversion. It took a few years to get it done mostly due to not wanting to be a slave to the project, and work on it for the enjoyment; and of course when family obligations allowed......teen daughter and high maintenance wife (IMG:style_emoticons/default/biggrin.gif)
What I started with was a local orignal owner '75 2.0 with 139K miles. The original owner "drove the heck out of it" until something died in the electrical system and he parked it in the garage for 14 years, as evidenced by the renewal tags. Only body damage was when he submarined the rear of a Mustang and creased the hood and flattened the left signal light pod. Otherwise, it was a good condition rust free (SoCal) car. Brief specs are: '01 LS1 Z28 motor, Audi 01E 6 speed tranaxle, 911 front suspension, custom made rear trailing arms, Koni shocks, 993 wheels, and AC. Below, are photos of what I started with, and what I ended-up with. I'll do my best to re-trace the build process, so if you have any questions along the way, please ask. BTW, how does one place text between photos in the same post? Andys Attached thumbnail(s) 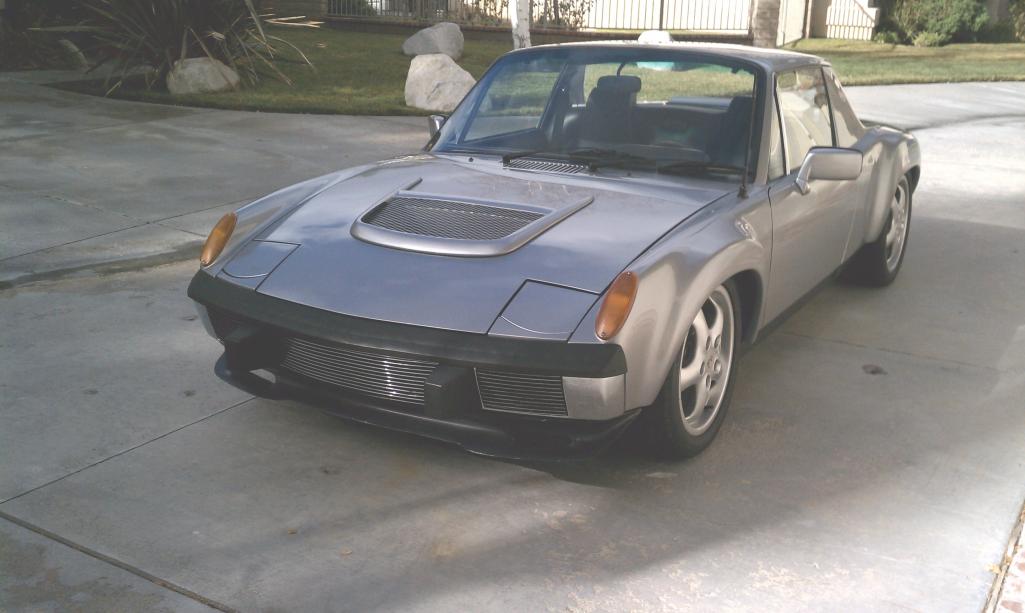 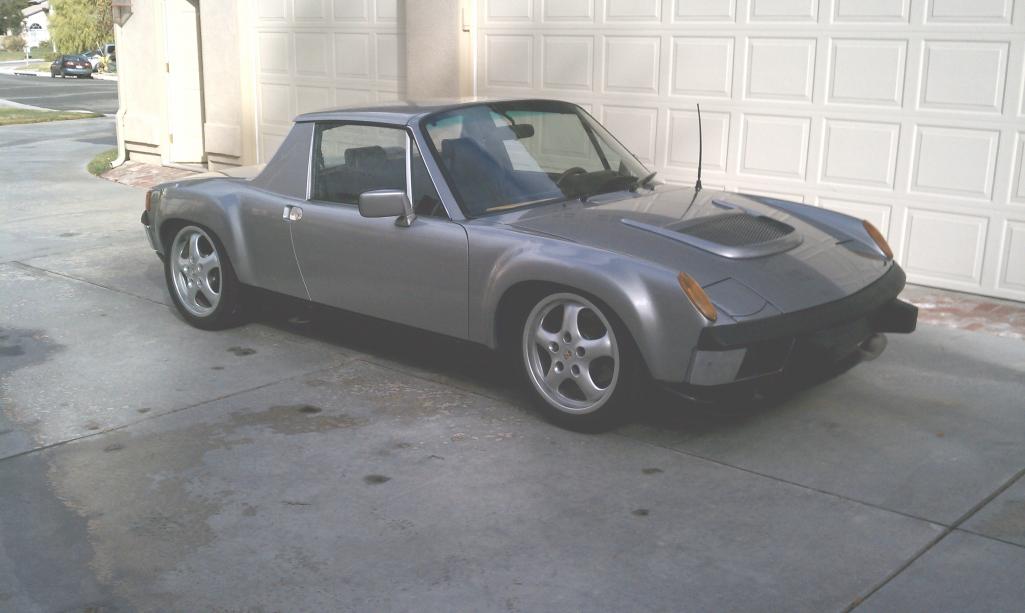   Attached image(s) 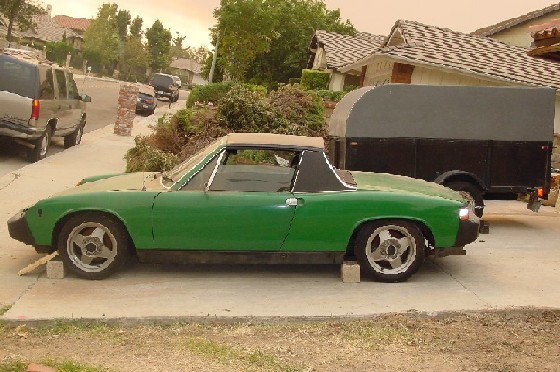 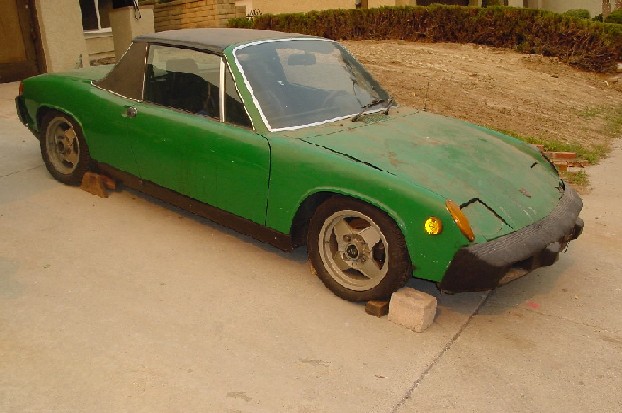 
|
   |

 
|
  |
Replies(1 - 19)
| Tom_T |
Feb 21 2013, 12:55 PM
Post
#2
|
|
TMI.... Group: Members Posts: 8,318 Joined: 19-March 09 From: Orange, CA Member No.: 10,181 Region Association: Southern California |
In Full Edit mode - just add space lines with your enter/return key & type in there.
IMHO the pix look better with a line space between them anyway, especially when large. |
|
|
|
| andys |
Feb 21 2013, 01:11 PM
Post
#3
|
|
Advanced Member Group: Members Posts: 2,165 Joined: 21-May 03 From: Valencia, CA Member No.: 721 Region Association: None |
I decided quite quickly, that I wanted to go with a modern V8 motor with all the EFI controls, so I went with an all aluminum LS1. Before acquiring the motor, I went through the somewhat difficult process of selecting the kind of transaxle that would be rugged enough, reasonable in cost, decent gearing, all in a modern package. I really liked what the Audi 01E transaxle offered, but there were two problems. 1.) The FWD version was never available in the US, and 2.) no one made an adapter plate (at the time) to mate to a LS1. Being the engineering type with a background in managing prototype machining, I could make the adapter plate myself. So now I'm relegated to find said 01E. My search took me to Europe, and after a number of inquiries, I found a low mileage (12K kilometer) 01E from an '02 Passat TDI, which has the more desireable gearing of the 01E series. After a few phone calls and arranging a freight forwarder, it arrives at my door in exactly one week! Price? $1100 landed, though this was some years ago when the exchange rate was way more favorable than it is today. Needless to say, I got a killer deal that's likely to never be duplicated again.
Andys Attached thumbnail(s) 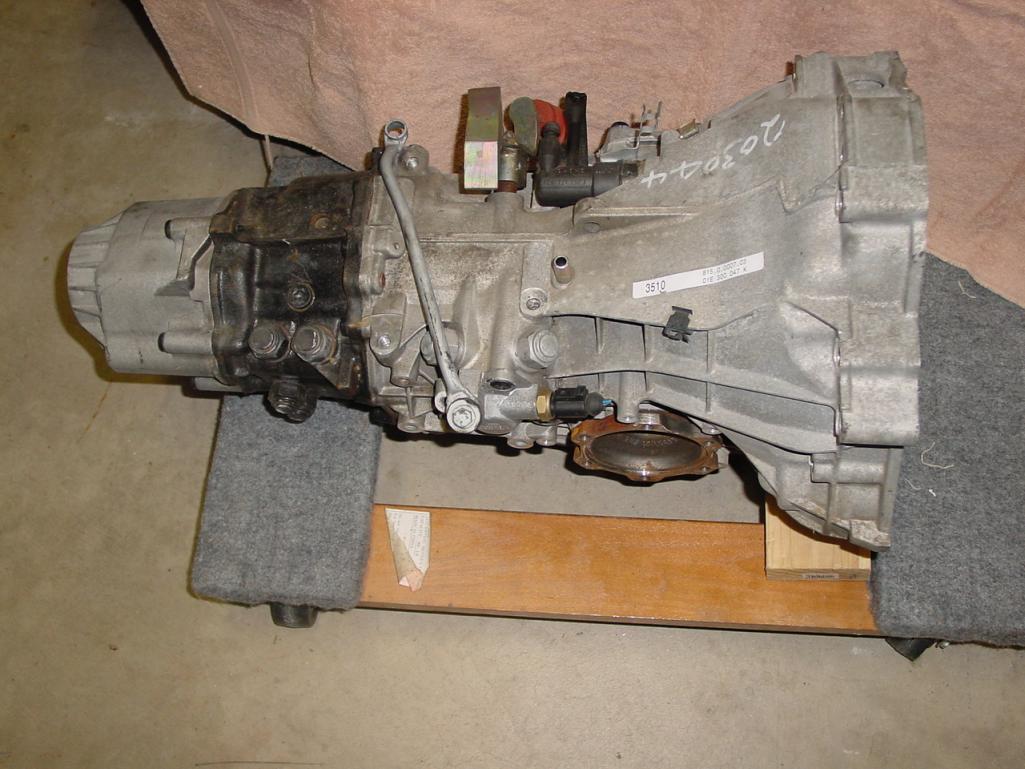 Attached image(s) 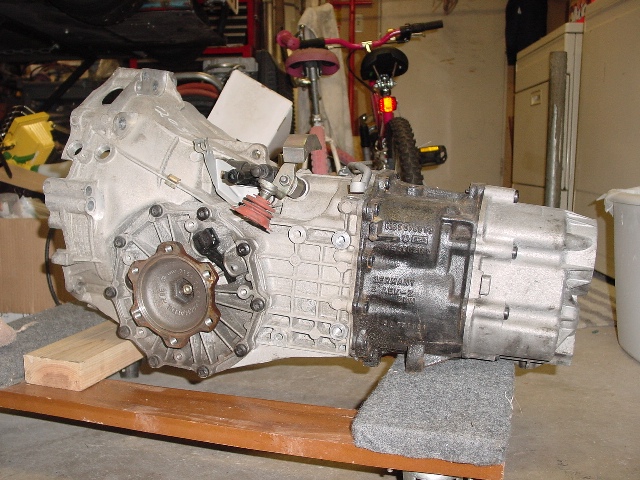
|
|
|
|
| andys |
Feb 21 2013, 01:16 PM
Post
#4
|
|
Advanced Member Group: Members Posts: 2,165 Joined: 21-May 03 From: Valencia, CA Member No.: 721 Region Association: None |
QUOTE(Tom_T @ Feb 21 2013, 11:55 AM)  In Full Edit mode - just add space lines with your enter/return key & type in there. IMHO the pix look better with a line space between them anyway, especially when large. Tom, What do you mean "in full edit mode?" Is this done while I'm in the New Post/Add Reply window? Where would I find that button/tab/selection? Thanks, Andys |
|
|
|
| worn |
Feb 21 2013, 02:07 PM
Post
#5
|
|
can't remember Group: Members Posts: 3,150 Joined: 3-June 11 From: Madison, WI Member No.: 13,152 Region Association: Upper MidWest |
QUOTE(andys @ Feb 21 2013, 11:16 AM) QUOTE(Tom_T @ Feb 21 2013, 11:55 AM) In Full Edit mode - just add space lines with your enter/return key & type in there. IMHO the pix look better with a line space between them anyway, especially when large. Tom, What do you mean "in full edit mode?" Is this done while I'm in the New Post/Add Reply window? Where would I find that button/tab/selection? Thanks, Andys Andys, It doesn't matter, keep the photos coming! I love the story so far. |
|
|
|
| andys |
Feb 21 2013, 02:34 PM
Post
#6
|
|
Advanced Member Group: Members Posts: 2,165 Joined: 21-May 03 From: Valencia, CA Member No.: 721 Region Association: None |
I wanted to avoid having a motor shipped, so I started searching for local yards that may have a LS1 with reasonably low mileage. What I found, was a salvage yard that specializes only in late model Camaro's/Firebird's, but motors go fast so I had to stay on top of them with frequent phone calls. They get two cars in, so I run down there right away. There's a '02 Firebird with 30 some K miles, and had the late and more desirable LS6 heads, but I found a mount for a nitrous bottle in the truck, so I passed. The other car was a "01 Z28 with 49K miles. Looked well kept and was hit in the rear. Started immediately, so I closed the deal. I had to come back the next day so they could pull the motor. Turned out that when I got there, they hadn't even started, so I waited another 1 1/2 hrs before they were ready to load it into my truck. Motor came complete with all the systems (harness, PCM, manifolds, cats, flex plate, starter, even the Camaro air intake box).
Andys Attached image(s) 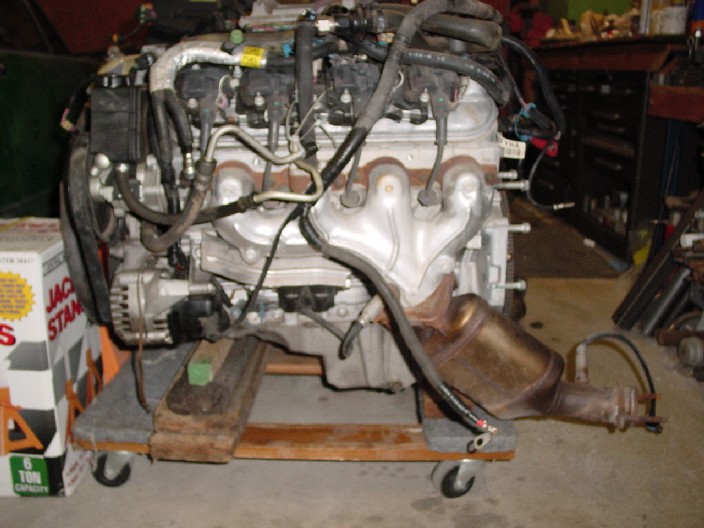 
|
|
|
|
| andys |
Feb 21 2013, 05:48 PM
Post
#7
|
|
Advanced Member Group: Members Posts: 2,165 Joined: 21-May 03 From: Valencia, CA Member No.: 721 Region Association: None |
I wanted to start by adapting the motor to the transaxle, which would allow me to do all my trial fitting of the assembly into the chassis. So, adapter plate, flywheel here we come!
I layed-out the transaxle bolt pattern using a surface plate and height gage with indicator. Did 'x', then rotated the transaxle 90 degrees, and did 'y' coordinants both about the center of the input shaft. The LS1 side was simple, since it has the same bolt pattern as a Gen I SBC, minus one of the holes. There are two bolt positions on the oil pan that some people don't use, but I chose to use since the oil pan is deemed a structural component. From this information, I made a master plate of 1/4" aluminum cast tooling plate (for its stability) to check the alignment. Making the adapter plate is only part of the story, as you need to resolve the starter, flywheel, clutch disc, pressure plate, and TO bearing interfaces. Again, no one at the time made anything for the LS1, so I started from ground zero. After much research, I finally hooked up with QuarterMaster as they were so willing to field all my questions, and of course being race guys, they understood what I needed to get everything to fit up. Let me take a moment to gush at how great they were to deal with, typical Mid-Western stock car race guys that were very accomodating to all my needs; second to none in my book! So after all the planning and designing, I started in on the fab work. I started with a 3/4" thick hot rolled steel plate and had the profile water jet cut, which I then sent out to get blanchard ground on both sides down to 1/2". I then drilled and tapped the necessary hole pattern on my mill. Final yellow zinc plating. To get the correct axial spacing, an additional 1" of thickness was required to clear the flex plate and accommodate the starter. I water jet cut a piece of 1" cast aluminum tooling plate as a spacer. I also made alignment dowel extenders to span that distance. For the flwheel/clutch, I went with the QuarterMaster 8 1/4" button flywheel and bronze/ceramic clutch disc. The pressure plate diaphram spring that was recommended make this combo good for 450 ft-lbs. QuarterMaster does make a button flywheel with the LS1 crank bolt pattern, so no adapters were necessary. I did have to make a 1.1" thick spacer plate to move the whole clutch assembly to locate properly on the transaxle input shaft. I used a QuarterMaster spherical faced TO bearing which I adapter to the existing TO bearing carrier on the transaxle. This way, I could retain the stock TO fork and hydraulic slave cylinder. That was long-winded....here are some photos: Attached image(s) 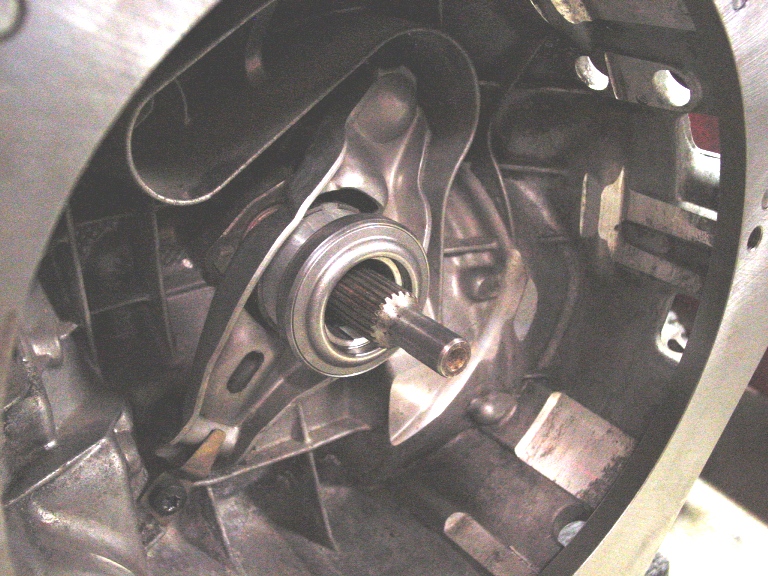 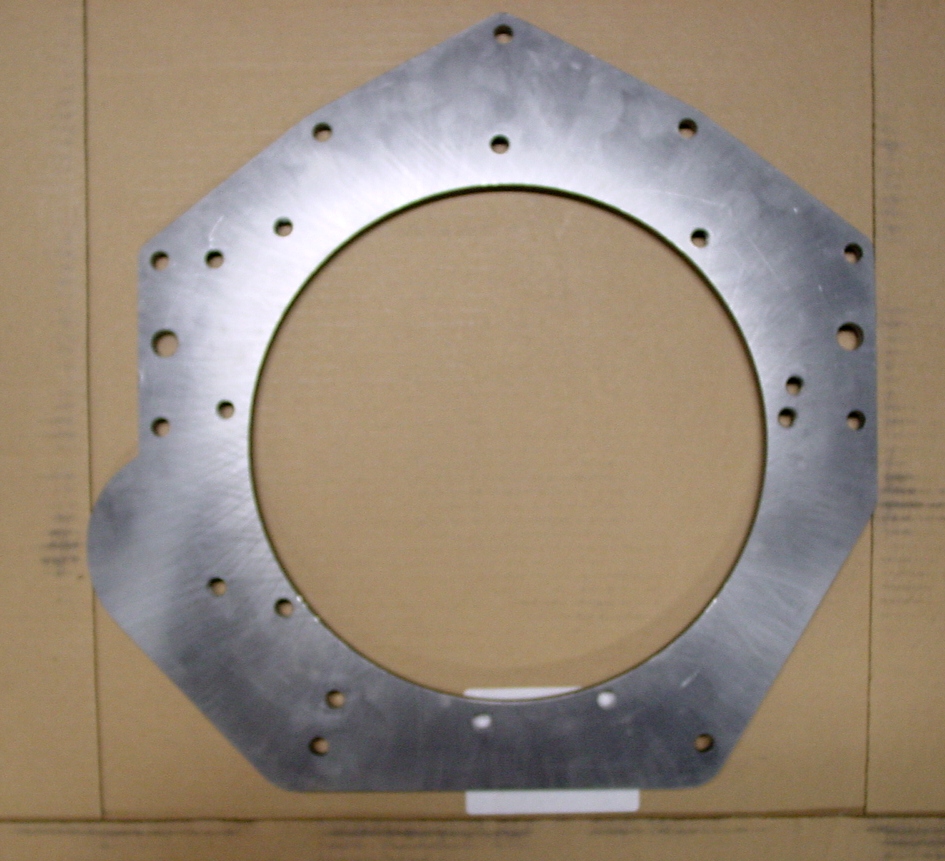 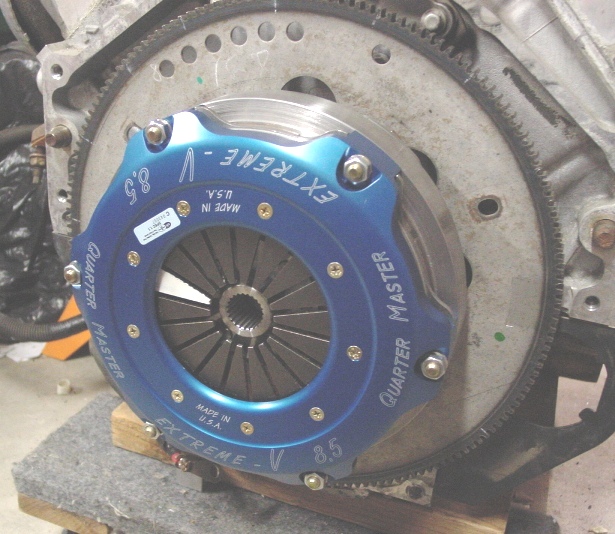 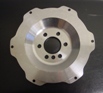  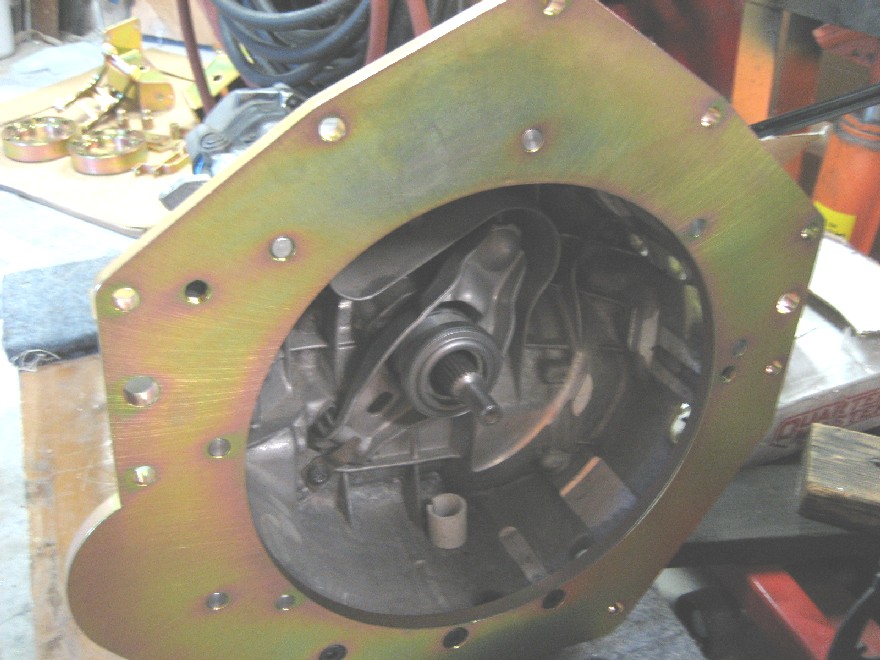 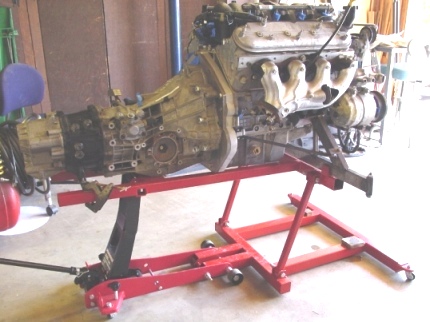
|
|
|
|
| Bruce Hinds |
Feb 21 2013, 06:33 PM
Post
#8
|
|
V-8 madness Group: Members Posts: 733 Joined: 27-December 06 From: Port Orchard, WA Member No.: 7,391 Region Association: Pacific Northwest |
Tell us about that jack!
|
|
|
|
| andys |
Feb 21 2013, 06:47 PM
Post
#9
|
|
Advanced Member Group: Members Posts: 2,165 Joined: 21-May 03 From: Valencia, CA Member No.: 721 Region Association: None |
QUOTE(Bruce Hinds @ Feb 21 2013, 05:33 PM) Tell us about that jack! Bruce, I spend 6 years on the car, and you ask about the jack.......... (IMG:style_emoticons/default/biggrin.gif) Made trom an ATV jack, it colllapses down to 4". That allows me to get the motor under the car without having to raise it up so high. Handles the LS1 and trans just fine. Attached image(s) 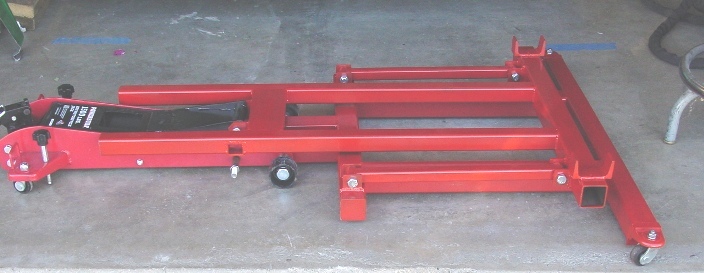  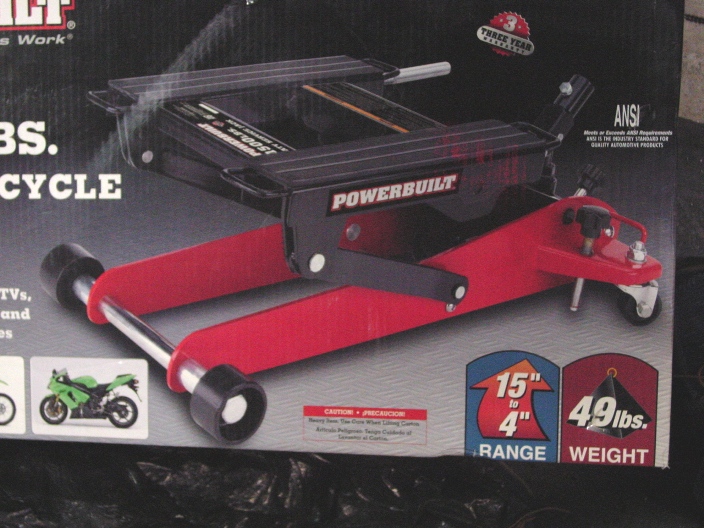
|
|
|
|
| turk22 |
Feb 21 2013, 07:25 PM
Post
#10
|
|
Treetop Flyer Group: Members Posts: 735 Joined: 27-July 12 From: Cincinnati OH Member No.: 14,725 Region Association: Upper MidWest |
Lovin this story and the work you did.
Looking forward to hearing the rest of it.. (IMG:style_emoticons/default/beerchug.gif) |
|
|
|
| Bruce Hinds |
Feb 21 2013, 07:47 PM
Post
#11
|
|
V-8 madness Group: Members Posts: 733 Joined: 27-December 06 From: Port Orchard, WA Member No.: 7,391 Region Association: Pacific Northwest |
ask about the jack!
Well yeah... the cars freak'n gorgeous and the trans setup is sweet. But that jack, that's a great piece of work. Well done! On all accounts. Did you make the hood vent, or is that from something else? |
|
|
|
| Mike Bellis |
Feb 21 2013, 07:47 PM
Post
#12
|
|
Resident Electrician Group: Members Posts: 8,345 Joined: 22-June 09 From: Midlothian TX Member No.: 10,496 Region Association: None |
Keep going! We need more!
I know you did custom axle flange work but I will through out that Boxster output flanges (100mm) snap right in. I was going to go your route but the factory Porsche (Audi) part fits so well. |
|
|
|
| andys |
Feb 22 2013, 10:27 AM
Post
#13
|
|
Advanced Member Group: Members Posts: 2,165 Joined: 21-May 03 From: Valencia, CA Member No.: 721 Region Association: None |
QUOTE(Bruce Hinds @ Feb 21 2013, 06:47 PM) ask about the jack! Well yeah... the cars freak'n gorgeous and the trans setup is sweet. But that jack, that's a great piece of work. Well done! On all accounts. Did you make the hood vent, or is that from something else? Bruce, Yeah, I used the heck out of the jack; glad I took the time to fab it up. The hood vent is a creation that was designed by an Art Center College of Design student, since I have zero artistic/creative skill. Modeled it out of foam, then covered in f'glass. Andys |
|
|
|
| andys |
Feb 22 2013, 12:32 PM
Post
#14
|
|
Advanced Member Group: Members Posts: 2,165 Joined: 21-May 03 From: Valencia, CA Member No.: 721 Region Association: None |
With the motor and transaxle coupled together, I now set about the task of fitting it to the car.
Initial fittng revealed that the motor damned near fits with the water pump in place, which means it still doesn't fit. After some measuring, I determined that if I use the LS2 water pump with the short pulley, I'll reduce the length by about 2" (from memory, which is not that great anymore). Found a brand new LS2 water pump on Ebay along with a LS6 Vette crank pulley (which is also shorted than the LS1 by some 3/4") to line up with the water pump. Fitting again revealed that I would only need to move the firewall hump into the cabin 1 1/8" to get everything to clear......well almost. The water pump outlet points straight forward into the firewall, so I needed to re-think that. Some of you may think why should I goof with the stock water pump, when a remote mechanical or electric water pump (Meziere) might offer an easier solution? Well, frankly I like stock components over aftermarket as they are properly engineered and designed for dependability. Another issue that led to my decision, was the need for a properly configured thermostat, and heater hose and valving. To resolve the water pump outlet, I capped the original outlet, drilled a hole pointing toward the passenger side, machined a new neck with barb for a 1 1/4" hose, and TIG welded it in place. I did a similar thing with the inlet side; I machined a neck with barb, and TIG welded it to the stock thermostat housing in a more favorable position. Attached thumbnail(s) 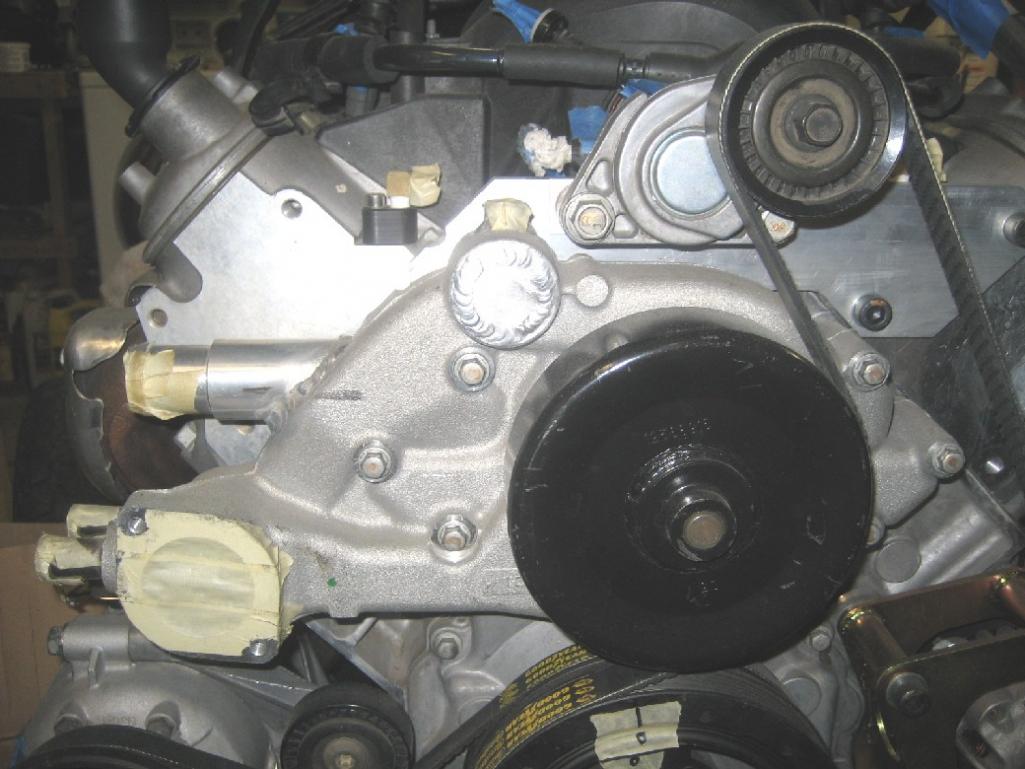 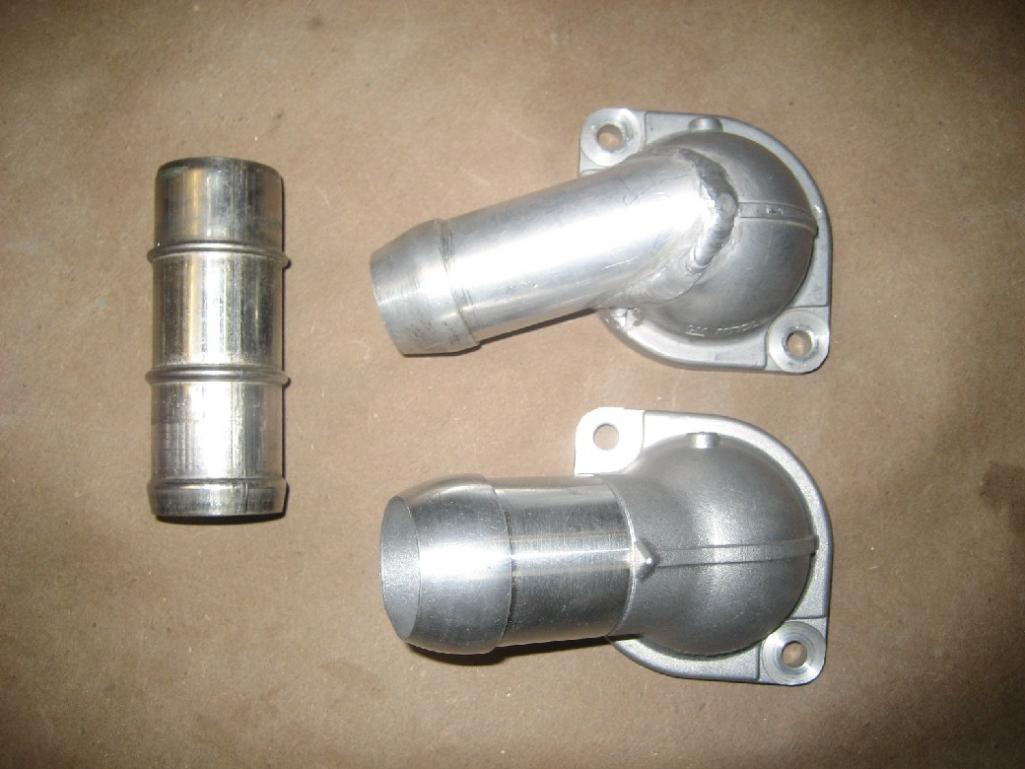 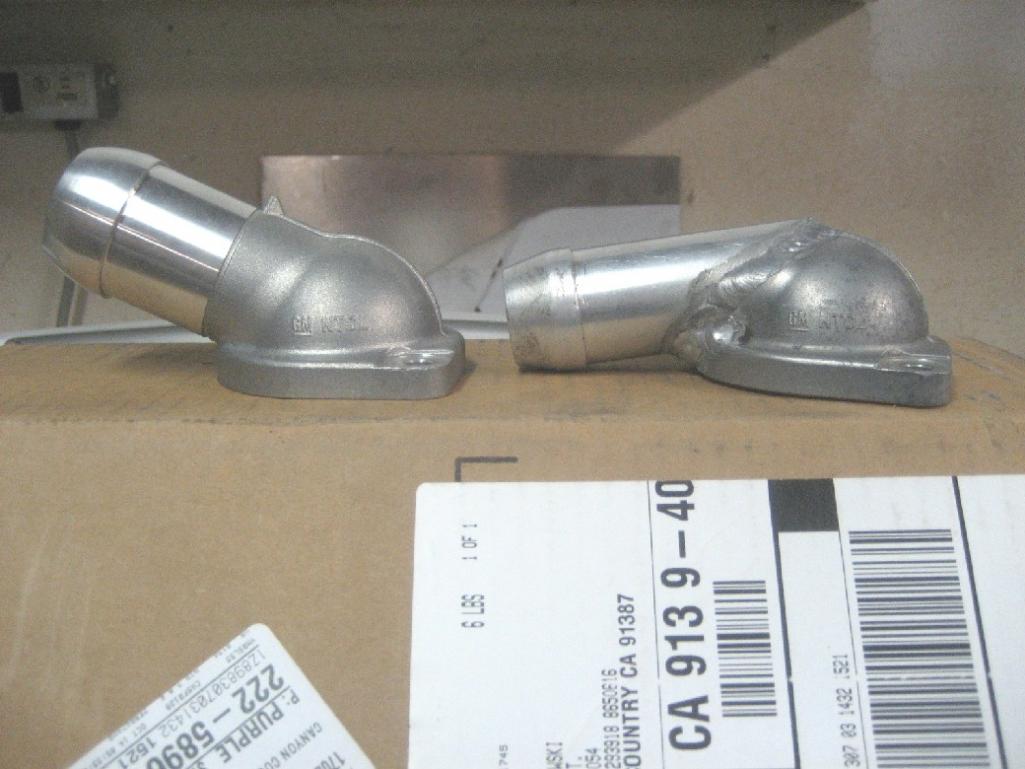 Attached image(s) 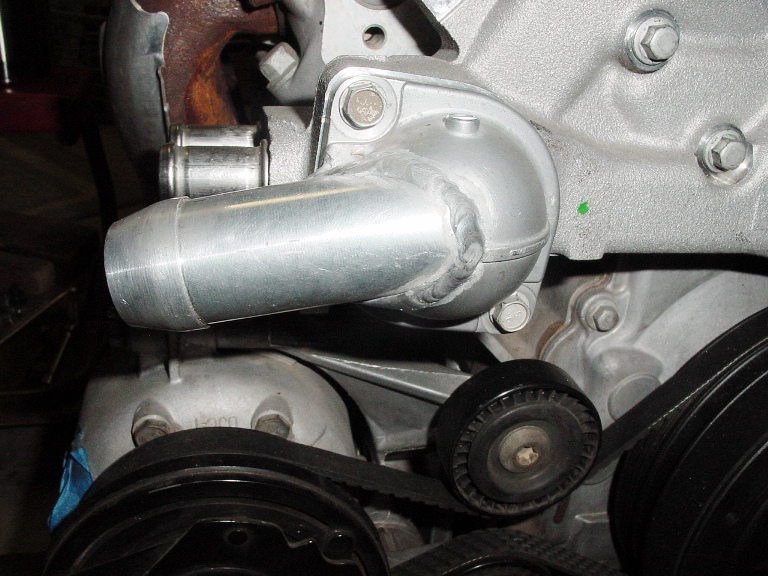
|
|
|
|
| TurboWalt |
Feb 22 2013, 02:15 PM
Post
#15
|
|
Member Group: Members Posts: 157 Joined: 14-March 10 From: Chattanooga, TN Member No.: 11,463 Region Association: Northern California |
Great work, keep the pics coming!
|
|
|
|
| BIGKAT_83 |
Feb 22 2013, 02:29 PM
Post
#16
|
|
Senior Member Group: Members Posts: 1,798 Joined: 25-January 03 From: Way down south Bogart,GA Member No.: 194 Region Association: South East States |
Great work! keep the pictures coming. I keep coming back to the site every 10 mins.
Bob |
|
|
|
| andys |
Feb 22 2013, 03:07 PM
Post
#17
|
|
Advanced Member Group: Members Posts: 2,165 Joined: 21-May 03 From: Valencia, CA Member No.: 721 Region Association: None |
While not exactly in the correct sequence of the build, I will probably group things so as to keep some sense to the project. While waiting for one thing, I would switch over to say the flare installation or chassis stiffening in between, but anyone that's done this kind of thing before, knows what I'm talking about.
Let's proceed to the accessoy drive on the front of the motor. The water pump pulley and the crank pulley are in alignment, but the AC part of the crank pulley is now about 1" closer to the block than the LS1 AC compressor pulley, so I had to fab a plate that moves it back,,,,,but not so fast. The compressor now interfers with the header (stock cast iron LS6 header), so I remake the plate to also moving the compressor down by 3/4"....but now the compressor interfers with the cool looking Vette aluminum motor mounts I got from Ebay. After some thought, I decide to fab my own motor mounts. Ok, back to the accessory drive. The alternator (in it's stock position) needs to move closer to the block as well, so I found it easier to fab my own alternator mount; done deal. Now, the serpentine drive needs to be configured. What I came up with was to mount the tensioner high and somewhat centered, which coincidentally turns out to be the same solution that Factory Five uses on their GTM cars (their bracket is steel, mine is aluminum). I measured the necessary belt length with a string, then searched the Goodyear site and found what I needed. Not as many photos as I'd like to display, but that's all I have. The zinc plated part is the alternator front mount (there's also a rear mount). Attached image(s) 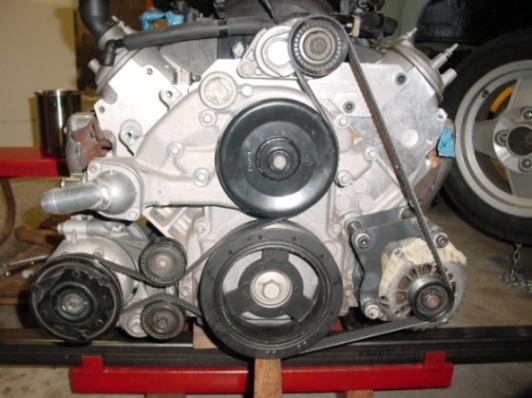 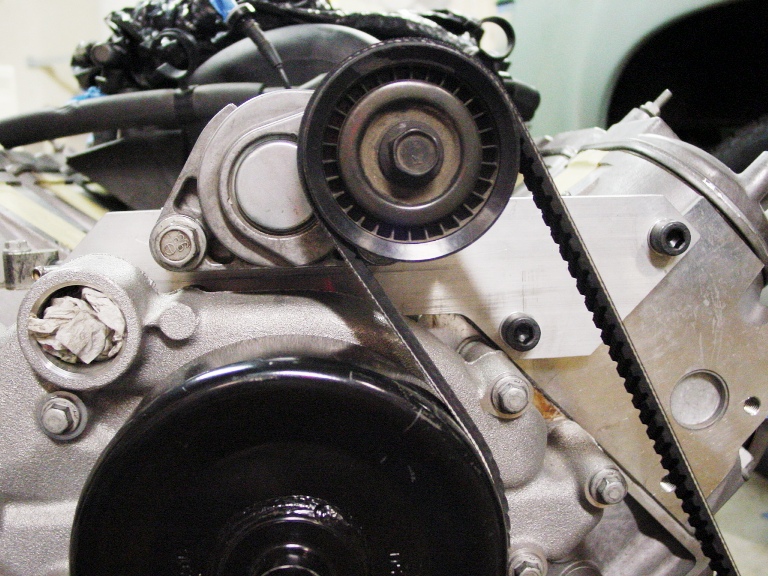 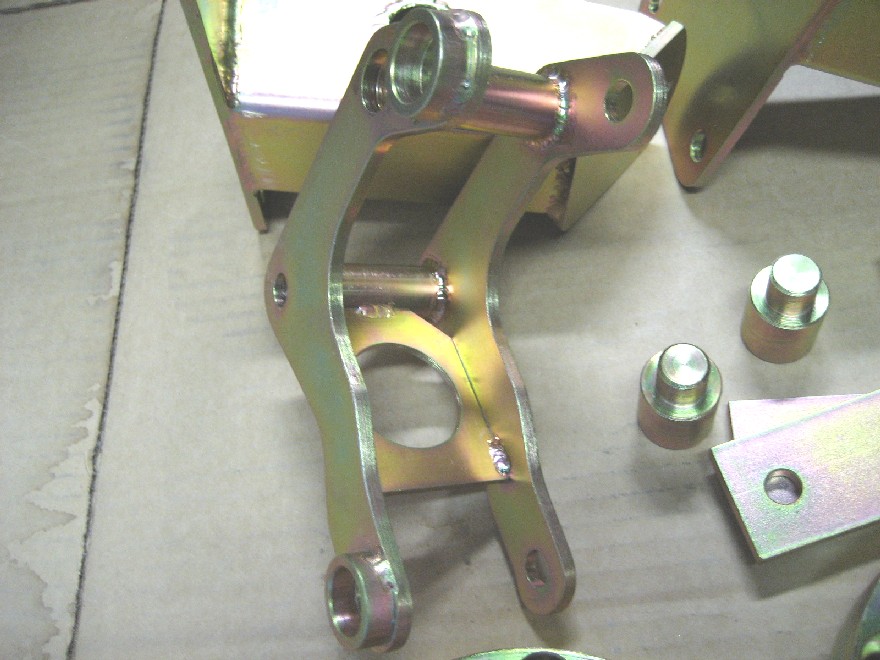
|
|
|
|
| worn |
Feb 22 2013, 09:52 PM
Post
#18
|
|
can't remember Group: Members Posts: 3,150 Joined: 3-June 11 From: Madison, WI Member No.: 13,152 Region Association: Upper MidWest |
Amazing. Inspiring. I wanna drive it!
|
|
|
|
| rick 918-S |
Feb 23 2013, 07:39 AM
Post
#19
|
|
Hey nice rack! -Celette Group: Members Posts: 20,443 Joined: 30-December 02 From: Now in Superior WI Member No.: 43 Region Association: Northstar Region |
|
 |
|
| Cairo94507 |
Feb 23 2013, 08:03 AM
Post
#20
|
|
Michael Group: Members Posts: 9,731 Joined: 1-November 08 From: Auburn, CA Member No.: 9,712 Region Association: Northern California |
I am in awe. Amazing skills and work. Keep 'em coming.
|
|
|
|
|
1 User(s) are reading this topic (1 Guests and 0 Anonymous Users)
0 Members:

|
Lo-Fi Version | Time is now: 5th May 2024 - 01:47 PM |
Invision Power Board
v9.1.4 © 2024 IPS, Inc.