|
|
|
Porsche, and the Porsche crest are registered trademarks of Dr. Ing. h.c. F. Porsche AG.
This site is not affiliated with Porsche in any way. Its only purpose is to provide an online forum for car enthusiasts. All other trademarks are property of their respective owners. |
|
|

  |

| r3dplanet |
 Mar 12 2013, 08:00 PM Mar 12 2013, 08:00 PM
Post
#1
|
|
Senior Member  Group: Members Posts: 679 Joined: 3-September 05 From: Portland, Oregon Member No.: 4,741 Region Association: None |
So I decided to pull the throttle body (valve) from my car in order to rebuild it. The throttle valve had a tendency to leak and stick. It was also moderately dirty. At the time I was on a personal mission to pull and restore every major component of the D-Jet system. Since then, I've performed similar operations on the MPS, AAR, etc. Perhaps I'll document those operations in a similar way.
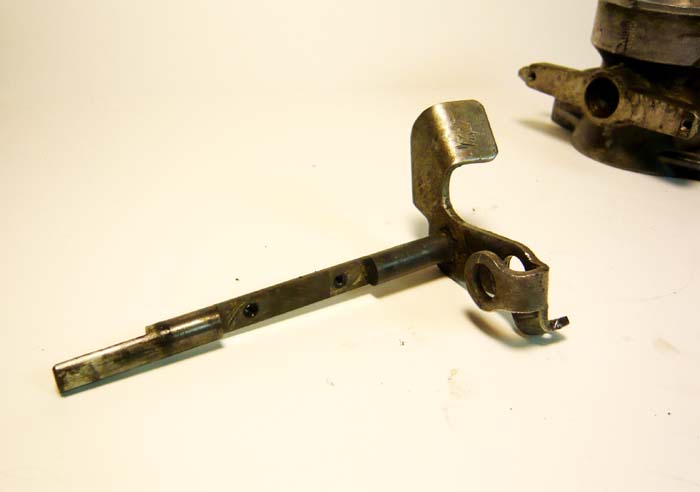
My car is a 1971, but the engine is a 1973. I know that other engines use a top-mounted throttle valve, but it's actually quite similar to the side-mounted units like mine. I realize that this isn't superorbital propulsion engineering, but it might be helpful to somebody. Here's the original setup. You can clearly see the part number 022 133 067 under the muck, along with various scratches and nasties. 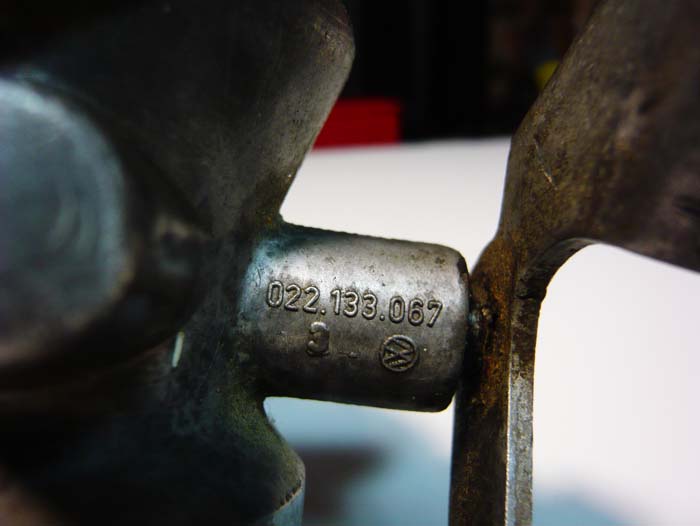 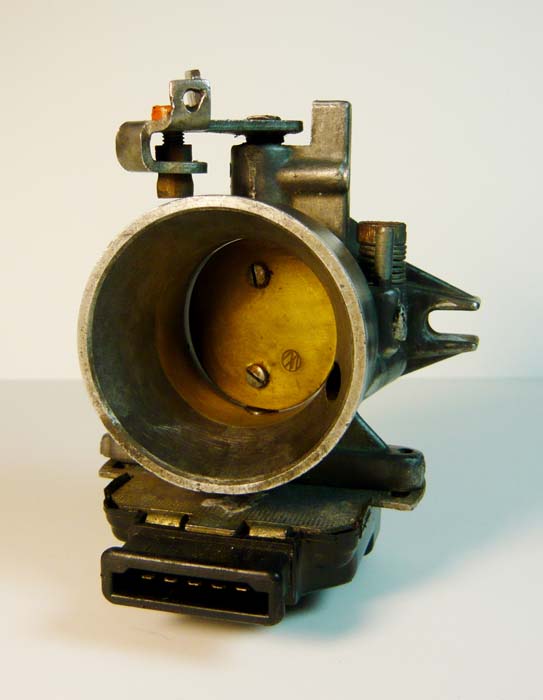 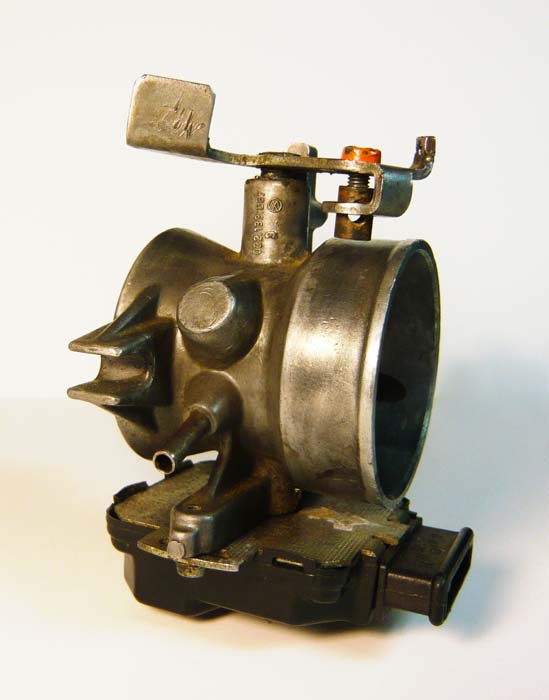 In this photo you can see that there's quite a gap around the brass air valve and inner diameter of the main bore. It seals if the valve is fully closed, but even the smallest relief of the lever allows air to pass. 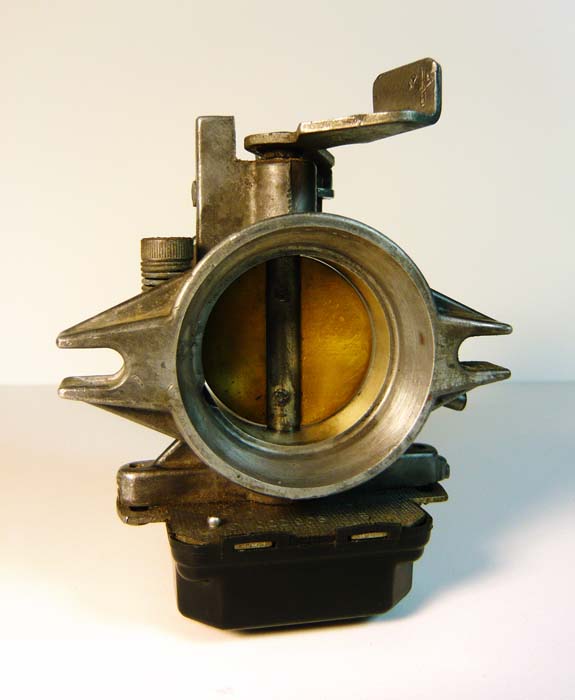 |
   |

 
|
| r3dplanet |
Mar 12 2013, 08:08 PM
Post
#2
|
|
Senior Member Group: Members Posts: 679 Joined: 3-September 05 From: Portland, Oregon Member No.: 4,741 Region Association: None |
Moving on, pay careful attention not to lose any small parts. You could source them again if you look around, but it's nothing you can go to Ace Hardware and pick up in the fasteners section.
Pull the cable stop. 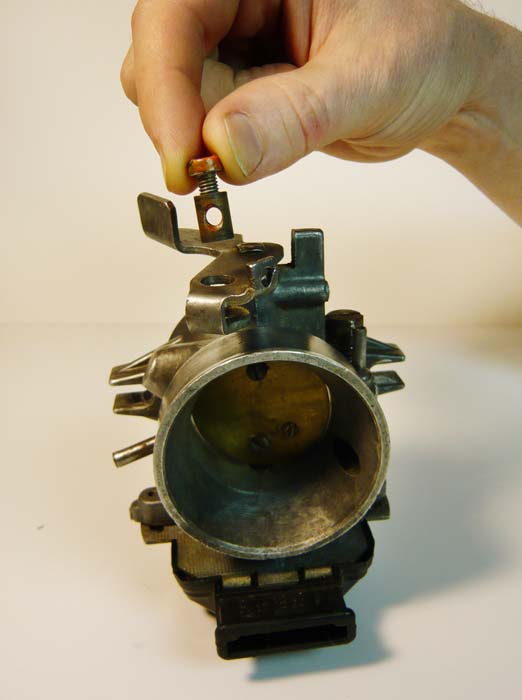 Also take a moment to familiarize yourself with the approximate locate of the hash marks on the underside. This plastic box houses the throttle position switch. At the end, you can use a multimeter to make sure this is set correctly. 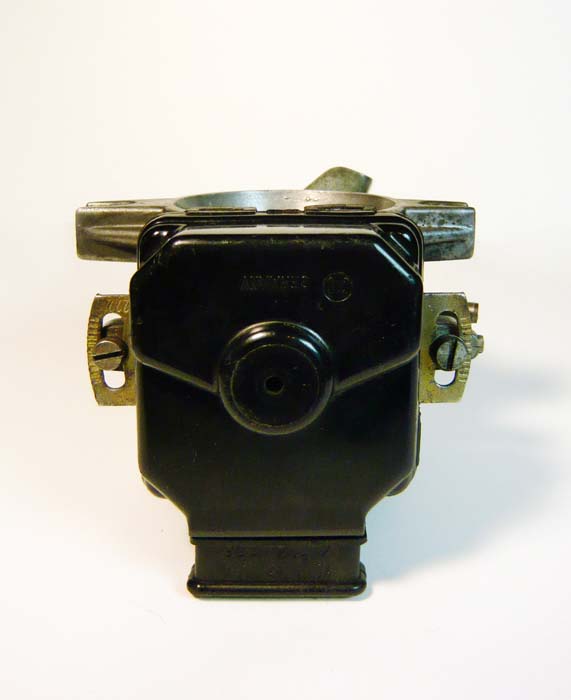 Use a flat blade screwdriver to remove both of these screws.  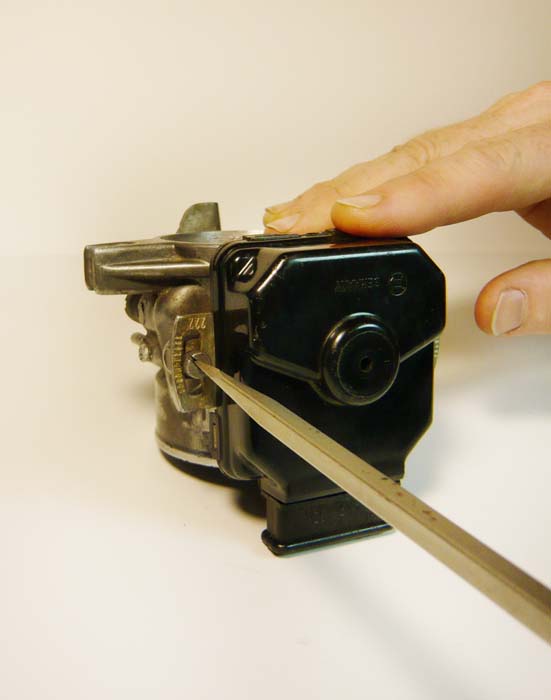 It took a little force, but you can now free the throttle position switch from the valve shaft. 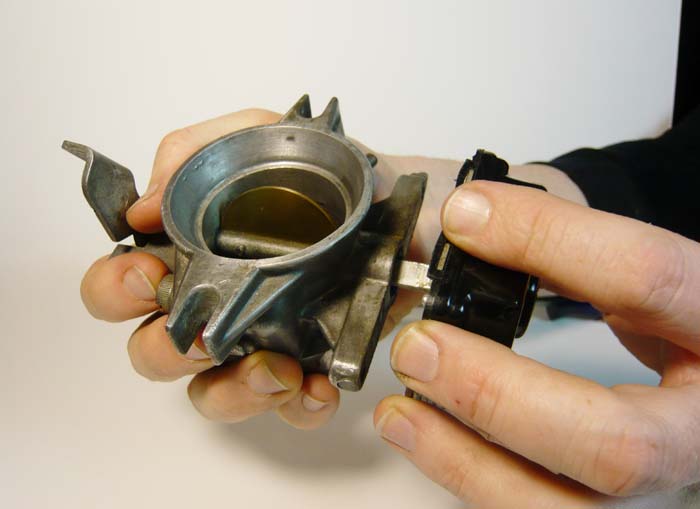 You can see that the plastic housing is clamped to the perimeter of the TPS by use of six plastic tabs. The one in the lower right corner is broken. If you have a lot broken tabs, you might consider finding another one. 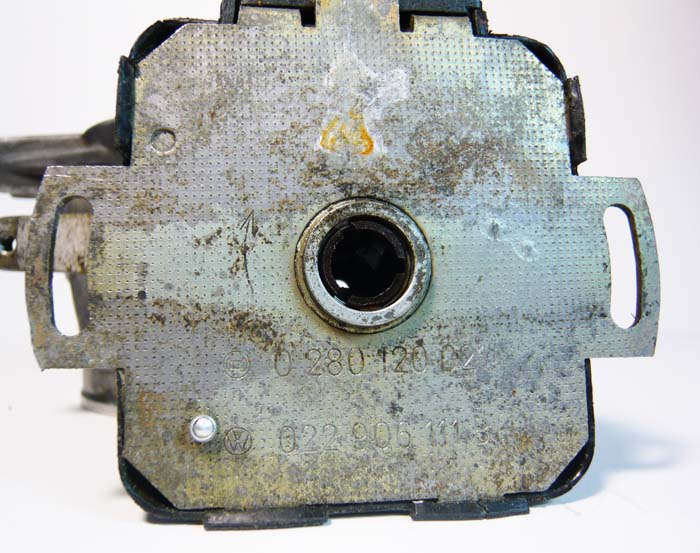 |
|
|
|
| r3dplanet |
Mar 12 2013, 08:14 PM
Post
#3
|
|
Senior Member Group: Members Posts: 679 Joined: 3-September 05 From: Portland, Oregon Member No.: 4,741 Region Association: None |
Next, remove the idle air control valve by unscrewing the large pan-head screw. Hopefully the spring underneath isn't broken. Mine was almost frozen stuck, so I dropped in a little PB Blaster.
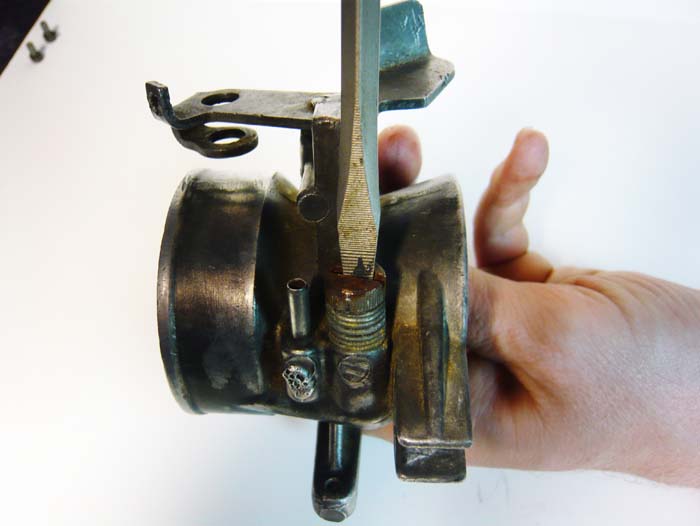 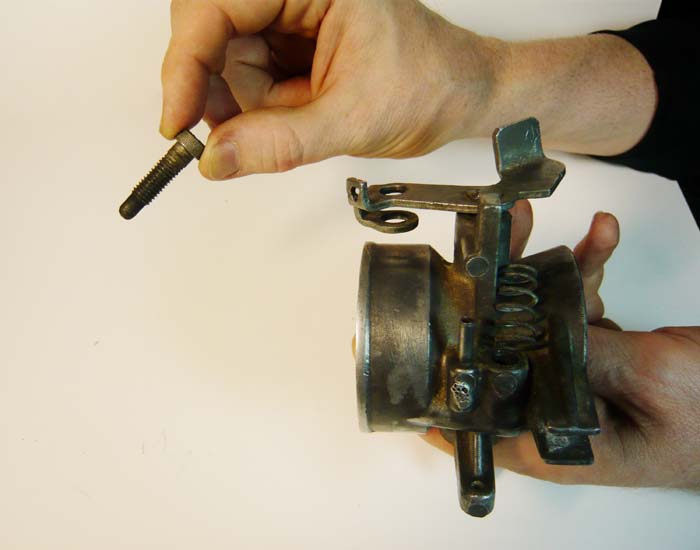 Moving ahead, you can now use a long thin screwdriver to release and remove the screws holding the air valve to the shaft. Mine were quite hard to break. Again, PB Blaster to the rescue. 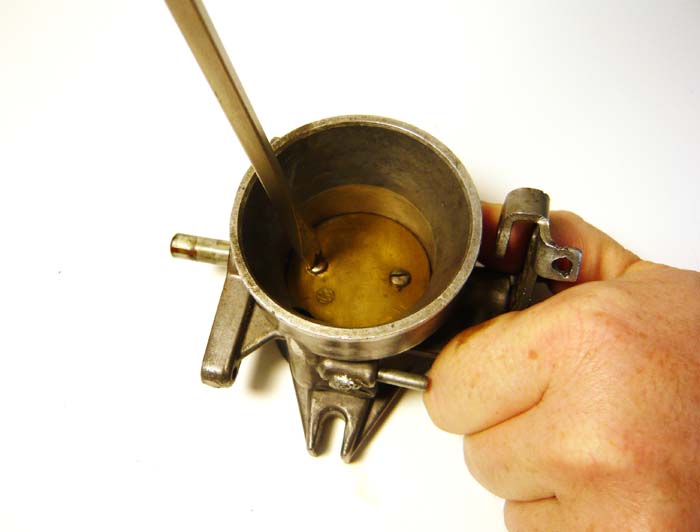 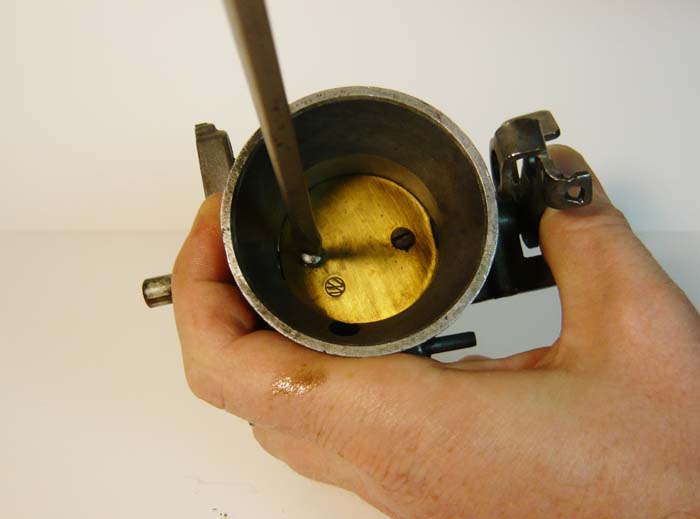 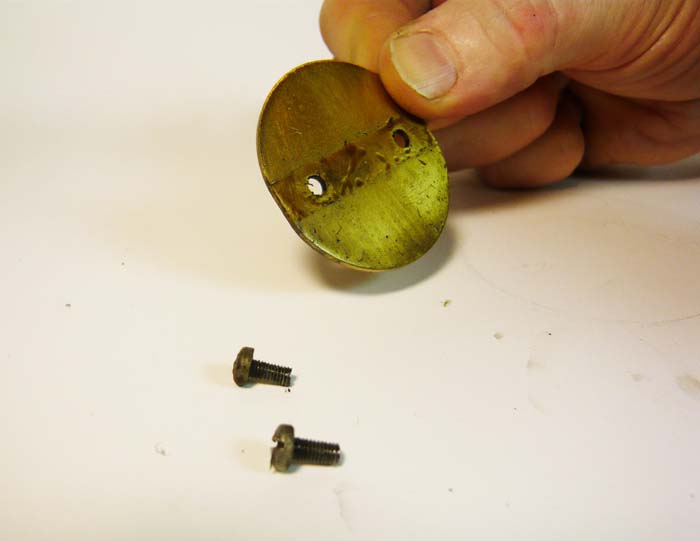 |
|
|
|
| r3dplanet |
Mar 12 2013, 08:25 PM
Post
#4
|
|
Senior Member Group: Members Posts: 679 Joined: 3-September 05 From: Portland, Oregon Member No.: 4,741 Region Association: None |
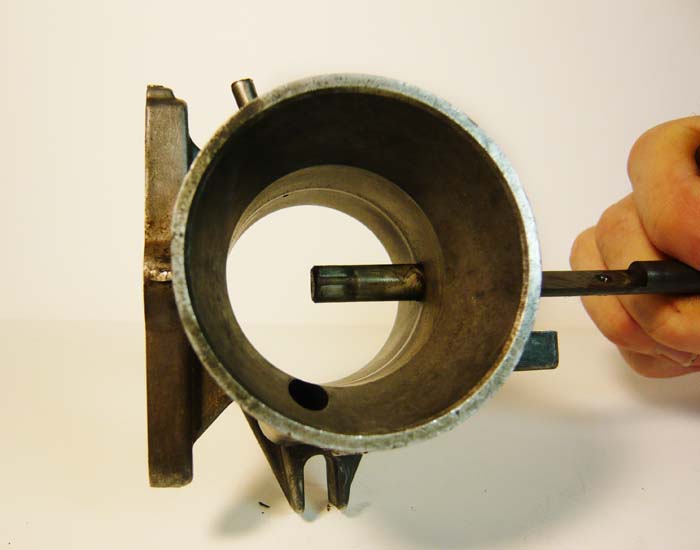
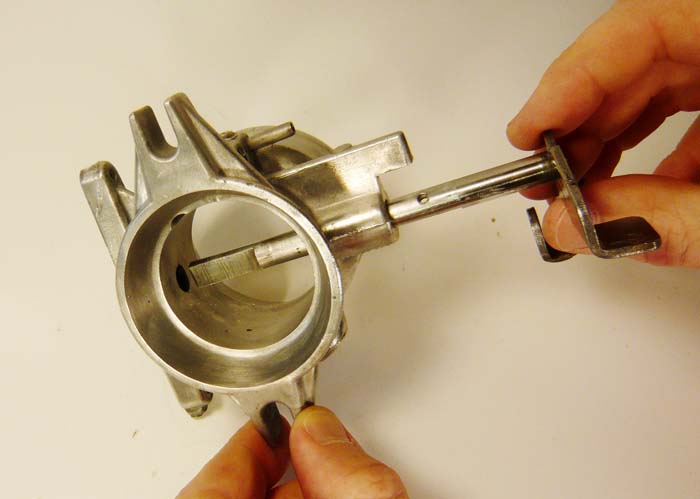
Now pull the shaft.
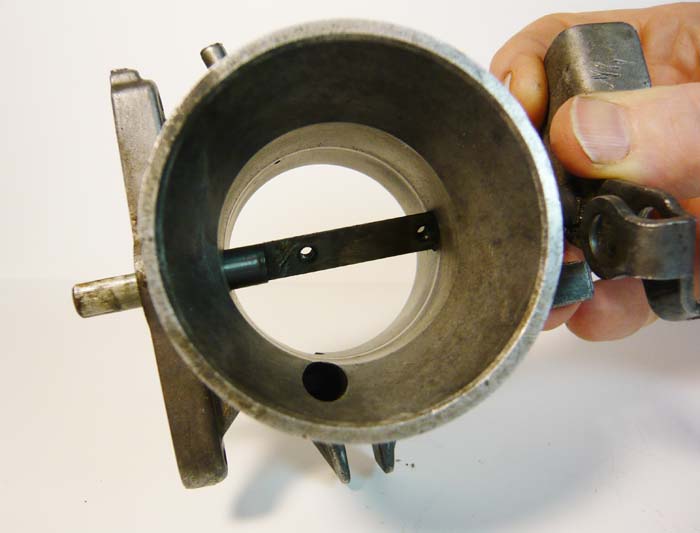   You can see in the next couple of photos that the shaft housing likes to attract dirt because of the strong vacuum. The aluminum wears away over time, the gap around the shaft enlarges, and more dirt can get sucked in which abrades the housing further and faster. This right here is the Achilles' heel of our throttle valve. There are no bearings or bushings to protect the aluminum. 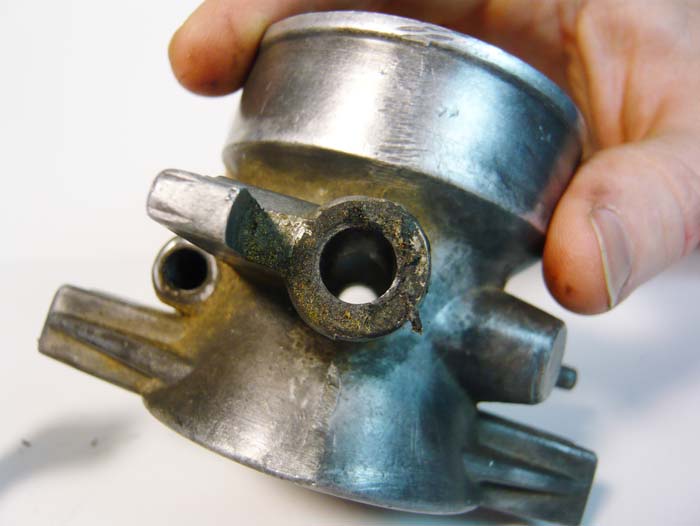 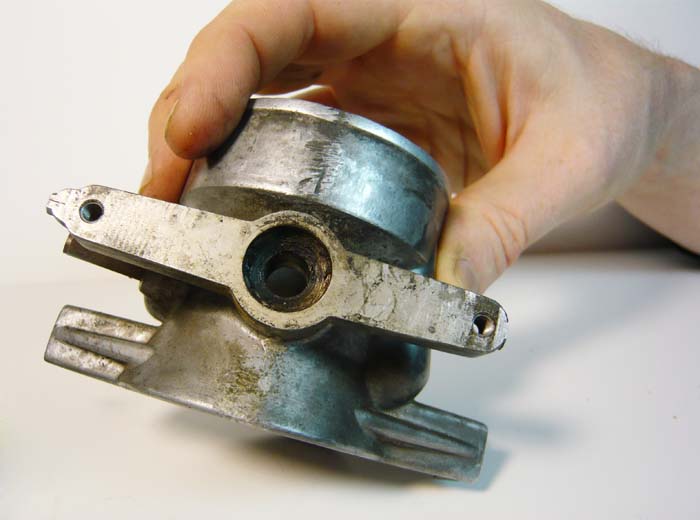 The fix for this? Bronze bushings. Neither I nor my machinist was able to find metric bushings that would work exactly right, so I ended up cheating and using US non-Standard ones instead. We used Oilite AA-306-11B bearings. They have 5/6" inner diameter and 3/8" outer diameter. The other reason we used non-Metric sizing was because we'll have to use a reamer, and a 5/16" reamer was much easier to find. I'm almost ashamed to admit this. I've gone to great lengths not to use US non-Standard anywhere on the car. But believe me when I say that this works perfectly. 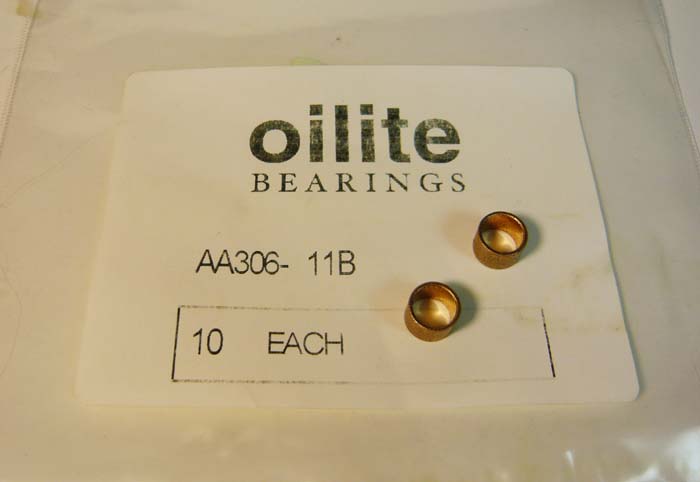 |
|
|
|
| r3dplanet |
Mar 12 2013, 08:35 PM
Post
#5
|
|
Senior Member Group: Members Posts: 679 Joined: 3-September 05 From: Portland, Oregon Member No.: 4,741 Region Association: None |
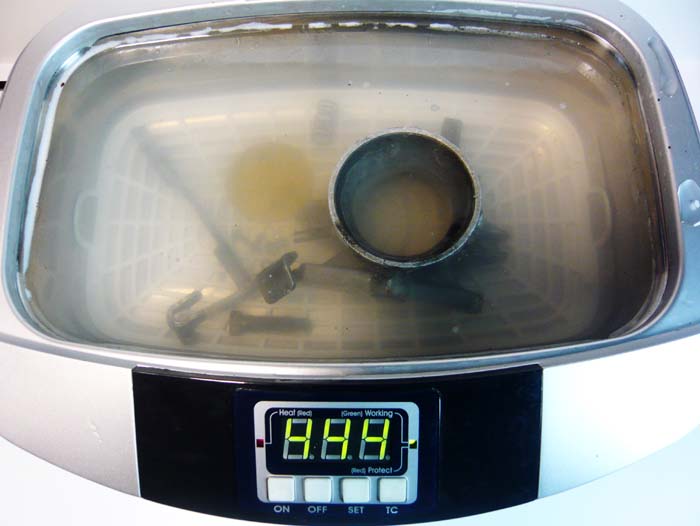
Now drop everything into your ultrasonic cleaner and give it a bath. Don't have one? Well, go out and get one. I use it for everything. I used four rounds with a vinegar and salt solution, followed by a few more rounds with a Simple Green solution.
 For reasons I can't explain, I lost the photo of the actual reaming process. It was easy though. Carefully drill each of the shaft to a depth equal to the length of the bronze bushing. Then buy a reaming hand tool and gently bore out each end of the throttle valve shaft very carefully until you think the bushing will tap in. It should be exactly 3/8" inch. Then carefully tap in a bushing on each side with a small ball peen hammer. Clean with compressed air and then wash it again. I took the extra step of polishing the parts with a Dremel. 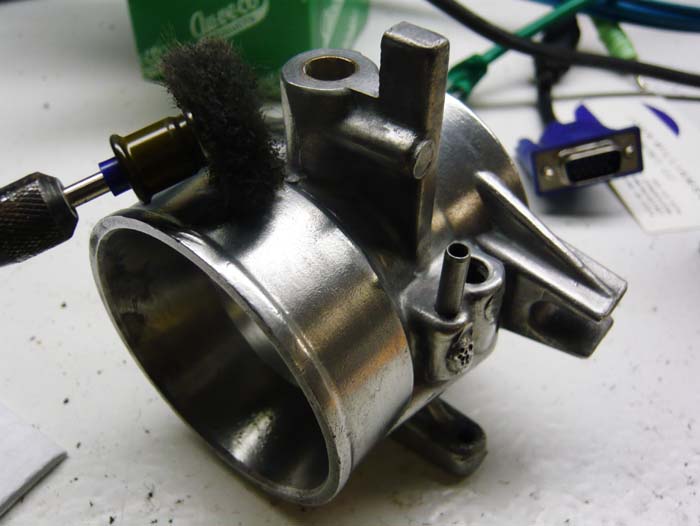 Also, I wrapped some masking tape around the shaft and shot the spring plate with some clear paint to keep it from rusting. 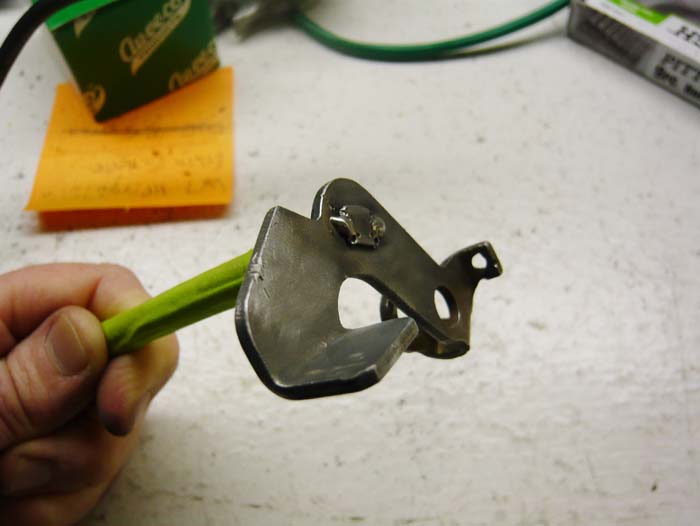 See? Pretty. 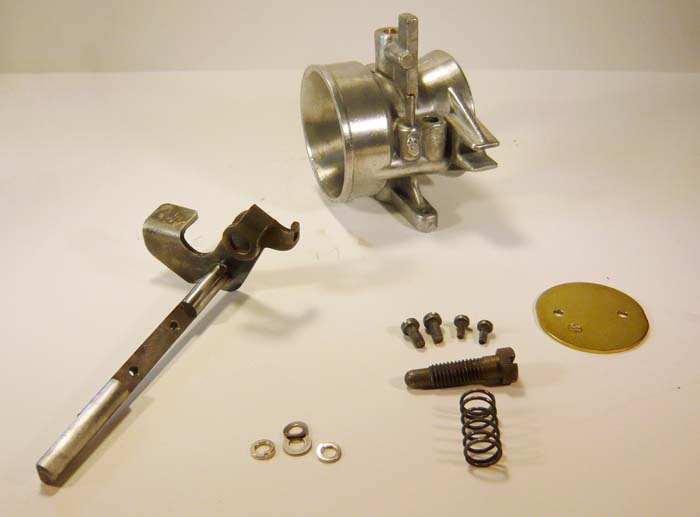 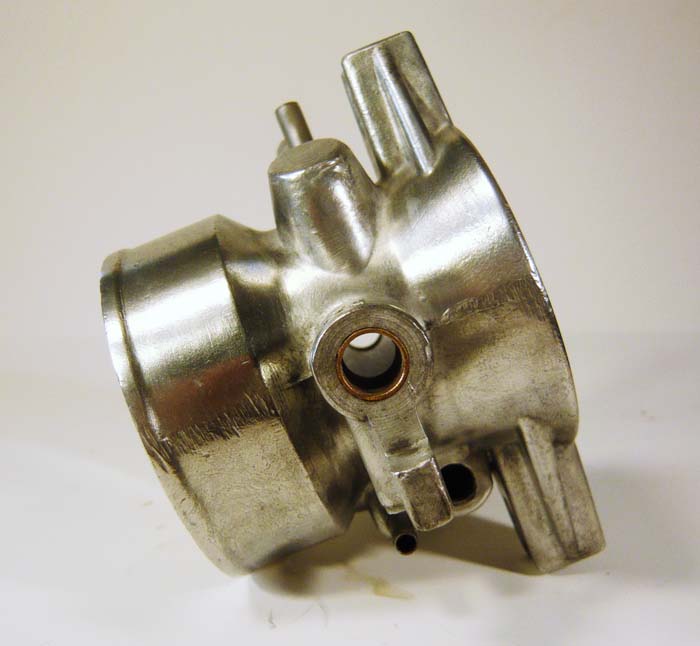 Attached image(s) 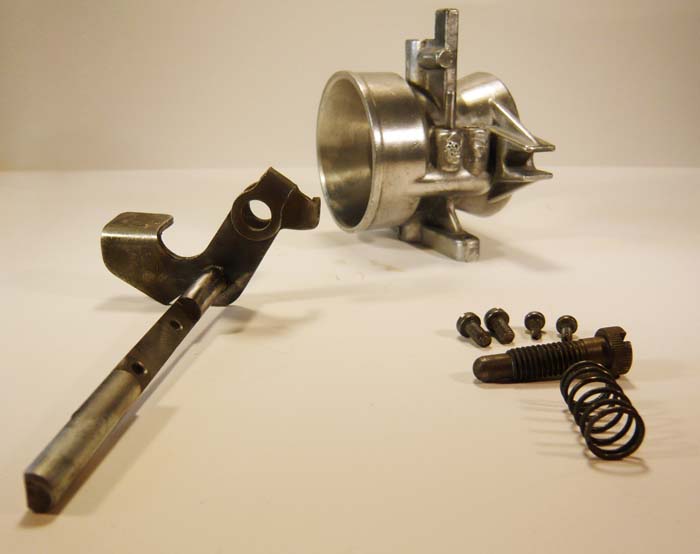 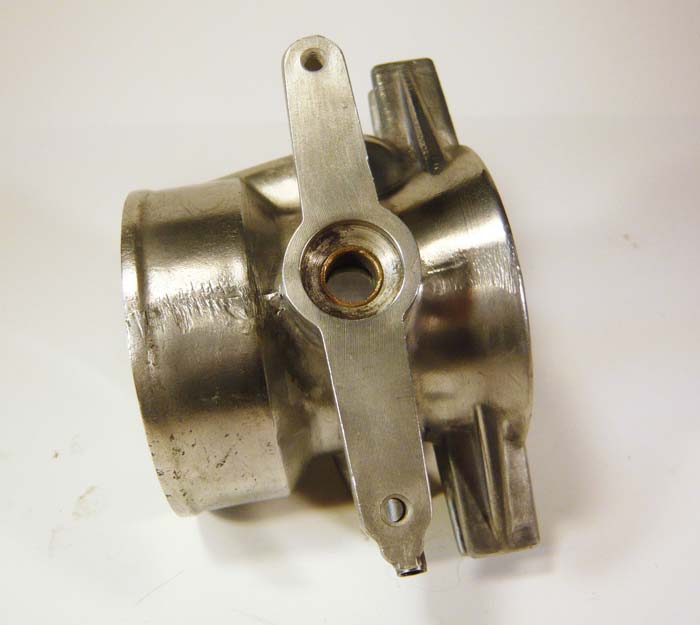
|
|
|
|
| r3dplanet |
Mar 12 2013, 08:42 PM
Post
#6
|
|
Senior Member Group: Members Posts: 679 Joined: 3-September 05 From: Portland, Oregon Member No.: 4,741 Region Association: None |
Installation is the reverse of removal.
  A little blue Locktite wouldn't be a bad idea here. It's doubtful that you want one or more screws flying into a combustion chamber. 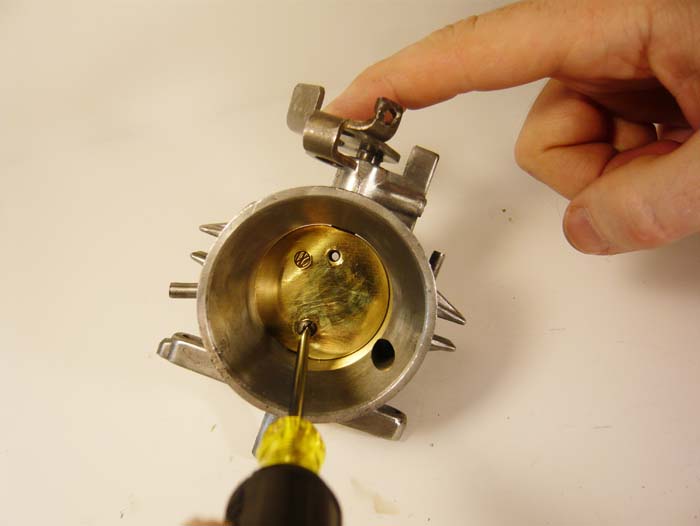 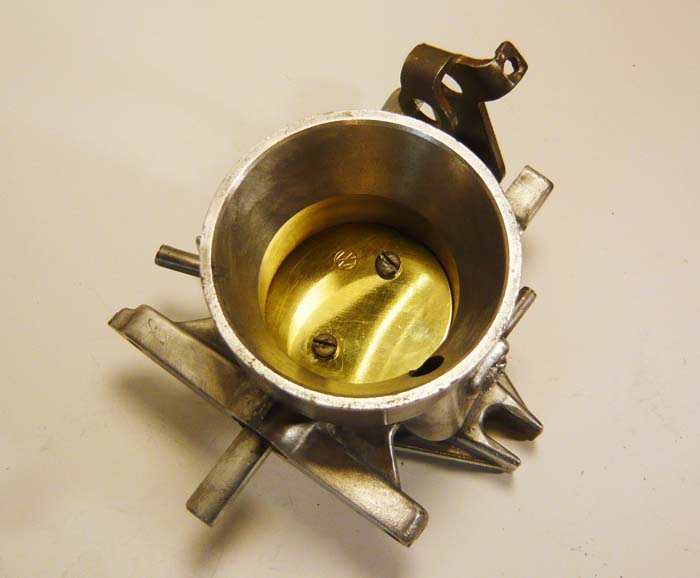 Also make super triple sure that the air bypass valve is completely clean. One more thing you'll congratulate yourself for if you use an ultrasonic cleaner. 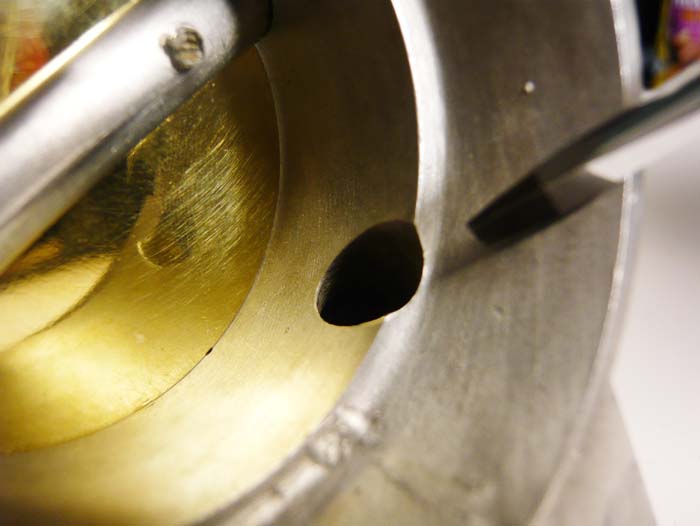 Make sure that the throttle shaft rotates perfectly smooth inside of the new bushings. Also make sure that there isn't any wobble or slop at all. Super critical. 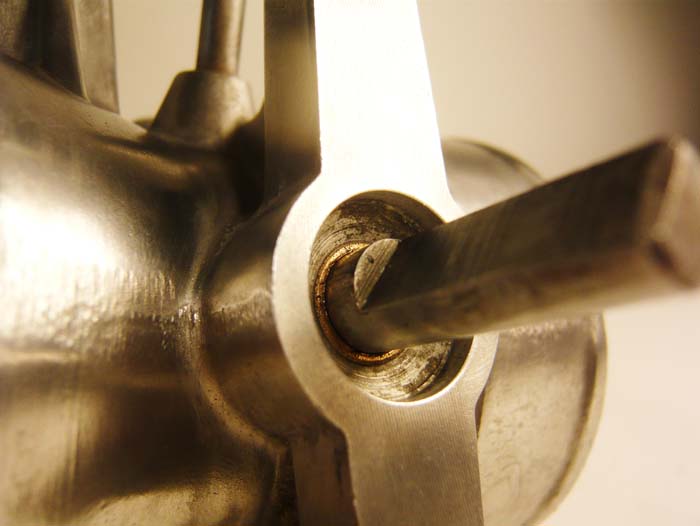 |
|
|
|
| r3dplanet |
Mar 12 2013, 08:48 PM
Post
#7
|
|
Senior Member Group: Members Posts: 679 Joined: 3-September 05 From: Portland, Oregon Member No.: 4,741 Region Association: None |
While I was in there, I took the time to remove the throttle position switch circuit board and install a new replacement. Mine looked awful. But that's a subject for another post.
Note that when I reattached the TPS, I still had to contend with one broken plastic tab. Thankfully only one. I used a bit of hot glue to secure it. Then I pulled out the multimeter and adjusted the TPS thanks to the famous Pelican article and diagram found here: http://www.pelicanparts.com/techarticles/9...brate_17-18.jpg 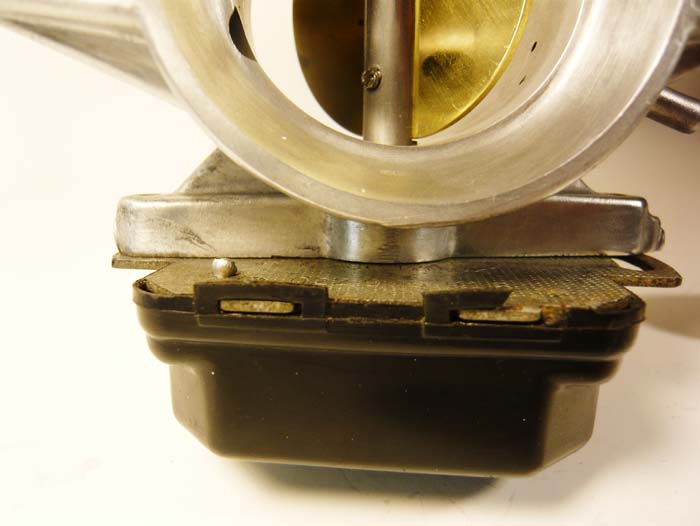 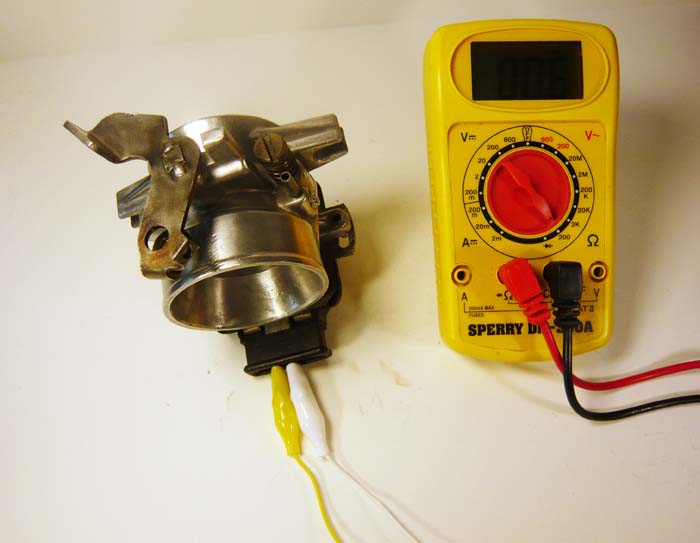 Joy: 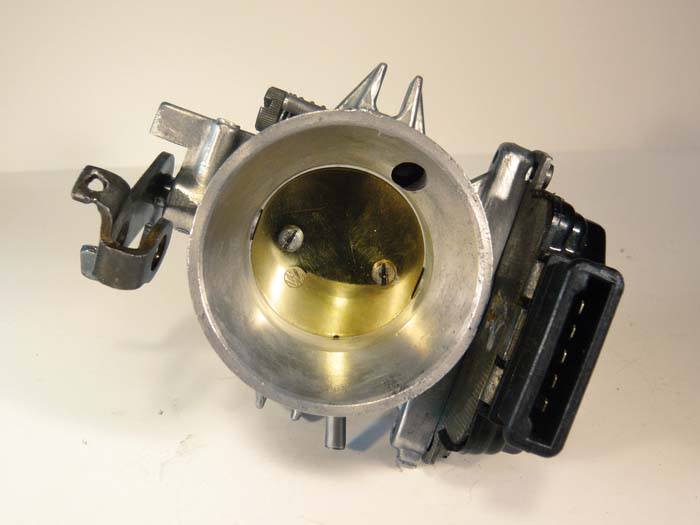 Overall, I found that by performing this little R&R session I managed to get the car free of a non-obvious and troublesome vacuum leak. Hopefully it will help someone else also. Thanks for reading, Marcus |
|
|
|
| Dave_Darling |
Mar 12 2013, 08:50 PM
Post
#8
|
|
914 Idiot Group: Members Posts: 15,355 Joined: 9-January 03 From: Silicon Valley / Kailua-Kona Member No.: 121 Region Association: Northern California |
QUOTE I realize that this isn't superorbital propulsion engineering,... I love that quote! (IMG:style_emoticons/default/smile.gif) Mike Cooley used to offer a similar service years ago. He was using a lathe, I think, to get everything to fit well. How would you deal with a throttle shaft that was worn? Or do you think that the shaft won't wear because it's riding on softer aluminum? --DD |
|
|
|
| zonedoubt |
Mar 12 2013, 11:22 PM
Post
#9
|
|
Canadian Member Group: Members Posts: 668 Joined: 14-May 03 From: Vancouver, BC Member No.: 696 Region Association: Canada |
Nice write up! I did some similar r&r on my throttle body. See here:
http://www.914world.com/bbs2/index.php?s=&...t&p=1444564 Did yours not have rubber seals on either end? Maybe different for the 1.8L TBs. |
|
|
|
| McMark |
Mar 13 2013, 12:39 AM
Post
#10
|
|
914 Freak! Group: Retired Admin Posts: 20,180 Joined: 13-March 03 From: Grand Rapids, MI Member No.: 419 Region Association: None |
Awesome. I have to do this for my turbo motor. So I really appreciate the part numbers. If you feel like doing another one, let me know how much. (IMG:style_emoticons/default/wink.gif)
|
|
|
|
| r3dplanet |
Mar 13 2013, 12:59 AM
Post
#11
|
|
Senior Member Group: Members Posts: 679 Joined: 3-September 05 From: Portland, Oregon Member No.: 4,741 Region Association: None |
It's super easy. I'm mechanically inclined but I'm no machinist.
Just be careful with the reamer. I initially brought my throttle valve to my machinist thinking he'd use some fancy bore or lathe tool to precisely drill out the shaft, but he worried that it would remove too much material as the aluminum is soft. So he just had me drill a precise hole and use a hand reamer. But I can see that it would be really easy to take too much material out. If that happened, then it's time to find a new unit. Zonedoubt - I love the seals you have on your TB. I've never seen them on a 1.7 liter TB, but that's not to say that there couldn't be. I'm not sure how they could be adapted given the different inset of the shaft, but would love to have a better seal. Bronze bushings are clunky, but better than nothing at all. |
|
|
|
| r3dplanet |
Mar 13 2013, 01:19 AM
Post
#12
|
|
Senior Member Group: Members Posts: 679 Joined: 3-September 05 From: Portland, Oregon Member No.: 4,741 Region Association: None |
I love it, too. It comes from a client of mine that was a retired NASA engineer. He had exactly one joke to his name. One only. I quote, "I might be a superorbital propulsion engineer, but I'm not rocket scientist! HA!" He told me that joke a dozen times.
To answer your question, the throttle shaft wasn't worn because it's made of steel. It might actually wear down a tiny bit and that could be a problem. I see that Zonedoubt was lucky enough to have a (1.8 liter) throttle valve that could use rubber seals. We're not as lucky with the 1.7. It could be potentially helpful to buy a bronze bushing with the same outer diameter but a smaller inner diameter then ream it a whisker at a time until the shaft fits. That's not very scientific, but it's all I can think to do beyond just using a better donor part. -m. QUOTE(Dave_Darling @ Mar 12 2013, 07:50 PM)  QUOTE I realize that this isn't superorbital propulsion engineering,... I love that quote! (IMG:style_emoticons/default/smile.gif) Mike Cooley used to offer a similar service years ago. He was using a lathe, I think, to get everything to fit well. How would you deal with a throttle shaft that was worn? Or do you think that the shaft won't wear because it's riding on softer aluminum? --DD |
|
|
|
|
1 User(s) are reading this topic (1 Guests and 0 Anonymous Users)
0 Members:

|
Lo-Fi Version | Time is now: 12th July 2026 - 11:16 PM |
Invision Power Board
v9.1.4 © 2026 IPS, Inc.