|
|

|
Porsche, and the Porsche crest are registered trademarks of Dr. Ing. h.c. F. Porsche AG.
This site is not affiliated with Porsche in any way. Its only purpose is to provide an online forum for car enthusiasts. All other trademarks are property of their respective owners. |
|
|
  |
| Curbandgutter |
 Jun 27 2016, 09:41 PM Jun 27 2016, 09:41 PM
Post
#101
|
|
Senior Member    Group: Members Posts: 566 Joined: 8-March 13 From: Murrieta CA Member No.: 15,637 Region Association: Southern California 
|
I see what you mean but just think how much better this car will be than stock. Or even those that only are able to reinforce the longs. I think I'll be all right.
|
| Andyrew |
 Jun 28 2016, 08:15 AM Jun 28 2016, 08:15 AM
Post
#102
|
|
Spooling.... Please wait           Group: Members Posts: 13,380 Joined: 20-January 03 From: Riverbank, Ca Member No.: 172 Region Association: Northern California 
|
So your not planning on gutting the chassis and putting this tube frame under it? Because that what it sounded like.
|
| Curbandgutter |
 Jun 28 2016, 01:34 PM Jun 28 2016, 01:34 PM
Post
#103
|
|
Senior Member    Group: Members Posts: 566 Joined: 8-March 13 From: Murrieta CA Member No.: 15,637 Region Association: Southern California 
|
No I'm not gutting the entire chassis but I am removing quite a bit from the rear. It will not have the rear strut towers, transmission mounts, engine support, rear suspension attachment points, rear lower trunk sheet metal and engine sheet metal wrap around.
|
| Curbandgutter |
 Jul 9 2016, 08:14 AM Jul 9 2016, 08:14 AM
Post
#104
|
|
Senior Member    Group: Members Posts: 566 Joined: 8-March 13 From: Murrieta CA Member No.: 15,637 Region Association: Southern California 
|
Well I've had to take a break to prepare for my son's wedding. I've taken little windows of time and worked on the chassis table thoug. It's almost complete just need to add the webs for the trusses and it's ready to mount the 996 on it first. I'm going to compile xyz coordinates for all of the suspension pick up points on the 996 and then transfer those coordinates onto the 914. That way I will keep the same suspension geometry that the factory had. I'll also be doing a twist test on the 996 and on the 914 pre-tube chassis and post tube-chassis. It will be interesting to note how much better the 914 chassis will be. I'll be taking all of the measurements with a laser plummet and a laser distance measure....stay tuned.
Attached thumbnail(s) 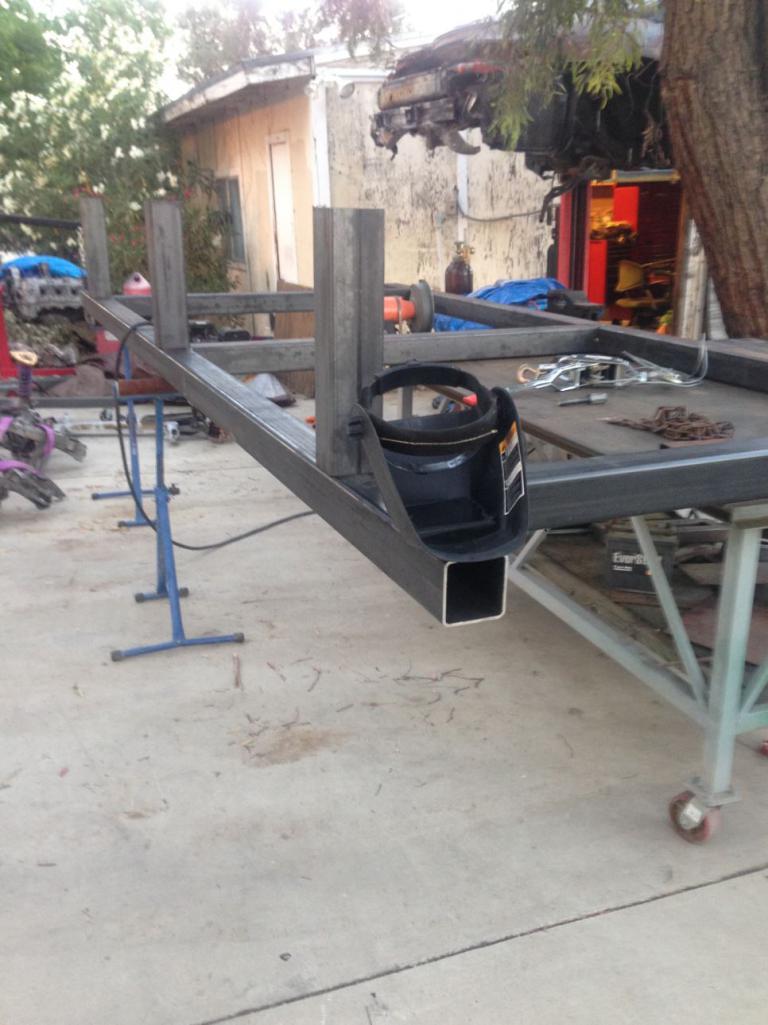 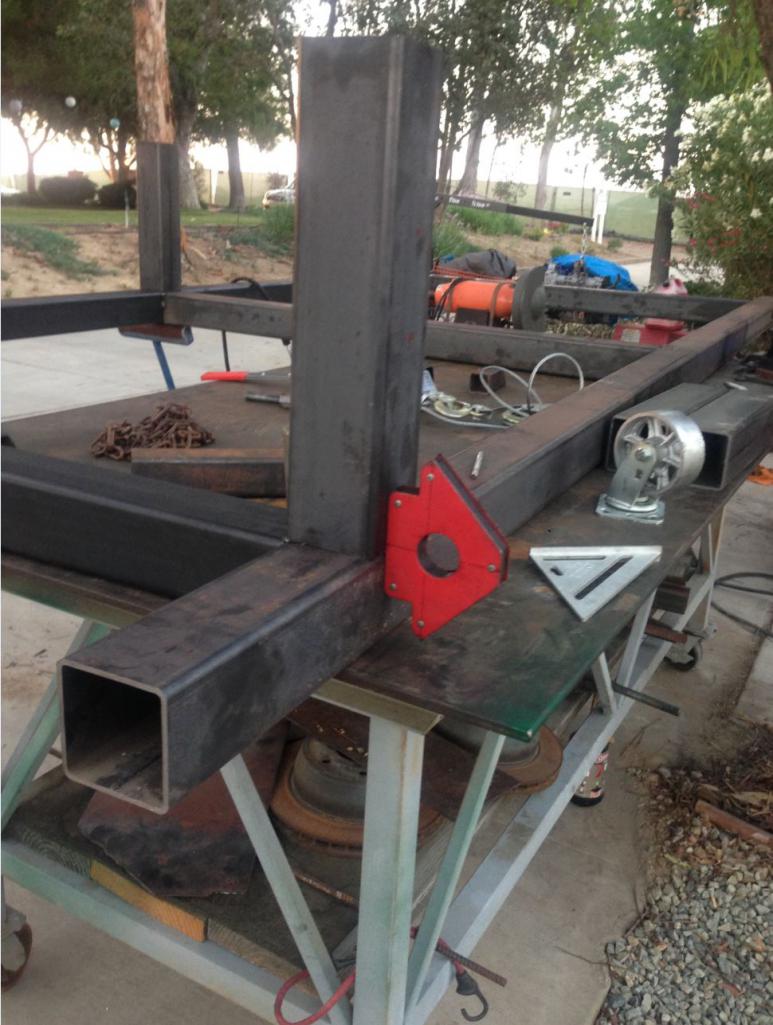 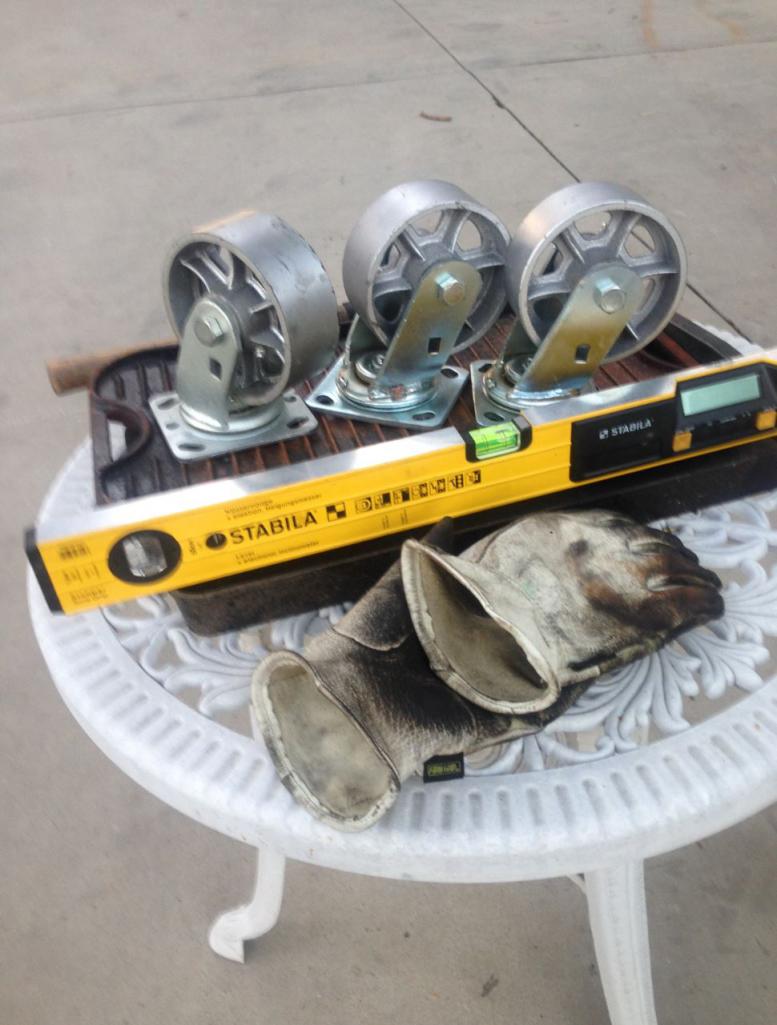 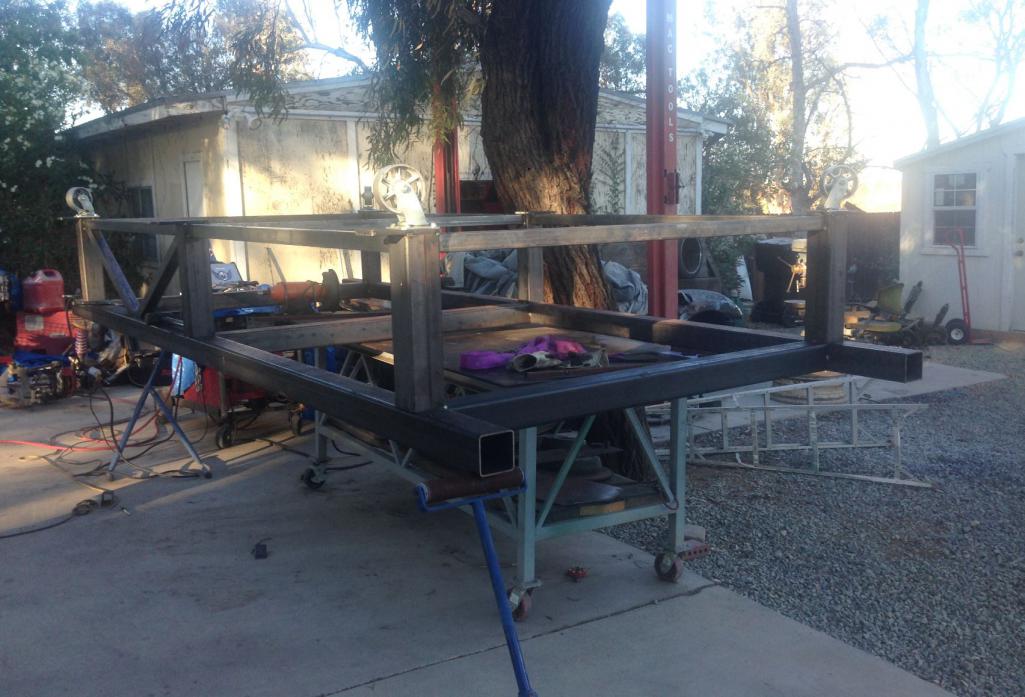 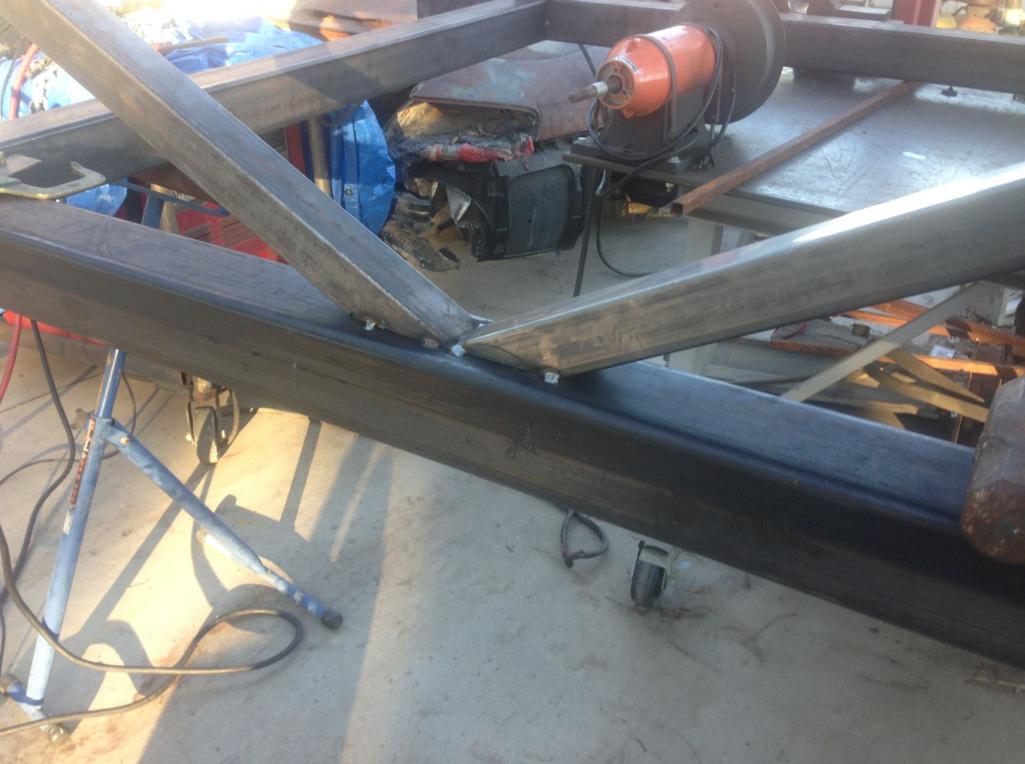 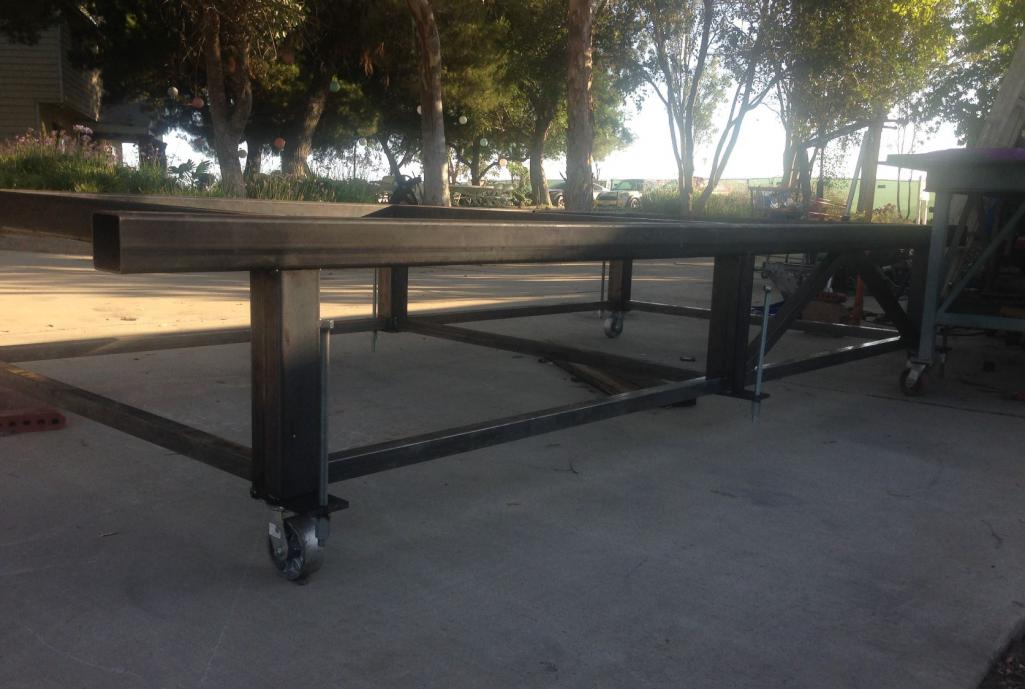 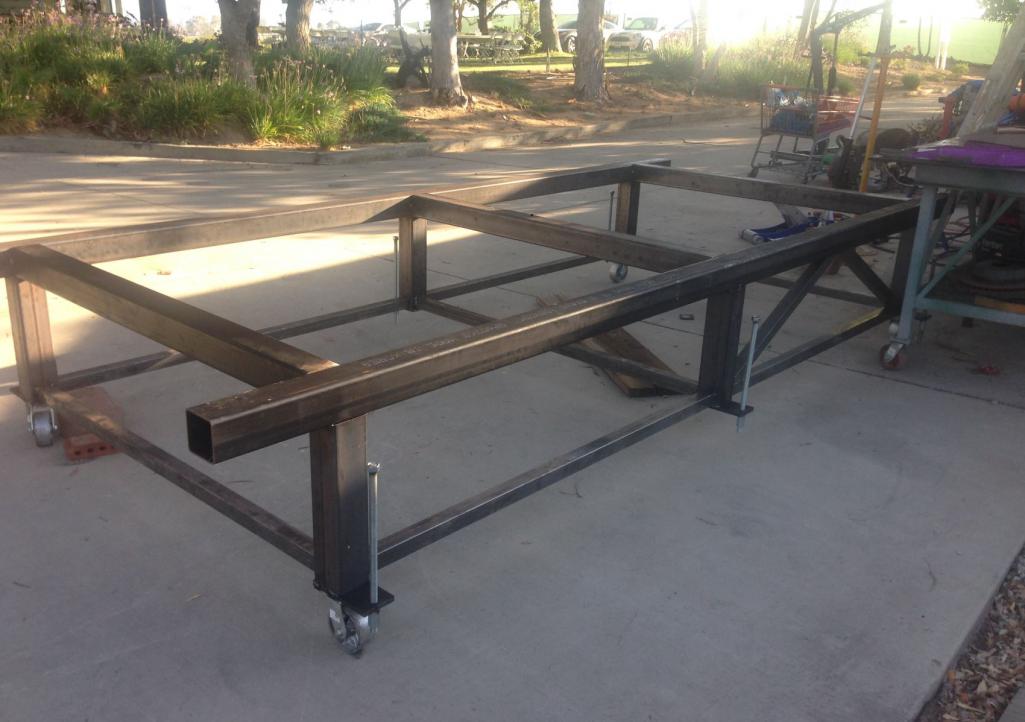 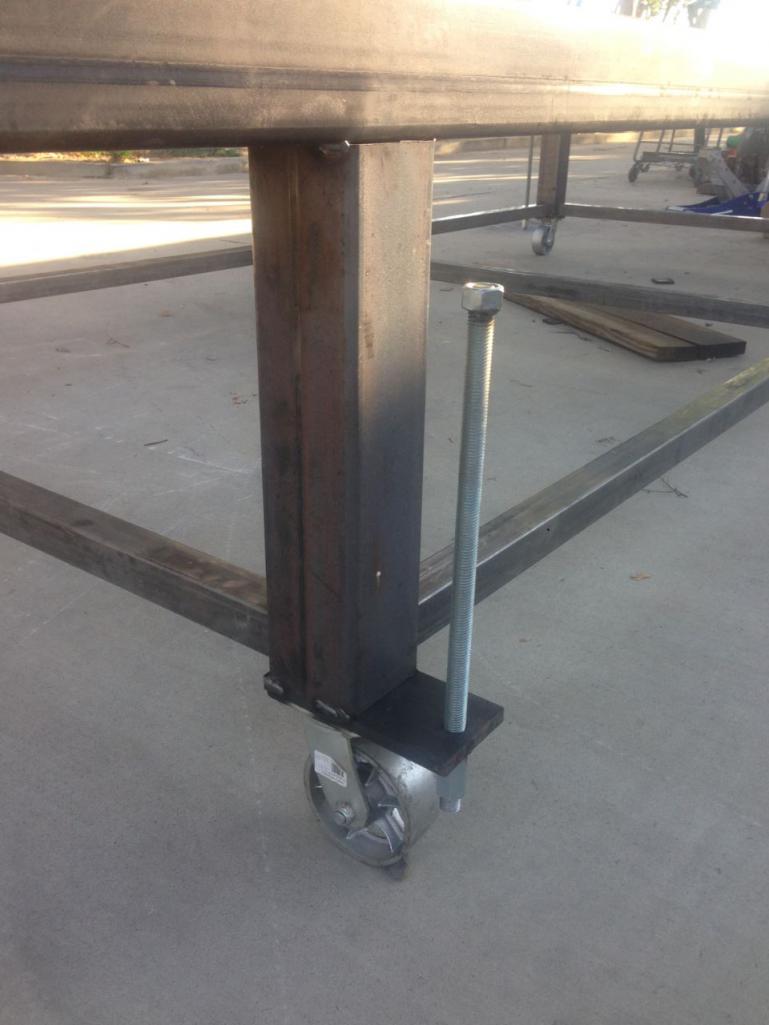 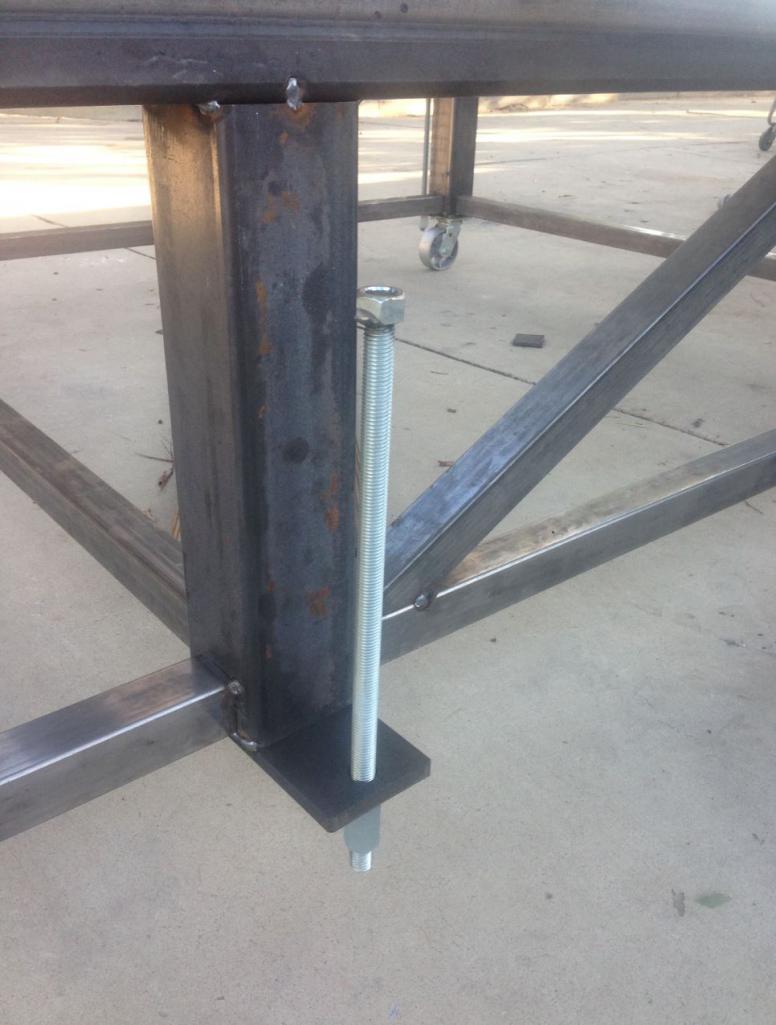
|
| jd74914 |
 Jul 10 2016, 03:53 PM Jul 10 2016, 03:53 PM
Post
#105
|
|
Its alive     Group: Members Posts: 4,864 Joined: 16-February 04 From: CT Member No.: 1,659 Region Association: North East States |
I'll also be doing a twist test on the 996 and on the 914 pre-tube chassis and post tube-chassis. It will be interesting to note how much better the 914 chassis will be. I'll be taking all of the measurements with a laser plummet and a laser distance measure....stay tuned. Sweet table! Very very nice! (IMG:style_emoticons/default/drooley.gif) You work fast! I've always wanted twist measurements; they should be really interesting. I've built solid "shocks" and twisted some formula cars. It's relatively easy to do and really neat to see how the results compare to FEA expectations. Unfortunately, our FEA was always a bit optimistic because it didn't include finite stiffnesses for all of the suspension joints. It would be really interesting if you could twist it a few times after the tube frame with and without the engine, belly pan, etc. just to see how much incremental stiffness each piece adds. |
| csdilligaf |
 Jul 11 2016, 10:30 AM Jul 11 2016, 10:30 AM
Post
#106
|
|
Member   Group: Members Posts: 106 Joined: 18-April 12 From: San Diego CA Member No.: 14,397 Region Association: None |
Looks like your moving along well. I did a 914 with 993 suspension a long time ago with an LS6 and G50-52. I had the rotisserie and set up and a welding table For the suspension set up. With no room to store the stuff I got rid of it and now I have a new 914 project starting and was planning on making all the stuff again. As you know it is a huge investment and a lot of work. How about right after you get your chassis set up and of the table you do mine and recover some of the money you have in all this effort? I am just down the road in San Diego. Also here is another thread that you may have seen but its always good to see what others have going and see how they went about things.
http://www.914world.com/bbs2/index.php?sho...219539&st=0 Looking good so far and I will be following the progress. And here is a shot of my 914 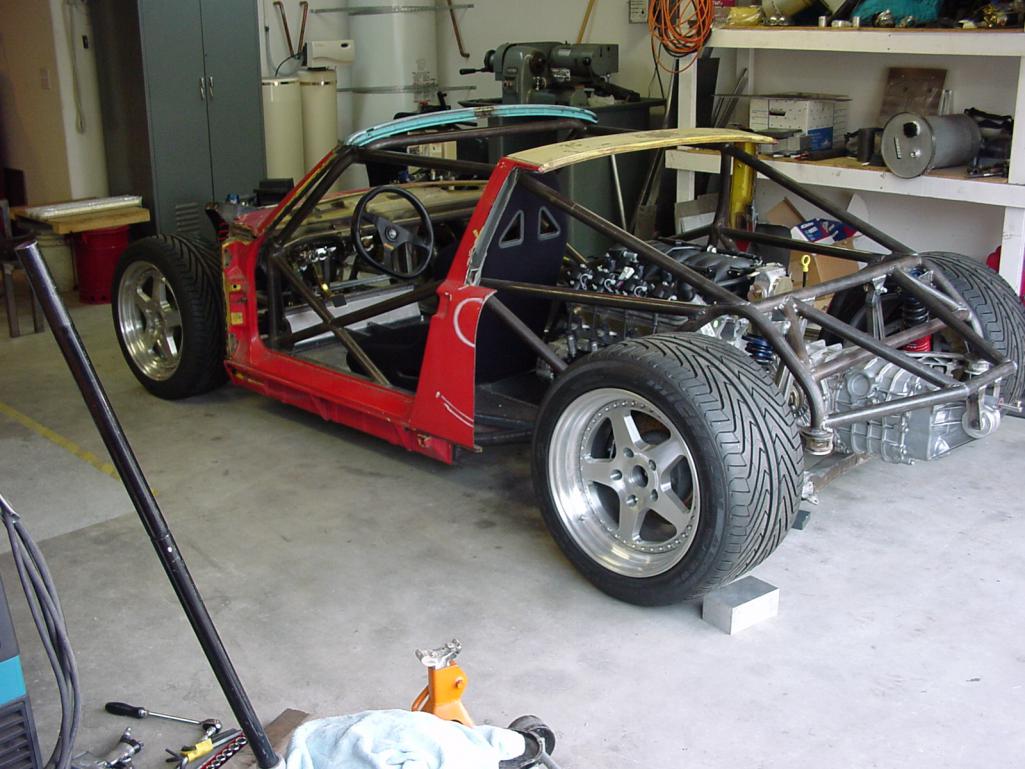 |
| Curbandgutter |
 Jul 11 2016, 12:39 PM Jul 11 2016, 12:39 PM
Post
#107
|
|
Senior Member    Group: Members Posts: 566 Joined: 8-March 13 From: Murrieta CA Member No.: 15,637 Region Association: Southern California 
|
CSDIILIGAF hey that 914 you did with the 993 suspension looks killer. Let's talk about using my rotisserie and frame table. I'm thinking that I can just rent it out to you for an extended period of time. That way your cost will be a fraction of the cost to make and I get a little back for my investment. PM me and give me your contact information I'm sure I can learn from someone who's done it already. Glad to have you commenting.
|
| Curbandgutter |
 Jul 11 2016, 12:43 PM Jul 11 2016, 12:43 PM
Post
#108
|
|
Senior Member    Group: Members Posts: 566 Joined: 8-March 13 From: Murrieta CA Member No.: 15,637 Region Association: Southern California 
|
JD74914 Instead of using the solid shock idea, which is a cool idea by the way, I was thinking of just setting the car up on 3 jack stands on the frame table, clamping them down and loading the wheel that doesn't have the jack stand under it. What do you think? Is there a better way? And yes I would like to test the twist under various conditions. We're just going to geek out and have fun with the numbers as well as the final product. (IMG:style_emoticons/default/biggrin.gif)
|
| Curbandgutter |
 Jul 12 2016, 10:17 AM Jul 12 2016, 10:17 AM
Post
#109
|
|
Senior Member    Group: Members Posts: 566 Joined: 8-March 13 From: Murrieta CA Member No.: 15,637 Region Association: Southern California 
|
Does anyone have a good idea as to how to set up a jackstand with some form of a clamp to attach to bottom of longs? Taking all good suggestions. Bad ones (IMG:style_emoticons/default/screwy.gif) will be ridiculed (IMG:style_emoticons/default/lol-2.gif) (IMG:style_emoticons/default/lol-2.gif) . Just kidding of course but yeah let me know how you'v e done it or saw someone else do it. BTW no Mo-Clamps those are North of $200 each.
|
| Curbandgutter |
 Jul 12 2016, 11:32 AM Jul 12 2016, 11:32 AM
Post
#110
|
|
Senior Member    Group: Members Posts: 566 Joined: 8-March 13 From: Murrieta CA Member No.: 15,637 Region Association: Southern California 
|
I'm thinking of welding these to the end of a 2x2 post and using them instead of a jack stand. They are cheap and will do the job.
Attached image(s) 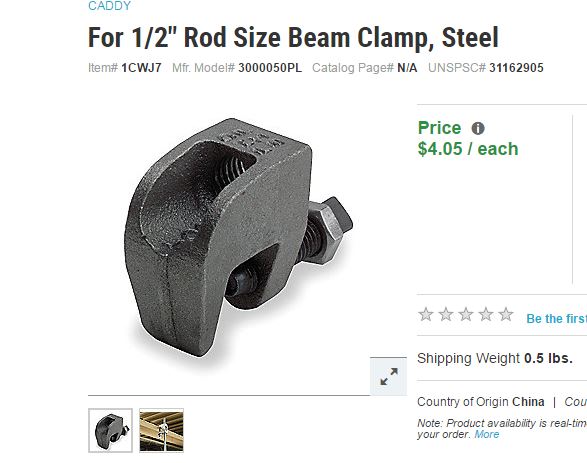
|
| 914forme |
 Jul 12 2016, 11:38 AM Jul 12 2016, 11:38 AM
Post
#111
|
|
Times a wastin', get wrenchin'!     Group: Members Posts: 3,899 Joined: 24-July 04 From: Dayton, Ohio Member No.: 2,388 Region Association: None 
|
Weld a block of steel on one side, and tap for 2 3/8" bolts, add another on the others side and pinch the seem. Add knurling if you want between the jaws. Stands will need to be able to move as this design is not self centering.
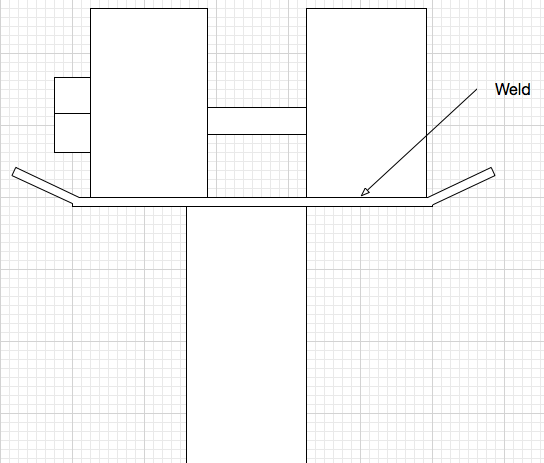 Our weld C clamps to the to of the jack stands. Or weld a set of nuts to steel plates, weld steel plates under the rockers, bolt them to the fixture and grind them off once done. Put wooden blocks under the rockers, drill holes through the rockers , wooden blocks, and fixture, use all thread, bolt it down. I am guessing this is to do twist testing. I would weld three legs down, and not use jack stands, as you will have to strap the car down anyways Use weldable trailer rings onto the logs, put what ever you want under it, ratchet it down with welded rings on your fixture. Trailer rings can be found that are rated for 18,000 of force per ring, and cost about 12.50 per ring plus shipping. Then some big straps, or chain. Or just load binders. |
| 914forme |
 Jul 12 2016, 11:41 AM Jul 12 2016, 11:41 AM
Post
#112
|
|
Times a wastin', get wrenchin'!     Group: Members Posts: 3,899 Joined: 24-July 04 From: Dayton, Ohio Member No.: 2,388 Region Association: None 
|
|
| Curbandgutter |
 Jul 12 2016, 12:23 PM Jul 12 2016, 12:23 PM
Post
#113
|
|
Senior Member    Group: Members Posts: 566 Joined: 8-March 13 From: Murrieta CA Member No.: 15,637 Region Association: Southern California 
|
914FORME I like your idea about the trailer rings. Yes that will be necessary to be able to hold the car down for the twist test. I'm going to hold down into concrete with a wedge anchor. I do believe that the clamps that I have are rated for 750lbs. I'm going to give them a shot and see what happens.
|
| Curbandgutter |
 Jul 13 2016, 10:41 AM Jul 13 2016, 10:41 AM
Post
#114
|
|
Senior Member    Group: Members Posts: 566 Joined: 8-March 13 From: Murrieta CA Member No.: 15,637 Region Association: Southern California 
|
Well look at what came it today. The parts look to be first rate. Everything is USA made with the exception of a wand piece that is made in Germany. The company told me that they stand by their product and that if I'm not happy with the results that they will take it back. We will see. Supposedly they were able to do 1 sf per 1 min and 15 secs. Not bad at all.
Attached thumbnail(s) 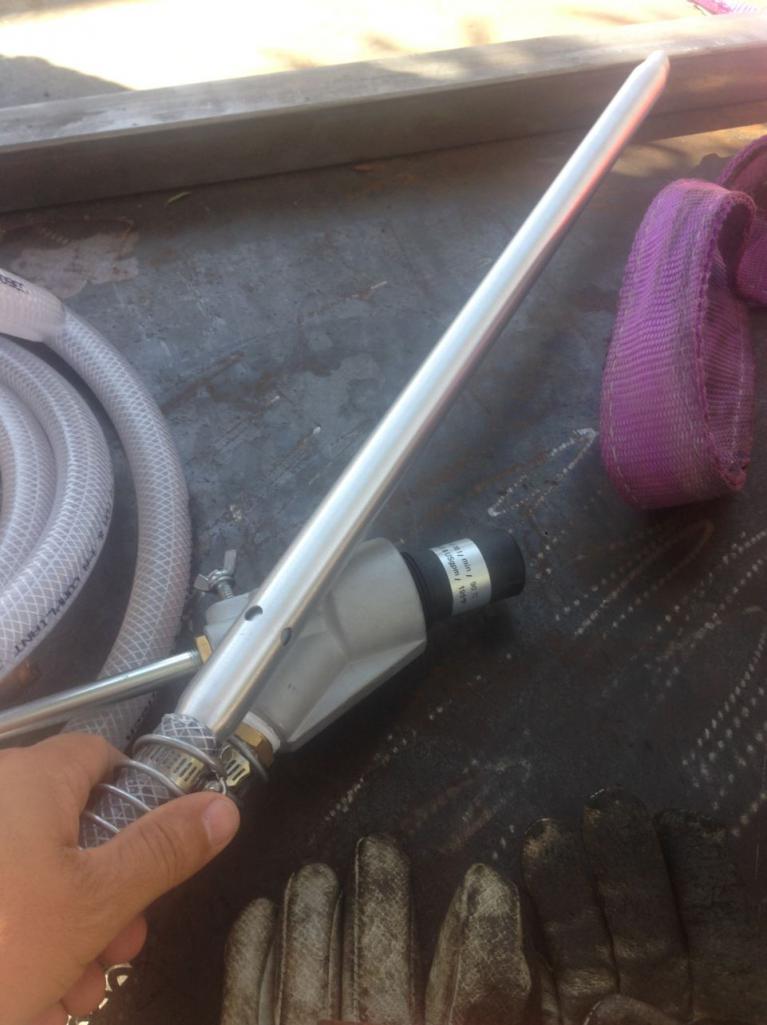 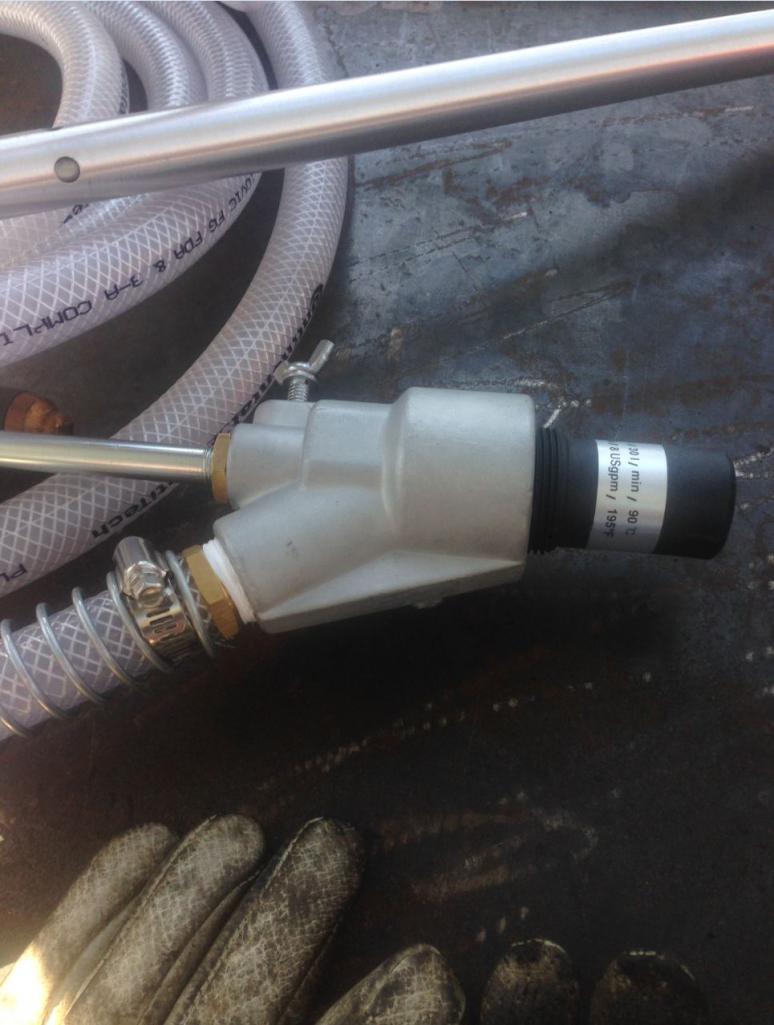 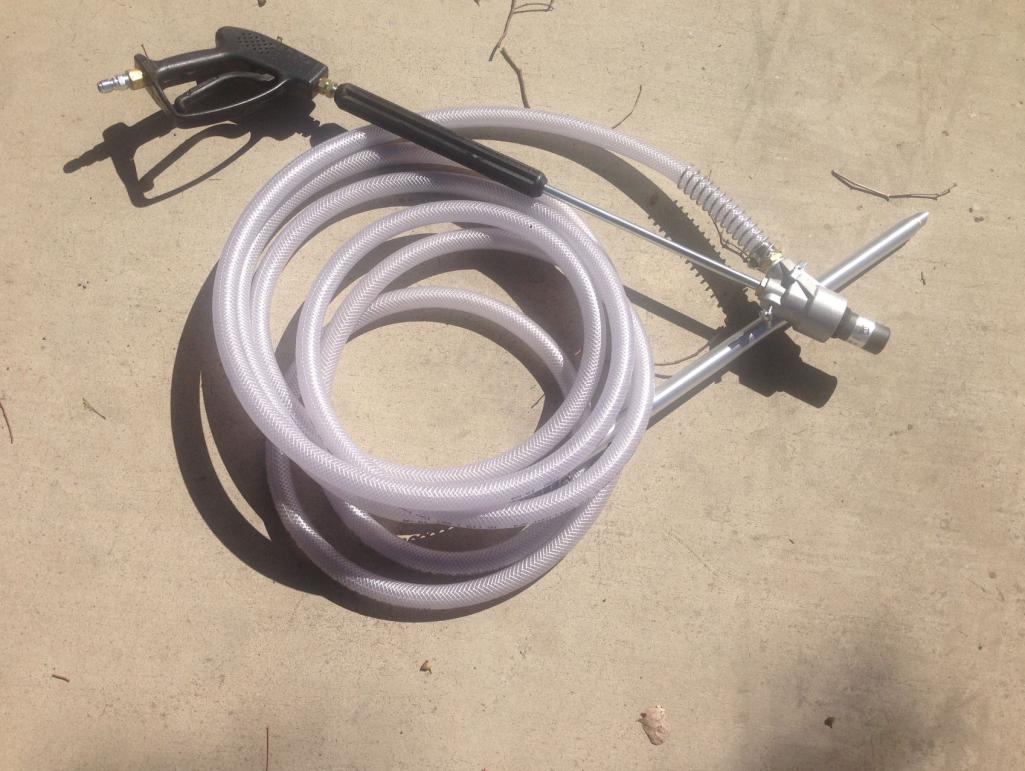
|
| Curbandgutter |
 Jul 17 2016, 07:02 PM Jul 17 2016, 07:02 PM
Post
#115
|
|
Senior Member    Group: Members Posts: 566 Joined: 8-March 13 From: Murrieta CA Member No.: 15,637 Region Association: Southern California 
|
Well chassis table is complete. I measured it with a survey grade level and it is straight to 1/64th or 15 thousands of an inch. Now I can start about with actually working on the 914 rather than building all of the infrastructure (Rotisserie, Chassis Table, Sand Blast Cabinet). I guess I could have done it on the concrete floor and then have a twisted frame. But I couldn't live with myself. Rather, I'm doing it this way though because I just can't do this not knowing if my work is straight. However I have 3 weddings to attend in the next 2 months so my weekends are going to be used up in nonsense (IMG:style_emoticons/default/confused24.gif) (IMG:style_emoticons/default/confused24.gif) cause you know where I would rather be.
The order of work will be as follows. First load 996 and measure and do a twist test. second wet sand blast 914 on rotisserie repair rust and epoxy primer fourth put 914 on chassis table and do baseline twist test then start building tube chassis Attached thumbnail(s) 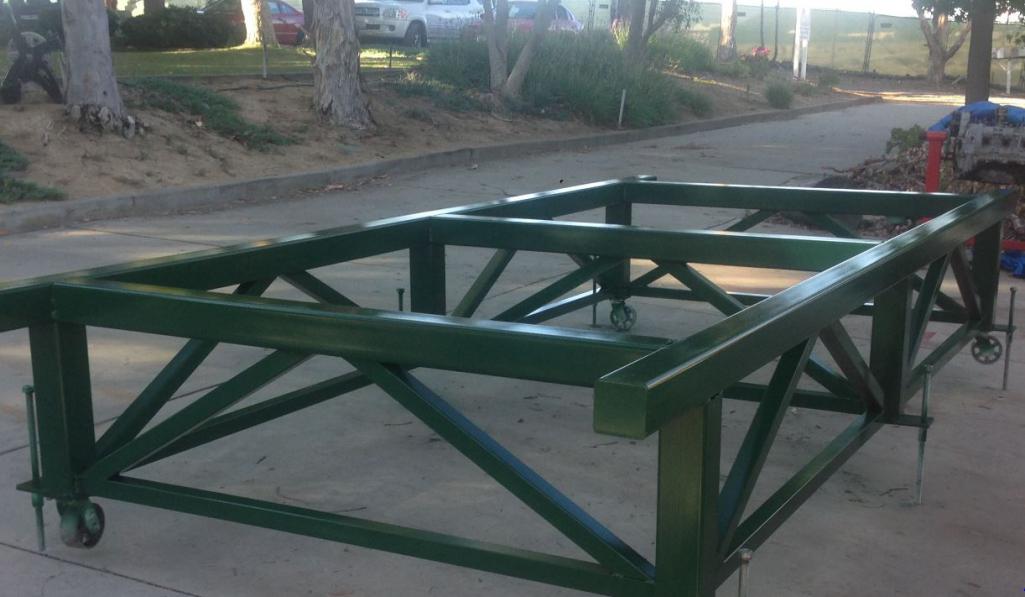 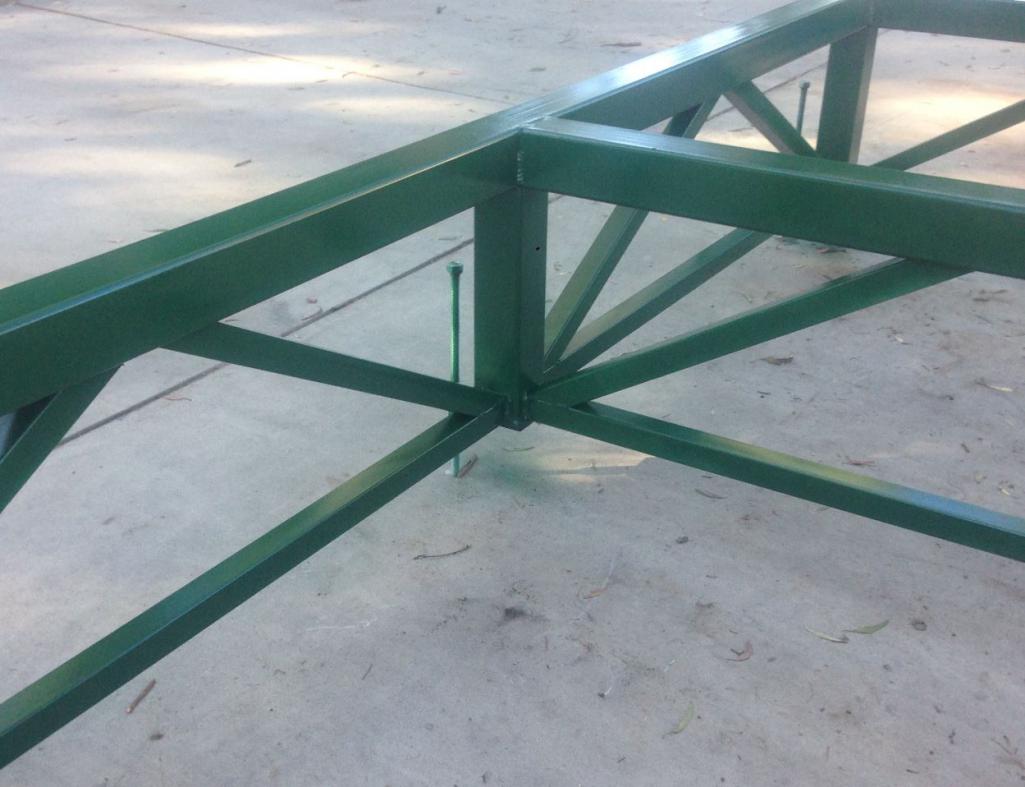 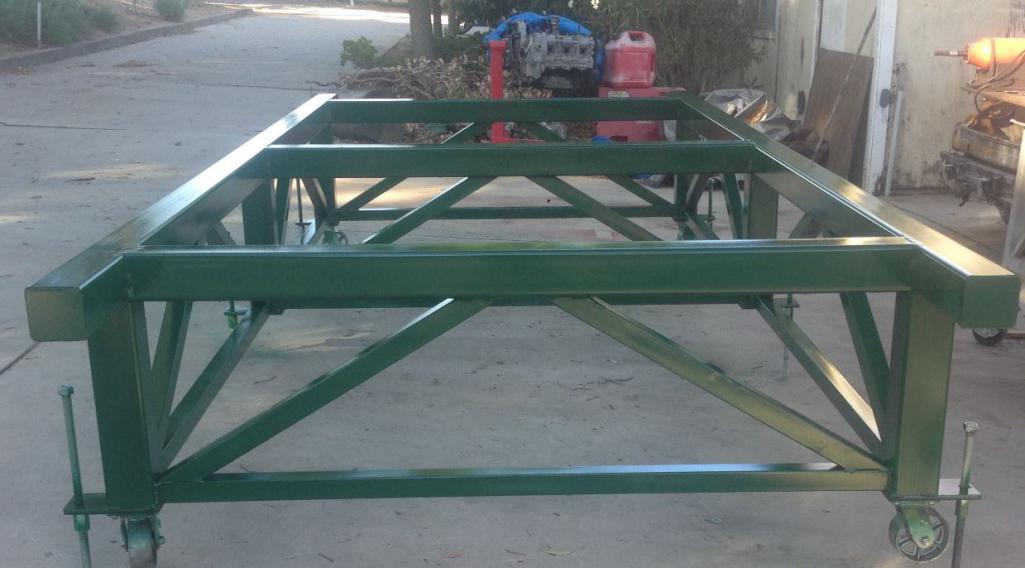
|
| mbseto |
 Jul 18 2016, 09:17 AM Jul 18 2016, 09:17 AM
Post
#116
|
|
Senior Member    Group: Members Posts: 1,257 Joined: 6-August 14 From: Cincy Member No.: 17,743 Region Association: North East States |
Wow. That's a sweet piece of work.
|
| Curbandgutter |
 Jul 19 2016, 11:35 PM Jul 19 2016, 11:35 PM
Post
#117
|
|
Senior Member    Group: Members Posts: 566 Joined: 8-March 13 From: Murrieta CA Member No.: 15,637 Region Association: Southern California 
|
Thanks bud.
|
| jd74914 |
 Jul 20 2016, 06:35 AM Jul 20 2016, 06:35 AM
Post
#118
|
|
Its alive     Group: Members Posts: 4,864 Joined: 16-February 04 From: CT Member No.: 1,659 Region Association: North East States |
JD74914 Instead of using the solid shock idea, which is a cool idea by the way, I was thinking of just setting the car up on 3 jack stands on the frame table, clamping them down and loading the wheel that doesn't have the jack stand under it. What do you think? Is there a better way? And yes I would like to test the twist under various conditions. We're just going to geek out and have fun with the numbers as well as the final product. (IMG:style_emoticons/default/biggrin.gif) It all depends on what you want to get out of it. The clamping jack stands sound like a good idea you're most concerned with seeing changes in chassis stiffness and comparing to your FEA model. It's certainly easier than making solid shocks and hub adapters to clamp to the table and would produce really interesting data. I would love to see how close the FEA comes to actual! On the other hand, it doesn't give you a great feeling on the stiffness of the whole system. I like to think of the chassis as a huge bracket which holds the suspension together; basically something that connects the dots. The most important reason to have a stiff chassis (besides impact safety which is a whole other design arena) is to remove an additional "spring" from your suspension. A flexy chassis can make suspension tuning difficult since it is sometimes tough to tune around that unknown spring. I did hub connections for my twist tests because I wanted hub-to-hub stiffness to understand the whole system. There can be a shocking amount of compliance in suspension mounts and components which you will miss if just doing a pure chassis twist. I have read that OEMs spend millions of dollars making sure mounting compliance is minimizes which is something the normal person isn't able to do. Since you're keeping the stock suspension measurements, perhaps making hub adapters which bolt to the table wouldn't be so bad since you could use them multiple times and on both chassis? Just thinking out loud. I really do like the clamping jack idea too, the above were jut things to think about. (IMG:style_emoticons/default/smile.gif) I'm thinking of welding these to the end of a 2x2 post and using them instead of a jack stand. They are cheap and will do the job. Those should do the trick! They can hold a stupid amount on i-beams so I don't see why they wouldn't work on a flange. |
| jd74914 |
 Jul 20 2016, 06:35 AM Jul 20 2016, 06:35 AM
Post
#119
|
|
Its alive     Group: Members Posts: 4,864 Joined: 16-February 04 From: CT Member No.: 1,659 Region Association: North East States |
Your table is awesome BTW! I'm super jealous!
|
| Curbandgutter |
 Jul 20 2016, 01:42 PM Jul 20 2016, 01:42 PM
Post
#120
|
|
Senior Member    Group: Members Posts: 566 Joined: 8-March 13 From: Murrieta CA Member No.: 15,637 Region Association: Southern California 
|
JD74914 your responses are always so on the spot and I really do appreciate them. It is what makes these forums. With respect to the twist test incorporating the compliance in the bushings, tie rods, etc., I agree wholeheartedly. However, what I am trying to do is to get a chassis stiffness so that I know how to set up the springs. My current 996 suspension needs new bushings and ball joints, so checking it in this fashion will be counterproductive for my purposes. As you may already know, a rule of thumb is that if your suspension stiffness is more than 10% of the chassis stiffness, then a portion of the chassis will be flexing and absorbing the loads instead of it going into the springs and dampeners. This condition will give a horrible ride and will cause premature cracks in the chassis. I suspect that this happens quite often when people put a really stiff spring on a stock 914 chassis. As would be my case if I just used the springs off of a car that weighs 3274 lbs and placed them in a car that weighs 2100 lbs.
The chassis torsional stiffness that I will check will be: 1) The baseline existing 914; 2) The 914 with the longs stiffened; 3) The 914 with the steel roll cage; 4) The 996 in stock form (oh oh). My intent is to help other teener's so that they can see if stiffening the longs truly works. And if so, how well? It will be very interesting to me and to others, I suspect. I've been reading that a typical torsional stiffness for a sports car is somewhere between 10000 and 20000 ft-lbs/degree. Also, F1 cars are much higher than 20,000 ft-lbs/degree. I hope to load the 996 on the chassis table this weekend. Them I'm off camping to Sequoia so I won't be updating for about one week. BTW I really did like the way the chassis table turned out. It's nice to know that what you are basing everything off of is straight and true. (IMG:style_emoticons/default/beerchug.gif) |
  |
4 User(s) are reading this topic (4 Guests and 0 Anonymous Users)
0 Members:

|
Lo-Fi Version | Time is now: 30th January 2026 - 01:40 PM |
Invision Power Board
v9.1.4 © 2026 IPS, Inc.


