|
|
|
Porsche, and the Porsche crest are registered trademarks of Dr. Ing. h.c. F. Porsche AG.
This site is not affiliated with Porsche in any way. Its only purpose is to provide an online forum for car enthusiasts. All other trademarks are property of their respective owners. |
|
|

  |

| eeyore |
 Sep 16 2016, 12:13 PM Sep 16 2016, 12:13 PM
Post
#161
|
|
Senior Member  Group: Members Posts: 889 Joined: 8-January 04 From: meridian, id Member No.: 1,533 Region Association: None |
QUOTE(Curbandgutter @ Sep 16 2016, 05:50 AM)  The left long had about a large coffee can of sand in it. I don't know where it could come from since the left did not have any corrosion. On the other hand the right long, the one with the hell hole, that one only had about a up of sand in it? You would expect it to be the other way around. Also, the left long had some fibrous cotton like material inside of it? Anybody have an idea what this is? The heater tubes inside the longs are non-metallic and insulated. My guess is the tube in the left long is broken / deteriorated. So any sand that went in the left rear or cabin heater tubes didn't leaked out of the internal tube and went into the long. On the right long the sand went through the tube and out the other end. |
   |

 
|
| Curbandgutter |
Sep 16 2016, 03:10 PM
Post
#162
|
|
Senior Member Group: Members Posts: 566 Joined: 8-March 13 From: Murrieta CA Member No.: 15,637 Region Association: Southern California |
QUOTE(Mark Garriott @ Sep 16 2016, 11:13 AM) QUOTE(Curbandgutter @ Sep 16 2016, 05:50 AM) The left long had about a large coffee can of sand in it. I don't know where it could come from since the left did not have any corrosion. On the other hand the right long, the one with the hell hole, that one only had about a up of sand in it? You would expect it to be the other way around. Also, the left long had some fibrous cotton like material inside of it? Anybody have an idea what this is? The heater tubes inside the longs are non-metallic and insulated. My guess is the tube in the left long is broken / deteriorated. So any sand that went in the left rear or cabin heater tubes didn't leaked out of the internal tube and went into the long. On the right long the sand went through the tube and out the other end. I taped the heater tubes so that sand would not get it. It had to get in there some other way.....and I'm not exaggerating when I say that it was enough to fill a large coffee can. |
|
|
|
| 6freak |
Sep 16 2016, 03:24 PM
Post
#163
|
|
MR.C Group: Members Posts: 4,740 Joined: 19-March 08 From: Tacoma WA Member No.: 8,829 Region Association: Pacific Northwest |
] [/quote] Flips flops and a pressure washer (IMG:style_emoticons/default/slap.gif) you know if that water/air gets in your blood vains your gonna be really sick if not died ...just say n Safety first fella! when have a family its not just about you very cool project looking forward to the end results MikeC |
|
|
|
| Curbandgutter |
Sep 16 2016, 07:26 PM
Post
#164
|
|
Senior Member Group: Members Posts: 566 Joined: 8-March 13 From: Murrieta CA Member No.: 15,637 Region Association: Southern California |
[quote name='6freak' date='Sep 16 2016, 02:24 PM' post='2399343']
] [/quote] Flips flops and a pressure washer (IMG:style_emoticons/default/slap.gif) you know if that water/air gets in your blood vains your gonna be really sick if not died ...just say n Safety first fella! when have a family its not just about you very cool project looking forward to the end results MikeC [/quote] Hey 6freak You're right thank you for the flogging. Point taken. I promise i'll never do it again and post it. |
|
|
|
| Cracker |
Sep 17 2016, 07:05 AM
Post
#165
|
|
Advanced Member Group: Members Posts: 2,148 Joined: 2-February 10 From: Atlanta (area) Member No.: 11,316 Region Association: South East States |
(IMG:style_emoticons/default/av-943.gif) (IMG:style_emoticons/default/lol-2.gif) (IMG:style_emoticons/default/slap.gif)
QUOTE(Curbandgutter @ Sep 16 2016, 09:26 PM) I promise i'll never do it again and post it. |
|
|
|
| Curbandgutter |
Sep 17 2016, 12:21 PM
Post
#166
|
|
Senior Member Group: Members Posts: 566 Joined: 8-March 13 From: Murrieta CA Member No.: 15,637 Region Association: Southern California |
Hey Cracker (IMG:style_emoticons/default/w00t.gif) but yes safety first. (IMG:style_emoticons/default/agree.gif) Anyway I completed gutting out the rear (phase 1). Phase 2 will be remove the inner fender well weld rear deck lid in place and cut quarter panels and make it tilt back for easy maintenace (IMG:style_emoticons/default/smile.gif) (IMG:style_emoticons/default/smile.gif) I also removed the warm air tubes and boy was that tough. They are basically two dryer vent tubes withing each other and insulated with cotton. With the air tubes out I was able to remove all of the sand from the longs. Unbelievable amount of sand. Now I know why they say that you will never get all of the sand out!! In my case I did though. (IMG:style_emoticons/default/shades.gif) I'm also going to take the opportunity to treat the inside of the longs to that eastwood rust converter. I'm hoping to install suspension jig later today and then start reinforcing the longs with the truss idea.
Attached thumbnail(s) 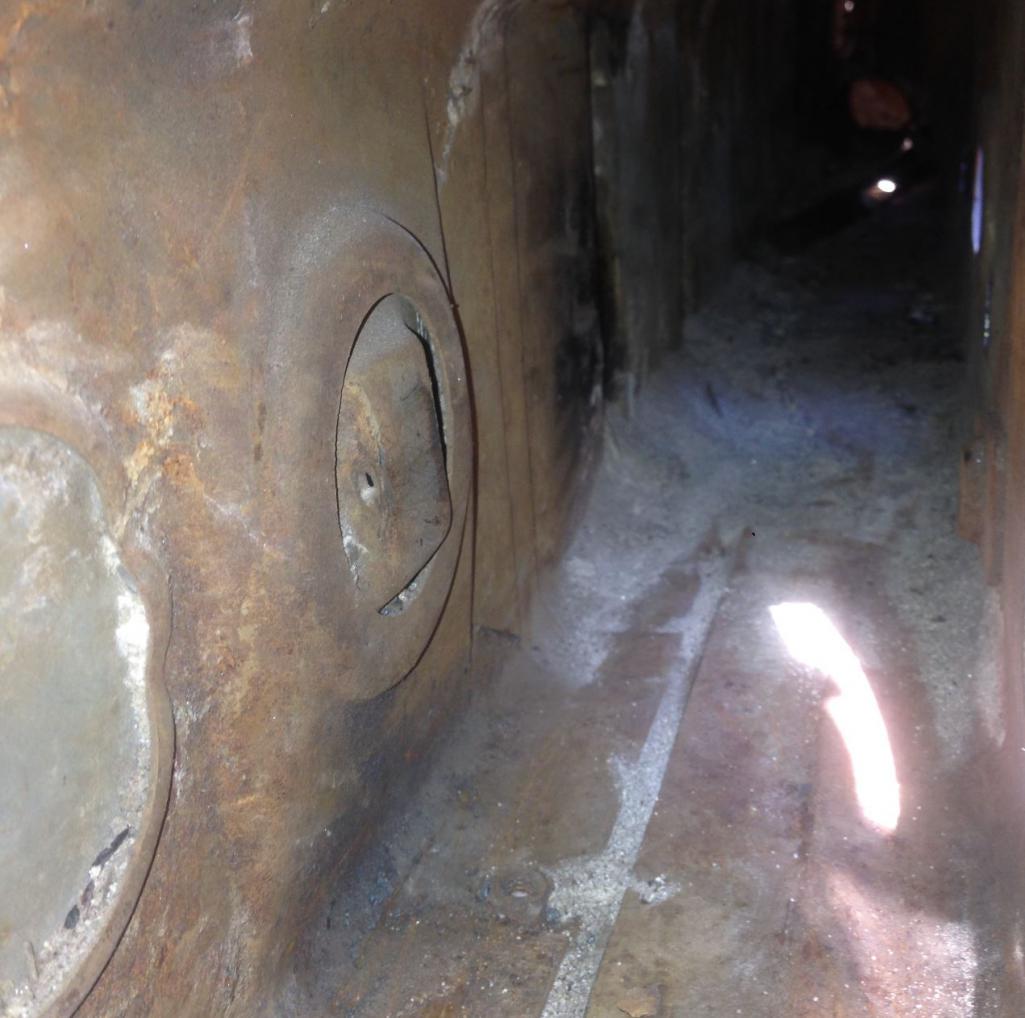 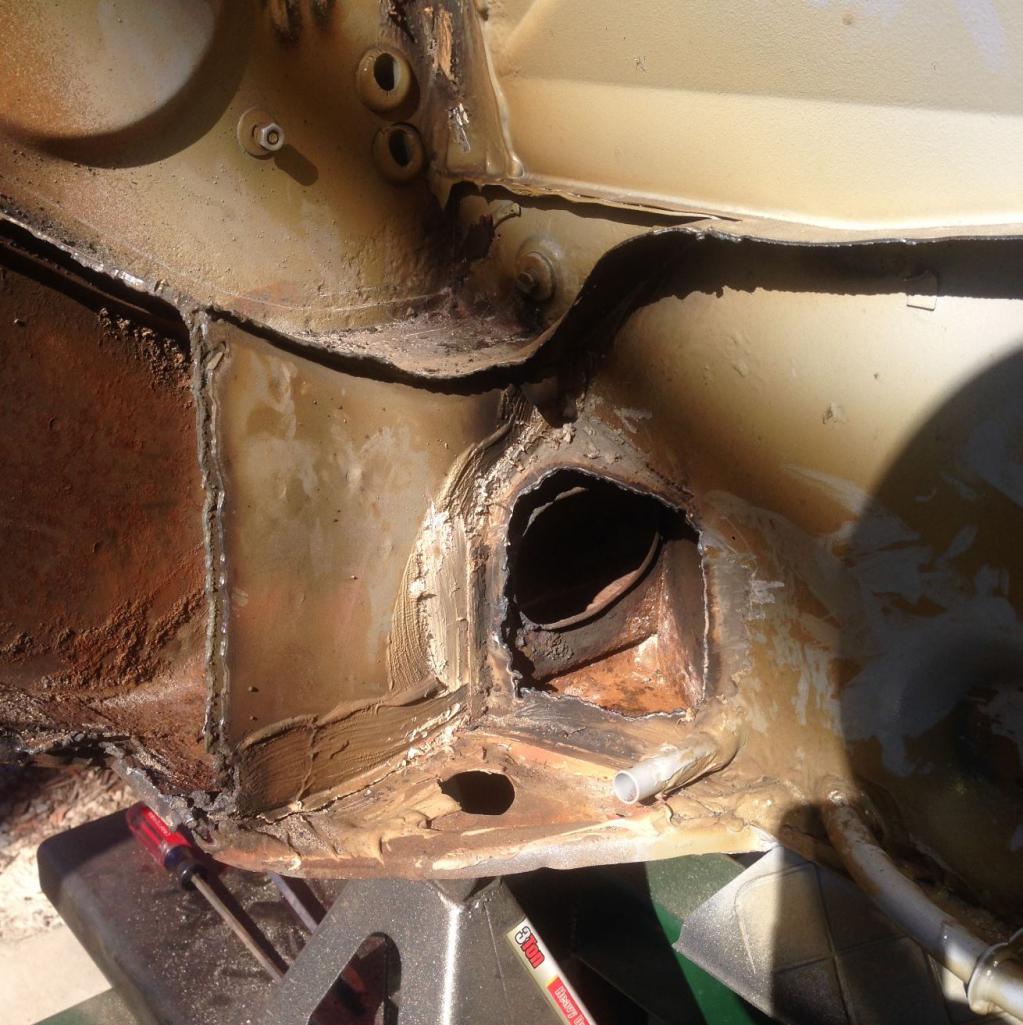 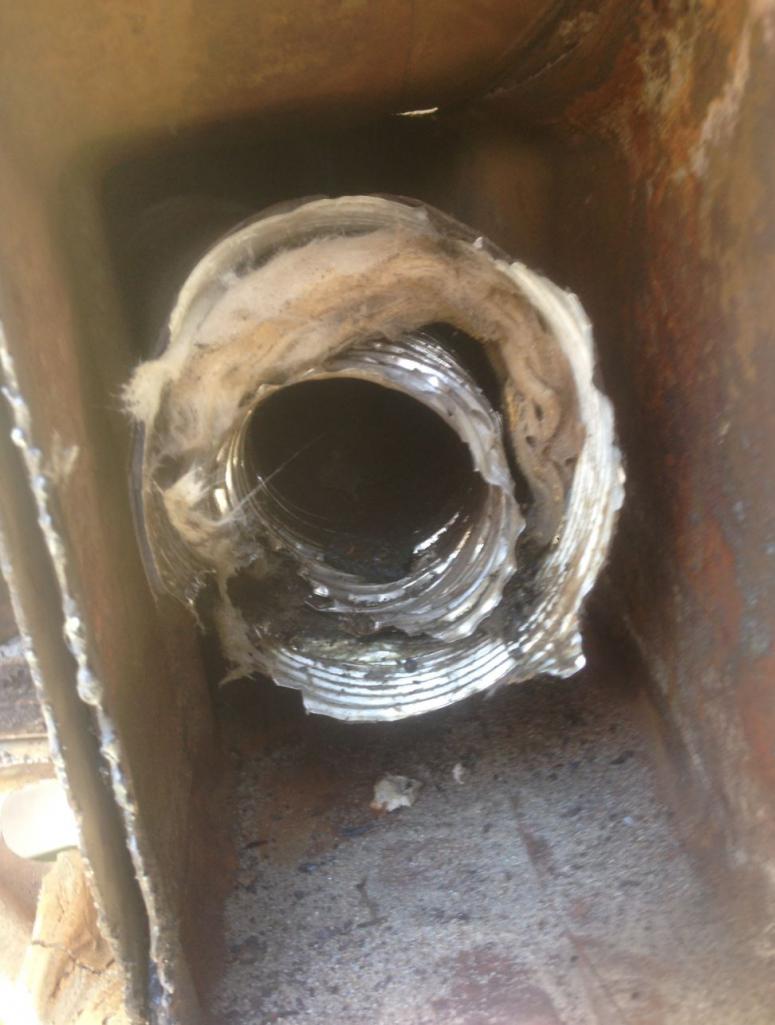 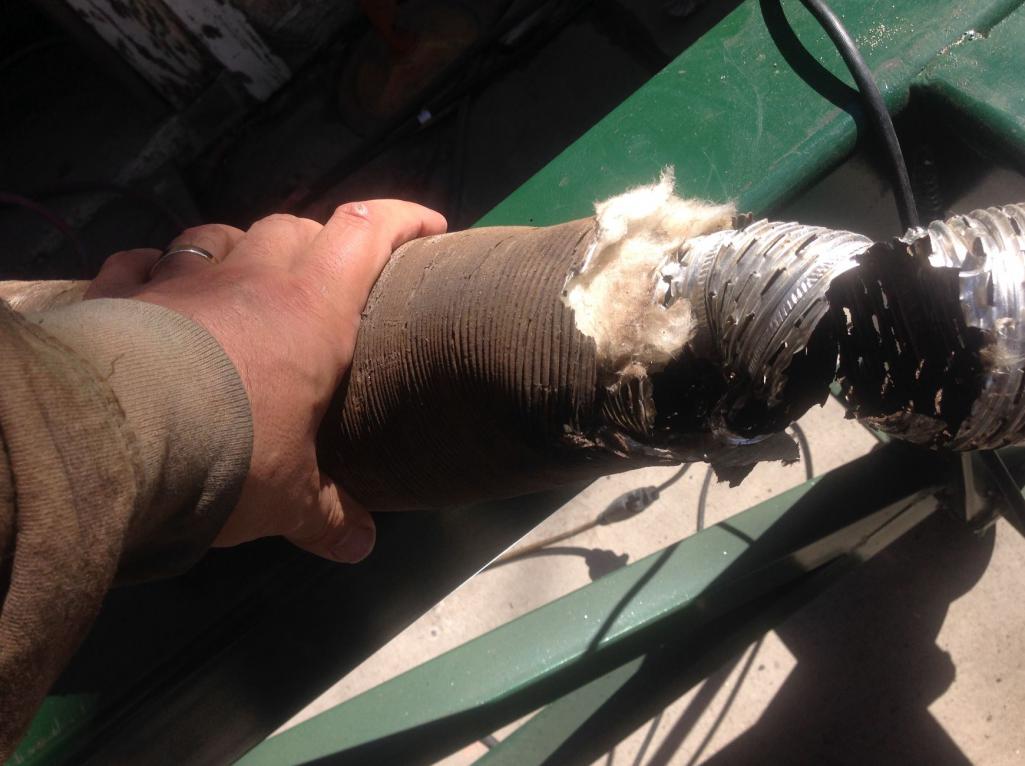 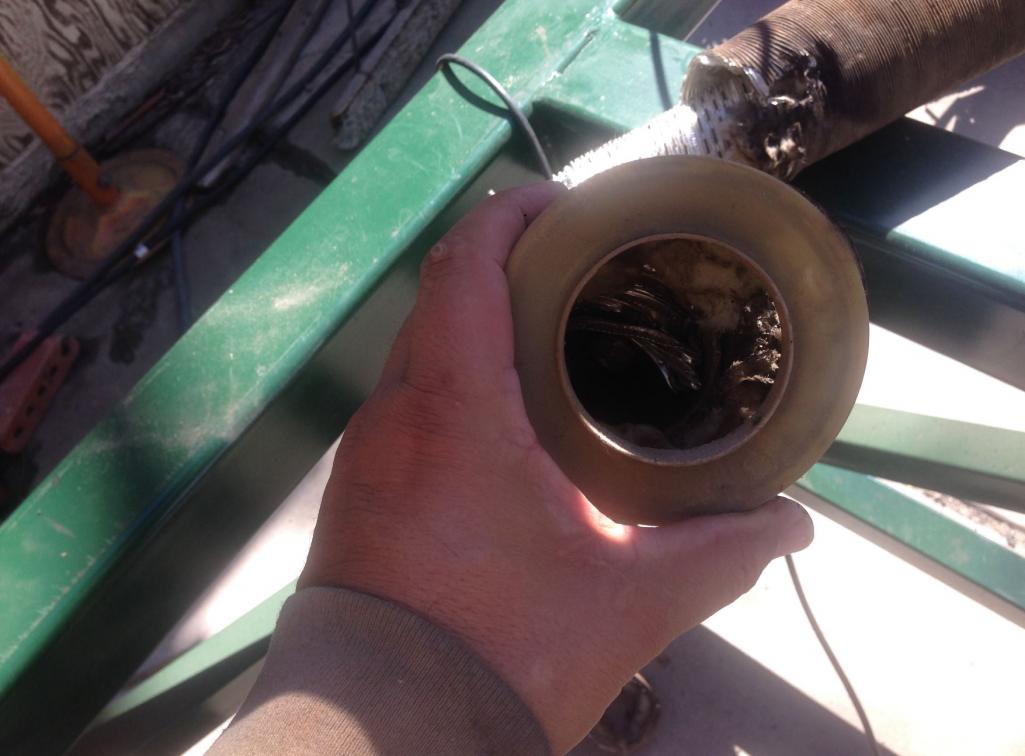 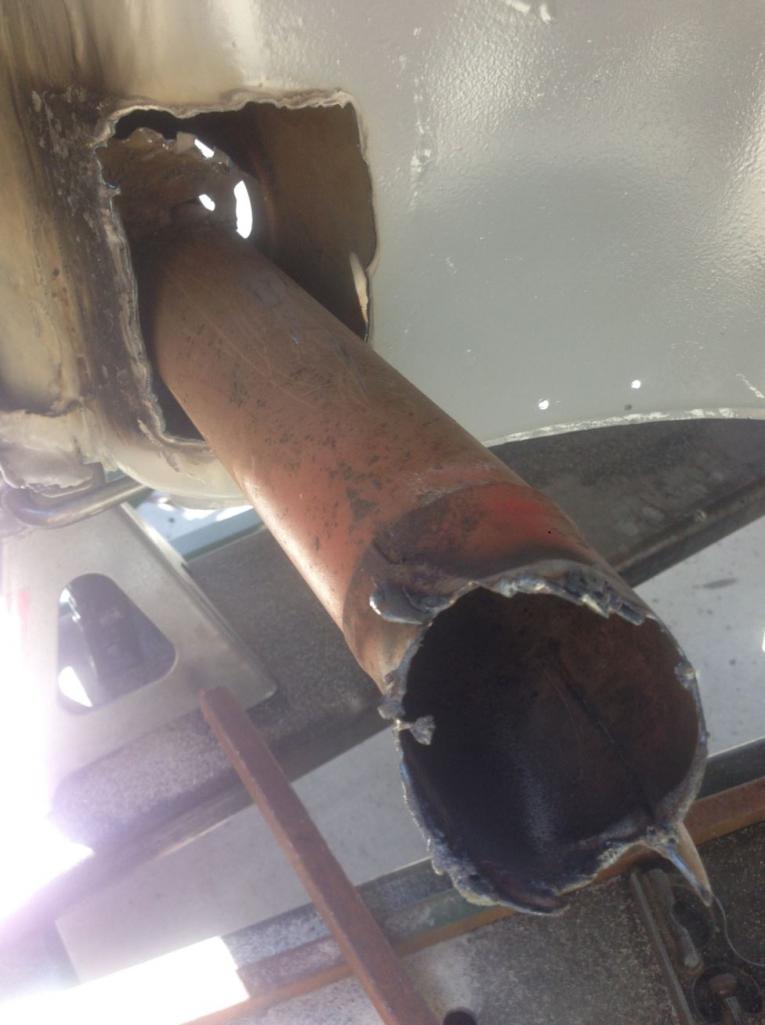 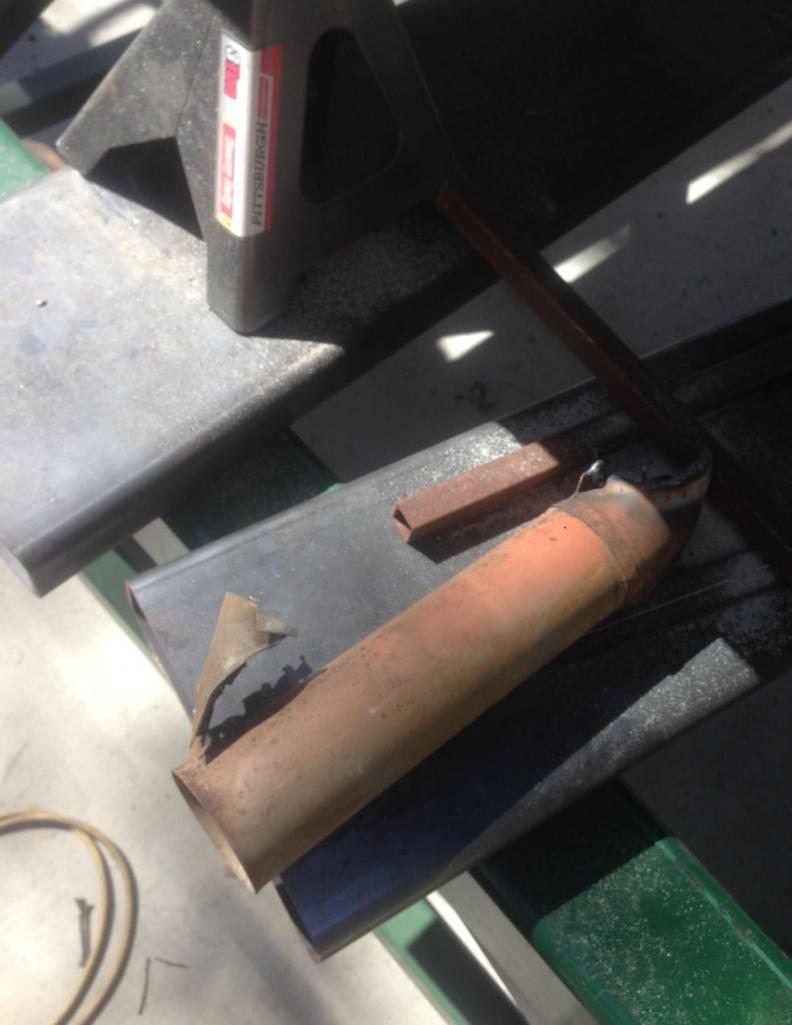 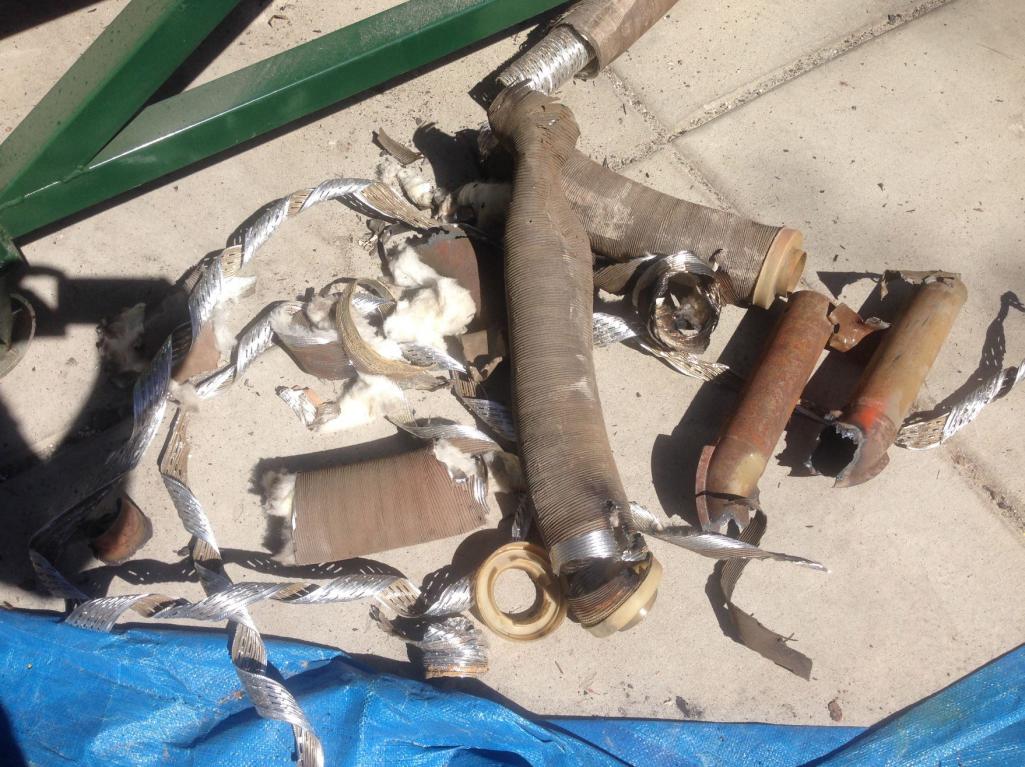 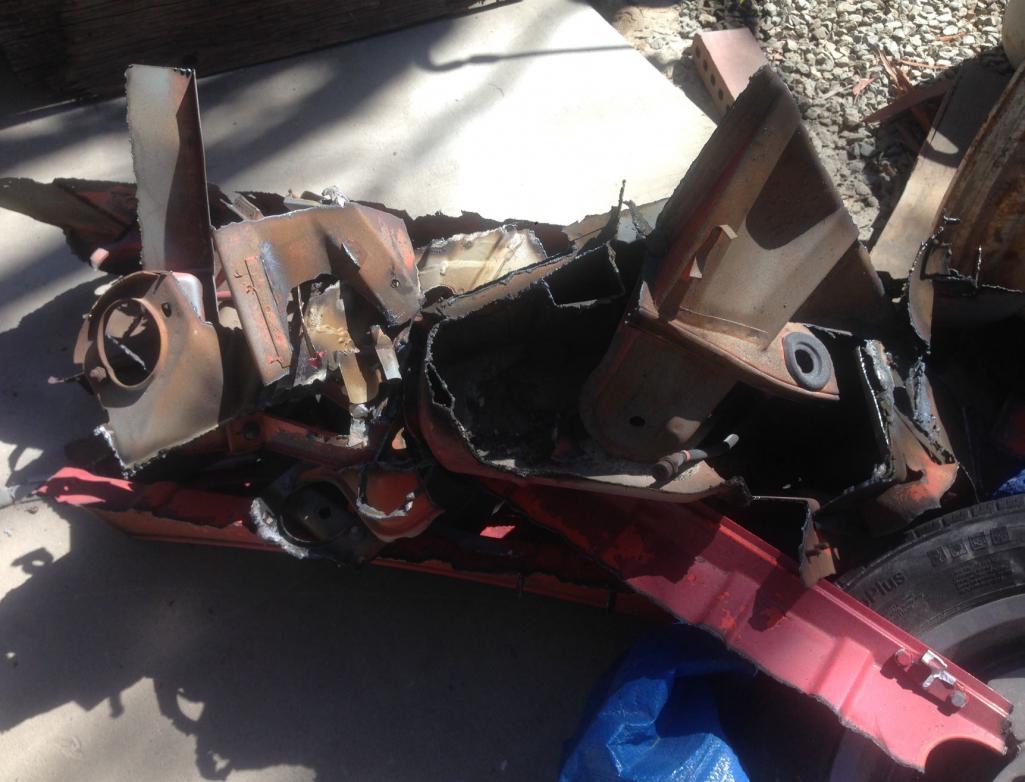 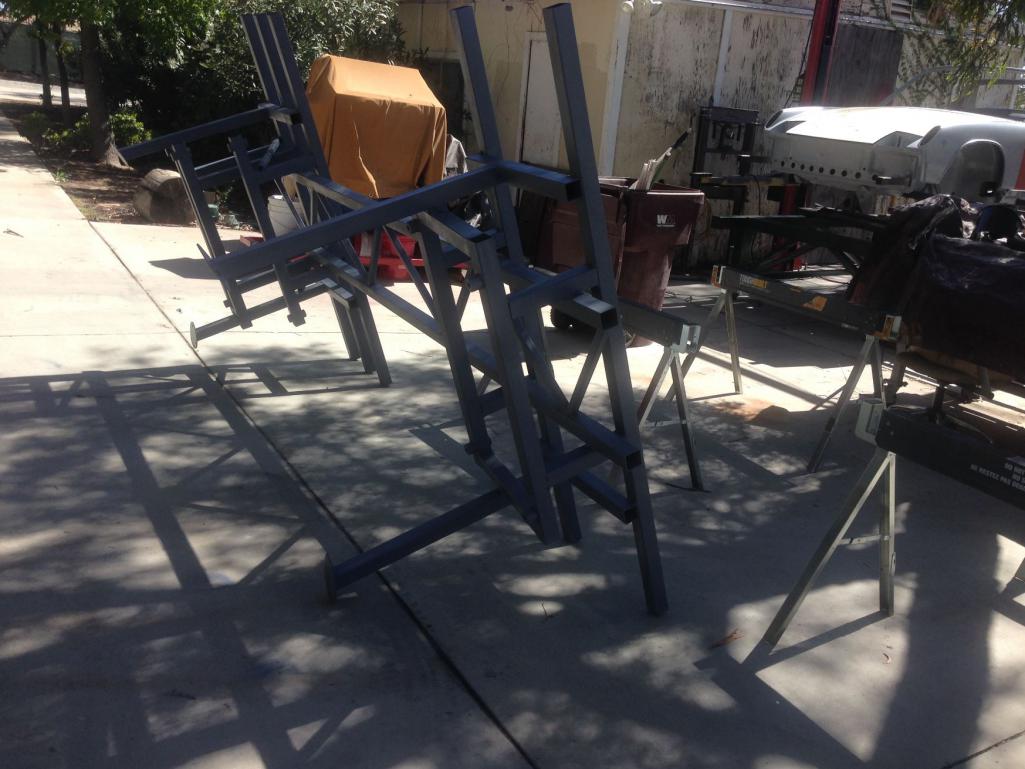
|
|
|
|
| Curbandgutter |
Sep 17 2016, 12:33 PM
Post
#167
|
|
Senior Member Group: Members Posts: 566 Joined: 8-March 13 From: Murrieta CA Member No.: 15,637 Region Association: Southern California |
This is what I'm thinking of for trussing the longs.
Attached thumbnail(s) 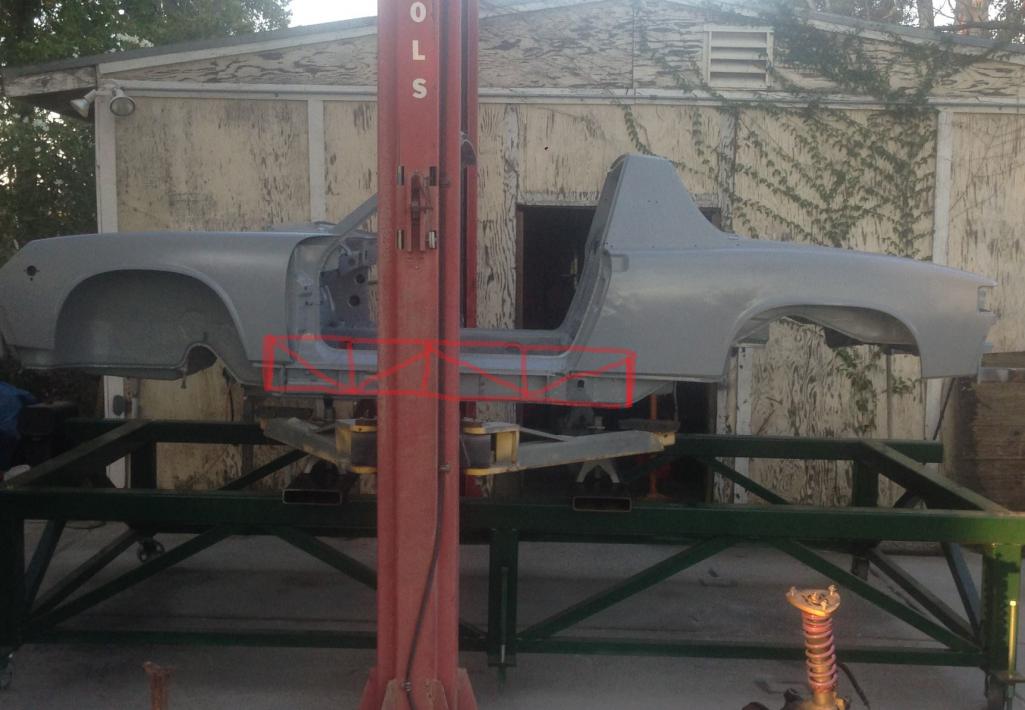
|
|
|
|
| Curbandgutter |
Sep 17 2016, 04:30 PM
Post
#168
|
|
Senior Member Group: Members Posts: 566 Joined: 8-March 13 From: Murrieta CA Member No.: 15,637 Region Association: Southern California |
996 SUSPENSION NEST MEETS 914......WELL HELLO THERE (IMG:style_emoticons/default/beerchug.gif) (IMG:style_emoticons/default/beerchug.gif)
Attached thumbnail(s) 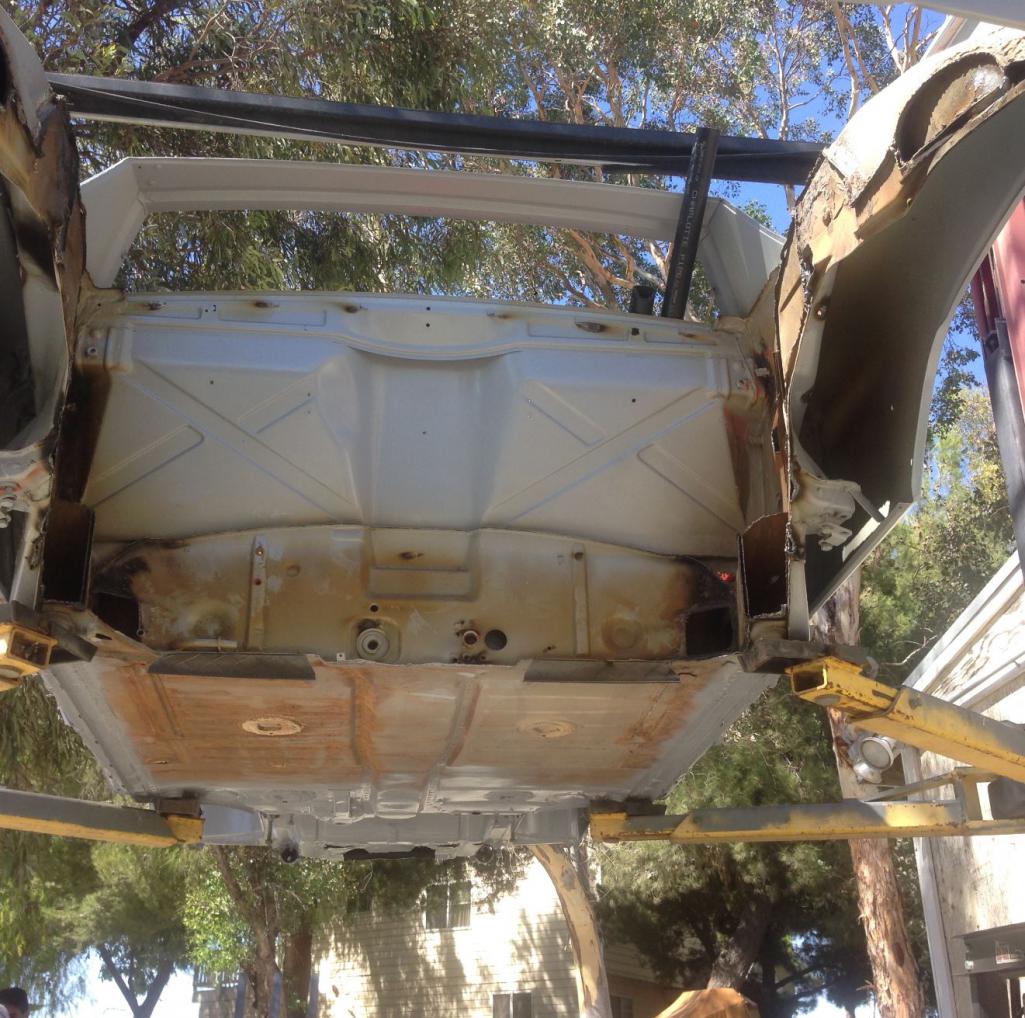 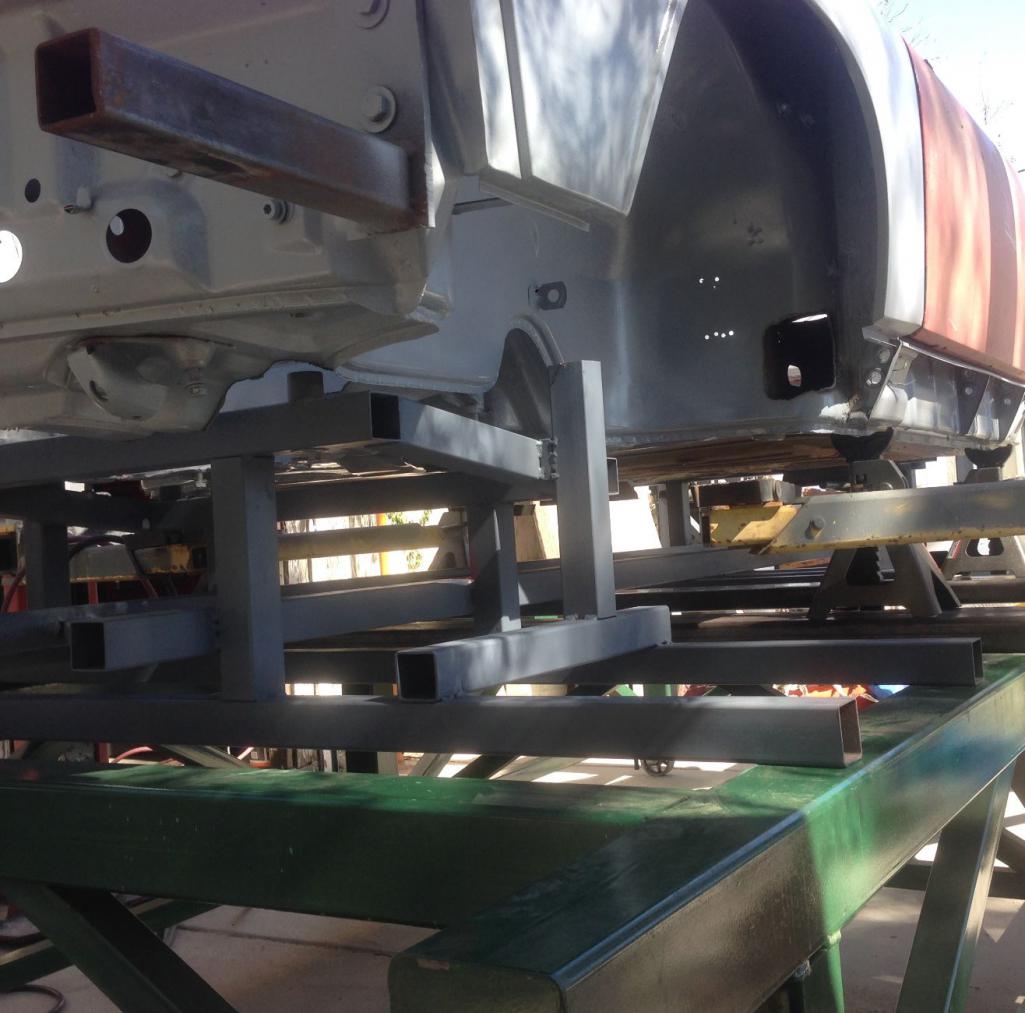 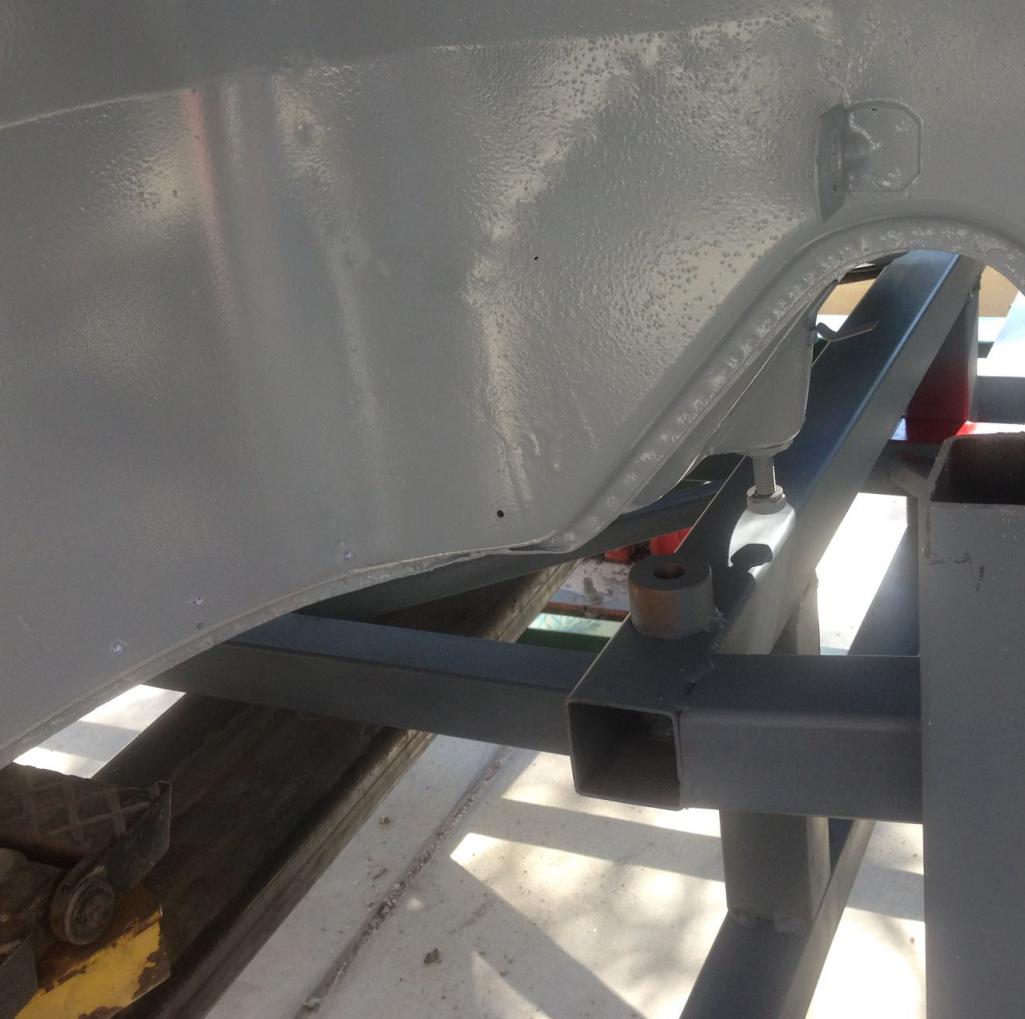 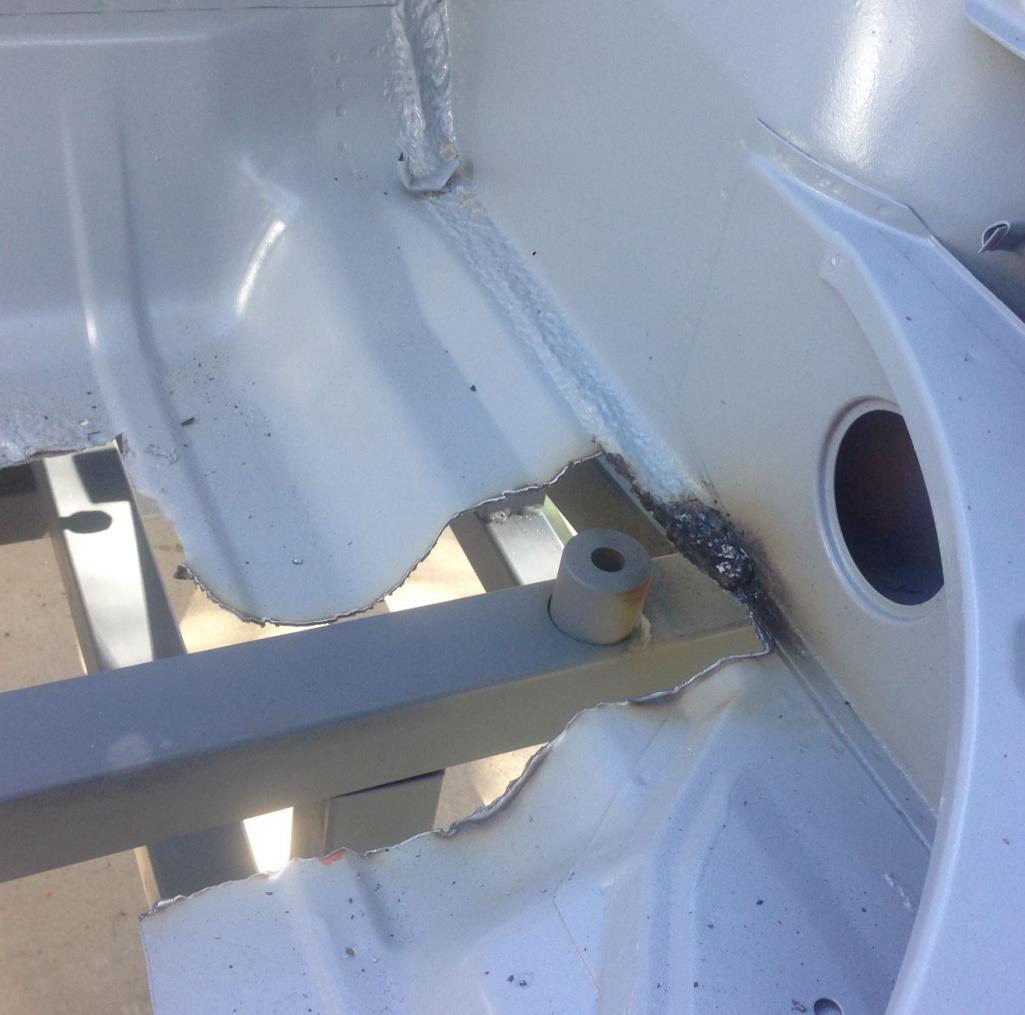 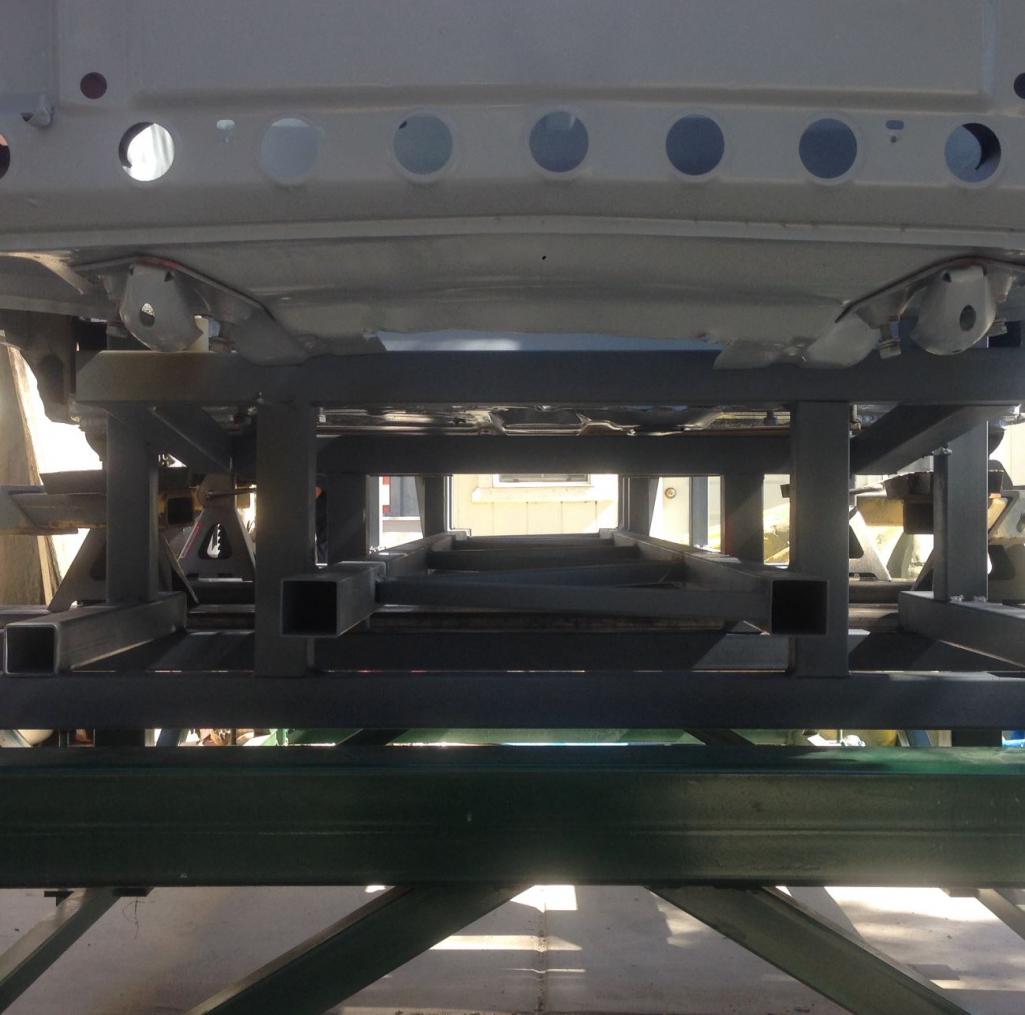 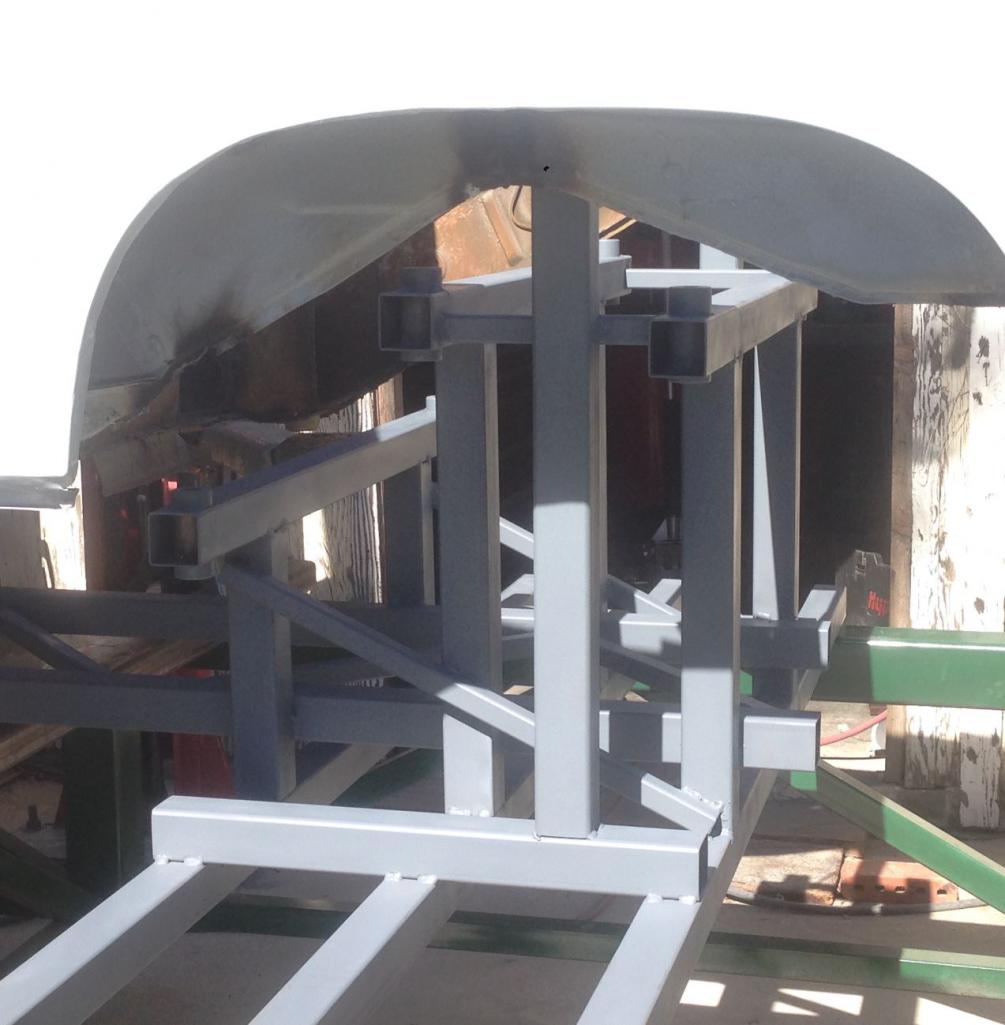 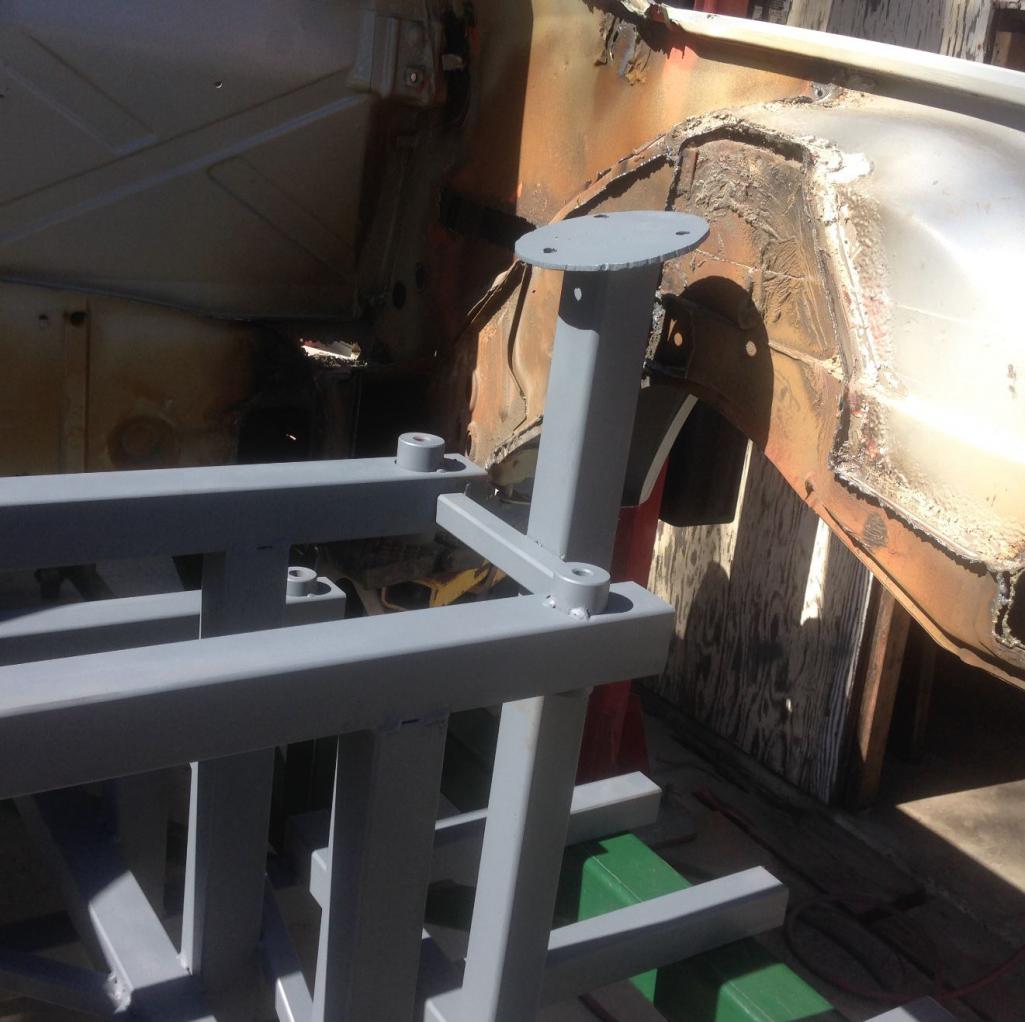 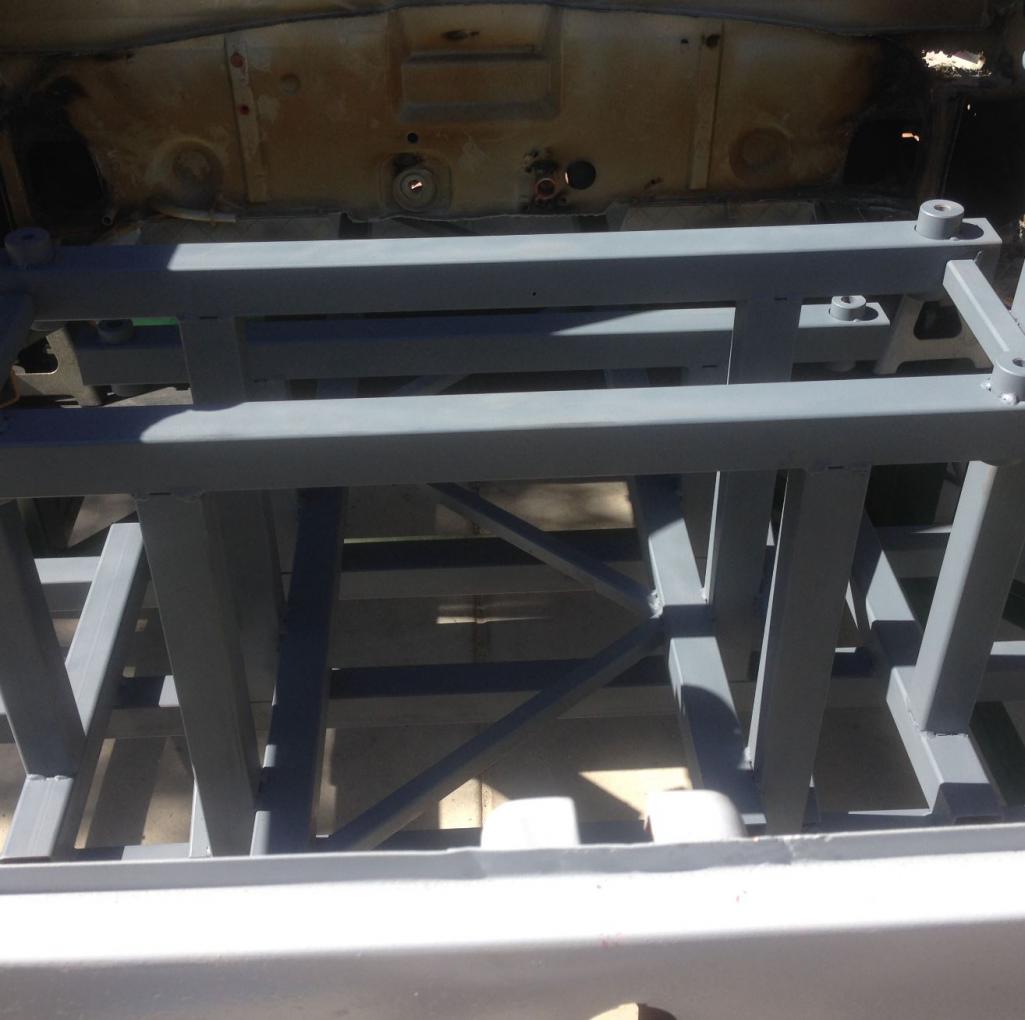
|
|
|
|
| Curbandgutter |
Sep 27 2016, 09:27 AM
Post
#169
|
|
Senior Member Group: Members Posts: 566 Joined: 8-March 13 From: Murrieta CA Member No.: 15,637 Region Association: Southern California |
Little update. I've been cleaning up the firewall before I install the tubes. I'm hoping to start bending and notching this weekend.
Attached thumbnail(s) 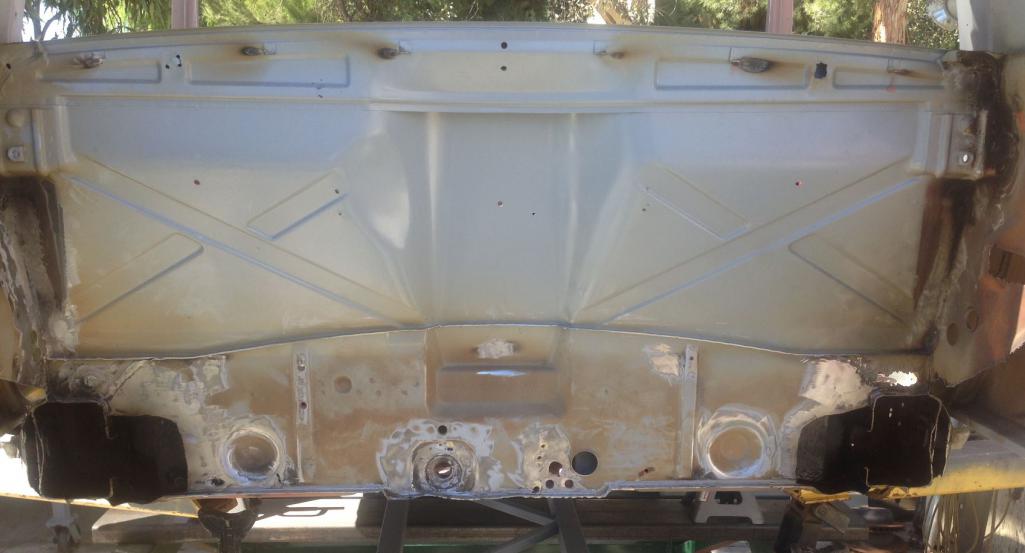  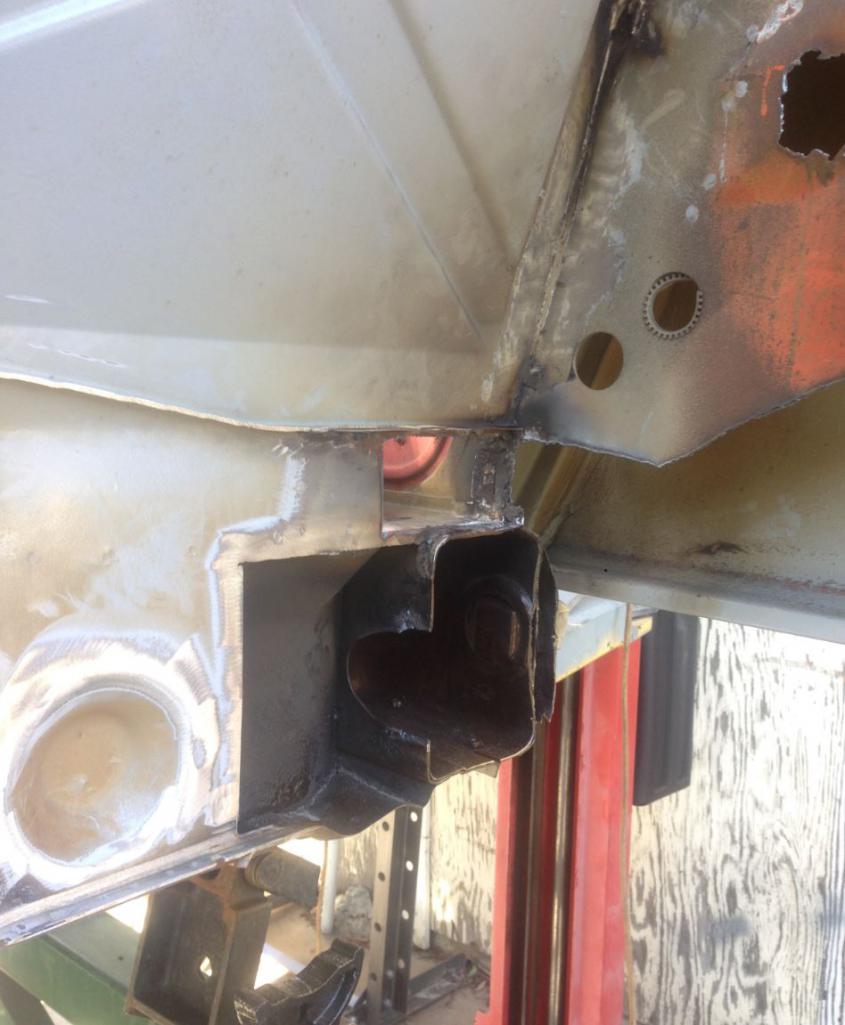 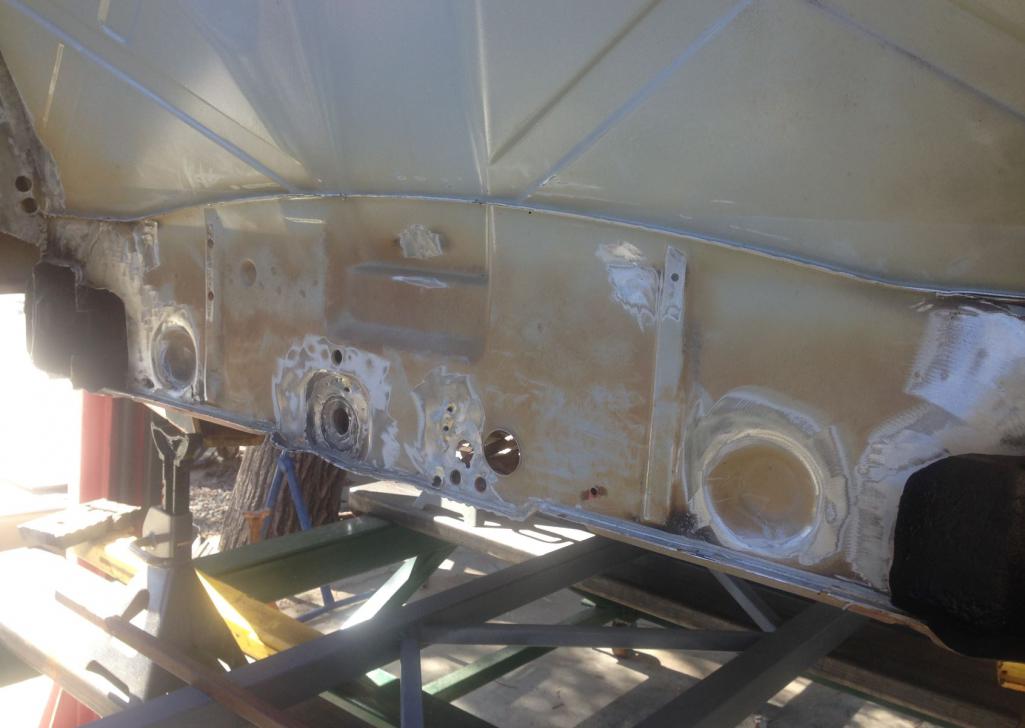
|
|
|
|
| Curbandgutter |
Oct 2 2016, 10:45 AM
Post
#170
|
|
Senior Member Group: Members Posts: 566 Joined: 8-March 13 From: Murrieta CA Member No.: 15,637 Region Association: Southern California |
Well I was able to insert some of the reinforcement for the longs.
DISCLAIMER: Do not attempt to duplicate anything that is mentioned or illustrated in the entirety of this thread. I do not make any warranties of any kind. If you try to build what I am doing, you take full risk. Do not try this. It may be dangerous to your health and may get you killed Attached thumbnail(s)  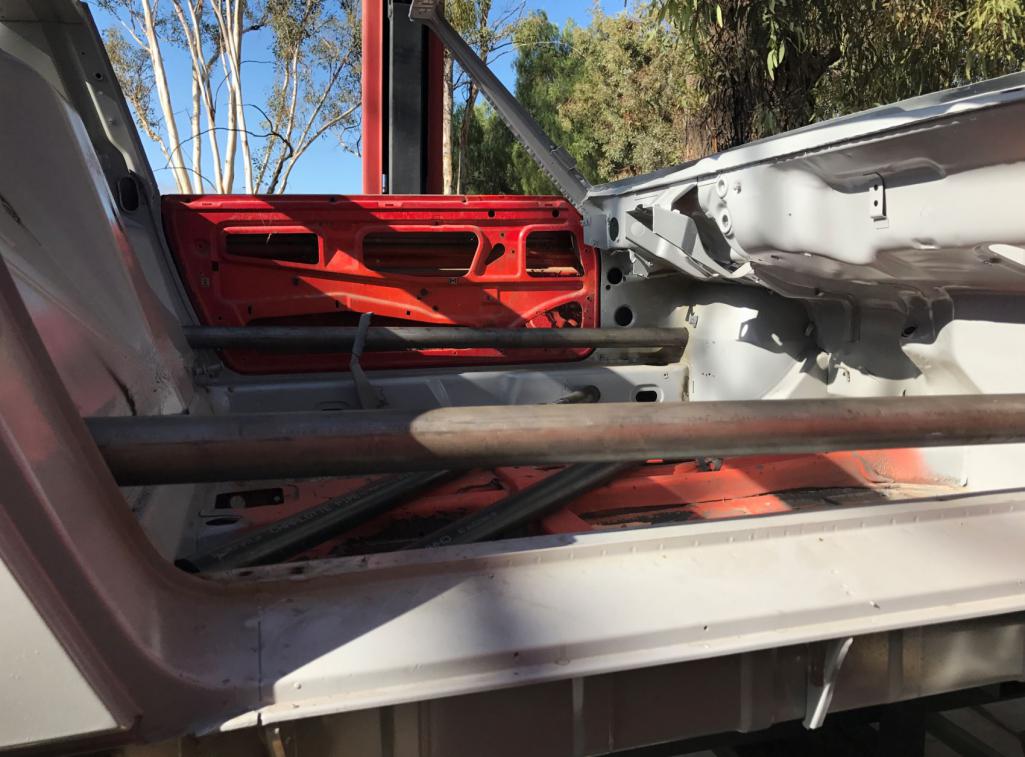  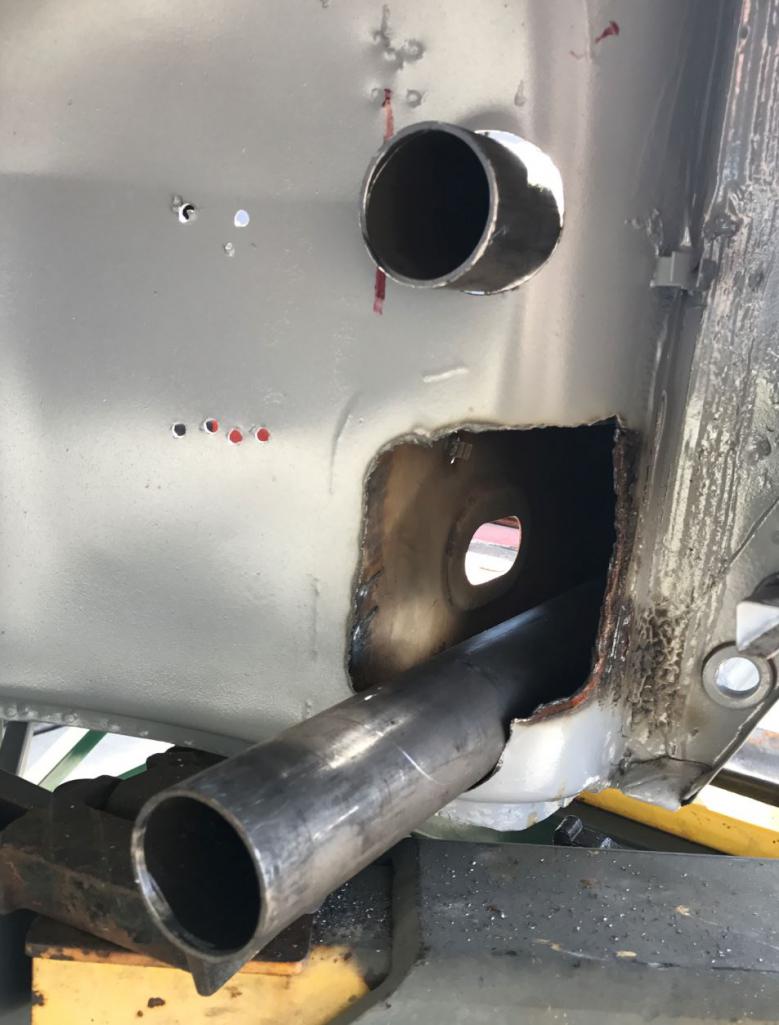 
|
|
|
|
| Cracker |
Oct 2 2016, 11:01 AM
Post
#171
|
|
Advanced Member Group: Members Posts: 2,148 Joined: 2-February 10 From: Atlanta (area) Member No.: 11,316 Region Association: South East States |
|
|
|
|
| Curbandgutter |
Oct 17 2016, 11:07 AM
Post
#172
|
|
Senior Member Group: Members Posts: 566 Joined: 8-March 13 From: Murrieta CA Member No.: 15,637 Region Association: Southern California |
Well I've been bending and nothching the chassis. I made jig to be able to notch greater than 45 degrees. I have some tubes that need 70 degree bends. I hope to be able to complete the a and b pillar hoops this week. Then it's time to tie the a and b hoops to the front and rear suspension. I was really pleased with the nothching at steep angles. Came out really tight.
Attached thumbnail(s) 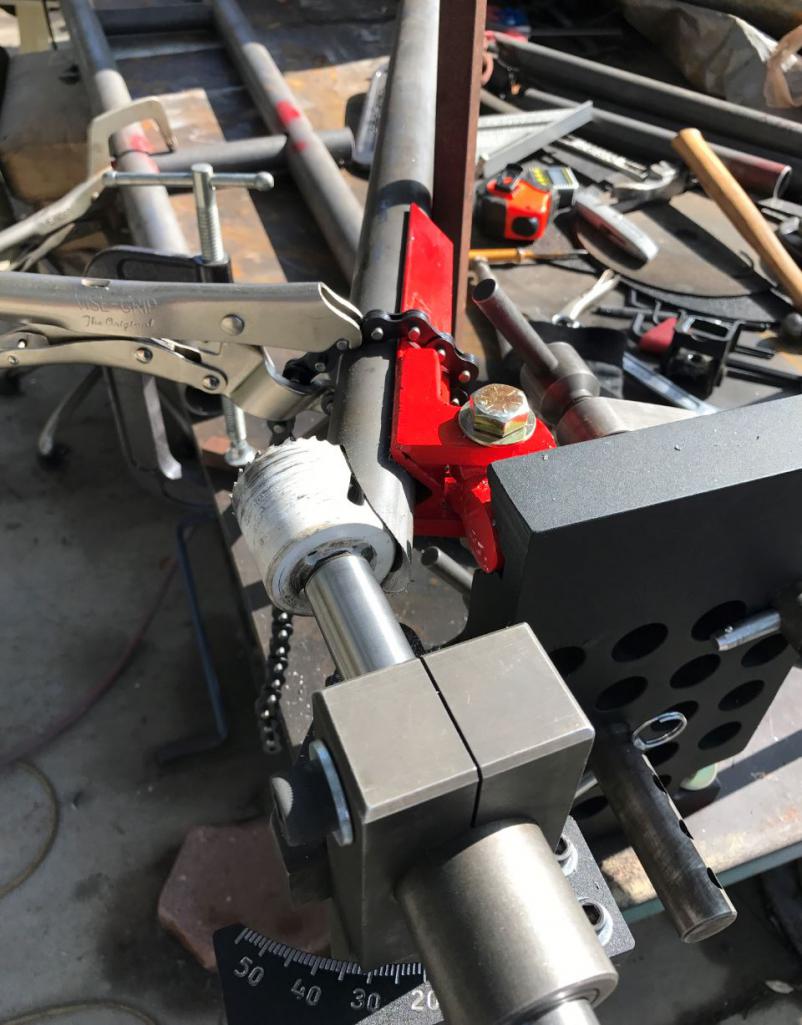 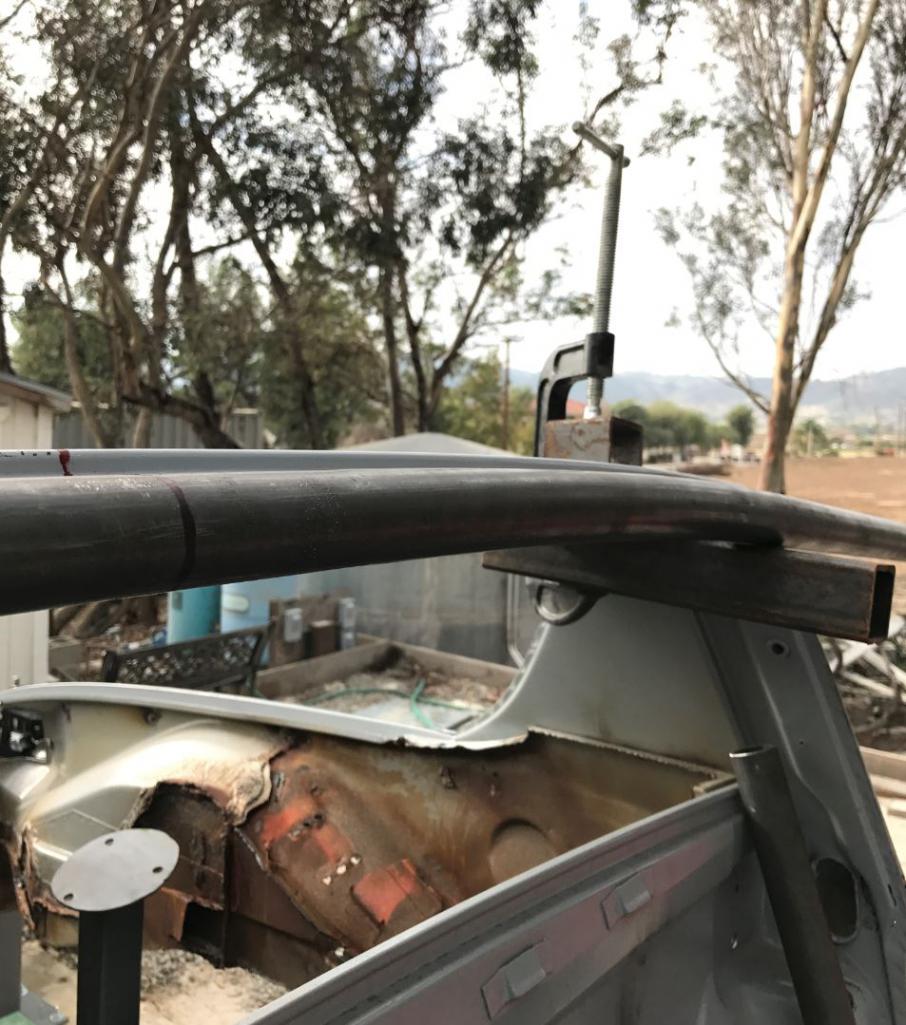 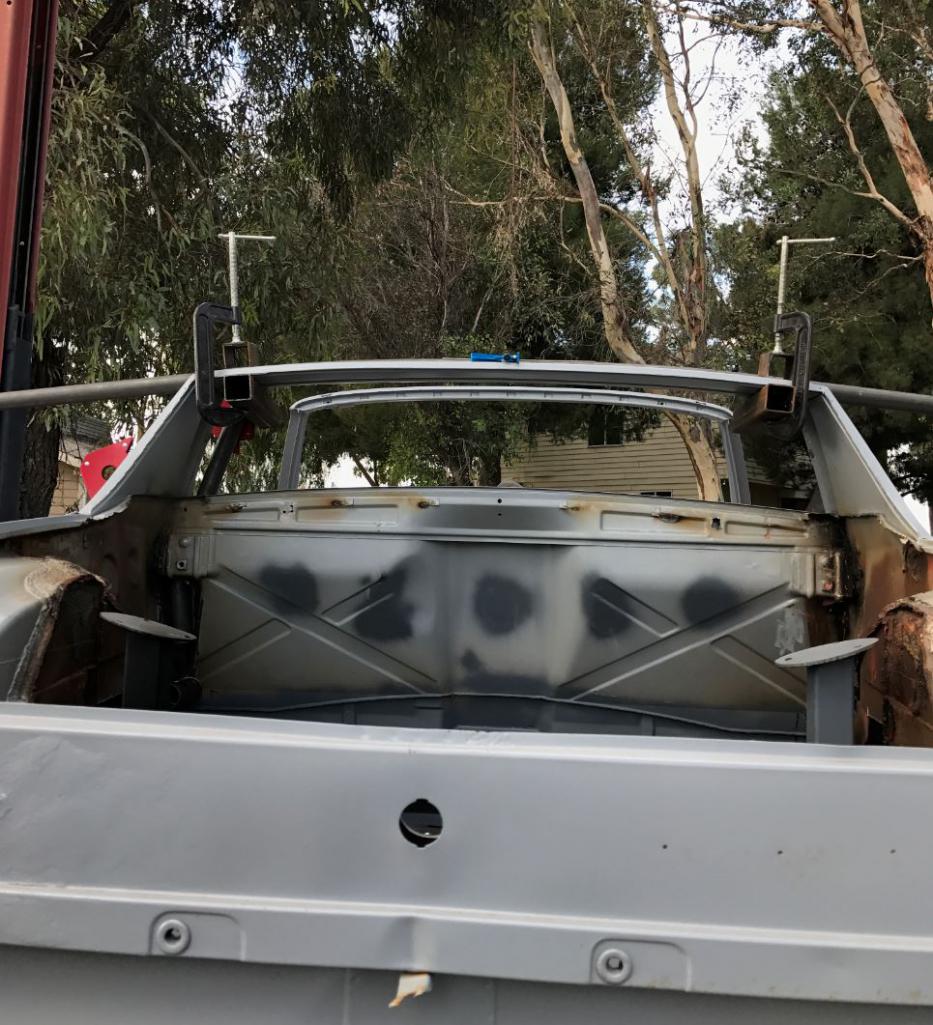 Attached image(s) 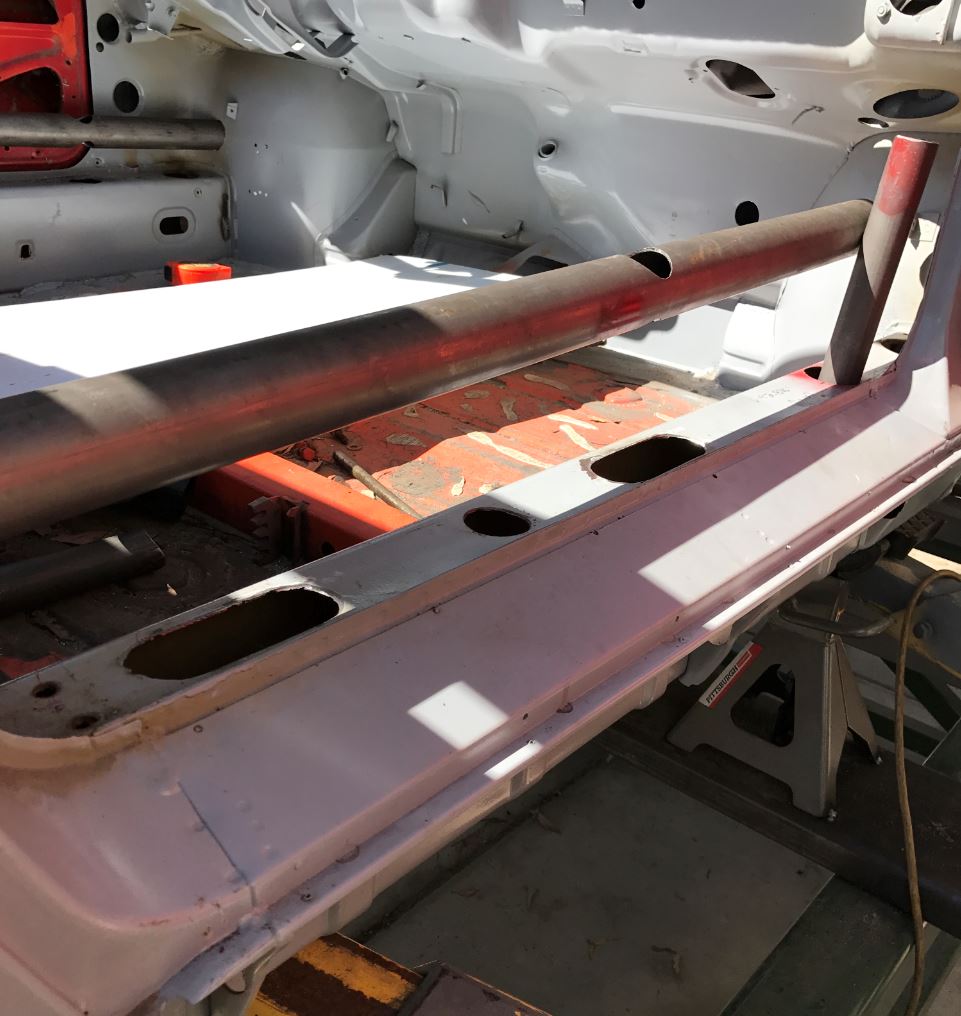
|
|
|
|
| csdilligaf |
Oct 17 2016, 02:04 PM
Post
#173
|
|
Member Group: Members Posts: 106 Joined: 18-April 12 From: San Diego CA Member No.: 14,397 Region Association: None |
I see Progress. I all most stopped by to check in on the way back from the Pomona Car Swap. The oblong holes are for the truss pieces?
|
|
|
|
| siverson |
Oct 17 2016, 02:20 PM
Post
#174
|
|
Advanced Member Group: Benefactors Posts: 2,464 Joined: 5-May 03 From: San Diego, CA Member No.: 654 Region Association: Southern California |
Looks great. I'd love to see this in person some day too...
-Steve |
|
|
|
| Cracker |
Oct 18 2016, 06:13 AM
Post
#175
|
|
Advanced Member Group: Members Posts: 2,148 Joined: 2-February 10 From: Atlanta (area) Member No.: 11,316 Region Association: South East States |
Looks really nice...and to think I thought this might of been a pipe dream originally - you were actually dreaming of pipe! Keep us posted...
Tony |
|
|
|
| Curbandgutter |
Oct 18 2016, 04:03 PM
Post
#176
|
|
Senior Member Group: Members Posts: 566 Joined: 8-March 13 From: Murrieta CA Member No.: 15,637 Region Association: Southern California |
QUOTE(csdilligaf @ Oct 17 2016, 01:04 PM) I see Progress. I all most stopped by to check in on the way back from the Pomona Car Swap. The oblong holes are for the truss pieces? QUOTE(siverson @ Oct 17 2016, 01:20 PM) Looks great. I'd love to see this in person some day too... -Steve QUOTE(Cracker @ Oct 18 2016, 05:13 AM) Looks really nice...and to think I thought this might of been a pipe dream originally - you were actually dreaming of pipe! Keep us posted... Tony |
|
|
|
| Curbandgutter |
Oct 20 2016, 04:28 PM
Post
#177
|
|
Senior Member Group: Members Posts: 566 Joined: 8-March 13 From: Murrieta CA Member No.: 15,637 Region Association: Southern California |
Well I entered the 2017 Build off Challenge. Let's see how it goes.
|
|
|
|
| Curbandgutter |
Oct 24 2016, 09:43 AM
Post
#178
|
|
Senior Member Group: Members Posts: 566 Joined: 8-March 13 From: Murrieta CA Member No.: 15,637 Region Association: Southern California |
Well I finally finished bending the A and B pillars. The A pillar was tough! I had to measure, try, measure, try, measure, try......then screw up and try again.
Attached thumbnail(s)  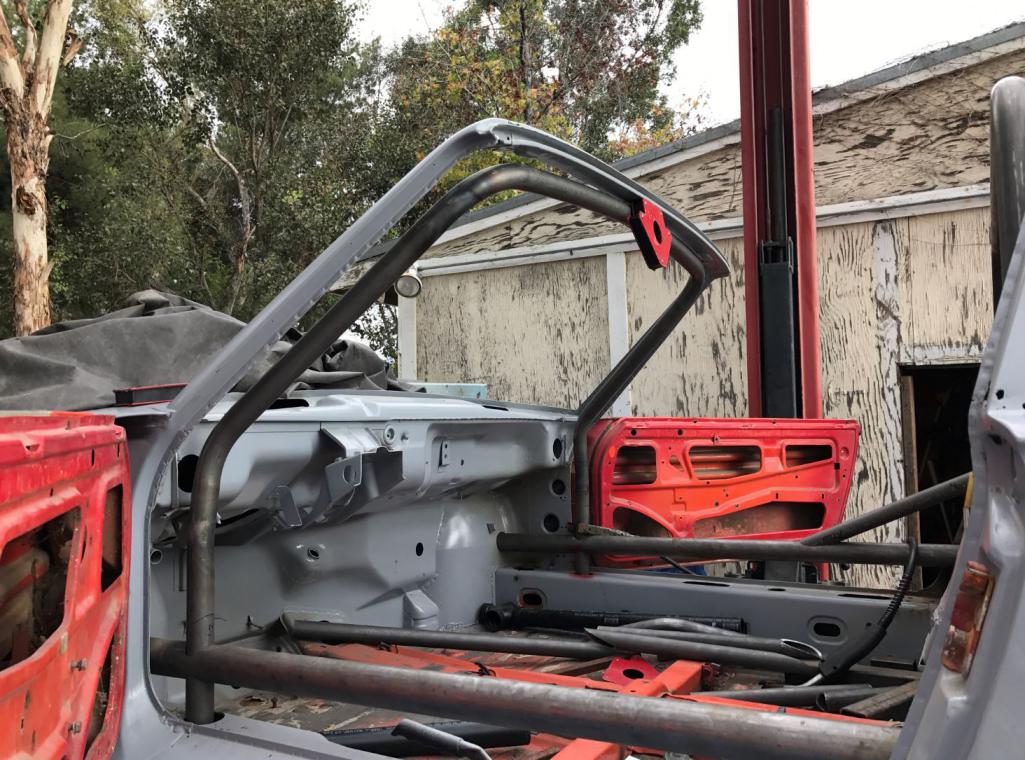 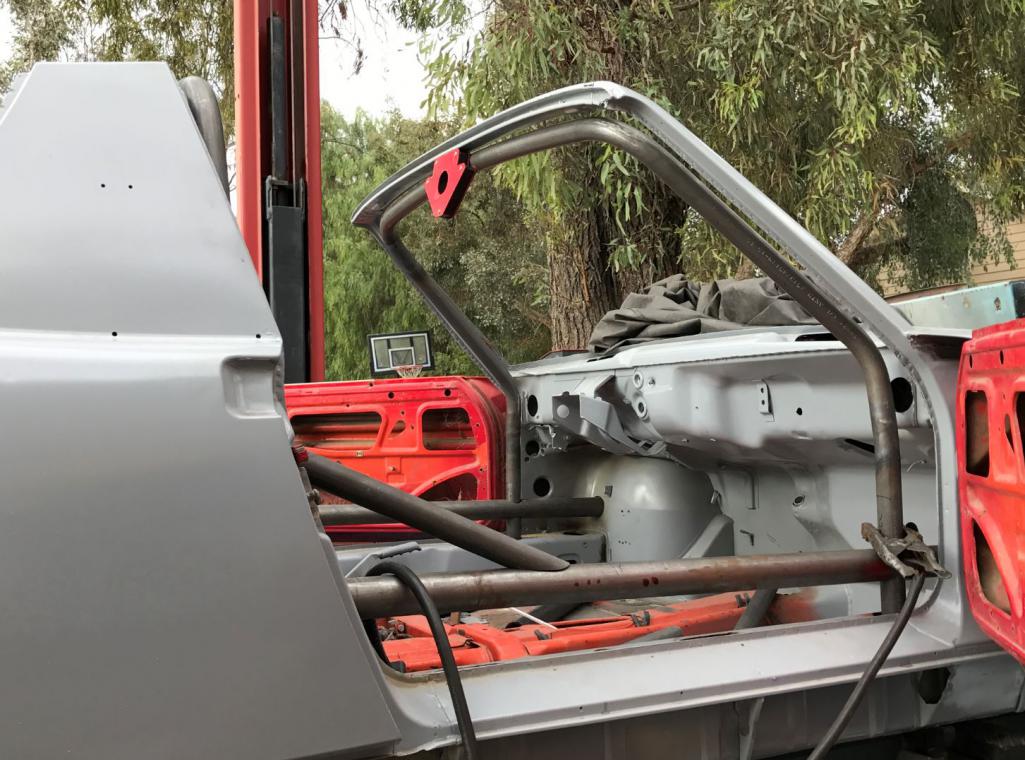
|
|
|
|
| tygaboy |
Oct 24 2016, 10:01 AM
Post
#179
|
|
914 Guru Group: Members Posts: 5,752 Joined: 6-October 15 From: Petaluma, CA Member No.: 19,241 Region Association: Northern California |
The cage is looking great! I know what you mean about "measure, bend, try again."
I'm sure you're on top of this but the critical factor for me seems to be ensuring the tube doesn't creep as the bend starts. Well, that and being sure I'm bending the correct end of the tube! (Ask me how I know...) Keep up the great work (IMG:style_emoticons/default/aktion035.gif) and lots of pics. I need a regular fix! |
|
|
|
| jd74914 |
Oct 24 2016, 10:24 AM
Post
#180
|
|
Its alive Group: Members Posts: 4,864 Joined: 16-February 04 From: CT Member No.: 1,659 Region Association: North East States |
That cage is looking awesome Rudy! (IMG:style_emoticons/default/biggrin.gif) Are you using a JD2 bender?
Since you're MIG welding it might not help too much, but it has helped me while TIG welding so I thought I'd share...Apologies in advance if you've heard this before, etc. (IMG:style_emoticons/default/smile.gif) If you drill a small hole at each tube junction so the whole cage is one single volume, you can back purge and the quality of the welds is much nicer. Even without purging, the holes let any of the smoke from oil in the tubes move so you don't get any blowouts from pressure buildup while heating and the welds tend to be cleaner. |
|
|
|
|
1 User(s) are reading this topic (1 Guests and 0 Anonymous Users)
0 Members:

|
Lo-Fi Version | Time is now: 30th January 2026 - 04:57 PM |
Invision Power Board
v9.1.4 © 2026 IPS, Inc.