|
|
|
Porsche, and the Porsche crest are registered trademarks of Dr. Ing. h.c. F. Porsche AG.
This site is not affiliated with Porsche in any way. Its only purpose is to provide an online forum for car enthusiasts. All other trademarks are property of their respective owners. |
|
|

  |

| Andyrew |
 Oct 24 2016, 12:30 PM Oct 24 2016, 12:30 PM
Post
#181
|
|
Spooling.... Please wait  Group: Members Posts: 13,380 Joined: 20-January 03 From: Riverbank, Ca Member No.: 172 Region Association: Northern California |
I just did a roll hoop for a Miata and used 1/2" conduit to form the outer edge of the hoop.. Might be cheaper to grab some conduit than messing up that nice DOM?
|
   |

 
|
| 914forme |
Oct 24 2016, 12:36 PM
Post
#182
|
|
Times a wastin', get wrenchin'! Group: Members Posts: 3,899 Joined: 24-July 04 From: Dayton, Ohio Member No.: 2,388 Region Association: None |
Andrew, so you used the conduit to make a test piece? I'm a bit confused by your statement.
|
|
|
|
| Andyrew |
Oct 24 2016, 01:37 PM
Post
#183
|
|
Spooling.... Please wait Group: Members Posts: 13,380 Joined: 20-January 03 From: Riverbank, Ca Member No.: 172 Region Association: Northern California |
QUOTE(914forme @ Oct 24 2016, 11:36 AM)  Andrew, so you used the conduit to make a test piece? I'm a bit confused by your statement. Yes, sorry. Conduit for test piece, then .120 wall DOM tubing for the actual hoop. I can see your confusion (IMG:style_emoticons/default/smile.gif) |
|
|
|
| 914forme |
Oct 24 2016, 04:13 PM
Post
#184
|
|
Times a wastin', get wrenchin'! Group: Members Posts: 3,899 Joined: 24-July 04 From: Dayton, Ohio Member No.: 2,388 Region Association: None |
Makes perfect sense now.
|
|
|
|
| Curbandgutter |
Oct 24 2016, 04:50 PM
Post
#185
|
|
Senior Member Group: Members Posts: 566 Joined: 8-March 13 From: Murrieta CA Member No.: 15,637 Region Association: Southern California |
QUOTE(tygaboy @ Oct 24 2016, 09:01 AM) The cage is looking great! I know what you mean about "measure, bend, try again." I'm sure you're on top of this but the critical factor for me seems to be ensuring the tube doesn't creep as the bend starts. Well, that and being sure I'm bending the correct end of the tube! (Ask me how I know...) Keep up the great work (IMG:style_emoticons/default/aktion035.gif) and lots of pics. I need a regular fix! Thanks for the compliment. I'm using the JD2 model 32 bender and tube creep was never an issue. Do you have something other than a JD2 bender. QUOTE(jd74914 @ Oct 24 2016, 09:24 AM) That cage is looking awesome Rudy! (IMG:style_emoticons/default/biggrin.gif) Are you using a JD2 bender? Since you're MIG welding it might not help too much, but it has helped me while TIG welding so I thought I'd share...Apologies in advance if you've heard this before, etc. (IMG:style_emoticons/default/smile.gif) If you drill a small hole at each tube junction so the whole cage is one single volume, you can back purge and the quality of the welds is much nicer. Even without purging, the holes let any of the smoke from oil in the tubes move so you don't get any blowouts from pressure buildup while heating and the welds tend to be cleaner. Hey Jim....yes JD2 model 32. That's good advice on the back purging. I will save that for when I do the headers. Yes you're right I'm MIG welding the frame so no back purging required. |
|
|
|
| Curbandgutter |
Oct 24 2016, 04:56 PM
Post
#186
|
|
Senior Member Group: Members Posts: 566 Joined: 8-March 13 From: Murrieta CA Member No.: 15,637 Region Association: Southern California |
QUOTE(Andyrew @ Oct 24 2016, 11:30 AM) I just did a roll hoop for a Miata and used 1/2" conduit to form the outer edge of the hoop.. Might be cheaper to grab some conduit than messing up that nice DOM? Yes that is a good suggestion. I ruined 2 hoops (the rear "easy one")l, but I just need to cut the bends off and then I have material for the webs. But yes after I ruined two hoops I learned the error of my ways and was able to do the A pillar hoop in one try. If you notice the A pillar hoop is complex in that it has an offset bend and it also has a slight arch that follows the roof line. That arch is not in the plane of the windshield it is twisted about 47 degrees from the plane of the windshield. It was tricky but I did it and am satisfied with the result. |
|
|
|
| 914forme |
Oct 24 2016, 06:49 PM
Post
#187
|
|
Times a wastin', get wrenchin'! Group: Members Posts: 3,899 Joined: 24-July 04 From: Dayton, Ohio Member No.: 2,388 Region Association: None |
I was always taught to drill tubes when welding, otherwise you run the risk of making it a pressurized vessel and it may blow out. Molten Metal is not a fun shower. (IMG:style_emoticons/default/sad.gif)
Do you guys back purge more than just Stainless (IMG:style_emoticons/default/confused24.gif) |
|
|
|
| jd74914 |
Oct 24 2016, 08:07 PM
Post
#188
|
|
Its alive Group: Members Posts: 4,864 Joined: 16-February 04 From: CT Member No.: 1,659 Region Association: North East States |
QUOTE(914forme @ Oct 24 2016, 07:49 PM) I was always taught to drill tubes when welding, otherwise you run the risk of making it a pressurized vessel and it may blow out. Molten Metal is not a fun shower. (IMG:style_emoticons/default/sad.gif) Do you guys back purge more than just Stainless (IMG:style_emoticons/default/confused24.gif) Here are my rules for back purging from the old school welders I used to work with (these were aircraft welders who only wire brushed in one direction, degrease before and after brushing, etc.): - 100% of the time if TIG welding carbon steel, stainless, or titanium tubing (just as you would if welding piping or pressure vessels). - No back purging for aluminum tubing - Typically no back purging for MIG welding, though it does help on thin tubing. If someone else is paying for the gas absolutely back purge. (IMG:style_emoticons/default/laugh.gif) Sorry for the hijack Rudy. (IMG:style_emoticons/default/smile.gif) |
|
|
|
| Curbandgutter |
Oct 25 2016, 03:42 PM
Post
#189
|
|
Senior Member Group: Members Posts: 566 Joined: 8-March 13 From: Murrieta CA Member No.: 15,637 Region Association: Southern California |
No highjacking just good information for those that are following the thread. And yes, I agree no need to backpurge for mig on mild steel. Also, I have never heard of the situation where the tube becomes a pressure vessel? Wow that is amazing and I am having a hard time believing it. One would think that the conditions for it would have to be a one in a million. It's possible but not probable, practically speaking.
|
|
|
|
| jd74914 |
Oct 25 2016, 09:29 PM
Post
#190
|
|
Its alive Group: Members Posts: 4,864 Joined: 16-February 04 From: CT Member No.: 1,659 Region Association: North East States |
While certainly not pressure vessel grade, I've had melt blowout problems with smaller sealed tubes while TIGing. We're talking about 1" tubing of about a foot or little longer length. While not dangerous it's certainly inconvenient.
|
|
|
|
| Curbandgutter |
Oct 26 2016, 07:39 PM
Post
#191
|
|
Senior Member Group: Members Posts: 566 Joined: 8-March 13 From: Murrieta CA Member No.: 15,637 Region Association: Southern California |
Well completed trussing the long on the right side. Material is all cut for the left side....that is next. I love the look that it's getting. I also removed the center tunnel. That is going to get some extra special treatment (IMG:style_emoticons/default/smile.gif) (IMG:style_emoticons/default/smile.gif) . It will add tremendous stiffness to the chassis.
Attached thumbnail(s) 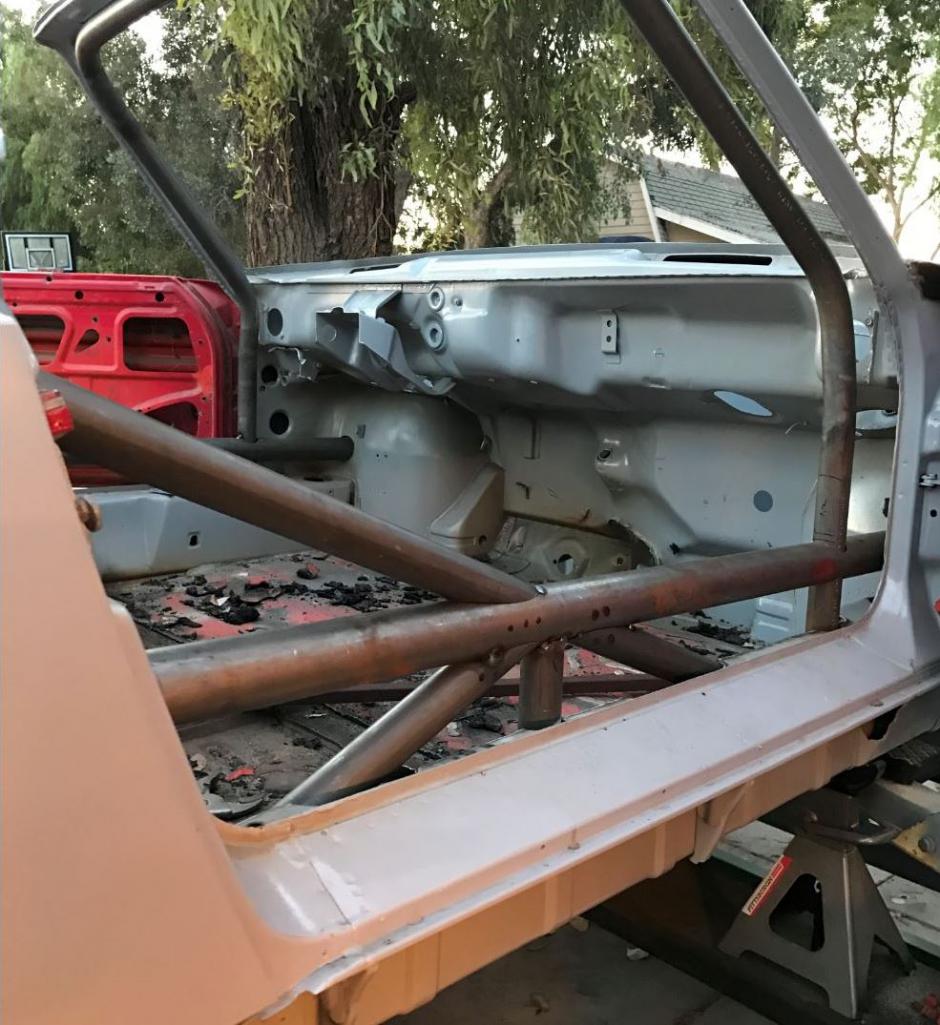 Attached image(s) 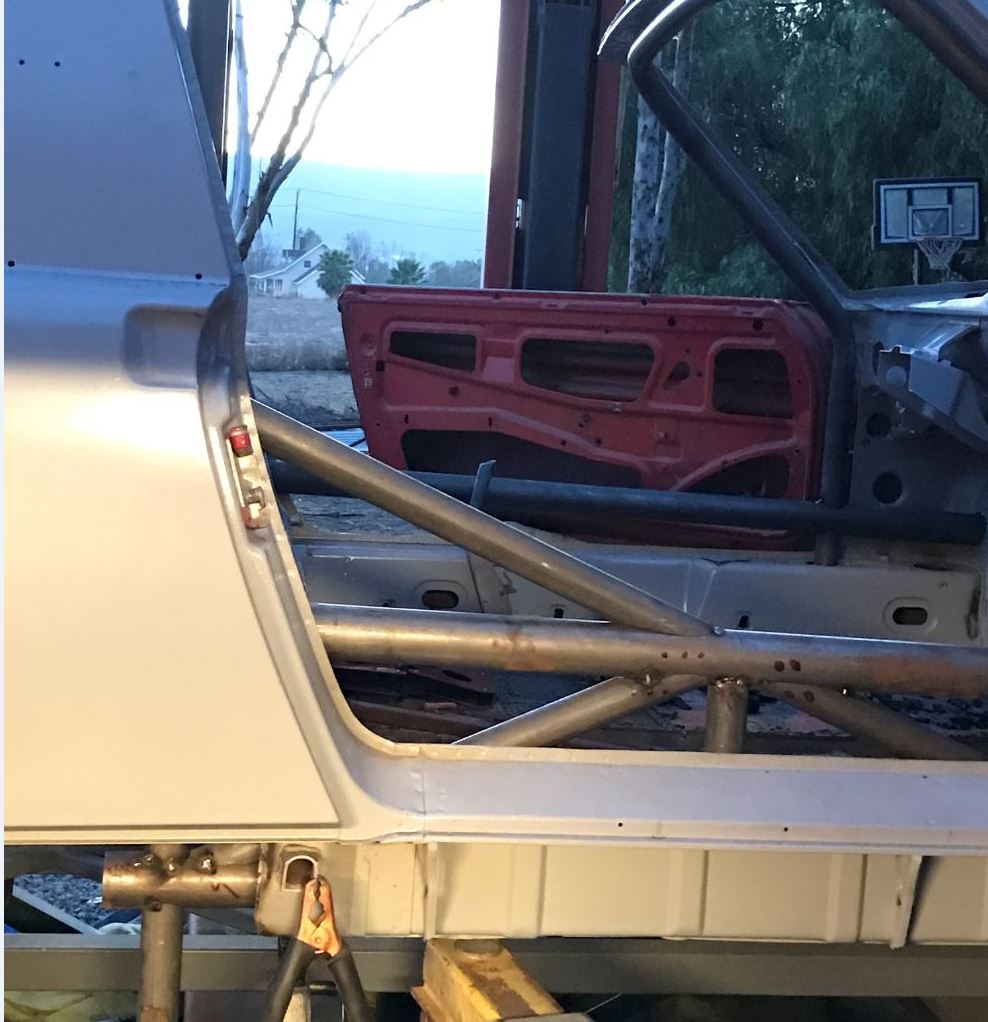
|
|
|
|
| csdilligaf |
Oct 27 2016, 07:16 AM
Post
#192
|
|
Member Group: Members Posts: 106 Joined: 18-April 12 From: San Diego CA Member No.: 14,397 Region Association: None |
Nice and tight tube notching and fitment you did there Rudy. That should really stiffen things up.
|
|
|
|
| Curbandgutter |
Oct 30 2016, 09:24 PM
Post
#193
|
|
Senior Member Group: Members Posts: 566 Joined: 8-March 13 From: Murrieta CA Member No.: 15,637 Region Association: Southern California |
Ok finished other side. Next step is to tie front and rears to new strut towers. Ohhhh...I'm lengthening wheelbase by 2 inches
Attached thumbnail(s) 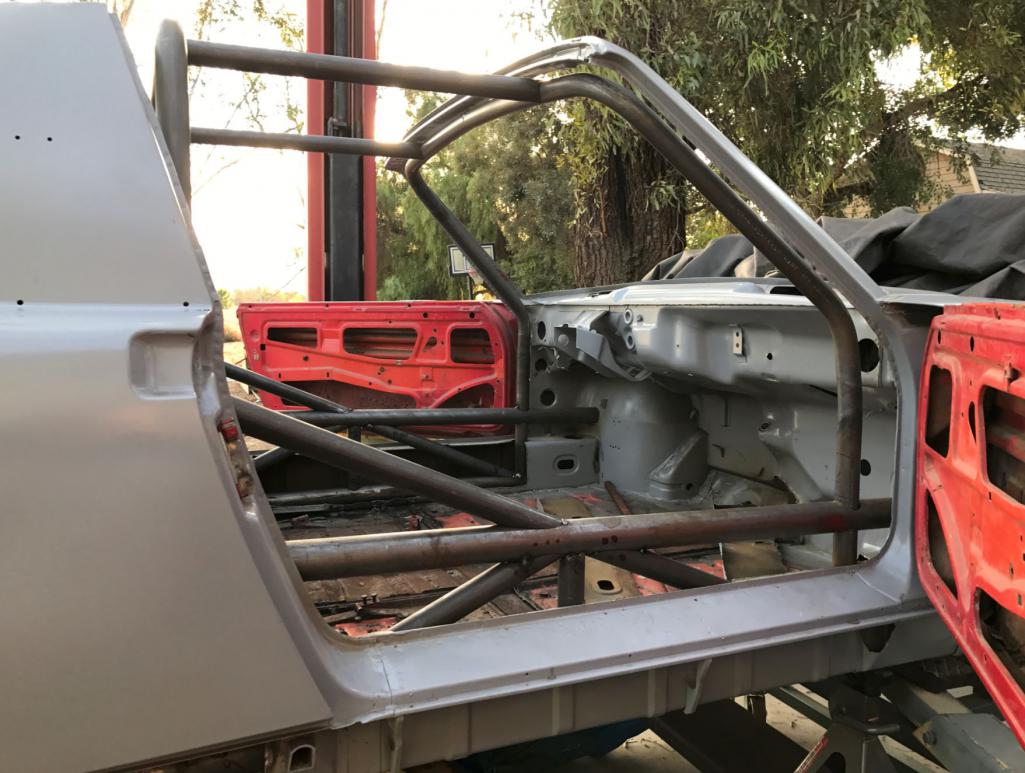 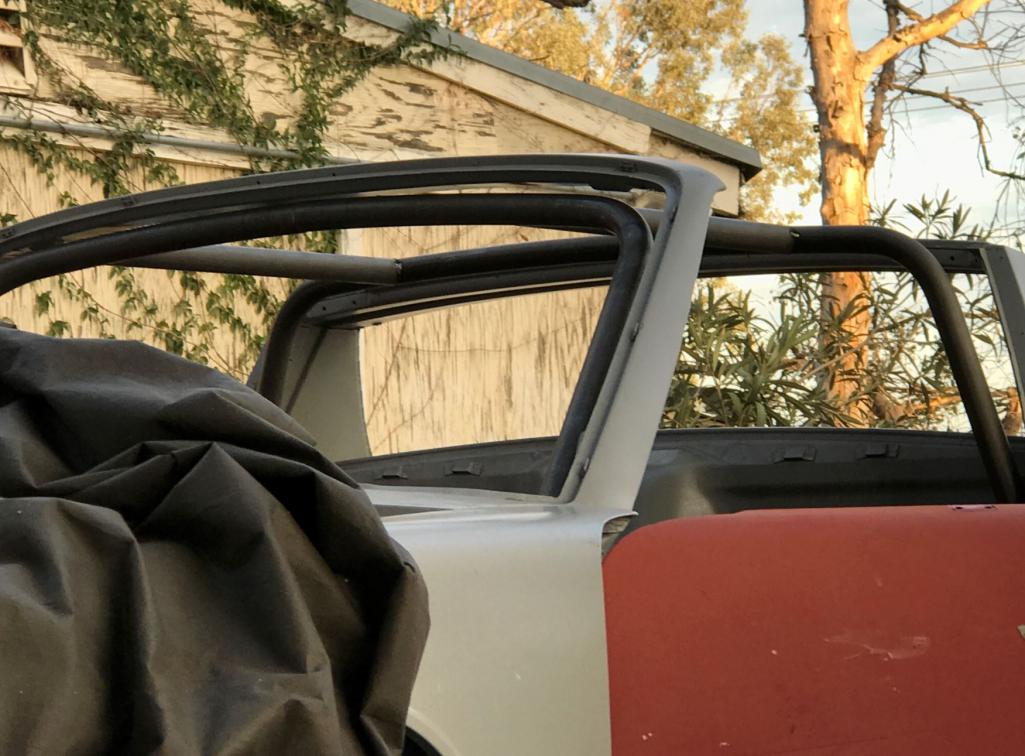 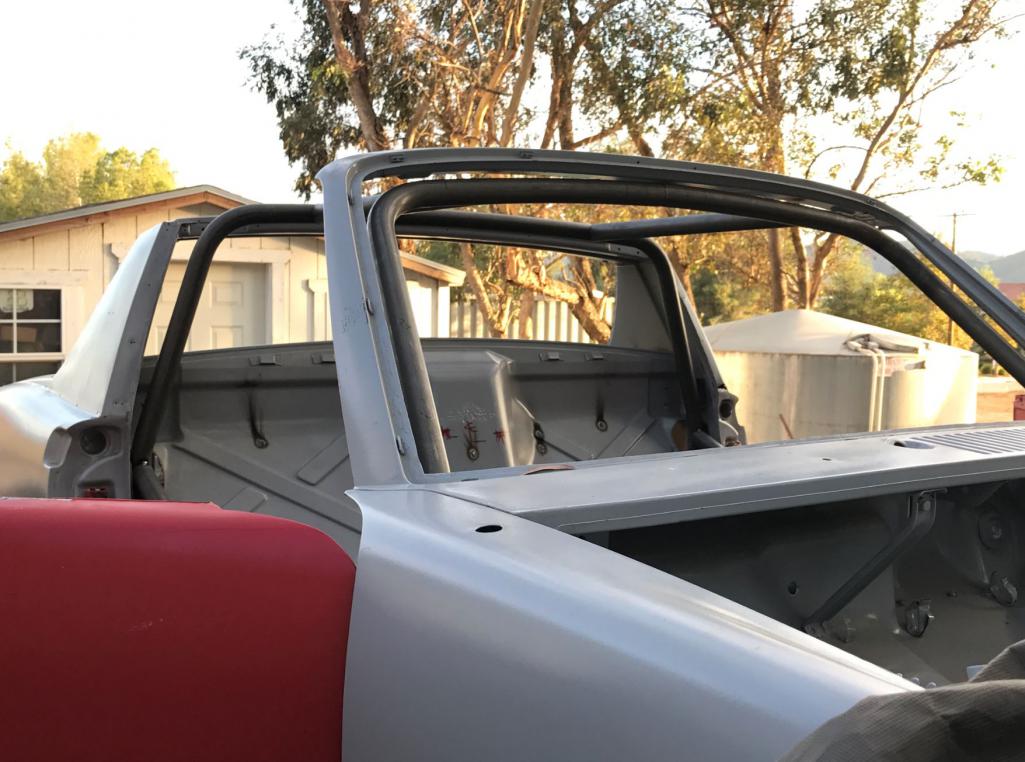 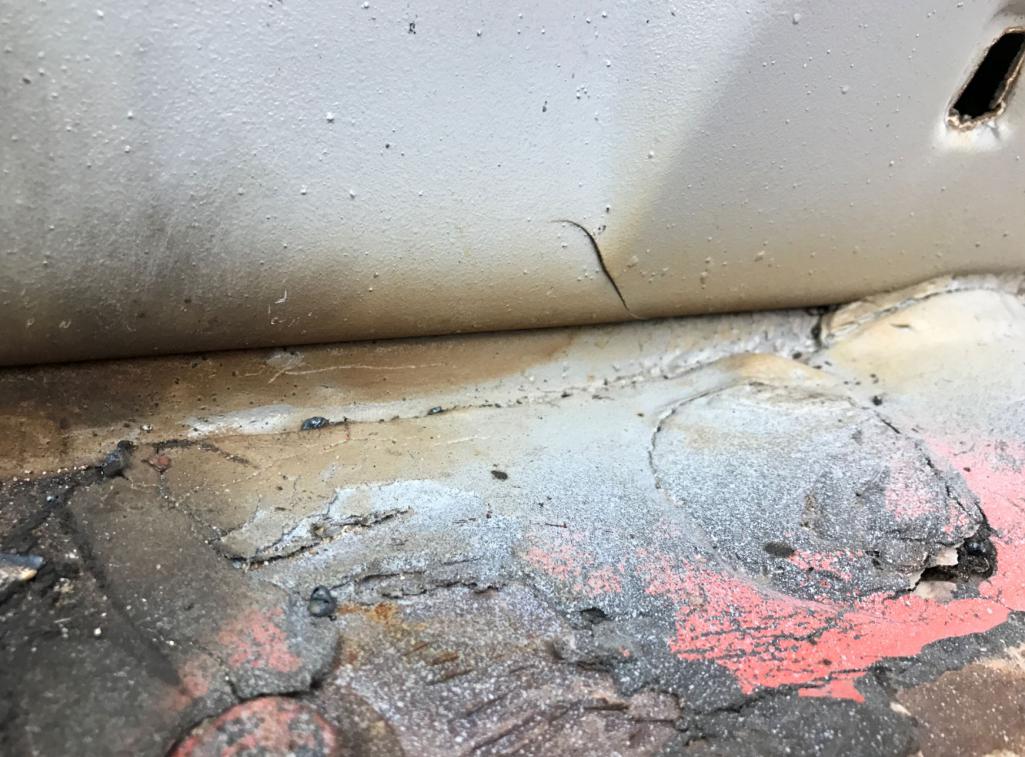
|
|
|
|
| Curbandgutter |
Oct 30 2016, 09:27 PM
Post
#194
|
|
Senior Member Group: Members Posts: 566 Joined: 8-March 13 From: Murrieta CA Member No.: 15,637 Region Association: Southern California |
While adding long reinforcement I noticed this stress crack in the long.
Attached thumbnail(s) 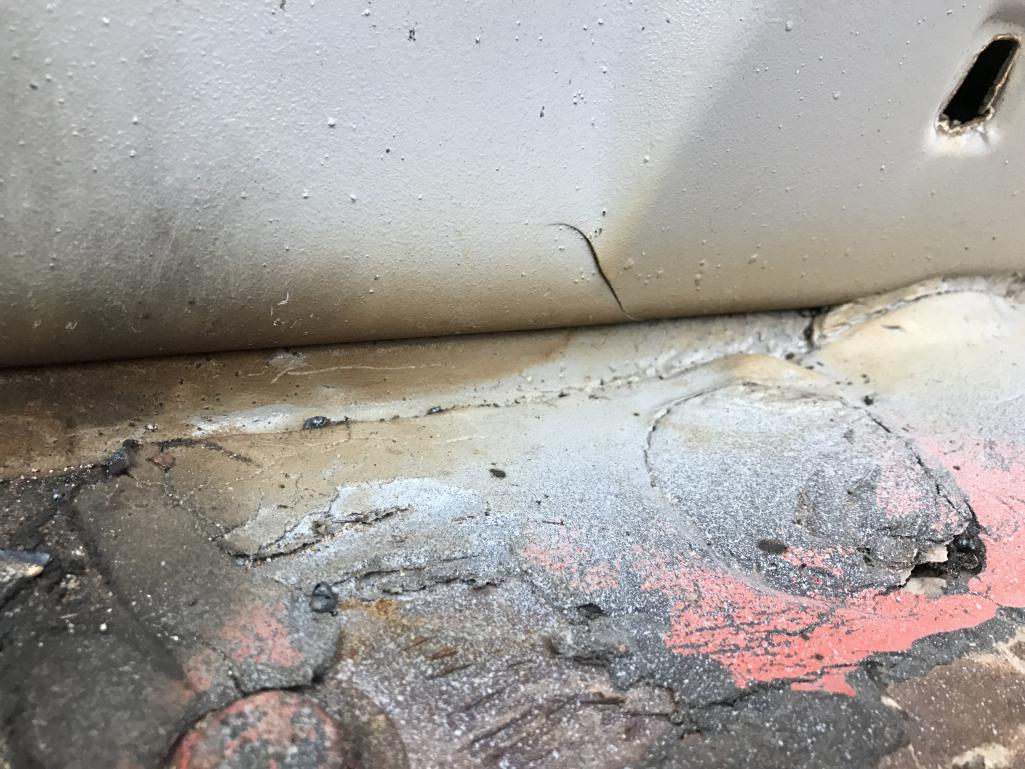
|
|
|
|
| MichiganMat |
Oct 31 2016, 04:46 AM
Post
#195
|
|
Member Group: Members Posts: 115 Joined: 14-June 06 From: San Jose, CA Member No.: 6,222 Region Association: Northern California |
Whats your thinking behind the placement of those upper bars connecting the front and rear hoops?
Im concerned that they are placed too far inward which could put them directly over the drivers head instead of off to the side. Is there a reason you haven't placed them off to the corners? Theres not a lot of headroom for drivers & passengers as it is in these cars, you might consider putting them as far off to the corners as possible. Loving the build so far, keep the pictures coming! |
|
|
|
| Andyrew |
Oct 31 2016, 07:11 AM
Post
#196
|
|
Spooling.... Please wait Group: Members Posts: 13,380 Joined: 20-January 03 From: Riverbank, Ca Member No.: 172 Region Association: Northern California |
QUOTE(Curbandgutter @ Oct 30 2016, 08:24 PM) Ok finished other side. Next step is to tie front and rears to new strut towers. Ohhhh...I'm lengthening wheelbase by 2 inches 2 inch wheelbase lengthening? That would be awesome.. That would really increase the stability at your power level. (IMG:style_emoticons/default/smile.gif) |
|
|
|
| Curbandgutter |
Oct 31 2016, 03:01 PM
Post
#197
|
|
Senior Member Group: Members Posts: 566 Joined: 8-March 13 From: Murrieta CA Member No.: 15,637 Region Association: Southern California |
QUOTE(MichiganMat @ Oct 31 2016, 03:46 AM) Whats your thinking behind the placement of those upper bars connecting the front and rear hoops? Good eye Michigan! Actually they are place holders for right now. I will only add them if the twist test shows an appreciable improvement in torsional stiffness. QUOTE(Andyrew @ Oct 31 2016, 06:11 AM) QUOTE(Curbandgutter @ Oct 30 2016, 08:24 PM) Ohhhh...I'm lengthening wheelbase by 2 inches 2 inch wheelbase lengthening? That would be awesome.. That would really increase the stability at your power level. (IMG:style_emoticons/default/smile.gif) Yes, the lengthening came about from thinking how this would give me a better straight line stability. Two inches is a number that I can sneak in and still look like a regular teener. This gives me more room in the engine compartment and allows the cv axles to line up better with the transaxle. |
|
|
|
| Cracker |
Oct 31 2016, 07:27 PM
Post
#198
|
|
Advanced Member Group: Members Posts: 2,148 Joined: 2-February 10 From: Atlanta (area) Member No.: 11,316 Region Association: South East States |
That would be wonderful...my drive flange to hub centerline is 2.6" - a 2" increase would be ideal. With a little massaging - I will be able to retrieve about 1". Jealous.
T QUOTE(Curbandgutter @ Oct 31 2016, 05:01 PM) This gives me more room in the engine compartment and allows the cv axles to line up better with the transaxle. |
|
|
|
| 76-914 |
Oct 31 2016, 07:33 PM
Post
#199
|
|
Repeat Offender & Resident Subaru Antagonist Group: Members Posts: 13,846 Joined: 23-January 09 From: Temecula, CA Member No.: 9,964 Region Association: Southern California |
You gonna tell 'em about the other 2" mod or is that classified? (IMG:style_emoticons/default/beerchug.gif) Kent
|
|
|
|
| Curbandgutter |
Nov 1 2016, 11:03 AM
Post
#200
|
|
Senior Member Group: Members Posts: 566 Joined: 8-March 13 From: Murrieta CA Member No.: 15,637 Region Association: Southern California |
QUOTE(76-914 @ Oct 31 2016, 06:33 PM) You gonna tell 'em about the other 2" mod or is that classified? (IMG:style_emoticons/default/beerchug.gif) Kent That i s"HIGHLY" classified (IMG:style_emoticons/default/stirthepot.gif) |
|
|
|
|
1 User(s) are reading this topic (1 Guests and 0 Anonymous Users)
0 Members:

|
Lo-Fi Version | Time is now: 30th January 2026 - 04:57 PM |
Invision Power Board
v9.1.4 © 2026 IPS, Inc.