|
|

|
Porsche, and the Porsche crest are registered trademarks of Dr. Ing. h.c. F. Porsche AG.
This site is not affiliated with Porsche in any way. Its only purpose is to provide an online forum for car enthusiasts. All other trademarks are property of their respective owners. |
|
|
  |
| csdilligaf |
 Mar 24 2017, 03:42 PM Mar 24 2017, 03:42 PM
Post
#401
|
|
Member   Group: Members Posts: 106 Joined: 18-April 12 From: San Diego CA Member No.: 14,397 Region Association: None |
Rudy and I discussed the header plan. At first I was going too make us both a set and go equal length and relocate the turbo's to a better location for our needs but then in the interest of speeding up the process we decided to go cheap to get it running. We were aware of the cracking issue but Hell, at $135 they are disposable. We will most likely chop and modify them at least once. So consider them mock up.
|
| Mike Bellis |
 Mar 24 2017, 04:43 PM Mar 24 2017, 04:43 PM
Post
#402
|
|
Resident Electrician      Group: Members Posts: 8,347 Joined: 22-June 09 From: Midlothian TX Member No.: 10,496 Region Association: None 

|
I went through a similar issue with my 1.8T. I bought several headers/manifolds trying to find the right location for my turbo. I had a nice SS equal length header that I cut up trying to realign the turbo housing to no avail. A $79 ebay special ended up being perfect. I still have about $1,200 in exhaust manifolds collecting dust in my garage...
|
| csdilligaf |
 Mar 24 2017, 06:11 PM Mar 24 2017, 06:11 PM
Post
#403
|
|
Member   Group: Members Posts: 106 Joined: 18-April 12 From: San Diego CA Member No.: 14,397 Region Association: None |
cheapy's will work for testing but a little more money and these ones made from 1 1/4" schedule 10 stainless pipe would be better when time to finalize things. For what they cost I can't buy the flanges, elbows and pipe and then weld them up.
http://www.ebay.com/itm/3mm-thick-MANIFOLD...XL0&vxp=mtr Ideally I want to delete the pig tail curl they have and lower the turbo with the outlet angled up slightly to clear the axels. We'll see if that is what works on Rudy's first. Edit: They are XSPower. With some research on XSPower turbo headers I found "XS Power is proud to be partnering with Stainless Works" "Stainless Works manufactures them on-site, right here in the United States" |
| csdilligaf |
 Mar 25 2017, 08:06 AM Mar 25 2017, 08:06 AM
Post
#404
|
|
Member   Group: Members Posts: 106 Joined: 18-April 12 From: San Diego CA Member No.: 14,397 Region Association: None |
OK Rudy's lets see if with all the emission and things we don't need if you can get rats nest of wires to look like this?
Attached image(s) 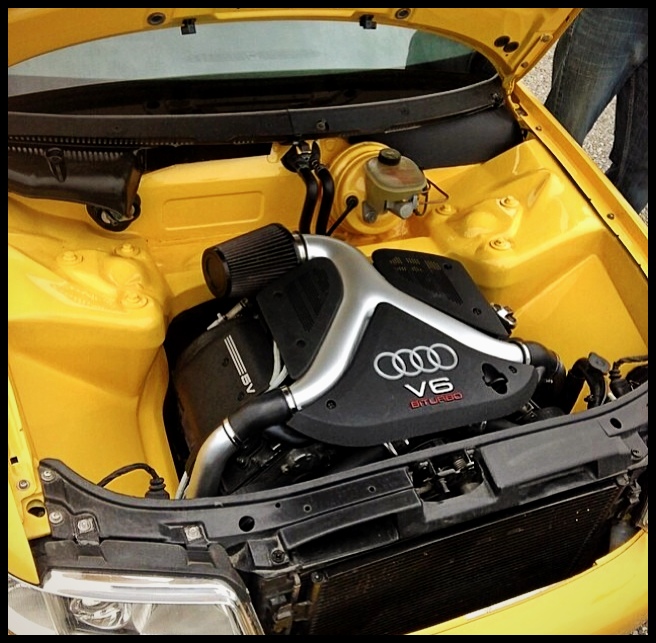
|
| Curbandgutter |
 Mar 25 2017, 08:51 AM Mar 25 2017, 08:51 AM
Post
#405
|
|
Senior Member    Group: Members Posts: 566 Joined: 8-March 13 From: Murrieta CA Member No.: 15,637 Region Association: Southern California 
|
Hahahaha. Seems to me like that car does not run. We're getting rid of the evap, the secondary air and pcv. It cleans up quite a bit. Getting it to look like that may be difficult. We will come close though. The problem that we have is that al of the wiring is along the firewall of the Audi which can hid the wiring. In our case all of our wiring is visible since it's mid engine. We will have to come up with some fancy way of hiding the wiring.
|
| Andyrew |
 Mar 25 2017, 09:18 AM Mar 25 2017, 09:18 AM
Post
#406
|
|
Spooling.... Please wait           Group: Members Posts: 13,380 Joined: 20-January 03 From: Riverbank, Ca Member No.: 172 Region Association: Northern California 
|
For me the biggest thing was there was so much stuff to fit in the engine compartment something like this was no way a possibility. I mean the piping for the intercooler take up a considerable amount of room and you'll have two turbos to pipe to either one A/W IC or run twin side mounts.
|
| Curbandgutter |
 Mar 25 2017, 12:09 PM Mar 25 2017, 12:09 PM
Post
#407
|
|
Senior Member    Group: Members Posts: 566 Joined: 8-March 13 From: Murrieta CA Member No.: 15,637 Region Association: Southern California 
|
I agree Andrew the piping for the intercoolers will take up space. However, I have the luxury of not having a rear trunk and rear firewall. Therefore, since I am going to create a side vent into the engine compartment at each quarter panel, I will be able to fit the intercooler in such a way as to simplify the plumbing. The side vents will fold into the quarter panel rather than protrude like a scoop. They will follow the angle of the tube chassis as it tapers from the B pillar rollbar to the where it pinches at the rear suspension. I'm toying with the idea of making the vent, as it folds in, out of carbon fiber. I set the intercooler in place and it fits perfectly. The intercoolers wil be set in such a way that when the rear hood and rear fenders tilt back, the intercoolers will be exposed. See attached for a preview.
Attached thumbnail(s) 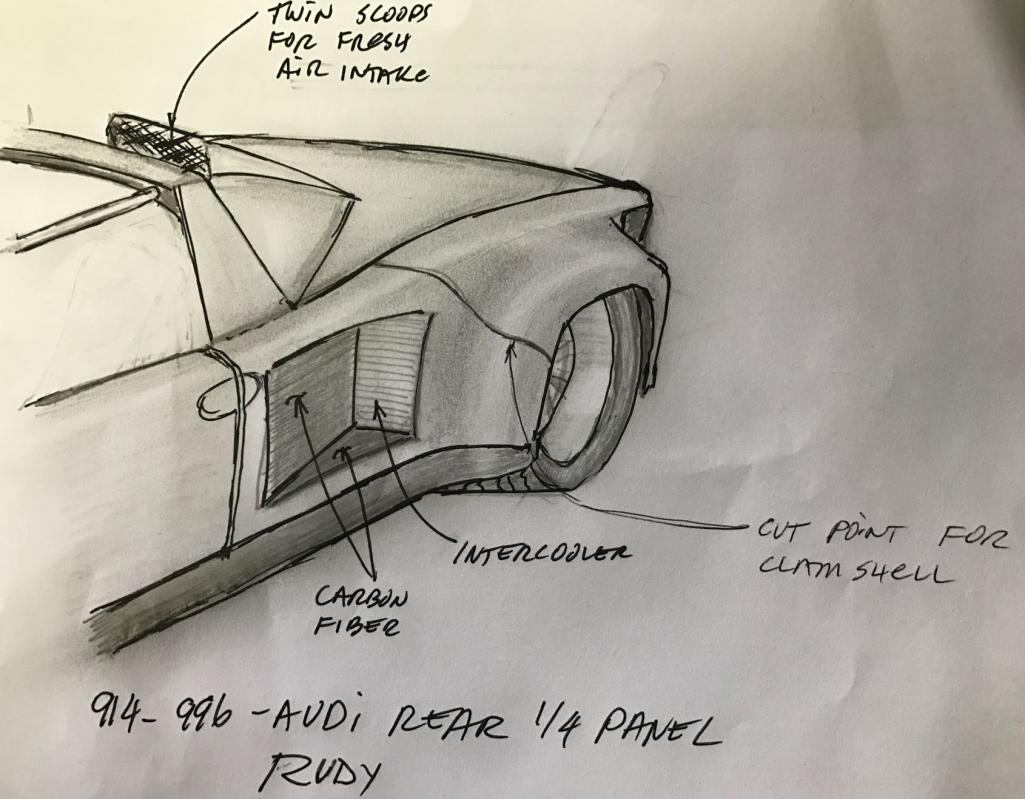
|
| Curbandgutter |
 May 9 2017, 02:36 PM May 9 2017, 02:36 PM
Post
#408
|
|
Senior Member    Group: Members Posts: 566 Joined: 8-March 13 From: Murrieta CA Member No.: 15,637 Region Association: Southern California 
|
Wow it's been a while. Was out on vaca and had to dig out of a ton of work. Back on the project now. Had to make a lifting cradle since I need to lift the engine out of the car often. This contraption worked out perfectly. The next step is to fab the engine supports and finish the last chevron brace in the rear. I'm ordering a new floor pan since that is the next order of business once the engine is tied into the frame.
Attached thumbnail(s) 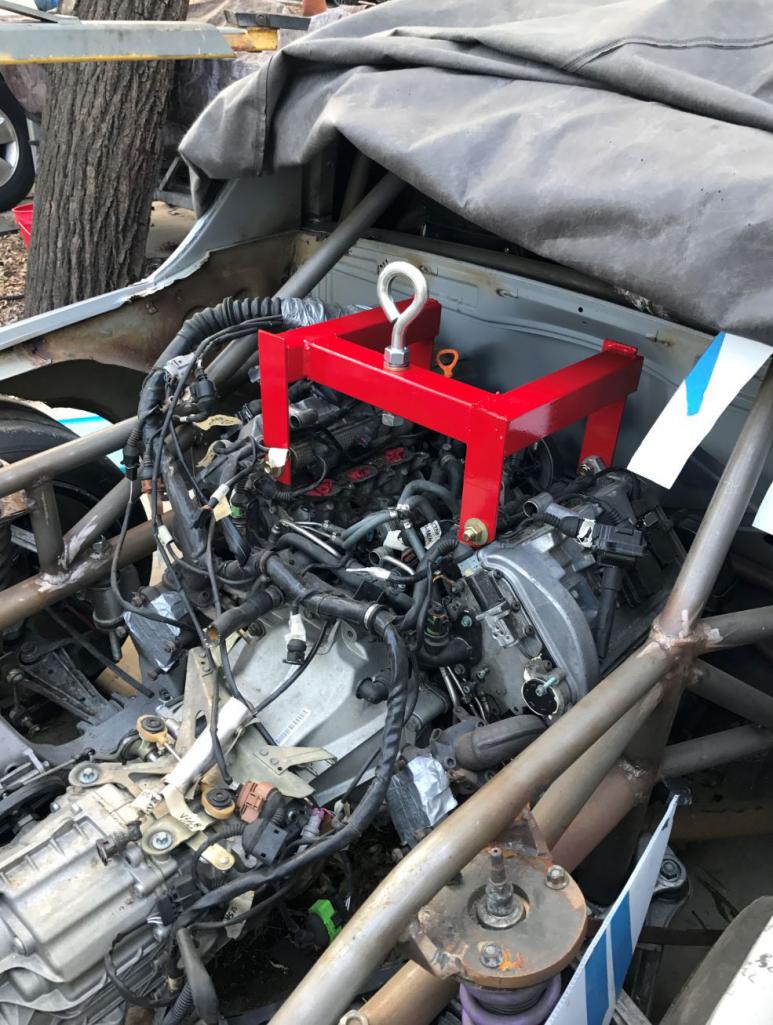 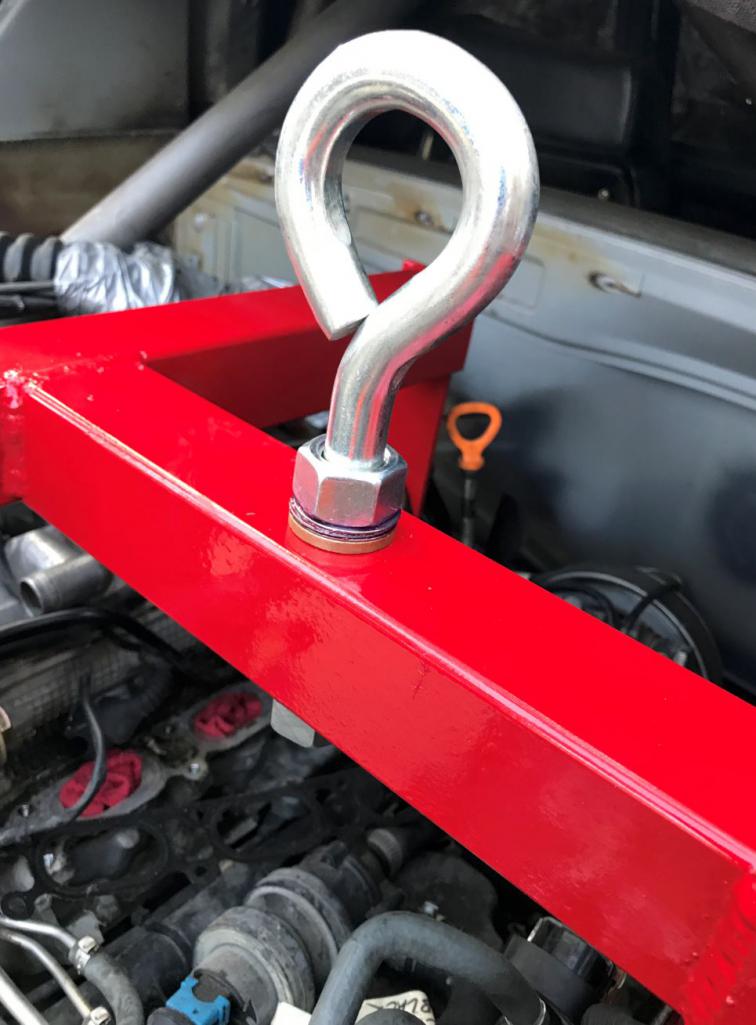 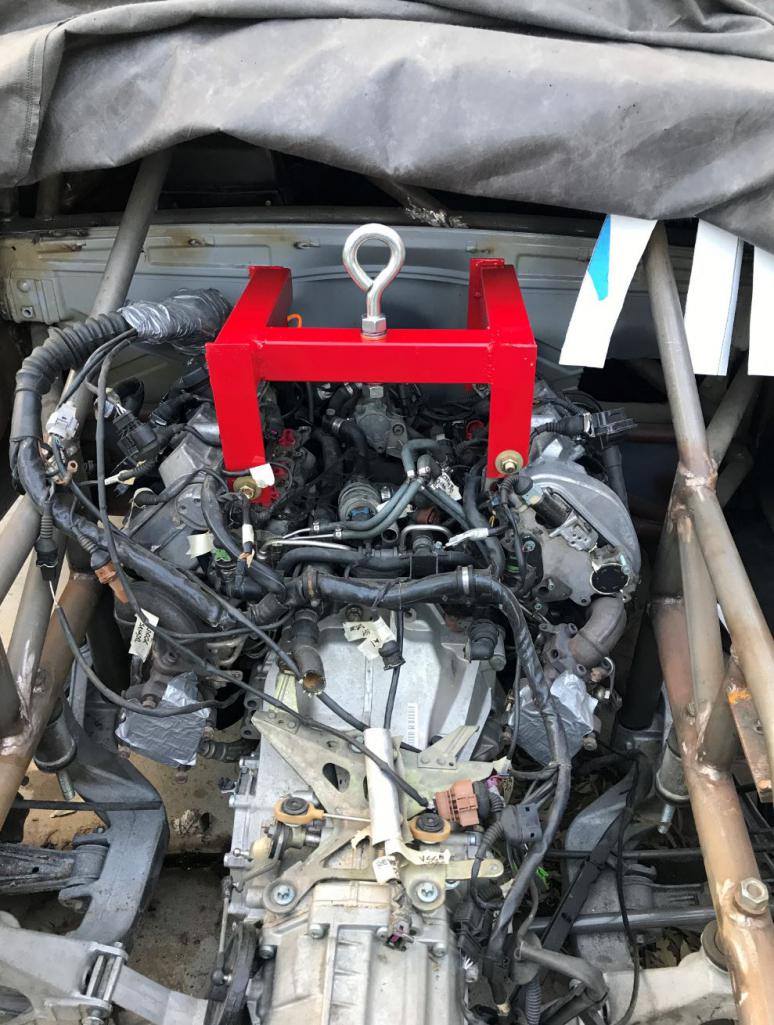 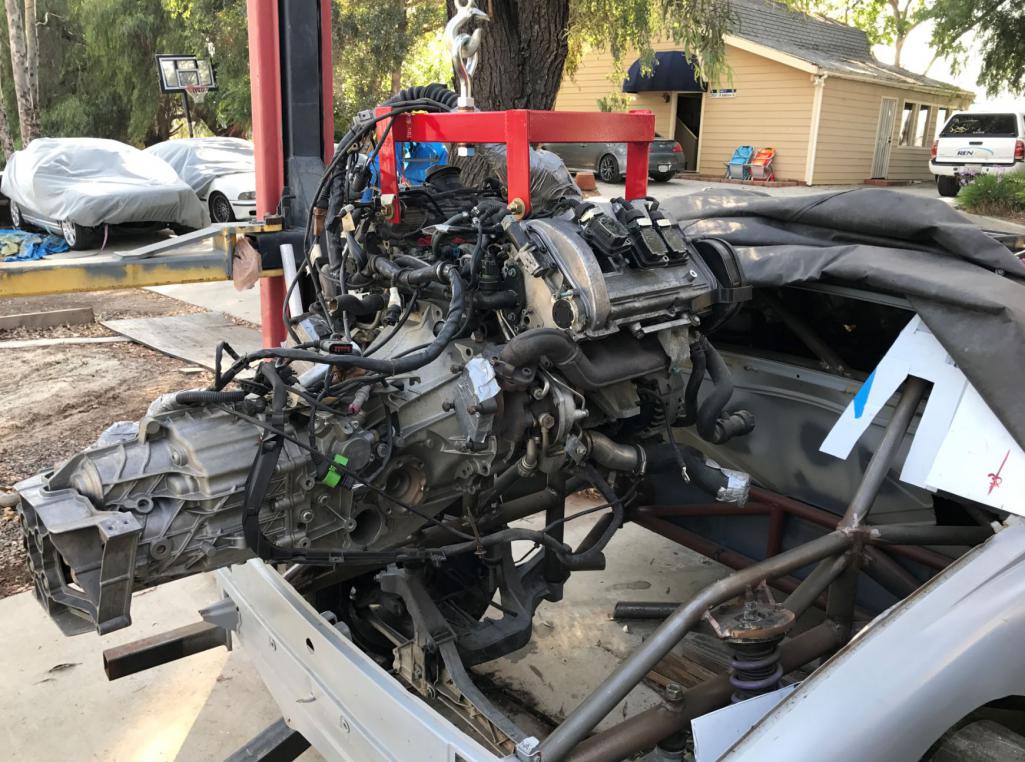
|
| tygaboy |
 May 9 2017, 02:53 PM May 9 2017, 02:53 PM
Post
#409
|
|
914 Guru      Group: Members Posts: 5,701 Joined: 6-October 15 From: Petaluma, CA Member No.: 19,241 Region Association: Northern California 
|
Rudy - Good to see you back at it. (IMG:style_emoticons/default/aktion035.gif)
I'm still weeks away from working on mine... |
| Curbandgutter |
 May 11 2017, 07:15 AM May 11 2017, 07:15 AM
Post
#410
|
|
Senior Member    Group: Members Posts: 566 Joined: 8-March 13 From: Murrieta CA Member No.: 15,637 Region Association: Southern California 
|
It's nice to be back. Hope you get better soon and are able to get your project going again. The time off has been good to get the creative juices flowing again.
|
| Curbandgutter |
 May 13 2017, 12:49 PM May 13 2017, 12:49 PM
Post
#411
|
|
Senior Member    Group: Members Posts: 566 Joined: 8-March 13 From: Murrieta CA Member No.: 15,637 Region Association: Southern California 
|
Well I got the car back on the chassis table to level everything up and place engine where it needs to be. I like its final position. The oil pan is 1/2" above the floor and the engine sits almost level. The engine and transaxle are shoved forward as much as possible. This will give me a more balanced car in conjunction with extending the wheelbase 3". The next step is to weld the engine mount s. After that it will be floor pan and finish buttoning up all of the welds and covering up all access holes.
Attached thumbnail(s) 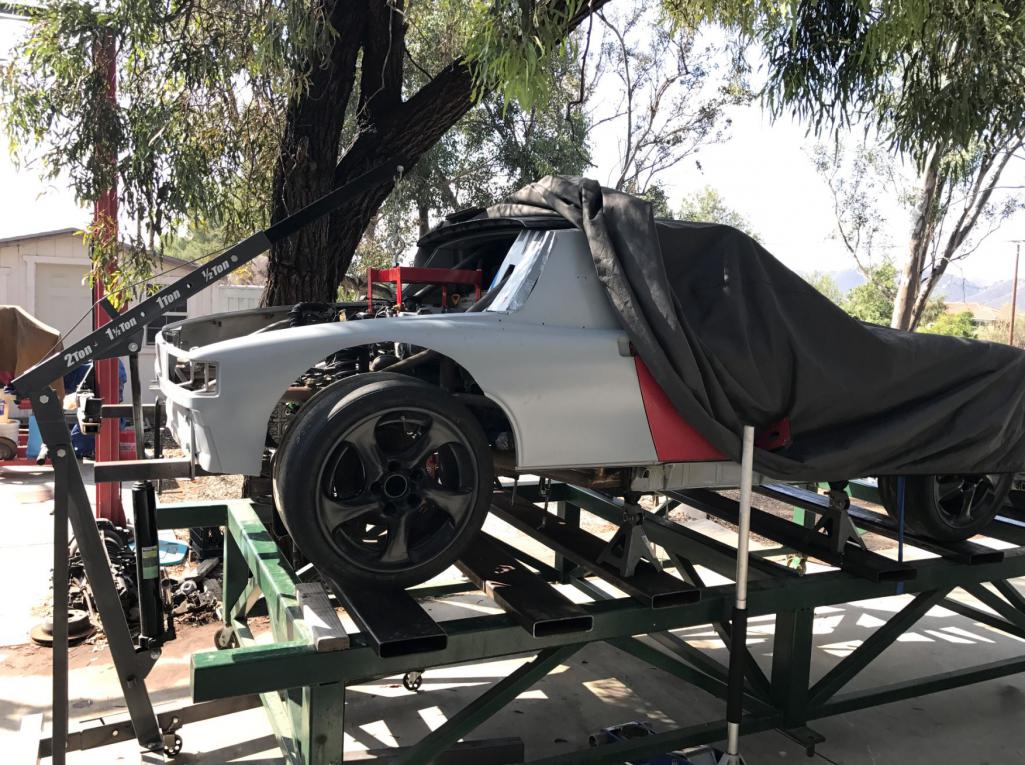 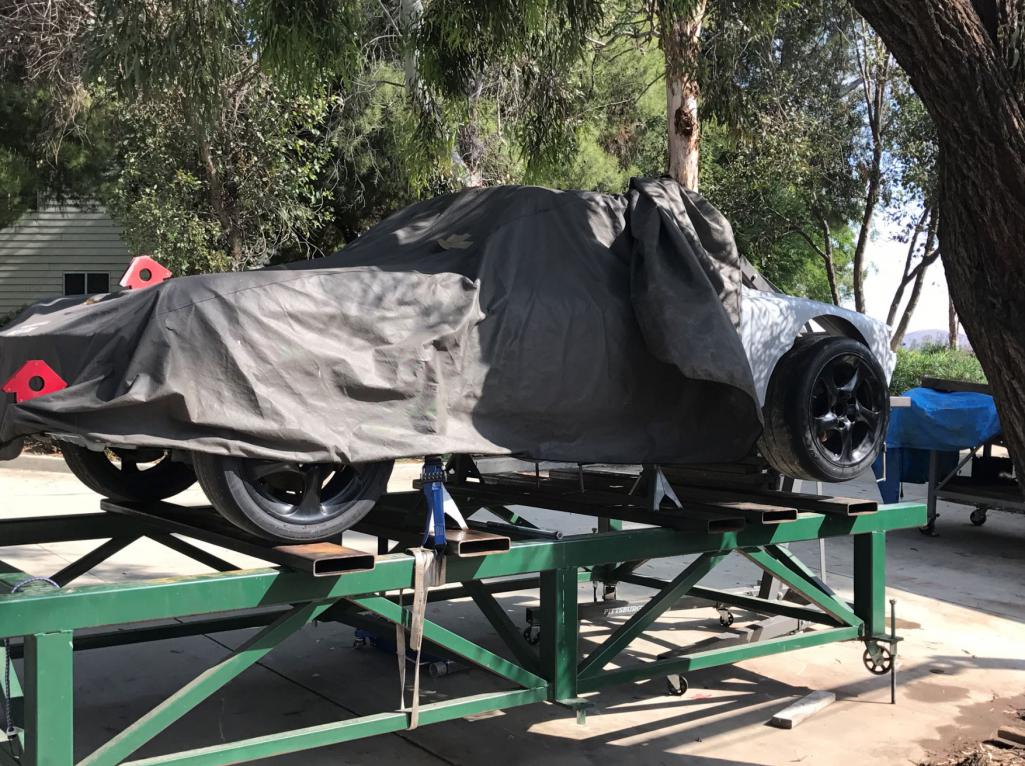 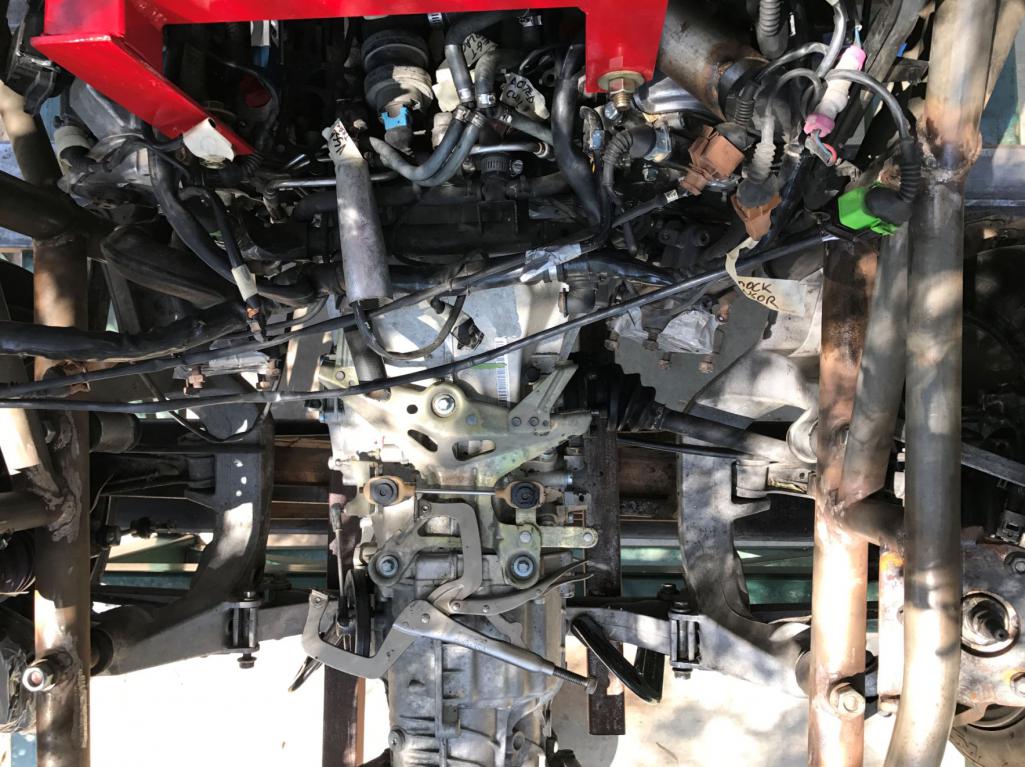 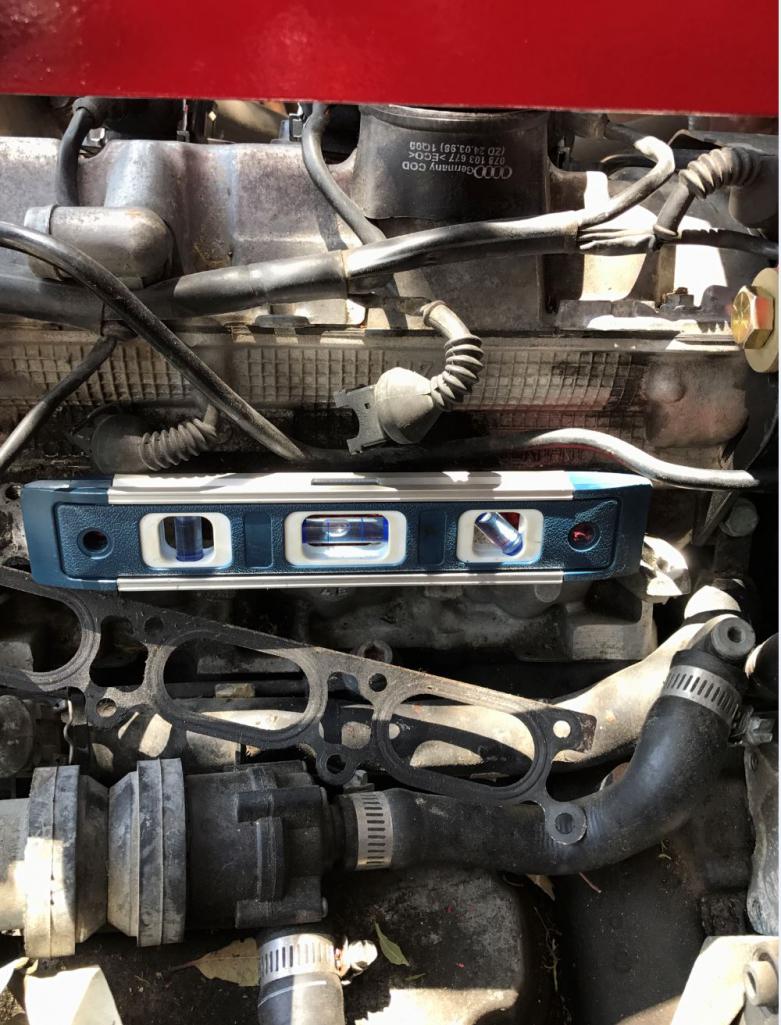 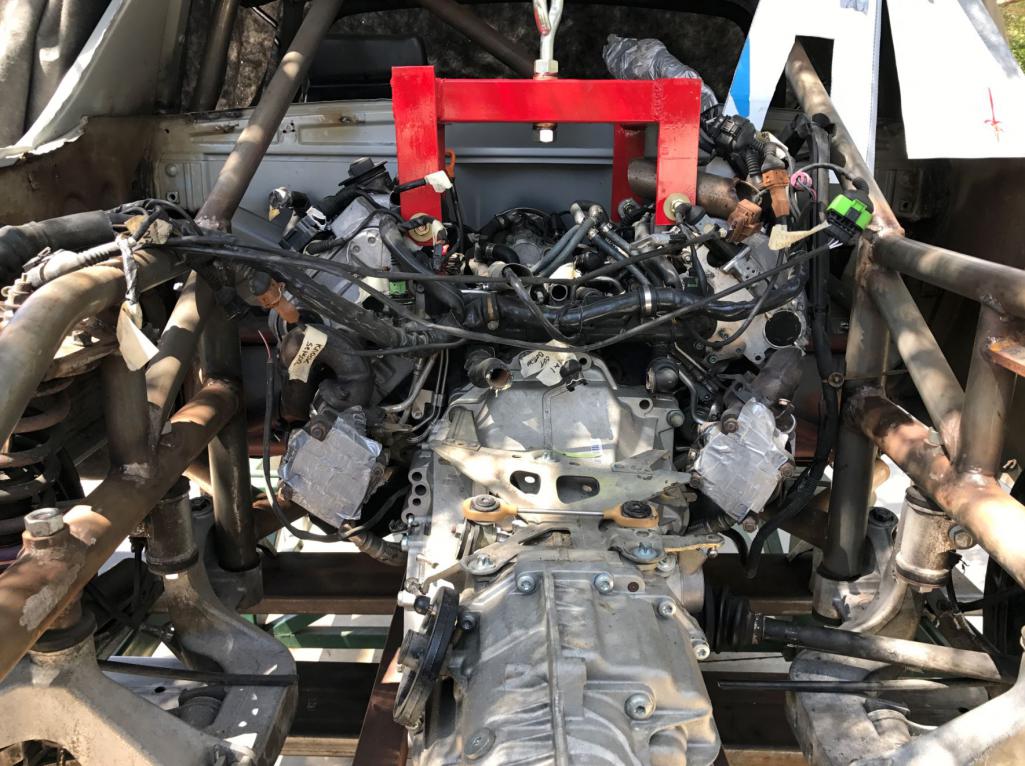 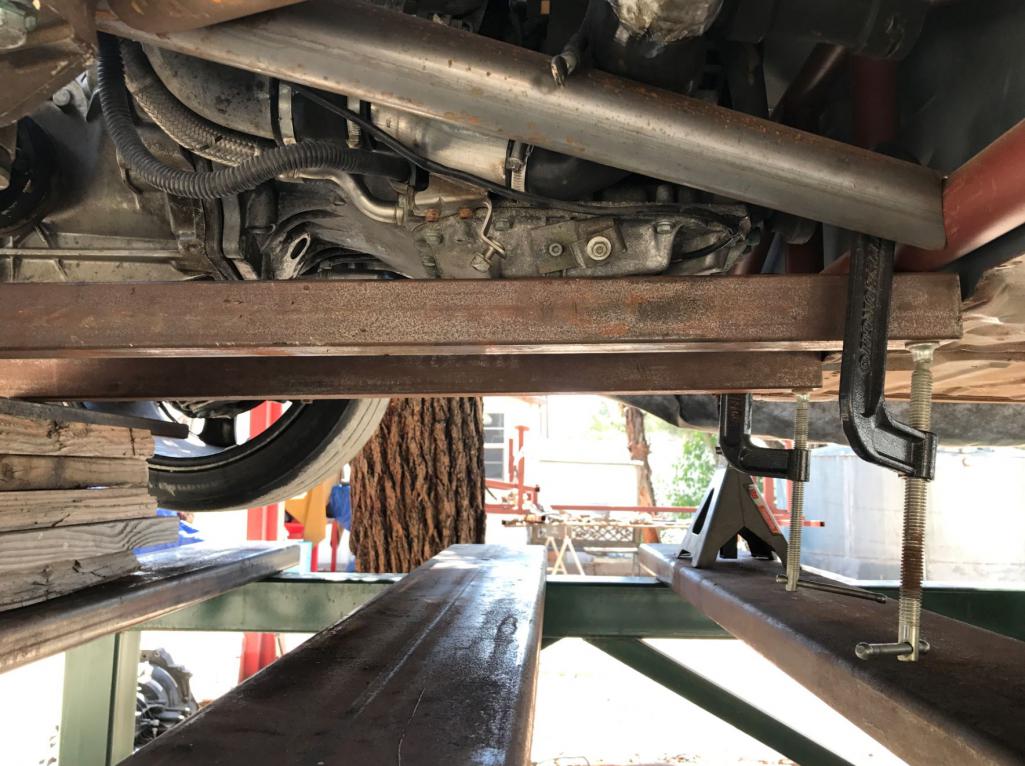 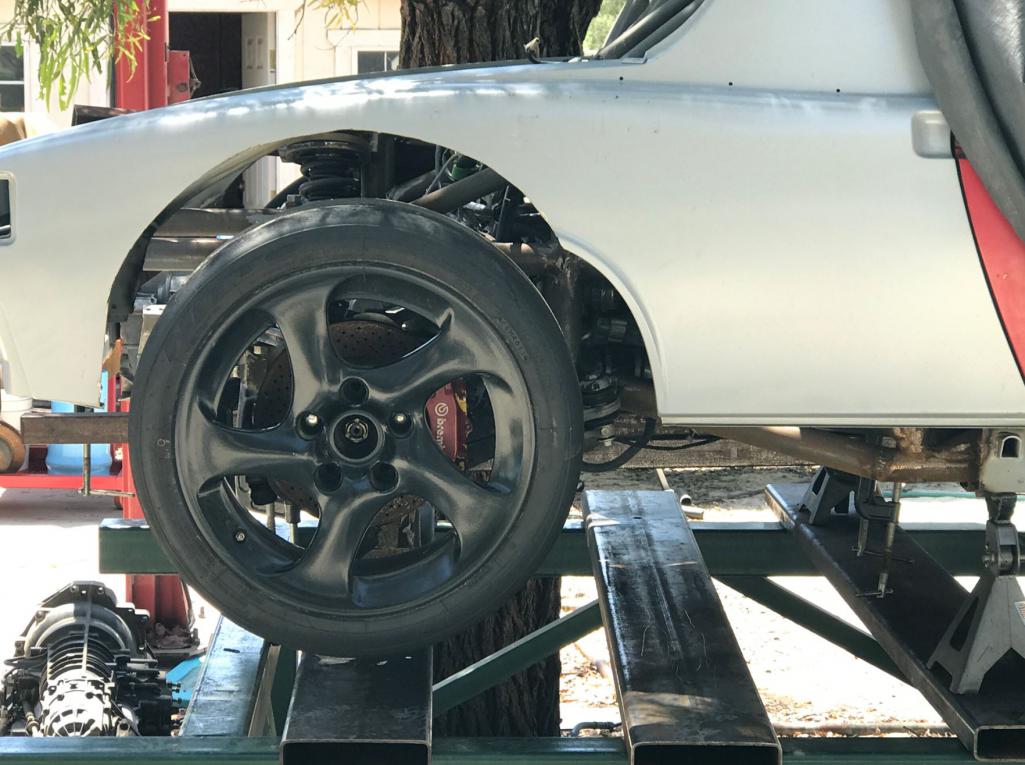 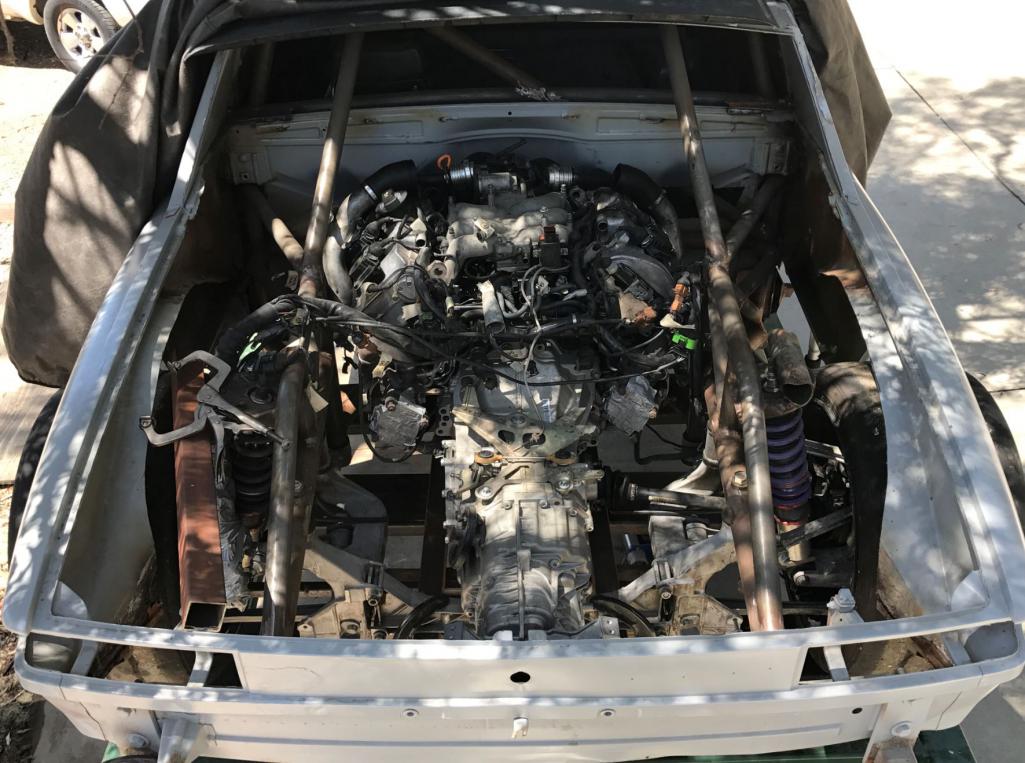 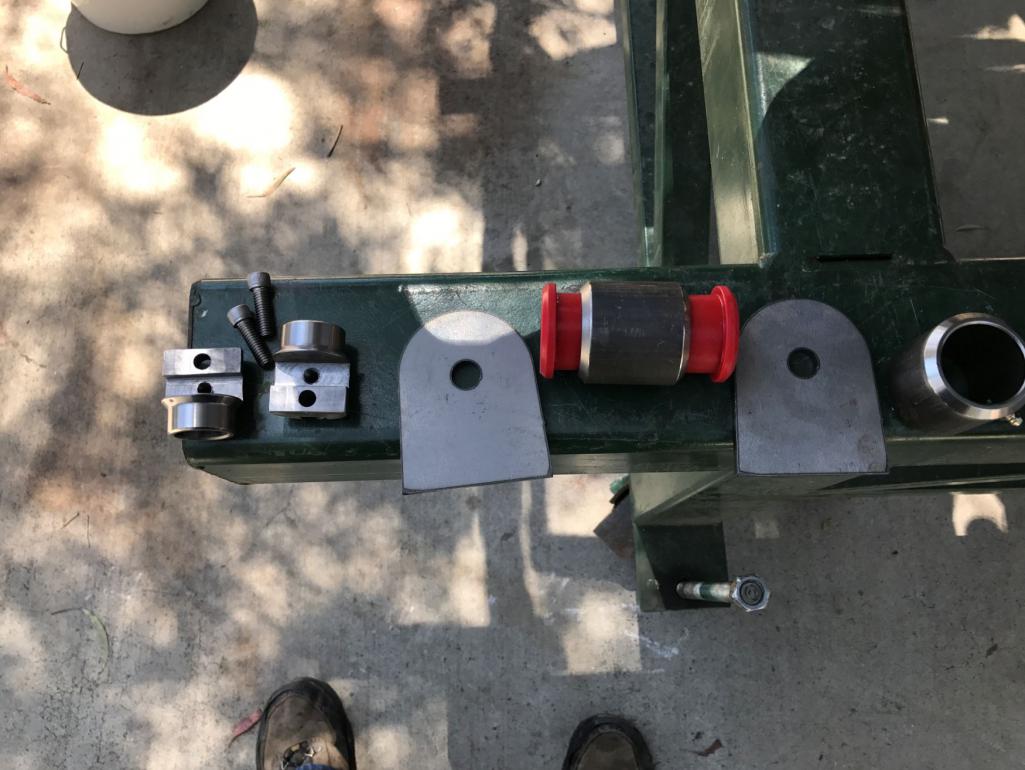 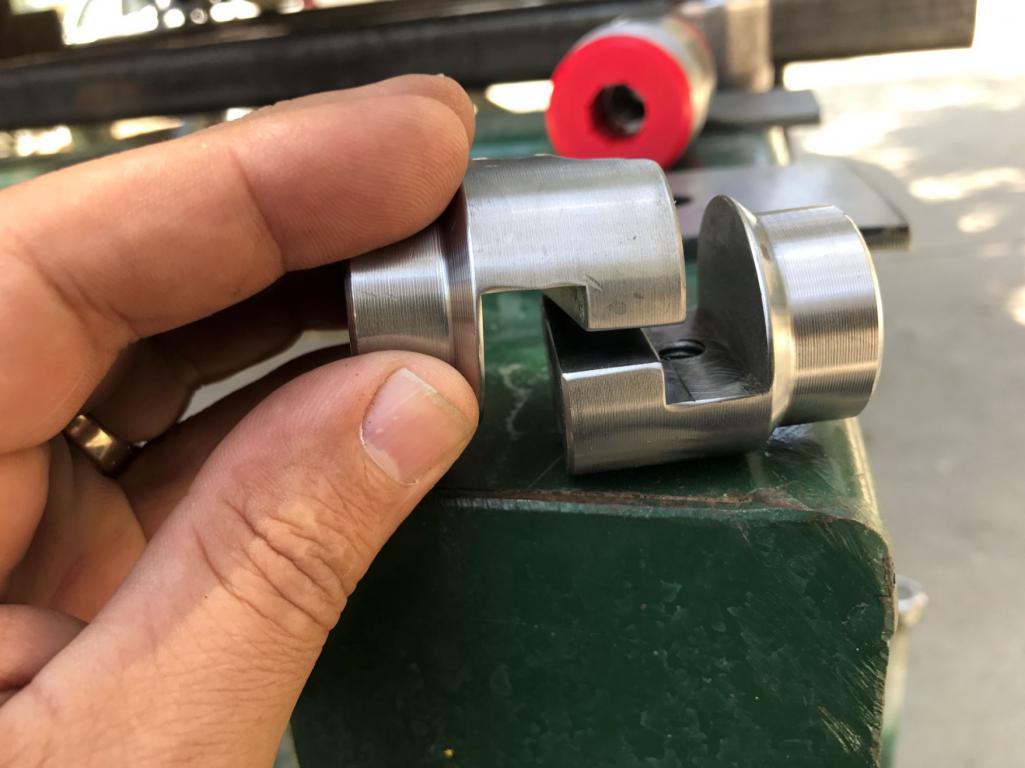 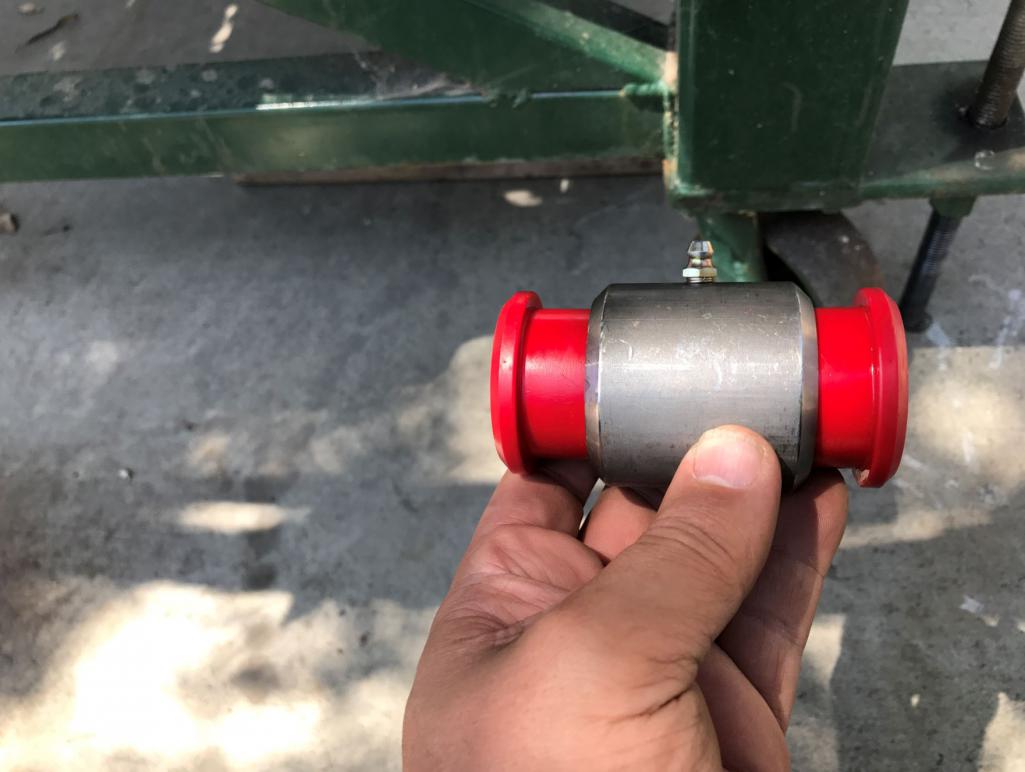 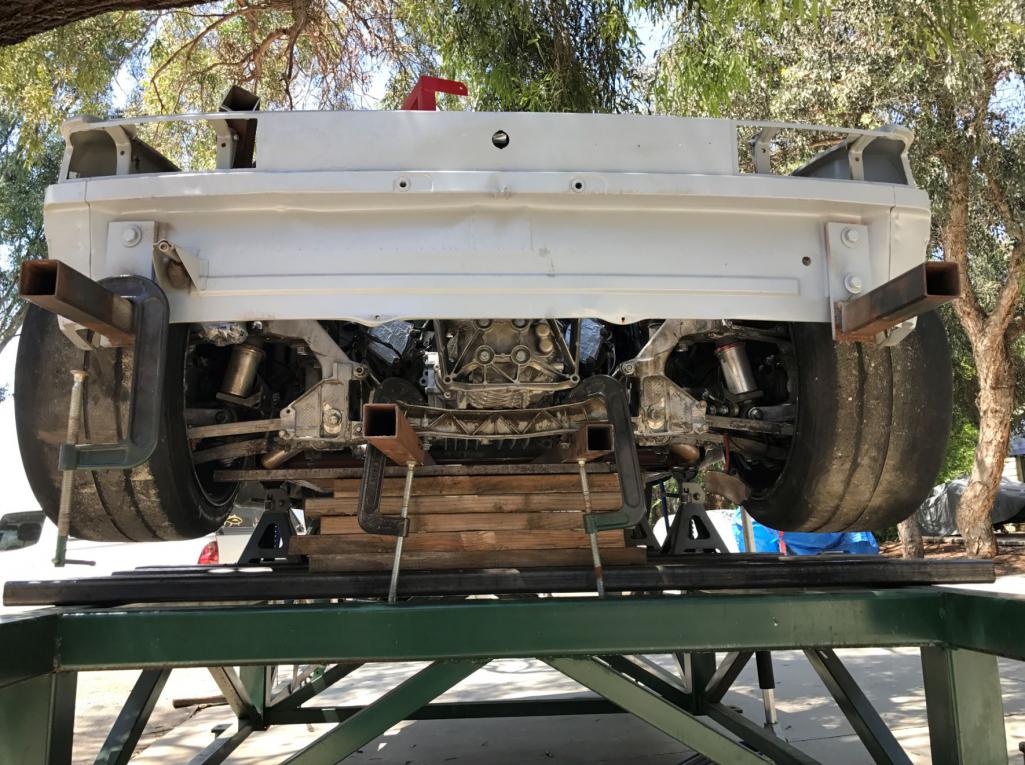
|
| Andyrew |
 May 13 2017, 01:12 PM May 13 2017, 01:12 PM
Post
#412
|
|
Spooling.... Please wait           Group: Members Posts: 13,380 Joined: 20-January 03 From: Riverbank, Ca Member No.: 172 Region Association: Northern California 
|
|
| McMark |
 May 14 2017, 05:34 AM May 14 2017, 05:34 AM
Post
#413
|
|
914 Freak!                Group: Retired Admin Posts: 20,180 Joined: 13-March 03 From: Grand Rapids, MI Member No.: 419 Region Association: None |
It's a bolt-together joint. I used a couple sets on a 911 rear cage. They're fantastic.
Attached image(s) 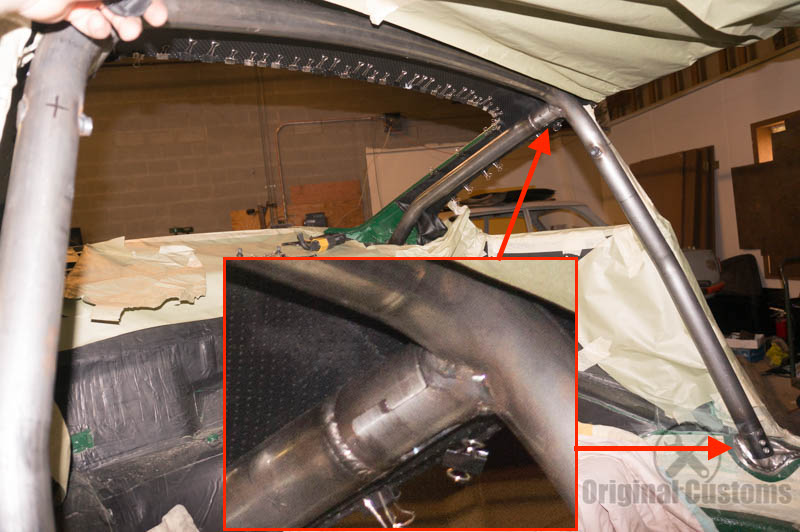
|
| Curbandgutter |
 May 14 2017, 09:32 AM May 14 2017, 09:32 AM
Post
#414
|
|
Senior Member    Group: Members Posts: 566 Joined: 8-March 13 From: Murrieta CA Member No.: 15,637 Region Association: Southern California 
|
(IMG:style_emoticons/default/agree.gif) Exactly. Andrew they will be used for the couple of cross bars that will go over the engine/transmission bay. That way when I need to remove the engine and trans, the y come out as a unit over the top. This car is being set up to be able to remove the engine and transaxle easily for servicing.
|
| Curbandgutter |
 May 21 2017, 07:11 PM May 21 2017, 07:11 PM
Post
#415
|
|
Senior Member    Group: Members Posts: 566 Joined: 8-March 13 From: Murrieta CA Member No.: 15,637 Region Association: Southern California 
|
Some more progress on the transaxle mount. It ended up being very tricky since I did not want the transaxle mounting bolts to have any tension on them. The factory was designed with tension, but since I am adding a much longer ecentricity to the new brace it will add too much tension on the factory bolts. I cam up with a way to tie them together so that there will be zero tension on the bolts. They will only see shear forces. Almost done tying the back end up.
Attached thumbnail(s) 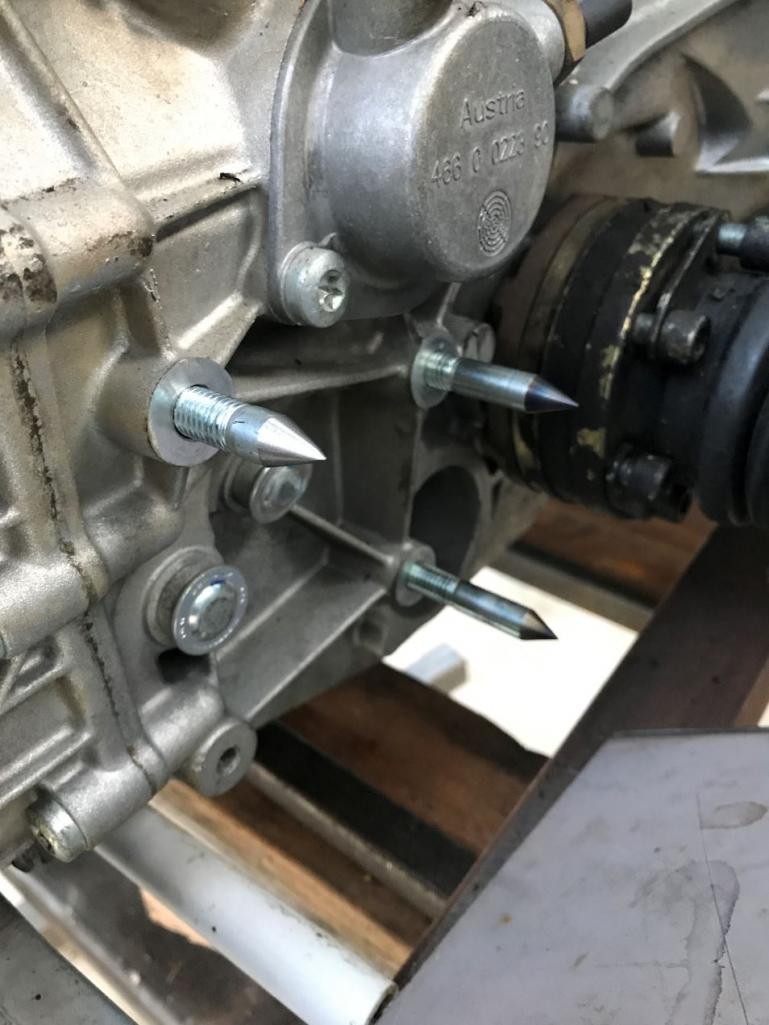 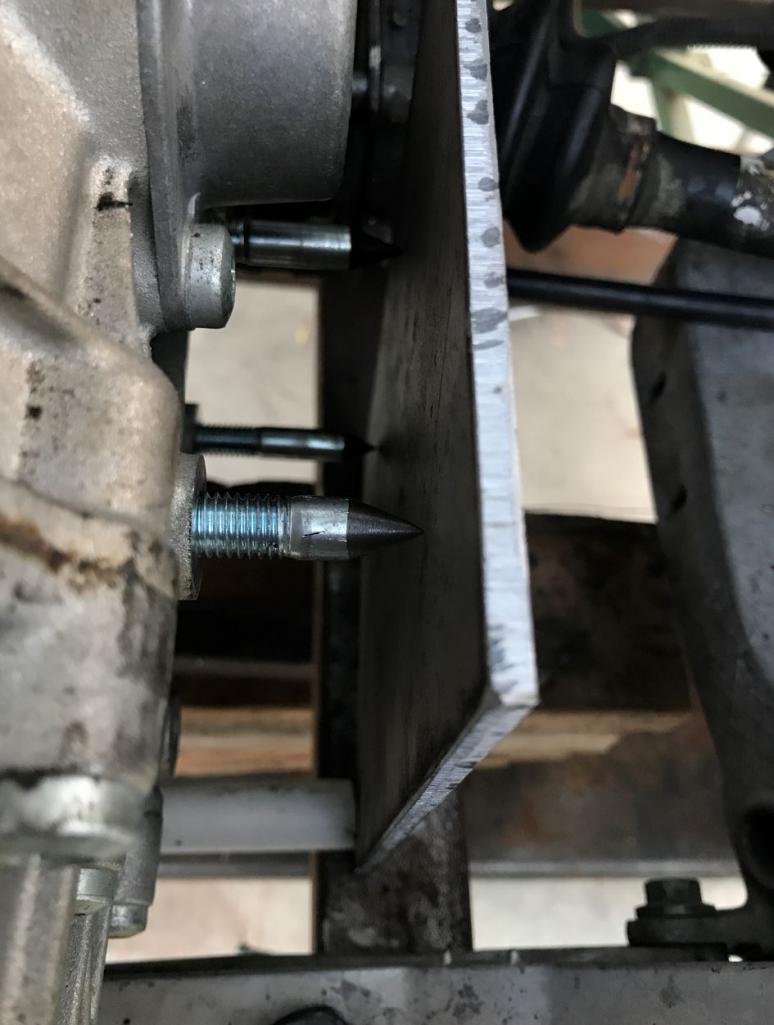 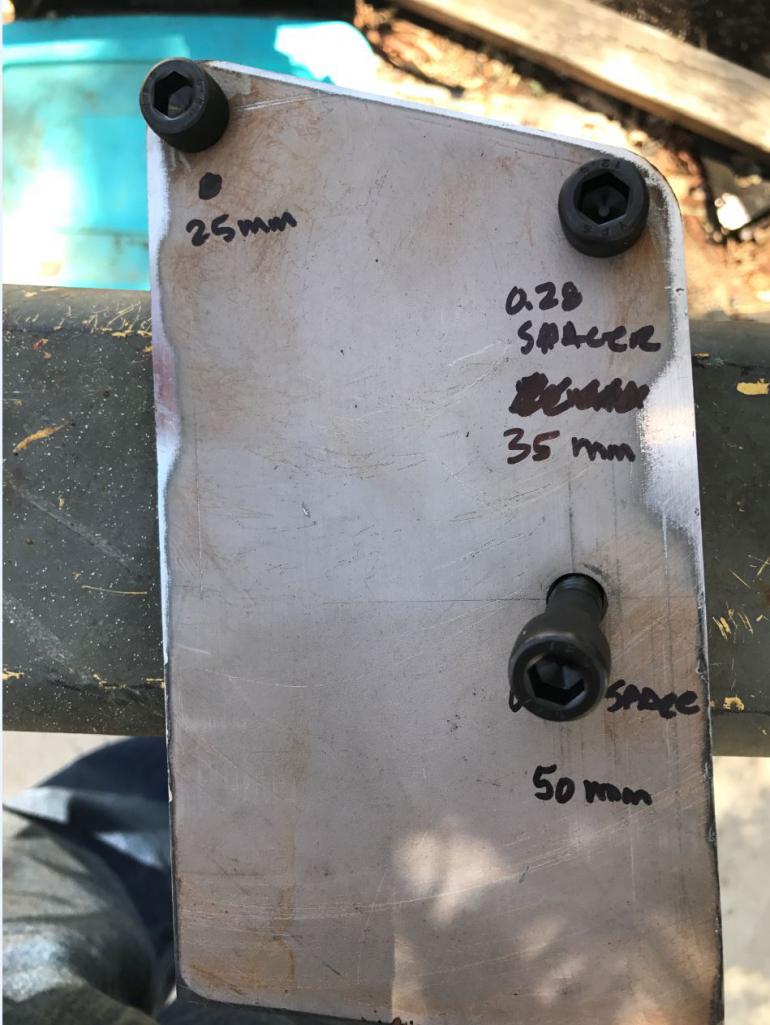 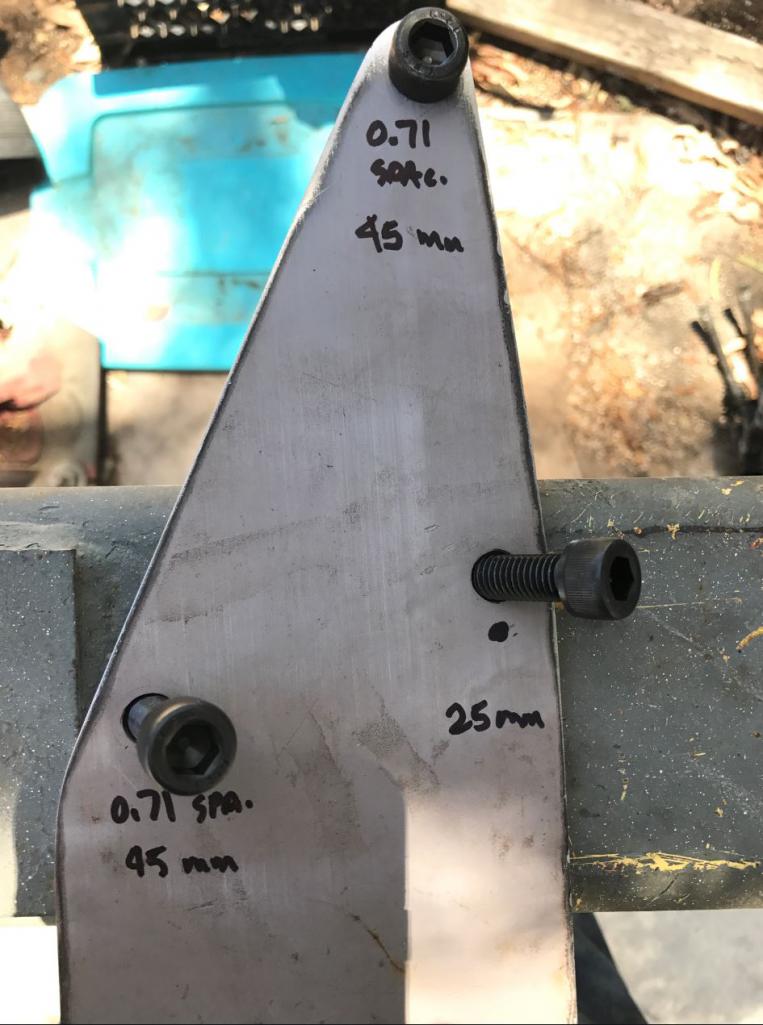 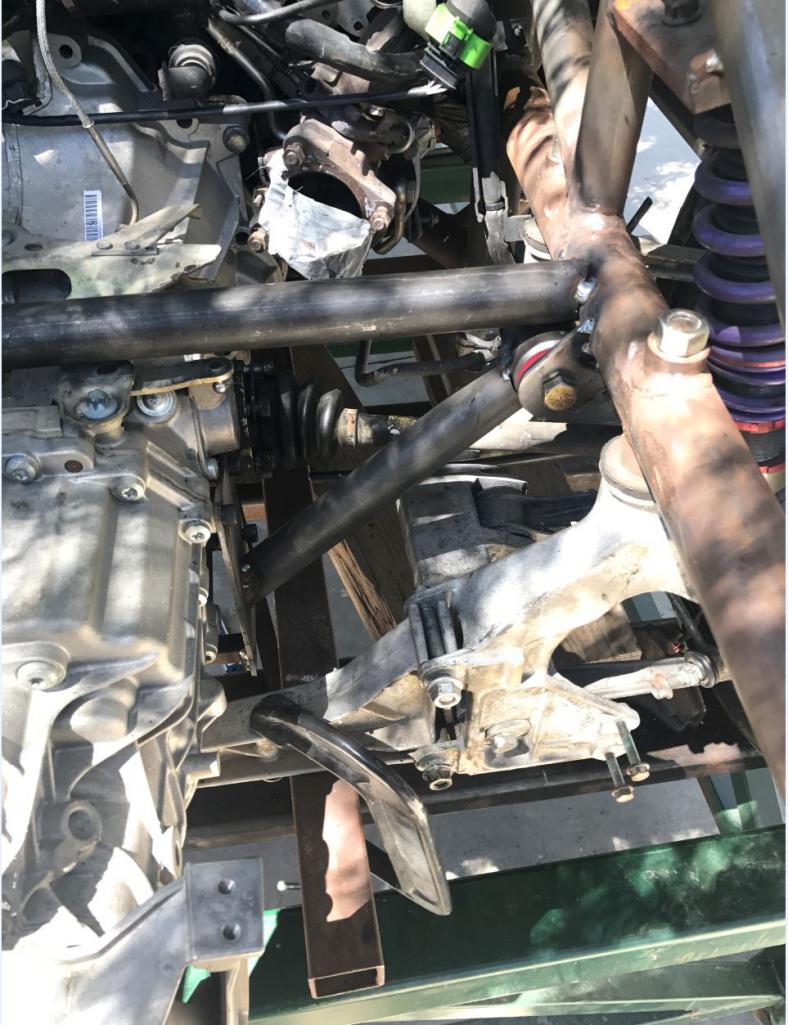 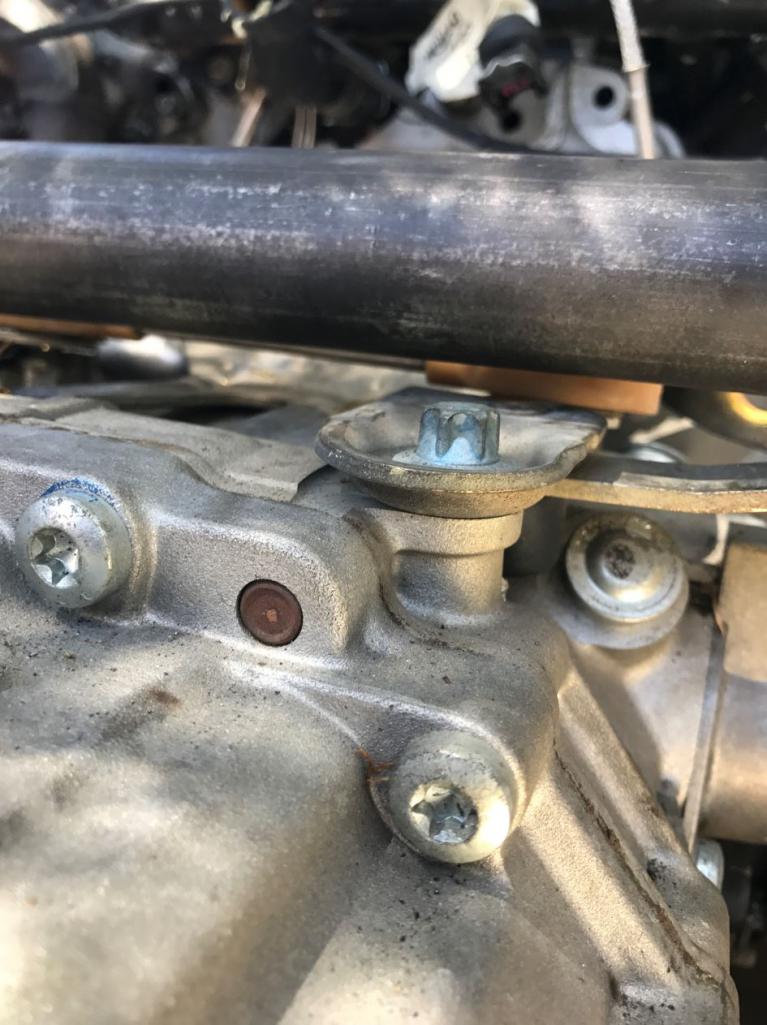 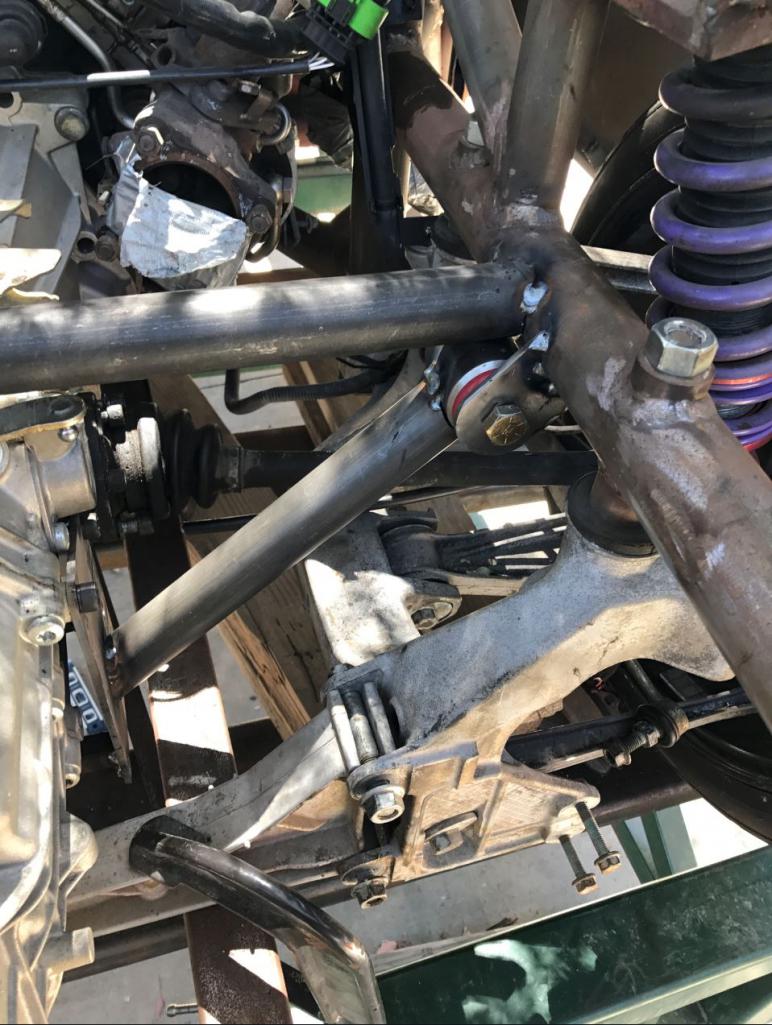 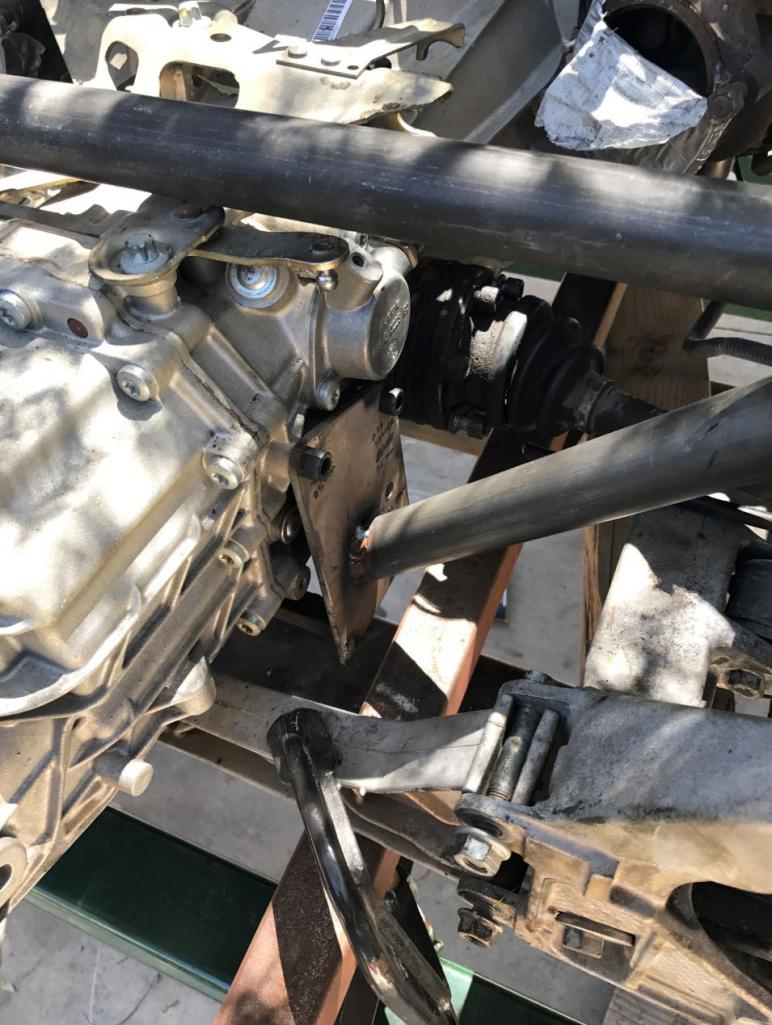 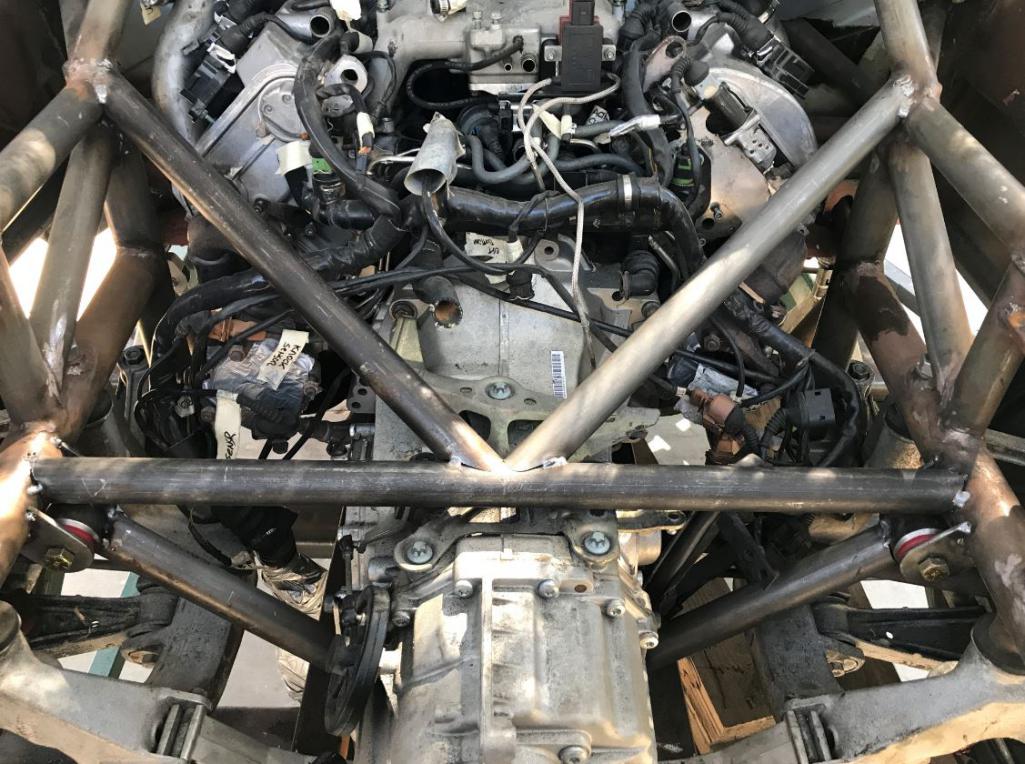
|
| Curbandgutter |
 May 24 2017, 09:31 AM May 24 2017, 09:31 AM
Post
#416
|
|
Senior Member    Group: Members Posts: 566 Joined: 8-March 13 From: Murrieta CA Member No.: 15,637 Region Association: Southern California 
|
Here is the how I'm doing the front engine mounts. After this weekend I'll be move to the front struts. I need to lower front end 3 inches. I have a solution that keeps the 996 struts and coilovers. If it works out, then the car will have 3 inches of ground clearance but with the stock suspension travel. More on that later.
Attached thumbnail(s) 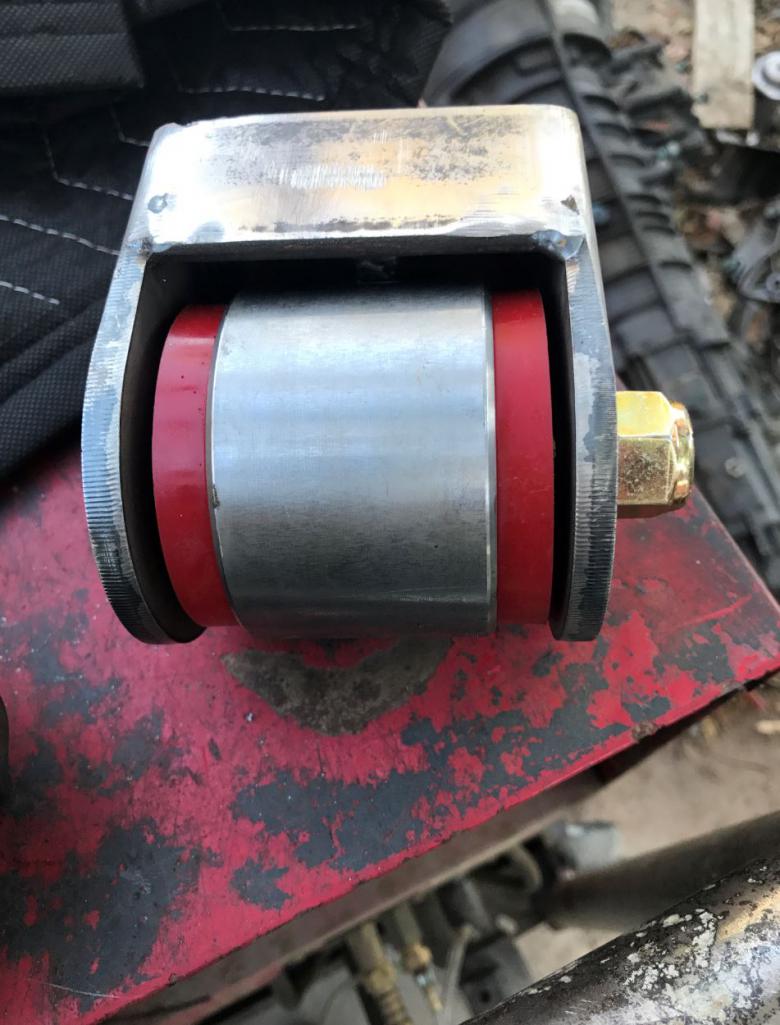 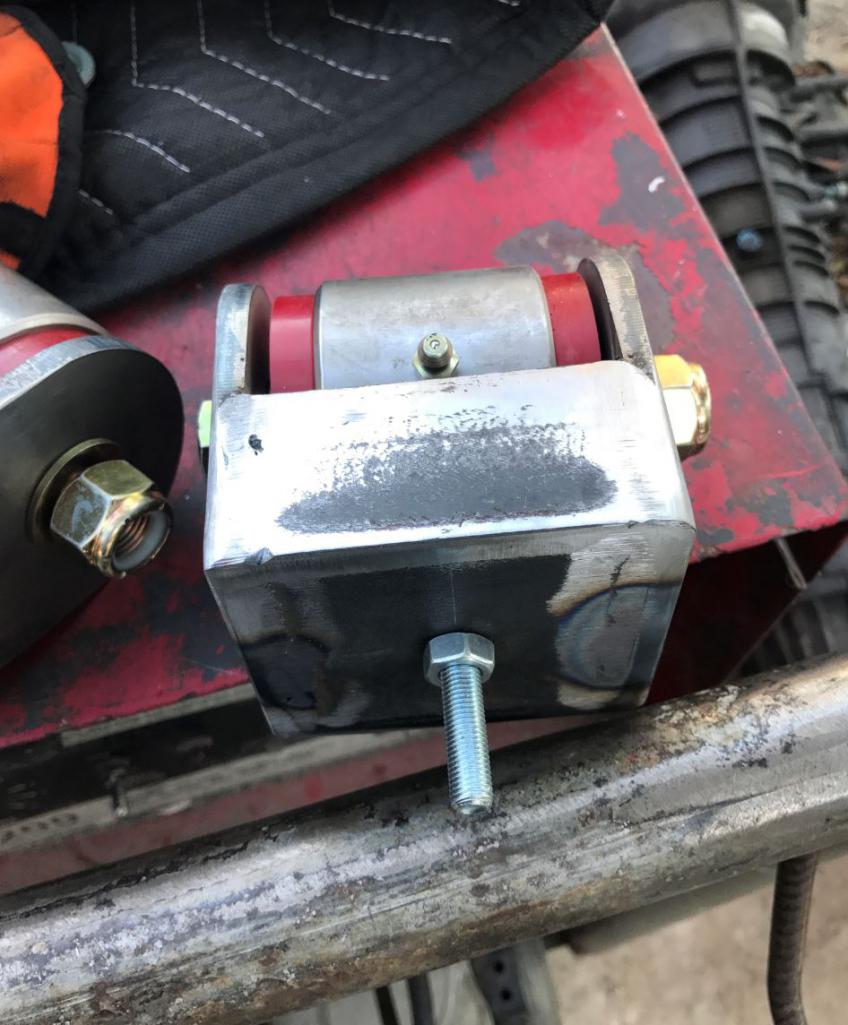 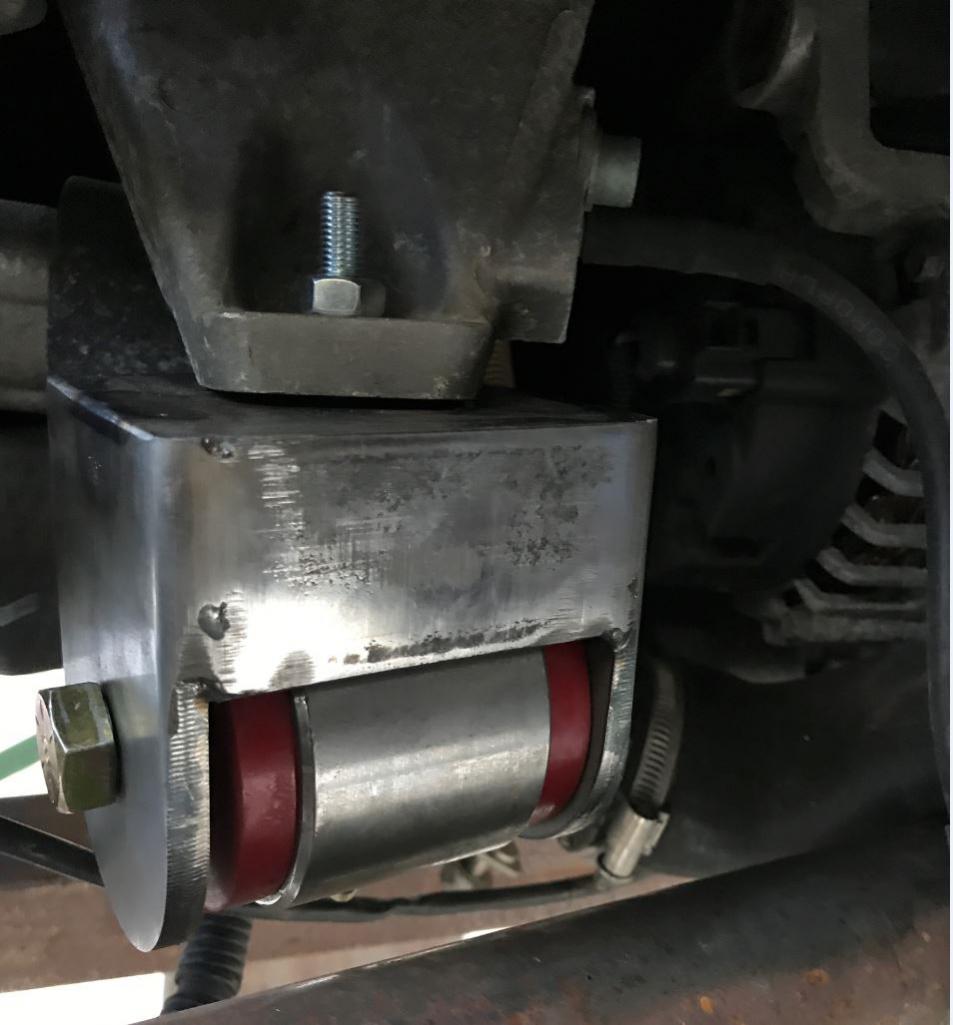 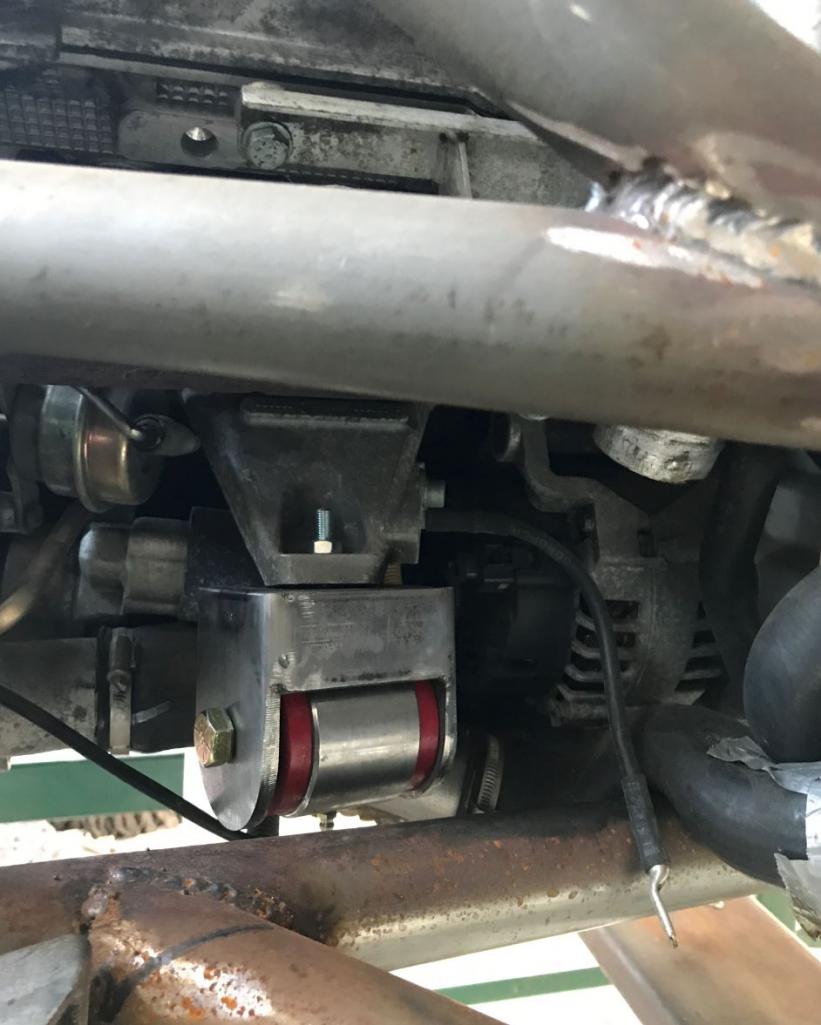
|
| Andyrew |
 May 24 2017, 09:40 AM May 24 2017, 09:40 AM
Post
#417
|
|
Spooling.... Please wait           Group: Members Posts: 13,380 Joined: 20-January 03 From: Riverbank, Ca Member No.: 172 Region Association: Northern California 
|
Here is the how I'm doing the front engine mounts. After this weekend I'll be move to the front struts. I need to lower front end 3 inches. I have a solution that keeps the 996 struts and coilovers. If it works out, then the car will have 3 inches of ground clearance but with the stock suspension travel. More on that later. Custom lower control arm? (IMG:style_emoticons/default/smile.gif) (IMG:http://www.914world.com/bbs2/uploads/post-15637-1495639877_thumb.jpg) Be sure to drill your hole for the nipple in the stock cast mounting piece. Thats why its not sitting flush (IMG:style_emoticons/default/smile.gif) |
| Curbandgutter |
 May 24 2017, 10:52 AM May 24 2017, 10:52 AM
Post
#418
|
|
Senior Member    Group: Members Posts: 566 Joined: 8-March 13 From: Murrieta CA Member No.: 15,637 Region Association: Southern California 
|
It's not sitting flush cause i haven't tightened the nut. It will sit flush then. You have a good eye Andrew.
|
| Curbandgutter |
 May 29 2017, 11:36 AM May 29 2017, 11:36 AM
Post
#419
|
|
Senior Member    Group: Members Posts: 566 Joined: 8-March 13 From: Murrieta CA Member No.: 15,637 Region Association: Southern California 
|
OK the engine is finally sitting in its custom engine and transaxle mounts. Took way longer than expected. I still have to complete welding but I have to remove the engine and transaxle for that. Next step is to work on the front struts. I need to lower the ride height 3 inches in the front.
This is the front engine mount. 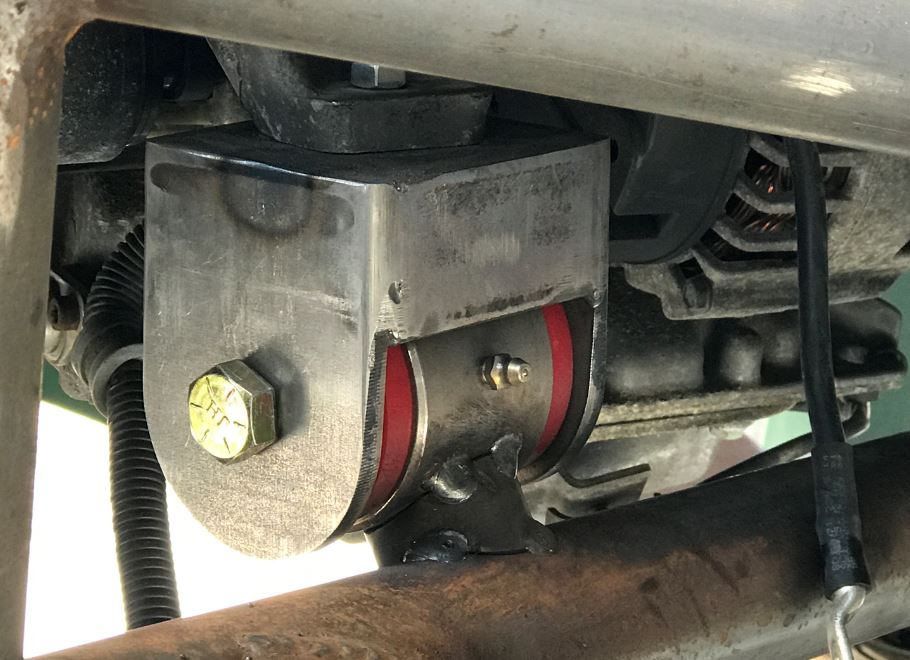 This is the way I tied the transaxle mounts to each other 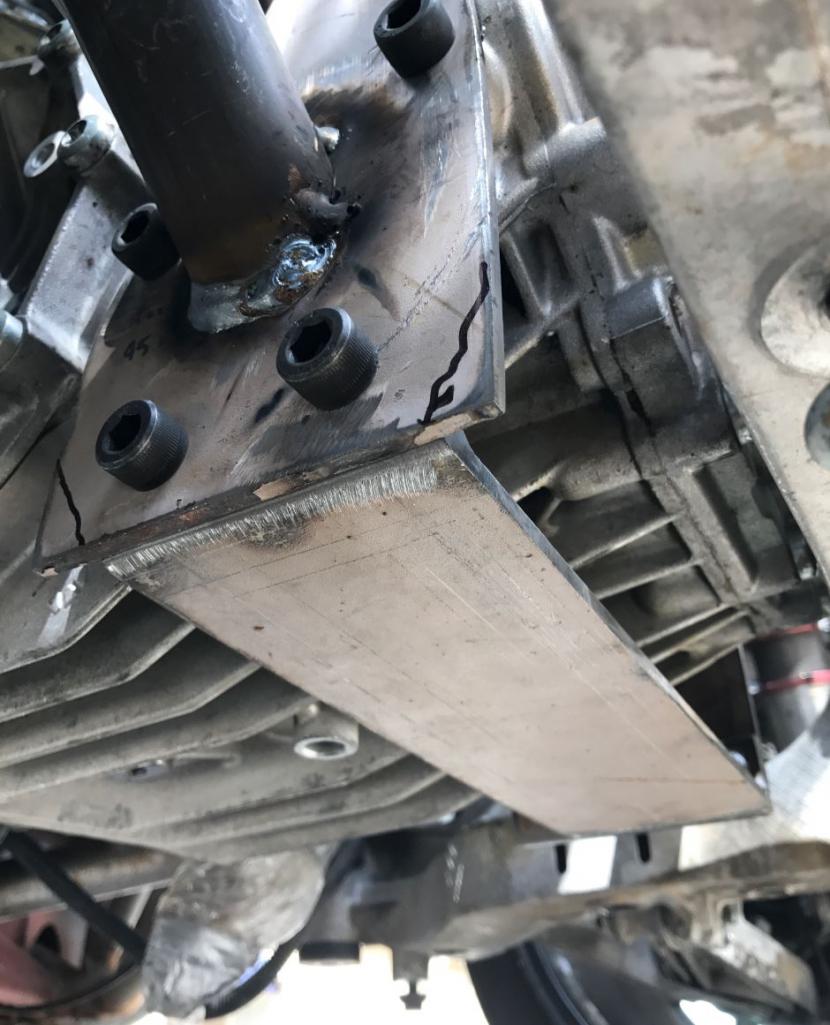 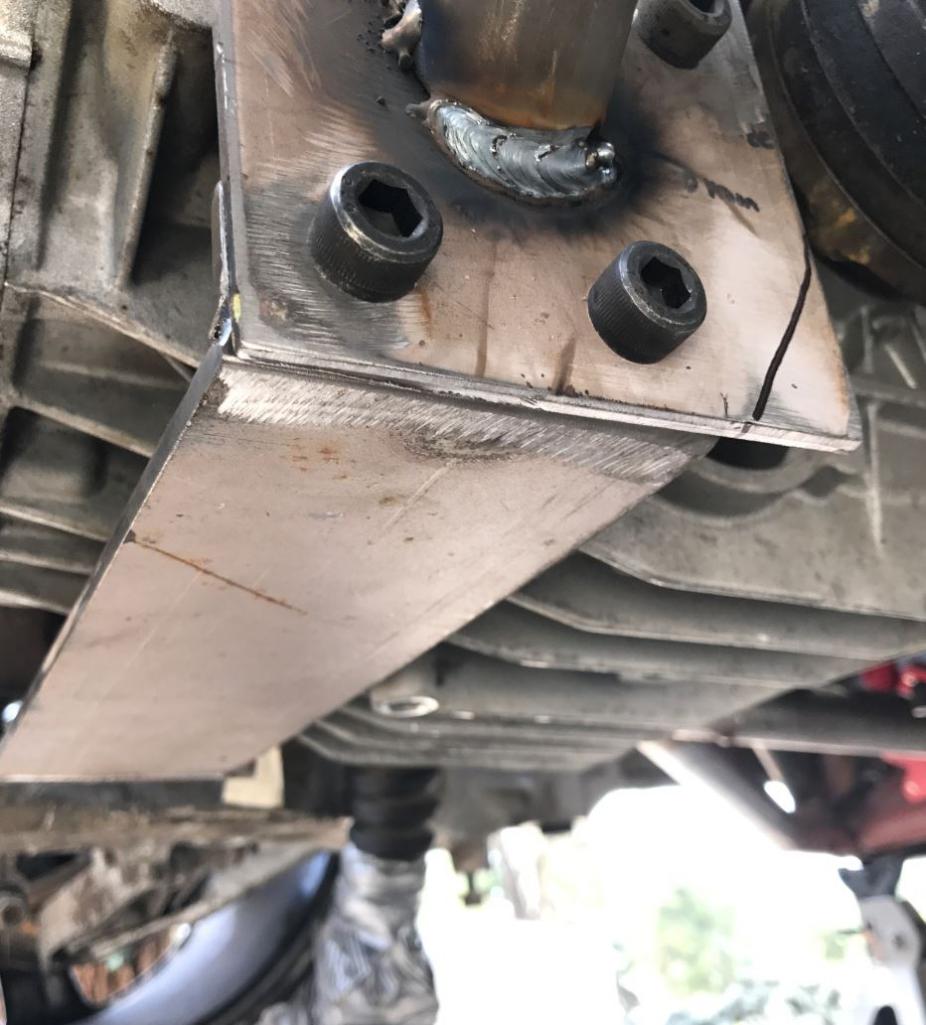 1/2" clearance from the floor pan on both engine and transaxle. They are on the same plane and the motor and transaxle are almost dead level. I will tie the entire bottom of the engine/transaxle bay together with one single aluminum plate across the entire engine/transxle bay opening. It will be tied to the factory suspension bolts and to the tube steel chassis. This will completely tie the opening together and take out any flex in the truss system. The load will then transfer into the floorpan thereby removing any lateral deflection in the chassis. I will also take the opportunity and blend the structural element into a diffuser. 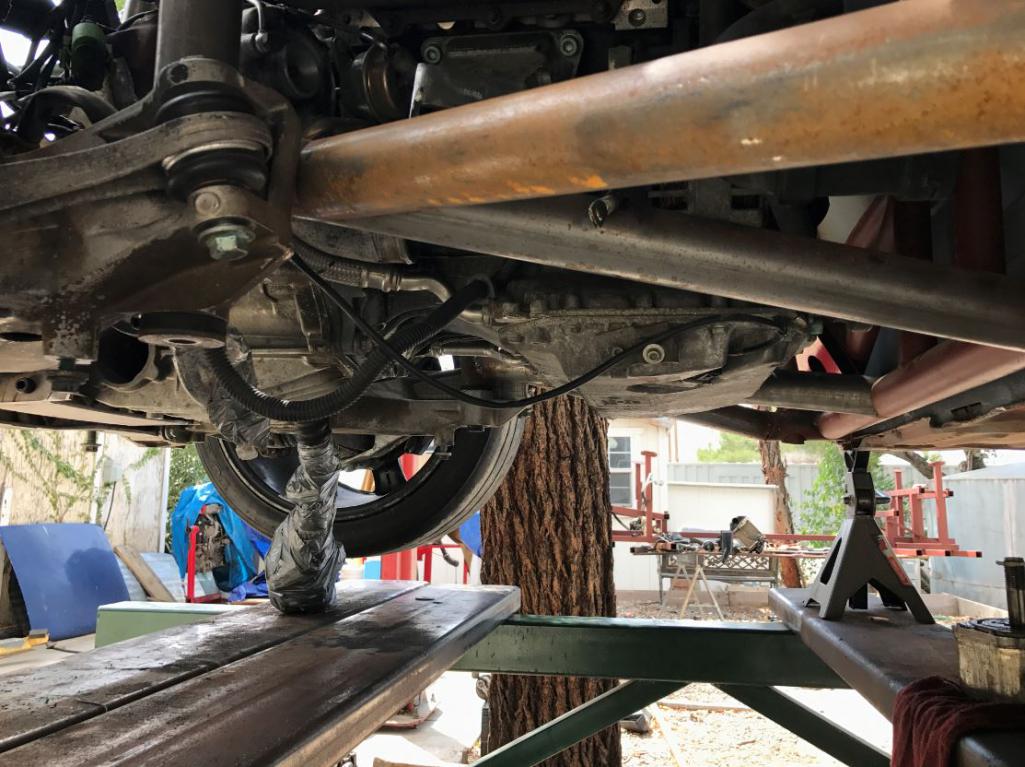 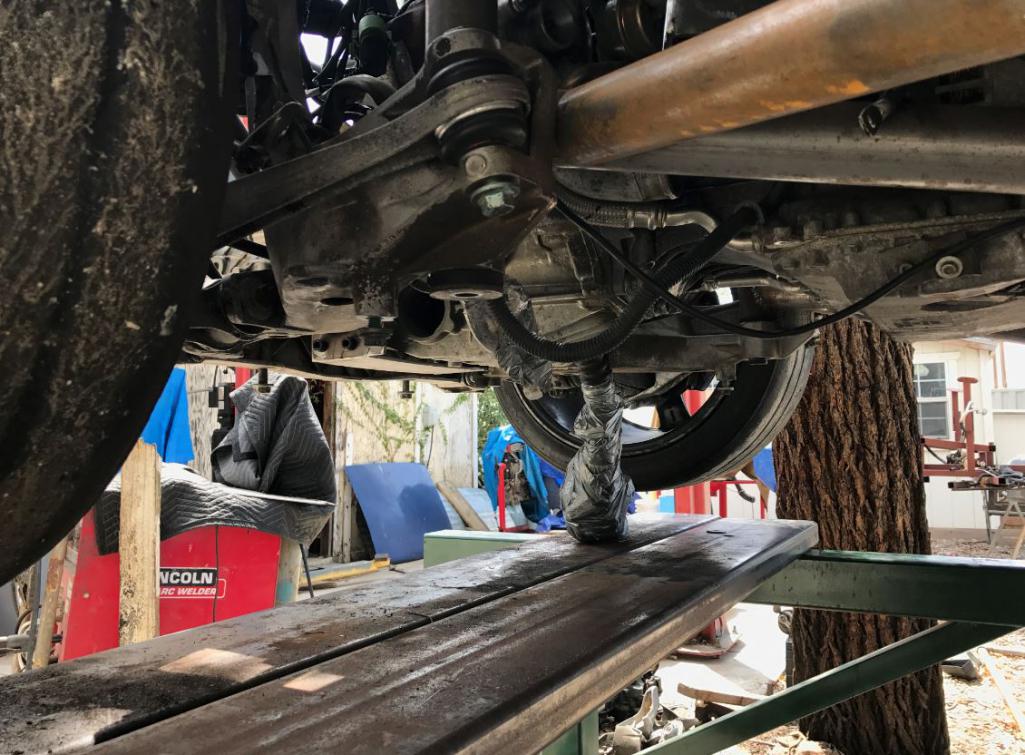 Look at what I picked up. 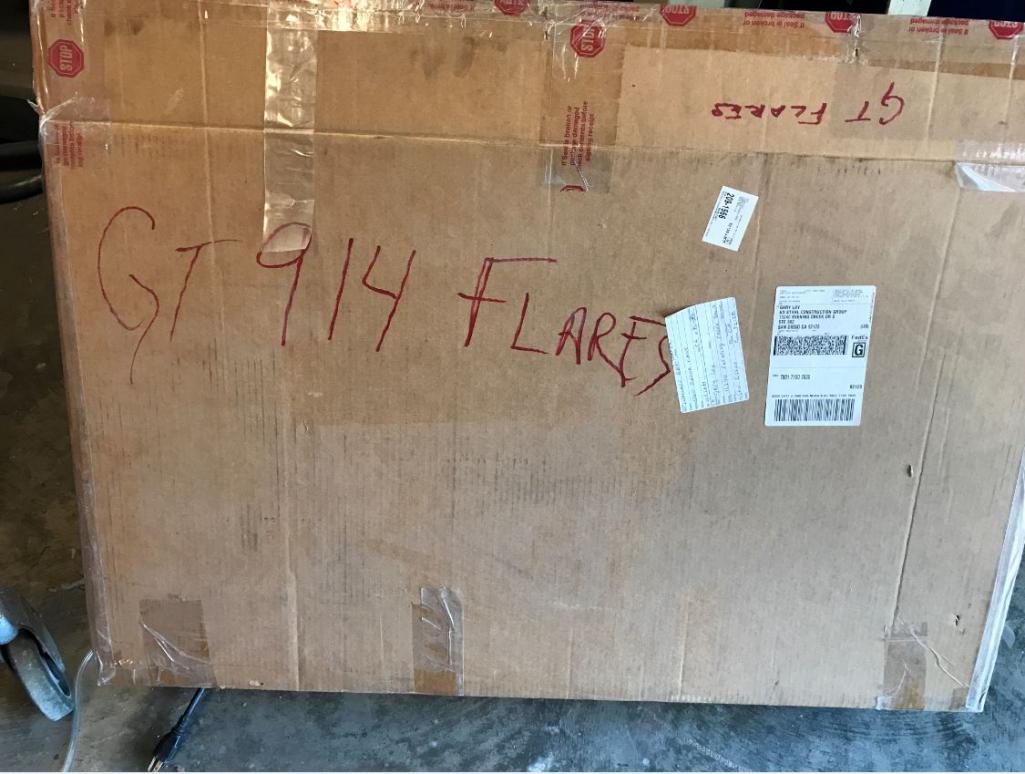 Attached thumbnail(s) 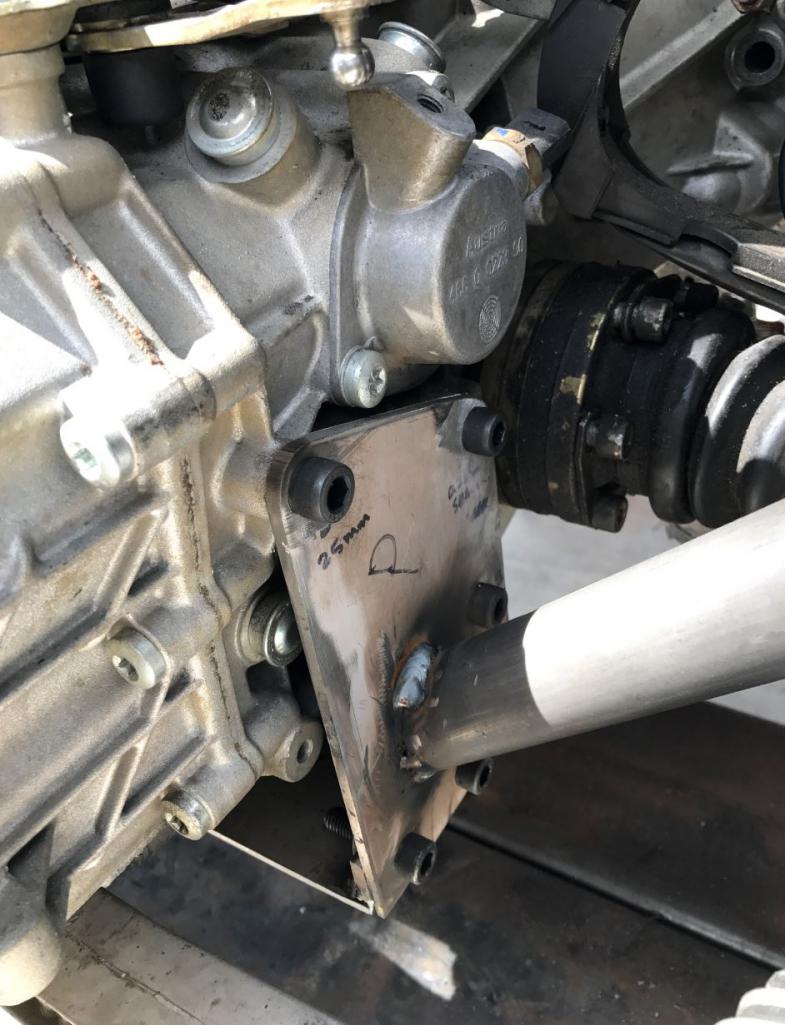 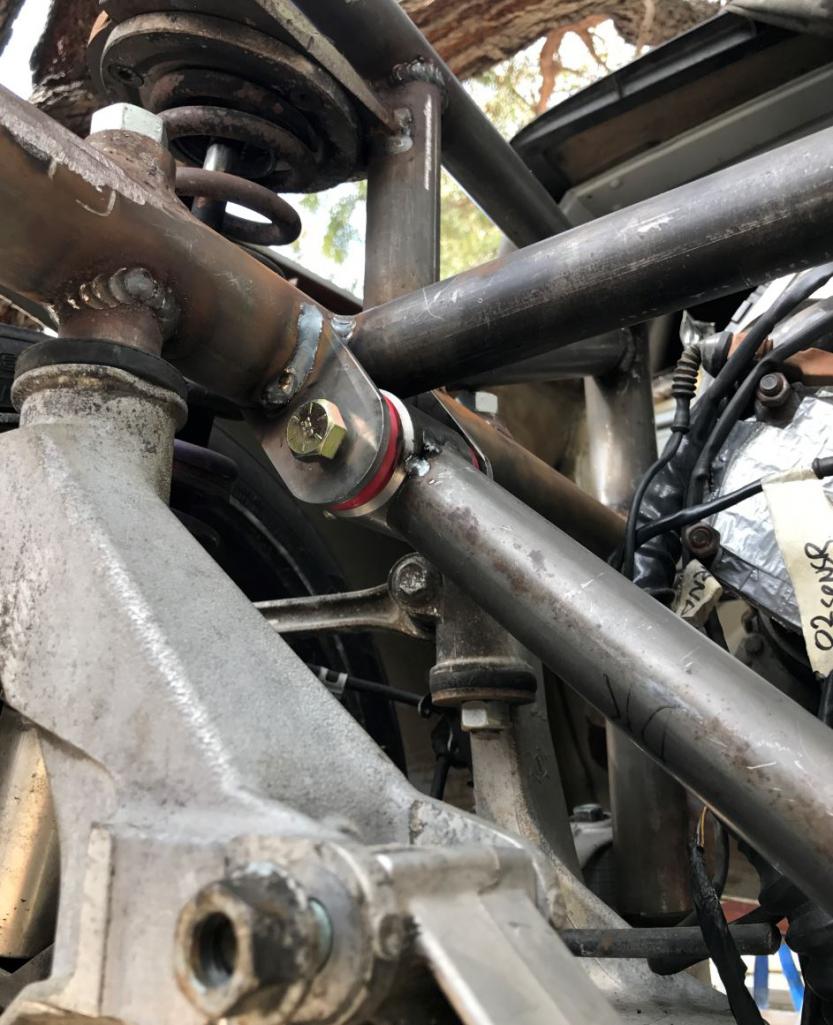 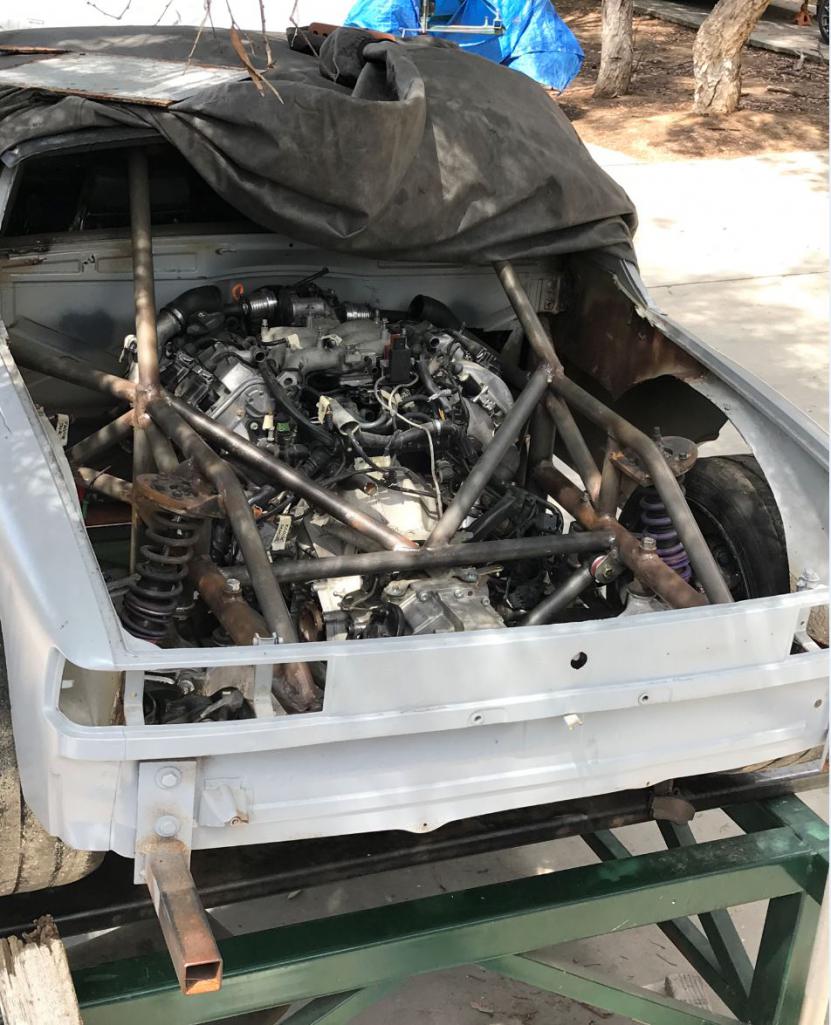
|
| sixnotfour |
 May 29 2017, 02:40 PM May 29 2017, 02:40 PM
Post
#420
|
|
914 Wizard           Group: Members Posts: 11,031 Joined: 12-September 04 From: Life Elevated..planet UT. Member No.: 2,744 Region Association: Rocky Mountains 

|
flatbar under trans ...looks so ...you finish the sentence....
awesome jiob (IMG:style_emoticons/default/beerchug.gif) |
  |
2 User(s) are reading this topic (2 Guests and 0 Anonymous Users)
0 Members:

|
Lo-Fi Version | Time is now: 18th November 2025 - 01:30 PM |
Invision Power Board
v9.1.4 © 2025 IPS, Inc.


