|
|
|
Porsche, and the Porsche crest are registered trademarks of Dr. Ing. h.c. F. Porsche AG.
This site is not affiliated with Porsche in any way. Its only purpose is to provide an online forum for car enthusiasts. All other trademarks are property of their respective owners. |
|
|


| Erben914 |
 Apr 3 2013, 10:53 PM Apr 3 2013, 10:53 PM
Post
#1
|
|
Member  Group: Members Posts: 137 Joined: 1-January 13 From: Sacramento Member No.: 15,314 Region Association: Central California |
Hey all.
I bought a running and driving 1974 2.0 white (not light ivory) with the appearance package914 in December of 2012. Since then I have joined this awsome site and have been doing some (IMG:style_emoticons/default/sawzall-smiley.gif) , (IMG:style_emoticons/default/welder.gif) and wrenching . I wanted to document what I have been doing and get some more help along the way. I have already met a bunch of generous and helpful people here on 914 world. (jsconst is my hero) I h made it to two events already. The panckake breakfast in Freemont and the Sacramento area meet last month. The best thing about these cars is (IMG:style_emoticons/default/driving.gif) right? I am doing all that I can to fix it up while keeping it on the road. I have a reoccuring nightmare of putting it on jackstands and never driving it again. (See I have learned a lot from this site already) (IMG:style_emoticons/default/av-943.gif) My plan is to get everything working and in good shape before I tear it completly apart, do the hell hole work and bring it back to the original light ivory color. Here is what I have done so far.... Brought it home 150 miles on a trailer. It ran but the guy I got it from said the transmission was going out. It wouldnt go into 1st or reverse without grinding. It just needed the clutch cable adjusted! (IMG:style_emoticons/default/aktion035.gif) 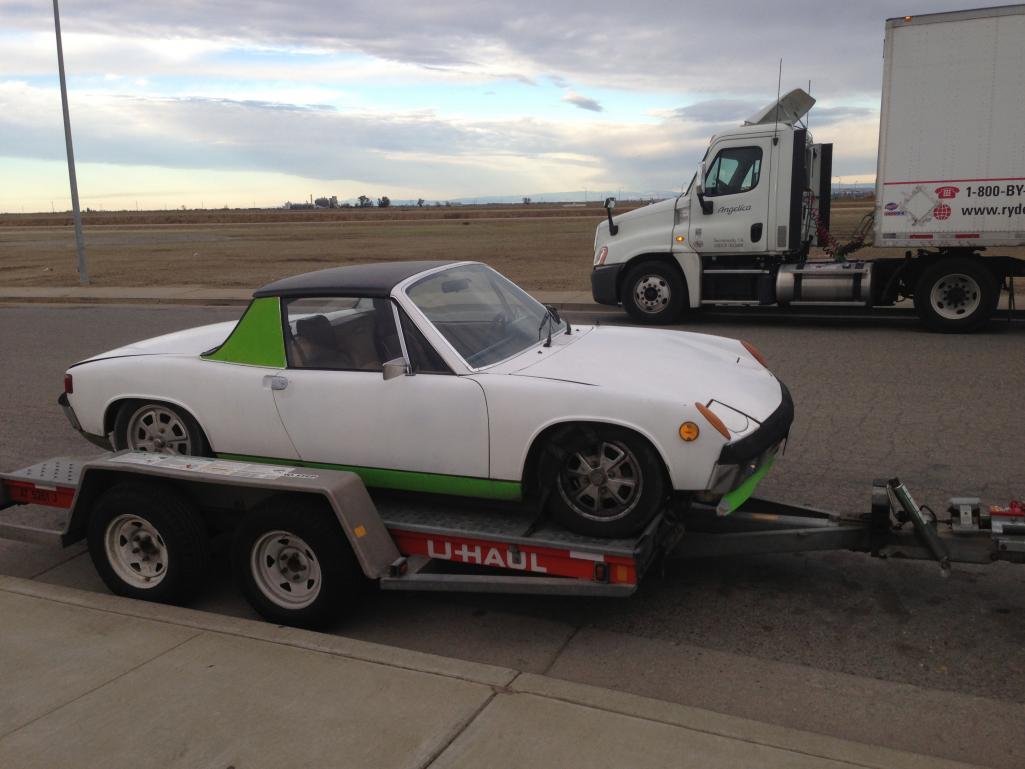 Got some ramps after reading about the "Jack stand incident" thanks again world 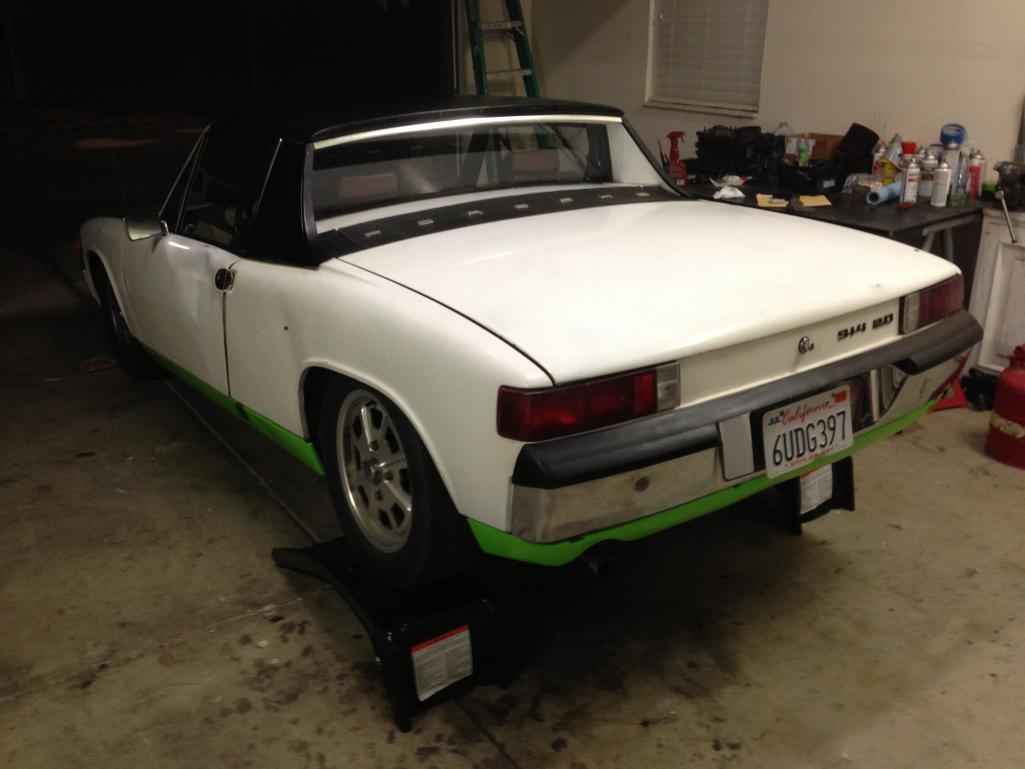 |
   |

 
|
  |
Replies
| Erben914 |
Apr 4 2013, 10:53 PM
Post
#2
|
|
Member Group: Members Posts: 137 Joined: 1-January 13 From: Sacramento Member No.: 15,314 Region Association: Central California |
A few weeks back I was frustrated with my sloppy hex bar throttle linkage that was controlling my webers. After a lot of research and design hijacking, I decided to build my own cable/ pulley throttle linkage. Props to Tangarine racing and another guy named Van on this board.
I also considered McMarks push pull rod style linkage. I wanted to go with a smooth pulley type action. I ended up purchasing and modifiying two pulleys with a master and slave type of system. I threaded one pulley onto the first carb that linked to another pulley on the second carb. I make it fully adjustable so that I can control both of the carbs to actuate at exactly the same time with exactly the same amount of throw. In addition the throttle control is consistent all the way through the pedal range. The hex bar style pushes on a lever that moves the butterflies more in the middle of the pedal range than the begining and end of the range. The pulley system pulls on a true arc so that it is consistent all the way. It makes sence to me... I took off my carbs and mocked it up many times until it worked how I wanted. 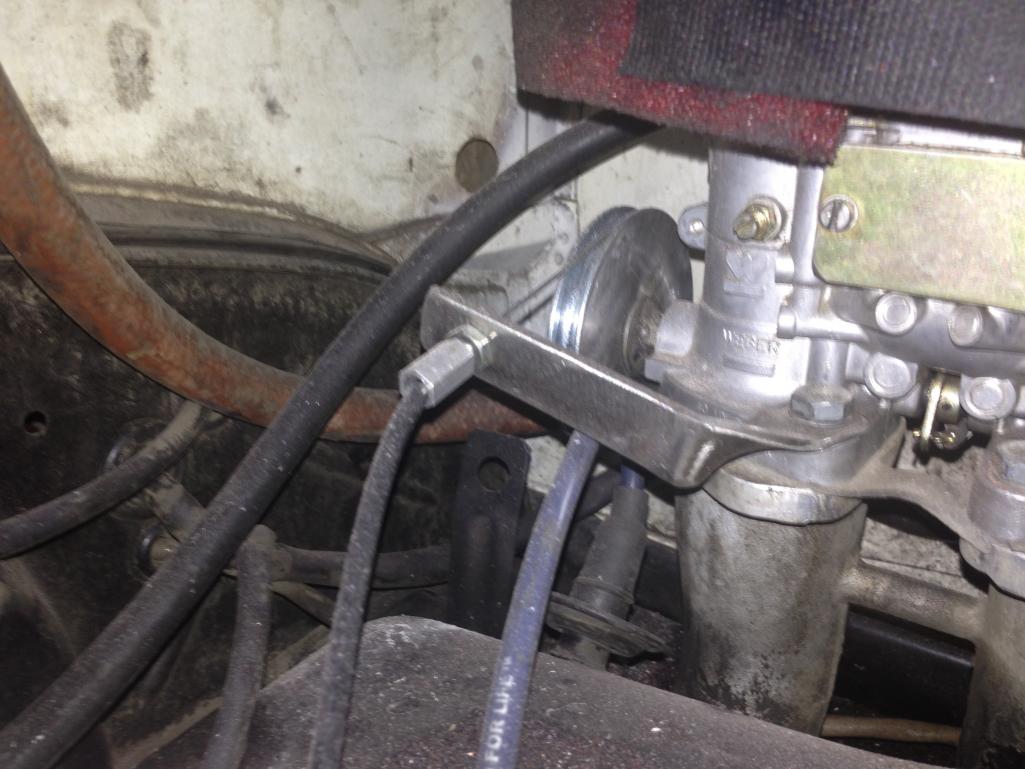 this one has the stock throttle cable to the top of the pulley and the secondary cable going across to the other carb. You can see I have threaded adjusters to take up any slack so I can eliminate any throttle delay. My engine bay is filthy. That is ok Im just trying to get everything how I want it right now. I will make it pretty later. 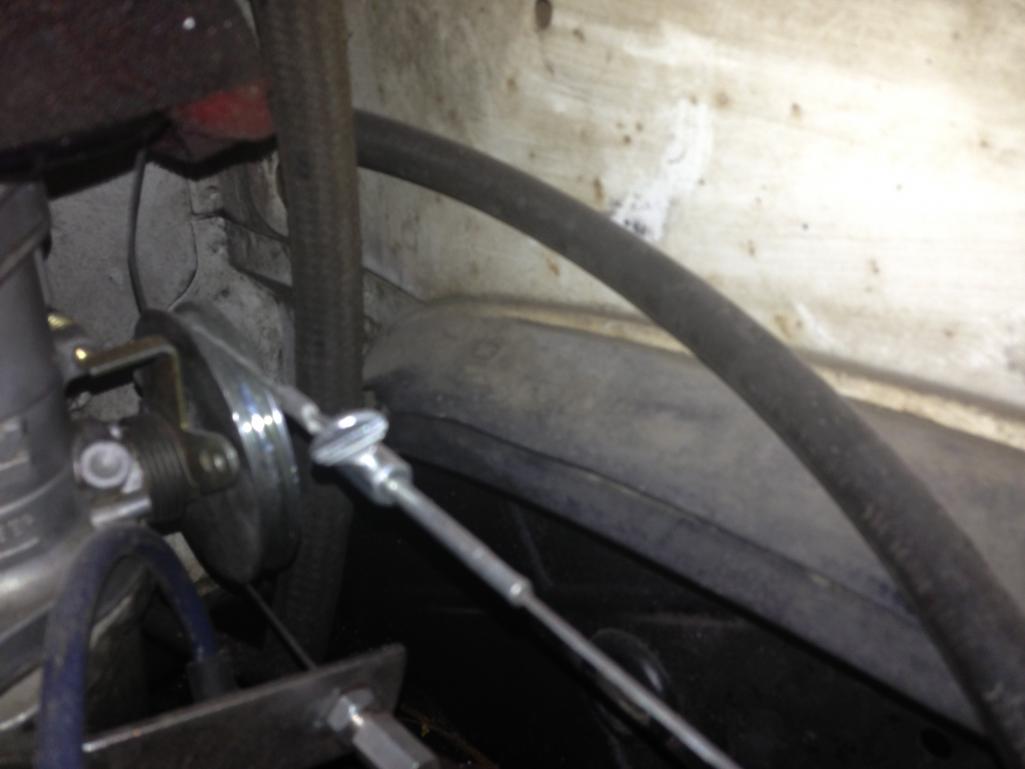 |
|
|
|
Posts in this topic
 Erben914 Erben's Build Thread Apr 3 2013, 10:53 PM
 Erben914 I found some holes in the jack post and into the l... Apr 3 2013, 10:58 PM Erben914 Fabricated my first anything
And welded the new... Apr 3 2013, 11:05 PM
Erben914 I found some holes in the jack post and into the l... Apr 3 2013, 10:58 PM Erben914 Fabricated my first anything
And welded the new... Apr 3 2013, 11:05 PM
 ndfrigi
Fabricated my first anything
And welded the ne... Apr 3 2013, 11:50 PM Erben914
Fabricated my first anything
And welded the n... Apr 4 2013, 12:17 AM Erben914 And back on the road.
Apr 3 2013, 11:10 PM bulitt Your already smarter than most of us! Apr 3 2013, 11:22 PM Erben914 The next project was to change out my smashed in d... Apr 3 2013, 11:23 PM Erben914 RE: Erben's Build Thread Apr 3 2013, 11:25 PM bulitt
So you just cut the structure off the newer d... Apr 4 2013, 06:57 AM Erben914
So you just cut the structure off the newer ... Apr 4 2013, 11:10 AM Erben914 I ordered one of these just to make sure that it r... Apr 3 2013, 11:33 PM Erben914 I want to get rid of the hockey pucks on the side ... Apr 4 2013, 09:07 PM Erben914 Ive seen some guys use a magnet to hold the part i... Apr 4 2013, 09:11 PM Erben914 not my best welding but with a little grinding an... Apr 4 2013, 09:13 PM Erben914 RE: Erben's Build Thread Apr 4 2013, 09:16 PM Erben914 I knew that there was some damage on the drivers q... Apr 4 2013, 09:32 PM Erben914 Here is my new quarter that we spent all afternoon... Apr 4 2013, 09:40 PM Erben914
I decided to fix this beauty. I repaired the big... Apr 4 2013, 09:48 PM Erben914
test fit #1 of about 20... Apr 4 2013, 10:05 PM Erben914 Final fitment.
Apr 4 2013, 10:11 PM Erben914 Looking pretty good. Apr 4 2013, 10:15 PM jsconst Pretty Good......That looks fuching awesome :Qarl... Apr 4 2013, 10:52 PM Erben914 Thanks Jeff. You are Da Man!
That parts car l... Apr 4 2013, 10:57 PM Erben914 Its hard to take good pictures inside the engine b... Apr 4 2013, 11:08 PM jeeperjohn56 Nice work Eric, You are doing a great job, you are... Apr 5 2013, 04:32 AM Erben914
Nice work Eric, You are doing a great job, you ar... Apr 5 2013, 10:05 AM Erben914 I am going to revive this build thread. I have bee... Jan 30 2015, 02:27 AM Erben914 I welded up a dolly and put it on casters so I cou... Jan 30 2015, 02:33 AM Erben914 There were several areas that needed patch panels... Jan 31 2015, 12:28 AM Erben914 RE: Erben's Build Thread Jan 31 2015, 12:35 AM Erben914 I sanded all of the exterior down to bare metal wi... Jan 31 2015, 01:00 AM Cairo94507 Terrific thread. Please keep the pictures coming,... Jan 31 2015, 08:24 AM FourBlades Great work and courage to take it on! :headba... Jan 31 2015, 09:06 AM Erben914 Getting ready to shoot primer in my make shift pai... Feb 2 2015, 09:44 PM Erben914 RE: Erben's Build Thread Feb 2 2015, 09:48 PM Erben914 I wish I had more room to lay out all the panels a... Feb 2 2015, 10:00 PM Erben914 Finally time to shoot the original light ivory. I ... Feb 2 2015, 10:16 PM Erben914 And the next day we did the important parts.
I ... Feb 2 2015, 10:23 PM ndfrigi Nice and beauty! Feb 2 2015, 10:35 PM zambezi looks great. Feb 2 2015, 10:41 PM Erben914 I have some orange peel in the clearcoat but some ... Feb 2 2015, 10:49 PM Erben914 Now the rewarding part begins. I hope I don't ... Feb 2 2015, 11:04 PM KELTY360
I wife brushed the brake calipers, changed the pa... Feb 3 2015, 10:04 AM Erben914
I wife brushed the brake calipers, changed the p... Feb 3 2015, 07:35 PM Erben914 Thanks for the compliments guys. :trophy: Feb 2 2015, 11:06 PM raw1298 This is inspiring! Looks great and I hope to s... Feb 3 2015, 06:43 AM
ndfrigi
Fabricated my first anything
And welded the ne... Apr 3 2013, 11:50 PM Erben914
Fabricated my first anything
And welded the n... Apr 4 2013, 12:17 AM Erben914 And back on the road.
Apr 3 2013, 11:10 PM bulitt Your already smarter than most of us! Apr 3 2013, 11:22 PM Erben914 The next project was to change out my smashed in d... Apr 3 2013, 11:23 PM Erben914 RE: Erben's Build Thread Apr 3 2013, 11:25 PM bulitt
So you just cut the structure off the newer d... Apr 4 2013, 06:57 AM Erben914
So you just cut the structure off the newer ... Apr 4 2013, 11:10 AM Erben914 I ordered one of these just to make sure that it r... Apr 3 2013, 11:33 PM Erben914 I want to get rid of the hockey pucks on the side ... Apr 4 2013, 09:07 PM Erben914 Ive seen some guys use a magnet to hold the part i... Apr 4 2013, 09:11 PM Erben914 not my best welding but with a little grinding an... Apr 4 2013, 09:13 PM Erben914 RE: Erben's Build Thread Apr 4 2013, 09:16 PM Erben914 I knew that there was some damage on the drivers q... Apr 4 2013, 09:32 PM Erben914 Here is my new quarter that we spent all afternoon... Apr 4 2013, 09:40 PM Erben914
I decided to fix this beauty. I repaired the big... Apr 4 2013, 09:48 PM Erben914
test fit #1 of about 20... Apr 4 2013, 10:05 PM Erben914 Final fitment.
Apr 4 2013, 10:11 PM Erben914 Looking pretty good. Apr 4 2013, 10:15 PM jsconst Pretty Good......That looks fuching awesome :Qarl... Apr 4 2013, 10:52 PM Erben914 Thanks Jeff. You are Da Man!
That parts car l... Apr 4 2013, 10:57 PM Erben914 Its hard to take good pictures inside the engine b... Apr 4 2013, 11:08 PM jeeperjohn56 Nice work Eric, You are doing a great job, you are... Apr 5 2013, 04:32 AM Erben914
Nice work Eric, You are doing a great job, you ar... Apr 5 2013, 10:05 AM Erben914 I am going to revive this build thread. I have bee... Jan 30 2015, 02:27 AM Erben914 I welded up a dolly and put it on casters so I cou... Jan 30 2015, 02:33 AM Erben914 There were several areas that needed patch panels... Jan 31 2015, 12:28 AM Erben914 RE: Erben's Build Thread Jan 31 2015, 12:35 AM Erben914 I sanded all of the exterior down to bare metal wi... Jan 31 2015, 01:00 AM Cairo94507 Terrific thread. Please keep the pictures coming,... Jan 31 2015, 08:24 AM FourBlades Great work and courage to take it on! :headba... Jan 31 2015, 09:06 AM Erben914 Getting ready to shoot primer in my make shift pai... Feb 2 2015, 09:44 PM Erben914 RE: Erben's Build Thread Feb 2 2015, 09:48 PM Erben914 I wish I had more room to lay out all the panels a... Feb 2 2015, 10:00 PM Erben914 Finally time to shoot the original light ivory. I ... Feb 2 2015, 10:16 PM Erben914 And the next day we did the important parts.
I ... Feb 2 2015, 10:23 PM ndfrigi Nice and beauty! Feb 2 2015, 10:35 PM zambezi looks great. Feb 2 2015, 10:41 PM Erben914 I have some orange peel in the clearcoat but some ... Feb 2 2015, 10:49 PM Erben914 Now the rewarding part begins. I hope I don't ... Feb 2 2015, 11:04 PM KELTY360
I wife brushed the brake calipers, changed the pa... Feb 3 2015, 10:04 AM Erben914
I wife brushed the brake calipers, changed the p... Feb 3 2015, 07:35 PM Erben914 Thanks for the compliments guys. :trophy: Feb 2 2015, 11:06 PM raw1298 This is inspiring! Looks great and I hope to s... Feb 3 2015, 06:43 AM |
2 User(s) are reading this topic (2 Guests and 0 Anonymous Users)
0 Members:

|
Lo-Fi Version | Time is now: 14th May 2024 - 11:29 AM |
Invision Power Board
v9.1.4 © 2024 IPS, Inc.