|
|
|
Porsche, and the Porsche crest are registered trademarks of Dr. Ing. h.c. F. Porsche AG.
This site is not affiliated with Porsche in any way. Its only purpose is to provide an online forum for car enthusiasts. All other trademarks are property of their respective owners. |
|
|

  |

| lsintampa |
 May 5 2013, 09:21 AM May 5 2013, 09:21 AM
Post
#1
|
|
Senior Member  Group: Members Posts: 520 Joined: 28-January 13 From: Tampa, FL Member No.: 15,441 Region Association: South East States |
75 914/4 2.0
I've rebuilt a small number of calipers over time - it really isn't my forte, but simple enough to do. Or so I thought. I'm not sure that I even understand how the rear calipers work on this car. I've never seen pistons screw on and off from the cylinders. In any event, I'm assuming that the adjusting nut on the outside half needs to come out so I can replace whatever o-rings are under there. I've soaked this puppy in blaster for two days. I can turn the large nut using a 1/2 inch socket, but then you can't hold the bolt steady and the whole thing turns. I can barely manage to get a wrench on the nut and then use a hex wrench but the bolt just won't budge. Question is, since I can turn the whole thing with a socket, would it be OK to adjust the piston that way? I'm worried that with all the turning that the o-rings may be not so good under there. And just as a side, how the hell does that piston even move? It doesn't seem that it can, so I'm really confused on how this whole system works. And as another side, what other calipers may work on the back beside these puppies? Thanks, Len 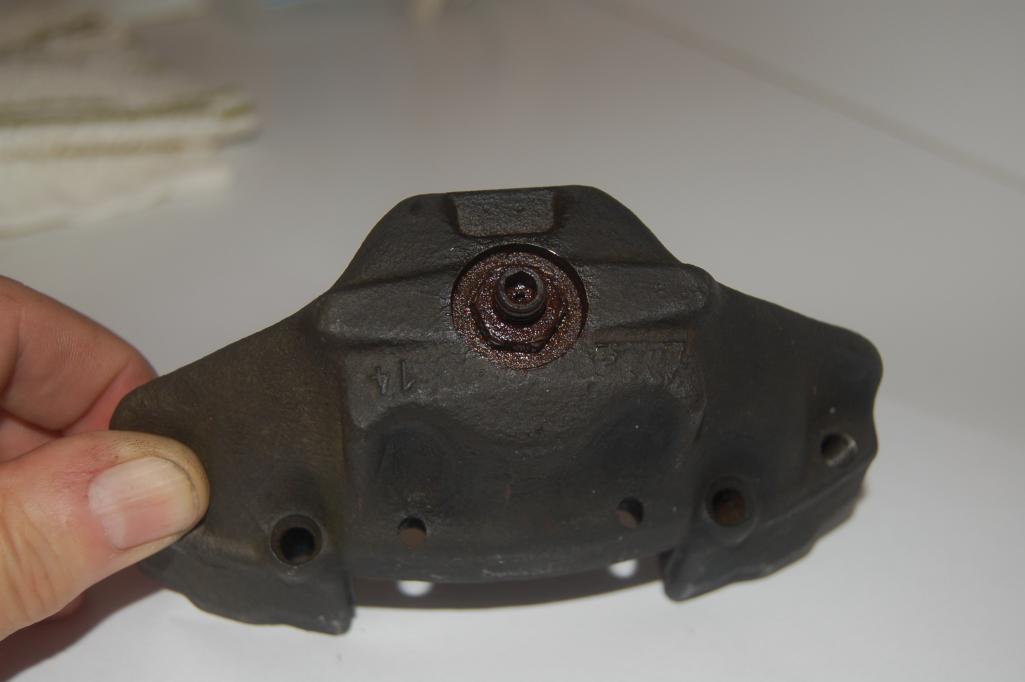 |
   |

 
|
| mepstein |
May 5 2013, 09:28 AM
Post
#2
|
|
914-6 GT in waiting Group: Members Posts: 19,278 Joined: 19-September 09 From: Landenberg, PA/Wilmington, DE Member No.: 10,825 Region Association: MidAtlantic Region |
PMBPerformance.com has some good video's on their site and there is a reason why Eric keeps busy restoring calipers on our cars.
|
 |
|
| brant |
May 5 2013, 10:03 AM
Post
#3
|
|
914 Wizard Group: Members Posts: 11,625 Joined: 30-December 02 From: Colorado Member No.: 47 Region Association: Rocky Mountains |
no other caliper on the back will allow you to have a parking brake
the video will help lots of pieces there is a small circlip (some times called an E-clip?) on the nut/bolt you have pictured. Yours may be rusted mostly away but may have enough left to prevent the nut from screwing off? take a dental pick and chase the thread on the center bolt. You should find the void where the thread stops and the C-clip is supposed to snap on. brant |
|
|
|
| JawjaPorsche |
May 5 2013, 11:06 AM
Post
#4
|
|
Advanced Member Group: Members Posts: 3,463 Joined: 23-July 11 From: Clayton, Georgia Member No.: 13,351 Region Association: South East States |
|
|
|
|
| Eric_Shea |
May 5 2013, 11:10 AM
Post
#5
|
|
PMB Performance Group: Admin Posts: 19,275 Joined: 3-September 03 From: Salt Lake City, UT Member No.: 1,110 Region Association: Rocky Mountains |
QUOTE I've soaked this puppy in blaster for two days... ...would it be OK to adjust the piston that way? I'm worried that with all the turning that the o-rings may be not so good under there. After soaking in PB blaster for two days, the o-ring is shot anyway. In for a penny in for a pound right now. Watch the video and let me know if you have any questions. |
|
|
|
| lsintampa |
May 5 2013, 03:03 PM
Post
#6
|
|
Senior Member Group: Members Posts: 520 Joined: 28-January 13 From: Tampa, FL Member No.: 15,441 Region Association: South East States |
QUOTE(Eric_Shea @ May 5 2013, 01:10 PM)  QUOTE I've soaked this puppy in blaster for two days... ...would it be OK to adjust the piston that way? I'm worried that with all the turning that the o-rings may be not so good under there. After soaking in PB blaster for two days, the o-ring is shot anyway. In for a penny in for a pound right now. Watch the video and let me know if you have any questions. Fantastic video - I'll be watching it several times before I'm done for sure. The caliper in the photo had no c-clip and the adjustor and nut was basically one piece. I managed to get a small 1/2 inch (very thin) wrench on the nut and was able to brake the adjuster loose. YEAH! So the outside piston and adjustor are out!!! The other side did have a c-clip and the nut came off easily. But I'll get to that side after I get this one done. Just wanted to see if I was in for more drama. That's the good news. I'm still on the same caliper (left rear) now and I'm trying to get the inside adjuster out, but that's not working at all. It was rebuilt at some point in the past, I can tell because the adjustor cover has notches in it from someone knocking it off - as shown in the video. As well the hex hole on the cap is stripped, so there really isn't any way for it to come off at this point. All I can say at this point is that using a cold chisel on the thing is just mangeling up the cap to the point that there isn't an surface area on it to get a good bite. Can that thing be ground or drilled out or what? Afraid it isn't comeing off by banging on it any longer. Video is top notch! Very helpful. Thanks, Len |
|
|
|
| brant |
May 5 2013, 03:53 PM
Post
#7
|
|
914 Wizard Group: Members Posts: 11,625 Joined: 30-December 02 From: Colorado Member No.: 47 Region Association: Rocky Mountains |
The notches don't necessarily mean it was rebuilt in the past
that "cover" has to be removed to set the venting clearance on the car. rear brake venting clearance is a maintenance item and if not set periodically the parking brake will loose effectiveness and the brakes in whole will be less effective. |
|
|
|
| steuspeed |
May 5 2013, 04:43 PM
Post
#8
|
|
Senior Member Group: Members Posts: 1,006 Joined: 12-July 11 From: Portland, Oregon Member No.: 13,308 Region Association: Pacific Northwest |
|
|
|
|
| Mblizzard |
May 5 2013, 07:15 PM
Post
#9
|
|
Advanced Member Group: Members Posts: 3,033 Joined: 28-January 13 From: Knoxville Tn Member No.: 15,438 Region Association: South East States |
First let me say that other than using PMB products I have no connection with them. I spent many years working in my farther's machine shop. I have done everything from a simple valve job to rebuild marine Diesel engines of which the scale of we're just mind boggling (think pistons the size of manhole covers Really!). But one of the things that frustrated me the most was the 914 rear calipers. Each of us can watch the video and think it seems easy. For some it is. But I just could never get it right. When it came time to replace them on my most recent car, PMB was the right choice. I have no doubt that many here are much more skillful than I am or that rear calipers may just be my weak point, but sometimes it is best to leave it to a true expert. I don't mean to imply in any way that you are not capable of completing the task. But In brakes, PMB is the expert without question.
|
|
|
|
| 76-914 |
May 6 2013, 08:26 AM
Post
#10
|
|
Repeat Offender & Resident Subaru Antagonist Group: Members Posts: 13,504 Joined: 23-January 09 From: Temecula, CA Member No.: 9,964 Region Association: Southern California |
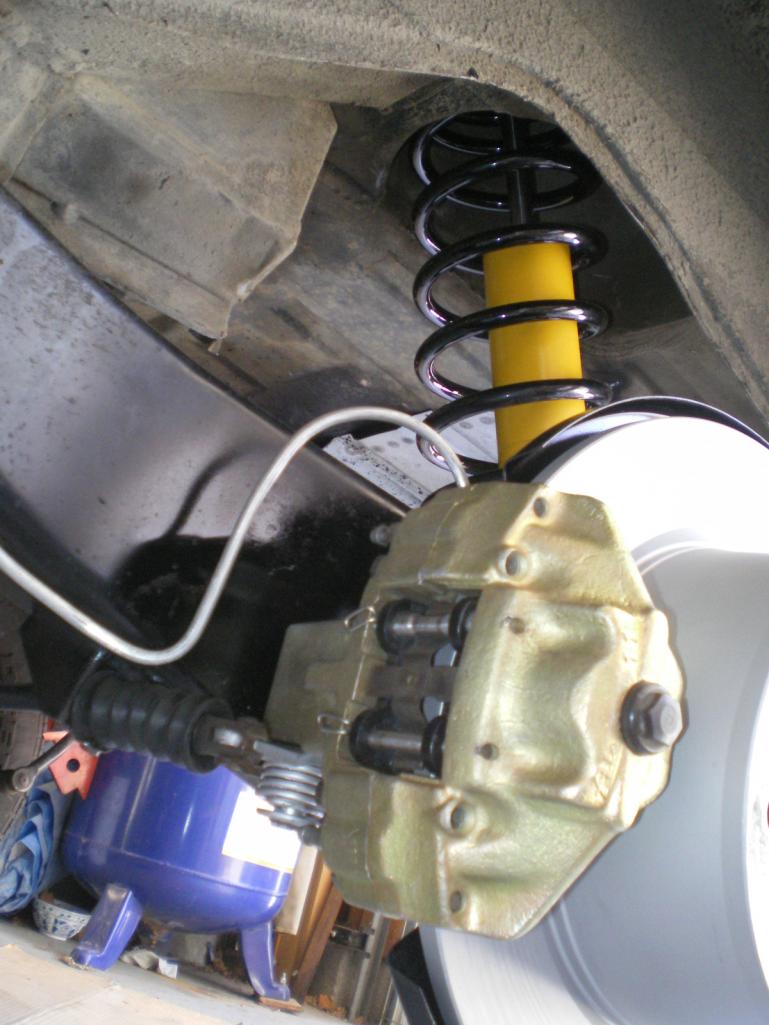
Eric's kit installed. If'n I can do it, so can you. Don't throw away the 13mm low profile nuts. They're "weren't" included in the kit.
 |
|
|
|
| Mark Henry |
May 6 2013, 08:33 AM
Post
#11
|
|
that's what I do! Group: Members Posts: 20,065 Joined: 27-December 02 From: Port Hope, Ontario Member No.: 26 Region Association: Canada |
If your the DIY type get Eric's complete caliper kit, for the bodies and bits all plated and the rebuild kits you can't beat that price.
|
|
|
|
| lsintampa |
May 6 2013, 08:40 AM
Post
#12
|
|
Senior Member Group: Members Posts: 520 Joined: 28-January 13 From: Tampa, FL Member No.: 15,441 Region Association: South East States |
Thanks all,
The video was great, but the issue(s) that I'm having have more to do with stuck caps / nuts on the adjusters. I managed to get the outside adjusters freed up, the inside caps are a challenge yet, but I do have a plan to deal with them. I'll shoot Eric a email and let him know what bits and pieces I need to finish the rebuild. He's been a great resource for me. (IMG:style_emoticons/default/cheer.gif) |
|
|
|
|
1 User(s) are reading this topic (1 Guests and 0 Anonymous Users)
0 Members:

|
Lo-Fi Version | Time is now: 20th May 2024 - 06:42 PM |
Invision Power Board
v9.1.4 © 2024 IPS, Inc.