|
|
|
Porsche, and the Porsche crest are registered trademarks of Dr. Ing. h.c. F. Porsche AG.
This site is not affiliated with Porsche in any way. Its only purpose is to provide an online forum for car enthusiasts. All other trademarks are property of their respective owners. |
|
|

 914World Classifieds Rules
We've established the following rules to help make your sales/purchases as successful as possible!
- Please List WTB:, FS:, TRADE: etc (want to buy, for sale, and trade respectively) before your add title.
- You *must* put a price in your ad and state how you would like payment!
- If you'd like to bump your ads, feel free to do so every two days.
- DO NOT MAKE YOUR ADS IN ALL CAPITAL LETTERS! It's considered rude.
- All eBay ads belong in the eBay category.
- Please consolidate your ads into one big lump... listings and pictures together in one thread. Please be considerate of other classified users!!
- Mark your items "SOLD" once you sell them. Please do not ask to have ads removed. Ads will automatically hide themselves after 30 days. We also ask that you leave your pricing in the ads to help others determine fair market value for future sales.
  |

| L-Jet914 |
 May 26 2013, 12:22 AM May 26 2013, 12:22 AM
Post
#21
|
|
Member  Group: Members Posts: 405 Joined: 24-October 12 From: Davis, CA Member No.: 15,080 Region Association: Northern California |
Martin Baker,
I ended up doing something like what you have done except not to the extent that you did. I bought a kit from Auto Atlanta which uses the 194 bulb at the time I was doing my Euro lense conversion and I had a friend of mine one night design the upper shield that slid onto the two lips inside the turn signal housings to keep light from going into the turn signal area with a piece of flat stock aluminium with a high polish on one end to redirect the light. If I knew that you had build shields for the bulb I would have come to you. Oh well. Great job on making those by the way. (IMG:style_emoticons/default/smile.gif) This is what I did. What do you think? Before (IMG:http://www.914world.com/bbs2/uploads_offsite/i98.photobucket.com-15080-1369549840.1.jpg) After (IMG:http://www.914world.com/bbs2/uploads_offsite/i98.photobucket.com-15080-1369549840.2.jpg) the little shield my friend and I made (fits right into the curvature of the lense) (IMG:http://www.914world.com/bbs2/uploads_offsite/i98.photobucket.com-15080-1369549840.3.jpg) |
   |

 
|
| Martin Baker |
May 26 2013, 08:05 AM
Post
#22
|
|
I just heard I sold my cars! Group: Members Posts: 1,140 Joined: 11-February 03 Member No.: 290 Region Association: Northern California |
Looks good, I wanted to stay away from aluminum, and wanted to equal, or exceed the factory part. I silver solder together all the components in the refracter assembly, which will not have a ground issue in the future that aluminum might/will, but its not hard to make these yourself. I have become proficiant in the process, so I do some now and again, and its nice to provide a good part for the car that I love so much, and make some friends along the way. My 914 2.0, 914/6 GT and my 914/6 GT SONAUTO Replica mean very much to me! Not sure what I would do without them! NOW, that is a little twisted!
Martin |
|
|
|
| L-Jet914 |
May 27 2013, 01:14 AM
Post
#23
|
|
Member Group: Members Posts: 405 Joined: 24-October 12 From: Davis, CA Member No.: 15,080 Region Association: Northern California |
I only used the aluminum for the shield itself. I have the bulb grounded through the lower turn signal lense screw if you look at the after picture, you can see the wire from the bulb kit. I have a 74 1.8L myself, my father is still the original owner, but now I drive, maintain and show the car. Keep up the good work. I will get a picture of my entire set up.
|
|
|
|
| Martin Baker |
Dec 20 2015, 07:30 PM
Post
#24
|
|
I just heard I sold my cars! Group: Members Posts: 1,140 Joined: 11-February 03 Member No.: 290 Region Association: Northern California |
I will have another set of these complete tomorrow. I just have to wire them up.
$200.00 shipped. Thanks. MB (Photo taken in 1974, car was new. Friend, on the right, sent it to me. Gotta LOVE the 70's!) Attached thumbnail(s) 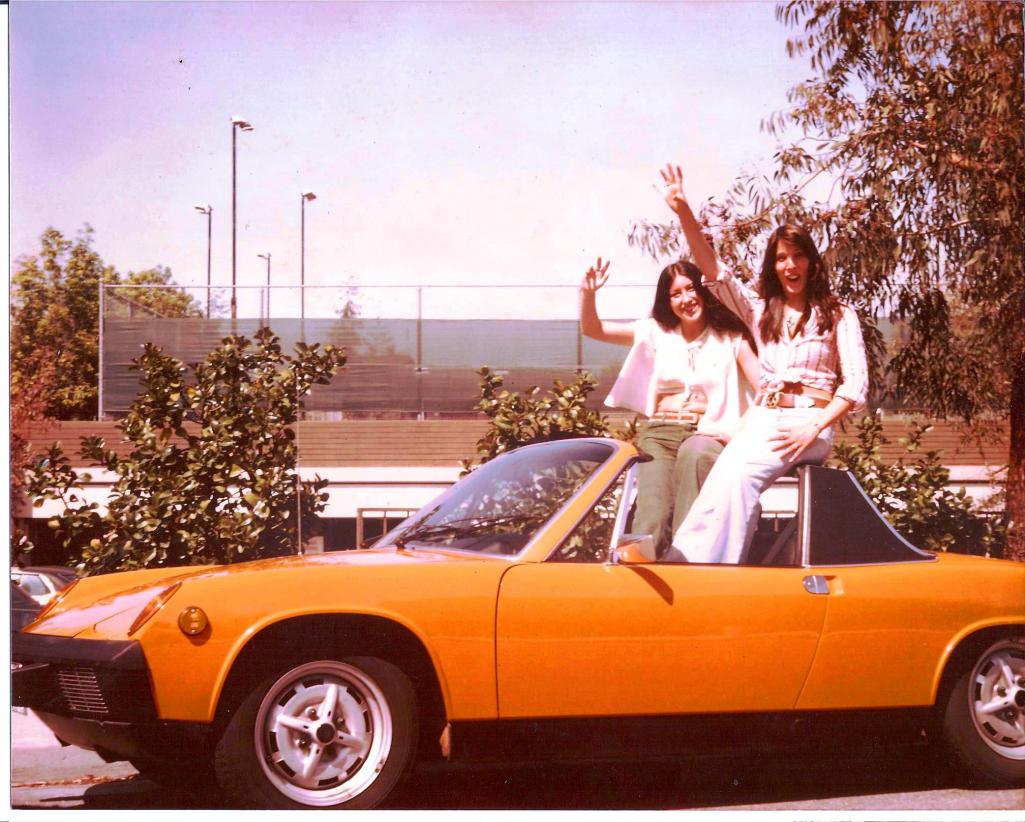
|
|
|
|
| hcdmueller |
Dec 20 2015, 10:07 PM
Post
#25
|
|
????????????? Group: Members Posts: 542 Joined: 4-February 06 From: UK Member No.: 5,527 Region Association: England |
Pm sent.
|
|
|
|
| Martin Baker |
Dec 21 2015, 03:35 PM
Post
#26
|
|
I just heard I sold my cars! Group: Members Posts: 1,140 Joined: 11-February 03 Member No.: 290 Region Association: Northern California |
Thanks. Replied, and awaiting your usable housing.
|
|
|
|
| Martin Baker |
Dec 21 2015, 06:52 PM
Post
#27
|
|
I just heard I sold my cars! Group: Members Posts: 1,140 Joined: 11-February 03 Member No.: 290 Region Association: Northern California |
Here they are, ready to be shipped. New bulbs included.
Attached thumbnail(s) 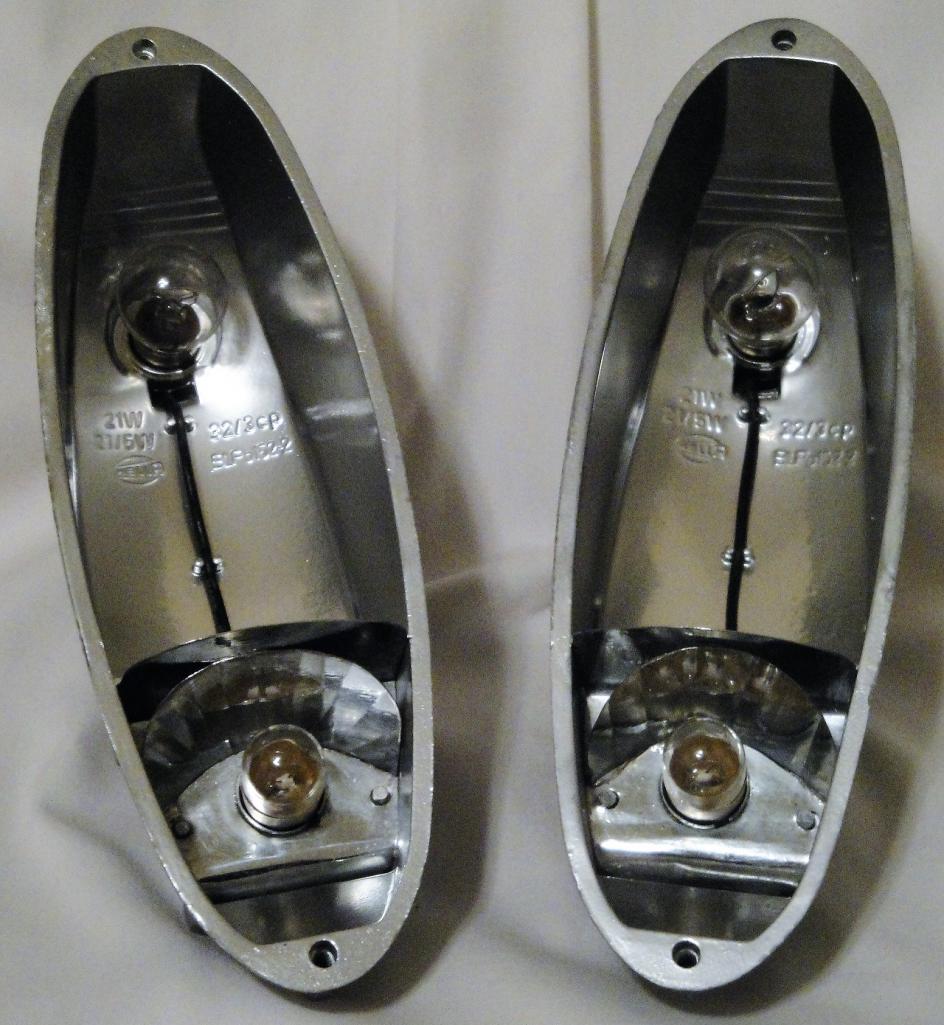
|
|
|
|
| mharmon |
Dec 21 2015, 08:19 PM
Post
#28
|
|
Member Group: Members Posts: 131 Joined: 1-November 06 From: Los Angeles Member No.: 7,133 |
Martin's set is top notch and he's a great guy to deal with. Count me as a very satisfied customer.
|
|
|
|
| mtn flyr |
Dec 21 2015, 08:23 PM
Post
#29
|
|
Member Group: Members Posts: 235 Joined: 20-December 07 From: Bozeman Mt Member No.: 8,491 Region Association: Rocky Mountains |
Pm coming
|
|
|
|
| Martin Baker |
Dec 21 2015, 08:37 PM
Post
#30
|
|
I just heard I sold my cars! Group: Members Posts: 1,140 Joined: 11-February 03 Member No.: 290 Region Association: Northern California |
OK first, THANKS Mike! I will take a pat on the back. I try my best. Every set of these I convert, I would use on my own car, and I want everyone to be satisfied when the install is finished..
Second, these are sold pending payment. Thank you, Dave for that. I also sold a DIY set, so I will get those finished up tomorrow. Had to order parts. Again thanks. MB |
|
|
|
| Mblizzard |
Dec 30 2015, 07:37 PM
Post
#31
|
|
Advanced Member Group: Members Posts: 3,033 Joined: 28-January 13 From: Knoxville Tn Member No.: 15,438 Region Association: South East States |
If you happen to do another set I would like to have a set please!
|
|
|
|
| Martin Baker |
Dec 31 2015, 12:05 AM
Post
#32
|
|
I just heard I sold my cars! Group: Members Posts: 1,140 Joined: 11-February 03 Member No.: 290 Region Association: Northern California |
QUOTE(Mblizzard @ Dec 30 2015, 05:37 PM)  If you happen to do another set I would like to have a set please! I would be glad to do a set for you. I am totally out of usable housings, so if you have a set that would be ideal, and save you some money as well. PM me for a shipping address once you have a good pair, and I will get them done for you. MB |
|
|
|
| Mblizzard |
Dec 31 2015, 11:53 AM
Post
#33
|
|
Advanced Member Group: Members Posts: 3,033 Joined: 28-January 13 From: Knoxville Tn Member No.: 15,438 Region Association: South East States |
QUOTE(Martin Baker @ Dec 30 2015, 10:05 PM) QUOTE(Mblizzard @ Dec 30 2015, 05:37 PM) If you happen to do another set I would like to have a set please! I would be glad to do a set for you. I am totally out of usable housings, so if you have a set that would be ideal, and save you some money as well. PM me for a shipping address once you have a good pair, and I will get them done for you. MB I may have a set. I will look and then PM you. |
|
|
|
| scrz914 |
Jan 1 2016, 11:54 PM
Post
#34
|
|
Member Group: Members Posts: 452 Joined: 21-April 04 From: Santa Cruz, CA Member No.: 1,960 Region Association: Central California |
Martin, if/when you have a DIY kit, I would like to purchase one.
BTW, have the euro lenses only exist as orange tint or are there red ones? Thanks. |
|
|
|
| Martin Baker |
Jan 2 2016, 11:36 AM
Post
#35
|
|
I just heard I sold my cars! Group: Members Posts: 1,140 Joined: 11-February 03 Member No.: 290 Region Association: Northern California |
I have never seen red in my life, could be custom,
& I sent you a PM. |
|
|
|
| scrz914 |
Jan 2 2016, 12:06 PM
Post
#36
|
|
Member Group: Members Posts: 452 Joined: 21-April 04 From: Santa Cruz, CA Member No.: 1,960 Region Association: Central California |
Responded. Thanks.
|
|
|
|
| Martin Baker |
Jan 5 2016, 02:05 PM
Post
#37
|
|
I just heard I sold my cars! Group: Members Posts: 1,140 Joined: 11-February 03 Member No.: 290 Region Association: Northern California |
Here is the photos for the DIY folks, thanks to them. I will start by saying this, don't wire up the socket with the type 89 bulb in the socket. You will need the slack in the wire or it could break under tension.
To start remove the housings wire terminal white cap. Use a long flat object to pop it off, to be 100% honest, I use a large flat file. It works perfect. Be very gentle, this plastic is old. And brittle. Take your time. Work it a little all the way around the circumference, not all at once, or it will break. You can also put a little heat on it with a heat gun to make it a little more pliable. USE COMMON SENSE. Before the refractor is seated you will need to stretch the insulation on the wire. Do this with the tip of your index and thumb of both hands. It will get hot if you do it right. It needs to be thinner to fit the pins that retain it in the housing. Grab it at the base of the socket and stretch it toward the end. It will fit between the retaining pins much better. Run the wire through the slot forward of the socket for the 1157 bulb. Set the refractor in the housing. It should fit tight. If its a little loose in your housing, squeeze it a bit to get a better fit. I have a housing here I use to fit everyone, it is undamaged. They are all a bit different after 40 years. Attached thumbnail(s) 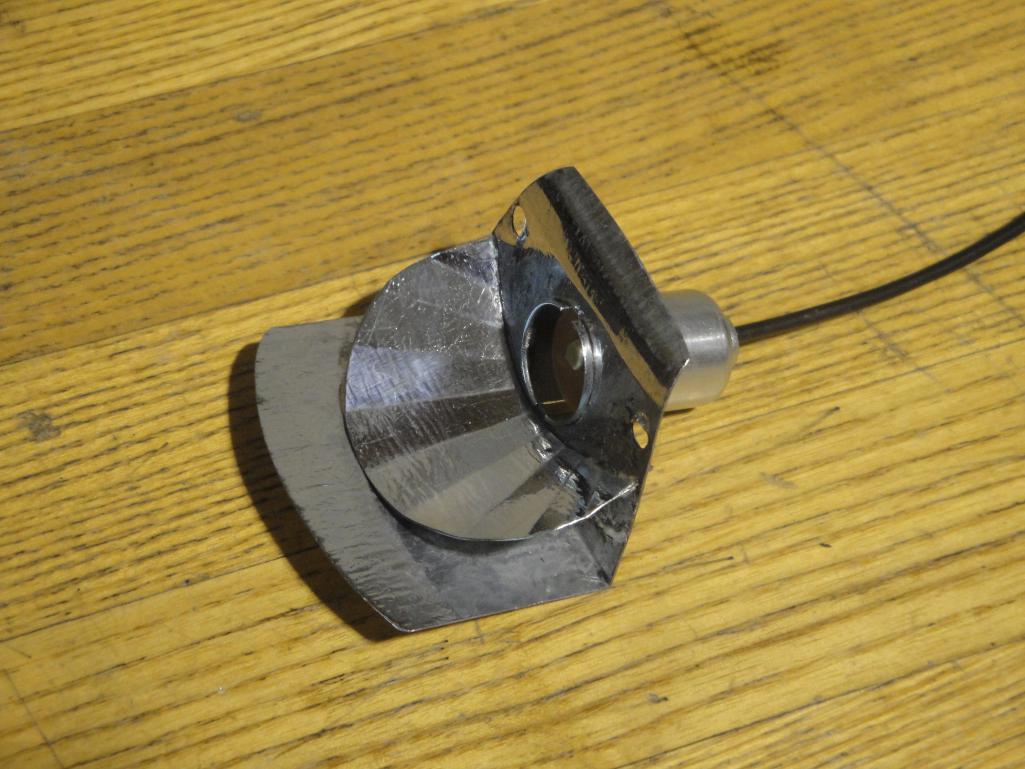 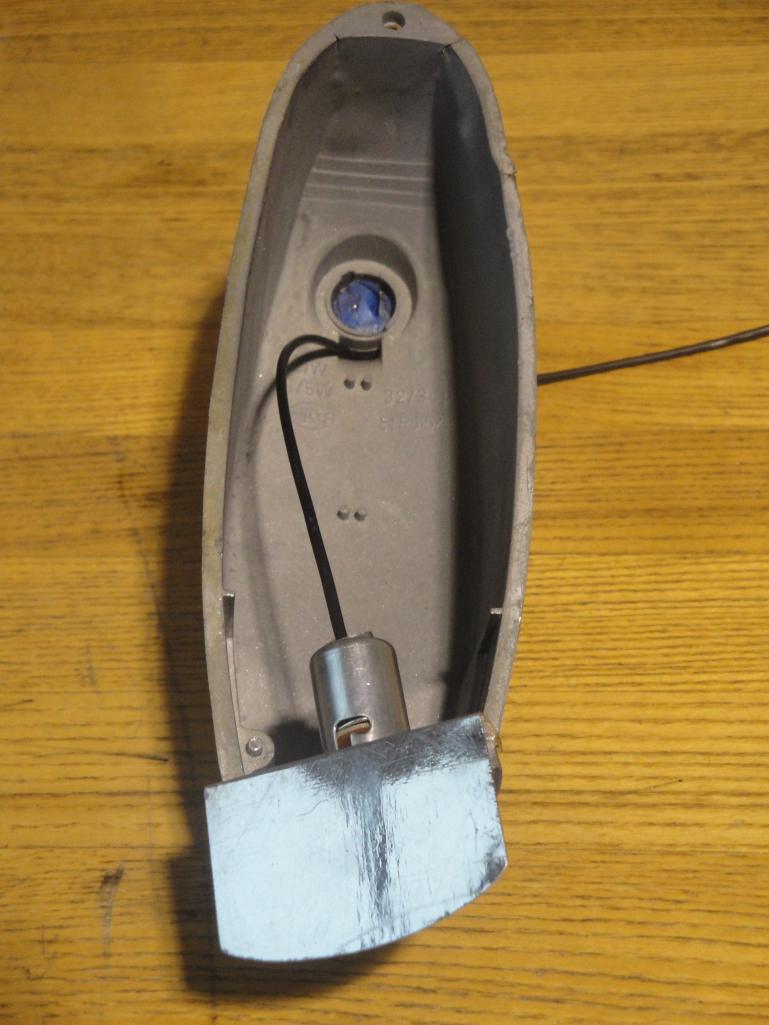 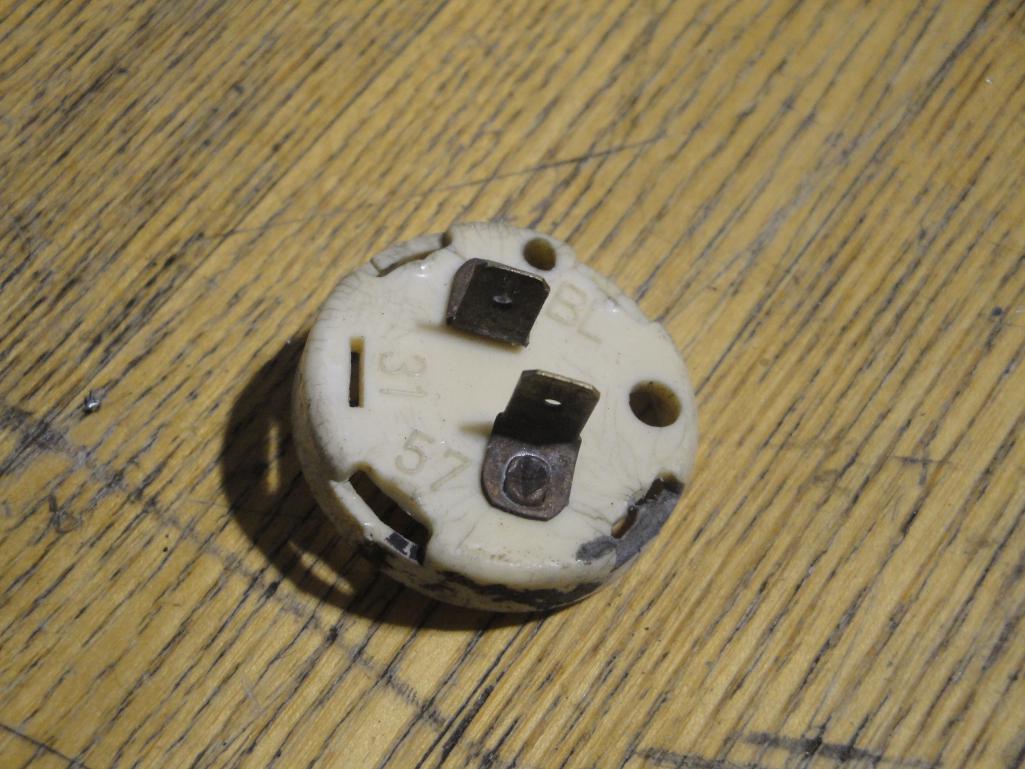
|
|
|
|
| Martin Baker |
Jan 5 2016, 02:13 PM
Post
#38
|
|
I just heard I sold my cars! Group: Members Posts: 1,140 Joined: 11-February 03 Member No.: 290 Region Association: Northern California |
After the refractor is set in place, with the bulb removed, set the power wire. I use the big end of a valve core tool. You do not want to nick the wire. AVOID sharp tools.
If you damage the wire it will short against the housing. Start at the refractor end, keeping just a bit of tension on the wire, so it stays nice and straight down the run, don't make it like a guitar string. Attached thumbnail(s) 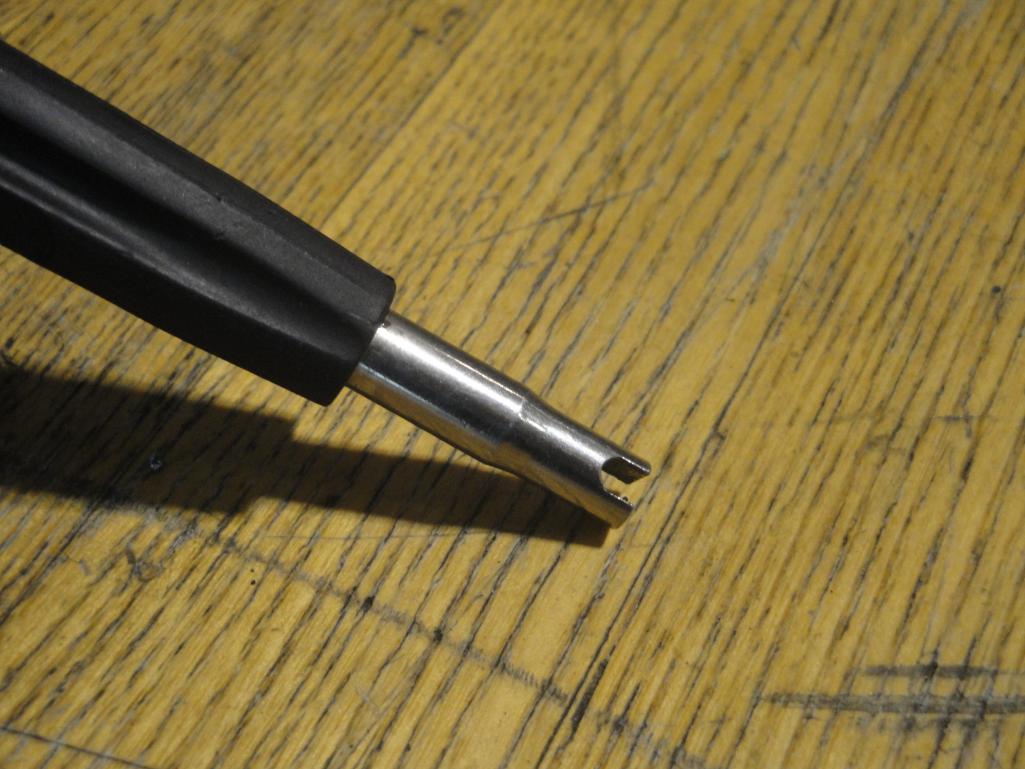 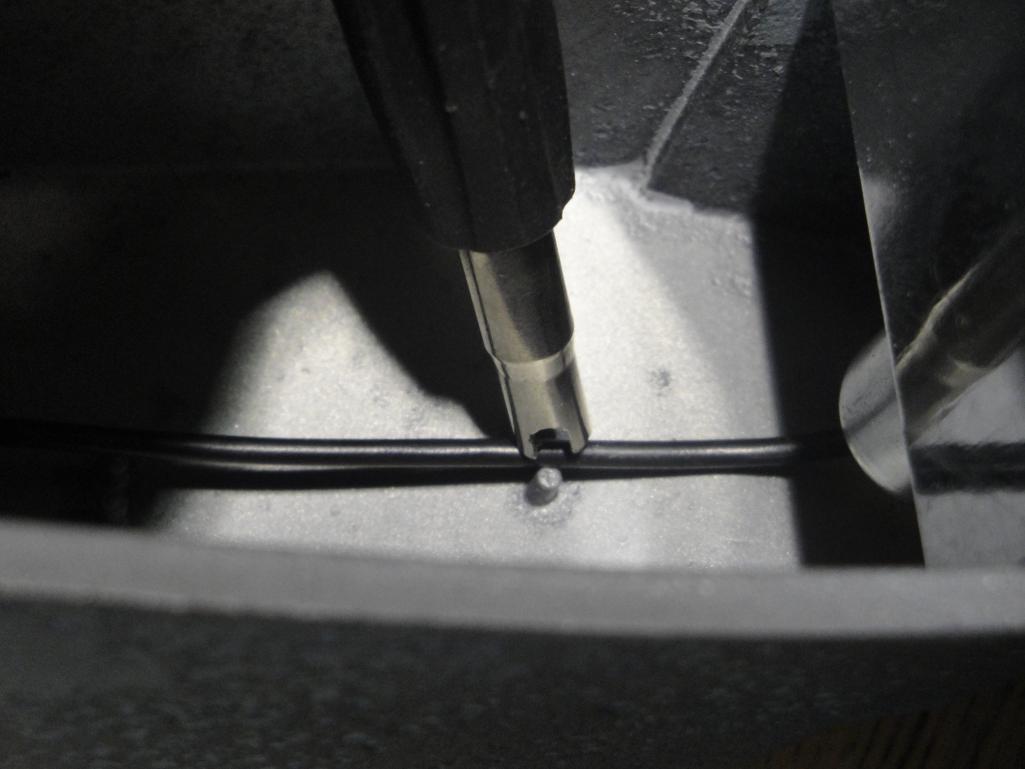
|
|
|
|
| Martin Baker |
Jan 5 2016, 02:17 PM
Post
#39
|
|
I just heard I sold my cars! Group: Members Posts: 1,140 Joined: 11-February 03 Member No.: 290 Region Association: Northern California |
So now, your refractor is set, tight, wire is placed in the three set of retainers. Next flip the housing over to trim excess wire. Leave about an inch or a little more. Not much more.
Attached thumbnail(s) 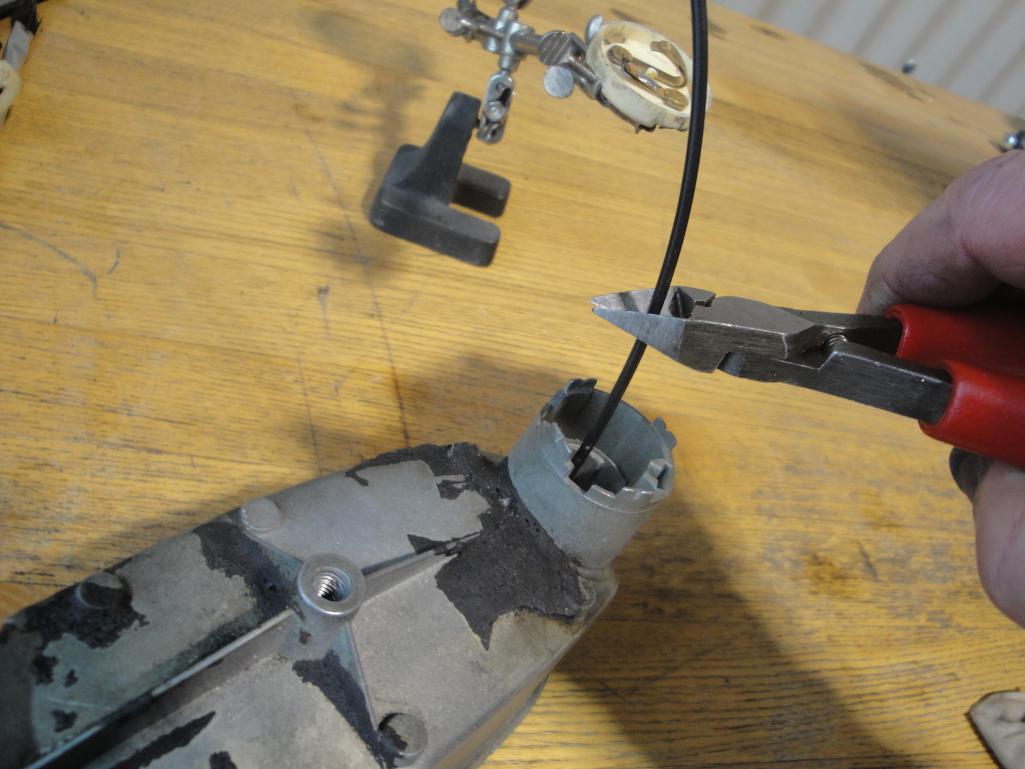
|
|
|
|
| Martin Baker |
Jan 5 2016, 02:20 PM
Post
#40
|
|
I just heard I sold my cars! Group: Members Posts: 1,140 Joined: 11-February 03 Member No.: 290 Region Association: Northern California |
So now this is the important stuff. You will cut terminal 57 on the terminal cap. Of course you will have had to removed that earlier. It will look like this. MAKE SURE YOU CUT THE 57 TERMINAL. The BL terminal is Blinker. 31 is the ground.
The terminal seen here is really bad, hopefully yours are better. You can repair them, but having a spare or two is a good thing. Attached thumbnail(s)  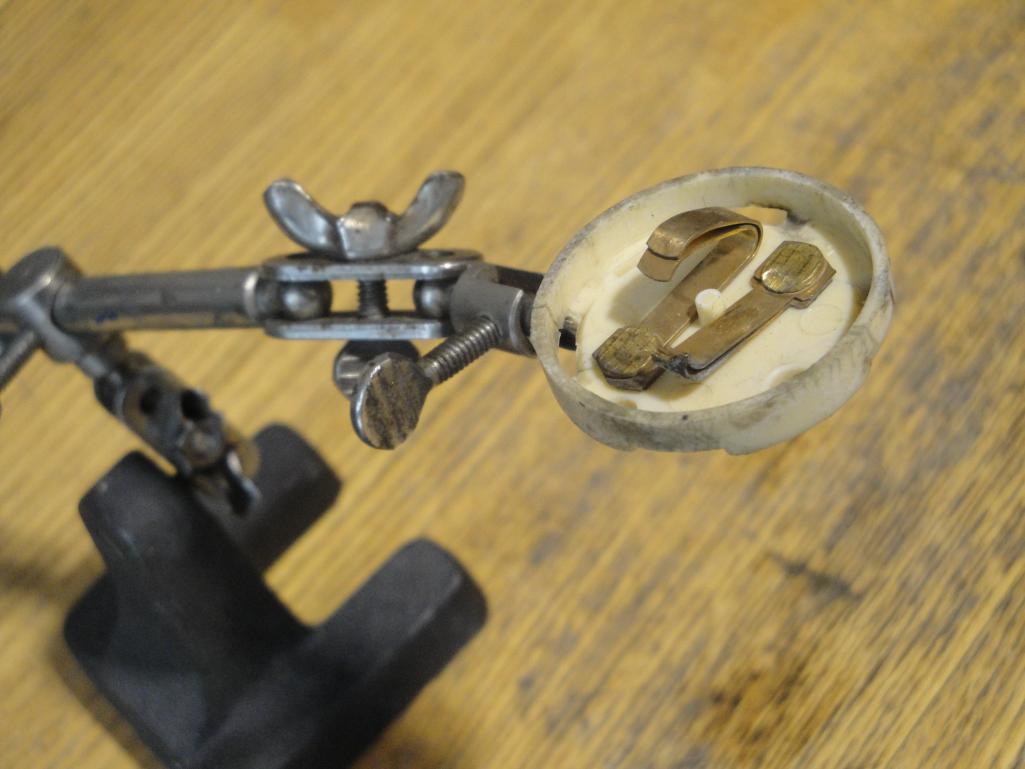
|
|
|
|
|
1 User(s) are reading this topic (1 Guests and 0 Anonymous Users)
0 Members:

|
Lo-Fi Version | Time is now: 28th June 2026 - 04:32 AM |
Invision Power Board
v9.1.4 © 2026 IPS, Inc.