|
|
|
Porsche, and the Porsche crest are registered trademarks of Dr. Ing. h.c. F. Porsche AG.
This site is not affiliated with Porsche in any way. Its only purpose is to provide an online forum for car enthusiasts. All other trademarks are property of their respective owners. |
|
|

  |

| stateofidleness |
 Jun 1 2013, 09:05 AM Jun 1 2013, 09:05 AM
Post
#1
|
|
Senior Member  Group: Members Posts: 810 Joined: 1-September 07 From: Canyon Lake, Texas! Member No.: 8,065 Region Association: None |
Can someone experienced enlighten me on the correct procedure for drilling out spot welds? Specifically on the engine shelf piece by the battery tray. I see the little spot welds that go all the way around the lip of it. When drilling these out, do you go through the piece itself AND the piece behind it, or do you only need to go through the piece that's welded and not go through the piece behind it?
Is this the correct method for replacing that engine shelf piece? |
   |

 
|
| rick 918-S |
Jun 1 2013, 09:38 AM
Post
#2
|
|
Hey nice rack! -Celette Group: Members Posts: 20,463 Joined: 30-December 02 From: Now in Superior WI Member No.: 43 Region Association: Northstar Region |
I don't own a spot weld bit. I use a die grinder with a 3" cut off wheel and grind the spot weld.
If your using a Blair or any other spot weld bit you usually use a center punch to get the spring point to stay center and not wander. The goal is to only drill close to through the first layer of metal leaving the second layer untouched. You then need to us a tool of some kind to detach the top piece of metal. That's the goal. After I had several of my guy's break the bits and toss them like they were free, and guy's drilling through both panels causing damage to the inner panel, I had them start using a die grinder. The biggest issue is the drill through. Even if your not going all the way through and you score the inner panel thin you end up with a thin spot that will weaken the attachment point for your replacement piece. I plan a how-to and will post it soon. Here's the overview: Tools I use: Die grinder with 3" cut off wheel. Screw driver with a reshaped end like a chisel. light to medium weight hammer. First, never remove body panels on a collision damaged car until you have re-dimensioned the chassis. By cutting off a section of the car that is crushed you trap damage that would otherwise be repaired as you pull and straighten the damaged section. Unitized cars transfer damage well back into the car unlike the old frame cars. Here is an example of what I mean. Page two shows damage repair. Notice I left the headlight buckets in place until I had the inner panels and outer fenders ball parked. http://www.914world.com/bbs2/index.php?sho...04128&st=20 Then when your satisfied you have things in reasonable shape cut away the damaged panel sections close to the spot weld flanges. This makes it easy to operate the grinder close to the flange. Carefully grind the spot weld marks to thin the metal. I only thin the metal. Then I carefully pry up the flange with the screw driver and start to split the flange off the inner panel. Once you have competed this you will have spot weld bumps along the inner panel that you can now grind off. You end up with a completely undamaged inner panel ready to spot weld on your new piece. |
|
|
|
| r_towle |
Jun 1 2013, 03:10 PM
Post
#3
|
|
Custom Member Group: Members Posts: 24,576 Joined: 9-January 03 From: Taxachusetts Member No.: 124 Region Association: North East States |
Similar to Rick, when you are removing the engine shelf, use a die grinder and cut all the metal away that you can and leave just the spot welds as the last project....so you will have 20 or so little triangles of metal left in the way.
Then use the die grinder sideways and scrape it across the top of the spot weld till you grind it down to nothing....or you can use a sander also. The key I have found is focus on removing all the metal of the engine tray first, get it out of your way, then you have a ton more room to remove the spot welds with a lot less collateral damage. Rich |
|
|
|
| rick 918-S |
Jun 1 2013, 03:42 PM
Post
#4
|
|
Hey nice rack! -Celette Group: Members Posts: 20,463 Joined: 30-December 02 From: Now in Superior WI Member No.: 43 Region Association: Northstar Region |
QUOTE(r_towle @ Jun 1 2013, 04:10 PM)  Similar to Rick, when you are removing the engine shelf, use a die grinder and cut all the metal away that you can and leave just the spot welds as the last project....so you will have 20 or so little triangles of metal left in the way. Then use the die grinder sideways and scrape it across the top of the spot weld till you grind it down to nothing....or you can use a sander also. The key I have found is focus on removing all the metal of the engine tray first, get it out of your way, then you have a ton more room to remove the spot welds with a lot less collateral damage. Rich (IMG:style_emoticons/default/agree.gif) If it ever stops raining here I have a car ready to go to the scrap yard. I will do a demo if I can and post it. |
|
|
|
| stateofidleness |
Jun 1 2013, 04:40 PM
Post
#5
|
|
Senior Member Group: Members Posts: 810 Joined: 1-September 07 From: Canyon Lake, Texas! Member No.: 8,065 Region Association: None |
Welp... I "bit the bullet" today and went at it! I actually used a chisel and a big flathead screwdriver to "pry" and separate the piece. I tackled the engine shelf piece today and quit while I was ahead (IMG:style_emoticons/default/biggrin.gif) The black areas in the last pictures are from a rust "converter" spray I put on to protect the bare good metal for the time being.
At what point do I have to worry about the car folding in half on me while I'm sitting in the engine compartment? LOL.. sounds dumb, but I actually have a fear of that happening as I start cutting out the metal in that area. 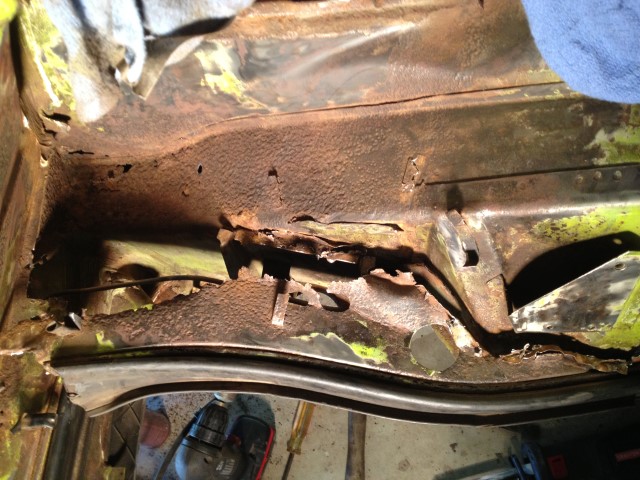 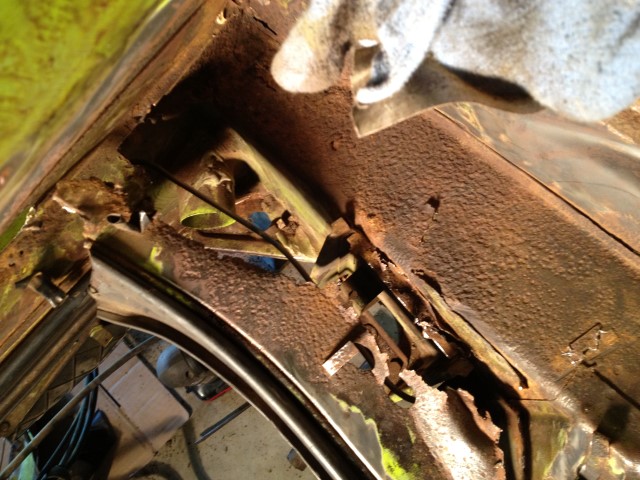 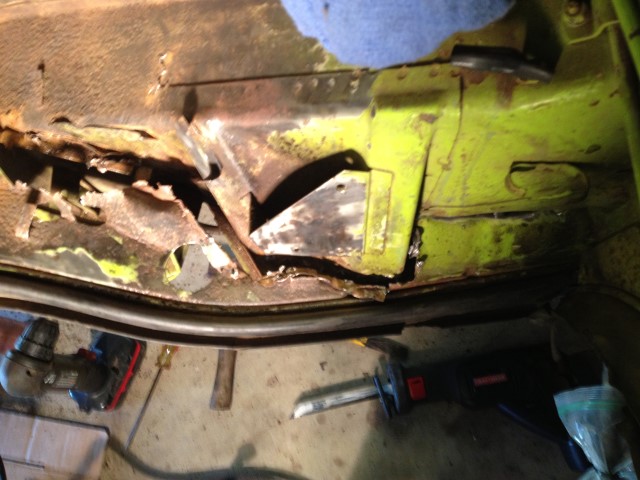 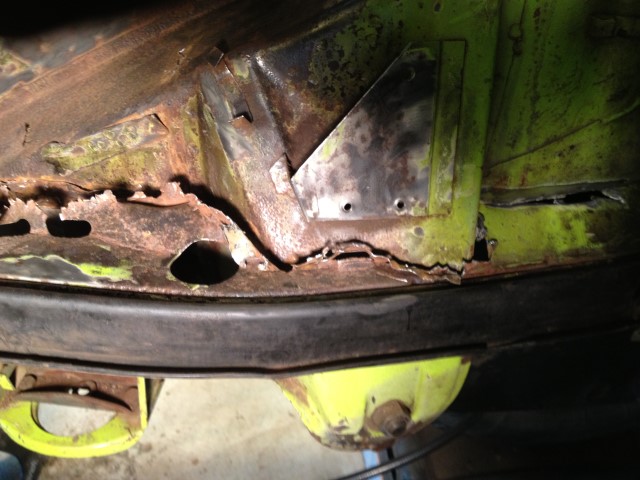 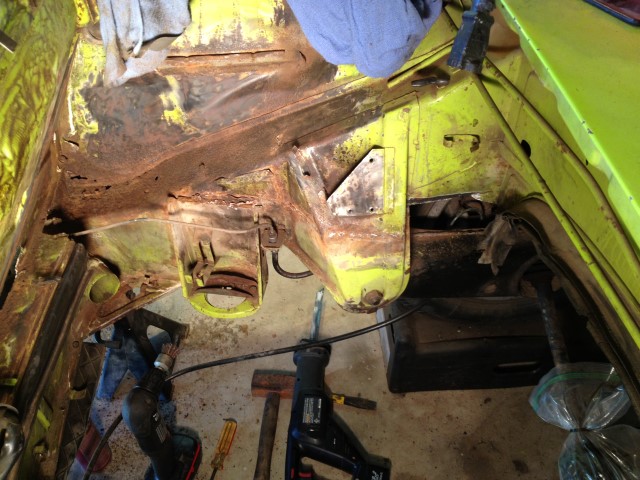 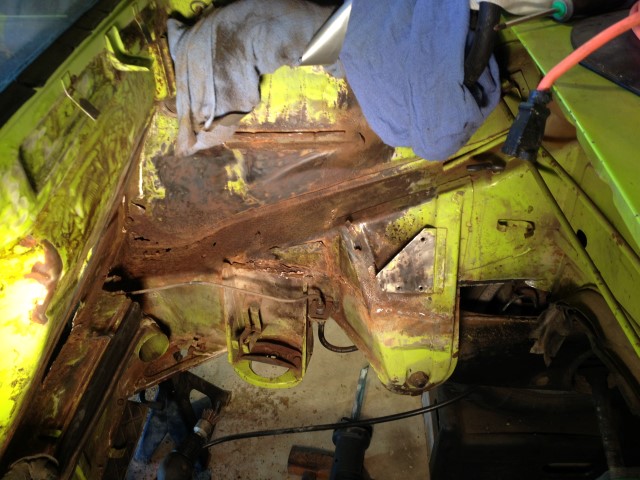 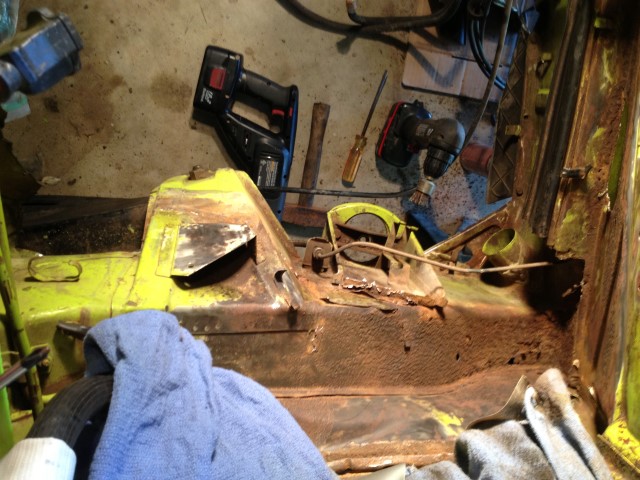 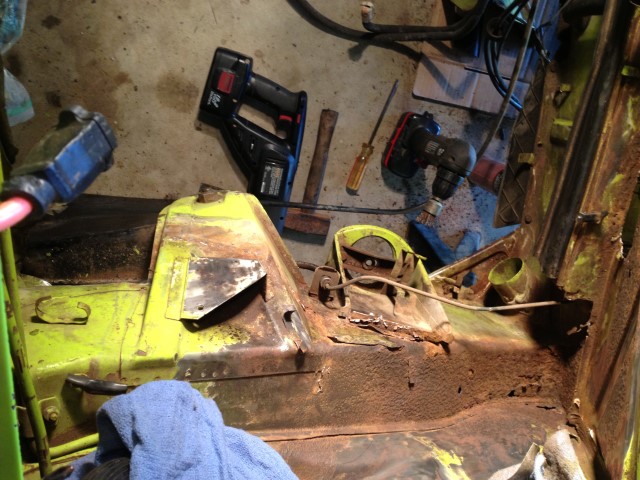 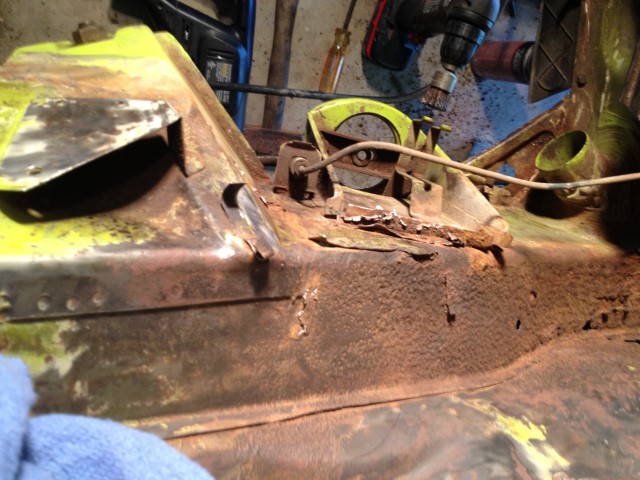 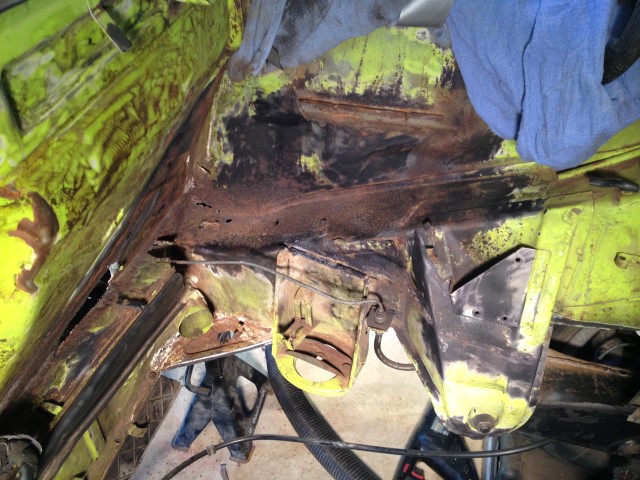 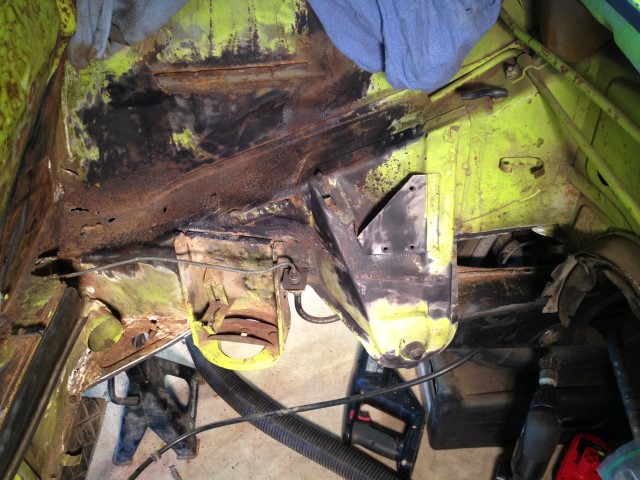 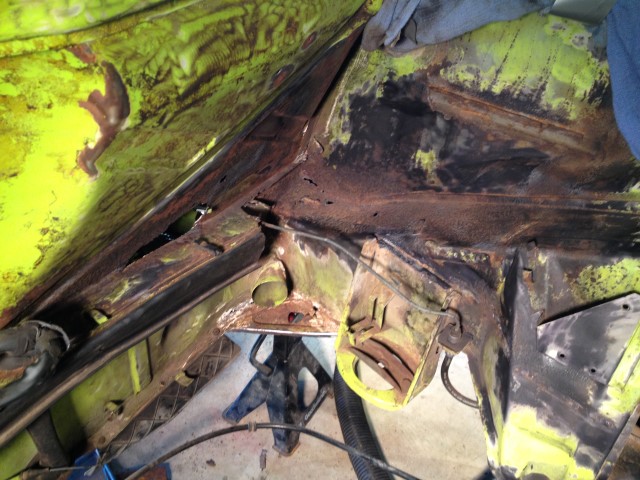 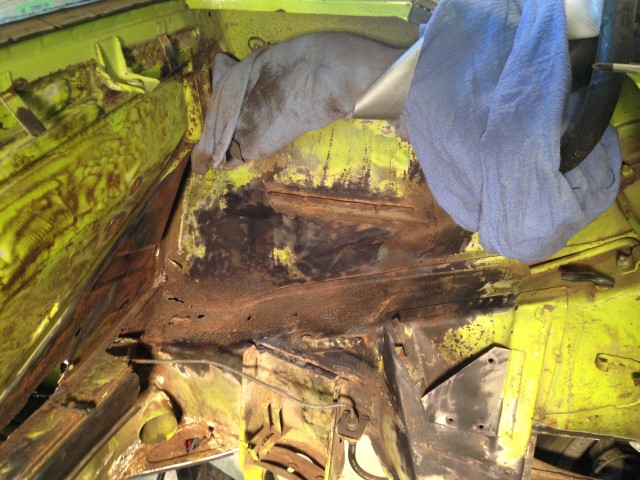 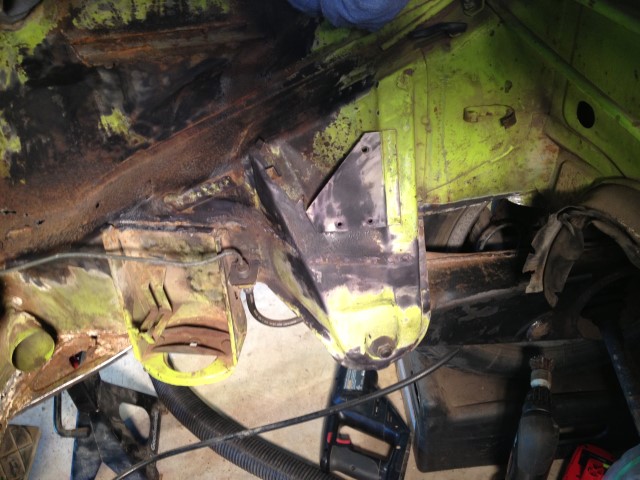 |
|
|
|
| rick 918-S |
Jun 1 2013, 05:11 PM
Post
#6
|
|
Hey nice rack! -Celette Group: Members Posts: 20,463 Joined: 30-December 02 From: Now in Superior WI Member No.: 43 Region Association: Northstar Region |
I would sand blast that area. You can tape it off with heavy plastic and stick the gun through the plastic. This will keep the sand mess local to the area. Then metal condition per the instructions on the product your using.
|
|
|
|
| stateofidleness |
Jun 1 2013, 05:24 PM
Post
#7
|
|
Senior Member Group: Members Posts: 810 Joined: 1-September 07 From: Canyon Lake, Texas! Member No.: 8,065 Region Association: None |
That would require me to buy a new toy (IMG:style_emoticons/default/smile.gif)
Guess I could.. saw a 100lb media tank at Harbor for $100. That's not too much money lost if it doesn't work out. Are you saying to sand blast that entire battery area, including the long, sidewall, firewall, and suspension console? I wasn't real sure how to condition to be honest with you. I often wondered what the "pros" do in between "sessions" to keep the metal from surface rusting again. If sand shoots holes in the top of the long, won't it just fill up with sand? How do I prevent that? (ps: I appreciate your guidance Rick. Your posts are really motivating me to tackle this, which is something I've been dreading for a long time) |
|
|
|
| rick 918-S |
Jun 1 2013, 06:04 PM
Post
#8
|
|
Hey nice rack! -Celette Group: Members Posts: 20,463 Joined: 30-December 02 From: Now in Superior WI Member No.: 43 Region Association: Northstar Region |
Cut out the area if it's pin holed and weld in a patch. Go ahead and blast it and see what it looks like.
|
|
|
|
| Matt Romanowski |
Jun 1 2013, 06:58 PM
Post
#9
|
|
Senior Member Group: Members Posts: 878 Joined: 4-January 04 From: Manchester, NH Member No.: 1,507 |
I think one of the biggest mistakes most people make is that they don't cut enough bad metal out. Get in there and cut the bad stuff out, sand blast what looks like surface rust, cut out the new pin holed spots, weld more patches in, and keep going.
|
|
|
|
| r_towle |
Jun 1 2013, 07:11 PM
Post
#10
|
|
Custom Member Group: Members Posts: 24,576 Joined: 9-January 03 From: Taxachusetts Member No.: 124 Region Association: North East States |
Instead of a blasting cabinet, buy a hand held sand blaster
|
|
|
|
| worn |
Jun 1 2013, 08:46 PM
Post
#11
|
|
can't remember Group: Members Posts: 3,156 Joined: 3-June 11 From: Madison, WI Member No.: 13,152 Region Association: Upper MidWest |
Now that you have come this far, why not get some piece of mind and weld in some fresh metal there too. You need some paper or cardboard to make a pattern.
To encourage you, I want to tell you that yesterday I welded that same piece in new metal back in on my car. Now I have a new engine shelf, long section and battery tray. Ok the floor still needs work, but that is coming along. So it should work. I also should I add that in many cases I use a spot weld drill. I am mortified that I have shifted to harbor freight because it works better for me. Go get em |
|
|
|
| stateofidleness |
Jun 1 2013, 09:10 PM
Post
#12
|
|
Senior Member Group: Members Posts: 810 Joined: 1-September 07 From: Canyon Lake, Texas! Member No.: 8,065 Region Association: None |
QUOTE(worn @ Jun 1 2013, 09:46 PM) To encourage you, I want to tell you that yesterday I welded that same piece in new metal back in on my car... ...Go get em (IMG:style_emoticons/default/beerchug.gif) What do you guys think of this? May pick it up tomorrow if it's worth the price. Only $100. Not sure what the media itself costs. Do I actually use real sand or has that become a general term for blasting with a more specific media? http://www.harborfreight.com/110-Lb-Pressu...utm_source=1003 |
|
|
|
| rick 918-S |
Jun 1 2013, 10:12 PM
Post
#13
|
|
Hey nice rack! -Celette Group: Members Posts: 20,463 Joined: 30-December 02 From: Now in Superior WI Member No.: 43 Region Association: Northstar Region |
That will work nice but be sure to get an filter system to keep the air dry - dry- dry. Also you will need a pretty good compressor. I have a desiccant dryer I got from Harbor freight. Not sure they sell them anymore.
|
|
|
|
| hot_shoe914 |
Jun 1 2013, 10:21 PM
Post
#14
|
|
on ramp passer Group: Members Posts: 3,802 Joined: 20-November 07 From: Earle, Ar. Member No.: 8,354 Region Association: None |
http://www.914world.com/bbs2/index.php?sho...mp;hl=beginning
Check out this thread, it shows most, if not all, of what you are doing. Shoe |
|
|
|
| mrbubblehead |
Jun 1 2013, 11:22 PM
Post
#15
|
|
Twodollardoug Group: Members Posts: 1,155 Joined: 17-December 10 From: calimesa ca. Member No.: 12,492 Region Association: Southern California |
im in the middle of the same project myself. so your not alone. just a little advice, do it right, do it once, so you dont have to do it again. but most of all dont get discouraged. a man put them together, a man can cut em up and put them together again (IMG:style_emoticons/default/beerchug.gif)
|
|
|
|
|
1 User(s) are reading this topic (1 Guests and 0 Anonymous Users)
0 Members:

|
Lo-Fi Version | Time is now: 20th May 2024 - 07:27 PM |
Invision Power Board
v9.1.4 © 2024 IPS, Inc.