|
|
|
Porsche, and the Porsche crest are registered trademarks of Dr. Ing. h.c. F. Porsche AG.
This site is not affiliated with Porsche in any way. Its only purpose is to provide an online forum for car enthusiasts. All other trademarks are property of their respective owners. |
|
|


| Steve_R |
 Jun 23 2013, 11:32 PM Jun 23 2013, 11:32 PM
Post
#1
|
|
Member  Group: Members Posts: 68 Joined: 8-August 12 From: San Diego, CA Member No.: 14,777 Region Association: None |
Hi, I would like to introduce myself and share my project. I’m Steve, I live in San Diego and I picked up this 1973 1.7 914 about a year ago. It was in great shape with no rust and had been sitting in a garage for the past 13 years. My plan is to restore it to its original condition. At this point I think the car is about 50% done.
The car had door guards riveted to the sides and I had them welded up. One of the first things I did when I got the car was to build a dolly to be able to work on the suspension and make it easy to move it around the garage. It’s made from 4 X 4s and plywood and it took about 4 hours to build. If you don’t have a wood saw Home Depot will cut the 4 X 4s and plywood to the correct length. There are lag screws on top of the vertical posts that stick up ½” that fit into the 4 jack points cups under the car. This keeps the car from falling off. Also, I removed the engine before I put the car on it. To get it up there I used some cement blocks, 4 jack stands and 2 scissor jacks. Over the past year I’ve learned a lot from reading your posts and now I would like to give back some of the knowledge I’ve learned. Attached image(s) 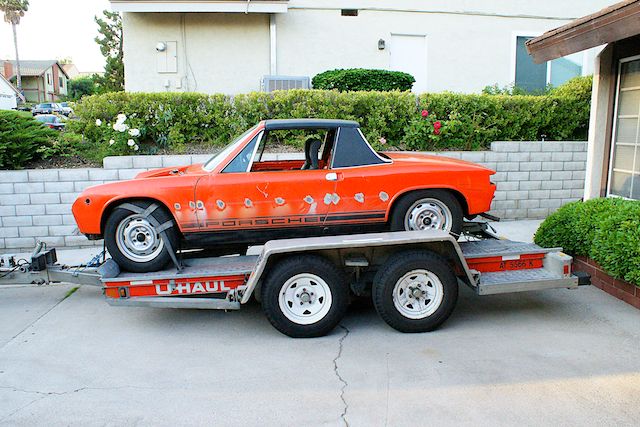 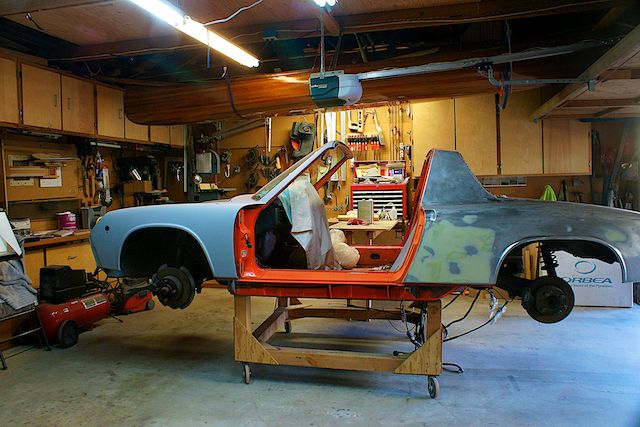 Attached File(s)  Dolly.pdf ( 97.5k )
Number of downloads: 277
Dolly.pdf ( 97.5k )
Number of downloads: 277 |
   |

 
|
  |
Replies
| Steve_R |
Mar 4 2014, 08:13 AM
Post
#2
|
|
Member Group: Members Posts: 68 Joined: 8-August 12 From: San Diego, CA Member No.: 14,777 Region Association: None |
More pics
Attached image(s)   
|
|
|
|
| Steve_R |
Mar 4 2014, 08:17 PM
Post
#3
|
|
Member Group: Members Posts: 68 Joined: 8-August 12 From: San Diego, CA Member No.: 14,777 Region Association: None |
Applied undercoating and relocated the fuel pump and filter to under the gas tank.
The pump I used is a NAPA Bosch N69133 and the filter is a NAPA 3482. For the fuel lines I used 3/8 & 5/16 steel lines from NAPA. I cut them to length and flared the ends for the fittings. I did buy stainless lines to connect to the engine. Attached image(s) 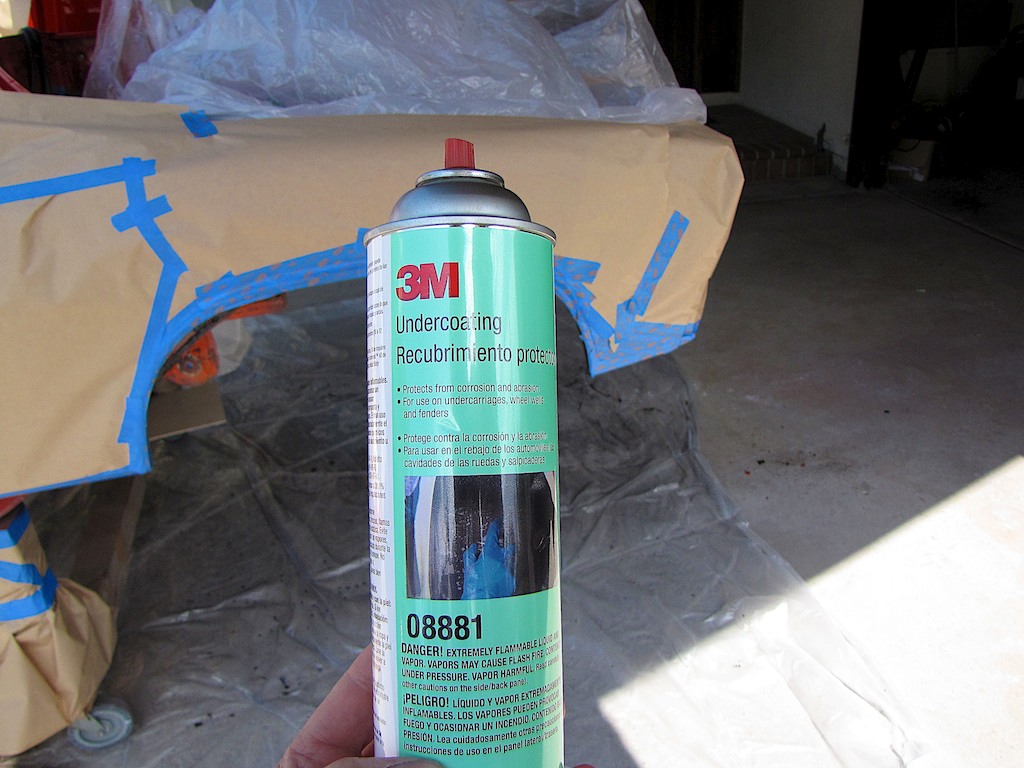 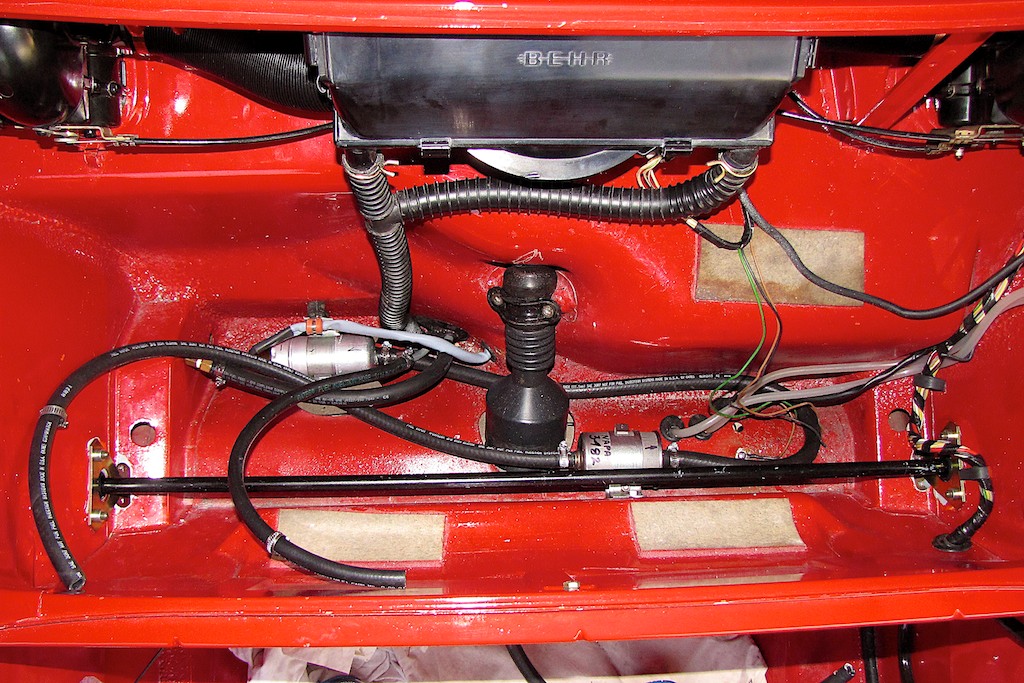 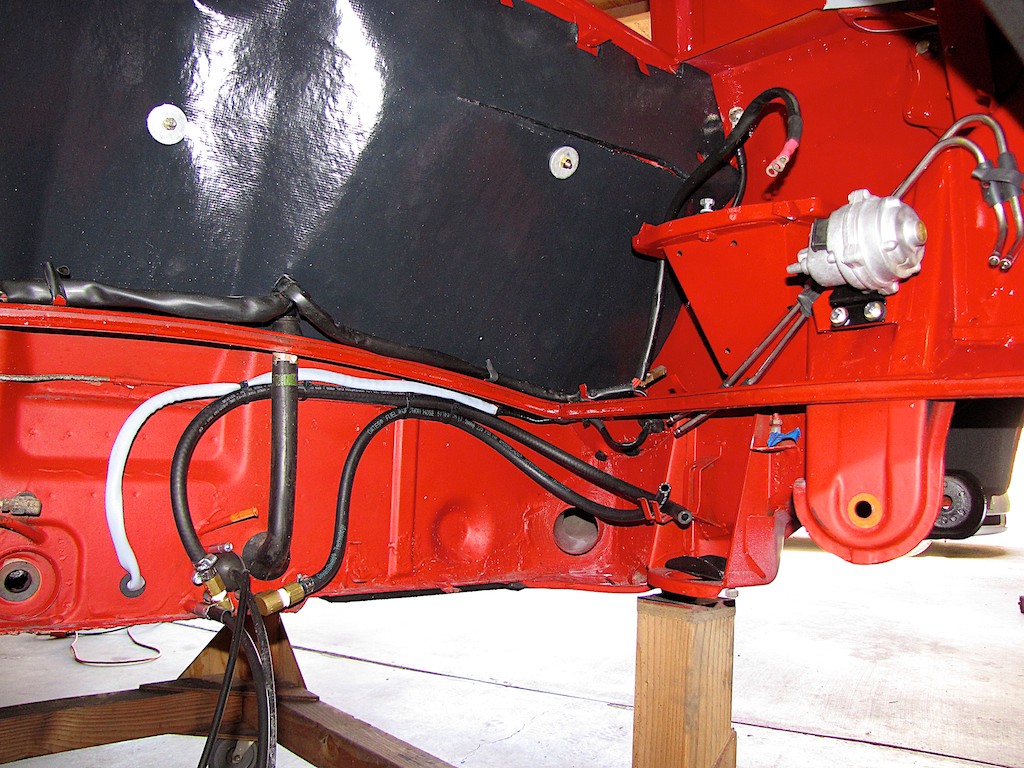 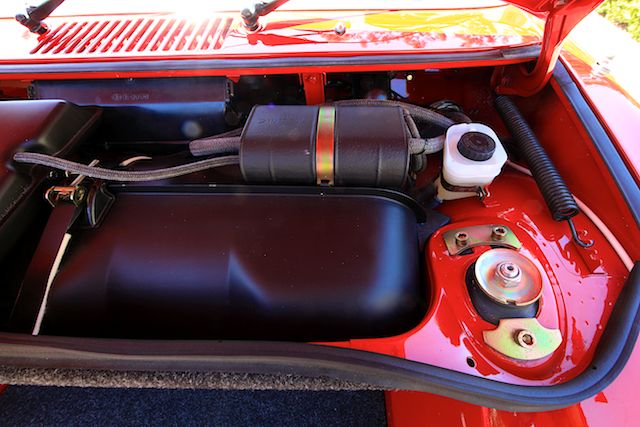
|
|
|
|
| type47 |
Mar 5 2014, 06:18 AM
Post
#4
|
|
Viermeister Group: Members Posts: 4,254 Joined: 7-August 03 From: Vienna, VA Member No.: 994 Region Association: MidAtlantic Region |
QUOTE(Steve_R @ Mar 4 2014, 06:17 PM)  ... and relocated the fuel pump and filter to under the gas tank. totally awesome work! Won't the filter location make it really hard to change? |
|
|
|
| Steve_R |
Mar 5 2014, 08:07 AM
Post
#5
|
|
Member Group: Members Posts: 68 Joined: 8-August 12 From: San Diego, CA Member No.: 14,777 Region Association: None |
QUOTE(type47 @ Mar 5 2014, 04:18 AM) QUOTE(Steve_R @ Mar 4 2014, 06:17 PM) ... and relocated the fuel pump and filter to under the gas tank. totally awesome work! Won't the filter location make it really hard to change? Thanks and good point. I think I'll re-relocate it back to it's original location and maybe add some insulation to help with vapor lock. |
|
|
|
| Steve_R |
Mar 5 2014, 08:18 AM
Post
#6
|
|
Member Group: Members Posts: 68 Joined: 8-August 12 From: San Diego, CA Member No.: 14,777 Region Association: None |
QUOTE(Steve_R @ Mar 5 2014, 06:07 AM) QUOTE(type47 @ Mar 5 2014, 04:18 AM) QUOTE(Steve_R @ Mar 4 2014, 06:17 PM) ... and relocated the fuel pump and filter to under the gas tank. totally awesome work! Won't the filter location make it really hard to change? Thanks and good point. I think I'll re-relocate it back to it's original location and maybe add some insulation to help with vapor lock. Actually, now that I think about it, it should be between the tank and the pump. So, I think I'll just leave it there. I want it to look stock as much as possible so I don't want to put it in the front trunk. |
|
|
|
| KELTY360 |
Mar 7 2014, 08:06 AM
Post
#7
|
|
914 Neferati Group: Members Posts: 5,031 Joined: 31-December 05 From: Pt. Townsend, WA Member No.: 5,344 Region Association: Pacific Northwest |
QUOTE(Steve_R @ Mar 5 2014, 06:18 AM) QUOTE(Steve_R @ Mar 5 2014, 06:07 AM) QUOTE(type47 @ Mar 5 2014, 04:18 AM) QUOTE(Steve_R @ Mar 4 2014, 06:17 PM) ... and relocated the fuel pump and filter to under the gas tank. totally awesome work! Won't the filter location make it really hard to change? Thanks and good point. I think I'll re-relocate it back to it's original location and maybe add some insulation to help with vapor lock. Actually, now that I think about it, it should be between the tank and the pump. So, I think I'll just leave it there. I want it to look stock as much as possible so I don't want to put it in the front trunk. Spectacular work! Your attention to detail will pay off many times over. You can make a more convenient location for the pump and filter by mounting in the cavity that holds the steering rack and master cylinder. It's protected from road debris by the panel yet easily accessed for service. What are your plans for wheels? |
|
|
|
| Steve_R |
Mar 9 2014, 11:18 AM
Post
#8
|
|
Member Group: Members Posts: 68 Joined: 8-August 12 From: San Diego, CA Member No.: 14,777 Region Association: None |
QUOTE(KELTY360 @ Mar 7 2014, 07:06 AM) QUOTE(Steve_R @ Mar 5 2014, 06:18 AM) QUOTE(Steve_R @ Mar 5 2014, 06:07 AM) QUOTE(type47 @ Mar 5 2014, 04:18 AM) QUOTE(Steve_R @ Mar 4 2014, 06:17 PM) ... and relocated the fuel pump and filter to under the gas tank. totally awesome work! Won't the filter location make it really hard to change? Thanks and good point. I think I'll re-relocate it back to it's original location and maybe add some insulation to help with vapor lock. Actually, now that I think about it, it should be between the tank and the pump. So, I think I'll just leave it there. I want it to look stock as much as possible so I don't want to put it in the front trunk. Spectacular work! Your attention to detail will pay off many times over. You can make a more convenient location for the pump and filter by mounting in the cavity that holds the steering rack and master cylinder. It's protected from road debris by the panel yet easily accessed for service. What are your plans for wheels? Marc, That's a great idea. My car didn't have a debris shield so I didn't think of putting it there. Does anyone have any pictures of this? I just picked up some Fuchs wheels that I'll be using with some Bridgestone Potenza 195/60R15 tires. I'll be painting the centers black. To paint the centers black I built a tool to cut the tape at a constant distance from the rim outer surface. It's basically a flat piece of aluminum with a standoff and a razor blade attached to the end. After taping up the wheel I just sliced thru the tape with the razor blade tool and had a perfect tape line. I'll add some pictures of the finished wheel next. Attached image(s) 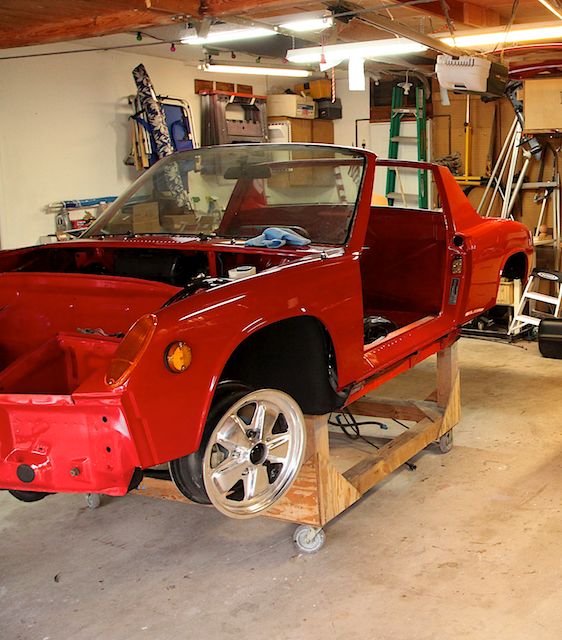 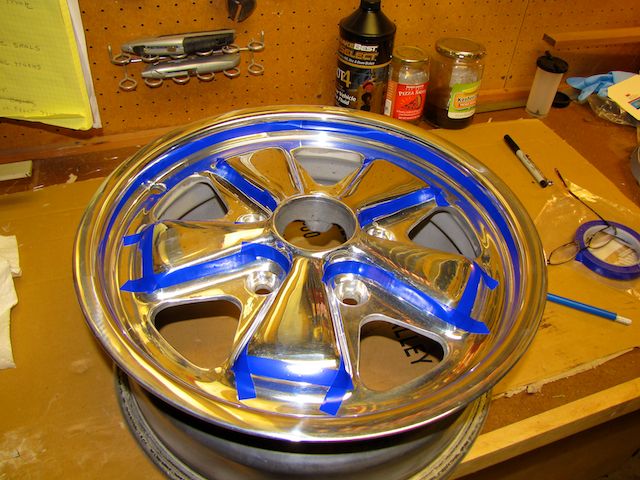 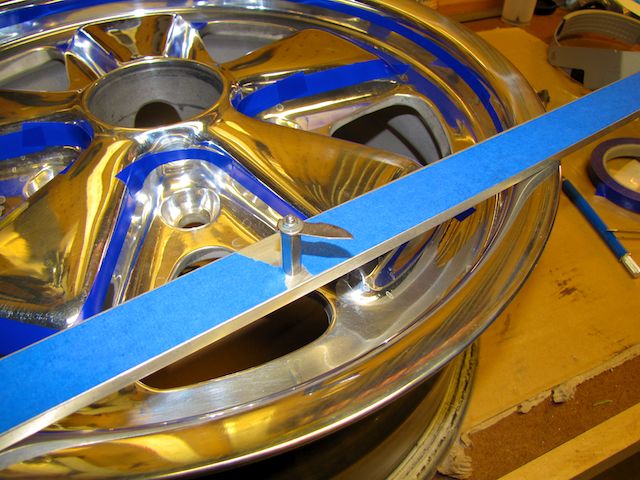 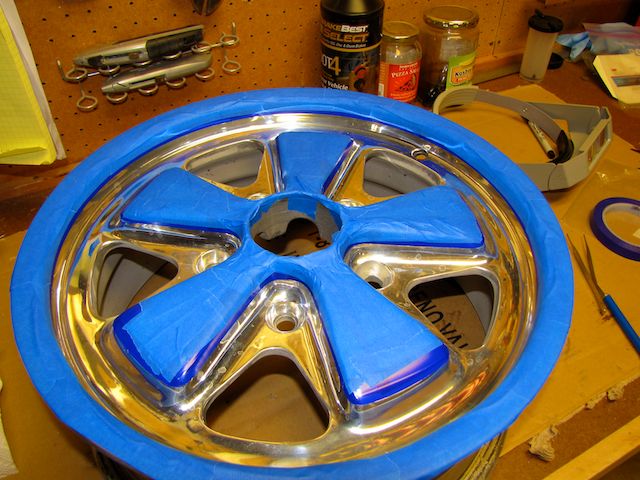 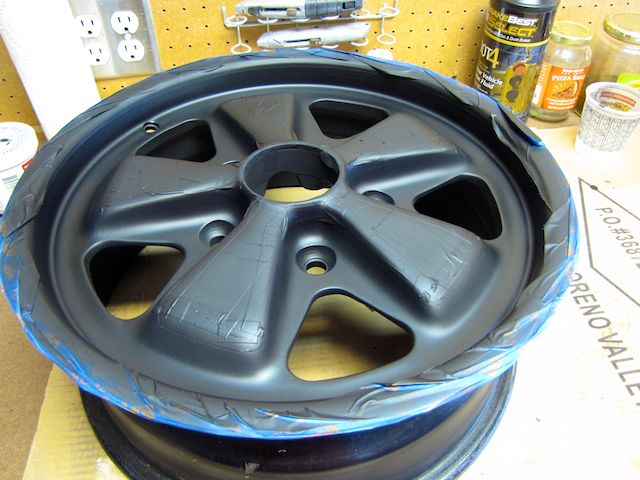 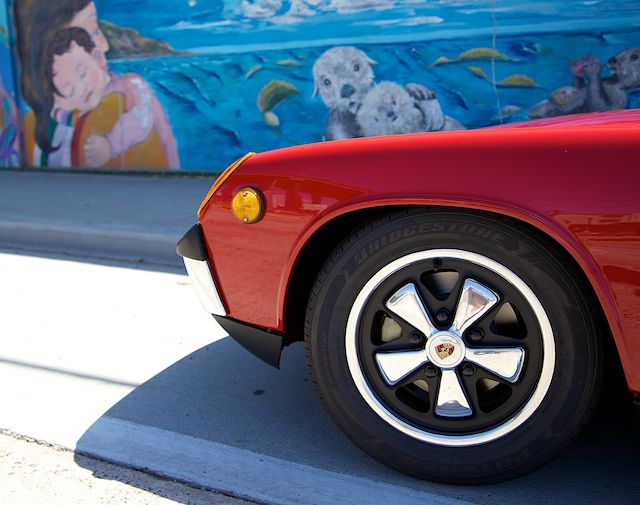
|
|
|
|
Posts in this topic
 Steve_R Steve's 73 1.7 Restoration Thread Jun 23 2013, 11:32 PM
 JawjaPorsche Good luck with your project. Looks like you have ... Jun 24 2013, 05:32 AM Steve_R I finally finished the paint job. Here in Californ... Aug 15 2013, 10:01 PM zambezi Great job. I hope my home paint job comes out tha... Aug 16 2013, 09:54 PM Cairo94507 That looks terrific! I hope you post more pic... Aug 17 2013, 07:55 AM rick 918-S Nice work :wttc: Aug 18 2013, 05:19 AM jimkelly thanks for the details and product list.
looks ni... Aug 18 2013, 05:41 AM bulitt Wow! Love the canoe! Aug 18 2013, 06:34 AM FourBlades What happened to welding in 30 rust repair panels?... Aug 18 2013, 07:18 AM watsonrx13 Excellent work. Can you show some pics of the pain... Aug 18 2013, 07:51 AM
JawjaPorsche Good luck with your project. Looks like you have ... Jun 24 2013, 05:32 AM Steve_R I finally finished the paint job. Here in Californ... Aug 15 2013, 10:01 PM zambezi Great job. I hope my home paint job comes out tha... Aug 16 2013, 09:54 PM Cairo94507 That looks terrific! I hope you post more pic... Aug 17 2013, 07:55 AM rick 918-S Nice work :wttc: Aug 18 2013, 05:19 AM jimkelly thanks for the details and product list.
looks ni... Aug 18 2013, 05:41 AM bulitt Wow! Love the canoe! Aug 18 2013, 06:34 AM FourBlades What happened to welding in 30 rust repair panels?... Aug 18 2013, 07:18 AM watsonrx13 Excellent work. Can you show some pics of the pain... Aug 18 2013, 07:51 AM
 Steve_R Rob,
I didn't use a paint booth. I painted it ... Aug 18 2013, 09:11 AM CptTripps I was planning on getting one of these to do the p... Mar 3 2014, 07:25 PM ndfrigi Hi Steve,
Can you share a picture(s) of your car ... Mar 3 2014, 07:45 PM cconcepcion +1 on the canoe! on a side note….you mus... Mar 3 2014, 07:49 PM Steve_R So, here's an update. Since my last post i... Mar 4 2014, 12:09 AM ndfrigi Wow beautiful! Thanks for sharing the update... Mar 4 2014, 12:19 AM Steve_R Started working on the interior this week. I bough... Mar 27 2014, 11:31 PM Steve_R The next project was to make a wire harness for th... Jun 3 2014, 10:09 PM Steve_R The gauges were in bad shape so I sanded them down... Jun 3 2014, 10:15 PM ThePaintedMan WOW. Really impressive work Steve. Nice to see som... Mar 4 2014, 08:29 AM wndsnd
WOW. Really impressive work Steve. Nice to see so... Mar 4 2014, 08:41 PM r3dplanet The hell you say! The 1.7 should never be cons... Mar 4 2014, 09:36 PM ben*james Cracking me up! :agree:
1.7 is worthy :wor... Mar 4 2014, 09:40 PM saigon71 Impressive work...very clean and meticulous! ... Mar 5 2014, 08:36 AM Steve_R The front bumper had a rust hole that needed some ... Mar 5 2014, 10:14 PM ndfrigi
The front bumper had a rust hole that needed some... Mar 5 2014, 10:35 PM Steve_R Yes, it is the same bumper. I forgot to mention th... Mar 5 2014, 10:53 PM ndfrigi
Yes, it is the same bumper. I forgot to mention t... Mar 5 2014, 11:48 PM Steve_R
Yes, it is the same bumper. I forgot to mention ... Mar 6 2014, 12:15 AM mepstein
[quote name='ndfrigi' post='2006733' date='Mar 5 ... Mar 6 2014, 07:17 AM ndfrigi
[quote name='ndfrigi' post='2006733' date='Mar 5 ... Mar 6 2014, 11:40 AM Steve_R
[quote name='ndfrigi' post='2006733' date='Mar 5... Mar 6 2014, 11:43 PM Steve_R One of the more challenging projects was to rebuil... Mar 7 2014, 12:04 AM mepstein Just WOW! Mar 5 2014, 10:27 PM Shindog1961 Nice! Really like the dolly, how did you get t... Mar 6 2014, 12:03 AM Cairo94507 Steve that is some outstanding work. Bumper looks... Mar 7 2014, 07:22 AM Philip W. :trophy: Very nice!, enjoyed seeing it all com... Mar 7 2014, 07:53 AM ndfrigi Hi Again Steve,
A real amazing job and beautiful ... Jun 4 2014, 01:43 AM Steve_R It's been a while since I've posted any pi... Oct 14 2014, 08:51 PM mepstein WOW! Oct 14 2014, 09:00 PM altitude411 Sa-Weet! Really nice work. Congrads on being... Oct 14 2014, 09:09 PM stevegm Wasn't there a picture on 914world of this car... Oct 14 2014, 09:25 PM Steve_R
Wasn't there a picture on 914world of this ca... Oct 14 2014, 10:02 PM stevegm
[quote name='stevegm' post='2097874' date='Oct 14... Oct 14 2014, 10:11 PM trojanhorsepower Wow! Oct 14 2014, 10:15 PM Cairo94507 Car looks beautiful! :first: Oct 15 2014, 07:29 AM CptTripps Great job on that interior. Very well done. Oct 15 2014, 11:04 AM Steve_R So now that I have about 1,000 miles on my car it�... Oct 22 2014, 08:08 PM Steve_R Some pics Dec 16 2014, 06:38 PM Cairo94507 I love your car :trophy:
What's up with tha... Dec 16 2014, 07:20 PM turk22 Absolutely beautiful job, just love the way it cam... Dec 16 2014, 07:21 PM Larmo63 Gawd, is there anything you CAN'T do?? You did... Dec 16 2014, 08:21 PM bigkensteele Stunning! I admire your ingenuity and will be... Dec 16 2014, 08:32 PM G e o r g e That 914 is a thing of beauty. Great job Dec 16 2014, 10:27 PM Cuda911 Holey Macaroni! Wow!! That is such an... Dec 17 2014, 12:26 AM Amphicar770 Wow! Beautiful work all around. I wish I had... Jun 30 2016, 09:34 AM
Steve_R Rob,
I didn't use a paint booth. I painted it ... Aug 18 2013, 09:11 AM CptTripps I was planning on getting one of these to do the p... Mar 3 2014, 07:25 PM ndfrigi Hi Steve,
Can you share a picture(s) of your car ... Mar 3 2014, 07:45 PM cconcepcion +1 on the canoe! on a side note….you mus... Mar 3 2014, 07:49 PM Steve_R So, here's an update. Since my last post i... Mar 4 2014, 12:09 AM ndfrigi Wow beautiful! Thanks for sharing the update... Mar 4 2014, 12:19 AM Steve_R Started working on the interior this week. I bough... Mar 27 2014, 11:31 PM Steve_R The next project was to make a wire harness for th... Jun 3 2014, 10:09 PM Steve_R The gauges were in bad shape so I sanded them down... Jun 3 2014, 10:15 PM ThePaintedMan WOW. Really impressive work Steve. Nice to see som... Mar 4 2014, 08:29 AM wndsnd
WOW. Really impressive work Steve. Nice to see so... Mar 4 2014, 08:41 PM r3dplanet The hell you say! The 1.7 should never be cons... Mar 4 2014, 09:36 PM ben*james Cracking me up! :agree:
1.7 is worthy :wor... Mar 4 2014, 09:40 PM saigon71 Impressive work...very clean and meticulous! ... Mar 5 2014, 08:36 AM Steve_R The front bumper had a rust hole that needed some ... Mar 5 2014, 10:14 PM ndfrigi
The front bumper had a rust hole that needed some... Mar 5 2014, 10:35 PM Steve_R Yes, it is the same bumper. I forgot to mention th... Mar 5 2014, 10:53 PM ndfrigi
Yes, it is the same bumper. I forgot to mention t... Mar 5 2014, 11:48 PM Steve_R
Yes, it is the same bumper. I forgot to mention ... Mar 6 2014, 12:15 AM mepstein
[quote name='ndfrigi' post='2006733' date='Mar 5 ... Mar 6 2014, 07:17 AM ndfrigi
[quote name='ndfrigi' post='2006733' date='Mar 5 ... Mar 6 2014, 11:40 AM Steve_R
[quote name='ndfrigi' post='2006733' date='Mar 5... Mar 6 2014, 11:43 PM Steve_R One of the more challenging projects was to rebuil... Mar 7 2014, 12:04 AM mepstein Just WOW! Mar 5 2014, 10:27 PM Shindog1961 Nice! Really like the dolly, how did you get t... Mar 6 2014, 12:03 AM Cairo94507 Steve that is some outstanding work. Bumper looks... Mar 7 2014, 07:22 AM Philip W. :trophy: Very nice!, enjoyed seeing it all com... Mar 7 2014, 07:53 AM ndfrigi Hi Again Steve,
A real amazing job and beautiful ... Jun 4 2014, 01:43 AM Steve_R It's been a while since I've posted any pi... Oct 14 2014, 08:51 PM mepstein WOW! Oct 14 2014, 09:00 PM altitude411 Sa-Weet! Really nice work. Congrads on being... Oct 14 2014, 09:09 PM stevegm Wasn't there a picture on 914world of this car... Oct 14 2014, 09:25 PM Steve_R
Wasn't there a picture on 914world of this ca... Oct 14 2014, 10:02 PM stevegm
[quote name='stevegm' post='2097874' date='Oct 14... Oct 14 2014, 10:11 PM trojanhorsepower Wow! Oct 14 2014, 10:15 PM Cairo94507 Car looks beautiful! :first: Oct 15 2014, 07:29 AM CptTripps Great job on that interior. Very well done. Oct 15 2014, 11:04 AM Steve_R So now that I have about 1,000 miles on my car it�... Oct 22 2014, 08:08 PM Steve_R Some pics Dec 16 2014, 06:38 PM Cairo94507 I love your car :trophy:
What's up with tha... Dec 16 2014, 07:20 PM turk22 Absolutely beautiful job, just love the way it cam... Dec 16 2014, 07:21 PM Larmo63 Gawd, is there anything you CAN'T do?? You did... Dec 16 2014, 08:21 PM bigkensteele Stunning! I admire your ingenuity and will be... Dec 16 2014, 08:32 PM G e o r g e That 914 is a thing of beauty. Great job Dec 16 2014, 10:27 PM Cuda911 Holey Macaroni! Wow!! That is such an... Dec 17 2014, 12:26 AM Amphicar770 Wow! Beautiful work all around. I wish I had... Jun 30 2016, 09:34 AM |
1 User(s) are reading this topic (1 Guests and 0 Anonymous Users)
0 Members:

|
Lo-Fi Version | Time is now: 17th May 2024 - 01:26 AM |
Invision Power Board
v9.1.4 © 2024 IPS, Inc.