|
|
|
Porsche, and the Porsche crest are registered trademarks of Dr. Ing. h.c. F. Porsche AG.
This site is not affiliated with Porsche in any way. Its only purpose is to provide an online forum for car enthusiasts. All other trademarks are property of their respective owners. |
|
|

  |

| r3dplanet |
 Jul 12 2013, 10:31 PM Jul 12 2013, 10:31 PM
Post
#21
|
|
Senior Member  Group: Members Posts: 679 Joined: 3-September 05 From: Portland, Oregon Member No.: 4,741 Region Association: None |
More disassembly.
Because the motor is a touch on the frozen side I couldn't remove the cylinders, rods, and pistons as a unit. Therefore the cylinders are coaxed off one at a time. Cylinders 1-3-5 are free. 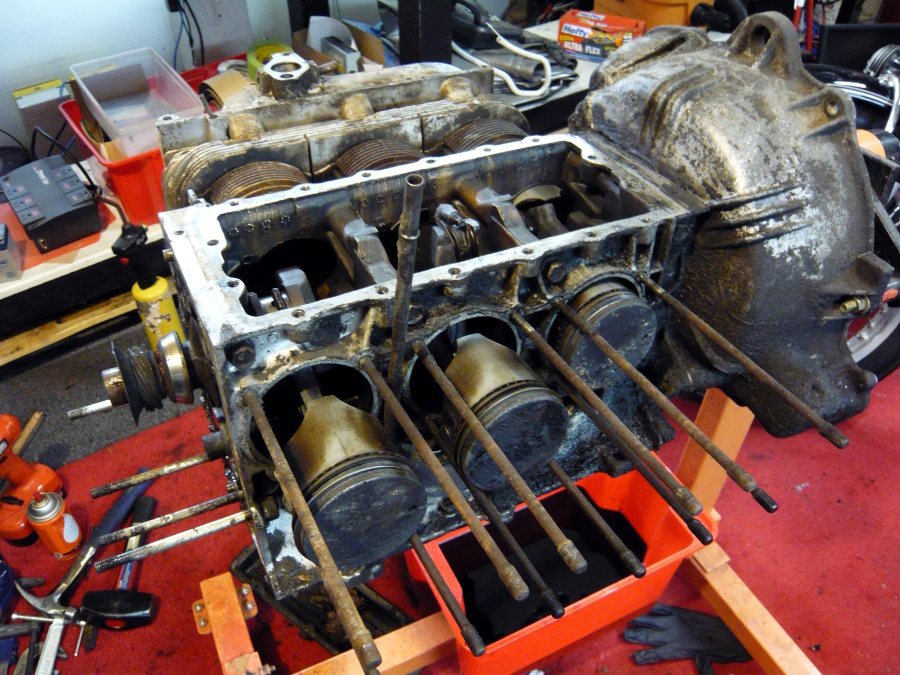 Now on the starboard side of the engine. I found that every one one of the top head stud nuts was frozen. It took two days of part-time work to torch each one repeatedly with MAP gas intermixed with drilling a 3/64" hole on either side of the nut and then splitting it with a sharp chisel. One can easily see that there's no nut where I'm torching. There was, but this is just for photographic clarity. 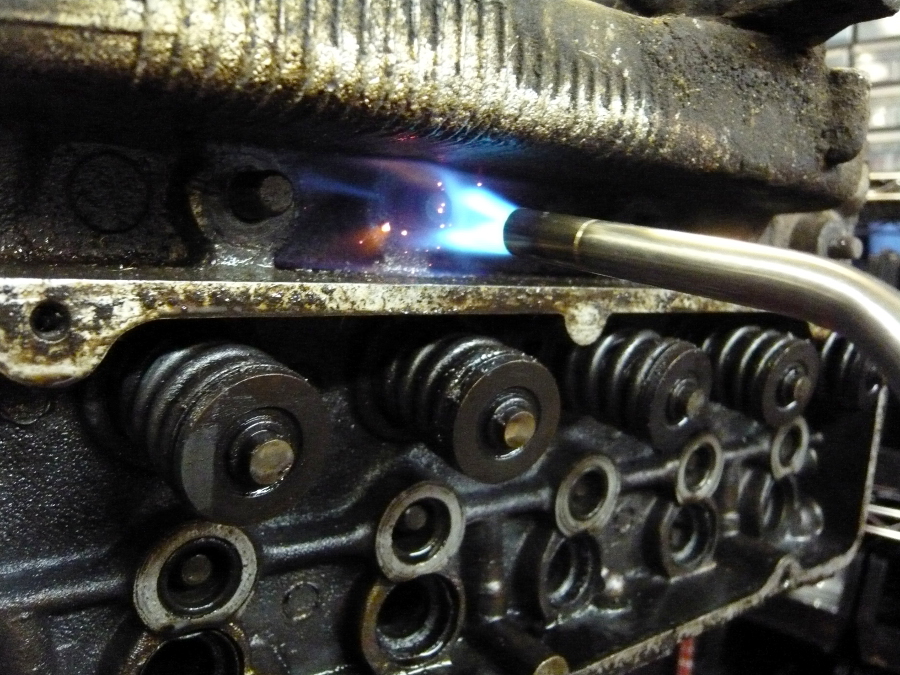 The starboard heads look even worse than the port heads. I have no clue what the hell happened on the outer two chambers to make them look so lousy. 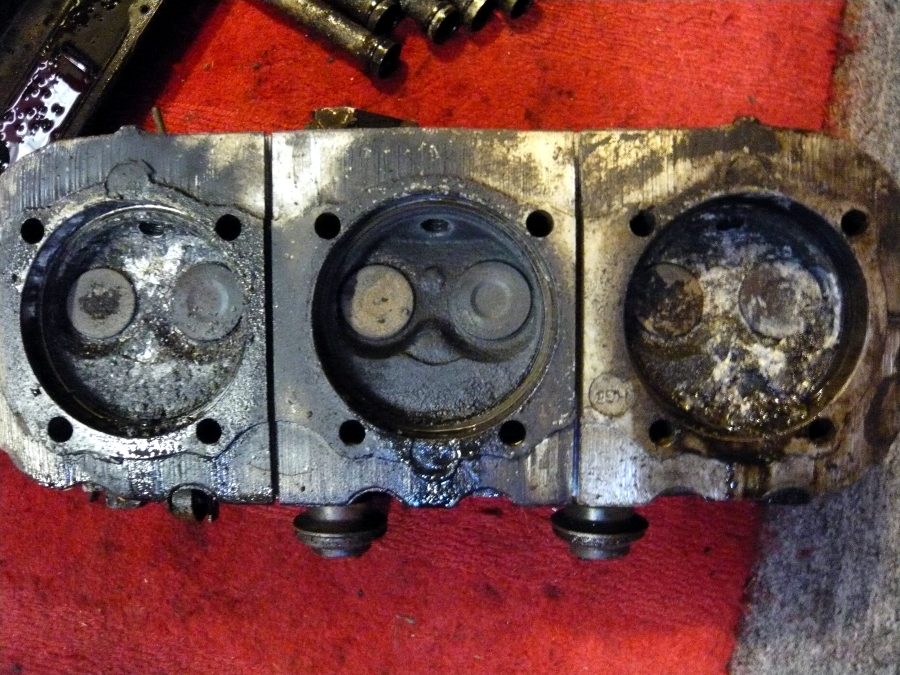 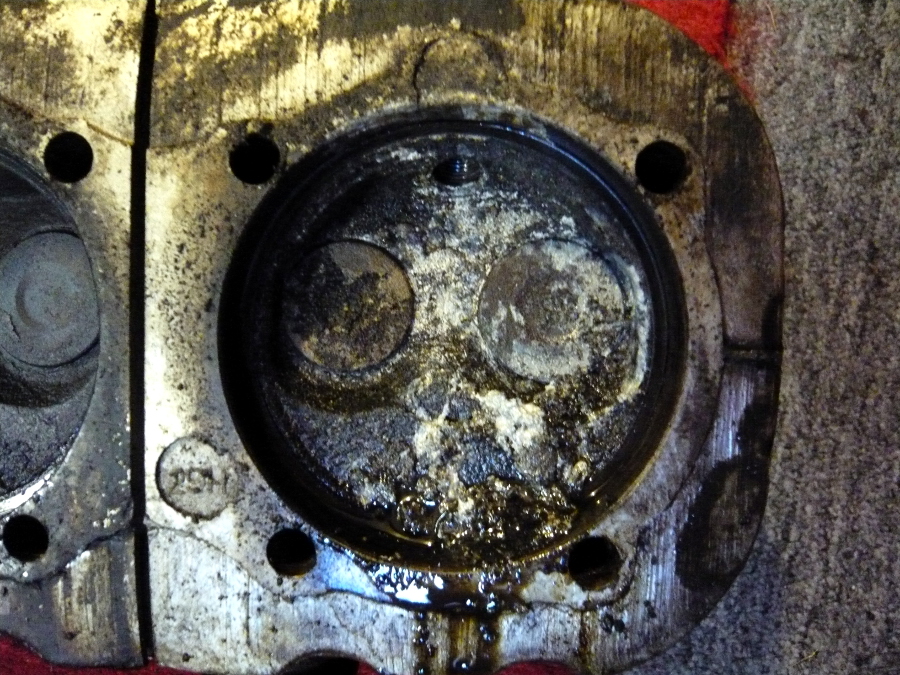 Even more debris on the #2 cylinder. 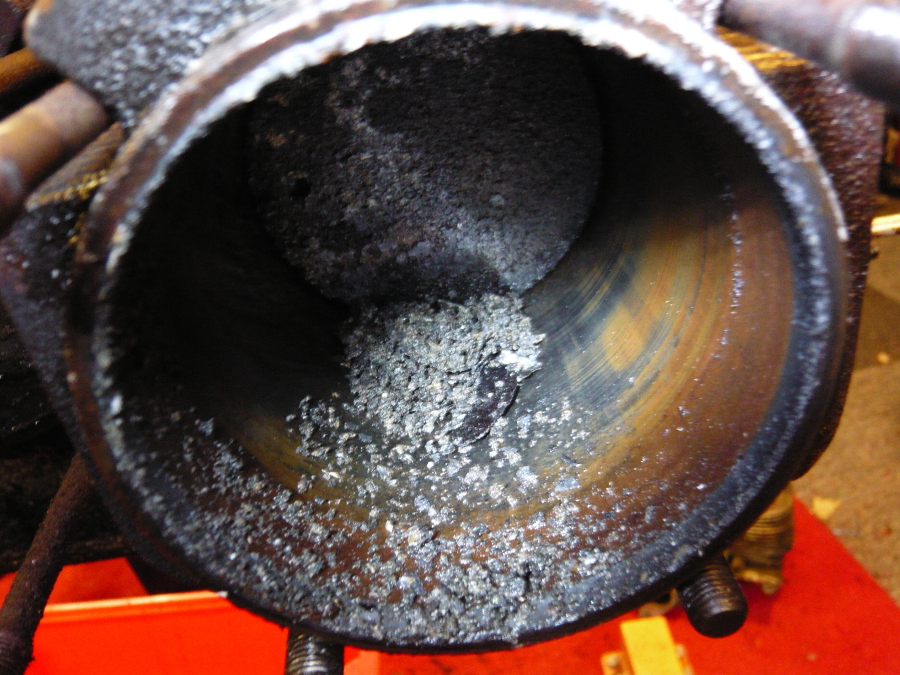 Finally free of the cylinders, the engine now spins quite nicely. 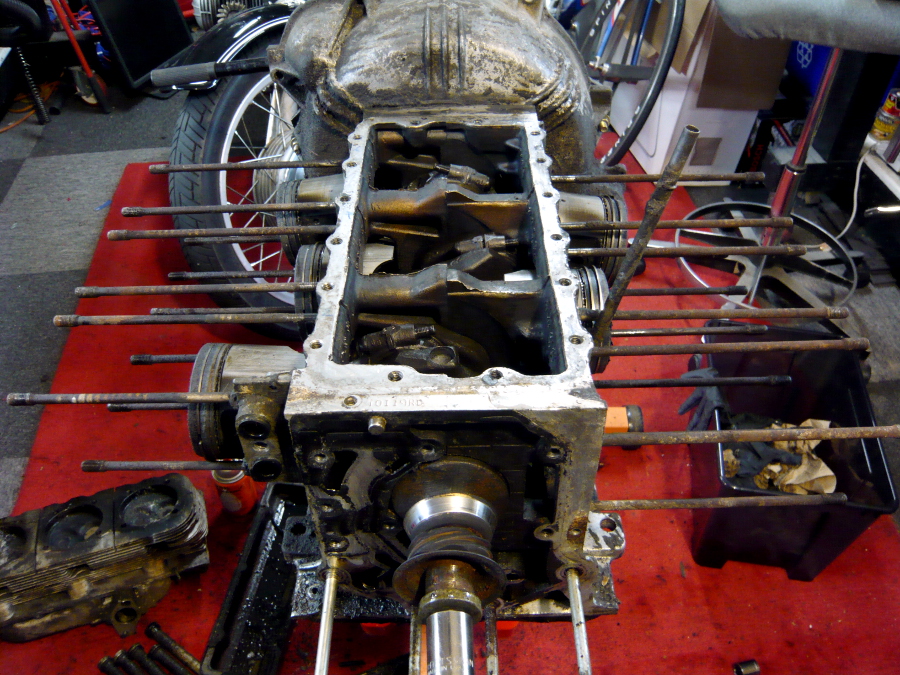 Now I can finally work out the connecting rod nuts. This actually took quite some time to remove. The bottom ones are hard to reach. 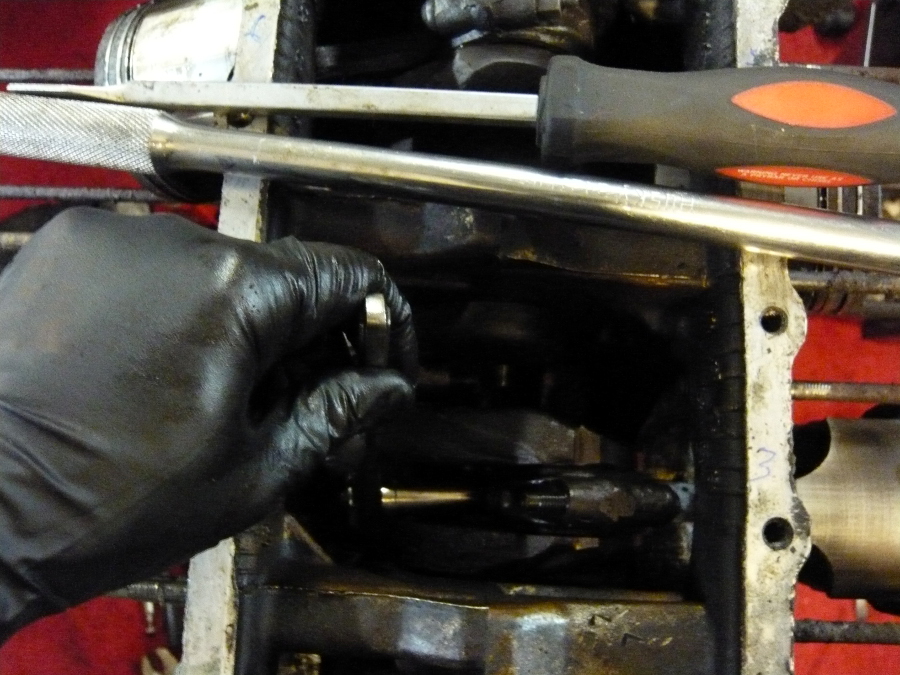 All clear. 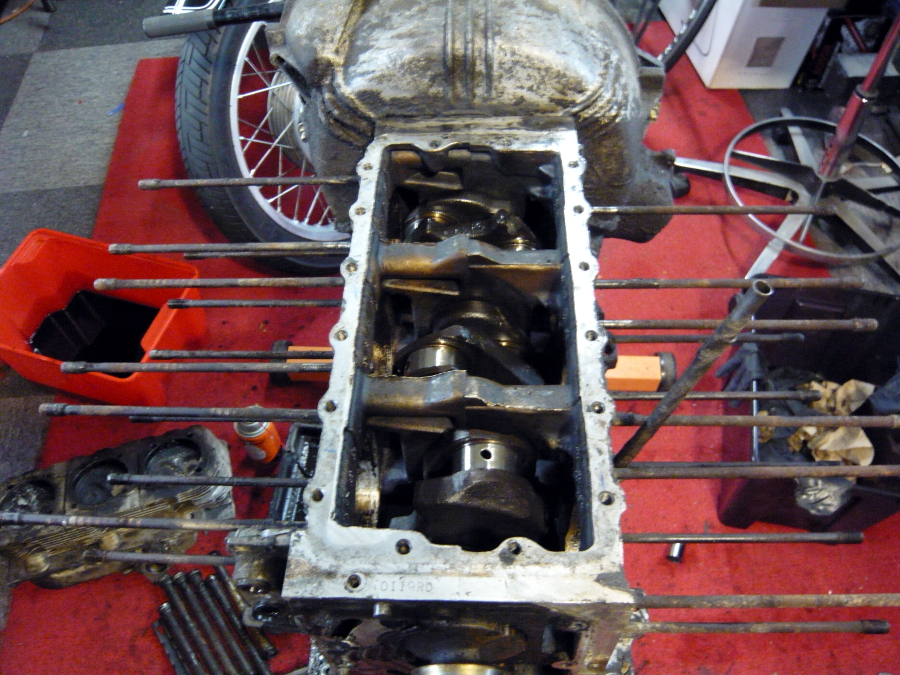 |
   |

 
|
| r3dplanet |
Jul 12 2013, 10:46 PM
Post
#22
|
|
Senior Member Group: Members Posts: 679 Joined: 3-September 05 From: Portland, Oregon Member No.: 4,741 Region Association: None |
Flipping the engine shows 19 bolts to remove the oil pan. I'll discard this item also in favor a much better aftermarket aluminum unit with cooling fins.
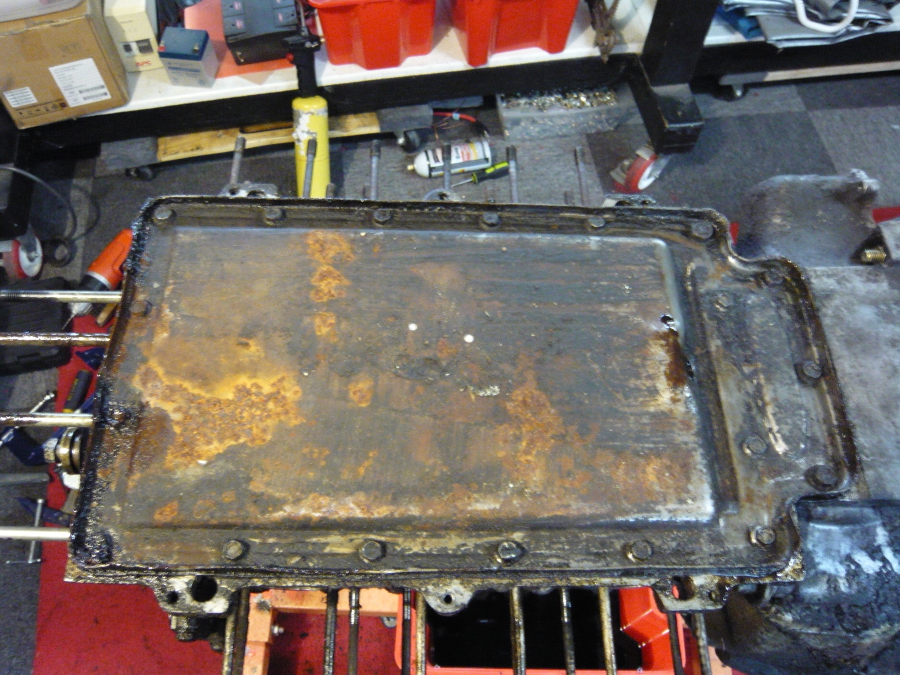 And the oil pickup is revealed. 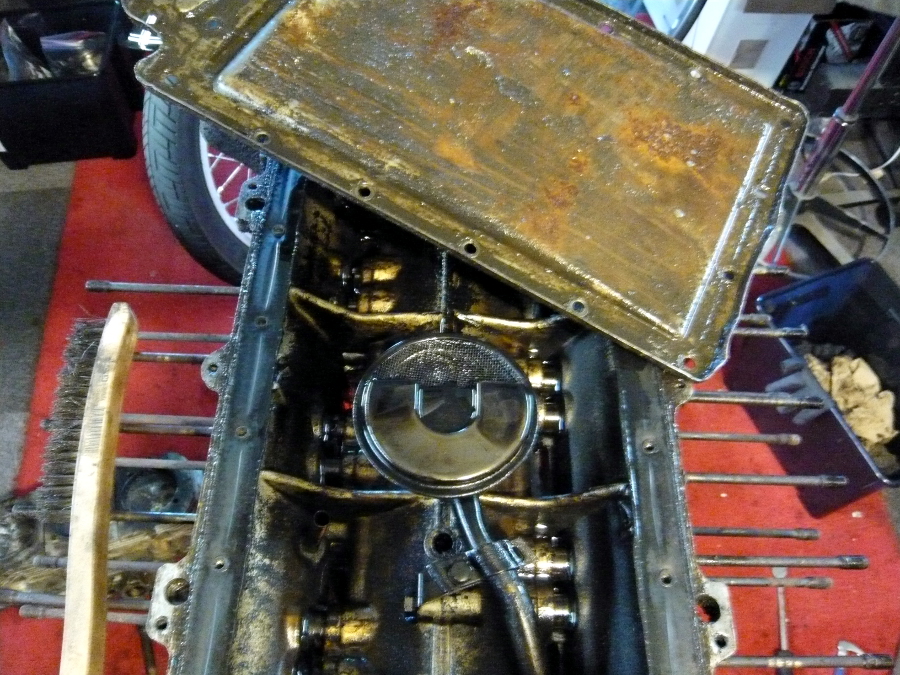 By CAREFULLY tapping the bottom of the dipstick tube with a 16oz hammer the case is free of one more accessory. 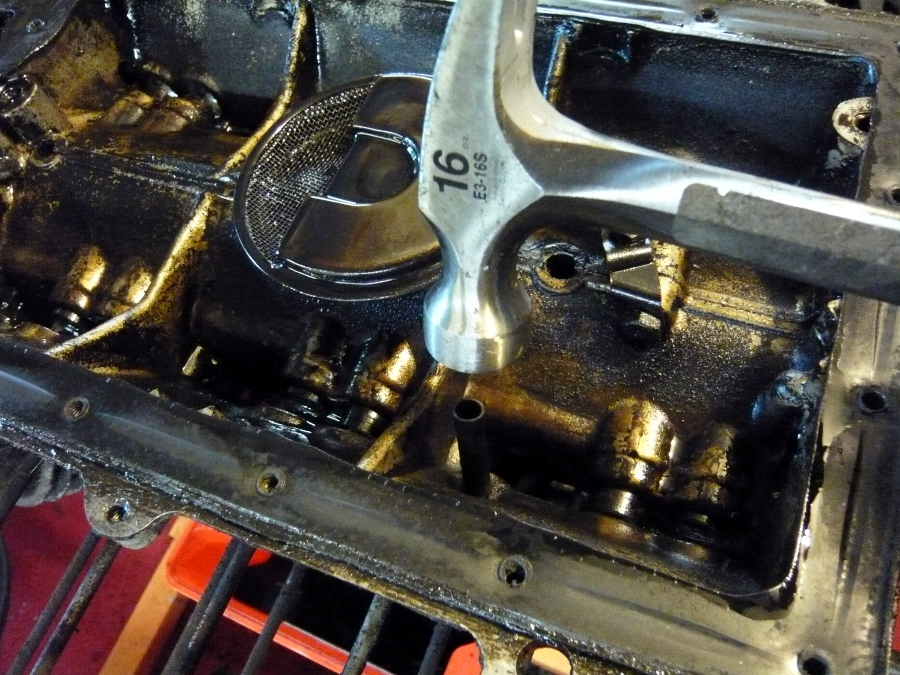 The oil pickup tube was really stuck. But I found that I could use a long extension and a 10mm socket to carefully drive it through the case from the outside. GM made a special tool for this job but it's completely unavailable. 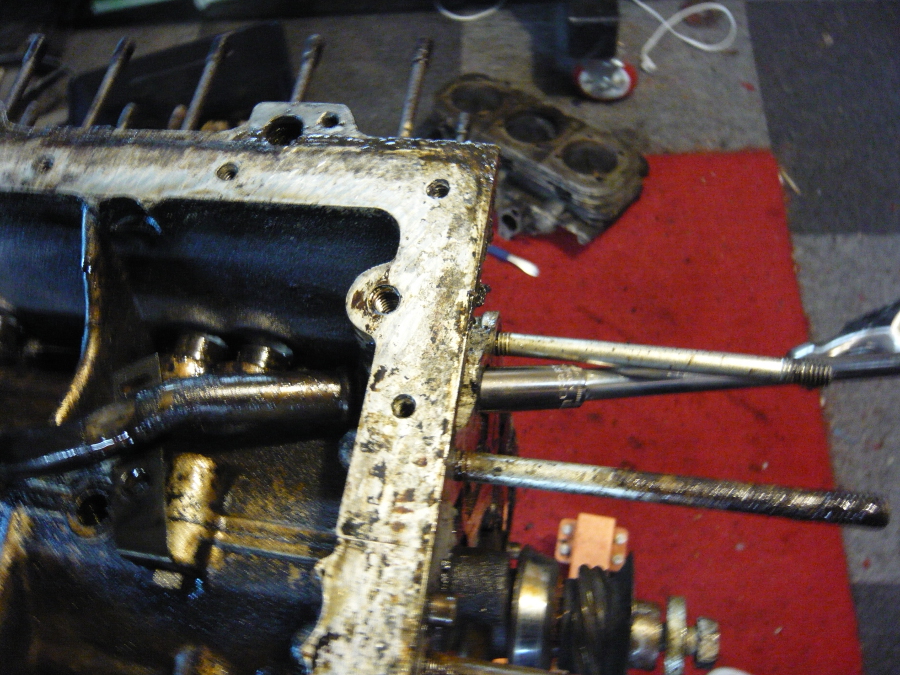 This part I've been dreading. The clutch, pressure plate, and flywheel assembly were just on the wrong side of the engine stand, and all of the bolts were super rusty. After a two day soak with Kroil, I was able to slowly draw them out.  The clutch plate and clutch disc are free. I unbolted the bottom bolts on the engine stand and was able to drop them right out. 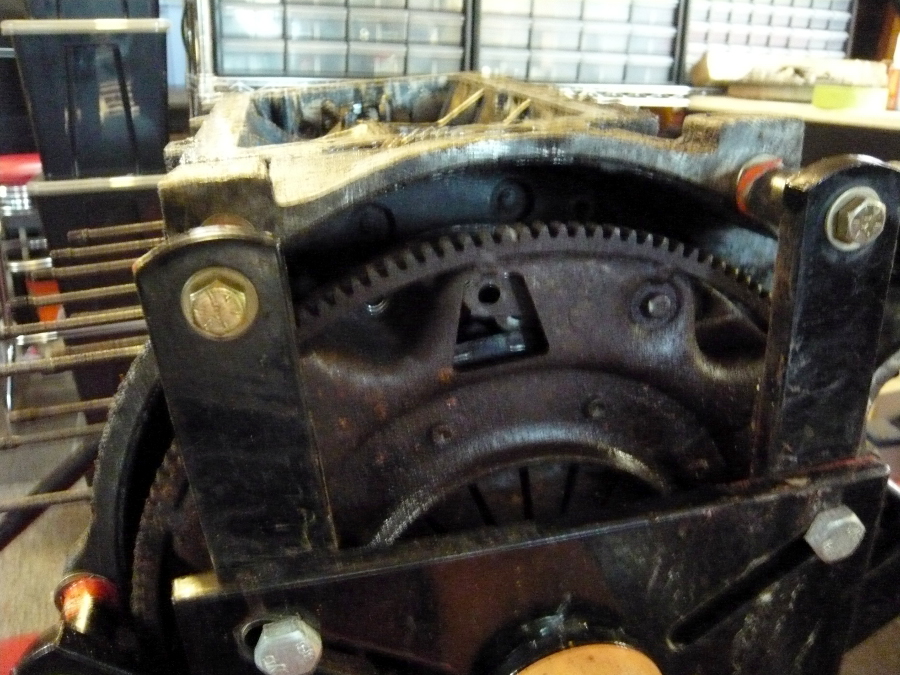 And finally the flywheel is revealed. The six flywheel-to-crank bolts looked as rusty as my high school German language skills. 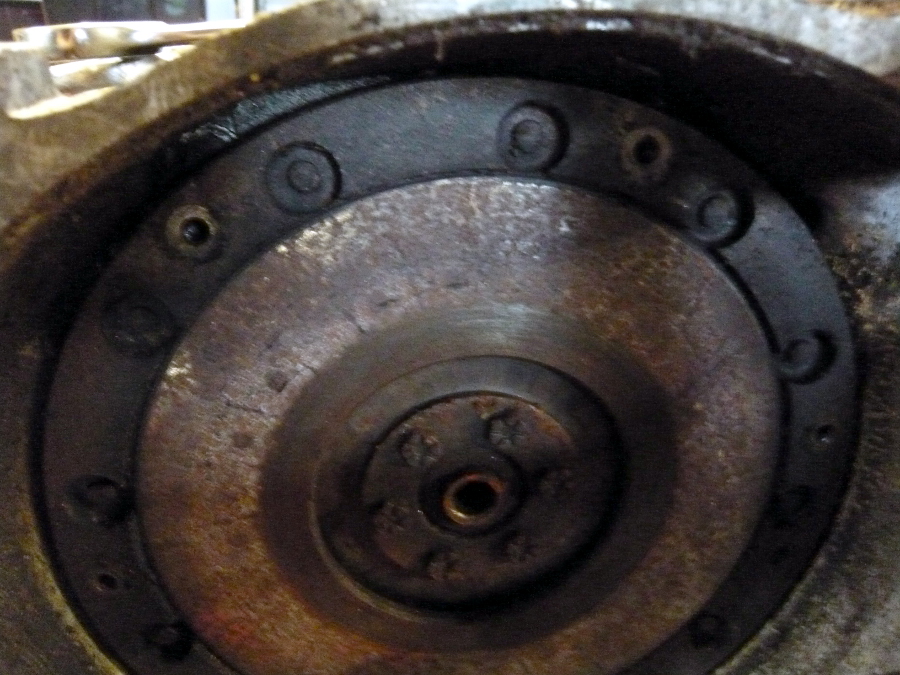 I couldn't keep the rotating assembly from spinning when I tried to loosen the bolts. So I threaded one bolt into the flywheel thread and another to the case and wedged a 1/2" combination wrench in between them. With even, heavy pressure on my long socket wrench the bolts slurped right out. 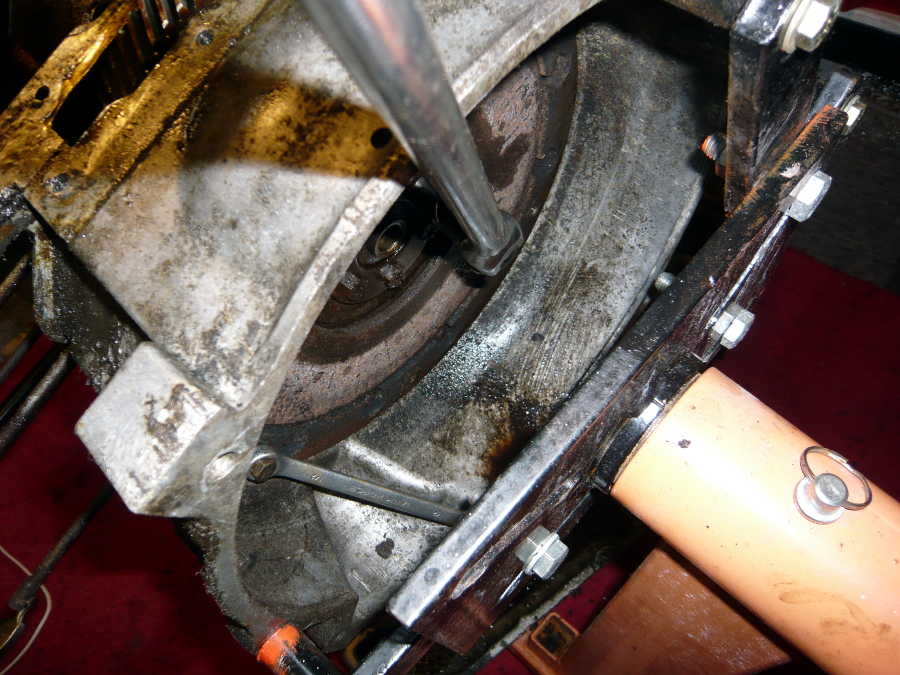 Finally just the bell housing bolts remain, but I need to prop up the crank case first. That's a job for this coming weekend. The bell housing, clutch assembly, and flywheel will also be discarded since it won't be used in the 914. 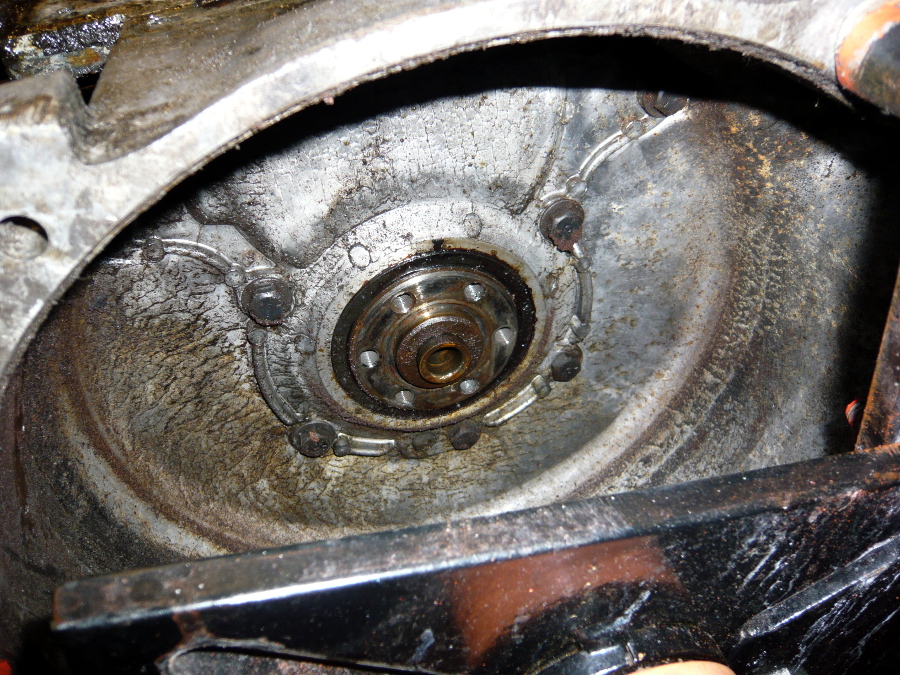 |
|
|
|
| Dr Evil |
Jul 13 2013, 12:23 AM
Post
#23
|
|
Send me your transmission! Group: Members Posts: 23,044 Joined: 21-November 03 From: Loveland, OH 45140 Member No.: 1,372 Region Association: MidAtlantic Region |
Your heads show that water and oil were allowed to accumulate in there.....common with poor storage practices (IMG:style_emoticons/default/dry.gif)
|
|
|
|
| r3dplanet |
Jul 13 2013, 01:16 AM
Post
#24
|
|
Senior Member Group: Members Posts: 679 Joined: 3-September 05 From: Portland, Oregon Member No.: 4,741 Region Association: None |
Yeah, it was pretty damp in the slaughterhouse.
QUOTE(Dr Evil @ Jul 12 2013, 11:23 PM)  Your heads show that water and oil were allowed to accumulate in there.....common with poor storage practices (IMG:style_emoticons/default/dry.gif) |
|
|
|
| relentless |
Jul 13 2013, 01:51 PM
Post
#25
|
|
Member Group: Members Posts: 352 Joined: 1-April 07 From: Oregon Member No.: 7,636 |
Ah, this brings back memories. My buddy had ran my 1.7L up to around 70mh in third passing a car, and caught second gear instead of fourth. So I was looking for a "new" and more powerful motor. Back in 1980 I started with a $250 140 Corvair engine and by the time I was done I had over $3k invested. Back then, I could have had a decent Porsche six for that price. (IMG:style_emoticons/default/confused24.gif)
You mentioned something about a stock 2.7L going to 3.1L, but as I recall the stock Corvair was 2.4L and I went .030 over on pistons to get about 2.7L. I was assisted in the engine build by "Terry to the Nth" who made me do everything perfect - or else! He even CC'd each head so we'd know exactly what the C/R was - to the drop! Keith Corp in Ashland balanced all the reciprocating parts and the engine sure was smooth. He said it would be good for 8,000 rpm. The main problem I had with the reverse rotation engine was having the fan belt pop off a few times. Kind of a dizzy design, the belt going from horizontal to vertical and back. I tried mounting a spring from the idler pulley to the firewall but the racket from the spring was horrendous. I think I went to a slightly longer fan belt to solve the problem. So welcome to the world of Porvairs, where we spend lots of dollars to make our cars worth-less (not worthless). Oh yeah, I just remembered that Terry made me take the block down to the airport and have it zyglowed. They use a special dye to check the aluminum block for cracks. |
|
|
|
| Dr Evil |
Jul 13 2013, 09:03 PM
Post
#26
|
|
Send me your transmission! Group: Members Posts: 23,044 Joined: 21-November 03 From: Loveland, OH 45140 Member No.: 1,372 Region Association: MidAtlantic Region |
Why would you put a spring on the tensioner when it is held in place by bolts??? It is not dynamically adjustable.
fan belts pop off when they are on too tight. I have not had one come off, yet. I know many vair owners that have not popped belts once adjusted looser. The engines are 2.7 from 65 on. Earlier than that they had different sizes which I dont know. |
|
|
|
| rick_cv |
Jul 14 2013, 09:55 PM
Post
#27
|
|
Newbie Group: Members Posts: 33 Joined: 3-March 09 From: PNW Member No.: 10,125 Region Association: Pacific Northwest |
Just curious. What do you use for flywheel, clutch and pressure plate? I have seen a few 215mm flywheels for vw/corvair conversions but the seem to be rare and expensive.
|
|
|
|
| r3dplanet |
Jul 14 2013, 10:28 PM
Post
#28
|
|
Senior Member Group: Members Posts: 679 Joined: 3-September 05 From: Portland, Oregon Member No.: 4,741 Region Association: None |
Good question. The flywheel is a custom part that's been produced by many manufacturers for decades. Crown, KEP, Otto, and others have made them. It's essentially a 130 tooth solid flywheel that has a built-in pressure plate. See photo #1 of this thread. The actual clutch disc and clutch are stock VW/Porsche parts and you can use any item you want. The 130 tooth flywheel is basically where the transition happens. The flywheel bolts to the crankshaft, and then the tooth arrangement allows for use of the stock starter. If you just swap the pinion gear in the gearbox, you would then have to use a reverse rotation VW starter or a stock Corvair starter with a small adapter. Somewhere I have the rest of the clutch pieces. When I find them I'll post pics.
Also, someone else asked about displacements on the engines. The very earliest 1960 Corvair engines were 140cid, but after 1961 a 145cid engine was made an option. With 1964 models (the great transition year) all displacements went to 164cid (2.7 liters). -m. |
|
|
|
| Dr Evil |
Jul 15 2013, 10:32 AM
Post
#29
|
|
Send me your transmission! Group: Members Posts: 23,044 Joined: 21-November 03 From: Loveland, OH 45140 Member No.: 1,372 Region Association: MidAtlantic Region |
I got a set off of ebay; Crown adapter from engine to VW gearbox and flywheel. They are packed up for a future project. It was not that expensive, all things considered.
|
|
|
|
| rick_cv |
Jul 15 2013, 02:55 PM
Post
#30
|
|
Newbie Group: Members Posts: 33 Joined: 3-March 09 From: PNW Member No.: 10,125 Region Association: Pacific Northwest |
I see 127 tooth, 130 tooth and 215mm flywheels. I take it the one to use is the 130 tooth. Do you use a bug pressure plate/clutch, bus or 914? Or a special pressure plate/clutch for the conversion. Thanks for the replies fellas. I thought JRusts new project was pretty neat also and will probably never have the money to do a Porsche six conversion. Just following my curiosity.
|
|
|
|
| r3dplanet |
Jul 15 2013, 05:17 PM
Post
#31
|
|
Senior Member Group: Members Posts: 679 Joined: 3-September 05 From: Portland, Oregon Member No.: 4,741 Region Association: None |
You certainly want the 130 tooth flywheel. I genuinely don't know if the clutch and pressure plate is straight VW or 914 specific. But since I want to clean up the assembly I have, I'll take it apart, get some photos, and glean any part numbers. All I can see right now is that I have an F&S pressure plate.
QUOTE(rick_cv @ Jul 15 2013, 01:55 PM) I see 127 tooth, 130 tooth and 215mm flywheels. I take it the one to use is the 130 tooth. Do you use a bug pressure plate/clutch, bus or 914? Or a special pressure plate/clutch for the conversion. Thanks for the replies fellas. I thought JRusts new project was pretty neat also and will probably never have the money to do a Porsche six conversion. Just following my curiosity. |
|
|
|
| r3dplanet |
Jul 15 2013, 11:27 PM
Post
#32
|
|
Senior Member Group: Members Posts: 679 Joined: 3-September 05 From: Portland, Oregon Member No.: 4,741 Region Association: None |
Okay, I have to admit that I'm a little confused but I'm sure that this challenge will be met and solved. To solve the curiosity for rick_cv, myself, and perhaps others I disassembled my crusty part.
The flywheel assembly is a sandwich made of the clutch disc, flywheel, and pressure plate. The pressure plate is bolted right to the conversion flywheel with the clutch disc kept inside. Here's a closer pic. I know these parts are rusty, but they'll be cleaned and balanced before being put into service. 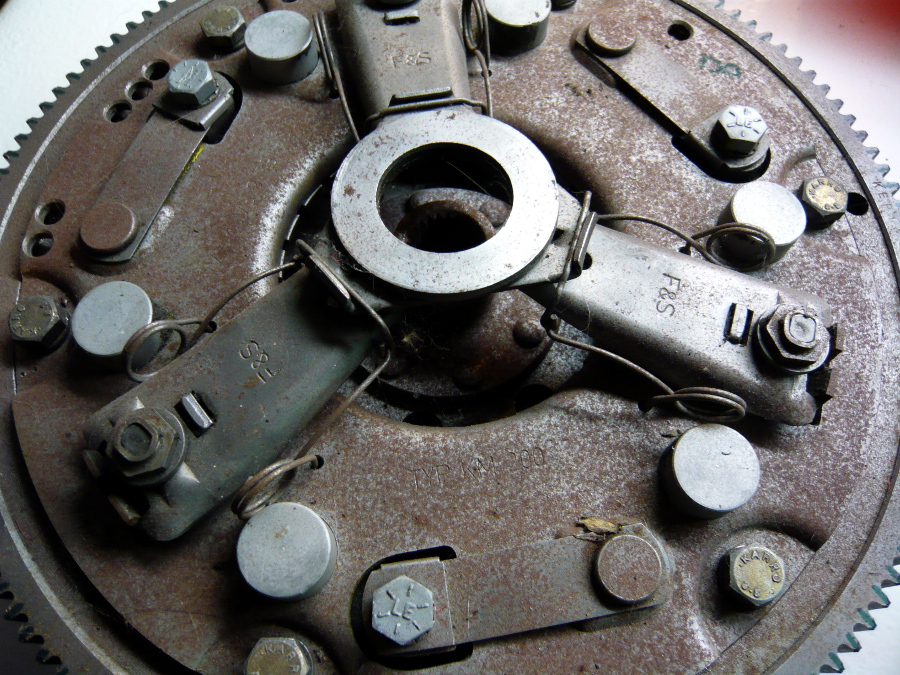 Apparently, this flywheel assembly is from Kennedy. 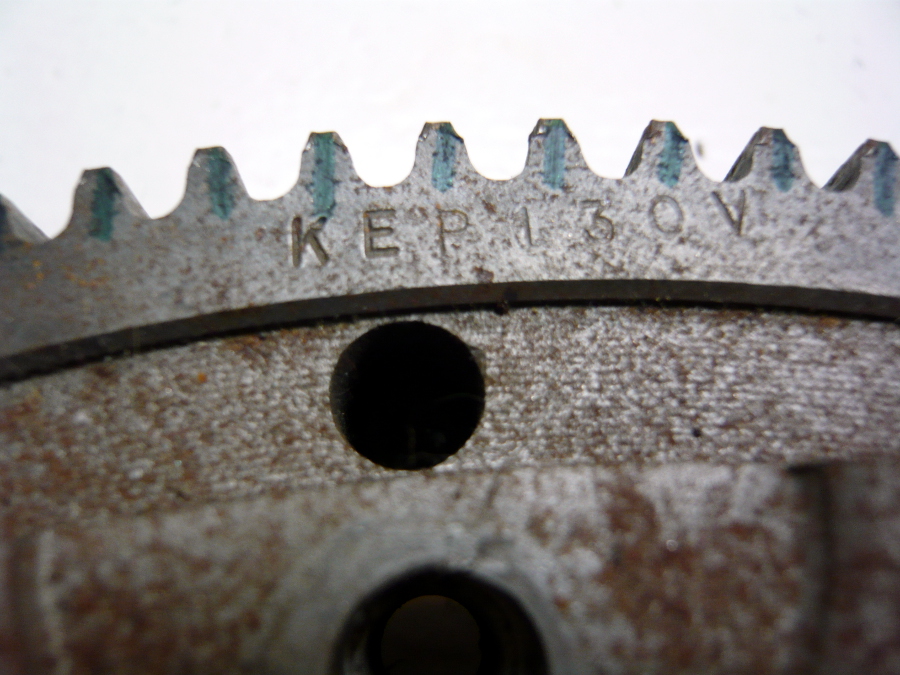 The clutch disc is also F&S (which is just Sachs now, isn't it?) and measured 180mm, quite a bit smaller than the 215mm 914 clutch. Hopefully that won't be a hideous issue. But the 180mm size tells me that this is a standard VW part - not a 914 part. Clark's sells three clutch discs. A standard VW clutch, and high performance clutch, and a racing / high hp clutch. I'll probably replace this clutch disc for one of the racing ones. 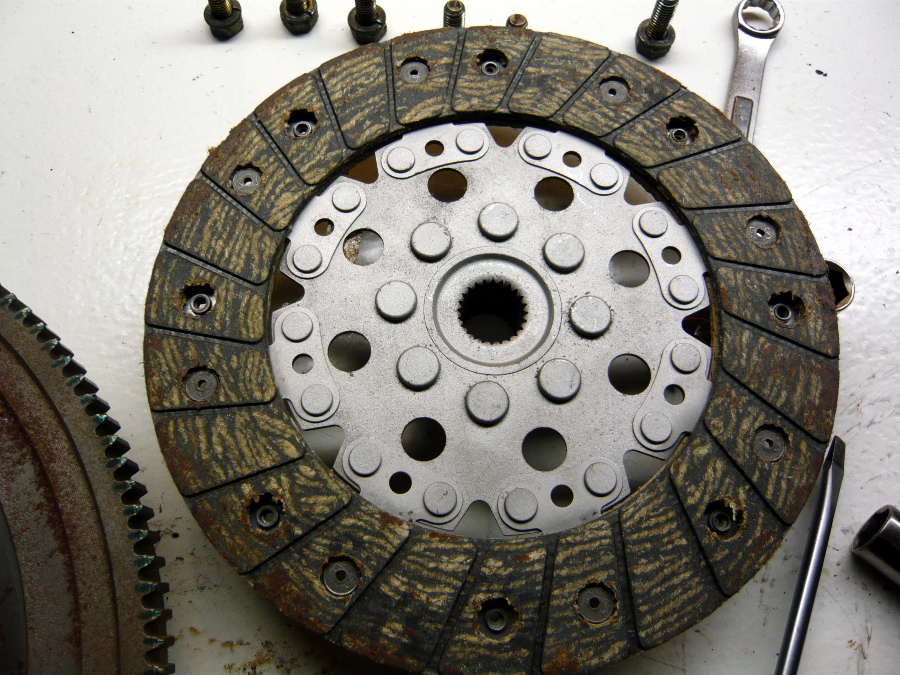 Finally, here's a pic the recesses for the flywheel bolts. 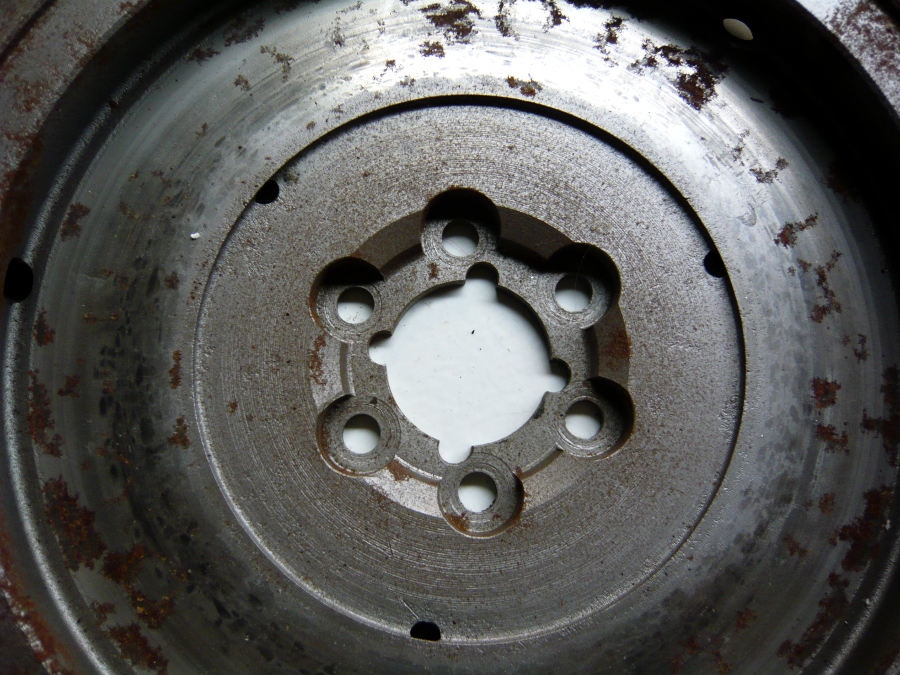 |
|
|
|
| Dr Evil |
Jul 16 2013, 07:25 AM
Post
#33
|
|
Send me your transmission! Group: Members Posts: 23,044 Joined: 21-November 03 From: Loveland, OH 45140 Member No.: 1,372 Region Association: MidAtlantic Region |
That is a bus pressure plate. Possible a bus flywheel and disk that has been converted as well.
|
|
|
|
| Dr Evil |
Jul 16 2013, 07:27 AM
Post
#34
|
|
Send me your transmission! Group: Members Posts: 23,044 Joined: 21-November 03 From: Loveland, OH 45140 Member No.: 1,372 Region Association: MidAtlantic Region |
Here is Clarks catalog for the conversion flywheels.
http://www.corvair.com/user-cgi/catalog.cg...mp;page=OTTO-39 |
|
|
|
| rick_cv |
Jul 16 2013, 01:45 PM
Post
#35
|
|
Newbie Group: Members Posts: 33 Joined: 3-March 09 From: PNW Member No.: 10,125 Region Association: Pacific Northwest |
That is what I thought when I first saw your image- that's a bug pressure plate. Don't know if it works with a 901 trans though. Will be watching this thread to see how it comes together.
Some good tidbits- http://www.tunacan.net/t4/tech/flywheel.htm |
|
|
|
| r3dplanet |
Jul 16 2013, 10:57 PM
Post
#36
|
|
Senior Member Group: Members Posts: 679 Joined: 3-September 05 From: Portland, Oregon Member No.: 4,741 Region Association: None |
From what I've read the adapter plates should fit any VW or 901 gearbox of the period. But I'll cross that bridge when I come to it. We're sort of getting ahead of where I want to be, so this issue will be revisited when the time comes.
QUOTE(rick_cv @ Jul 16 2013, 12:45 PM) That is what I thought when I first saw your image- that's a bug pressure plate. Don't know if it works with a 901 trans though. Will be watching this thread to see how it comes together. Some good tidbits- http://www.tunacan.net/t4/tech/flywheel.htm |
|
|
|
| r3dplanet |
Jul 17 2013, 12:22 AM
Post
#37
|
|
Senior Member Group: Members Posts: 679 Joined: 3-September 05 From: Portland, Oregon Member No.: 4,741 Region Association: None |
I've taken the past couple of evenings to do some cleanup and hit the reset button on my work area. I douched the tools with WD-40, cleaned the parts I've removed with my ultrasonic cleaner and then coated them with Boeshield, and finally bagged and tagged them. There are a large number of parts that won't be re-used for this application: flywheel, pressure plate, valve covers, bell housing, heads, cylinders, etc. It feels weird tossing that stuff aside. From an existential point of view it's really thought provoking to think that at this moment the engine does not actually exist. Instead, it's just several bins holding a bunch of constituent parts in a garage explosion. Leaving and returning. Chaos and Cosmos. Big Bangs and Brahma years. Hey, I was an academic for a long time so this is where my brain goes when I'm in the shop. Inner space. Besides, Carl Sagan is my spirit animal.
So here's the detail on the final stages of disassembly. After removing the engine from the stand and setting aside the bell housing, this lovely creature now graces my workbench. One might wonder why it looks like a robotic pin cushion. This is because the head studs are not to be removed from the case unless it's absolutely necessary. There's a test to torque them down to 30 or 40 lbs (depending on which manual you read) and see if they hold their torque. If they do, then it's smooth sailing. If not, then it's time for creative machining. 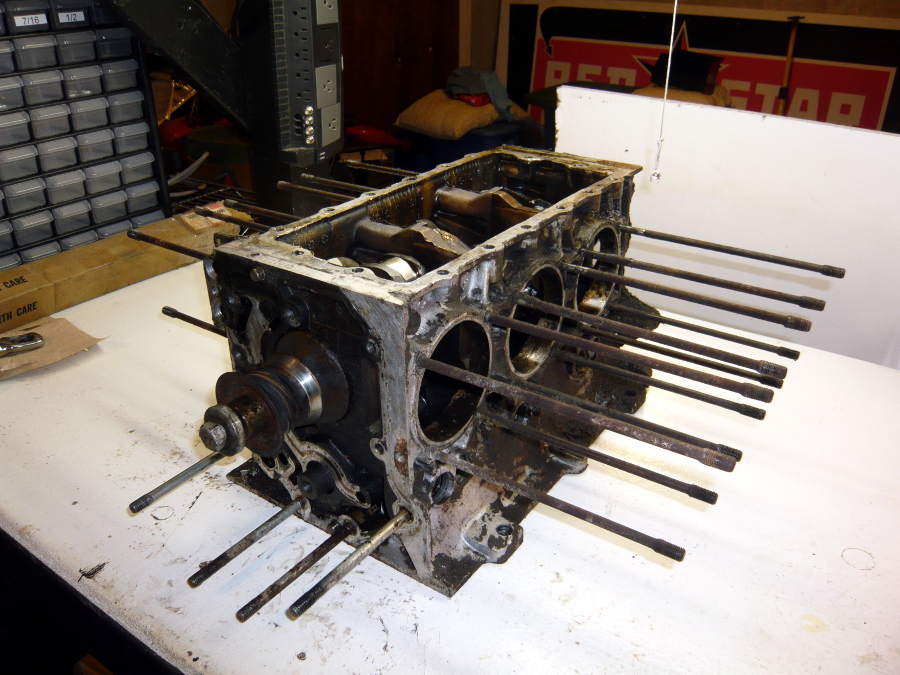 Here's a front view for no reason. 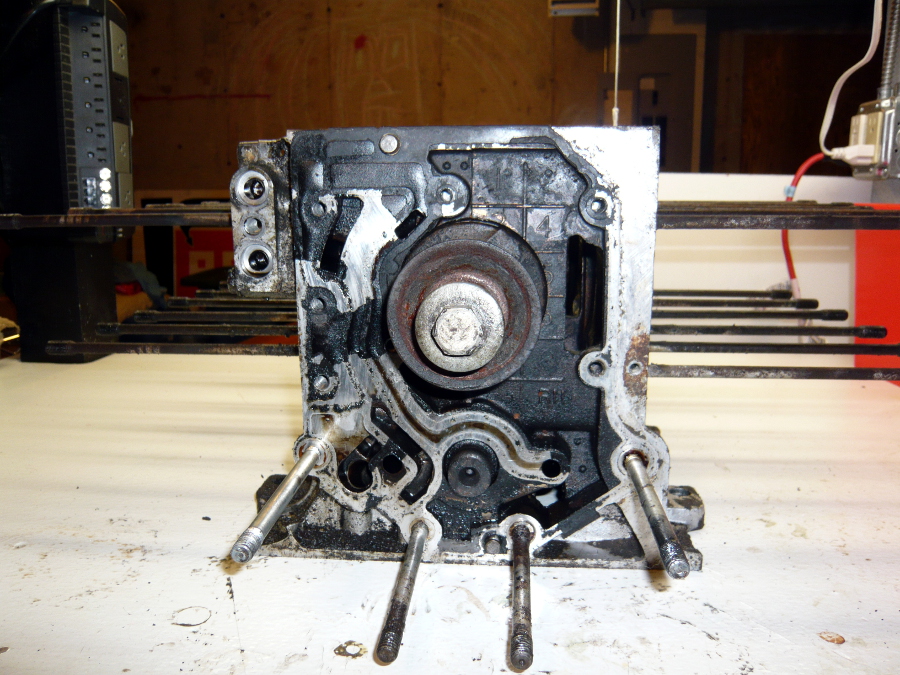 This part is the oil cooler adapter. I could have taken it off at any point during the disassembly, but both the 1965 Corvair Chassis Shop Manual and Bob Helt's The Classic Corvair say to leave this connected until this point. By the way, these manuals are fabulous. For dolts like myself they're really a fantastic resource. If you do a Corvair conversion yourself, be absolutely sure to get them. They're both in print. 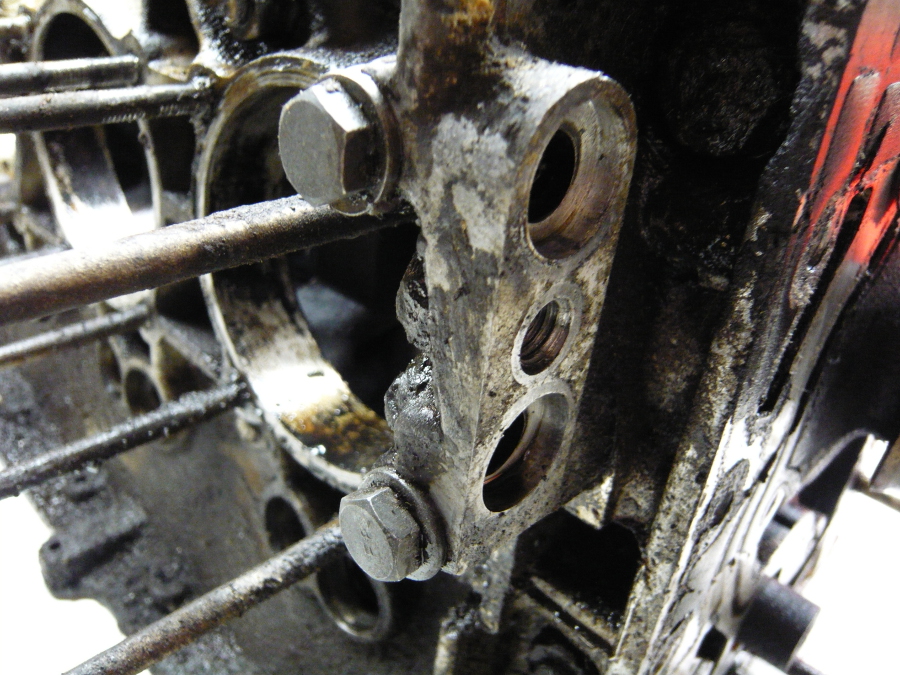 And .. removed. 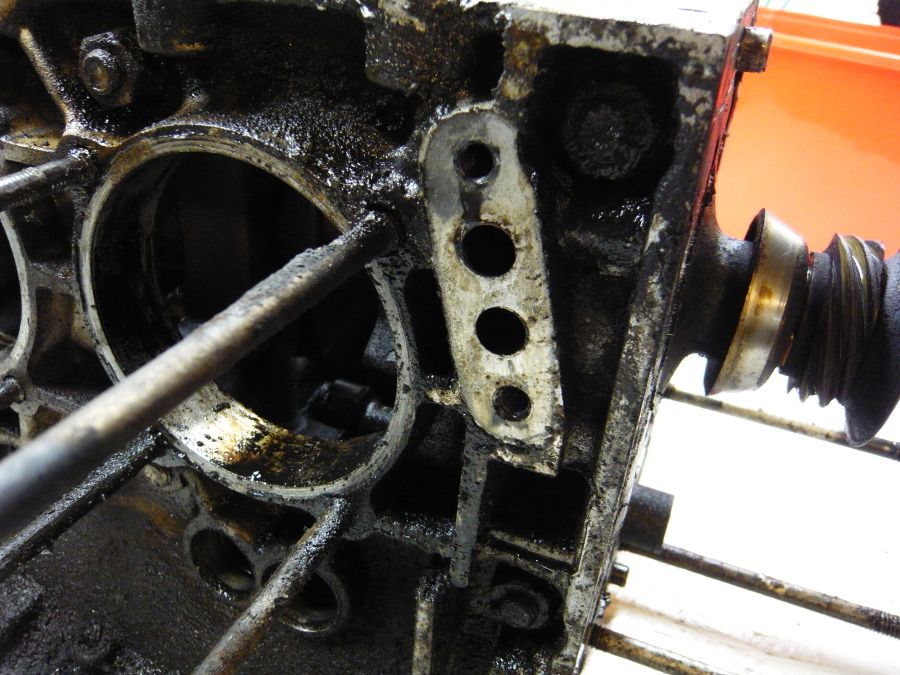 Now it's time to split the case. Here's a side view clearly showing the eight through-studs and corresponding nuts that hold the hemispheres together. Four on top, four sort of in the middle. Just before removing them I made sure to remove the bottom bolt that holds the oil pickup to the case. 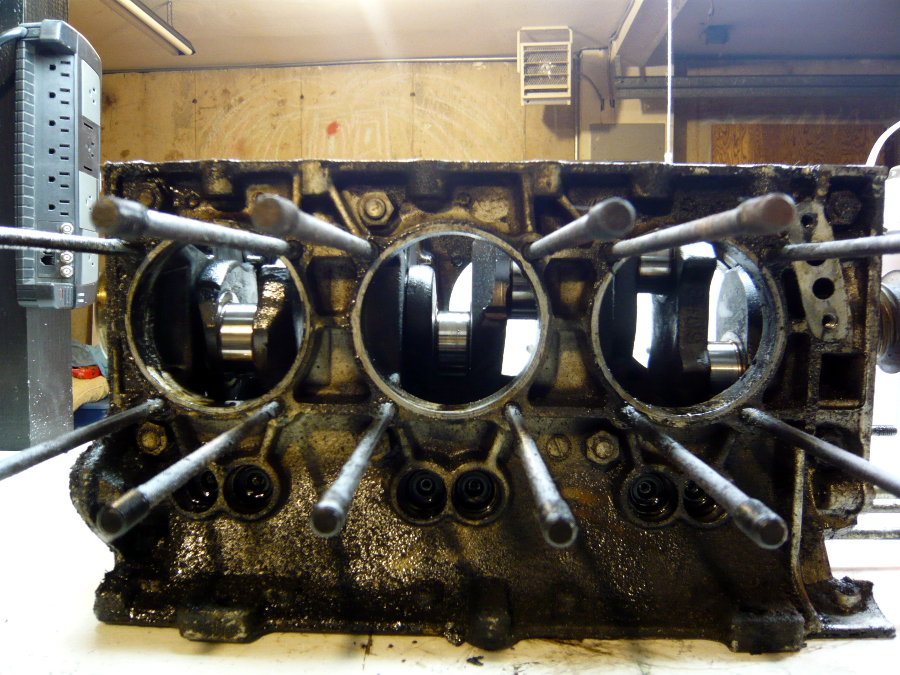 Having the motor on the bench sure makes this part straightforward. Using a ratchet and a long socket wrench, each comes off in turn with a little effort. No crazy stuck nuts like the ones holding the head. 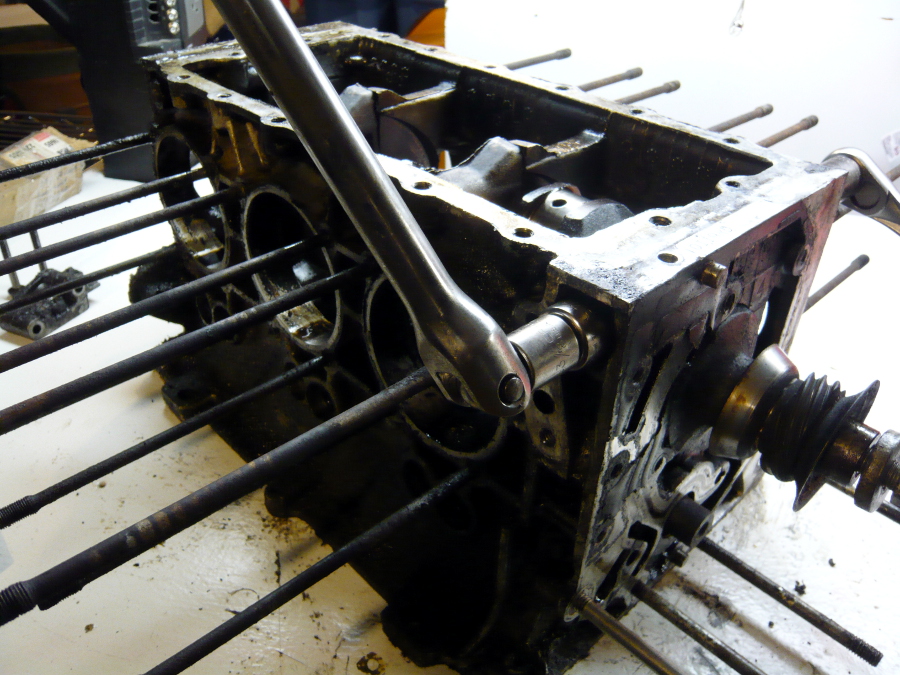 Now the big moment. A slight tap with a rubber mallet along the top edge of the inside of the case and it just pops apart. It took very little effort. 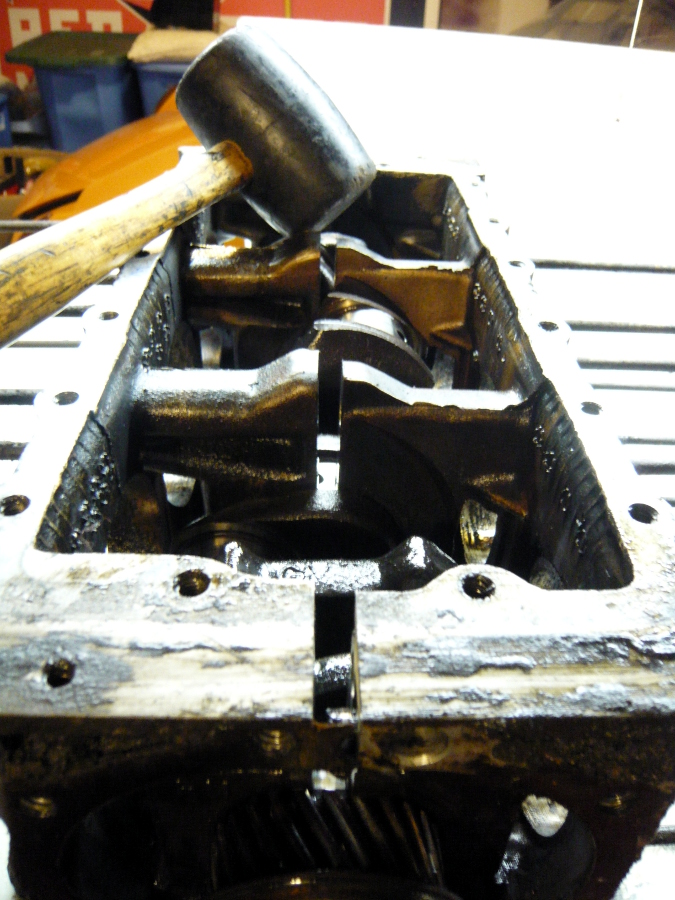 In fact, it popped apart a little too readily. The manual says to prop the bottom of one half of the case with a 2x4 to push one side of the engine higher than the other. That way you lift the free half and leave the crank and cam in place on the other side. This is to prevent the crank and cam from just spilling out onto the floor. Just as I reached for the wood, it split right open. Whoops. 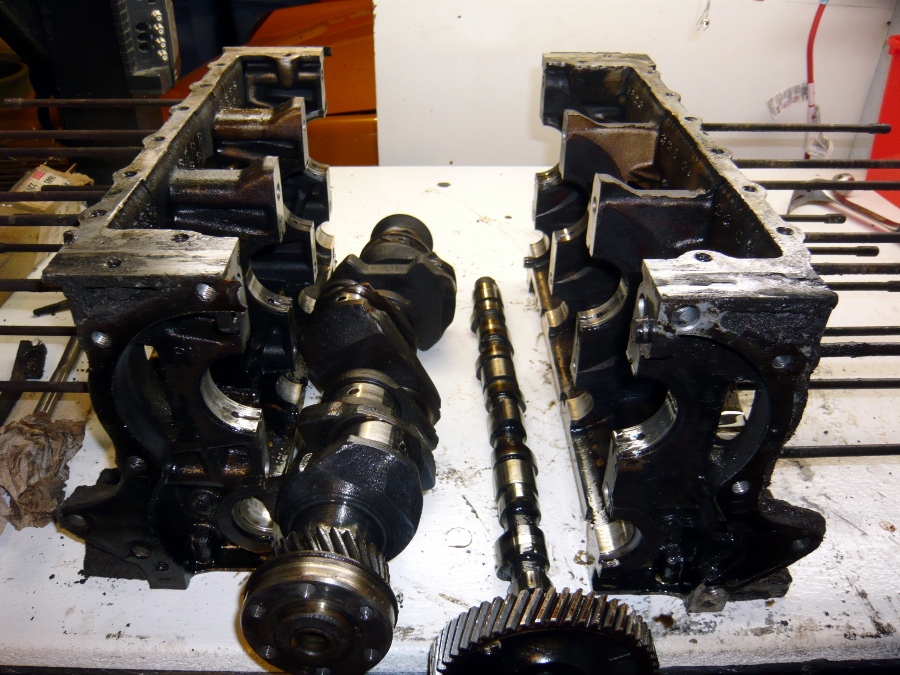 Yeach. This crank bearing is scored all to hell. The opposite side is also. The rest of them look like they have normal wear. 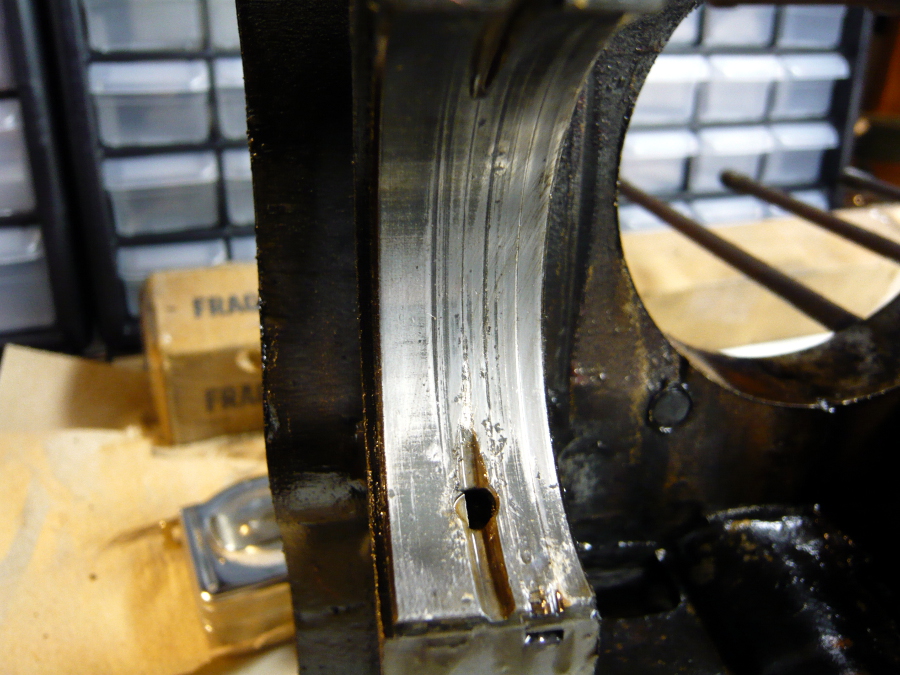 |
|
|
|
| r3dplanet |
Jul 17 2013, 12:42 AM
Post
#38
|
|
Senior Member Group: Members Posts: 679 Joined: 3-September 05 From: Portland, Oregon Member No.: 4,741 Region Association: None |
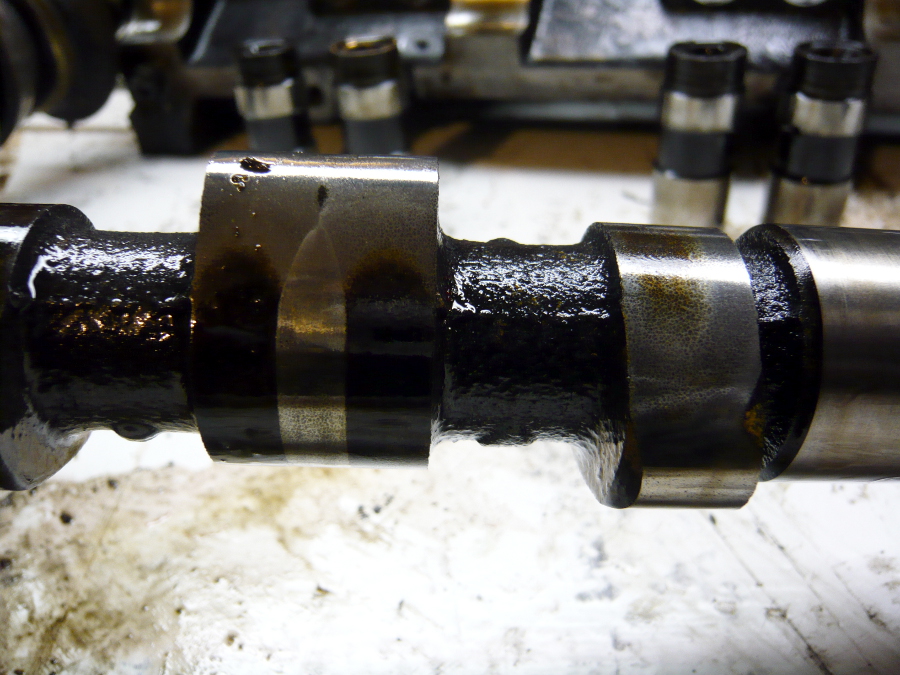
Moving along with a close-up of cam wear. This doesn't matter as the cam and cam gear will be replaced.
 A glamor shot of the starboard half of the engine with the hydraulic lifters and crank bearings removed, which I'll catalog and keep for reference. Note that the Corvair engine does not use cam bearings. Instead, the cam rides only on the oil between the cam and the engine case. I might have the cam surfaces coated with Teflon before re-assembly, assuming this case checks out. Before getting that far I'll get the case hot tanked and checked for cracks with Zyglo (thanks, Relentless!). That's coming up next. 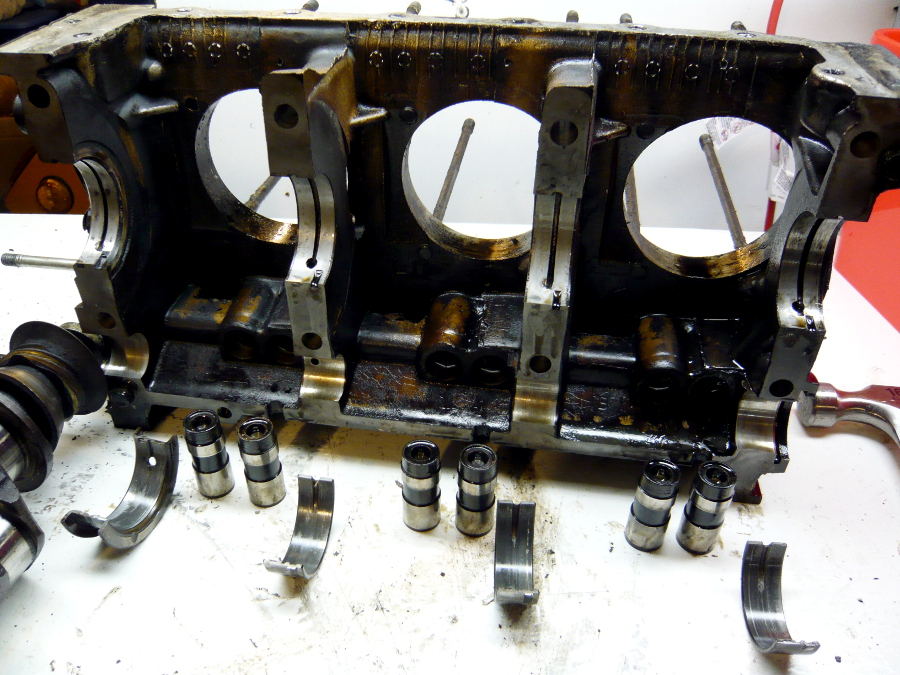 The corresponding glamor shot of the port side of the engine. This is the end of disassembly. Next up: finding a suitcase full of money to get the rebuild parts and checking and prepping the parts I already have. 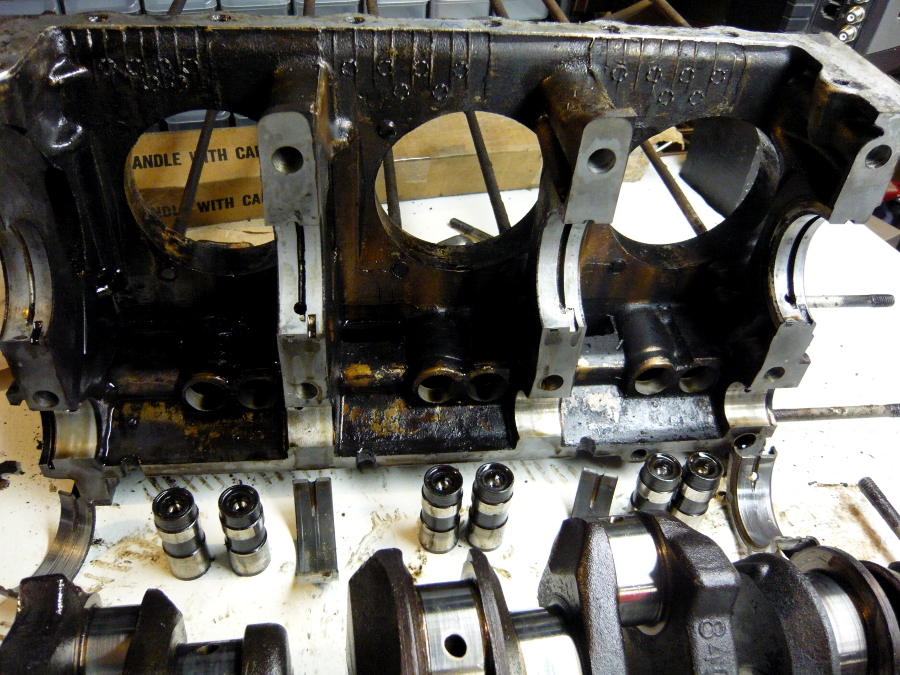 |
|
|
|
| relentless |
Jul 17 2013, 12:36 PM
Post
#39
|
|
Member Group: Members Posts: 352 Joined: 1-April 07 From: Oregon Member No.: 7,636 |
You're making good progress Marcus. It's been 33 years since I built my Corvair engine, but bits and pieces of the process keep coming back. (IMG:style_emoticons/default/smile.gif)
As I recall Terry (to the n'th) didn't want me to go more than .030 over on the barrels because he was concerned about the thinner metal being less able to dissipate heat and also he had me get forged pistons, and I believe Moly coated rings (?). Seems like there was a specific cross hatching on the cylinders also. Every time I'd go wild and suggest something like boring the cyls out to .060 he'd look at me and say "do you want an engine that lasts ten thousand miles or one that will last longer?" I'll be interested in seeing what advances they have made in the last three decades and what parts you select for your build. |
|
|
|
| Dr Evil |
Jul 18 2013, 07:04 PM
Post
#40
|
|
Send me your transmission! Group: Members Posts: 23,044 Joined: 21-November 03 From: Loveland, OH 45140 Member No.: 1,372 Region Association: MidAtlantic Region |
No special cross hatch, no special rings, and you can bore out farther if you open the registers which is required when using the TI VW cylinders. Please do not put forth partial memories as gospel unless you have some backup for them as this can cause damage to peoples engines and wallets in the future.
|
|
|
|
|
1 User(s) are reading this topic (1 Guests and 0 Anonymous Users)
0 Members:

|
Lo-Fi Version | Time is now: 15th June 2026 - 12:03 PM |
Invision Power Board
v9.1.4 © 2026 IPS, Inc.