|
|
|
Porsche, and the Porsche crest are registered trademarks of Dr. Ing. h.c. F. Porsche AG.
This site is not affiliated with Porsche in any way. Its only purpose is to provide an online forum for car enthusiasts. All other trademarks are property of their respective owners. |
|
|

  |

| DaveO90s4 |
 Jul 23 2018, 05:19 PM Jul 23 2018, 05:19 PM
Post
#241
|
|
Member  Group: Members Posts: 149 Joined: 26-April 16 From: Australia Member No.: 19,935 Region Association: None |
....starter ideas...
I received and installed my new starter yesterday. It is 1.4 kw (OEM 914 is 0.8kW). This is a high torque model that allows the user to rotate and set the housing in multiples of 20 deg to get best body / solenoid clearance. And was manufactured to set the pinion length to precisely match my unique ring gear depth. That was $500 - but not bad for a brand new more powerful starter that fits perfectly. My hot start woes are now solved. Built by CA Performance in Melbourne, Aus. I'll email you a photo Marcus. Cheers DaveO |
   |

 
|
| DaveO90s4 |
Jul 23 2018, 05:21 PM
Post
#242
|
|
Member Group: Members Posts: 149 Joined: 26-April 16 From: Australia Member No.: 19,935 Region Association: None |
....starter ideas...
I received and installed my new starter yesterday. It is 1.4 kw (OEM 914 is 0.8kW). This is a high torque model that allows the user to rotate and set the housing in multiples of 20 deg to get best body / solenoid clearance. And was manufactured to set the pinion length to precisely match my unique ring gear depth. That was $500 - but not bad for a brand new more powerful starter that fits perfectly. My hot start woes are now solved. Built by CA Performance in Melbourne, Aus. I'll email you a photo Marcus. Cheers DaveO |
|
|
|
| r3dplanet |
Jul 23 2018, 06:13 PM
Post
#243
|
|
Senior Member Group: Members Posts: 679 Joined: 3-September 05 From: Portland, Oregon Member No.: 4,741 Region Association: None |
Hopefully that's $500 AUS?
QUOTE(DaveO90s4 @ Jul 23 2018, 04:21 PM)  ....starter ideas... I received and installed my new starter yesterday. It is 1.4 kw (OEM 914 is 0.8kW). This is a high torque model that allows the user to rotate and set the housing in multiples of 20 deg to get best body / solenoid clearance. And was manufactured to set the pinion length to precisely match my unique ring gear depth. That was $500 - but not bad for a brand new more powerful starter that fits perfectly. My hot start woes are now solved. Built by CA Performance in Melbourne, Aus. I'll email you a photo Marcus. Cheers DaveO |
|
|
|
| r3dplanet |
Aug 17 2018, 09:21 PM
Post
#244
|
|
Senior Member Group: Members Posts: 679 Joined: 3-September 05 From: Portland, Oregon Member No.: 4,741 Region Association: None |
Hello. Apologies for the late update.
There are only a few updates to report since I'm still waiting around for my oil pan to return. Despite assurances from a local machinist that surfacing the oil pan would be no big deal, I returned many weeks later and he hadn't even moved the parts off of his office floor. Typical. So I sent it off to Tom Stark instead and it should return soon. In the meantime I have the following resolved: 1. Pushrods have arrived 2. Idler pulley is finished 3. Crank pulley is finished There's nothing left to do until the oil pan arrives. That and rustle up some strong labor to get the engine out of my spare room. The Engine Room. My engine didn't have an idler pulley along with most of the other ancillaries. I found one on eBay for cheap and finally got to cleaning it. The bearing is no longer made, but there is one that's very close. The shaft of the new bearing has a smaller OD that the original, which is a bit of a bummer. But I used a bit of Loctite 608 bearing retainer and pressed it on. It will work fine. Here's a photo of the original with a visible part number.  And a comparison of the old and new pulley pulley. 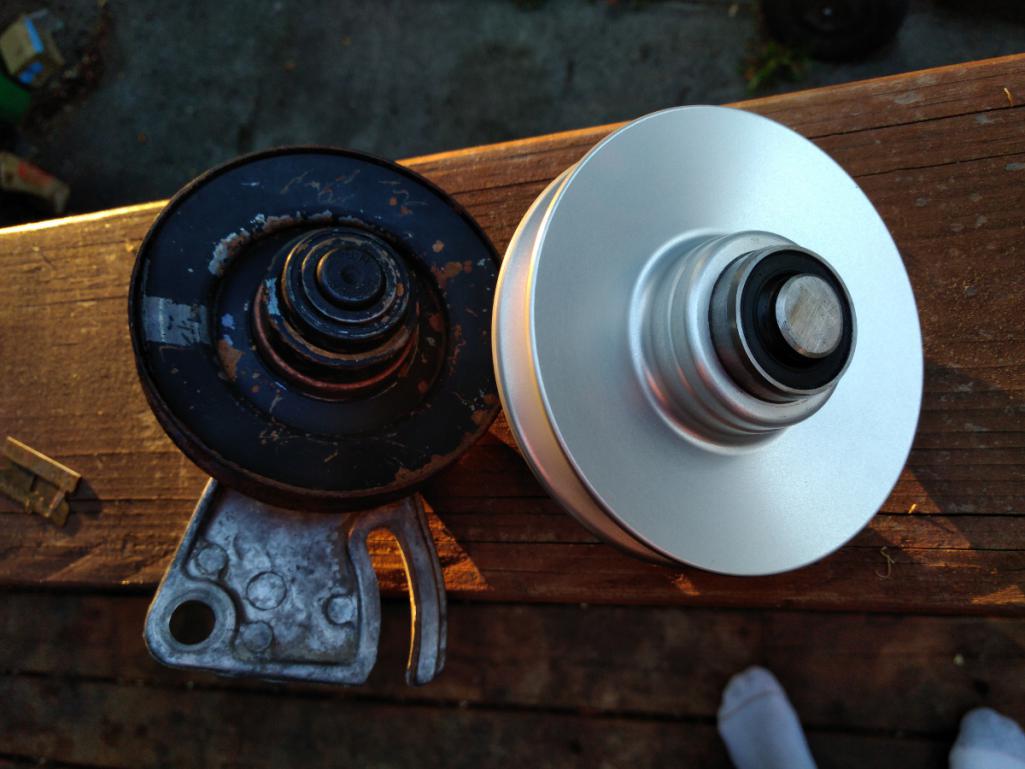 And then a reference measurement for the distance between the pulley and retaining bracket. This is a bit sloppy because there are no parallel surfaces, but hopefully it's good enough; from pulley edge to bracket is .401-ish." 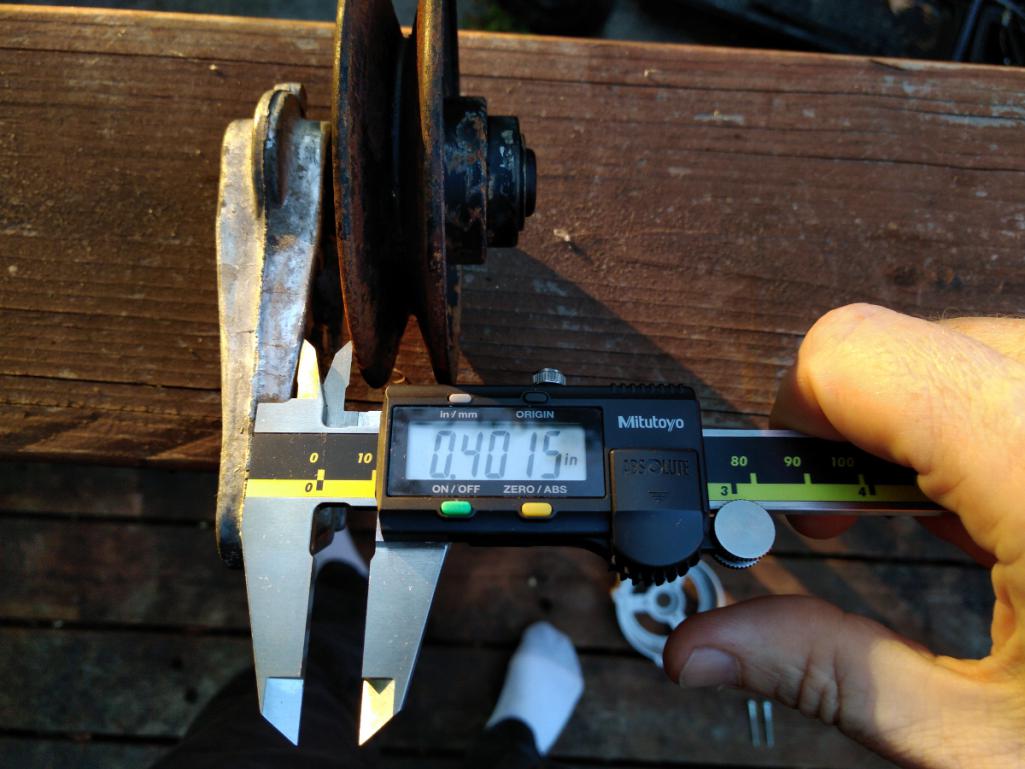 The bracket was another one of these little items where I spent way too much time playing about. The bracket is cast aluminum, so my first thought was to polish it and clear-coat it. But the Dremel polishing didn't work out at all, so instead I pulled out some needle files and removed all the ugly casting leftovers. Smooth surfaces are better. Then I thought about electrocleaning it, so I used a pair of stainless electrodes and some heated 85% phosphoric acid and ran some current through it. Didn't work. That's worked in the past on pot metal but this particular material wasn't having any of my scheme hatchery. So I gave up and powder coated it chrome, just like the sad oil cooler adapter. But this one came out better. It's a bit ghetto. I would have preferred polish and clear coat. Here it is assembled: 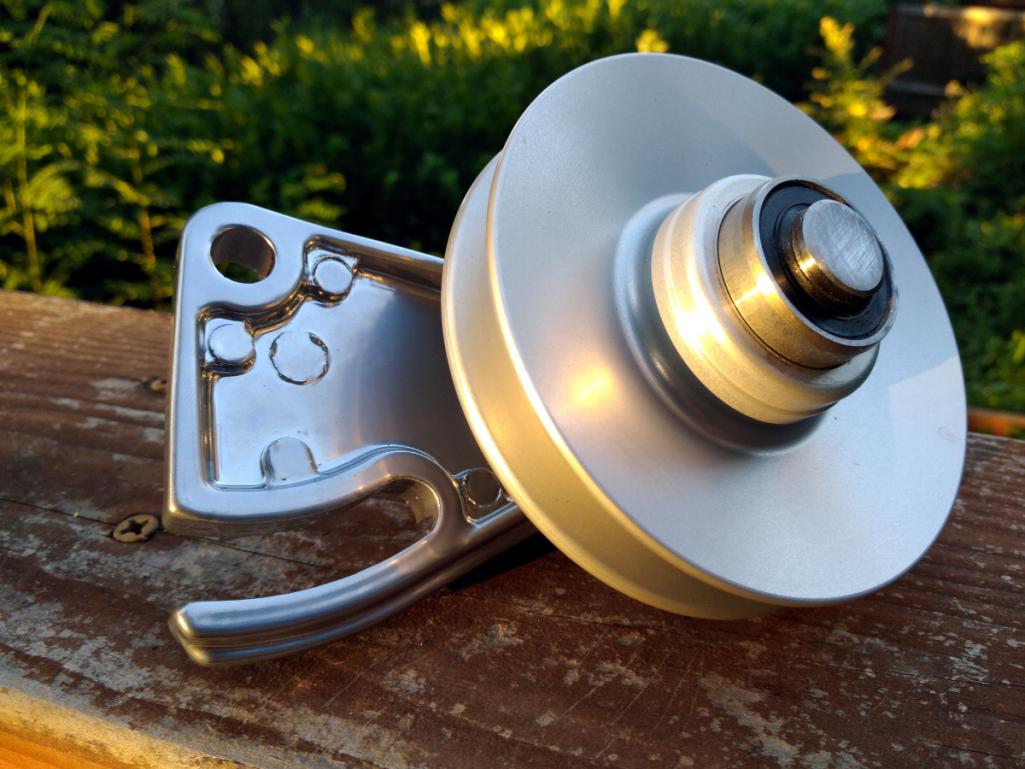 As you can see I'm off by a couple thousandths but in my defense a big hydraulic press isn't a precision instrument. Nor are my clumsy hands. I should have made a temporary gauge block. 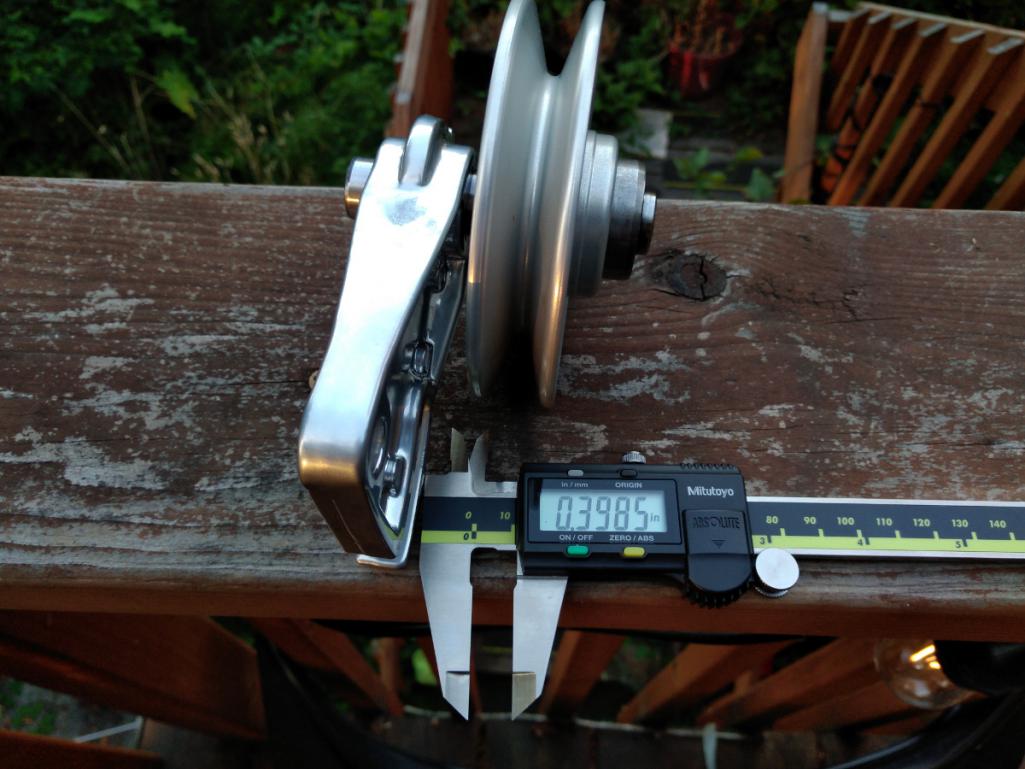 As ever, my cat Mouse keeps me company. She always wants to be where the action is, even if that means dozing from her shop perch. She's just my speed. 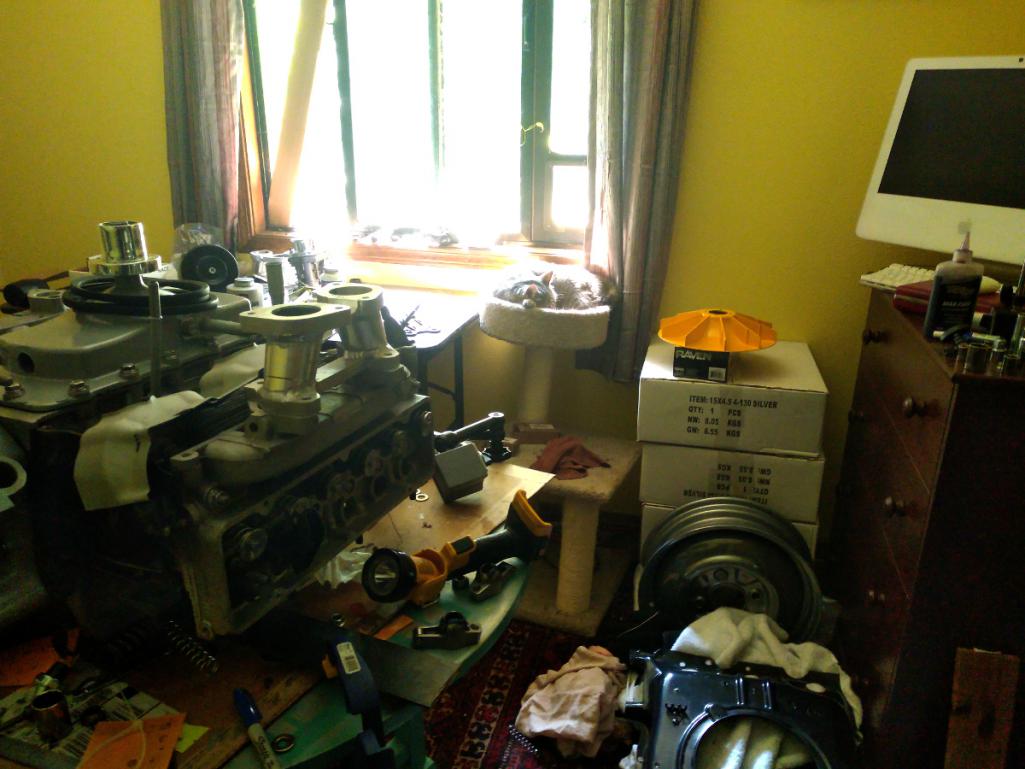 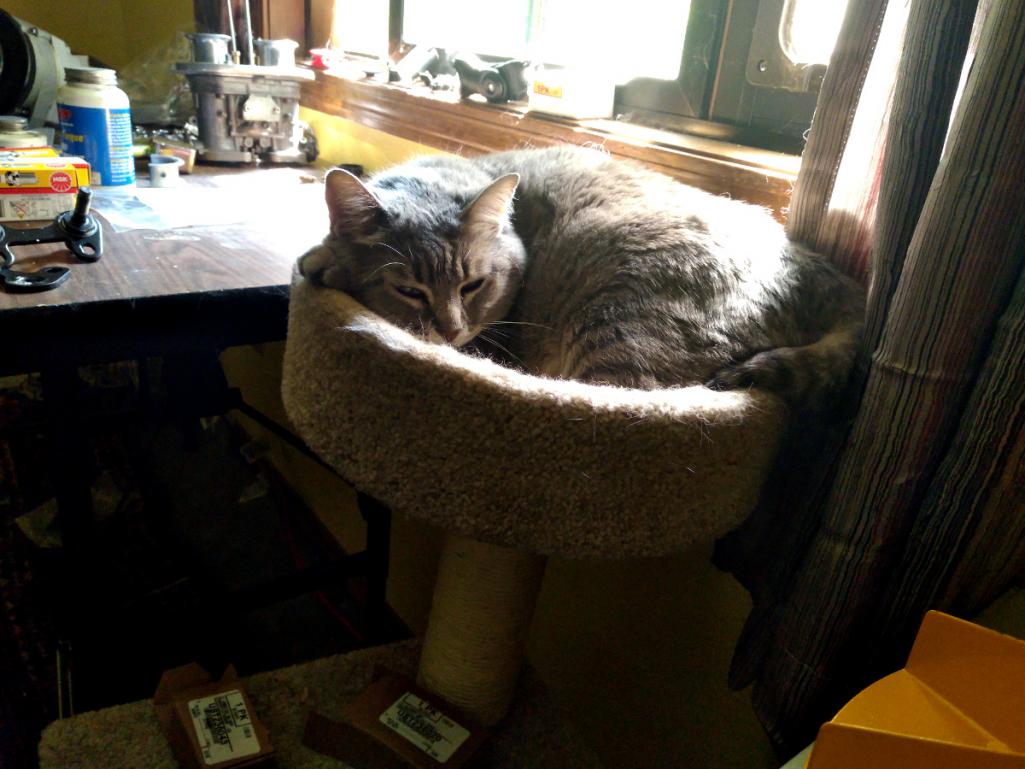 |
|
|
|
| r3dplanet |
Aug 17 2018, 09:24 PM
Post
#245
|
|
Senior Member Group: Members Posts: 679 Joined: 3-September 05 From: Portland, Oregon Member No.: 4,741 Region Association: None |
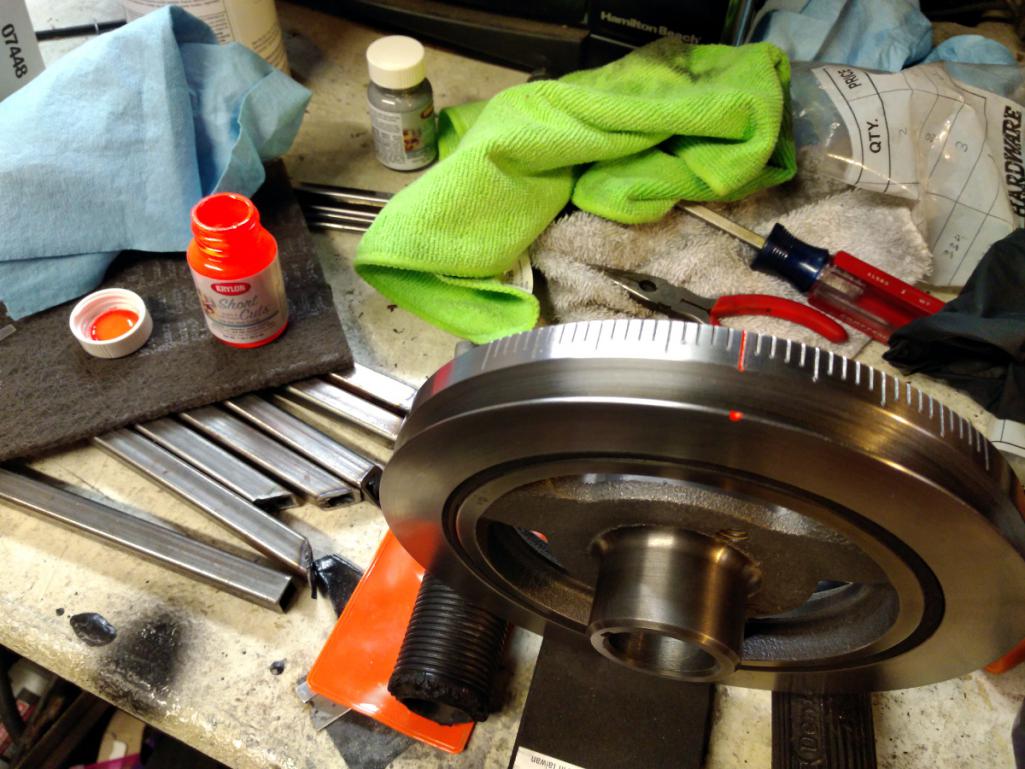
Another bit of trivia is the finishing of the harmonic damper. I bought it years ago and it was starting to rust a little, so I cleaned and polished it. Feeling crafty, I carefully painted a stylish orange stripe along the timing mark. Afterward I gave it three coats of 2K clear to seal it up. Not very interesting, but it is very nice looking.
  |
|
|
|
| r3dplanet |
Aug 17 2018, 09:31 PM
Post
#246
|
|
Senior Member Group: Members Posts: 679 Joined: 3-September 05 From: Portland, Oregon Member No.: 4,741 Region Association: None |
One final note for now.
I bought my pushrods (or "push rods") from Smith Brothers here in Oregon, in Redmond. Those guys knew exactly what I needed. They said they do many Corvair pushrods. They can make rods any size to within .005" lengths. All they needed to know was what length of pushrod and what the valve spring ratings are. They arrived two days later. One of the nonstop troubles I've had with this project is unreliable shop service, excluding those I've singled out along the way who do great work. But locally I've had a miserable time getting anything accomplished. So I was super pleased when these guys pulled right through for me. I'll get a photo of the rods tomorrow. The Golden Hour is over for today. |
|
|
|
| r3dplanet |
Aug 18 2018, 02:57 PM
Post
#247
|
|
Senior Member Group: Members Posts: 679 Joined: 3-September 05 From: Portland, Oregon Member No.: 4,741 Region Association: None |
Just a quick note about the pushrods from Smith Brothers.
The measurements are 5/16" outer diameter with 0.083" wall thickness. I don't know what the wall thickness of the factory pushrods are but I might slice one open to find out. The stock pushrods are also 5/16" OD. The rods are made of 4130 chromoly steel with heat treated ends. The spray holes are the same as factory with two on the valve end to act like a lawn sprinkler. The valve ends are rounded just like stock, but the lifter end is spherical unlike stock. Here's the build card: 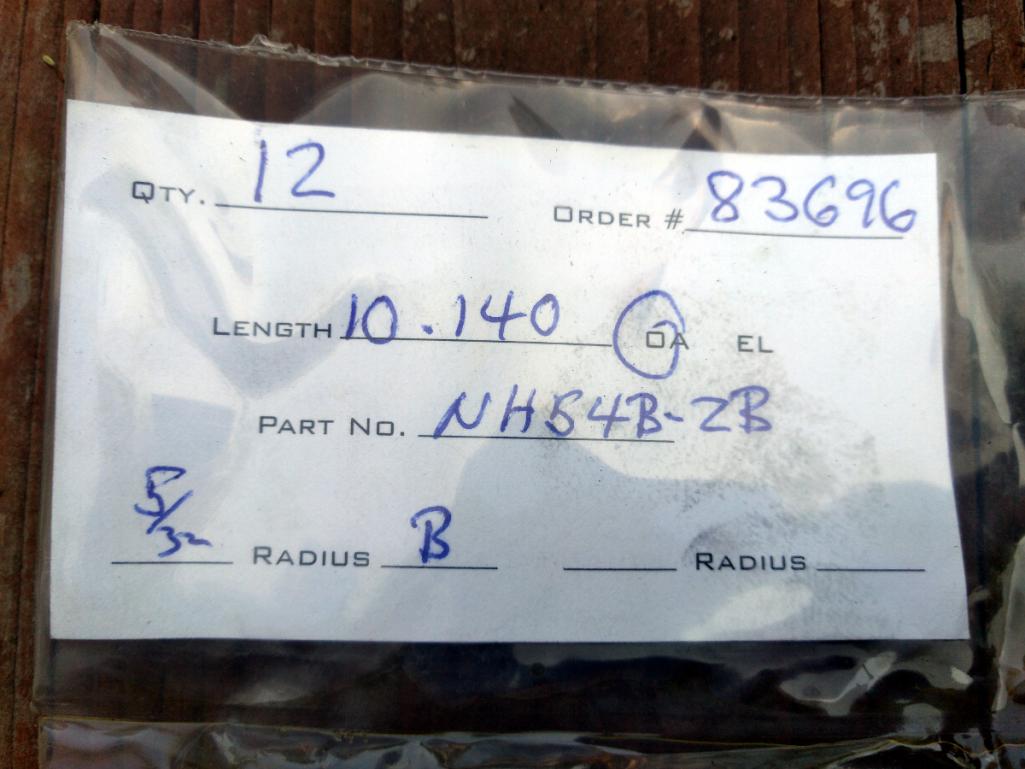 Lifter and valve ends: 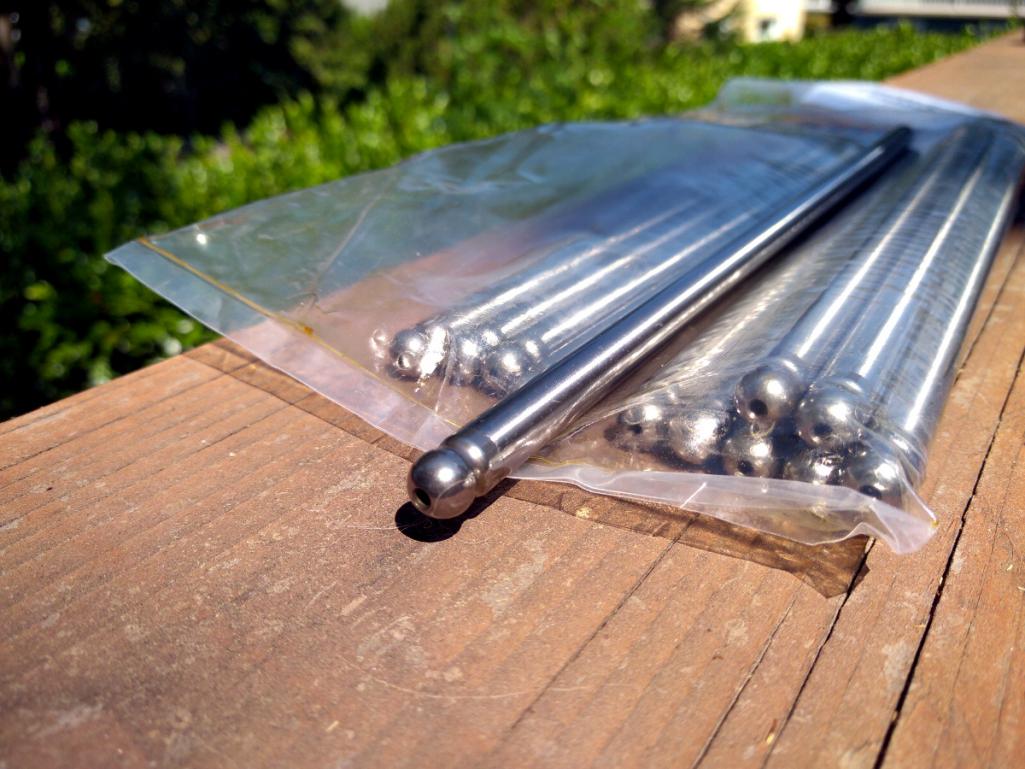  .. and contact info: 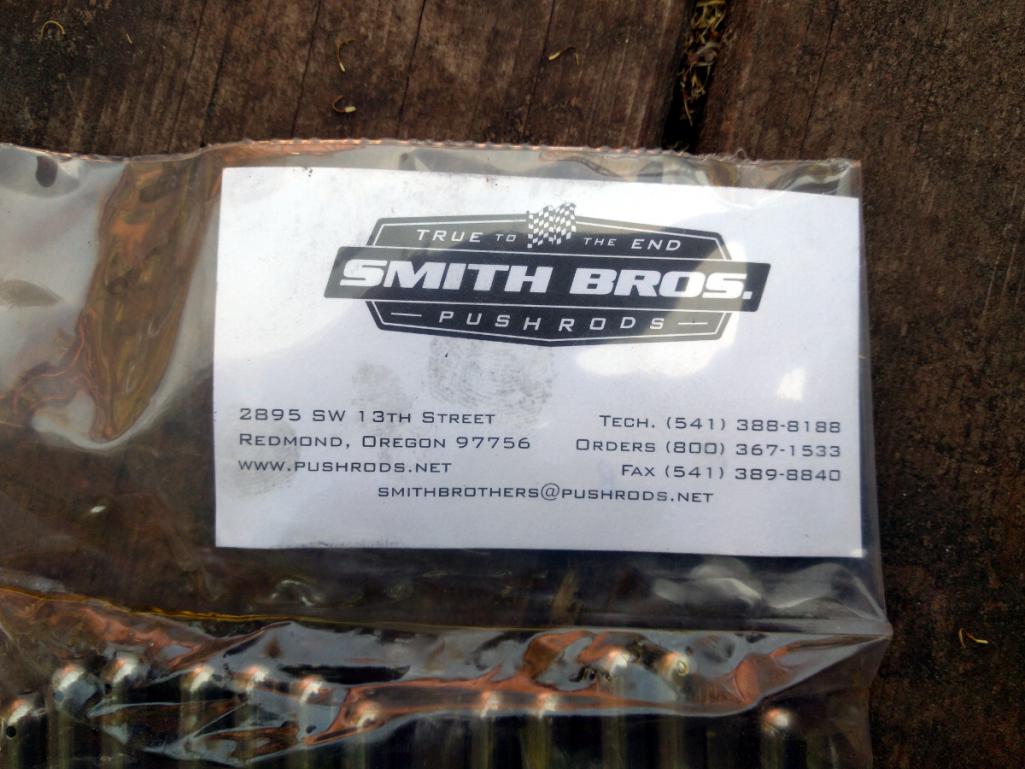 I'm hoping to get some strong men in tomorrow or the day after to move the engine outside. Getting anxious to start it! |
|
|
|
| Dr Evil |
Aug 20 2018, 08:45 AM
Post
#248
|
|
Send me your transmission! Group: Members Posts: 23,041 Joined: 21-November 03 From: Loveland, OH 45140 Member No.: 1,372 Region Association: MidAtlantic Region |
I was hanging with my new neighbor/friend last week when his Dad was visiting from Michigan. It so happened that he used to work on the corvair engine line, so of course I brought him next door and opened my bus engine lid for him. Cool guy and a fan of the engine. Small world.
|
|
|
|
| r3dplanet |
Sep 4 2018, 06:03 PM
Post
#249
|
|
Senior Member Group: Members Posts: 679 Joined: 3-September 05 From: Portland, Oregon Member No.: 4,741 Region Association: None |
Hey peeps. I'm *still* waiting for the oil pan work to happen. It's the very last part before I can try to start it up. It's like waiting for Godot.
But since I'm otherwise trying to sell my 914 before the winter arrives, maybe someone out there might be interested in taking over this project and popping into their own car. Just throwing the idea out there. Let me know. I'll bug the machinist with the oil pan one more time but I absolutely *hate* being that kind of guy. Plus he's doing me a huge favor. Just really want to hear it crank up. Or explode. Whichever way it goes it will be cathartic, and I'm all about catharsis these days. -marcus |
|
|
|
| Dr Evil |
Sep 4 2018, 08:39 PM
Post
#250
|
|
Send me your transmission! Group: Members Posts: 23,041 Joined: 21-November 03 From: Loveland, OH 45140 Member No.: 1,372 Region Association: MidAtlantic Region |
Man, I just decided to go SVX power in the bus or I’d be all over this. Can’t beat a well documented and assembled corvair motor.
|
|
|
|
| r3dplanet |
Sep 4 2018, 09:13 PM
Post
#251
|
|
Senior Member Group: Members Posts: 679 Joined: 3-September 05 From: Portland, Oregon Member No.: 4,741 Region Association: None |
Just get another bus! Your wife will totally approve. Or if you REALLY want to surprise her then my '65 Barracuda is also up for sale.
QUOTE(Dr Evil @ Sep 4 2018, 07:39 PM) Man, I just decided to go SVX power in the bus or I’d be all over this. Can’t beat a well documented and assembled corvair motor. |
|
|
|
| chrisg |
Sep 9 2018, 10:36 AM
Post
#252
|
|
Member Group: Members Posts: 63 Joined: 20-December 03 From: Paso Robles, CA Member No.: 1,455 Region Association: None |
As a slight aside, how important is it to do engine to body tin? I realize the water cooled conversions don’t use it but how does it affect an air cooled application? I would also think that it would make for a very dirty situation considering the upward flow of air. I ran across a site for a shop in CO that has Corvair/Porsche conversion experience but they mention on their site that they lost all of their 914 templates during a move.
DaveO, perhaps you have some input. |
|
|
|
| Dr Evil |
Sep 9 2018, 11:10 AM
Post
#253
|
|
Send me your transmission! Group: Members Posts: 23,041 Joined: 21-November 03 From: Loveland, OH 45140 Member No.: 1,372 Region Association: MidAtlantic Region |
QUOTE(chrisg @ Sep 9 2018, 12:36 PM) As a slight aside, how important is it to do engine to body tin? I realize the water cooled conversions don’t use it but how does it affect an air cooled application? I would also think that it would make for a very dirty situation considering the upward flow of air. I ran across a site for a shop in CO that has Corvair/Porsche conversion experience but they mention on their site that they lost all of their 914 templates during a move. DaveO, perhaps you have some input. I found it easy on the bus. I made rigid cardboard templates and simply used them to fab up metal ones. Worked so well I never prittied them up and used the mock ups as is. |
|
|
|
| r3dplanet |
Sep 9 2018, 12:19 PM
Post
#254
|
|
Senior Member Group: Members Posts: 679 Joined: 3-September 05 From: Portland, Oregon Member No.: 4,741 Region Association: None |
Yup. DaveO is way ahead on this.
QUOTE(chrisg @ Sep 9 2018, 09:36 AM) As a slight aside, how important is it to do engine to body tin? I realize the water cooled conversions don’t use it but how does it affect an air cooled application? I would also think that it would make for a very dirty situation considering the upward flow of air. I ran across a site for a shop in CO that has Corvair/Porsche conversion experience but they mention on their site that they lost all of their 914 templates during a move. DaveO, perhaps you have some input. |
|
|
|
| DaveO90s4 |
Sep 23 2018, 02:05 AM
Post
#255
|
|
Member Group: Members Posts: 149 Joined: 26-April 16 From: Australia Member No.: 19,935 Region Association: None |
Hi all, sorry I'd not seen these latest posts about engine tin until a friend told me over coffee yesterday.
I found making the tin ware a real fun challenge and not hard to do at all - requires a lot of thinking and rather less doing. I'd be more than happy to explain how I did it for anyone who is fitting a Corvair engine to a 914. Probably best to wake me up by email first. DoveringtonATozemailDOTcomDOTau. Cheers all DaveO |
|
|
|
| r3dplanet |
Sep 23 2018, 12:38 PM
Post
#256
|
|
Senior Member Group: Members Posts: 679 Joined: 3-September 05 From: Portland, Oregon Member No.: 4,741 Region Association: None |
Very cool.
Thinking into the future I think it would be of great benefit to have some plans drawn up and then made available. If we can get something on paper and into .pdf format I can always host the file so we can link to it from here. Or maybe even a cad file. Just projecting. Ha. Puns. QUOTE(DaveO90s4 @ Sep 23 2018, 01:05 AM) Hi all, sorry I'd not seen these latest posts about engine tin until a friend told me over coffee yesterday. I found making the tin ware a real fun challenge and not hard to do at all - requires a lot of thinking and rather less doing. I'd be more than happy to explain how I did it for anyone who is fitting a Corvair engine to a 914. Probably best to wake me up by email first. DoveringtonATozemailDOTcomDOTau. Cheers all DaveO |
|
|
|
| DaveO90s4 |
Sep 23 2018, 03:55 PM
Post
#257
|
|
Member Group: Members Posts: 149 Joined: 26-April 16 From: Australia Member No.: 19,935 Region Association: None |
Engine tin templates would be great - but not a trivial task. One would have to make all the tinware and fit it and engine, then removeve engine, remove tinware and hammer it flat to make the 'flat' templates.
I have kept most of the paper templates I made, but at best they are close approximations with lots of snipping and fettling required to make the bits fit. At the crank belt pulley end the tinware will also depend on how the engine has been mounted (I do have as built plans for how I did that and can share if required. As before send me an email to get my attention Cheers DaveO |
|
|
|
| chrisg |
Sep 23 2018, 08:35 PM
Post
#258
|
|
Member Group: Members Posts: 63 Joined: 20-December 03 From: Paso Robles, CA Member No.: 1,455 Region Association: None |
QUOTE(DaveO90s4 @ Sep 23 2018, 02:55 PM) Engine tin templates would be great - but not a trivial task. One would have to make all the tinware and fit it and engine, then removeve engine, remove tinware and hammer it flat to make the 'flat' templates. I have kept most of the paper templates I made, but at best they are close approximations with lots of snipping and fettling required to make the bits fit. At the crank belt pulley end the tinware will also depend on how the engine has been mounted (I do have as built plans for how I did that and can share if required. As before send me an email to get my attention Cheers DaveO Thanks Dave, I did have the later thought that it would in the end be install and car specific when not working with any set engine mount/location parameters. |
|
|
|
| chrisg |
Sep 23 2018, 08:45 PM
Post
#259
|
|
Member Group: Members Posts: 63 Joined: 20-December 03 From: Paso Robles, CA Member No.: 1,455 Region Association: None |
Hey Marcus, since we are on a bit of an intermission waiting for the oil pan, I was wondering what are your thoughts on how the dual 44 Webers are going to work. Is it a progressive linkage like the stock 4 carb (do I have that correct in how the stock carbs work?)? I re-read this thread and don't remember that being discussed other than seeing the gorgeous intakes you had fabbed.
|
|
|
|
| r3dplanet |
Sep 24 2018, 11:56 AM
Post
#260
|
|
Senior Member Group: Members Posts: 679 Joined: 3-September 05 From: Portland, Oregon Member No.: 4,741 Region Association: None |
Ugggghhhhhh wwabababb ththhhh this intermission suuuuuucks. So sure, let's talk about carbs.
First, just a quick point of order that I didn't fab those intakes. My welding is functional but nowhere near as nice as that work. Those were put together and sold commercially by Tom Knoblauch of American Flat 6. Check out his site here: http://americanflat6.com He's done quite a lot of the machine work for my engine. Definitely a great resource. The Corvairs came with a number of carburetor options: one single bore carb on either side for the 90, 110, and turbo engines, four carbs for the 140hp, aftermarket high-mounted single carbs, or the very cool modified custom intakes with triple bore Webers. Just like DaveO90s4 has on his. (drool). I should also mention that there's a very cool and affordable EFI kits that uses stock Ford 6-cylinder EFI bits and EDIS along with many custom made parts. You can get two or four throttle bodies or a kit made just for us big-bore adventurers: http://www.corvair-efi.com/gen-2-throttle-...le-thru-clarks/ I might have gone with the Weber triples but they're just so very expensive. So I split the difference and chose double bore Webers or Dellortos - I have both. I know the Webers inside and out so will use those just for ease of tuning and because I know they'll run great. Once the carbs are mounted on those sweet intakes they sit fairly high and clear of the fan. So all that's needed is a stock throttle cross bar to actuate them. My plan was to do either exactly that, or make a mount and use McMark's bellcrank linkage. I have this linkage for my Type-4 and I absolutely love it. Here's a thread from the group buy: http://www.914world.com/bbs2/index.php?sho...riginal+customs Here's what the stock linkage would look like (photos from Americanflat6.com, at http://americanflat6.com/products/2bbl40idfweberkits.html) 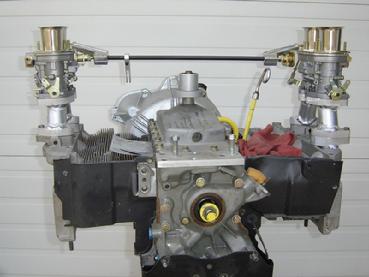 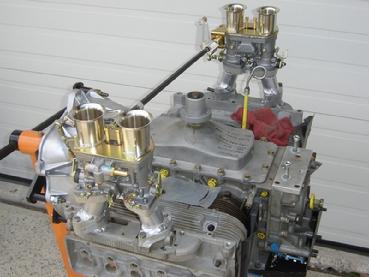 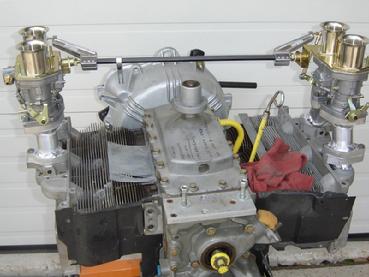 So.. options! Lots of cool stuff. Perhaps the only tiny side note is that I'm often asked about the turbo engine instead. My initial fear was that with the 901 gearbox the engine wouldn't rev far enough for long enough to spool up the turbo. It turns out that's the right answer. Others have poked around with the idea and it doesn't work. So for we 914 people the turbo isn't really viable. ... still waiting for this intermission to end ... QUOTE(chrisg @ Sep 23 2018, 07:45 PM) Hey Marcus, since we are on a bit of an intermission waiting for the oil pan, I was wondering what are your thoughts on how the dual 44 Webers are going to work. Is it a progressive linkage like the stock 4 carb (do I have that correct in how the stock carbs work?)? I re-read this thread and don't remember that being discussed other than seeing the gorgeous intakes you had fabbed. |
|
|
|
|
2 User(s) are reading this topic (2 Guests and 0 Anonymous Users)
0 Members:

|
Lo-Fi Version | Time is now: 5th November 2025 - 12:30 AM |
Invision Power Board
v9.1.4 © 2025 IPS, Inc.