|
|
|
Porsche, and the Porsche crest are registered trademarks of Dr. Ing. h.c. F. Porsche AG.
This site is not affiliated with Porsche in any way. Its only purpose is to provide an online forum for car enthusiasts. All other trademarks are property of their respective owners. |
|
|

  |

| jimkelly |
 Sep 23 2013, 05:35 AM Sep 23 2013, 05:35 AM
Post
#61
|
|
Delaware USA  Group: Members Posts: 4,969 Joined: 5-August 04 From: Delaware, USA Member No.: 2,460 Region Association: MidAtlantic Region |
here is what 2 panels of grey gloss rustoleum look like on my car.
I am using it to protect from flash rust temporarily and I wanted to see what grey looked like on my car and it is somewhat close to sport classic grey. Attached image(s) 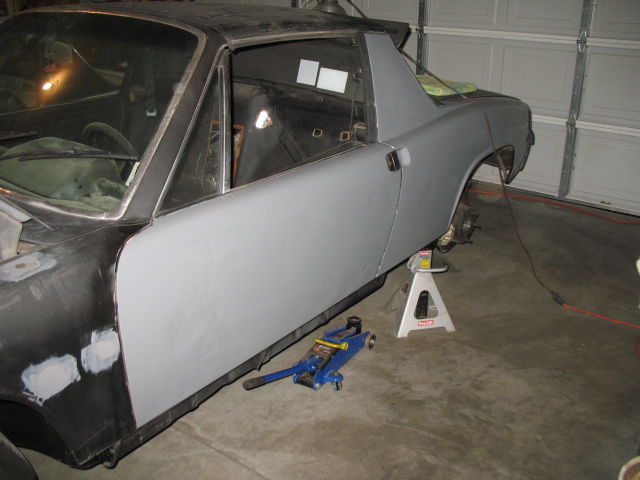 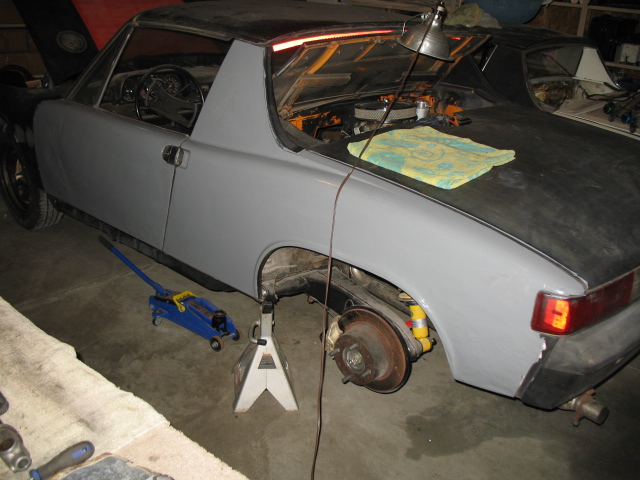
|
   |

 
|
| bulitt |
Sep 23 2013, 06:08 AM
Post
#62
|
|
Achtzylinder Group: Members Posts: 4,189 Joined: 2-October 11 Member No.: 13,632 Region Association: South East States |
QUOTE(CptTripps @ Sep 22 2013, 09:20 PM)  I'm really not that pleased with the job I'm doing. I think it has something to do with the motor going kaput on me. It was skipping which really messed me up a few times. I'm going to go over the whole thing and grind it all down to smooth. I won't sleep well until I know it's right. If you are using an extension cord make sure it is sufficient for the welder. An undersize cord will cause the intermittent wire feed you mentioned. Did you also check your wire feed roller tension? |
|
|
|
| CptTripps |
Sep 23 2013, 06:35 AM
Post
#63
|
|
:: Punch and Pie :: Group: Members Posts: 3,586 Joined: 26-December 04 From: Tuscaloosa, AL and Akron, OH Member No.: 3,342 Region Association: Upper MidWest |
QUOTE(bulitt @ Sep 23 2013, 08:08 AM) If you are using an extension cord make sure it is sufficient for the welder. An undersize cord will cause the intermittent wire feed you mentioned. Did you also check your wire feed roller tension? Yup...checked both. The feed motor isn't spinning at all. I'm plugged directly into the wall. (Same plug it's been connected to for almost 10 years.) I think it's just time to get the welder serviced. I bought it used from a welding repair shop, so it's entirely possible it just needs something else. Like...a fuse? (Just found the manual...need to check this when I get home!) The weather is getting colder...and my driving days are numbered, so I think it's time to concentrate on getting the garage cleaned out so I can get this project started in earnest. I've had my fun driving it this year, and am really starting to get the bug to get busy! (IMG:style_emoticons/default/welder.gif) The Subaru motor is getting pulled this week, and I should have everything at the house soon enough. I'm reading like a madman right now to get all the info I need so I can start building without having to stop too much. Something else I did this time around that should make things easier: I put an old laptop in the garage so I can look up info without having to go back in the house. All I need is a web-browser, so an old MacBook ought to do the trick. I'm sure it'll look like hell in a few months...like a proper "shop computer" should. (IMG:style_emoticons/default/biggrin.gif) Attached image(s) 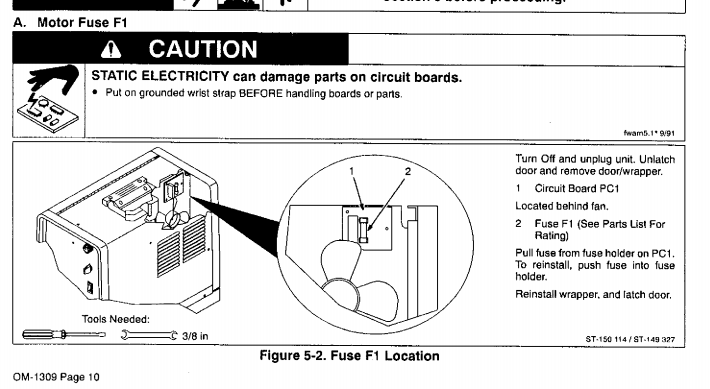
|
|
|
|
| CptTripps |
Sep 23 2013, 06:37 AM
Post
#64
|
|
:: Punch and Pie :: Group: Members Posts: 3,586 Joined: 26-December 04 From: Tuscaloosa, AL and Akron, OH Member No.: 3,342 Region Association: Upper MidWest |
QUOTE(strawman @ Sep 22 2013, 12:44 AM) As someone who has done the trailing arm reinforcements you have pictured above, I'd like to suggest you scrap that idea -- it makes 'em uber-heavy. Quick question on this: The reinforcements only weigh about 2-lb each. Does it really add that much weight? IIRC, those are about 15-18lb to begin with. Does another 2-ish change things that much? |
|
|
|
| badmiata |
Sep 23 2013, 07:27 AM
Post
#65
|
|
Newbie Group: Members Posts: 47 Joined: 21-June 07 From: Houston, TX (Clear Lake) Member No.: 7,826 Region Association: None |
Really love your progress!!!
|
|
|
|
| rick 918-S |
Sep 23 2013, 08:29 AM
Post
#66
|
|
Hey nice rack! -Celette Group: Members Posts: 21,257 Joined: 30-December 02 From: Now in Superior WI Member No.: 43 Region Association: Northstar Region |
QUOTE(CptTripps @ Sep 23 2013, 07:37 AM) QUOTE(strawman @ Sep 22 2013, 12:44 AM) As someone who has done the trailing arm reinforcements you have pictured above, I'd like to suggest you scrap that idea -- it makes 'em uber-heavy. Quick question on this: The reinforcements only weigh about 2-lb each. Does it really add that much weight? IIRC, those are about 15-18lb to begin with. Does another 2-ish change things that much? It's all un-sprung weight. The worst kind to add. |
|
|
|
| CptTripps |
Sep 23 2013, 08:39 AM
Post
#67
|
|
:: Punch and Pie :: Group: Members Posts: 3,586 Joined: 26-December 04 From: Tuscaloosa, AL and Akron, OH Member No.: 3,342 Region Association: Upper MidWest |
QUOTE(rick 918-S @ Sep 23 2013, 10:29 AM) It's all un-sprung weight. The worst kind to add. Gotcha. I guess that makes sense. QUOTE(badmiata @ Sep 23 2013, 09:27 AM) Really love your progress!!! Thanks...although it doesn't seem like I'm getting anywhere just yet. Gotta get him on jack-stands so I can really start cranking. I feel like if I took a week off work and just powered through, I could get a lot further. But then I think "If I finish too early, I'll just be pissed that the car is done, and I can't drive it in the snow." |
|
|
|
| jaxdream |
Sep 23 2013, 08:46 AM
Post
#68
|
|
Senior Member Group: Members Posts: 974 Joined: 8-July 08 From: North Central Tennessee Member No.: 9,270 Region Association: South East States |
This is what I done to my trailing arms , real easy to do with 1 inch tube, a little fat on the welds , but sound.
Jack 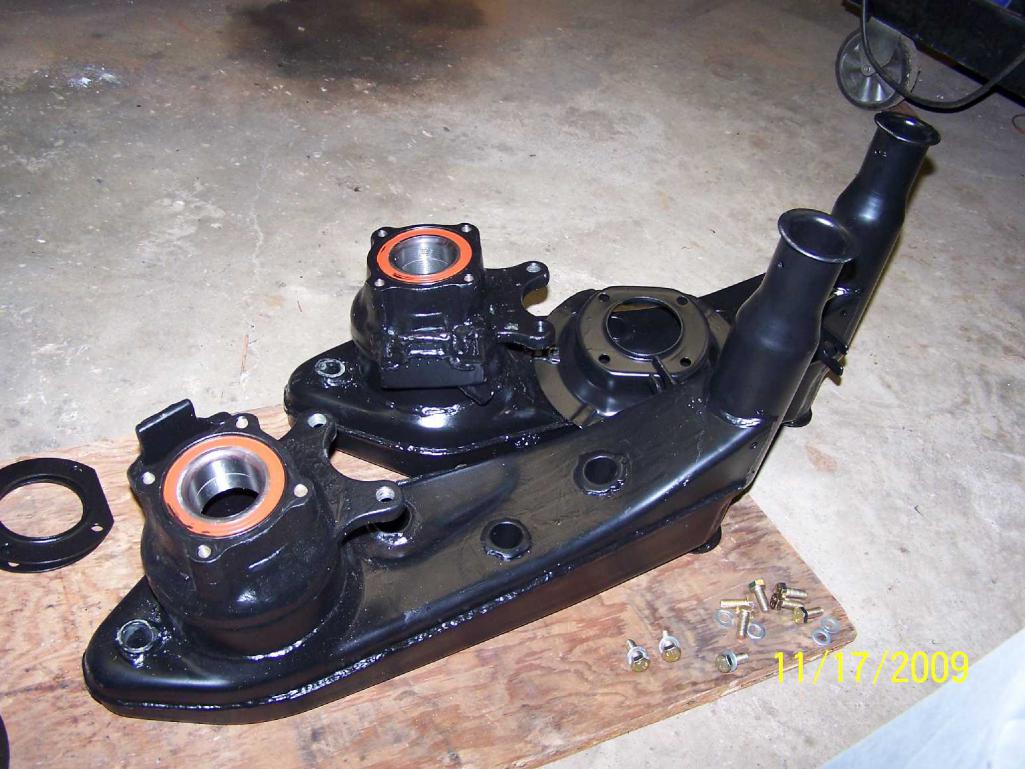 |
|
|
|
| CptTripps |
Sep 23 2013, 08:53 AM
Post
#69
|
|
:: Punch and Pie :: Group: Members Posts: 3,586 Joined: 26-December 04 From: Tuscaloosa, AL and Akron, OH Member No.: 3,342 Region Association: Upper MidWest |
QUOTE(jaxdream @ Sep 23 2013, 10:46 AM) This is what I done to my trailing arms , real easy to do with 1 inch tube, a little fat on the welds , but sound. So the idea is to cut 4-5 holes...put 1" pipe through them...then weld, and cut off the extra length? I could see adding 3 to each one, at 10-deg angles (for drainage and increased stability) but I'm not sure the weight would be that much different than the boxes. Perhaps I'm wrong. Luckily: Trailing arms aren't all that expensive and I'll bet I could play with this concept and see how it works out. Great idea...Thanks! Update: Here's the thread I found. http://www.914world.com/bbs2/index.php?showtopic=205604 |
|
|
|
| jaxdream |
Sep 23 2013, 09:07 AM
Post
#70
|
|
Senior Member Group: Members Posts: 974 Joined: 8-July 08 From: North Central Tennessee Member No.: 9,270 Region Association: South East States |
No . set them up under a small drill press , used a 1 inch hole saw , cut in two spots towards the pivot mount. The hole close to the bearing area is the factory hole for the caliper adjustment. two new holes only , tube goes from outside to inside all the way through. Look at the pic a little closer , you'll see what I have done . Racer Chris did a study of reenforcing trailing arms a while back skipping the clamshell setup . His were a lot more refined than mine , but mine are functional as is , and like I said easy to do.
Jack |
|
|
|
| CptTripps |
Sep 23 2013, 09:38 AM
Post
#71
|
|
:: Punch and Pie :: Group: Members Posts: 3,586 Joined: 26-December 04 From: Tuscaloosa, AL and Akron, OH Member No.: 3,342 Region Association: Upper MidWest |
Got it...only need two.
Here' what I came up with real quick. Do you think this would provide anything additional, or is it a waste of engineering effort? If I take each of the two and put them at opposing angles, this may be a way to add some additional stability. (Maybe...I'm no engineer.) I put this illustration together real quick to try and show what I 'm talking about. The red tubes are new. (and it's not exactly to scale, but you get the idea.) Attached thumbnail(s) 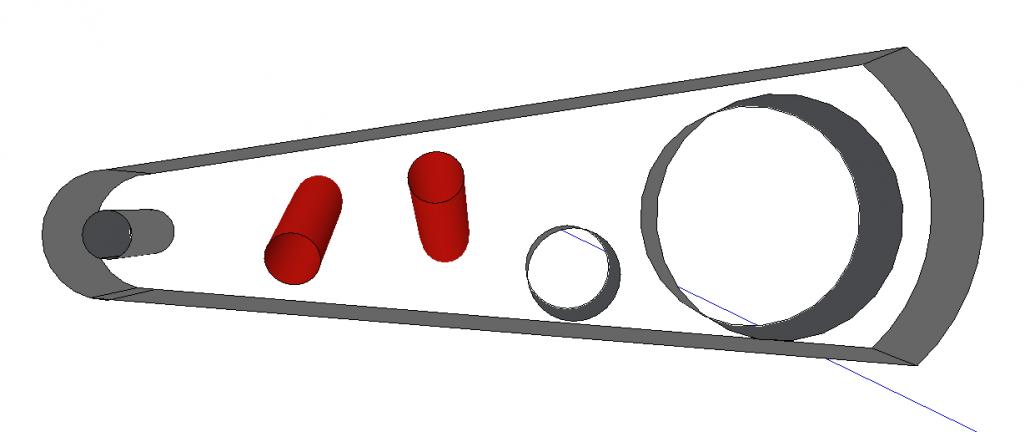 Attached image(s) 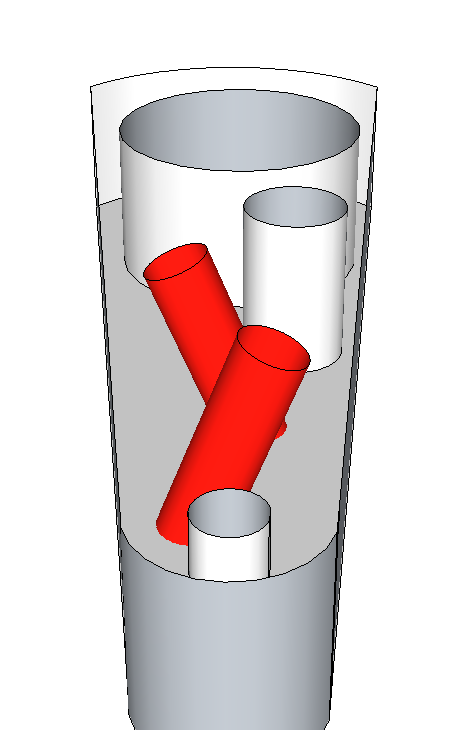 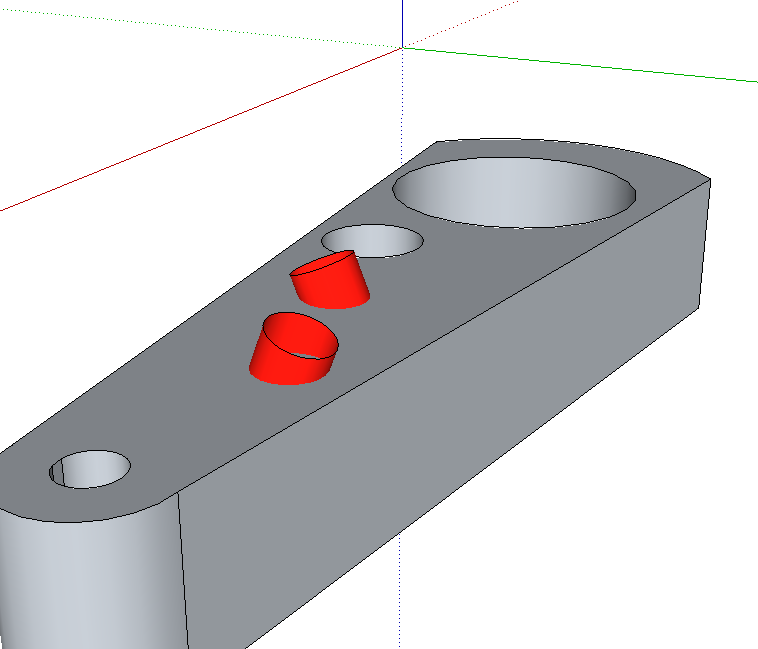
|
|
|
|
| jaxdream |
Sep 23 2013, 09:56 AM
Post
#72
|
|
Senior Member Group: Members Posts: 974 Joined: 8-July 08 From: North Central Tennessee Member No.: 9,270 Region Association: South East States |
That looks great , if you have the ability to get the different angles , they should be a good way to address the flexing forces . I see that you are upping the horsepower , this should help in getting it to the ground. Racer Chris used some great ideas about strengthening the arms , search for his threads. If I recall ( yeah right ) he cut the arms in half , installed some plates inside at differing angles , welded them back together. It was a way of strengthening with out showing on the outside , something to do with the rules of a racing class. I'd say go for it , won't add as much weight as the clamshells.
Jack |
|
|
|
| CptTripps |
Sep 23 2013, 10:00 AM
Post
#73
|
|
:: Punch and Pie :: Group: Members Posts: 3,586 Joined: 26-December 04 From: Tuscaloosa, AL and Akron, OH Member No.: 3,342 Region Association: Upper MidWest |
I was thinking about making 2 holes at each side, at different points, than putting the pipe through at the angles. Welding up the outside, then grinding them down smooth.
I'm definitely NOT racing this car, so it's just for the street. |
|
|
|
| jaxdream |
Sep 23 2013, 10:11 AM
Post
#74
|
|
Senior Member Group: Members Posts: 974 Joined: 8-July 08 From: North Central Tennessee Member No.: 9,270 Region Association: South East States |
No racing for me either . I just had in mind ( where ever it went ) to do some mods that I thought would be more bang for the buck , this was just so easy while I had the arms off to do a 5 lug with 928 / 944 ebrake conversion . Heck when I do get it back together , I'll be inserting a 1.7 that I salvaged from another 914, talk about wheel spinners!!!! (IMG:style_emoticons/default/aktion035.gif)
Jack |
|
|
|
| CptTripps |
Sep 23 2013, 10:55 AM
Post
#75
|
|
:: Punch and Pie :: Group: Members Posts: 3,586 Joined: 26-December 04 From: Tuscaloosa, AL and Akron, OH Member No.: 3,342 Region Association: Upper MidWest |
I've got a shit-ton of 1" and 1.5" gas pipe. I wonder if I can/should use that?
|
|
|
|
| CptTripps |
Sep 23 2013, 11:28 AM
Post
#76
|
|
:: Punch and Pie :: Group: Members Posts: 3,586 Joined: 26-December 04 From: Tuscaloosa, AL and Akron, OH Member No.: 3,342 Region Association: Upper MidWest |
Couple more pics of the flares, and this weekend's trans swap.
Attached thumbnail(s) 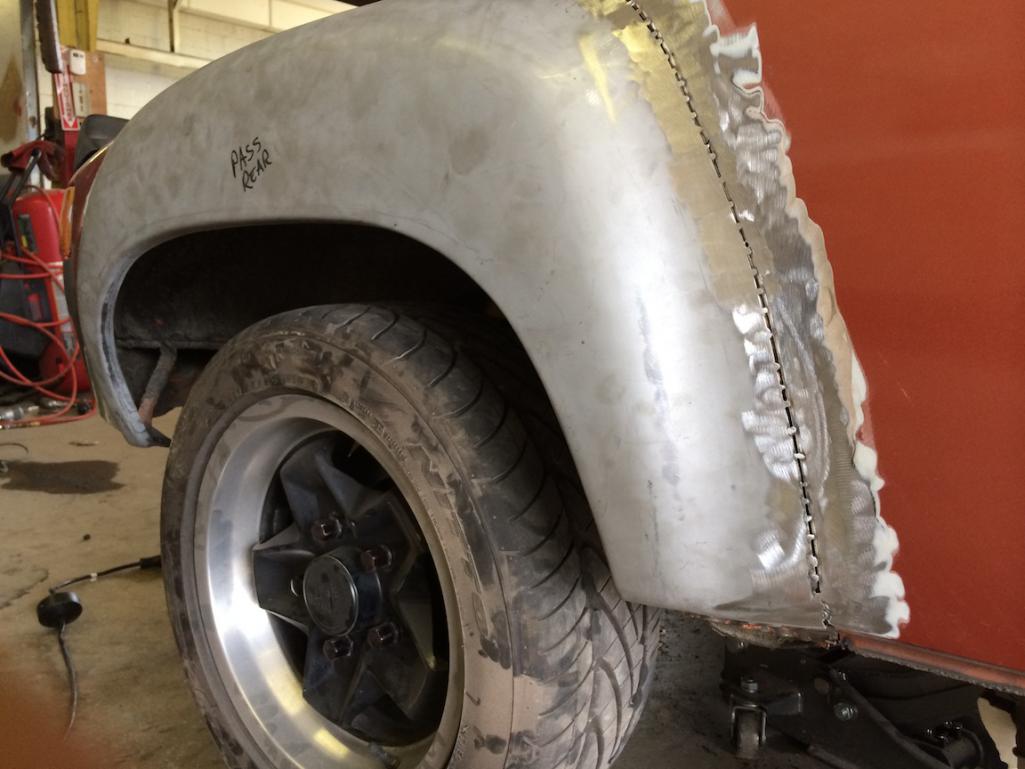 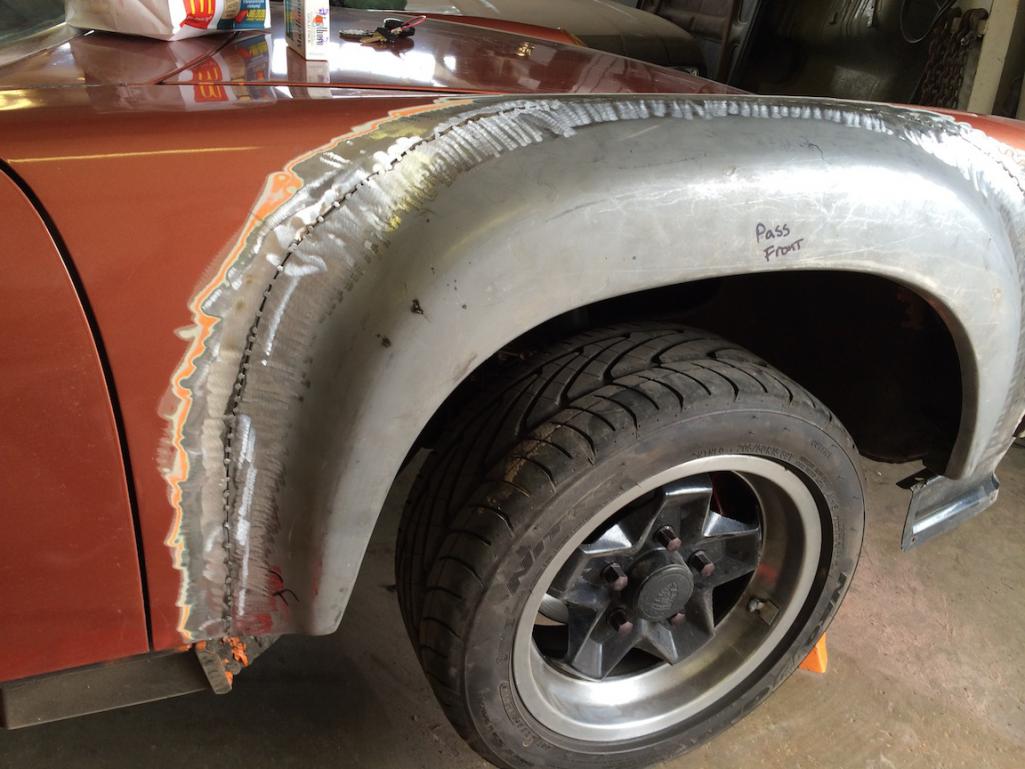 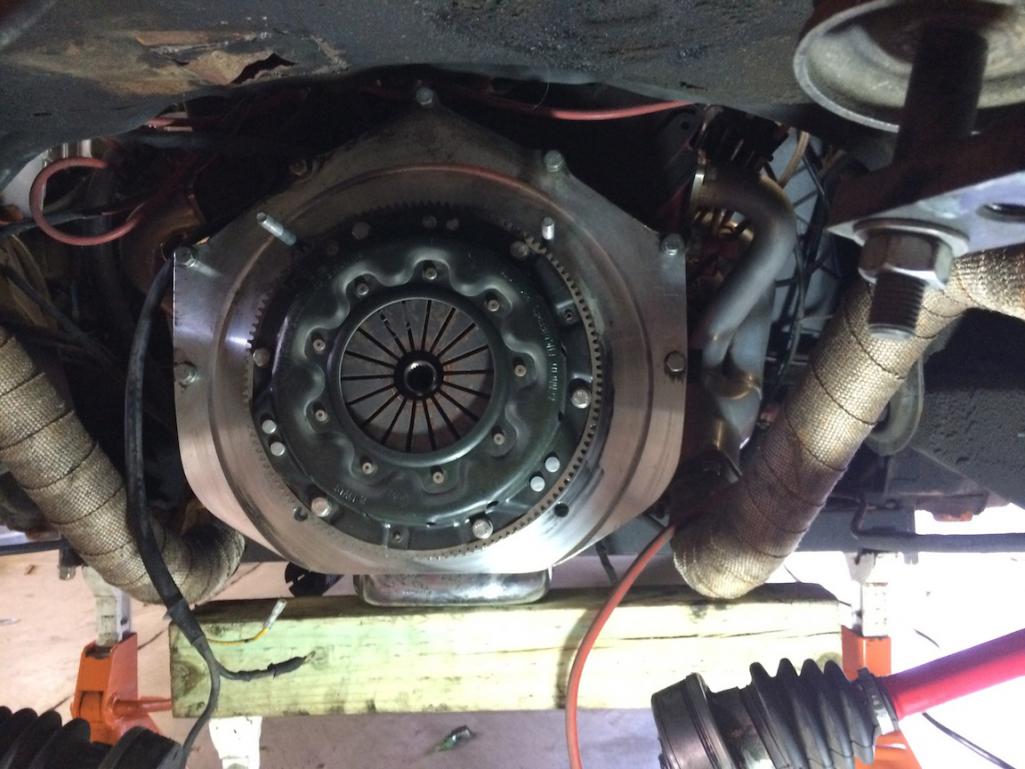 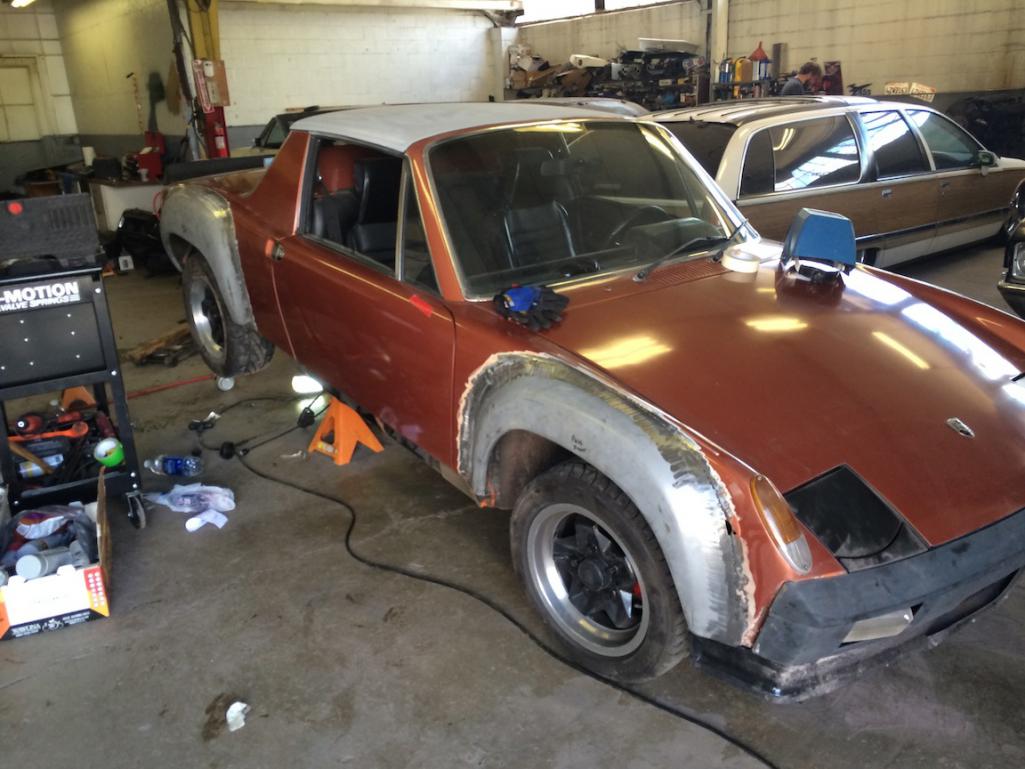
|
|
|
|
| pete |
Sep 23 2013, 02:34 PM
Post
#77
|
|
Member Group: Members Posts: 158 Joined: 23-August 10 From: New Jersey Member No.: 12,092 Region Association: North East States |
QUOTE(CptTripps @ Aug 30 2013, 09:10 PM) Just the regular PlastiDip Spray you buy from Home Depoti have the Glossifier spray too, and I'll put a coat of that on tomorrow. My caps came in today...so I sprayed one to see what it looks like. Do these Plastidiped wheels look as good in person as they do in the pic? Did you do them with a rattle can? What color is that? |
|
|
|
| pete |
Sep 23 2013, 02:36 PM
Post
#78
|
|
Member Group: Members Posts: 158 Joined: 23-August 10 From: New Jersey Member No.: 12,092 Region Association: North East States |
QUOTE(CptTripps @ Sep 23 2013, 01:28 PM) Couple more pics of the flares, and this weekend's trans swap. What are you going to be doing with the pipes and the rear trans mounts? I'm working on a SBC350 conversion and will be needing soon. (IMG:style_emoticons/default/biggrin.gif) |
|
|
|
| CptTripps |
Sep 23 2013, 05:38 PM
Post
#79
|
|
:: Punch and Pie :: Group: Members Posts: 3,586 Joined: 26-December 04 From: Tuscaloosa, AL and Akron, OH Member No.: 3,342 Region Association: Upper MidWest |
QUOTE(pete @ Sep 23 2013, 04:36 PM) What are you going to be doing with the pipes and the rear trans mounts? I'm working on a SBC350 conversion and will be needing soon. (IMG:style_emoticons/default/biggrin.gif) I'll have the adapter plate and headers for sale shortly. Actually, I'm driving to NJ in 2 weeks, and may be able to bring them out there if we can put a deal together. (IMG:style_emoticons/default/biggrin.gif) |
|
|
|
| CptTripps |
Sep 24 2013, 07:19 AM
Post
#80
|
|
:: Punch and Pie :: Group: Members Posts: 3,586 Joined: 26-December 04 From: Tuscaloosa, AL and Akron, OH Member No.: 3,342 Region Association: Upper MidWest |
Funny...I make one post, and get 10 PMs about selling off my old parts. Looks like I have myself a cradle and trans hangers, so I may be breaking everything down sooner than I originally expected!
Started working on the brakes last night. LOTS of powder to clean up. Tried adding the "Porsche" to the calipers, but I think I need to rough up the surface first. After it dried, I pulled the vinyl off and half the paint came with it. I think I put it on too thick. O-Well...glad I have more templates! Attached thumbnail(s) 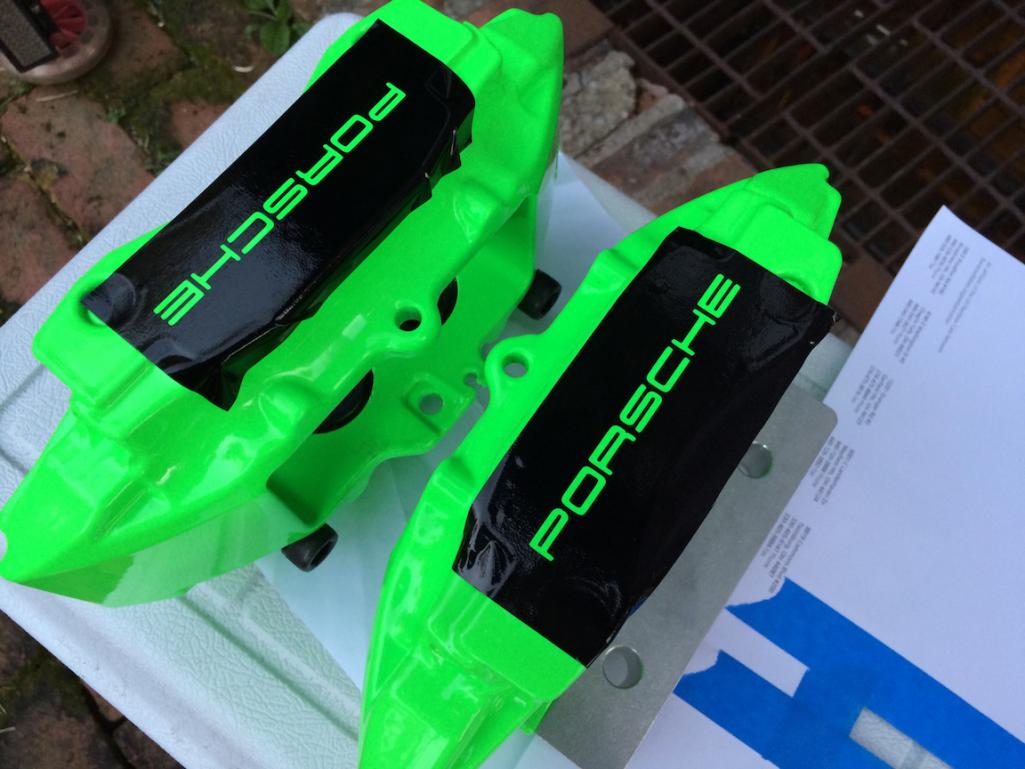 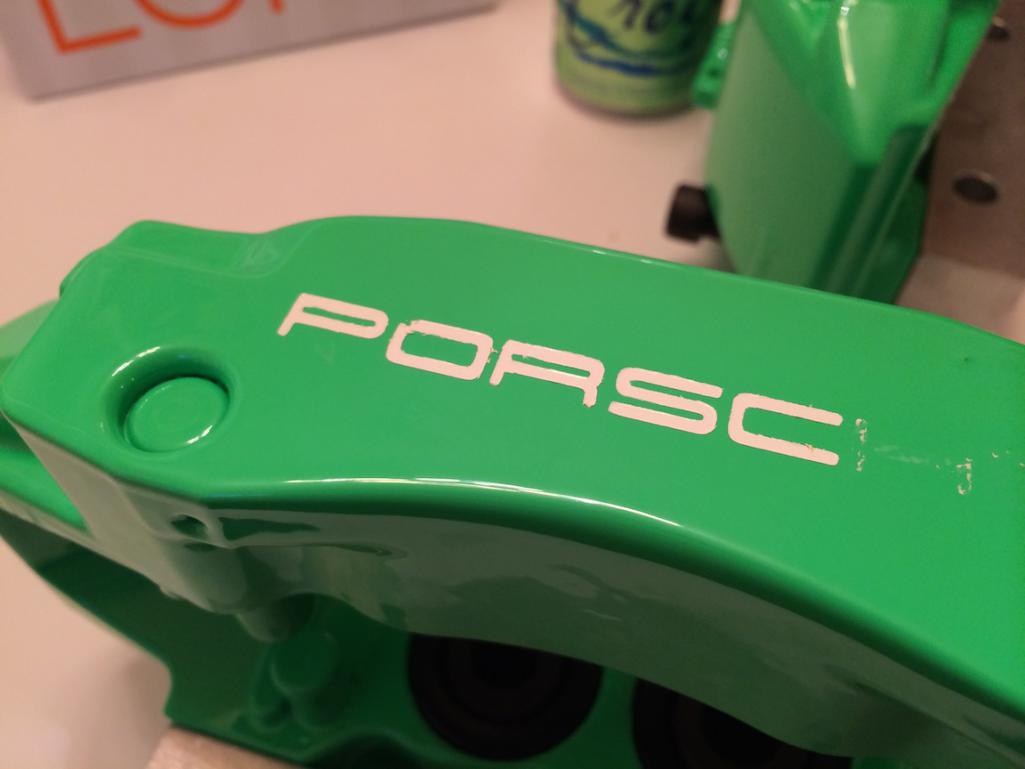
|
|
|
|
|
4 User(s) are reading this topic (4 Guests and 0 Anonymous Users)
0 Members:

|
Lo-Fi Version | Time is now: 30th April 2026 - 08:35 AM |
Invision Power Board
v9.1.4 © 2026 IPS, Inc.