|
|
|
Porsche, and the Porsche crest are registered trademarks of Dr. Ing. h.c. F. Porsche AG.
This site is not affiliated with Porsche in any way. Its only purpose is to provide an online forum for car enthusiasts. All other trademarks are property of their respective owners. |
|
|

  |

| mepstein |
 Dec 8 2013, 04:19 PM Dec 8 2013, 04:19 PM
Post
#21
|
|
914-6 GT in waiting  Group: Members Posts: 20,774 Joined: 19-September 09 From: Landenberg, PA/Wilmington, DE Member No.: 10,825 Region Association: MidAtlantic Region |
You also need to check out the passenger side rear suspension console. A known weak spot on these cars. They rust from the inside out so go hot and heavy with a big metal pick or screwdriver and flush out any weak spot. Failure of this piece will cause the rear wheel to lean in and fall off. Also check out the pedal reinforcement under the pedal cluster.
|
   |

 
|
| PanelBilly |
Dec 8 2013, 04:25 PM
Post
#22
|
|
914 Guru Group: Members Posts: 5,971 Joined: 23-July 06 From: Kent, Wa Member No.: 6,488 Region Association: Pacific Northwest |
I'd mount the doors and see if the body lines up before bracing. Don't rely on anything being right.
|
|
|
|
| scotty b |
Dec 8 2013, 04:53 PM
Post
#23
|
|
rust free you say ? Group: Members Posts: 16,375 Joined: 7-January 05 From: richmond, Va. Member No.: 3,419 Region Association: None |
You've got a lot of metal work ahead of you in either of those cars. Your initial car has the normal spots, but also has several abnormal spots for rust. The " donor " car is obviously quite compromised as it is folding at the door jambs.
Keep Andy's statement in mind as you progress I've never seen a car where the complete floor pan had to be replaced but the longs were solid. |
|
|
|
| Spoke |
Dec 8 2013, 07:02 PM
Post
#24
|
|
Jerry Group: Members Posts: 7,398 Joined: 29-October 04 From: Allentown, PA Member No.: 3,031 Region Association: None |
I don't have a good feeling about the donor car. There is a lot of rust seemingly everywhere. Even the engine shelf is missing the lip to hold on the sealing gaskets.
Plus the repair to the hell hole and battery tray does not look like it was done correctly. The Swiss cheese look on the longs is a hint that the longs are gone. By the time you wire wheel these areas the amount of rust will become evident. My 914 was a rust bucket but it is in much better shape than that donor. My recommendation would be to pass on this one. $250 may seem like a good price but the amount of time, work, and $$ you will put into it will dwarf the initial purchase price. Keep looking for a better car. |
|
|
|
| FourBlades |
Dec 8 2013, 08:34 PM
Post
#25
|
|
From Wreck to Rockin Group: Members Posts: 2,056 Joined: 3-December 07 From: Brevard, FL Member No.: 8,414 Region Association: South East States |
QUOTE(PanelBilly @ Dec 8 2013, 03:25 PM)  I'd mount the doors and see if the body lines up before bracing. Don't rely on anything being right. (IMG:style_emoticons/default/agree.gif) (IMG:style_emoticons/default/agree.gif) (IMG:style_emoticons/default/agree.gif) I totally agree with this idea. See if the door gaps are correct now before you do anything else. If they are way off it can be fixed, but you need to know now. These cars are so much fun to drive they are worth fixing. John |
|
|
|
| walterolin |
Dec 8 2013, 10:11 PM
Post
#26
|
|
Senior Member Group: Members Posts: 685 Joined: 30-November 11 From: Louisville, Ky Member No.: 13,838 Region Association: South East States |
|
|
|
|
| ky914 |
Dec 9 2013, 08:12 AM
Post
#27
|
|
Newbie Group: Members Posts: 28 Joined: 31-August 13 From: Lexington, KY Member No.: 16,328 Region Association: None |
Ok. I have heard enough concerns at this point. I plan to get the grinder out and look for rust on the suspension console, hell hole, the longs will be replaced if I use this chassis.
I will make sure all the body parts fit before doing too much more. I only have one door and it has a crease that needs to be addressed before it is mounted. I will keep my eyes out for a better candidate if one is available. I think I can get most of my money back from some of the parts off this one if it comes to that. But I haven't given up on this one yet. I appreciate the words of caution. |
|
|
|
| ky914 |
Jan 11 2018, 09:31 AM
Post
#28
|
|
Newbie Group: Members Posts: 28 Joined: 31-August 13 From: Lexington, KY Member No.: 16,328 Region Association: None |
I can't listen to any of the experts. I am determined to make this project work. Next week I am going to disassemble the donor car. I have searched and cannot find any threads that cover a complete chassis swap. I need to take my donor car down to the wiring harness as I plan on reusing the wiring harness. From those experienced on this thread, what is the order for disassembly? Here is what I am thinking:
remove interior remove trunk / engine lids remove bumpers remove doors remove fluids remove engine / trans remove items from front trunk near windshield (gas tank and air handling etc...) remove wiring harness remove rubber seals and glass remove remaining bits and pieces I would like a decent order to enable me to be efficient. I have a week dedicated and a helper that is an avid air cooled VW enthusiast. Do you think this is enough time? Thanks for your opinions. |
|
|
|
| ky914 |
Jan 15 2018, 08:09 PM
Post
#29
|
|
Newbie Group: Members Posts: 28 Joined: 31-August 13 From: Lexington, KY Member No.: 16,328 Region Association: None |
As a way to document my process, I started removing parts today with another person. I was able to complete the following on our first day.
1. Seats, 2. Center Console 3. Backpad and firewall 4. Carpet 5. Exhaust 6. Bumpers (front and back) 7. Windshield Chrome Trim 8. Rear trunk targa clip holders 9. Speaker mounts 10. Tail Lights 11. Seat Belts 12. Rear Trunk Rubber Trim 13. Rocker Covers 14. Aluminum sill covers 15. Trunk Lids 16. Headlights 17. Side Markers and front blinkers. So far about 8 hours work for 2 people. Nothing has been too challenging so far except removing the seat belts. The longs were so rusted out that the metal was fused with the bolt and was just ripping apart the long where the bolt was anchored. Ended up cutting out the bolt from the long where the metal wouldn't just pull out. Trying to figure out how to revove the headlight assembly was a bit of a puzzle also, but not difficult. |
|
|
|
| ky914 |
Jan 17 2018, 06:58 AM
Post
#30
|
|
Newbie Group: Members Posts: 28 Joined: 31-August 13 From: Lexington, KY Member No.: 16,328 Region Association: None |
Day 2 and The following was done.
1. Headlight motors 2. Fog Lights 3. Horns 4. Pull light wiring harness in front trunk 5. Loosen tension on rear trunk torsion bars 6. Windshield 7. Targa trim and sail panel mouldings 8. Rear glass 9. Gas tank 10. Air handling motor and defrost vents / tubing 11. Trunk lid We worked about 5.5 hours yesterday. Still not any real issues or major slow downs. It took awhile to figure out the headlight relays just pushed out. My fog lights were hard wired into the wiring harness with no connector that I could see, so I had to cut the wiring harness which surprised me and I didn't want to do it, but had to keeo moving forward. Got out the windshield without breaking it. Unfortunately, the main targa top seal wasn't so lucky. |
|
|
|
| VaccaRabite |
Jan 17 2018, 09:20 AM
Post
#31
|
|
En Garde! Group: Admin Posts: 13,884 Joined: 15-December 03 From: Dallastown, PA Member No.: 1,435 Region Association: MidAtlantic Region |
Did you ever do any of the metal remediation on the new tub? has there been degradation over the past 5 years?
At least hit the soft spots with a wire wheel to see how far they go? Everything is fixable! Zach |
|
|
|
| bbrock |
Jan 17 2018, 10:33 AM
Post
#32
|
|
914 Guru Group: Members Posts: 5,269 Joined: 17-February 17 From: Montana Member No.: 20,845 Region Association: Rocky Mountains |
QUOTE(Vacca Rabite @ Jan 17 2018, 08:20 AM) Did you ever do any of the metal remediation on the new tub? has there been degradation over the past 5 years? At least hit the soft spots with a wire wheel to see how far they go? Everything is fixable! Zach I'm just seeing this thread for the first time, but (IMG:style_emoticons/default/agree.gif) I wouldn't start putting parts into the new tub until at least those longs were dealt with. But with the car already stripped down, I'd go over all the metal. It's work, and time, but like Zach said, it is fixable! And with the pittance you have invested, I think worthwhile. I hope you are taking lots of pics and bagging and tagging the parts as you disassemble the donor. And I can relate to those seatbelts. Mine were the same way. Wouldn't come out without pulling a patch of skin. |
|
|
|
| marksteinhilber |
Jan 17 2018, 02:32 PM
Post
#33
|
|
Member Group: Members Posts: 229 Joined: 18-October 12 From: Foothill Ranch, CA 92610 Member No.: 15,057 Region Association: Southern California |
QUOTE(jimkelly @ Sep 12 2013, 09:27 AM) aside from the home made rear trunk pan - the hell hole might be an issue. clearly some of the rust you are showing is non structural. this is the thread I like to scare everyone with : ) http://www.914world.com/bbs2/index.php?showtopic=16748 Swiss Cheese Alert! This is alarming. You need to fix the Longitudinal and other structure before putting on the lipstick. It's way easier now and should be done if you're keeping the car for the long haul. If you don't do it, this rust continues to eat from the inside out. Car will not re-sell at the price you would like. It should be addressed with further exploration into the longitudinals, appropriate insert repairs, and possibly the extra longitudinal overlay sold by several vendors to get more strength than original. Right now, car might have some flex when you stand on the door sill. Doors may rub when closing at the top and gaps may be closing at the top of the door near the handle. Don't expect that the hell hole was properly addressed.... |
|
|
|
| Jamie |
Jan 17 2018, 08:38 PM
Post
#34
|
|
Senior Member Group: Members Posts: 1,211 Joined: 13-October 04 From: Georgetown,KY Member No.: 2,939 Region Association: South East States |
QUOTE(ky914 @ Jan 17 2018, 04:58 AM) Day 2 and The following was done. 1. Headlight motors 2. Fog Lights 3. Horns 4. Pull light wiring harness in front trunk 5. Loosen tension on rear trunk torsion bars 6. Windshield 7. Targa trim and sail panel mouldings 8. Rear glass 9. Gas tank 10. Air handling motor and defrost vents / tubing 11. Trunk lid We worked about 5.5 hours yesterday. Still not any real issues or major slow downs. It took awhile to figure out the headlight relays just pushed out. My fog lights were hard wired into the wiring harness with no connector that I could see, so I had to cut the wiring harness which surprised me and I didn't want to do it, but had to keeo moving forward. Got out the windshield without breaking it. Unfortunately, the main targa top seal wasn't so lucky. Hey ky914, do I know you? I'm in Georgetown and we should get our heads together on this project. I'm no body work expert, but I have had experiences with 914's since I've owned one for 16 yrs. and may be of some help with your project. Contact me at JDonaldson14@aol.com (IMG:style_emoticons/default/confused24.gif) |
|
|
|
| ky914 |
Jan 20 2018, 09:22 AM
Post
#35
|
|
Newbie Group: Members Posts: 28 Joined: 31-August 13 From: Lexington, KY Member No.: 16,328 Region Association: None |
Day 3 was spent primarily removing the dash and windshield motors as well as starting to pull the wiring harness.
Day 4 was spent primarily removing the Engine. Day 5 was spent removing the wiring harness and rubber grommets, half axles and brake calipers. We also pulled the shift rod, clutch cable, heater control lines and accelerator cable from the center console. The complete job was about 40 hours work for 2 people. We had very few problems that caused a significant delay like stuck bolts or missing a necessary tool. At this point, I have a naked shell that I need to figure out what to do with. The body panels are all excellent. The rear firewall, floorpans, and Longs are shot and the hell hole is awful. But other that that it is really good. Not sure what I am going to do with the shell, but it needs to be cut up and scrapped. Open to advice on this. |
|
|
|
| mepstein |
Jan 20 2018, 09:37 AM
Post
#36
|
|
914-6 GT in waiting Group: Members Posts: 20,774 Joined: 19-September 09 From: Landenberg, PA/Wilmington, DE Member No.: 10,825 Region Association: MidAtlantic Region |
This
Attached image(s) 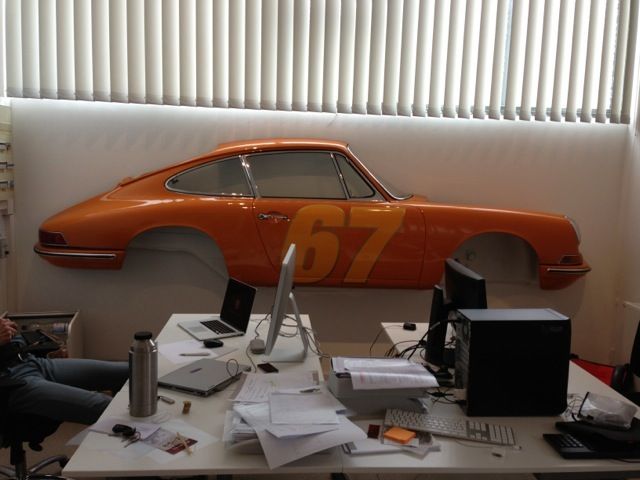
|
|
|
|
| ky914 |
Jan 20 2018, 09:41 AM
Post
#37
|
|
Newbie Group: Members Posts: 28 Joined: 31-August 13 From: Lexington, KY Member No.: 16,328 Region Association: None |
I like that idea. Wish I had more wall space.
|
|
|
|
| mepstein |
Jan 20 2018, 09:42 AM
Post
#38
|
|
914-6 GT in waiting Group: Members Posts: 20,774 Joined: 19-September 09 From: Landenberg, PA/Wilmington, DE Member No.: 10,825 Region Association: MidAtlantic Region |
"If I start cutting out everything that looks a little like swiss cheese, I will likely be replacing a huge percentage of the metal. I see rust evidence a little at the top of the windshield, in the trays under the headlights, in the fresh air vents behind the doors, etc... etc... etc... There has to be a point where it is ok to grind out the rust with a wire wheel, hit with metal ready or ospho to keep more rust from coming back and move on without cutting out chunks of metal.
I think you only learn where that line is from experience. Seems like the answer I am getting from the experienced people on this forum is you should always cut out the rust and put in new metal. If that is the case, my tub may be too far gone already and I am better off to resume looking for a better candidate." Did you ever fix the rust issues? |
|
|
|
| ky914 |
Jan 20 2018, 09:45 AM
Post
#39
|
|
Newbie Group: Members Posts: 28 Joined: 31-August 13 From: Lexington, KY Member No.: 16,328 Region Association: None |
By the way, an appliance dolly is the perfect tool to mount your engine and transmission on to move it around.
Been awhile since I tried to post photos. Can you still link to photobucket? |
|
|
|
| ky914 |
Jan 20 2018, 10:19 AM
Post
#40
|
|
Newbie Group: Members Posts: 28 Joined: 31-August 13 From: Lexington, KY Member No.: 16,328 Region Association: None |
QUOTE(mepstein @ Jan 20 2018, 10:42 AM) "If I start cutting out everything that looks a little like swiss cheese, I will likely be replacing a huge percentage of the metal. I see rust evidence a little at the top of the windshield, in the trays under the headlights, in the fresh air vents behind the doors, etc... etc... etc... There has to be a point where it is ok to grind out the rust with a wire wheel, hit with metal ready or ospho to keep more rust from coming back and move on without cutting out chunks of metal. I think you only learn where that line is from experience. Seems like the answer I am getting from the experienced people on this forum is you should always cut out the rust and put in new metal. If that is the case, my tub may be too far gone already and I am better off to resume looking for a better candidate." Did you ever fix the rust issues? I don't want to learn on this chassis. I have an experienced body guy that is familiar with the 914's having done a few of them already that happens to also be my neighbor. He will be in charge of addressing the roller. Right now I just need to eliminate one car from the fleet since I will be losing garage space in the spring. |
|
|
|
|
1 User(s) are reading this topic (1 Guests and 0 Anonymous Users)
0 Members:

|
Lo-Fi Version | Time is now: 18th June 2026 - 02:33 AM |
Invision Power Board
v9.1.4 © 2026 IPS, Inc.