|
|
|
Porsche, and the Porsche crest are registered trademarks of Dr. Ing. h.c. F. Porsche AG.
This site is not affiliated with Porsche in any way. Its only purpose is to provide an online forum for car enthusiasts. All other trademarks are property of their respective owners. |
|
|

  |

| colingreene |
 Nov 9 2022, 06:44 PM Nov 9 2022, 06:44 PM
Post
#121
|
|
Senior Member  Group: Members Posts: 755 Joined: 17-October 13 From: Southern California Member No.: 16,526 Region Association: Southern California |
Gotta start somewhere right so here we go.
one on 5 to go. 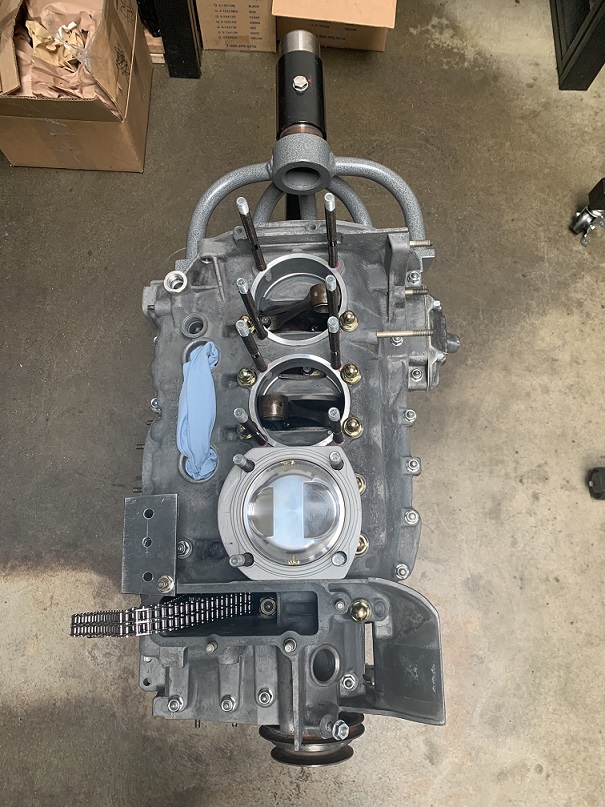 So, Do you remember having to have another set of pistons made? It would seem that I came up short on a wrist pin clip because I left one of them in the pistons I bought back to CP, Leading to this picture. 5 cyls on. 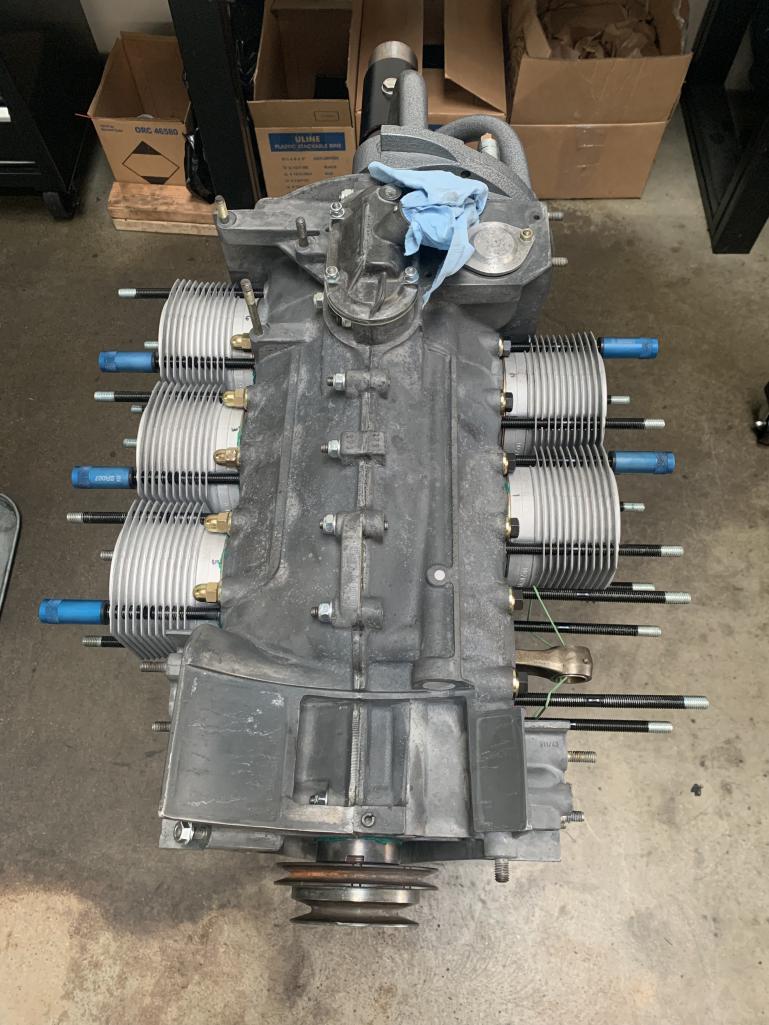 I had to run back to CP to go get another clip. Once We had all of those on i was ready to build the heads onto the cam towers. 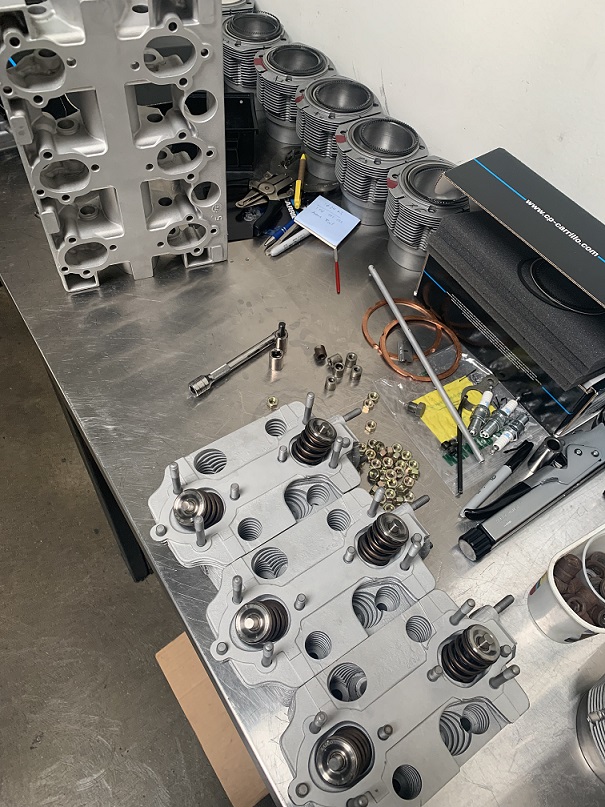 To do the cam towers i wound up pulling the tubes the plugs and everything i could get my hands on then vapor blasting and washing over and over and over and over to get it cleaned. I was really excited to see a nice looking orange squish once these were all torqued together. 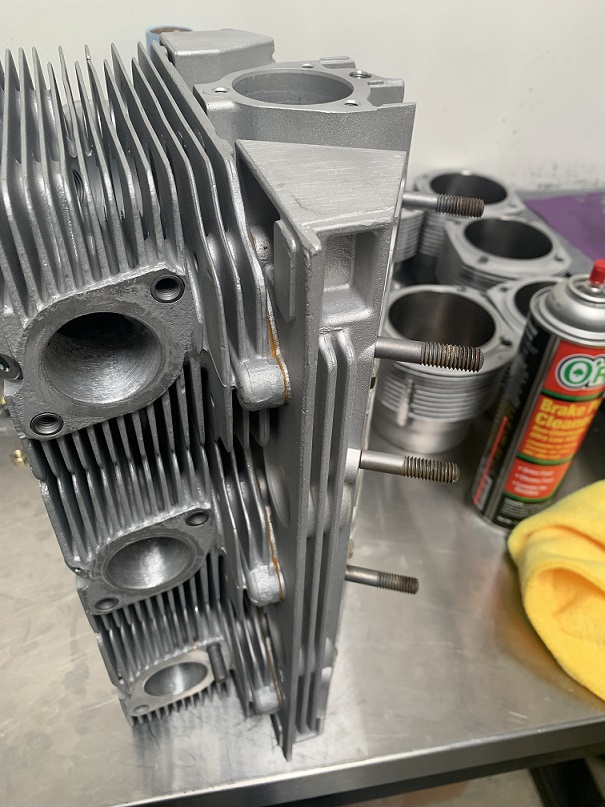 next I have to mount the heads and chain boxes. Hopefully with the tight fitting cyls it wont be a big problem getting it all to seat together. |
   |

 
|
| colingreene |
Nov 9 2022, 07:13 PM
Post
#122
|
|
Senior Member Group: Members Posts: 755 Joined: 17-October 13 From: Southern California Member No.: 16,526 Region Association: Southern California |
Fortunately for me, with a good plastic hammer and some patience i was able to get the heads and cam towers down and seated.
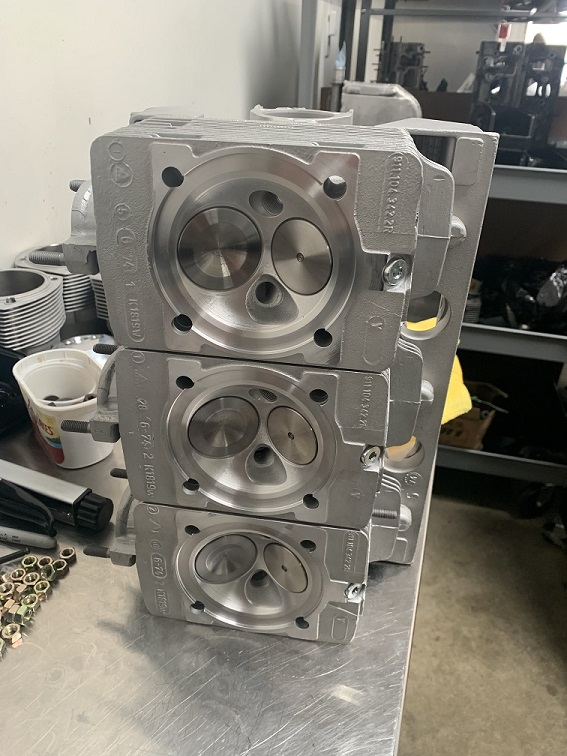 I don't think that I have a detail picture of it but when building these motors twin plugged clearance around the plug can get tight due to the cylindrical profile of the factory headnut. I ran into this on my 911 engine. On later motors that came from the factory twin plugged such as the 964 they had a different profile nut. I did buy a set of those only to find out the holes in the small motors 2.7 and down they do not fit into the cut pockets. What should I do? I found out that ARP will sell loose nuts. (insert joke there) They are crown shaped and smaller this allows really nice clearance around the spark plug to remove and install them. Going to do that on my other motor when I get the chance. If anyone needs a set of 6 let me know I have them hanging around. Ill sell them for whatever they cost me per nut when I bought 20 of them. 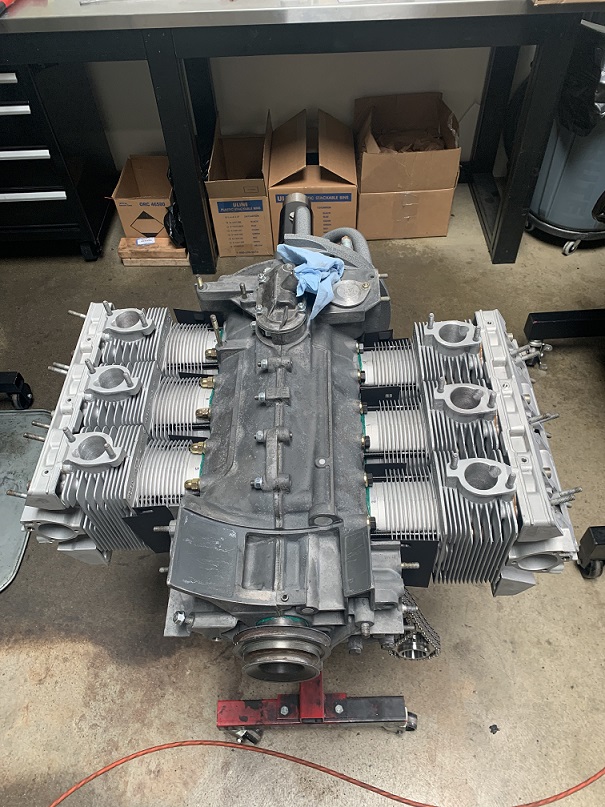 Next was to attach the chain boxes, note the routing of the chains around the post in the boxes. added the chain ramps and hoped for the best. However once I did that I realized I forgot to put the plug into the end of the cam housing Off came the chain housing to re install the plug and seal it up with some 574. Next up get the cams ready and cleaned up. For this build I went with some Dougherty DC60s. Hopefully I wont hate it. I have found limited information that talks about how these idle and run guess we will find out. 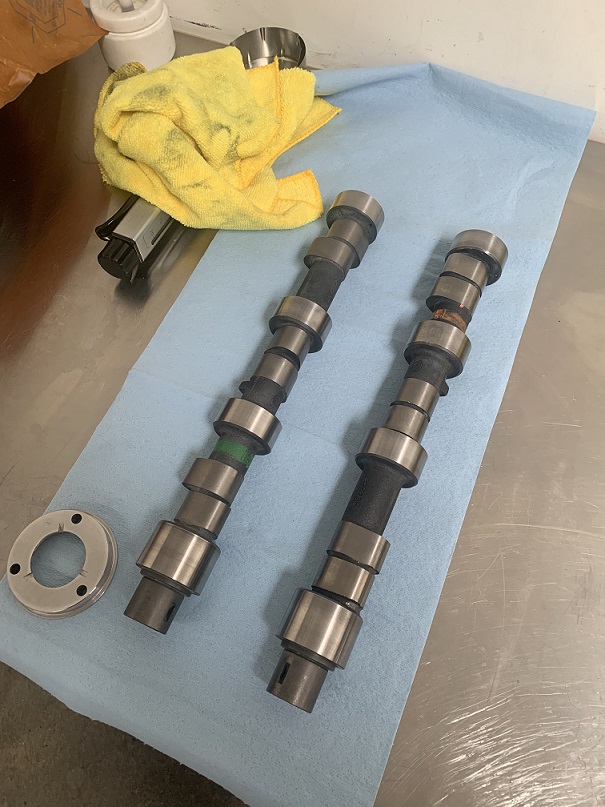 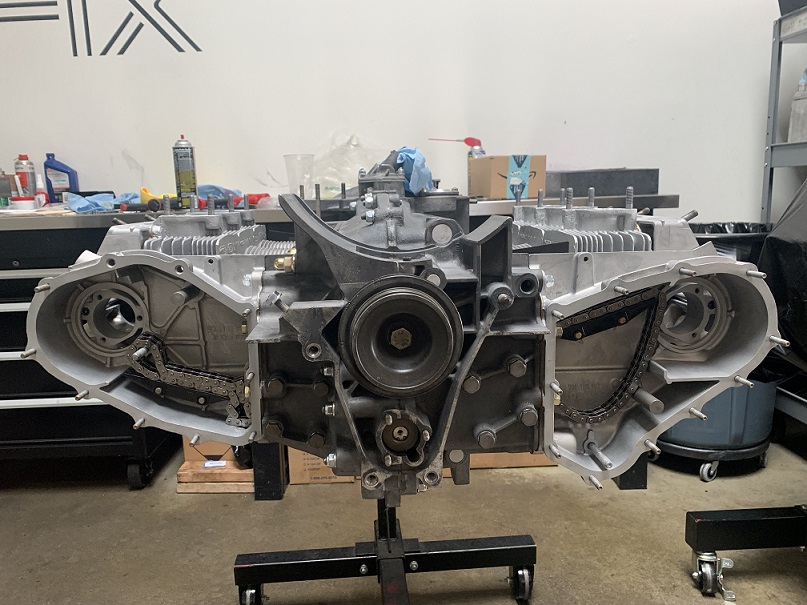 Next up is the important process of shimming the cam end play. If you go back and look before the case is closed up you will see that the chain runs on either side of the main shaft gear. The goal here is to get the measurements equal in order to not have any side load on the chain gears. When i originally disassembled this motor i could tell someone did not take the time and care to do this and the sprockets showed signs of wear due to being misaligned. Attached thumbnail(s) 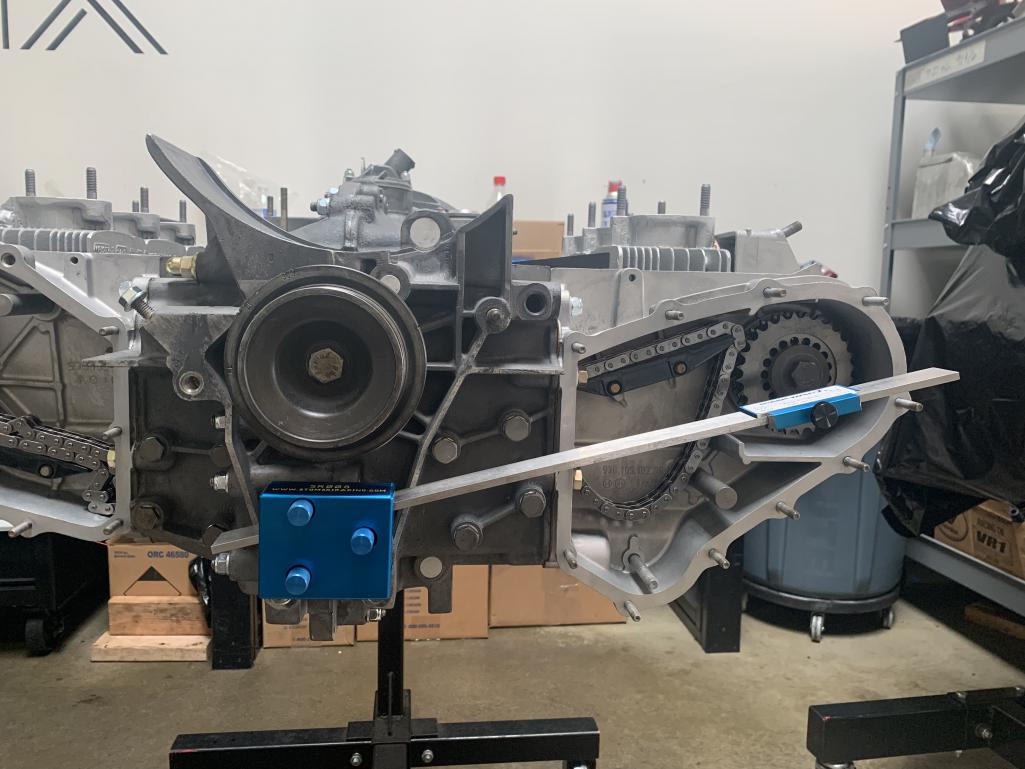
|
|
|
|
| colingreene |
Nov 9 2022, 10:52 PM
Post
#123
|
|
Senior Member Group: Members Posts: 755 Joined: 17-October 13 From: Southern California Member No.: 16,526 Region Association: Southern California |
Once the cam endplay is determined we can move on to attempting to time the cams.
Its not hard, its just tedious. Since my other motor has the "late" style cam bolts when i ordered these cams that is what I asked for. 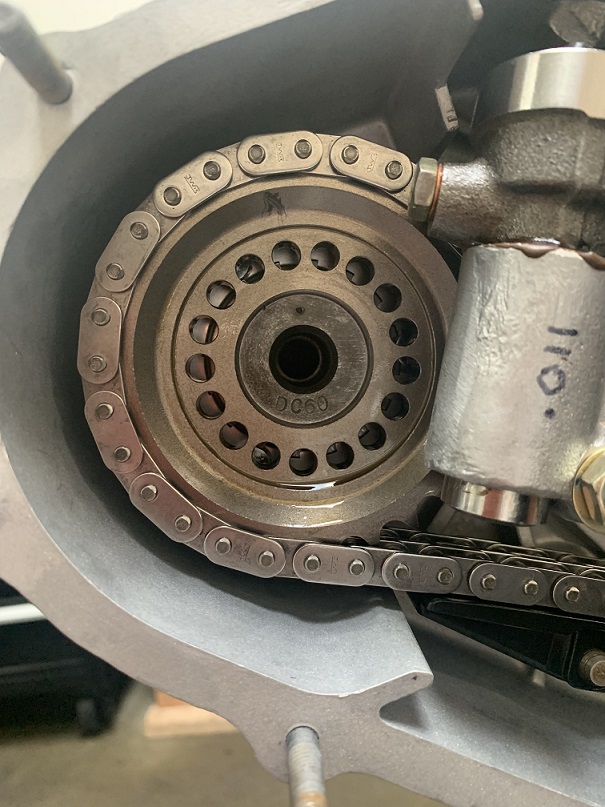 Obviously I tend to make some unconventional choices when doing this and I skipped the carrera tensioners so I had rebuilt the mechanicals and put them right in. Ultimately we wound up with 4.99mm lift on one side and 4.95 on the other. The cams say to set at 5.0 with a range up to 5.2 down to 4.7. I figure its close enough for my purpose. 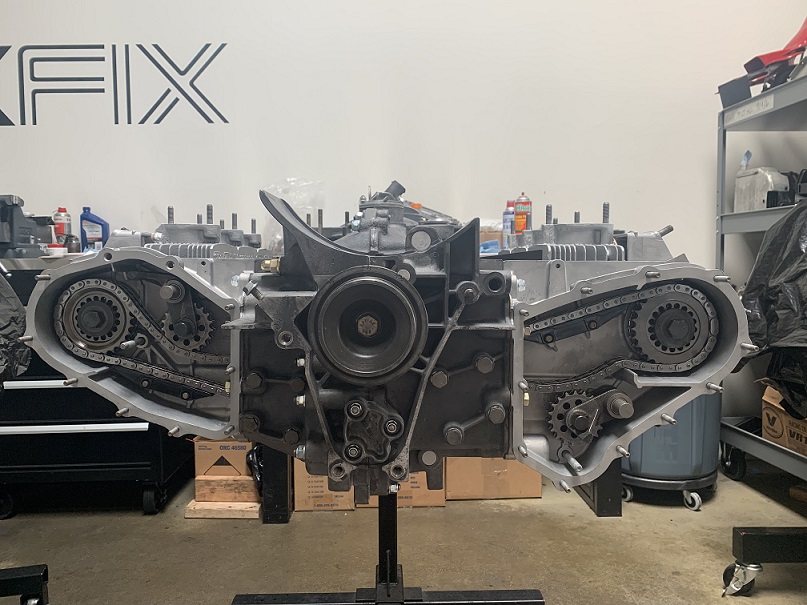  Here is a earlier picture of my motor going together along side a hot rod 2.4. As per usual that was not the end of my problems. the machine shop that did the case had some issues with installing this thread insert on the oil bypass piston, I had to get in there and pack it with paper towels and hand finish the end of this. Of course I did not notice this till the motor was mostly together. way to go me. 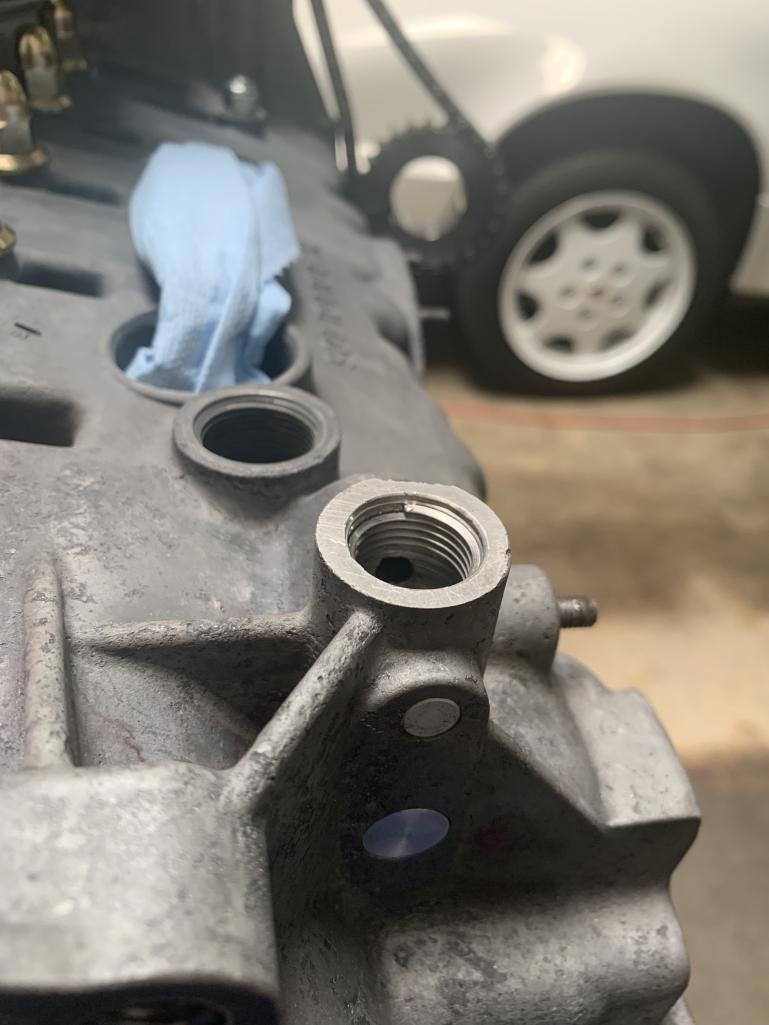 |
|
|
|
| colingreene |
Nov 28 2022, 09:47 PM
Post
#124
|
|
Senior Member Group: Members Posts: 755 Joined: 17-October 13 From: Southern California Member No.: 16,526 Region Association: Southern California |
So with a bunch of clever filing and cleaning up of the oil pressure bypass plug I was able to get the plug to thread as you can see in the below picture.
Its irritating that after spending a ton of money on machine work that I had to remediate on several points. I could just be salty or something but Its all fixed now.  With this thread I think at this point I am mostly doing it for myself so Ill post whatever I have. I did get the motor timed as mentioned and the cam boxes closed up. That was a nice feeling being able to know that serious progress had been made. We also stuck the distributor into the motor in order to be able to determine where top dead center is. 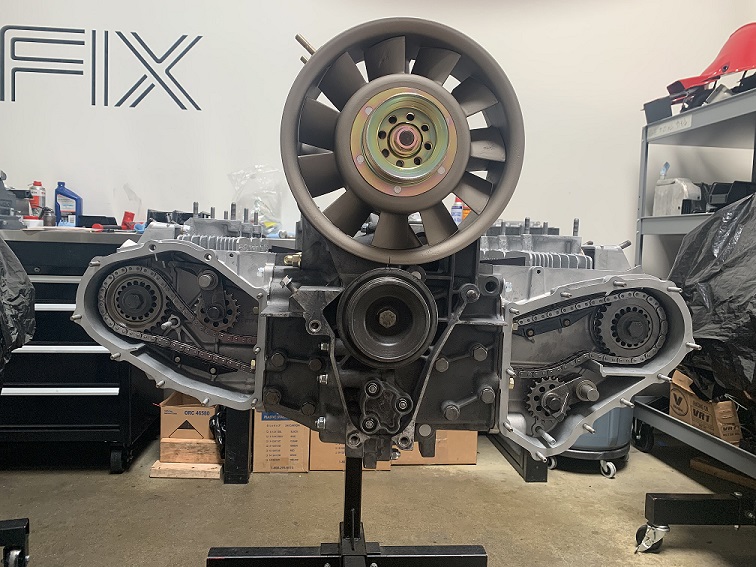 After this the only things really left to do would be to install rockers, set lash and turn it over a bunch. So that's where we went. Installed the rockers, turned it over probably 20 times and then checked lash again. I expect that Ill have to re set it again in about 1000 miles as all the parts in that realm are new and need to wear together. No big deal. I also chose to not put any form of sealant on the valve covers since I knew i would be in there pretty much immediately. 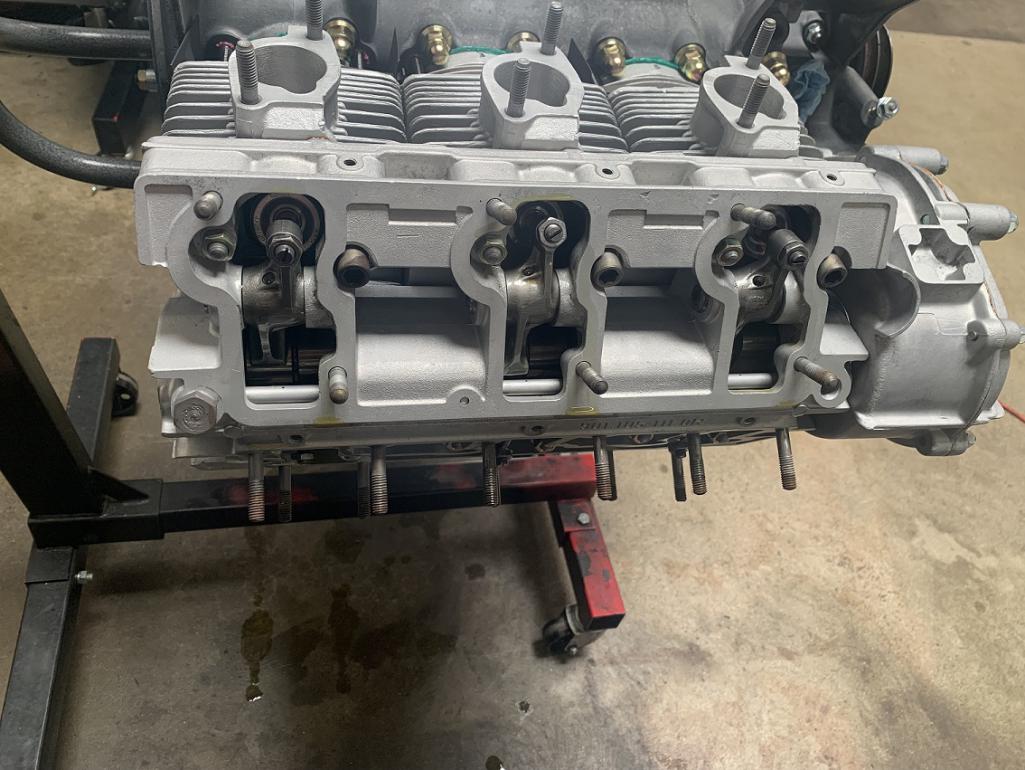 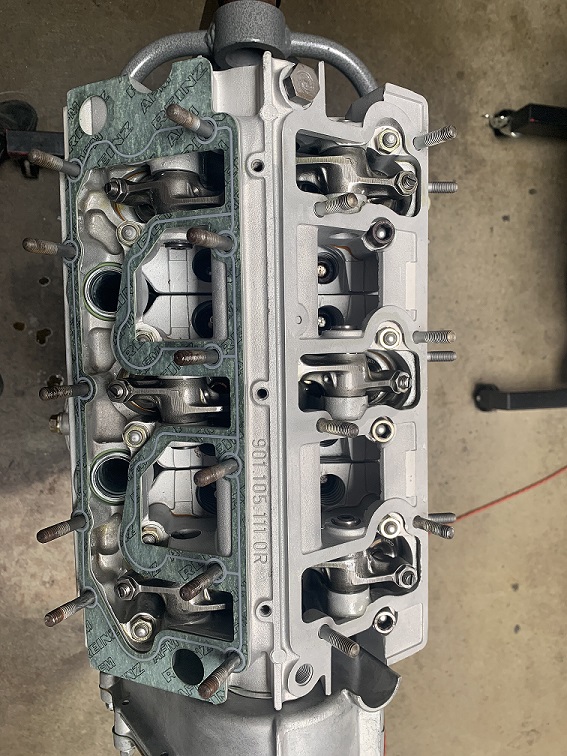 Once the motor was closed up I unfortunately had to leave again. I bought a 951 that needed some attention and my friend Jake has some 911 and also 951 projects that he needed assistance with. Oh and I was lucky enough to be able to spend a day going to South Dakota to get Glenn a new daily driver/tow vehicle. I'm always happy to help friends where I can. Plus like, its Glen, hes the best. |
|
|
|
| colingreene |
Nov 28 2022, 10:21 PM
Post
#125
|
|
Senior Member Group: Members Posts: 755 Joined: 17-October 13 From: Southern California Member No.: 16,526 Region Association: Southern California |
So here it is fully sealed up and ready to go into a car.
I think my tentative plan is to put it into my 911 and break it in. It has the fuel and cooling system to manage it and more importantly the car is closer to the motor than my 914 is. 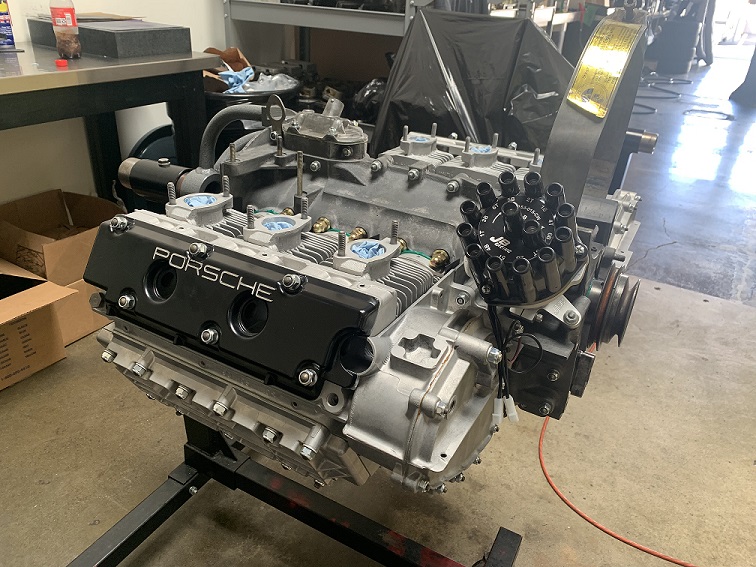  Ill have to create a new wiring harness for the 914 and buy a connector for it to the relay board. I think that ill keep it since I like the look of it. and I dont really want to re invent the wheel when it comes to that area of the car. I do however need to find a place for the twin CDI boxes and coils that will need to be mounted for the ignition. I am actually opposed to mounting them in the trunk but I am sure I will think of something. if anyone has an idea I am always open to it. and pictures are helpful. With that being said the fan shroud that came with the motor had some damage and it had a ton of holes I do not think ill need so a bunch of time repairing it was poured into it. Luckily for me my dad is talented with fiberglass and was able to repair the broken sections and get it cleaned up. Its being painted the factory green. Ultimately I may replace it with a amber shroud but its not high on the priority list. 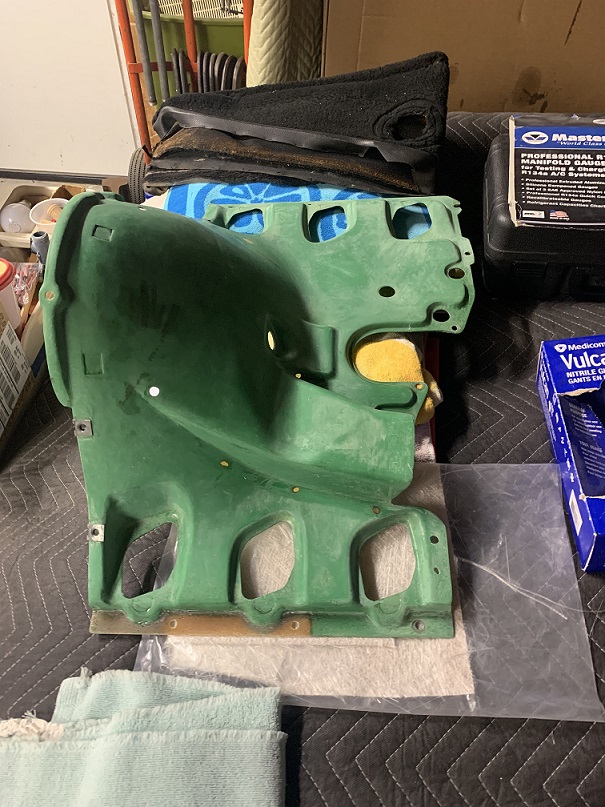 |
|
|
|
| colingreene |
Jan 17 2023, 10:07 PM
Post
#126
|
|
Senior Member Group: Members Posts: 755 Joined: 17-October 13 From: Southern California Member No.: 16,526 Region Association: Southern California |
So like the old TV shows often had what we have here is a crossover episode.
Now this next move may not win me a lot of popularity but I also have a 911. That being said this motor I am building for my 914 is in California as is my 911. I want to put it into my 914 but i don't have a front oil cooler for it yet or the fuel system needed to feed the motor. I do own the fuel system but i have done an admirable job failing to install it. The bad news is my 911 has been consuming a large quantity of oil after a rebuild. If anyone has any interest in the story all of that information is in the build thread below. I feel like I somewhat outgrew the thread title fairly quickly but I am stuck with it now. https://forums.pelicanparts.com/porsche-911...-questions.html My tentative plan was to remove my 911 motor and tear it down and put my 914 motor into the car in order to break it in, tune it and verify everything is good to go before I stuff it into the 914 chassis. 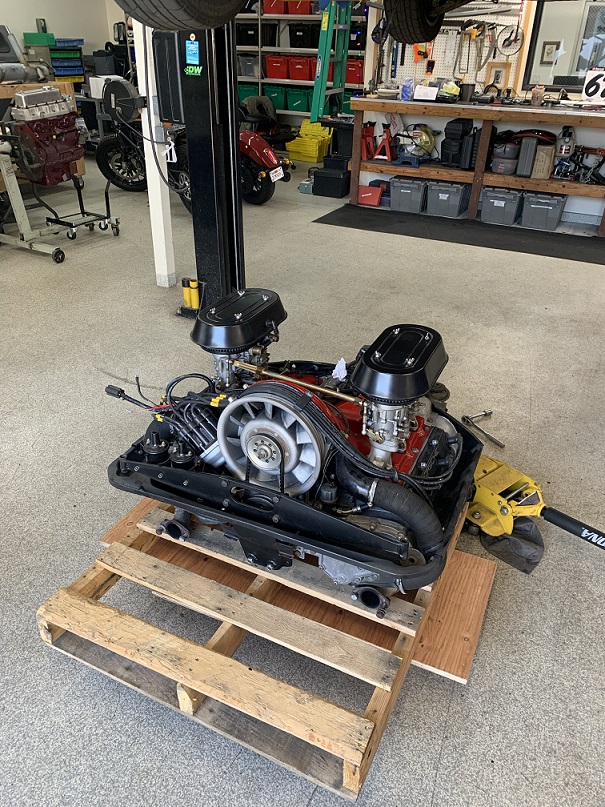 So that's what I did over this Christmas break. Clearly this motor started its life being placed into a 911 chassis so its not the end of the world that its going back into one. however I'm not sure I want it to be used to being backwards from the proper orientation.  Things to note, I did refurbish the fan but I found out quickly that not all alternators and fan rings have the same offset or depth, so i have a mismatched fan in there in order to maintain the 911 alternator with the chassis. I did not want to rewire for a temporary (we will see how long that lasts) situation. And I also decided to re use the spark plug wires but the orientation had made it somewhat messy due to the order being changed a bit. Thinking about this I probably could have solved it but I was in a hurry. The motor now has only about 160 miles on it but its better than nothing. I do have a 914-6 engine mount that welds in I bought from McMark years ago, however due to the spec of the motor I have some pause about if its the appropriate mount based on the power output of this 2.8. with this motor in the 911 its certainly healthy and pushes the car along with authority. I was considering buying a mad dog mount for its wider stance. I wanted to skip anything that was a solid mount or near solid since I do plan on driving the car frequently once its all together. I did when it was a 4 so i dont see any reason for that to change with a 6 cyl. So, what I am saying is I would not mind hearing opinions about this situation I have gotten myself into. 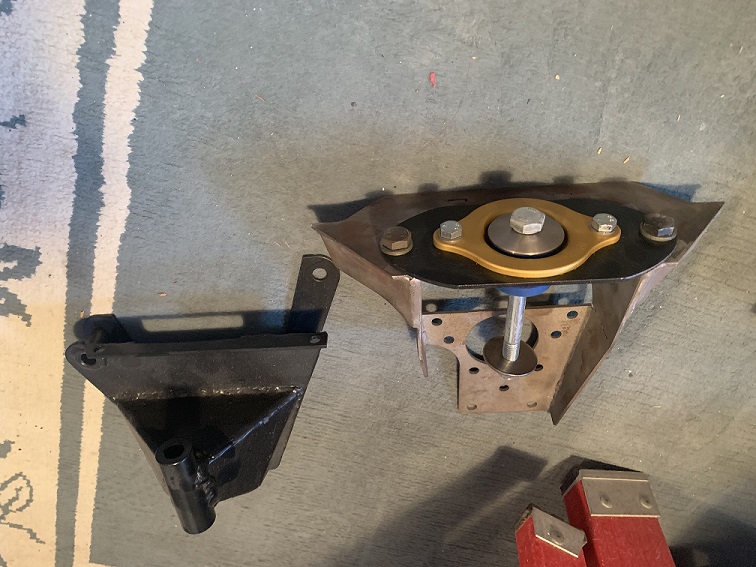 |
|
|
|
| colingreene |
Aug 9 2023, 03:06 PM
Post
#127
|
|
Senior Member Group: Members Posts: 755 Joined: 17-October 13 From: Southern California Member No.: 16,526 Region Association: Southern California |
Bummer no one has any feed back about my engine mount question.
Just popping in to update that once again my car is having ignition problems on the 4 cyl. Going to do some more trouble shooting but it eventually ate that cheap chineese 009 knock off distributor i put into it. this lead me to take the "reliable" 951 shit box I bought to work. for the favor it decided to try to idle at 2k. I'm wondering if i have a voltage regulator issue where its overcharging the battery and the extra current is destroying the points. Any one ever experience a bad voltage regulator on the high side? outside of that I don't have any ideas why its continuing to destroy ignition component's but nothing else. I did recently replace the 5 year old interstate battery and I did check the current output at idle but unfortunately i was not smart enough to also rev the motor up. however at idle it was making 13.5 volts so nothing crazy. Symptoms are exactly the same. missing bucking backfiring all the usual suspects. |
|
|
|
| DRPHIL914 |
Aug 10 2023, 10:57 AM
Post
#128
|
|
Dr. Phil Group: Members Posts: 5,941 Joined: 9-December 09 From: Kennesaw, GA Member No.: 11,106 Region Association: South East States |
Good to see you getting close to completion and installation!.
No comment on the mounts, i have no experience with the /6 , none-the-less, a great write up its fun to follow along, ive got to re assemble my original /4 motor sometime soon so following other motor build threads is educational and motivational. Phil |
|
|
|
| colingreene |
May 25 2025, 12:20 AM
Post
#129
|
|
Senior Member Group: Members Posts: 755 Joined: 17-October 13 From: Southern California Member No.: 16,526 Region Association: Southern California |
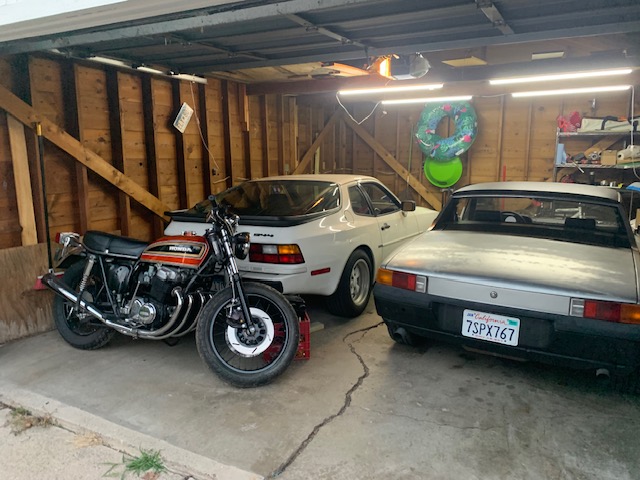
So ultimately I did buy the mad dog mount, the quality was not really up to the standard of the McMark creation.
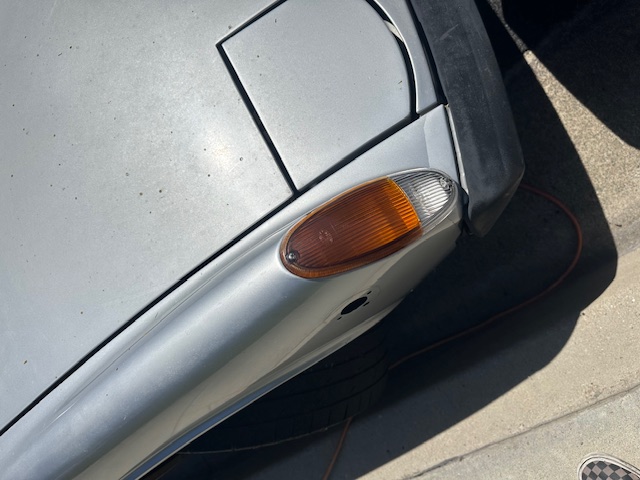
So, i may do some light structural support for it. My 2.8 is still in the 911 but that should be changing soon. I drove it directly to rennsport reunion with 160 miles on it. It ran perfectly and got decent milage even. It now needs the break in service completed. only issue i had was a loose battery terminal that caused the car to not want to start. I wound up putting yet another cheap distributor into the car and its been running okish. I did buy a set of the Euro bucket lights from Martin Baker, and decided now was the time to delete the wart side lights. something I did seemed to not agree with the car since now the blinkers quit working. They did work when i put the lights in so ill have to investigate that. I also have a dead short on one of the fuses that controls the blower fan/wipers/something else I need to investigate. the car is back home in California as I have moved back. weird to say I actually in some small way miss Minnesota and the good friends I made there. I swapped seats with CG914 and will be re covering his bug seats for him and his wife. Another set of wheels for the car was also purchased, 15x6. As much as my 16s are really nice they always looked just a bit too big for me. the tires still are in ok shape so they will remain for a while. Ill post more pictures probably tomorrow but the car otherwise remains a joy. It just needs some other minor details cleaned up, like the sail vinyl the dashboard and the wart holes welded shut. then also the 6 swap. I do have steel flares for the car but I think i will keep that on the back burner, I have enough going on right now and that's not mentioning the other car projects I have or the like 3 jobs I have right now. |
|
|
|
| 930cabman |
May 25 2025, 05:55 AM
Post
#130
|
|
Advanced Member Group: Members Posts: 4,687 Joined: 12-November 20 From: Buffalo Member No.: 24,877 Region Association: North East States |
I used the Maddog OEM style mount and was pleased with the results. My 914/6 conversion will never see the track, fun street use only
|
|
|
|
| colingreene |
May 26 2025, 10:25 PM
Post
#131
|
|
Senior Member Group: Members Posts: 755 Joined: 17-October 13 From: Southern California Member No.: 16,526 Region Association: Southern California |
Here are some pictures from the previously mentioned things.
 |
|
|
|
| colingreene |
May 26 2025, 10:26 PM
Post
#132
|
|
Senior Member Group: Members Posts: 755 Joined: 17-October 13 From: Southern California Member No.: 16,526 Region Association: Southern California |
 |
|
|
|
| colingreene |
May 26 2025, 10:27 PM
Post
#133
|
|
Senior Member Group: Members Posts: 755 Joined: 17-October 13 From: Southern California Member No.: 16,526 Region Association: Southern California |
 |
|
|
|
| colingreene |
May 26 2025, 10:29 PM
Post
#134
|
|
Senior Member Group: Members Posts: 755 Joined: 17-October 13 From: Southern California Member No.: 16,526 Region Association: Southern California |
My car is yet again showing signs of eating the cheap distributor I have put into it so I still have no idea what's doing it. I'm going to make another run at putting the mallory back into it.
Its a mallory points distributor so none of the oh the eye is bad and stuff. Could be a coil being crap also? washed the car today and started having thoughts about painting it. as you can see in the pictures the paint is not holding up since it was cheap and old. 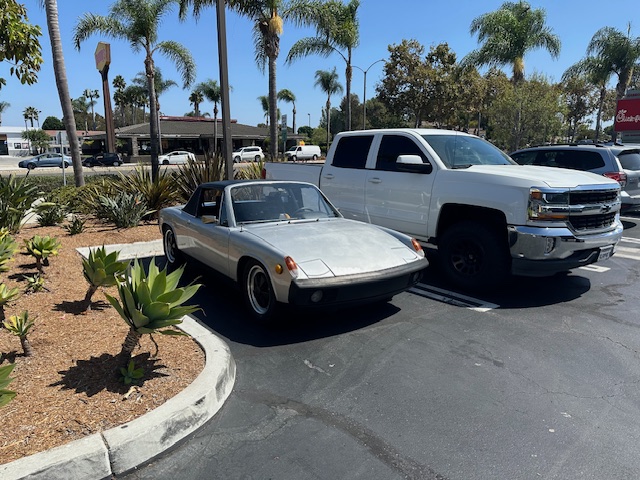 |
|
|
|
| colingreene |
Jun 15 2025, 06:13 PM
Post
#135
|
|
Senior Member Group: Members Posts: 755 Joined: 17-October 13 From: Southern California Member No.: 16,526 Region Association: Southern California |
Next up is seats needing to be re covered and the sail vinyl is showing severe sun damage so ill replace that.
I'm also considering going to a 15 inch wheel. The wheels I have on it are from 0396, and i have a sort of sentimental attachment to them but the car needs to have smaller wheels visually I also need to put a for sale ad up for my 4cyl. |
|
|
|
| 76-914 |
Jun 15 2025, 07:15 PM
Post
#136
|
|
Repeat Offender & Resident Subaru Antagonist Group: Members Posts: 13,891 Joined: 23-January 09 From: Temecula, CA Member No.: 9,964 Region Association: Southern California |
My car is yet again showing signs of eating the cheap distributor. (IMG:style_emoticons/default/confused24.gif)
|
|
|
|
| colingreene |
Jul 4 2025, 12:03 AM
Post
#137
|
|
Senior Member Group: Members Posts: 755 Joined: 17-October 13 From: Southern California Member No.: 16,526 Region Association: Southern California |
In other news, I never really got comfortable with the 16 inch wheel look on my car. while they have been fantastic and I am not in any hurry to remove them I did get a set of 15x6 I had on hand refinished.
Came out pretty nice. Attached image(s) 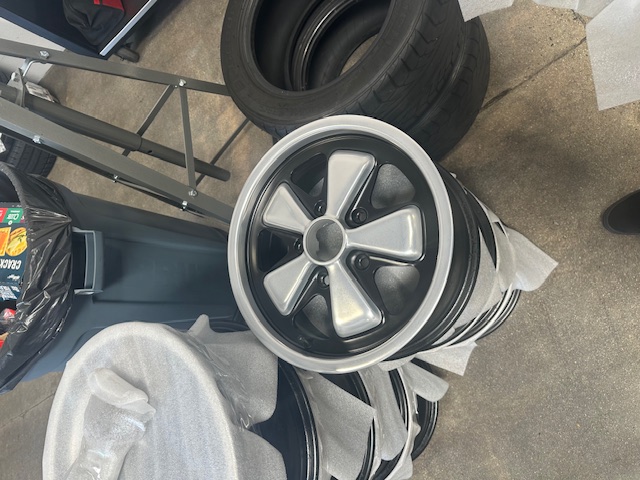
|
|
|
|
| Cairo94507 |
Jul 4 2025, 07:00 AM
Post
#138
|
|
Michael Group: Members Posts: 10,659 Joined: 1-November 08 From: Auburn, CA Member No.: 9,712 Region Association: Northern California |
Your wheels came out nice; 15" wheels look good on our cars. (IMG:style_emoticons/default/beerchug.gif)
|
 |
|
| lbubba42614 |
Jul 4 2025, 09:39 PM
Post
#139
|
|
Member Group: Members Posts: 62 Joined: 18-June 20 From: Chino Hills, Ca Member No.: 24,401 Region Association: Southern California |
|
|
|
|
| porschetub |
Jul 4 2025, 10:52 PM
Post
#140
|
|
914 Guru Group: Members Posts: 5,116 Joined: 25-July 15 From: New Zealand Member No.: 18,995 Region Association: None |
QUOTE(76-914 @ Jun 16 2025, 01:15 PM)  My car is yet again showing signs of eating the cheap distributor. (IMG:style_emoticons/default/confused24.gif) Me too , never heard of that (IMG:style_emoticons/default/confused24.gif) . |
|
|
|
|
1 User(s) are reading this topic (1 Guests and 0 Anonymous Users)
0 Members:

|
Lo-Fi Version | Time is now: 6th June 2026 - 08:28 AM |
Invision Power Board
v9.1.4 © 2026 IPS, Inc.