|
|
|
Porsche, and the Porsche crest are registered trademarks of Dr. Ing. h.c. F. Porsche AG.
This site is not affiliated with Porsche in any way. Its only purpose is to provide an online forum for car enthusiasts. All other trademarks are property of their respective owners. |
|
|

  |

| vintage914racer |
 Jan 22 2014, 05:59 PM Jan 22 2014, 05:59 PM
Post
#41
|
|
Member  Group: Members Posts: 463 Joined: 28-December 03 From: Minneapolis, MN Member No.: 1,473 |
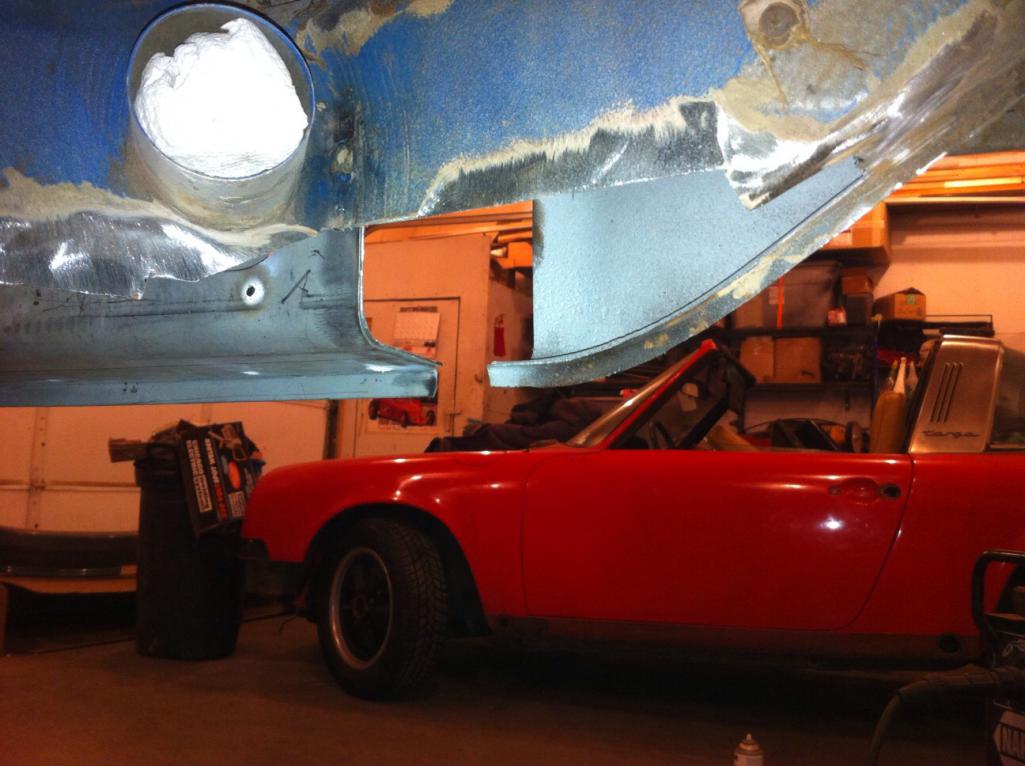
The rust removal continues. Rick is working away to get all the bad metal out in prep for new pieces.
    |
   |

 
|
| vintage914racer |
Jan 22 2014, 06:04 PM
Post
#42
|
|
Member Group: Members Posts: 463 Joined: 28-December 03 From: Minneapolis, MN Member No.: 1,473 |
While Rick has been working on the body, I've been tearing the engine apart. I will be replacing the valve cover gaskets, replacing the oil cooler seals, thermostat seals and chain housing gaskets.
When I went to adjust the valves earlier this week I found that a previous mechanic put the distributor in 180 degrees off and then adjusted the wire locations to compensate. I don't know why he didn't just flip the distributor, but I've learned this happens more than you might expect. 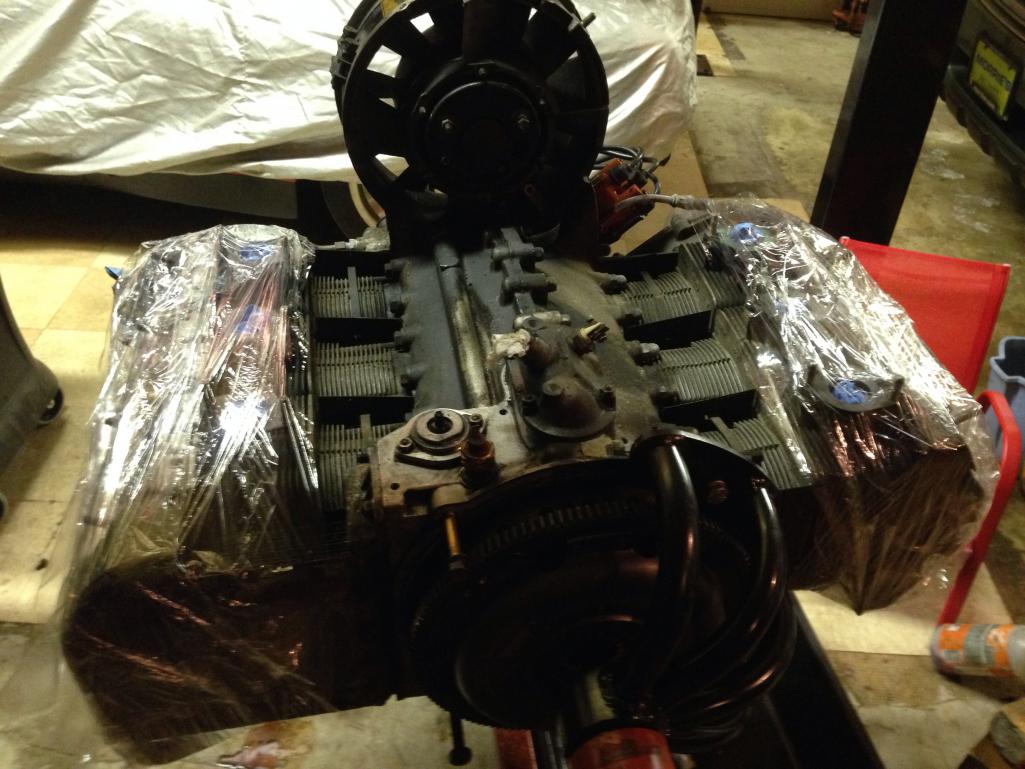 |
|
|
|
| rick 918-S |
Jan 22 2014, 07:53 PM
Post
#43
|
|
Hey nice rack! -Celette Group: Members Posts: 21,295 Joined: 30-December 02 From: Now in Superior WI Member No.: 43 Region Association: Northstar Region |
Nice work Ben. I'm just closing up the hell hole tonight. I have the inner reinforcement all rebuilt. The bottom of the rail is finished. Here's the bottom of the rail and the inside shot showing the reinforcement and ribs repaired. This is all double walled. I used the spot welder on the flange like the factory.
Attached image(s) 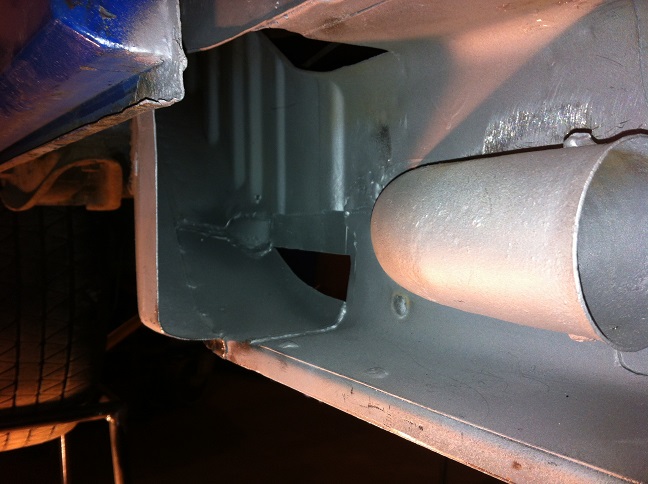 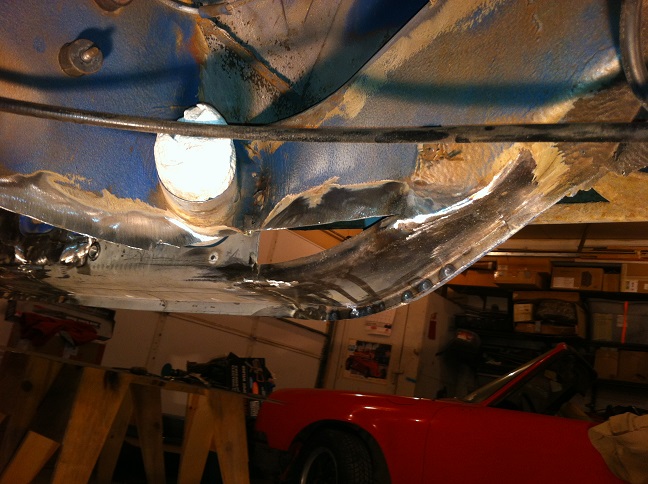 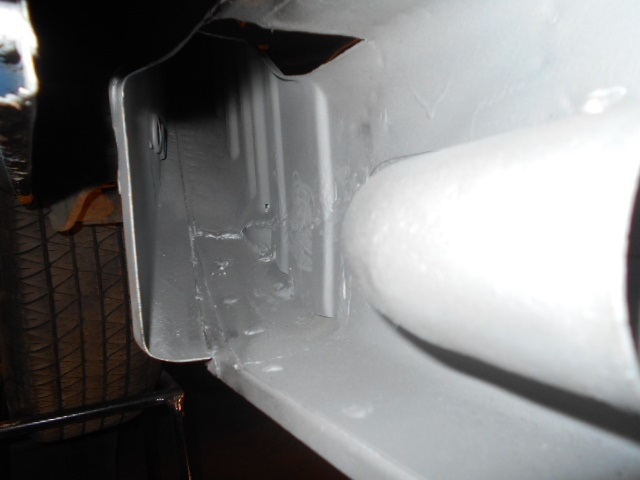
|
 |
|
| bigkensteele |
Jan 22 2014, 09:23 PM
Post
#44
|
|
Major Member Group: Members Posts: 2,200 Joined: 30-August 04 From: Cincinnati, OH Member No.: 2,660 Region Association: South East States |
Incredible work, Rick!
|
|
|
|
| rick 918-S |
Jan 22 2014, 11:43 PM
Post
#45
|
|
Hey nice rack! -Celette Group: Members Posts: 21,295 Joined: 30-December 02 From: Now in Superior WI Member No.: 43 Region Association: Northstar Region |
Top of the rail closed in. There is an inner panel under the outer skin of the hell hole that had to go in first.
Attached thumbnail(s) 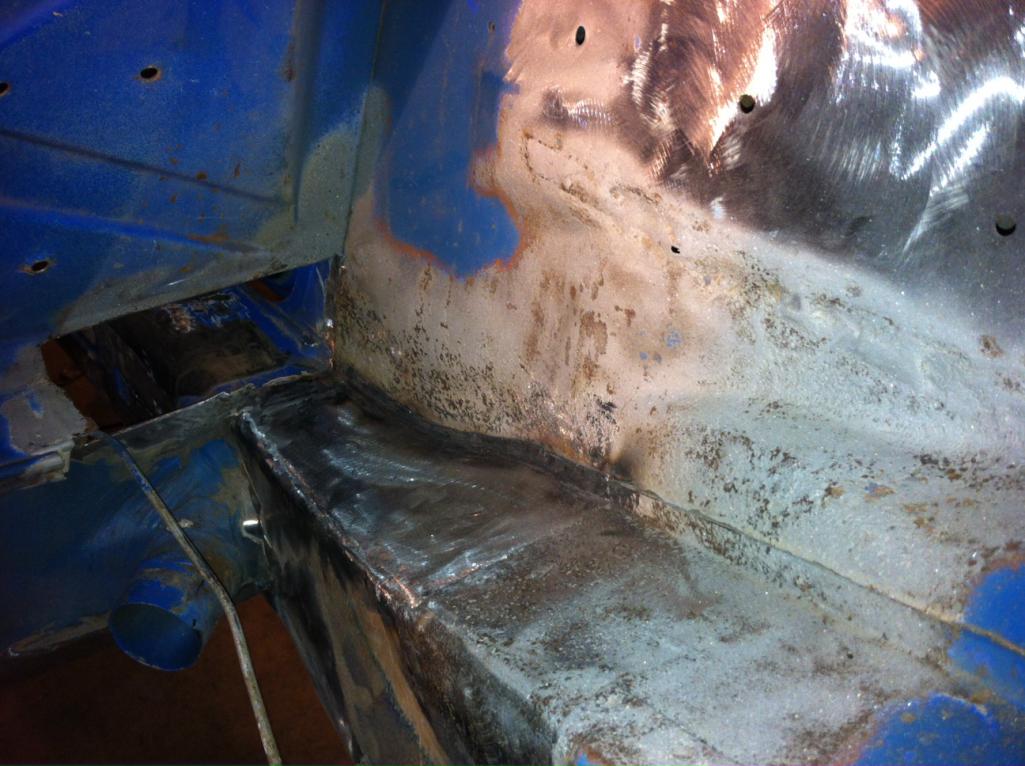
|
|
|
|
| Socalandy |
Jan 23 2014, 11:11 AM
Post
#46
|
|
Its got to be Yellow!!! Group: Members Posts: 2,432 Joined: 29-August 09 From: Orange Member No.: 10,742 Region Association: Southern California |
All the usual rust spots (IMG:style_emoticons/default/sad.gif) and another cool thread to watch. If Ricks Saucer (IMG:style_emoticons/default/alien.gif) wasn't on jackstands I could have used his skills on my project, great work (IMG:style_emoticons/default/aktion035.gif)
|
|
|
|
| doug_b_928 |
Jan 23 2014, 09:15 PM
Post
#47
|
|
Senior Member Group: Members Posts: 730 Joined: 17-January 13 From: Winnipeg Member No.: 15,382 Region Association: Canada |
Looks great, Rick! What kind of primer did you use on the inside of the long in the pics above: epoxy or self etching?
|
|
|
|
| rick 918-S |
Jan 23 2014, 09:37 PM
Post
#48
|
|
Hey nice rack! -Celette Group: Members Posts: 21,295 Joined: 30-December 02 From: Now in Superior WI Member No.: 43 Region Association: Northstar Region |
QUOTE(doug_b_928 @ Jan 23 2014, 09:15 PM)  Looks great, Rick! What kind of primer did you use on the inside of the long in the pics above: epoxy or self etching? It's Radnor Galvanizing weld through primer. I get it from the Air Gas store where I get my tanks filled. |
|
|
|
| rick 918-S |
Jan 23 2014, 09:57 PM
Post
#49
|
|
Hey nice rack! -Celette Group: Members Posts: 21,295 Joined: 30-December 02 From: Now in Superior WI Member No.: 43 Region Association: Northstar Region |
Blew up the compressor tonight! Drats! I have to order a new pump tomorrow. (IMG:style_emoticons/default/dry.gif)
I did get a bunch of stuff done since last night though. Transferred the carpet holding buttons from the rusty strip of floor pan. 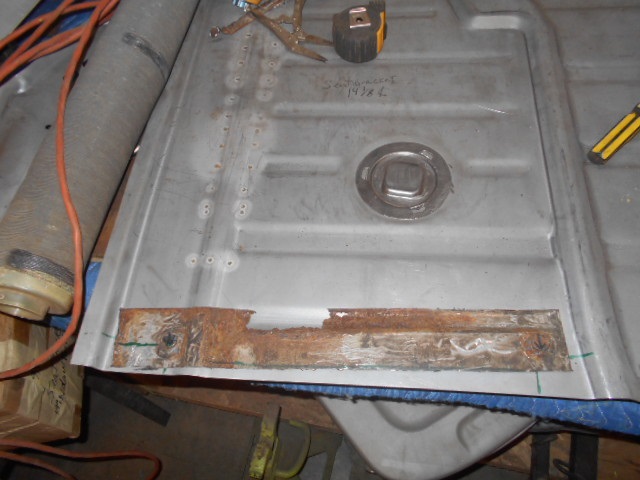 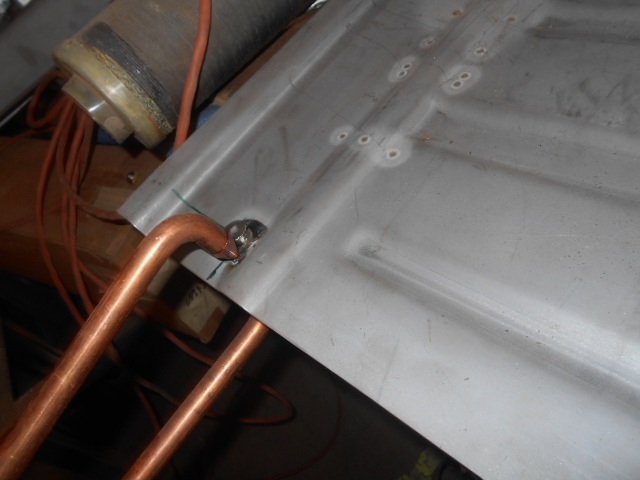 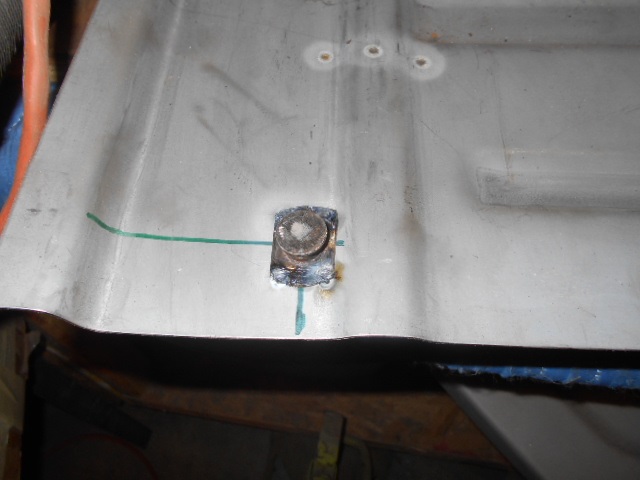 Punched the holes in the floor brace.   Welded the brace to the floor pan with my spot welder. Test fit the floor. I'm leaving the outer clam shell off until I have the floor pan welded in. That way I can use my pinch spotter on the longitudinal like the factory. I cut in the floor plug hole. Most don't bother but this is a factory 6 and I want the work to look as close as I can to the factory.   |
|
|
|
| sixnotfour |
Jan 23 2014, 10:17 PM
Post
#50
|
|
914 Wizard Group: Members Posts: 11,275 Joined: 12-September 04 Member No.: 2,744 Region Association: NineFourteenerVille |
Thank god the Mercedes is gone , you're rippin now... (IMG:style_emoticons/default/poke.gif)
|
|
|
|
| rick 918-S |
Jan 23 2014, 10:30 PM
Post
#51
|
|
Hey nice rack! -Celette Group: Members Posts: 21,295 Joined: 30-December 02 From: Now in Superior WI Member No.: 43 Region Association: Northstar Region |
QUOTE(sixnotfour @ Jan 23 2014, 10:17 PM) I got a call from the e-coat place. It's ready to be picked up. My friend is picking it up and bringing it home to Cleveland until I finish Ben's car and his father in law's 911. So it is coming back. (IMG:style_emoticons/default/smile.gif) |
|
|
|
| vintage914racer |
Jan 23 2014, 11:27 PM
Post
#52
|
|
Member Group: Members Posts: 463 Joined: 28-December 03 From: Minneapolis, MN Member No.: 1,473 |
It looks like its really coming along ow
|
|
|
|
| 1972 914 2.0 |
Jan 25 2014, 09:03 PM
Post
#53
|
|
Member Group: Members Posts: 74 Joined: 9-December 13 From: United States Member No.: 16,745 Region Association: MidAtlantic Region |
I've always wanted to see a 914 on cookie cutters, very nice indeed!! (IMG:style_emoticons/default/shades.gif)
|
|
|
|
| rick 918-S |
Jan 25 2014, 10:29 PM
Post
#54
|
|
Hey nice rack! -Celette Group: Members Posts: 21,295 Joined: 30-December 02 From: Now in Superior WI Member No.: 43 Region Association: Northstar Region |
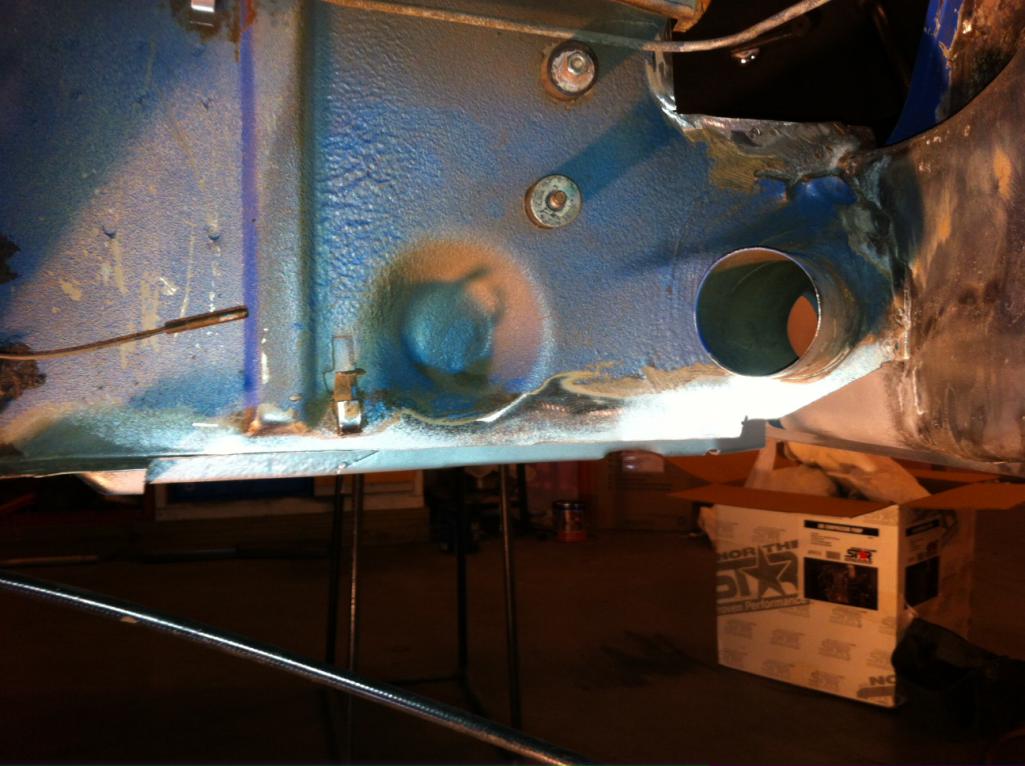
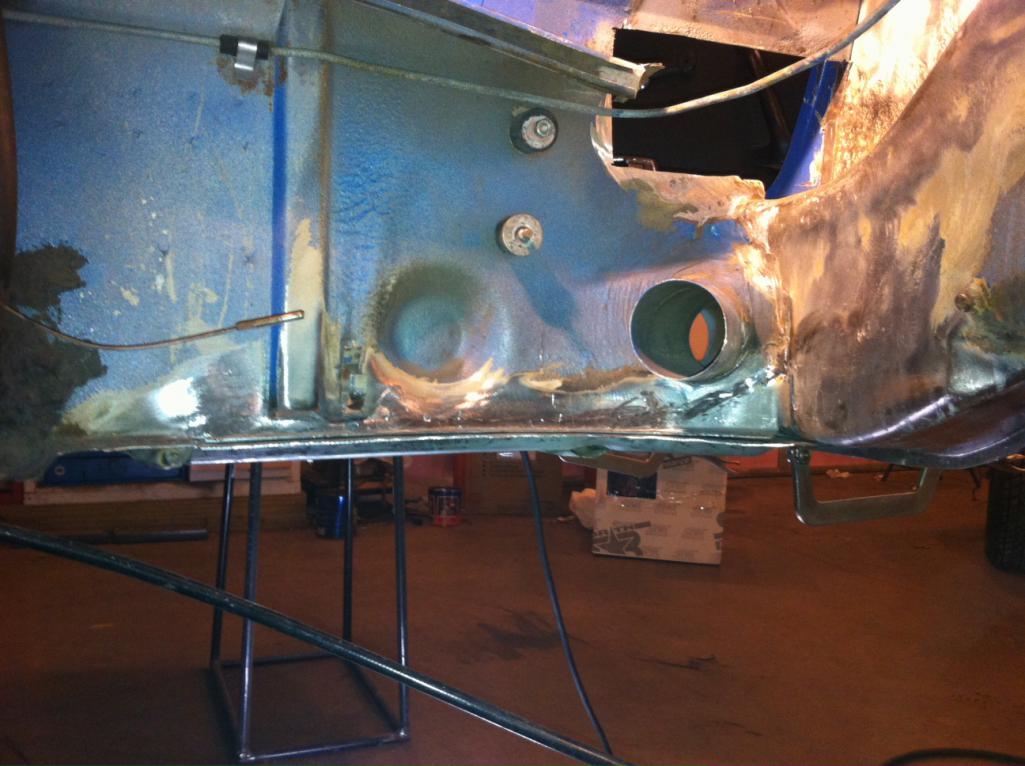
Sux with no compressor! Pump won't be here until next week. (IMG:style_emoticons/default/dry.gif)
Here's a couple photos anyway. 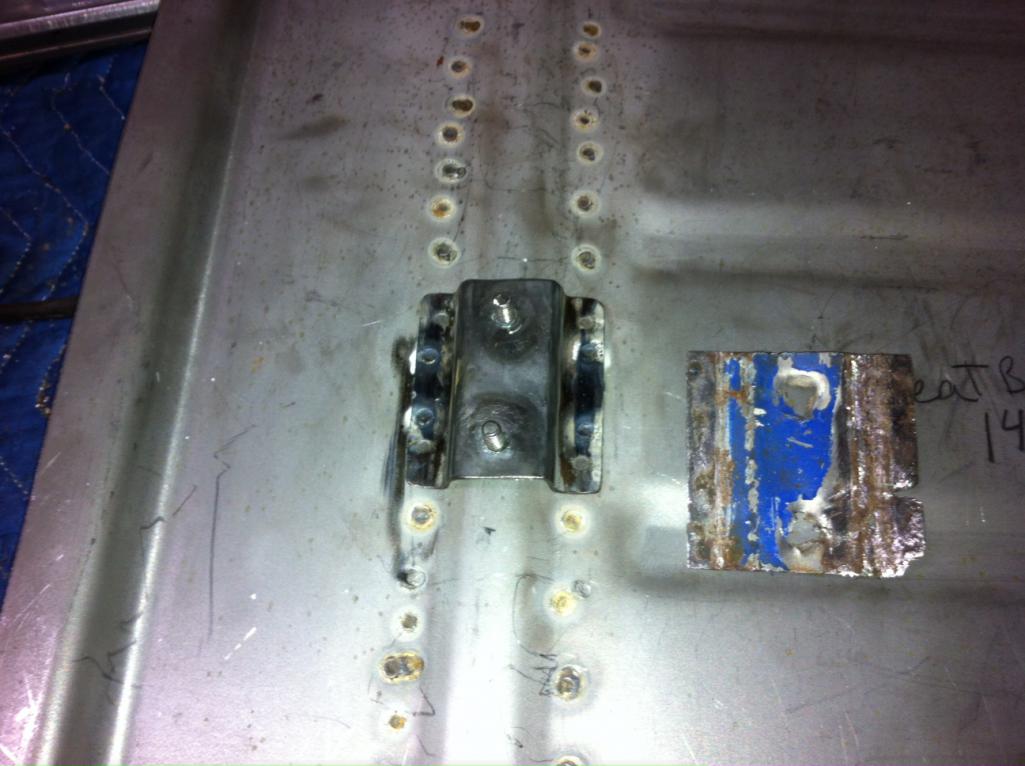 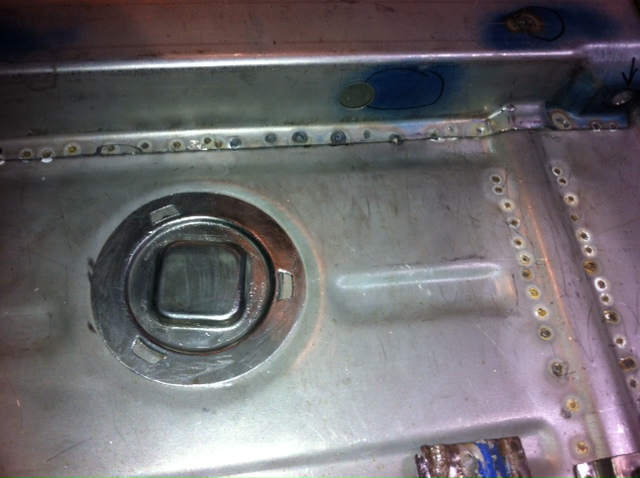 |
|
|
|
| Bartlett 914 |
Jan 28 2014, 08:42 AM
Post
#55
|
|
Advanced Member Group: Members Posts: 2,218 Joined: 30-August 05 From: South Elgin IL Member No.: 4,707 Region Association: Upper MidWest |
Hi Rick
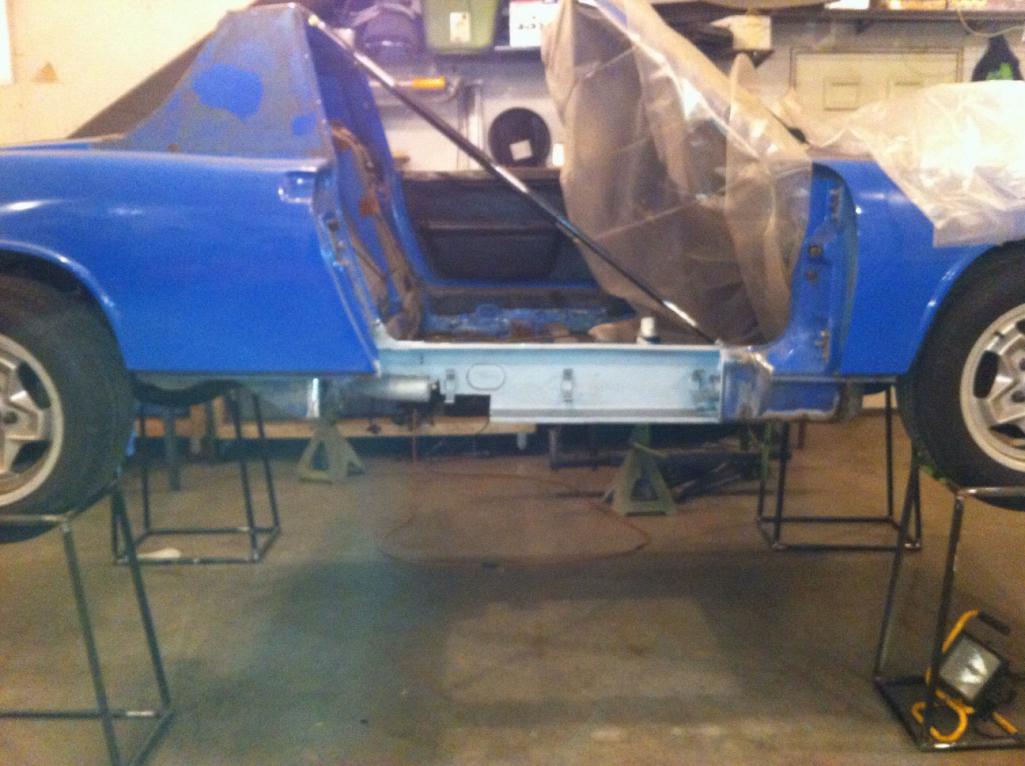
I will be working on door gap issues on a car later this Spring. I am watching your comments on correcting these problems. I notice that you have the car support high off the ground at the wheels. The door gap is braced. It looks to me that the car would want to close at the top. The brace is stopping this. Is this how you intend to weld in the long repair? It seems a little odd to support the car this way when we are so concerned about warping/ twisting when welding. I assumed it would have been best to have the car fully supported. Can you explain this please. |
|
|
|
| rick 918-S |
Jan 28 2014, 09:06 AM
Post
#56
|
|
Hey nice rack! -Celette Group: Members Posts: 21,295 Joined: 30-December 02 From: Now in Superior WI Member No.: 43 Region Association: Northstar Region |
By supporting the car under the suspension you are spreading out the weight where the chassis naturally carries it. You are adding less stress and pulling force to an already weak point.
Here's an example: take a piece of 11" X 17" poster board. Set up 4 pencils at the center 1/3 square of the poster board to support it. You will notice the poster board will sag dramatically at both ended. Move your pencil supports out 2" in all directions and you will see an dramatic decrease in the sag. If your repairing a car with no suspension you still need to try to move your support points out to the strut and shock mount points. this will decrease your odds of introducing stress in the chassis from heat and weight. Other considerations are having a chassis stretch at the long when you have removed a huge section. Any time you do this you really need to plan ahead and add a second brace. You could hold the length with a brace from the door latch bolt holes to the upper hinge. This will sort of add a triangle to the targa brace. |
|
|
|
| vintage914racer |
Jan 28 2014, 01:24 PM
Post
#57
|
|
Member Group: Members Posts: 463 Joined: 28-December 03 From: Minneapolis, MN Member No.: 1,473 |
QUOTE(rick 918-S @ Jan 28 2014, 07:06 AM) By supporting the car under the suspension you are spreading out the weight where the chassis naturally carries it. You are adding less stress and pulling force to an already weak point. Here's an example: take a piece of 11" X 17" poster board. Set up 4 pencils at the center 1/3 square of the poster board to support it. You will notice the poster board will sag dramatically at both ended. Move your pencil supports out 2" in all directions and you will see an dramatic decrease in the sag. If your repairing a car with no suspension you still need to try to move your support points out to the strut and shock mount points. this will decrease your odds of introducing stress in the chassis from heat and weight. Other considerations are having a chassis stretch at the long when you have removed a huge section. Any time you do this you really need to plan ahead and add a second brace. You could hold the length with a brace from the door latch bolt holes to the upper hinge. This will sort of add a triangle to the targa brace. Interesting. You learn something every day. |
|
|
|
| rick 918-S |
Jan 28 2014, 06:00 PM
Post
#58
|
|
Hey nice rack! -Celette Group: Members Posts: 21,295 Joined: 30-December 02 From: Now in Superior WI Member No.: 43 Region Association: Northstar Region |
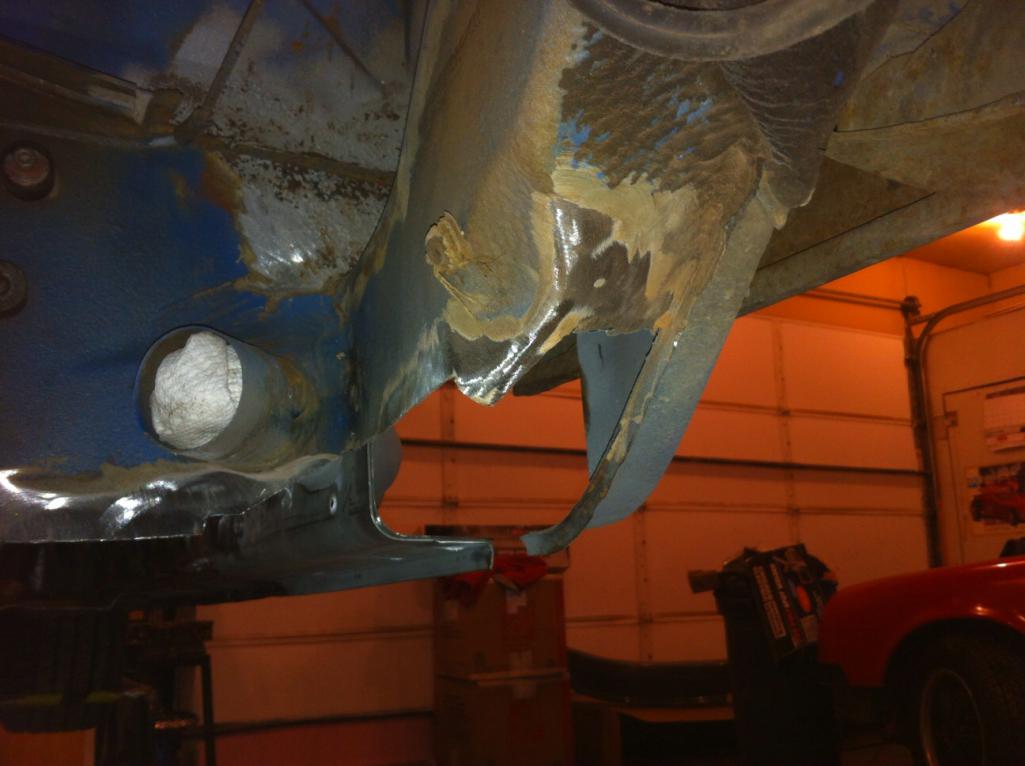
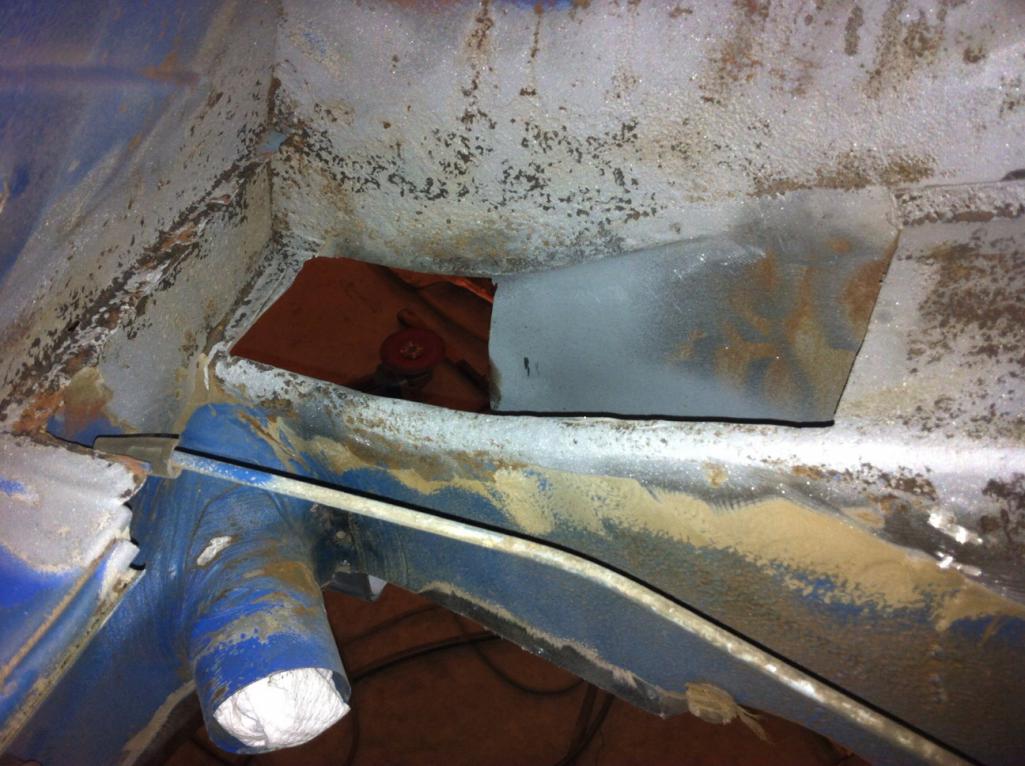
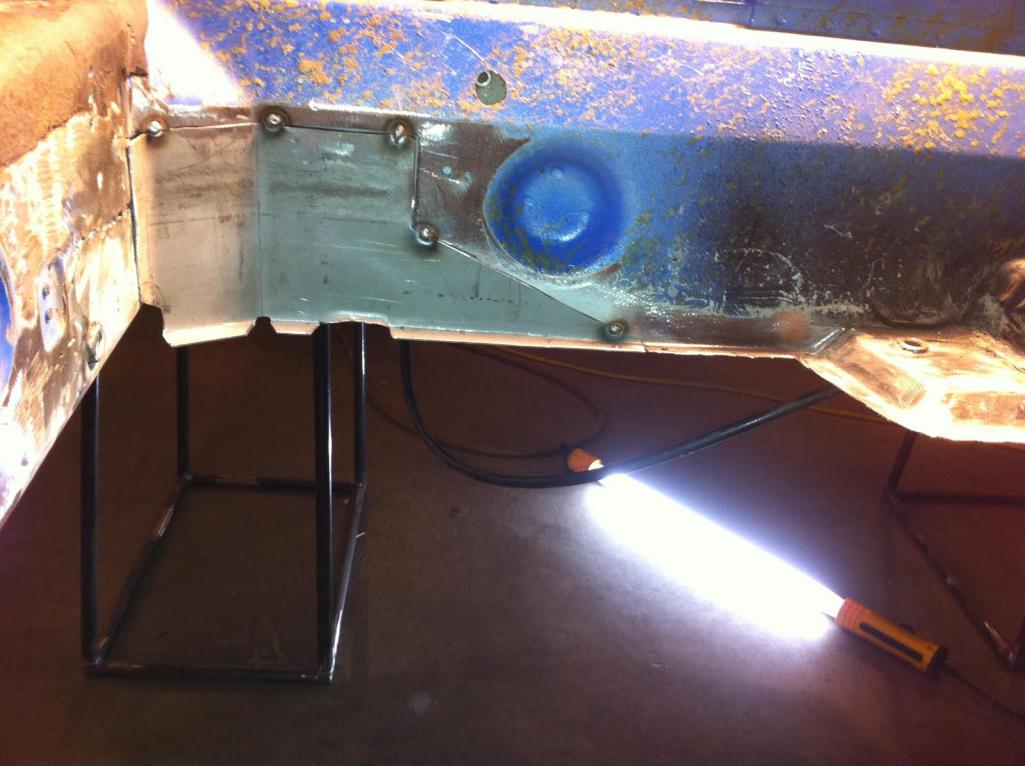
The compressor is back up and running. I installed a new pump last night. I was able to cut some sheet metal today and fab up a couple pieces I needed to close in the base of the rear bulkhead.
  |
|
|
|
| rick 918-S |
Jan 28 2014, 10:10 PM
Post
#59
|
|
Hey nice rack! -Celette Group: Members Posts: 21,295 Joined: 30-December 02 From: Now in Superior WI Member No.: 43 Region Association: Northstar Region |
Lower bulkhead engine side repaired.
  |
|
|
|
| r_towle |
Jan 28 2014, 10:19 PM
Post
#60
|
|
Custom Member Group: Members Posts: 24,705 Joined: 9-January 03 From: Taxachusetts Member No.: 124 Region Association: North East States |
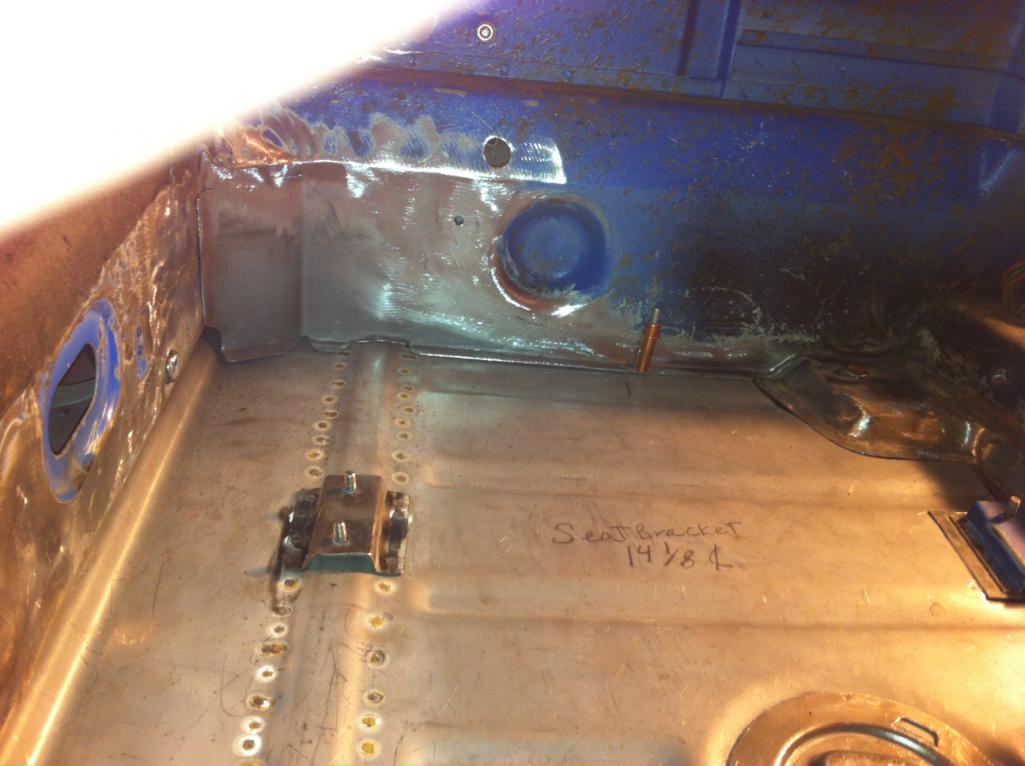
While you have the floor off, could you please take a picture of the bottom of the long, drivers side, right under the seat belt nut?
And then with the floor board in place?? I need to fix it, just like to see the assembly |
|
|
|
|
1 User(s) are reading this topic (1 Guests and 0 Anonymous Users)
0 Members:

|
Lo-Fi Version | Time is now: 3rd July 2026 - 07:57 AM |
Invision Power Board
v9.1.4 © 2026 IPS, Inc.