|
|
|
Porsche, and the Porsche crest are registered trademarks of Dr. Ing. h.c. F. Porsche AG.
This site is not affiliated with Porsche in any way. Its only purpose is to provide an online forum for car enthusiasts. All other trademarks are property of their respective owners. |
|
|

  |

| rick 918-S |
 Jan 29 2014, 03:09 PM Jan 29 2014, 03:09 PM
Post
#61
|
|
Hey nice rack! -Celette  Group: Members Posts: 21,296 Joined: 30-December 02 From: Now in Superior WI Member No.: 43 Region Association: Northstar Region |
QUOTE(r_towle @ Jan 28 2014, 10:19 PM)  While you have the floor off, could you please take a picture of the bottom of the long, drivers side, right under the seat belt nut? And then with the floor board in place?? I need to fix it, just like to see the assembly I'll see what I can do Rich. |
   |

 
|
| rick 918-S |
Jan 29 2014, 03:14 PM
Post
#62
|
|
Hey nice rack! -Celette Group: Members Posts: 21,296 Joined: 30-December 02 From: Now in Superior WI Member No.: 43 Region Association: Northstar Region |
I started welding in the floor pan on the passenger side. I drilled through the bottom of the long and plug welded the pan from the top side. Then I used my spot welder and spot welded the pan also. It looks stock with spot welds not big mig rosettes.
I left the long clam shell off until I have completed all the pan welds. I was able to use my pinch spotter that way. Made up a new bracket of the heater tube. 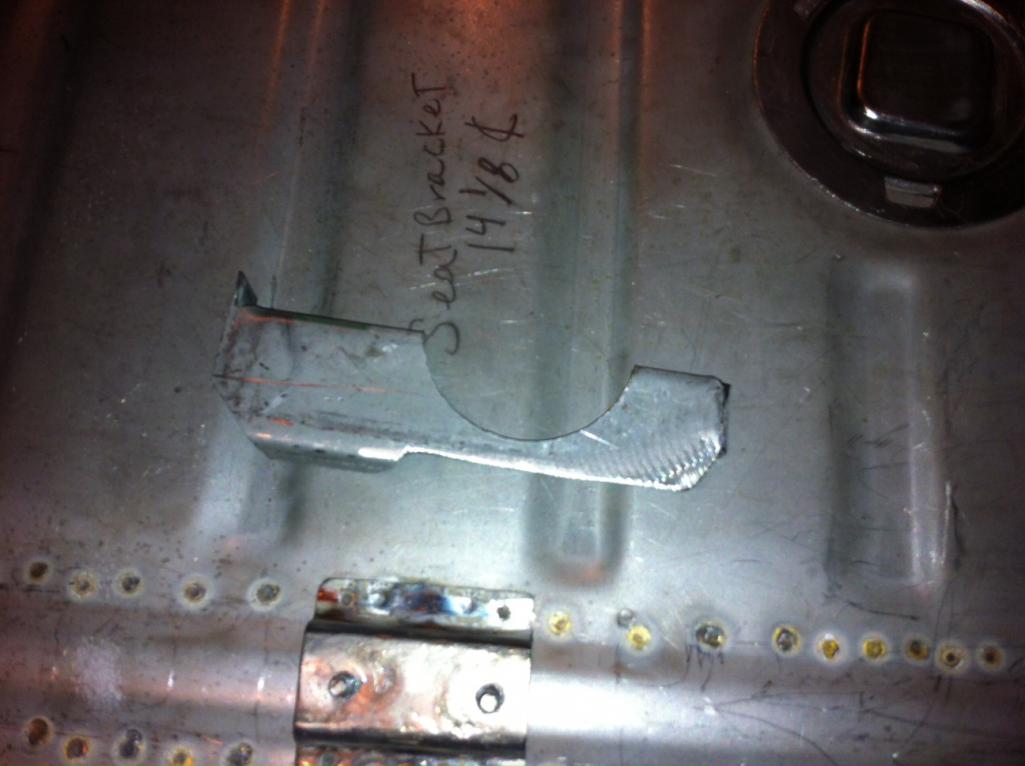 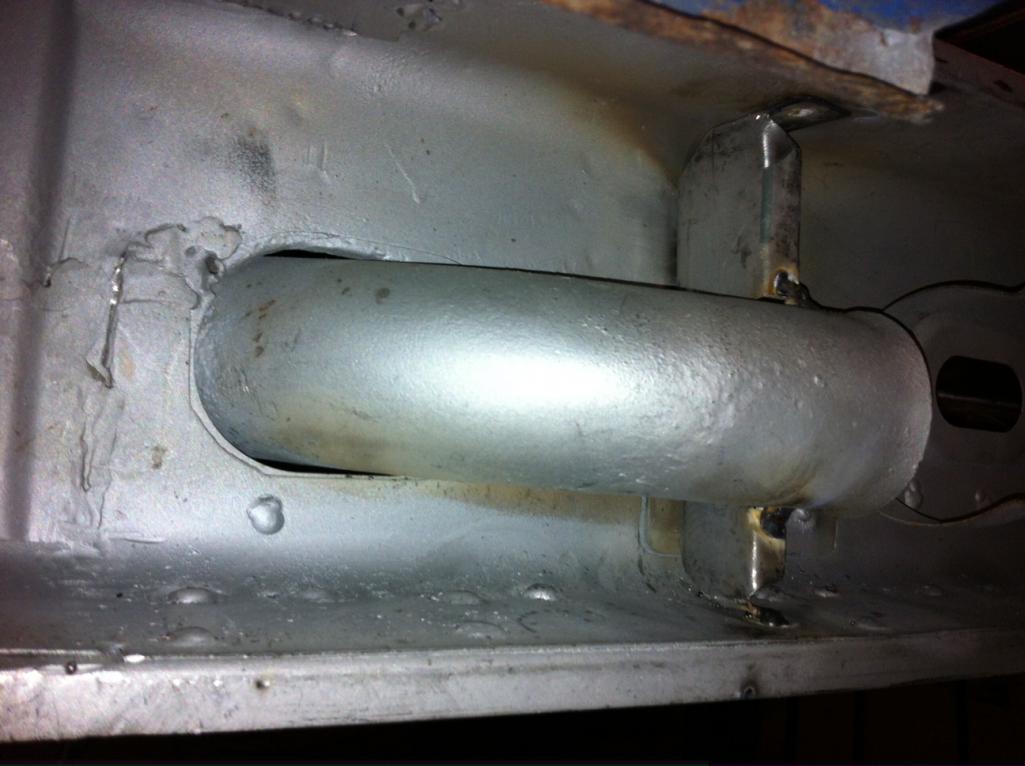 |
|
|
|
| rick 918-S |
Jan 30 2014, 05:29 PM
Post
#63
|
|
Hey nice rack! -Celette Group: Members Posts: 21,296 Joined: 30-December 02 From: Now in Superior WI Member No.: 43 Region Association: Northstar Region |
Welding in the right side floor pan.
 |
|
|
|
| rick 918-S |
Jan 31 2014, 03:28 PM
Post
#64
|
|
Hey nice rack! -Celette Group: Members Posts: 21,296 Joined: 30-December 02 From: Now in Superior WI Member No.: 43 Region Association: Northstar Region |
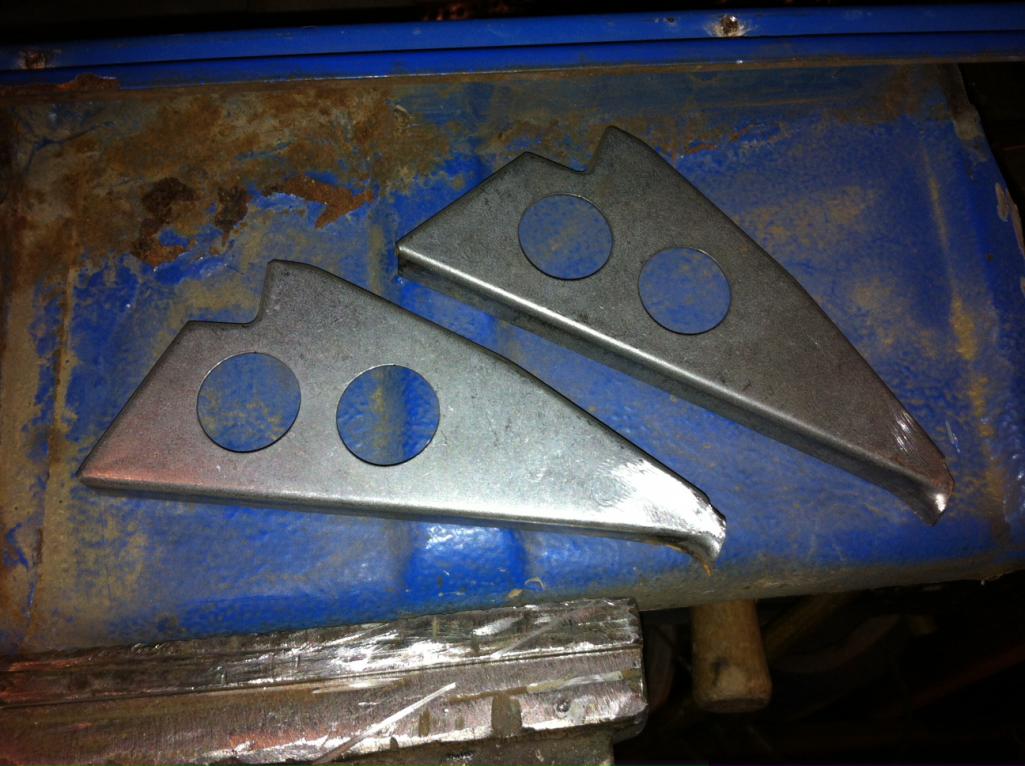
Here are a couple photos of the sill supports. They actually curve on the bottom edge. I reshaped them to match the factory parts.
  |
|
|
|
| rick 918-S |
Jan 31 2014, 07:29 PM
Post
#65
|
|
Hey nice rack! -Celette Group: Members Posts: 21,296 Joined: 30-December 02 From: Now in Superior WI Member No.: 43 Region Association: Northstar Region |
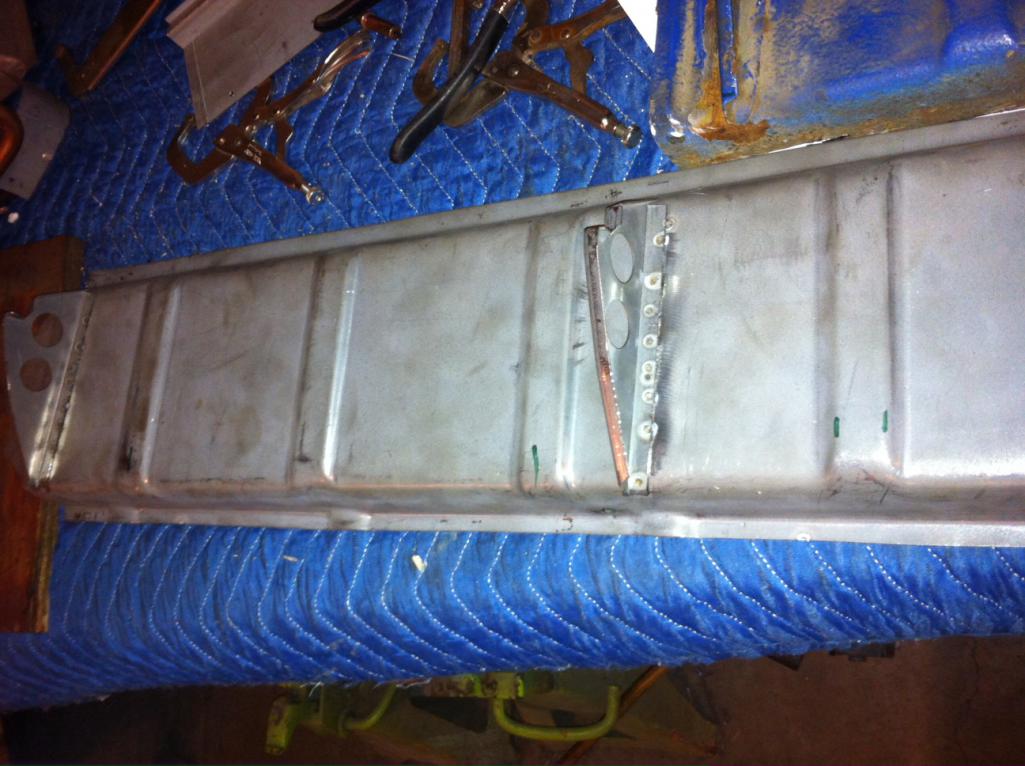
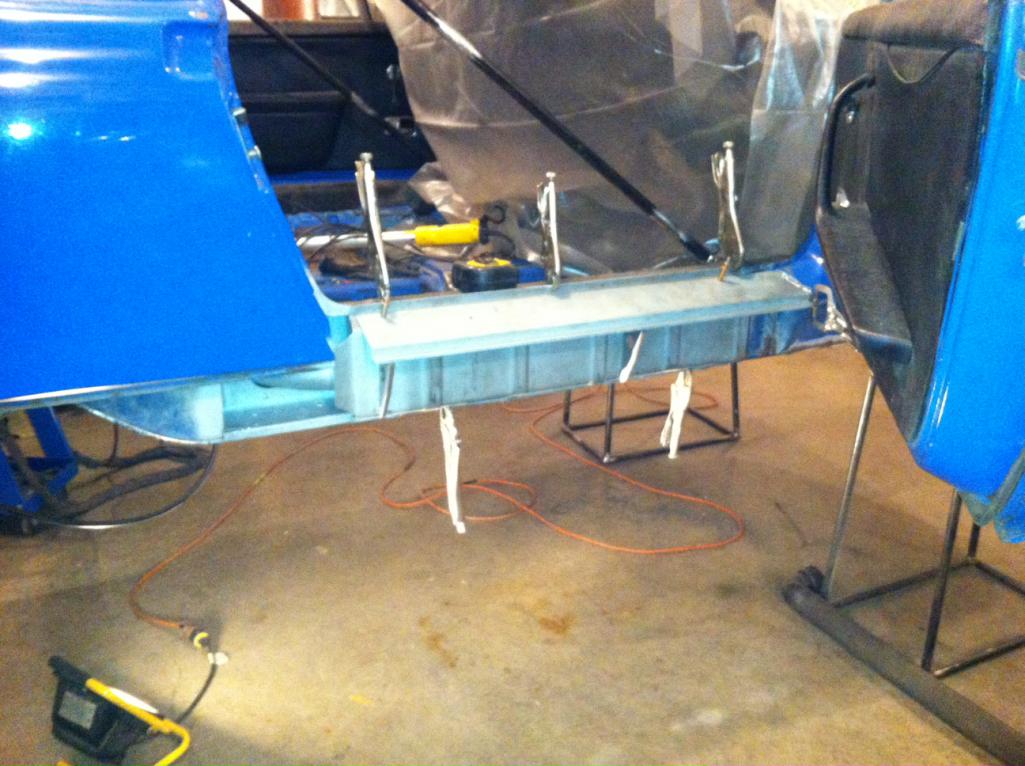
Couple more photos. I installed the sill brackets onto the outer long with my spot welder. and test fit it onto the car.
  |
|
|
|
| vintage914racer |
Feb 1 2014, 11:21 AM
Post
#66
|
|
Member Group: Members Posts: 463 Joined: 28-December 03 From: Minneapolis, MN Member No.: 1,473 |
QUOTE(rick 918-S @ Jan 31 2014, 05:29 PM) Couple more photos. I installed the sill brackets onto the outer long with my spot welder. and test fit it onto the car. Looking great, Rick! |
|
|
|
| rick 918-S |
Feb 1 2014, 11:23 PM
Post
#67
|
|
Hey nice rack! -Celette Group: Members Posts: 21,296 Joined: 30-December 02 From: Now in Superior WI Member No.: 43 Region Association: Northstar Region |
I will be closing up the right side long tomorrow and installing the right Jack post. I have a few more details to finish on the right side rear floor pan but it's close.
I still have lots to do but some stuff will move fairly quickly like the Battery stand and tray and the right side engine shelf. I have the right front floor to repair, clean the surface rust on the left floor pan and repair the left jack post. (IMG:style_emoticons/default/smash.gif) (IMG:style_emoticons/default/sawzall-smiley.gif) (IMG:style_emoticons/default/welder.gif) (IMG:style_emoticons/default/assimilate.gif) I have 18 GA. chassis stiffeners built into the inner structure where you don't see it. The chassis will look stock with spot welds but I have mig and tig welds hidden throughout the repair. This takes considerably longer to do but the end result will be worth it. |
|
|
|
| KELTY360 |
Feb 2 2014, 12:16 AM
Post
#68
|
|
914 Neferati Group: Members Posts: 5,190 Joined: 31-December 05 From: Pt. Townsend, WA Member No.: 5,344 Region Association: Pacific Northwest |
Nice work! You sure are getting your money's worth out of that spot welder. (IMG:style_emoticons/default/biggrin.gif)
|
|
|
|
| rick 918-S |
Feb 2 2014, 09:11 AM
Post
#69
|
|
Hey nice rack! -Celette Group: Members Posts: 21,296 Joined: 30-December 02 From: Now in Superior WI Member No.: 43 Region Association: Northstar Region |
QUOTE(KELTY360 @ Feb 2 2014, 12:16 AM) Nice work! You sure are getting your money's worth out of that spot welder. (IMG:style_emoticons/default/biggrin.gif) I fried two Harbor Freight 240 volt pinch spotters in the last two weeks. I had one for several years but sparks flew out of the front and it stopped working. (IMG:style_emoticons/default/unsure.gif) I purchased a new one and killed it in a week. (IMG:style_emoticons/default/confused24.gif) They have a 90 day warrantee so I just went up and exchanged it. (IMG:style_emoticons/default/biggrin.gif) It must have been defective because I had only used it for about a dozen spot welds when it failed. |
|
|
|
| r_towle |
Feb 2 2014, 09:26 AM
Post
#70
|
|
Custom Member Group: Members Posts: 24,705 Joined: 9-January 03 From: Taxachusetts Member No.: 124 Region Association: North East States |
Quickly....
The floor pan welds over (under really) the inner long? So it's just laying on the inner long in that area where you show a picture above? I know I have done this before, but I cannot see it ...... |
|
|
|
| rick 918-S |
Feb 2 2014, 10:02 AM
Post
#71
|
|
Hey nice rack! -Celette Group: Members Posts: 21,296 Joined: 30-December 02 From: Now in Superior WI Member No.: 43 Region Association: Northstar Region |
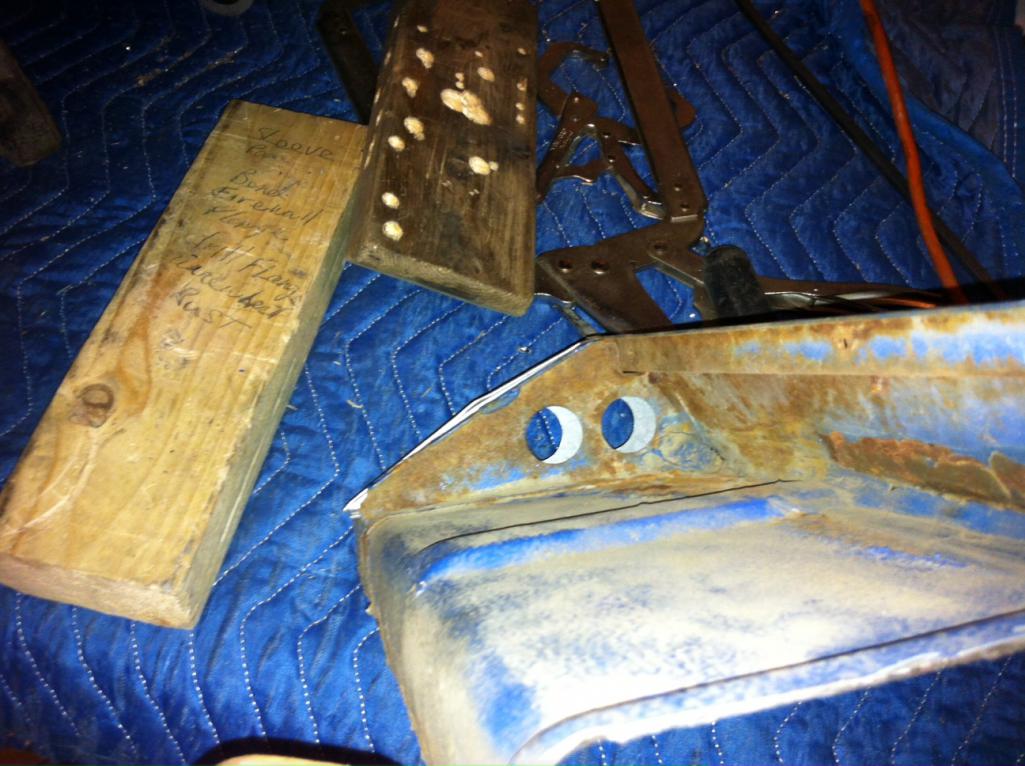
QUOTE(r_towle @ Feb 2 2014, 09:26 AM) Quickly.... The floor pan welds over (under really) the inner long? So it's just laying on the inner long in that area where you show a picture above? I know I have done this before, but I cannot see it ...... Yes Rich, The factory inner long actually has a slight recess pressed into the bottom. The Restoration design part does not. It also does not have the stamping recesses for the muffler clamps or the oval shaped cut outs. I only used the Restoration Design part as a starting place. Because of the condition of this car (not as rusty as most) I determined what I needed to actually repair. I cut the rust damaged inner long section out, I fit a section of the R.D. part then used my bead roller to add the recess to the R.D. part. When you look at the area where the pan spots to the long the repair I made now looks like the factory section I left in place. Once I had the section where the seat belt bolt is welded in I used the balance of the R.D. part as a reinforcement and plug welded it to the inside of the long. Here's what I worked on yesterday. This is a reinforcement panel and a outer rail closing panel I hand formed. 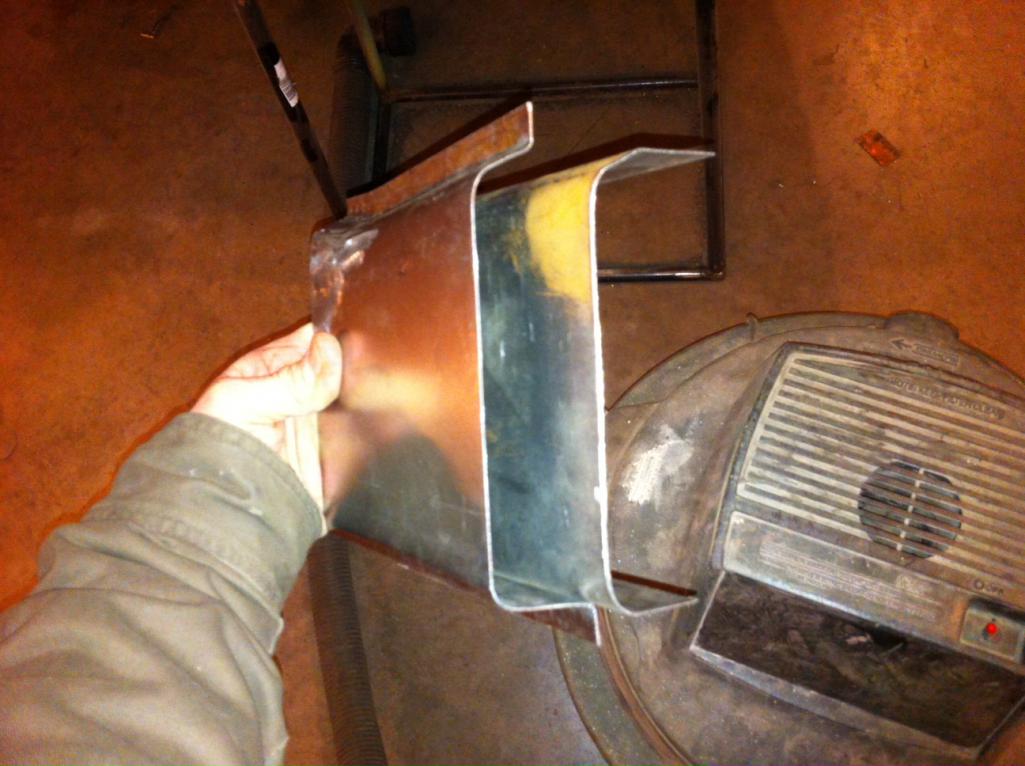 The R.D panel for the outer rail that welds in behind the jack post cover and it kicks up behind the quarter panel is huge. I did not need to replace that much of the outer long and did not see the point in purchasing a $ 300.00 plus part to cut off 8"  Here is the inner reinforcement mocked up in place. This part is slipped in behind the rail at the kick up and ends at the edge of the R.D. clam shell edge. This gives the 8" outer repair panel I made a backer behind the butt weld and adds a second layer of strength behind the jack point. 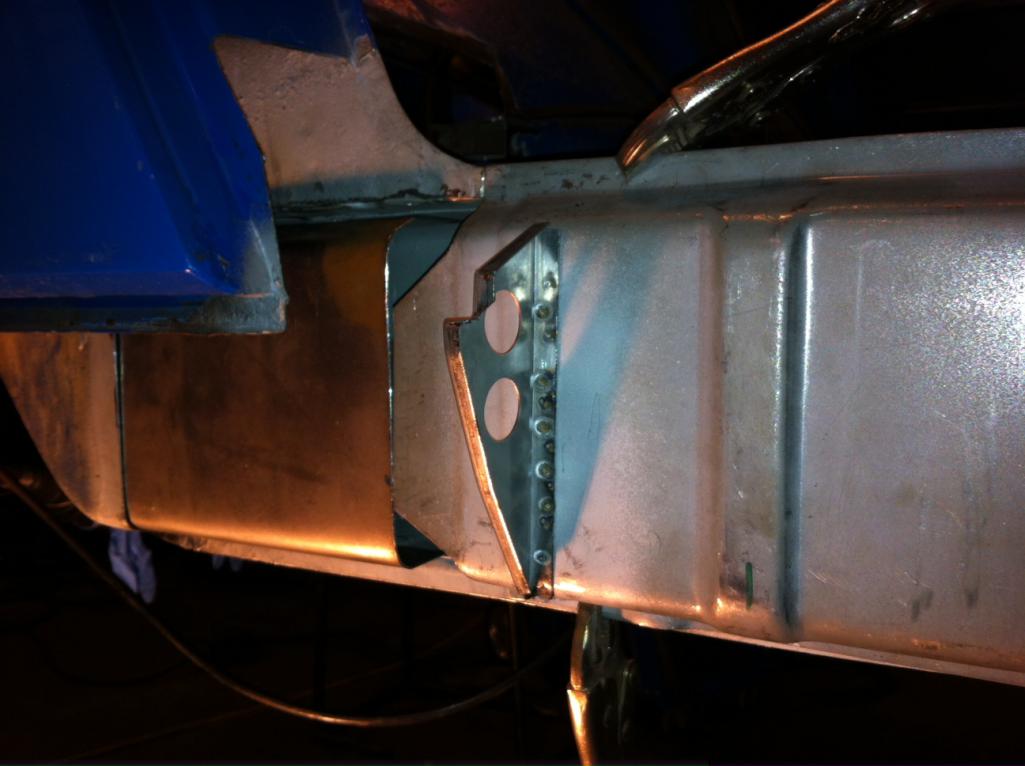 I have to repeat this on the left side. R.D does not make left side repair panels past the clamshell. BTW: I don't have a sheet metal brake. All my panels are hand formed using my vise and what ever I can figure out. |
|
|
|
| rick 918-S |
Feb 3 2014, 10:04 PM
Post
#72
|
|
Hey nice rack! -Celette Group: Members Posts: 21,296 Joined: 30-December 02 From: Now in Superior WI Member No.: 43 Region Association: Northstar Region |
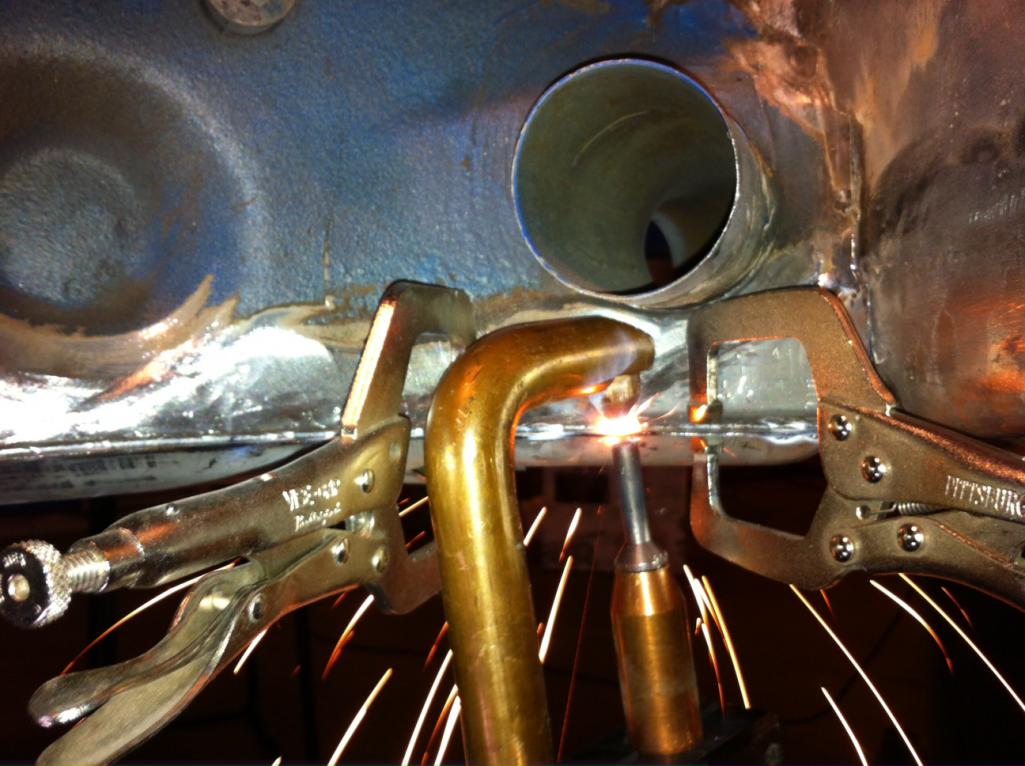
Finally closing up the right long. I sleeve all the butt seams. For the forward seam I installed the sleeve and plug welded it to the forward rail section. Everything is cleaned and sprayed with cold galvanizing.
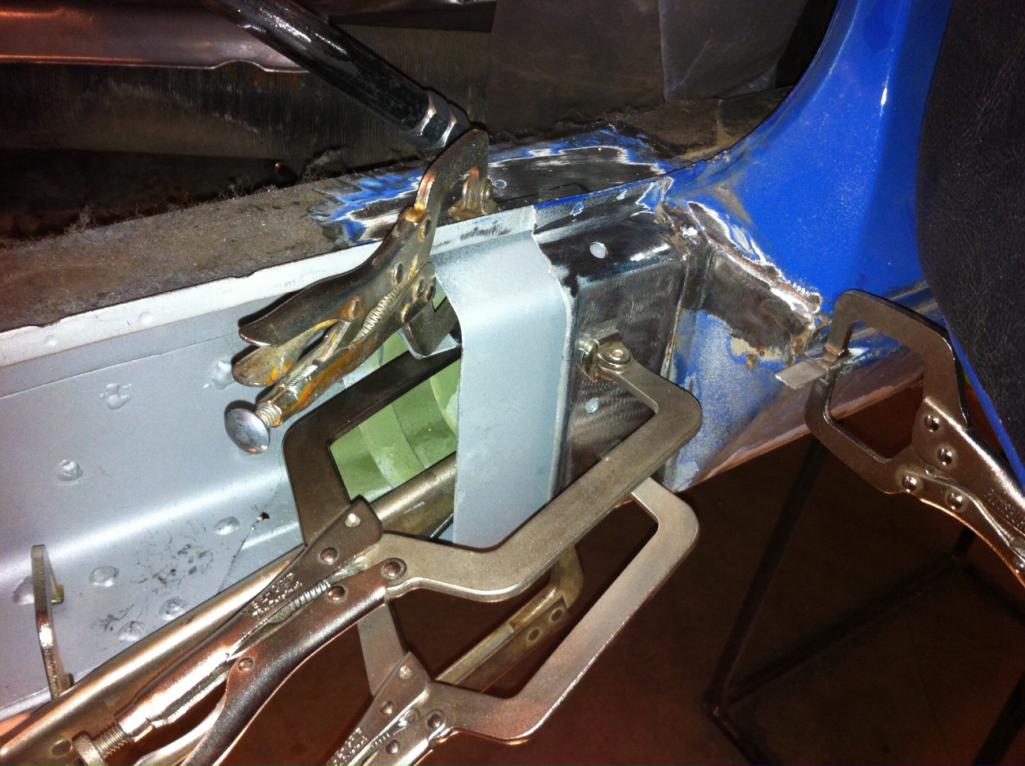 The rear side sleeve is plug welded to the long first then slipped inside the rail as it's installed. 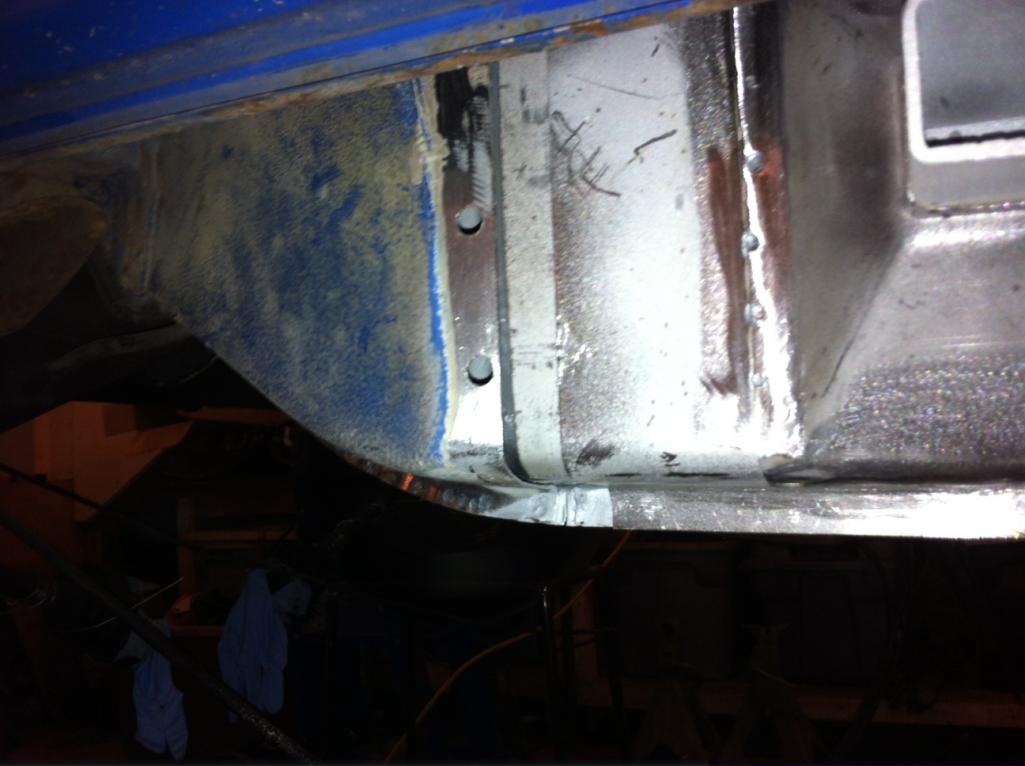 Notice the sleeve extends under the hell hole repair and is plug welded to the long.  I welded the jack post to the long before installing the outer section. 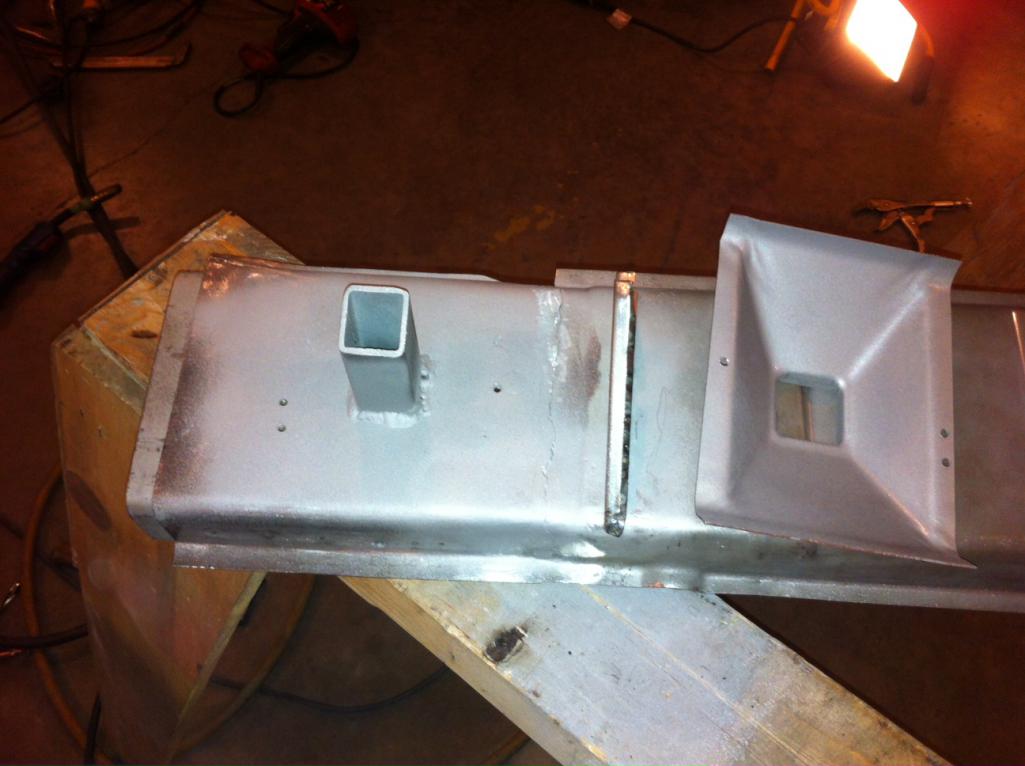 The jack post cover was plug welded first. All the welds were ground flush then spot welded to look stock. 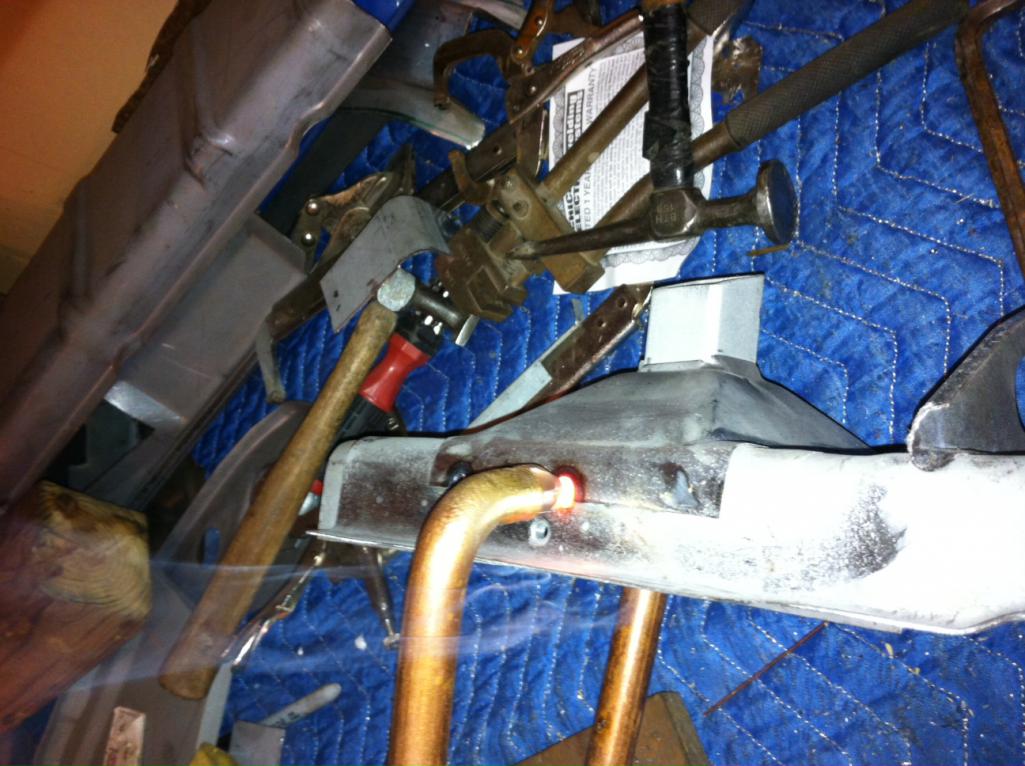 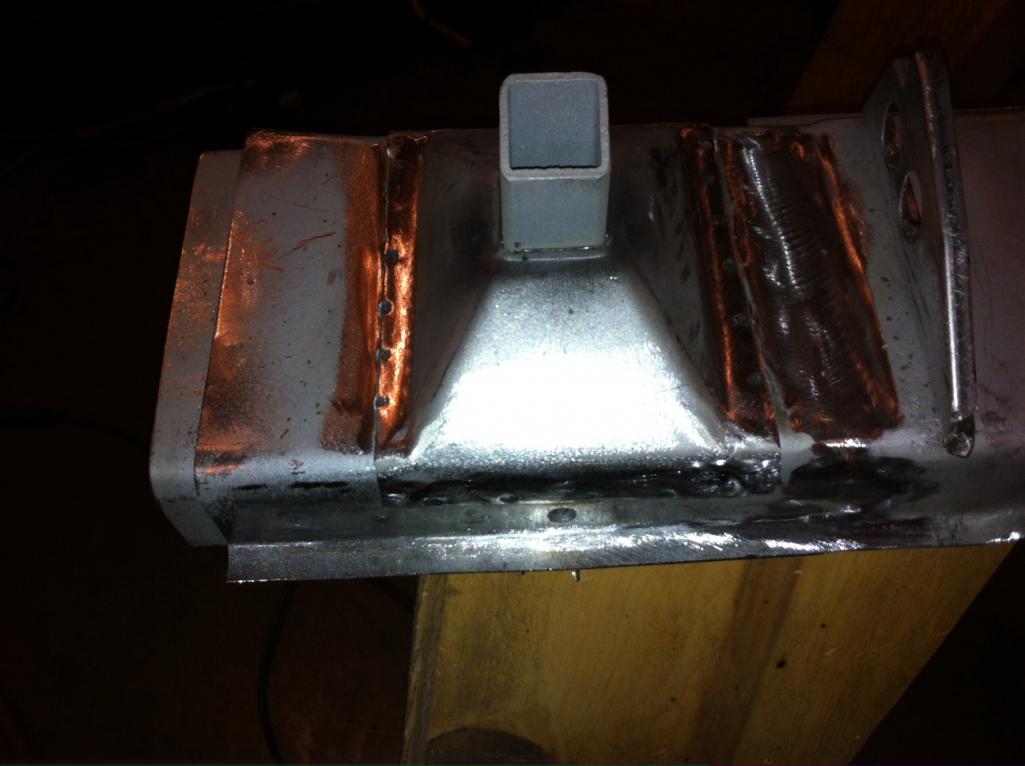 The seam and plug welds are ground flush. the rail has a stock appearance. 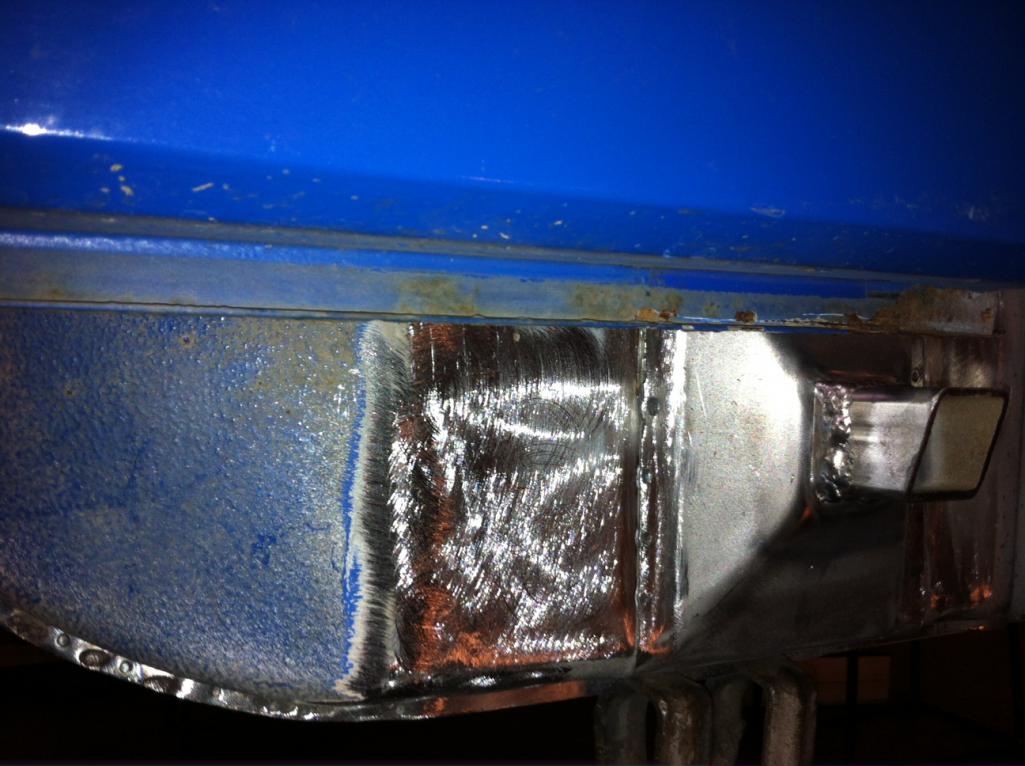 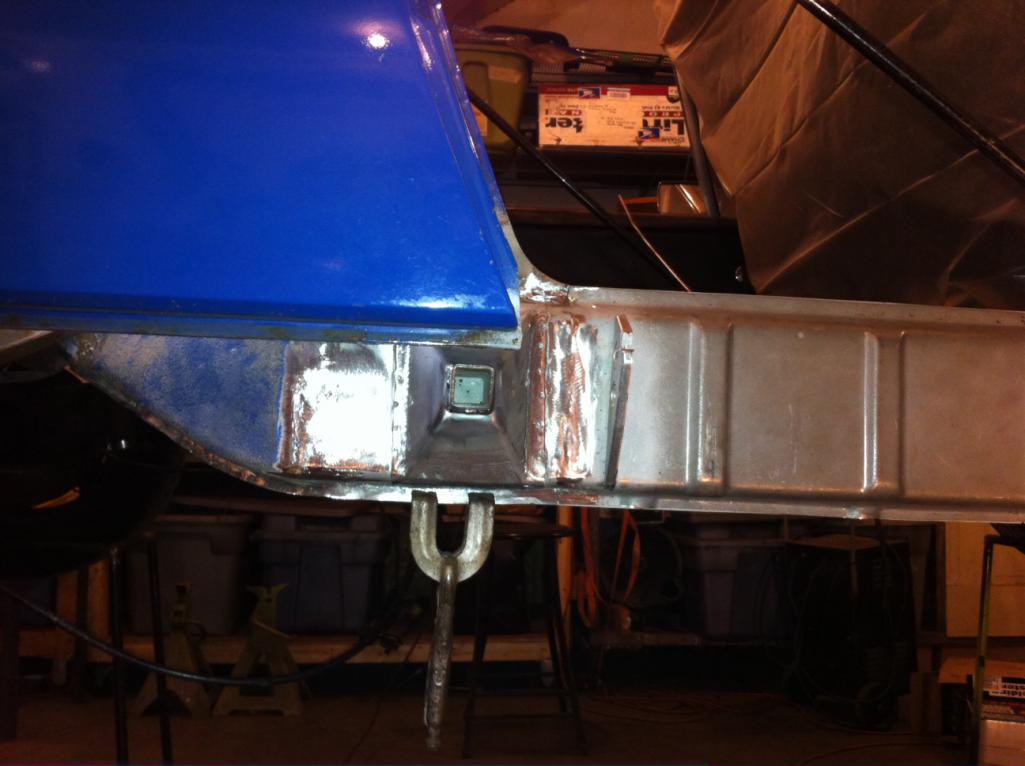 |
|
|
|
| doug_b_928 |
Feb 3 2014, 10:52 PM
Post
#73
|
|
Senior Member Group: Members Posts: 730 Joined: 17-January 13 From: Winnipeg Member No.: 15,382 Region Association: Canada |
Nice work, Rick! I hope you're still making that how to video...
|
|
|
|
| rick 918-S |
Feb 3 2014, 11:02 PM
Post
#74
|
|
Hey nice rack! -Celette Group: Members Posts: 21,296 Joined: 30-December 02 From: Now in Superior WI Member No.: 43 Region Association: Northstar Region |
QUOTE(doug_b_928 @ Feb 3 2014, 10:52 PM) Nice work, Rick! I hope you're still making that how to video... Started out with my son but he's been unavailable. (IMG:style_emoticons/default/dry.gif) |
|
|
|
| r_towle |
Feb 3 2014, 11:06 PM
Post
#75
|
|
Custom Member Group: Members Posts: 24,705 Joined: 9-January 03 From: Taxachusetts Member No.: 124 Region Association: North East States |
QUOTE(rick 918-S @ Feb 4 2014, 12:02 AM) QUOTE(doug_b_928 @ Feb 3 2014, 10:52 PM) Nice work, Rick! I hope you're still making that how to video... Started out with my son but he's been unavailable. (IMG:style_emoticons/default/dry.gif) He just does not want to go out in 50 degree below zero weather to film anything... (IMG:style_emoticons/default/bootyshake.gif) |
|
|
|
| cary |
Feb 3 2014, 11:15 PM
Post
#76
|
|
Advanced Member Group: Members Posts: 3,900 Joined: 26-January 04 From: Sherwood Oregon Member No.: 1,608 Region Association: Pacific Northwest |
That's a nice car ............ Wow.
|
|
|
|
| rick 918-S |
Feb 3 2014, 11:15 PM
Post
#77
|
|
Hey nice rack! -Celette Group: Members Posts: 21,296 Joined: 30-December 02 From: Now in Superior WI Member No.: 43 Region Association: Northstar Region |
QUOTE(r_towle @ Feb 3 2014, 11:06 PM) QUOTE(rick 918-S @ Feb 4 2014, 12:02 AM) QUOTE(doug_b_928 @ Feb 3 2014, 10:52 PM) Nice work, Rick! I hope you're still making that how to video... Started out with my son but he's been unavailable. (IMG:style_emoticons/default/dry.gif) He just does not want to go out in 50 degree below zero weather to film anything... (IMG:style_emoticons/default/bootyshake.gif) At least were not chopping wood (IMG:style_emoticons/default/happy11.gif) |
|
|
|
| r_towle |
Feb 3 2014, 11:16 PM
Post
#78
|
|
Custom Member Group: Members Posts: 24,705 Joined: 9-January 03 From: Taxachusetts Member No.: 124 Region Association: North East States |
No we....just me.
Boy went missing again...seems to happen each time lately... |
|
|
|
| pete000 |
Feb 3 2014, 11:21 PM
Post
#79
|
|
Senior Member Group: Members Posts: 1,887 Joined: 23-August 10 From: Bradenton Florida Member No.: 12,094 Region Association: South East States |
Impressive metal work !!!! (IMG:style_emoticons/default/welder.gif)
|
|
|
|
| sixnotfour |
Feb 4 2014, 05:34 AM
Post
#80
|
|
914 Wizard Group: Members Posts: 11,275 Joined: 12-September 04 Member No.: 2,744 Region Association: NineFourteenerVille |
There is a new inner long for the right and left being made in Germany that appears to have more of the factory details formed into it.
maybe even OG dies ? HESS , is a VW parts supplier Attached thumbnail(s)  Attached image(s) 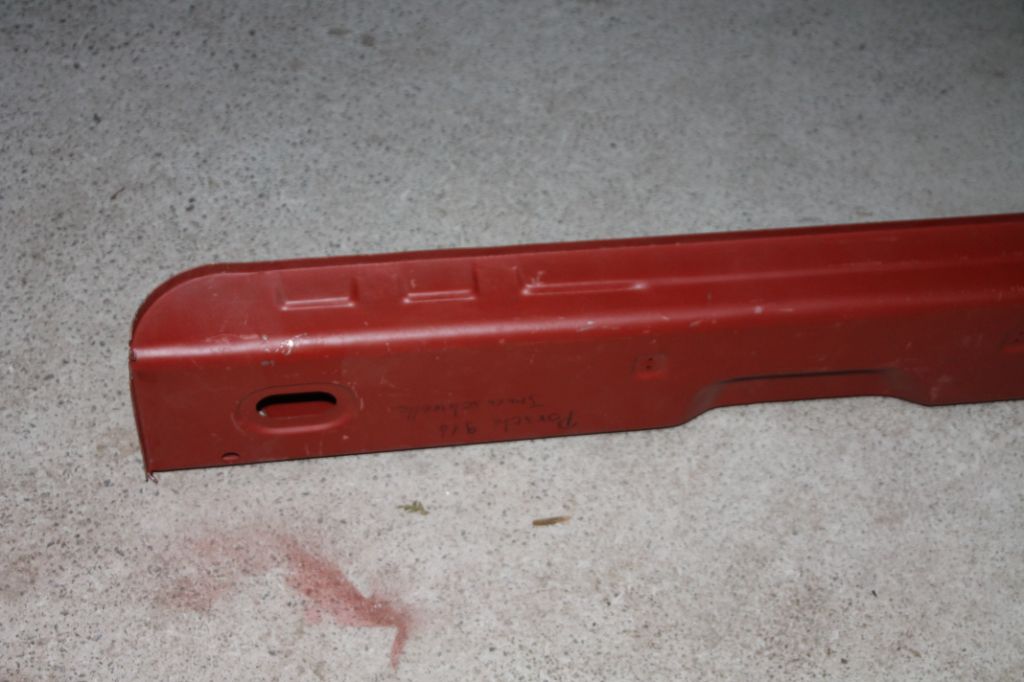 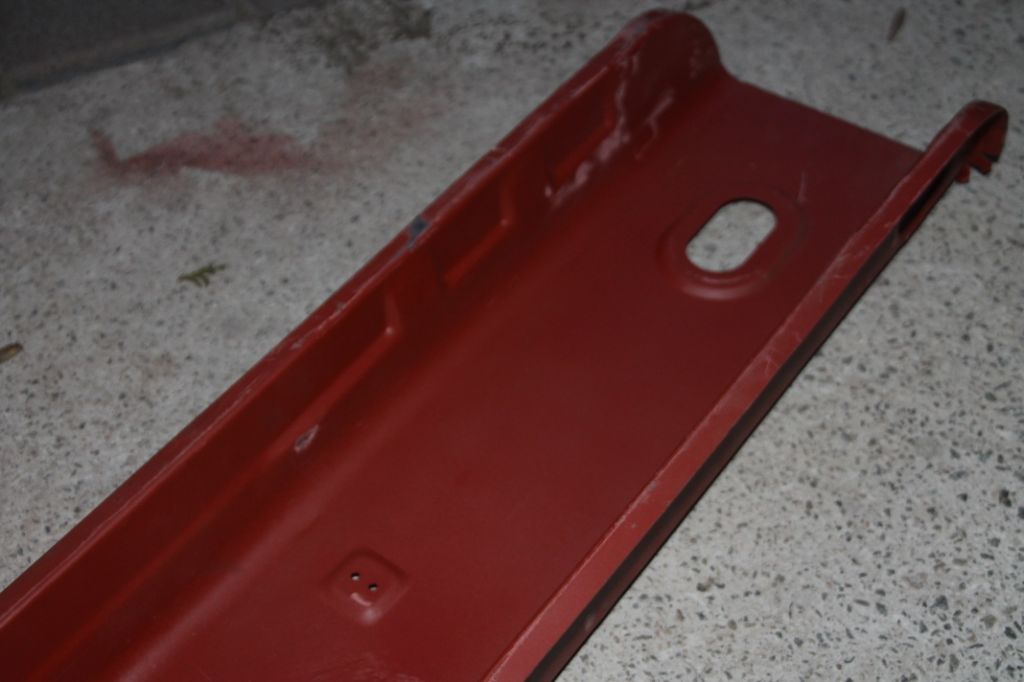
|
|
|
|
|
1 User(s) are reading this topic (1 Guests and 0 Anonymous Users)
0 Members:

|
Lo-Fi Version | Time is now: 3rd July 2026 - 09:14 AM |
Invision Power Board
v9.1.4 © 2026 IPS, Inc.