|
|
|
Porsche, and the Porsche crest are registered trademarks of Dr. Ing. h.c. F. Porsche AG.
This site is not affiliated with Porsche in any way. Its only purpose is to provide an online forum for car enthusiasts. All other trademarks are property of their respective owners. |
|
|

  |

| rick 918-S |
 Feb 4 2014, 08:29 AM Feb 4 2014, 08:29 AM
Post
#81
|
|
Hey nice rack! -Celette  Group: Members Posts: 21,296 Joined: 30-December 02 From: Now in Superior WI Member No.: 43 Region Association: Northstar Region |
That is a nice piece! Who carries those?
|
   |

 
|
| Luke M |
Feb 4 2014, 08:57 AM
Post
#82
|
|
Senior Member Group: Members Posts: 1,555 Joined: 8-February 05 From: WNY Member No.: 3,574 Region Association: North East States |
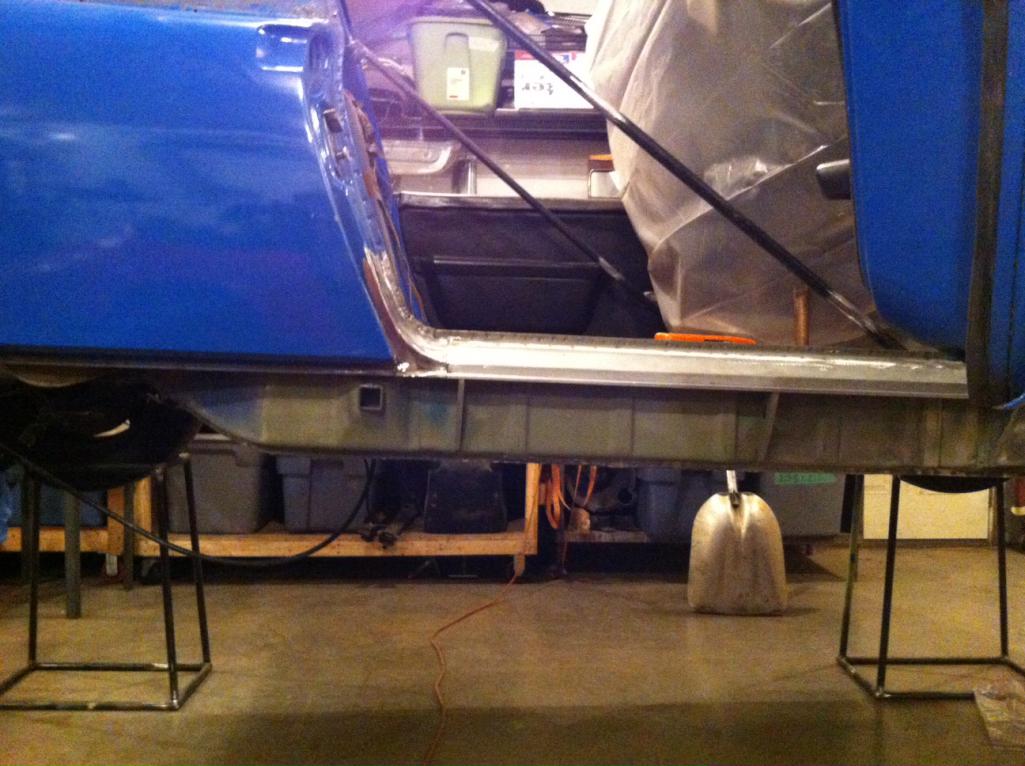
Great work on the repairs Rick. I have the same rust issues with my 914-6 and watching this thread has answered a few of my questions. The one main question and concern of mine is how do you keep the chassis as straight as possible while cutting then welding in the new metal. I have a brace similar to yours but mine attaches to the forward door post. I took the car off the rotisserie then placed it on jack stands to keep things level so I thought. I checked the roof to door/windshield gaps and found them to be off. A quick adjustment to the brace and things looked good again. My question to you is what do you think is the best method other then a bench to keep things straight? I see that you have this car on some type of wheel stands. Does this seam to help or is it just for a working height thing?
Keep up with the great work and pics. TIA, Luke |
|
|
|
| rick 918-S |
Feb 4 2014, 09:26 AM
Post
#83
|
|
Hey nice rack! -Celette Group: Members Posts: 21,296 Joined: 30-December 02 From: Now in Superior WI Member No.: 43 Region Association: Northstar Region |
QUOTE(Luke M @ Feb 4 2014, 08:57 AM)  Great work on the repairs Rick. I have the same rust issues with my 914-6 and watching this thread has answered a few of my questions. The one main question and concern of mine is how do you keep the chassis as straight as possible while cutting then welding in the new metal. I have a brace similar to yours but mine attaches to the forward door post. I took the car off the rotisserie then placed it on jack stands to keep things level so I thought. I checked the roof to door/windshield gaps and found them to be off. A quick adjustment to the brace and things looked good again. My question to you is what do you think is the best method other then a bench to keep things straight? I see that you have this car on some type of wheel stands. Does this seam to help or is it just for a working height thing? Keep up with the great work and pics. TIA, Luke Ben's car is really fairly solid. I did not need to get into the trailing arm mount so the suspension could stay in the car. It sounds like your car is a shell. Here is the answer I posted when asked this question earlier in this thread. I suggested supporting the car under the suspension pickup points not in the usual places where we set jack stands.: By supporting the car under the suspension you are spreading out the weight where the chassis naturally carries it. You are adding less stress and pulling force to an already weak point. Here's an example: take a piece of 11" X 17" poster board. Set up 4 pencils at the center 1/3 square of the poster board to support it. You will notice the poster board will sag dramatically at both ended. Move your pencil supports out 2" in all directions and you will see an dramatic decrease in the sag. If your repairing a car with no suspension you still need to try to move your support points out to the strut and shock mount points. this will decrease your odds of introducing stress in the chassis from heat and weight. Other considerations are having a chassis stretch at the long when you have removed a huge section. Any time you do this you really need to plan ahead and add a second brace. You could hold the length with a brace from the door latch bolt holes to the upper hinge. This will sort of add a triangle to the targa brace. Really. The best method to protect yourself from having to worry about changing the chassis is to spend money and buy enough steel to build a fixture to hold the car. The second thing you really need to do is plan your welding procedure. If you look at the above photos you will see I have the vertical welds completed. I have not welded the horizontal welds yet. This allowed the welds to naturalize without pulling the chassis. |
|
|
|
| bigkensteele |
Feb 4 2014, 07:29 PM
Post
#84
|
|
Major Member Group: Members Posts: 2,200 Joined: 30-August 04 From: Cincinnati, OH Member No.: 2,660 Region Association: South East States |
I hope you remembered to re-install the heater tube before you buttoned it up! (IMG:style_emoticons/default/poke.gif)
|
|
|
|
| sixnotfour |
Feb 4 2014, 07:35 PM
Post
#85
|
|
914 Wizard Group: Members Posts: 11,275 Joined: 12-September 04 Member No.: 2,744 Region Association: NineFourteenerVille |
QUOTE(bigkensteele @ Feb 4 2014, 05:29 PM) I hope you remembered to re-install the heater tube before you buttoned it up! (IMG:style_emoticons/default/poke.gif) Get a late heater tube they are aluminum foil lined..the insulation is not exposed to the ID. |
|
|
|
| rick 918-S |
Feb 4 2014, 09:18 PM
Post
#86
|
|
Hey nice rack! -Celette Group: Members Posts: 21,296 Joined: 30-December 02 From: Now in Superior WI Member No.: 43 Region Association: Northstar Region |
QUOTE(bigkensteele @ Feb 4 2014, 07:29 PM) I hope you remembered to re-install the heater tube before you buttoned it up! (IMG:style_emoticons/default/poke.gif) (IMG:style_emoticons/default/unsure.gif) |
|
|
|
| rick 918-S |
Feb 4 2014, 10:42 PM
Post
#87
|
|
Hey nice rack! -Celette Group: Members Posts: 21,296 Joined: 30-December 02 From: Now in Superior WI Member No.: 43 Region Association: Northstar Region |
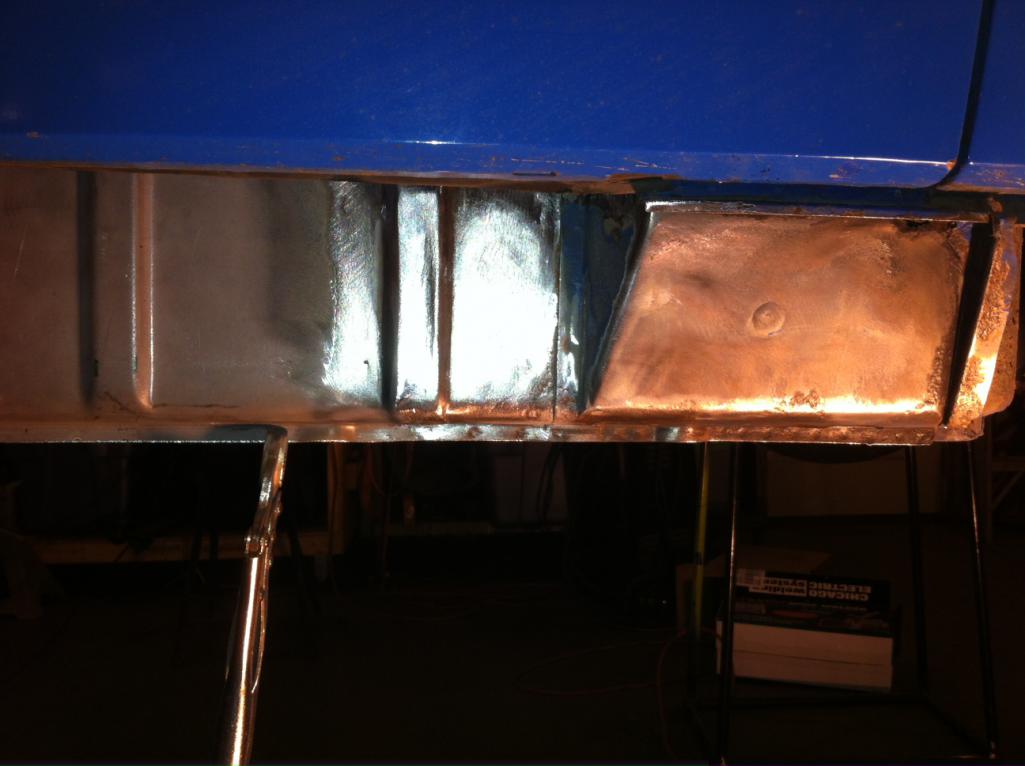
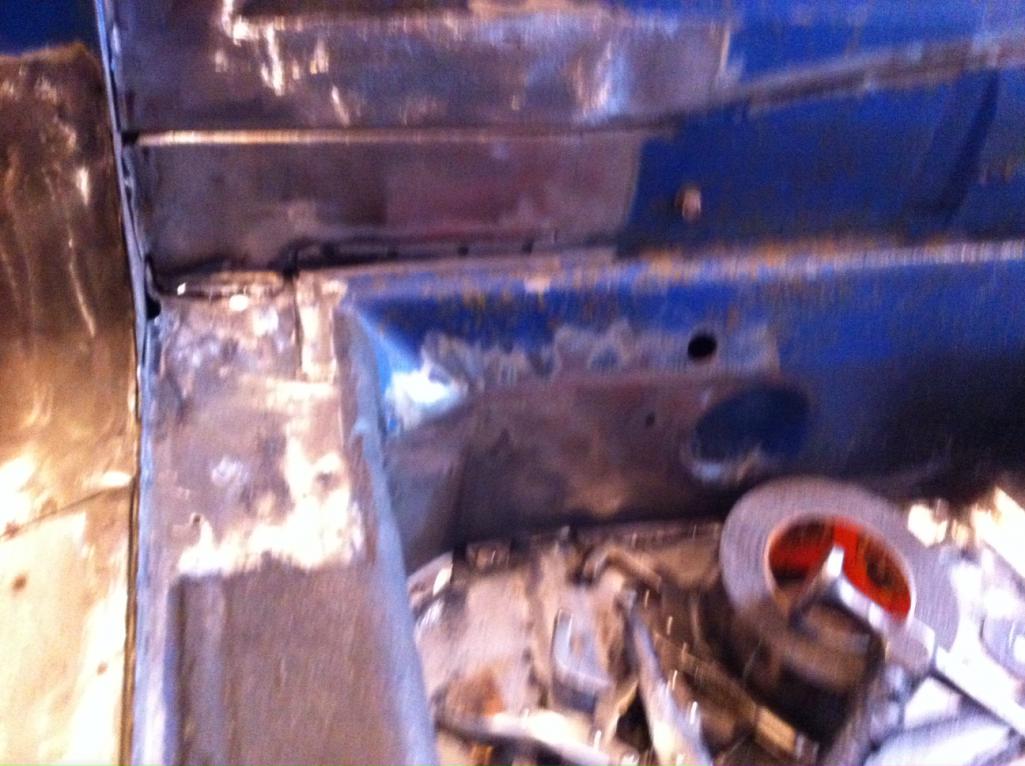
Not much progress today. I spent most of the day cleaning the shop. Really Alllllll dayyyyyy........ (IMG:style_emoticons/default/wacko.gif) I did get the front vertical seam finished.
 |
|
|
|
| euro911 |
Feb 4 2014, 10:52 PM
Post
#88
|
|
Retired & living the dream. God help me if I wake up! Group: Members Posts: 8,937 Joined: 2-December 06 From: So.Cal. & No.AZ (USA) Member No.: 7,300 Region Association: Southern California |
QUOTE(rick 918-S @ Feb 4 2014, 08:18 PM) QUOTE(bigkensteele @ Feb 4 2014, 07:29 PM) I hope you remembered to re-install the heater tube before you buttoned it up! (IMG:style_emoticons/default/poke.gif) (IMG:style_emoticons/default/unsure.gif) |
|
|
|
| rick 918-S |
Feb 4 2014, 10:56 PM
Post
#89
|
|
Hey nice rack! -Celette Group: Members Posts: 21,296 Joined: 30-December 02 From: Now in Superior WI Member No.: 43 Region Association: Northstar Region |
QUOTE(euro911 @ Feb 4 2014, 10:52 PM) QUOTE(rick 918-S @ Feb 4 2014, 08:18 PM) QUOTE(bigkensteele @ Feb 4 2014, 07:29 PM) I hope you remembered to re-install the heater tube before you buttoned it up! (IMG:style_emoticons/default/poke.gif) (IMG:style_emoticons/default/unsure.gif)(IMG:style_emoticons/default/lol-2.gif) That would suck. |
|
|
|
| rick 918-S |
Feb 6 2014, 12:17 AM
Post
#90
|
|
Hey nice rack! -Celette Group: Members Posts: 21,296 Joined: 30-December 02 From: Now in Superior WI Member No.: 43 Region Association: Northstar Region |
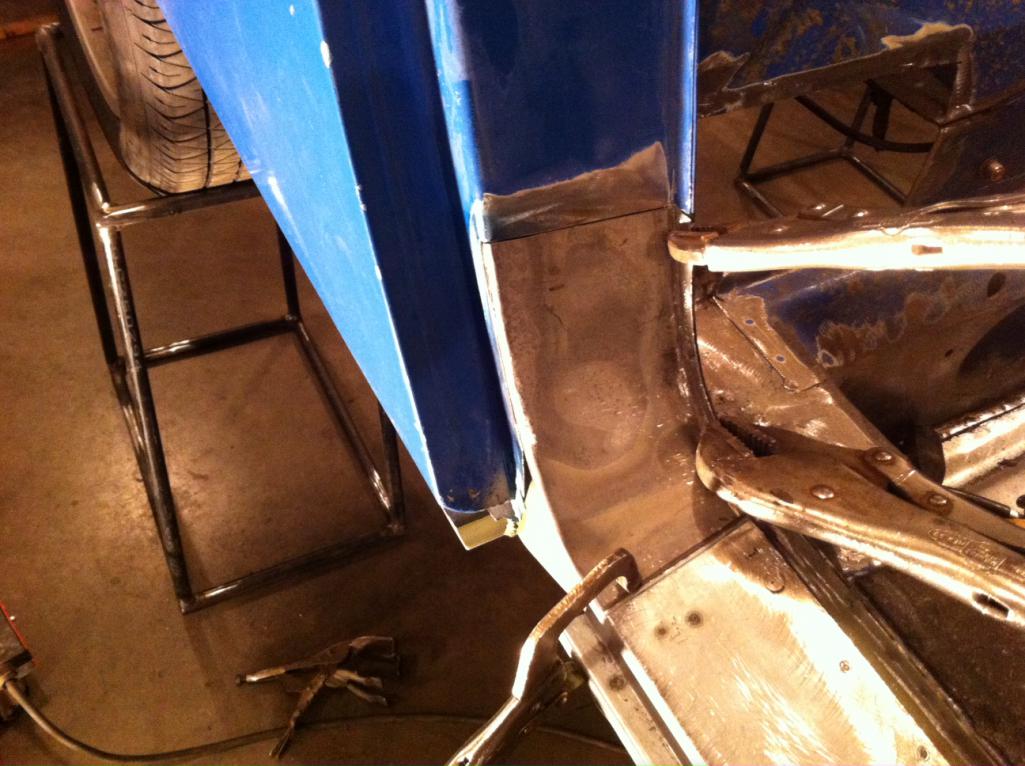
I spot welded the outer long today. I used a pinch spotter to close it up like the factory.
 I misted on some self etching primer and added a bead of urethane seam sealer to the top edge as the factory did. 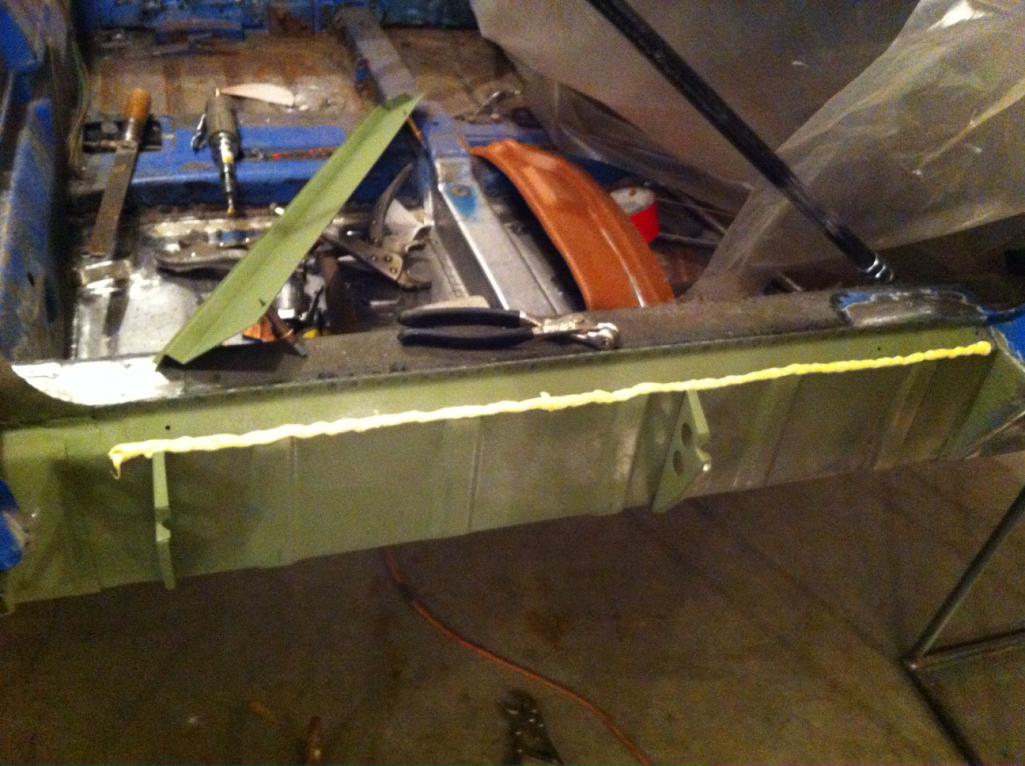 Then I added the sill panel. I used my Lenco panel spotter to face spot the panel and used the pinch spotter to spot weld the braces to the sill. 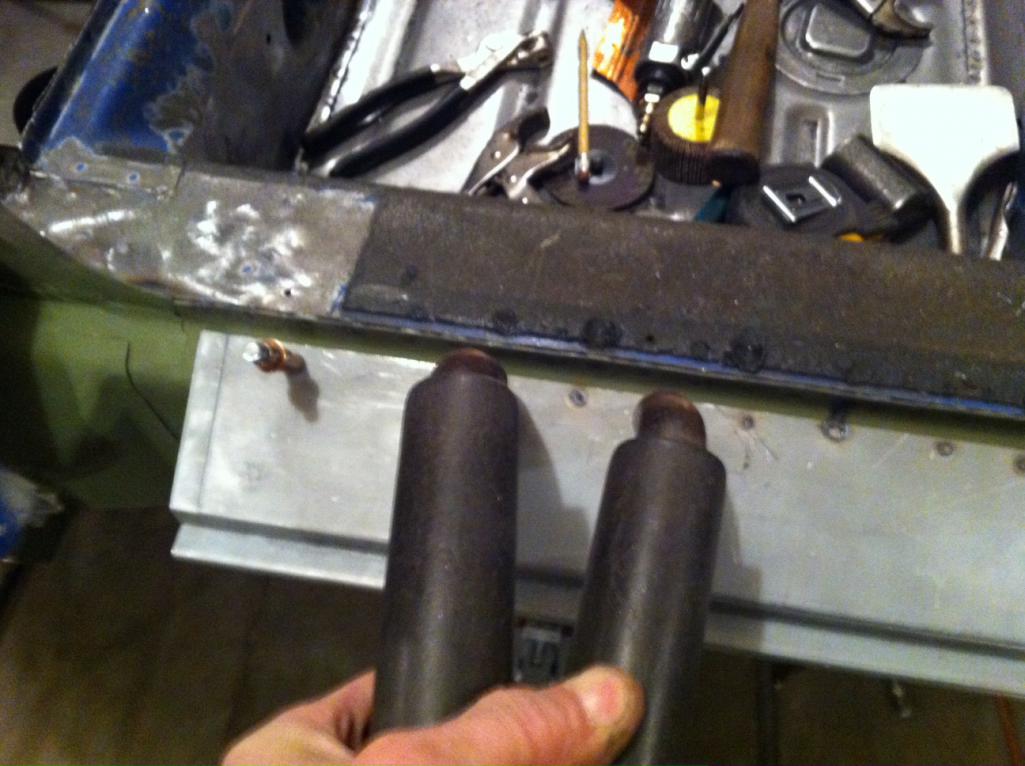 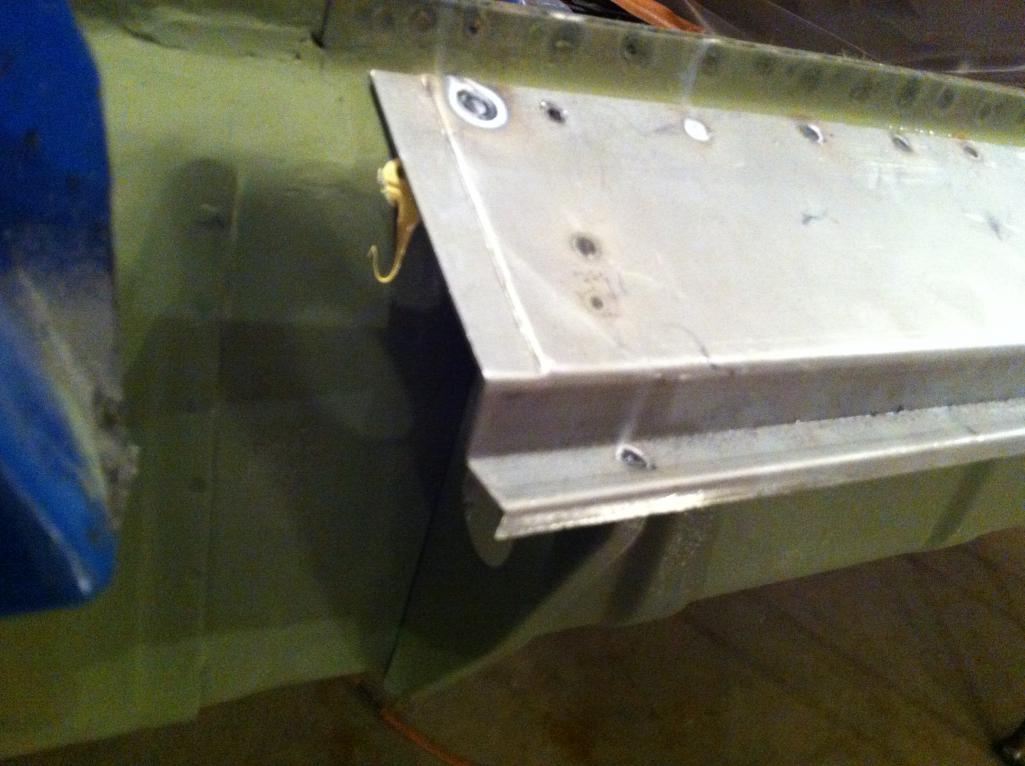 Here is the bottom of the sill after installing. The seam sealer is squeezed out and prevents moisture from starting rust under it. 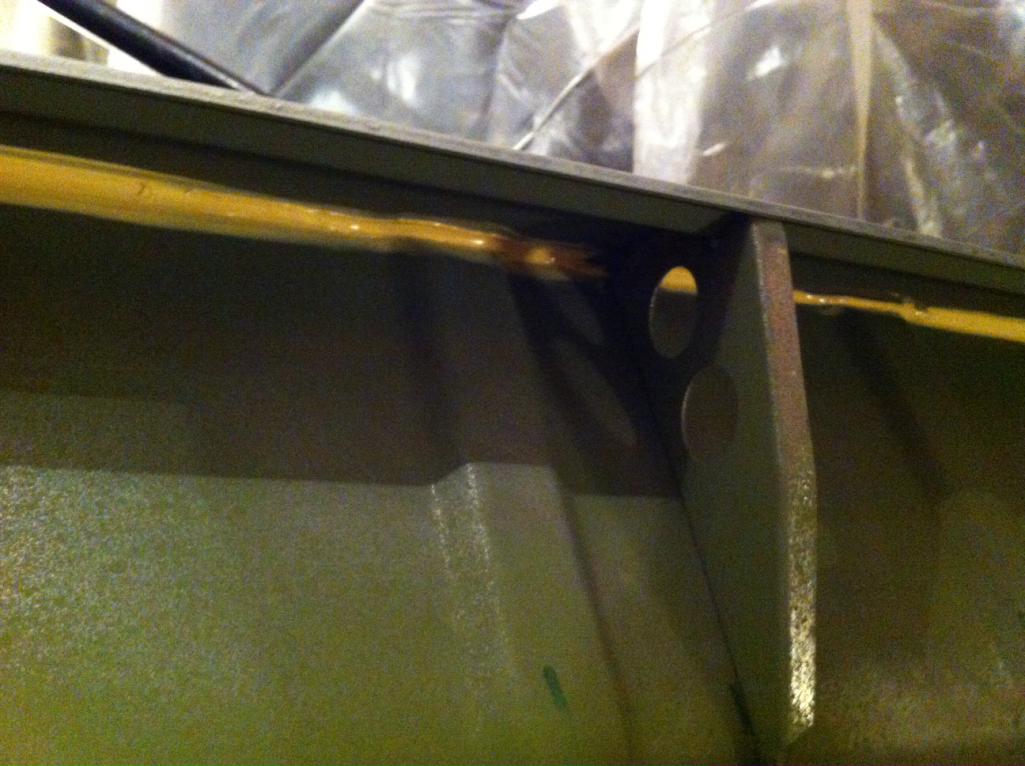 |
|
|
|
| Cairo94507 |
Feb 6 2014, 07:10 AM
Post
#91
|
|
Michael Group: Members Posts: 10,686 Joined: 1-November 08 From: Auburn, CA Member No.: 9,712 Region Association: Northern California |
That is beautiful work. (IMG:style_emoticons/default/welder.gif)
|
 |
|
| rick 918-S |
Feb 6 2014, 08:09 PM
Post
#92
|
|
Hey nice rack! -Celette Group: Members Posts: 21,296 Joined: 30-December 02 From: Now in Superior WI Member No.: 43 Region Association: Northstar Region |
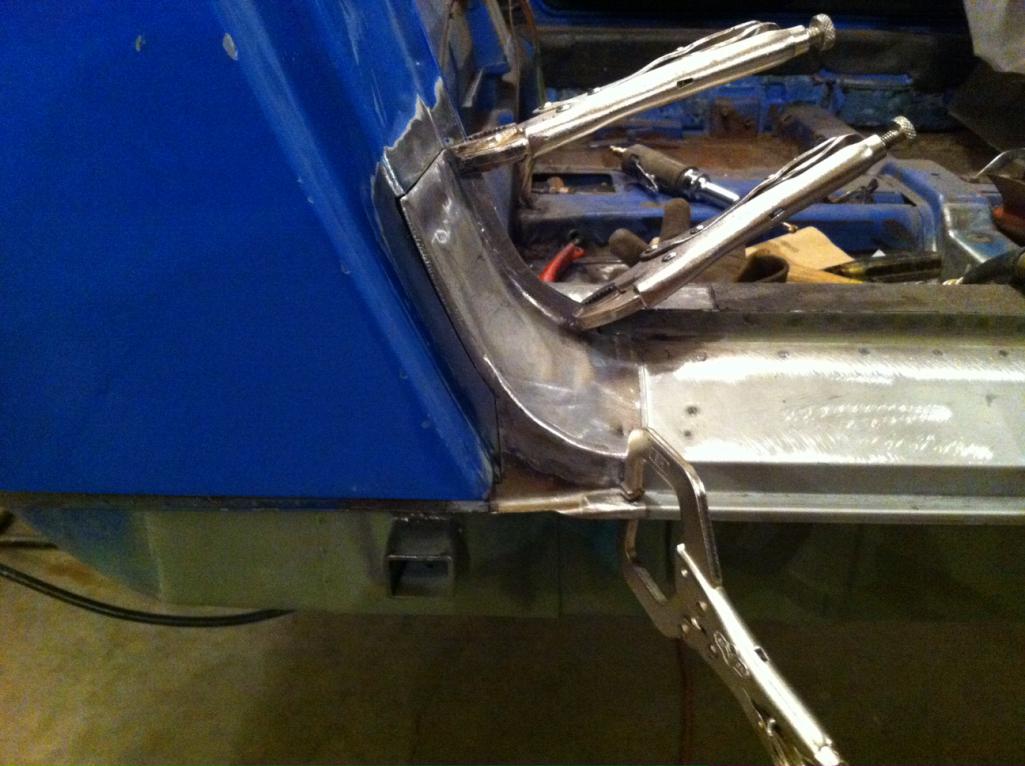
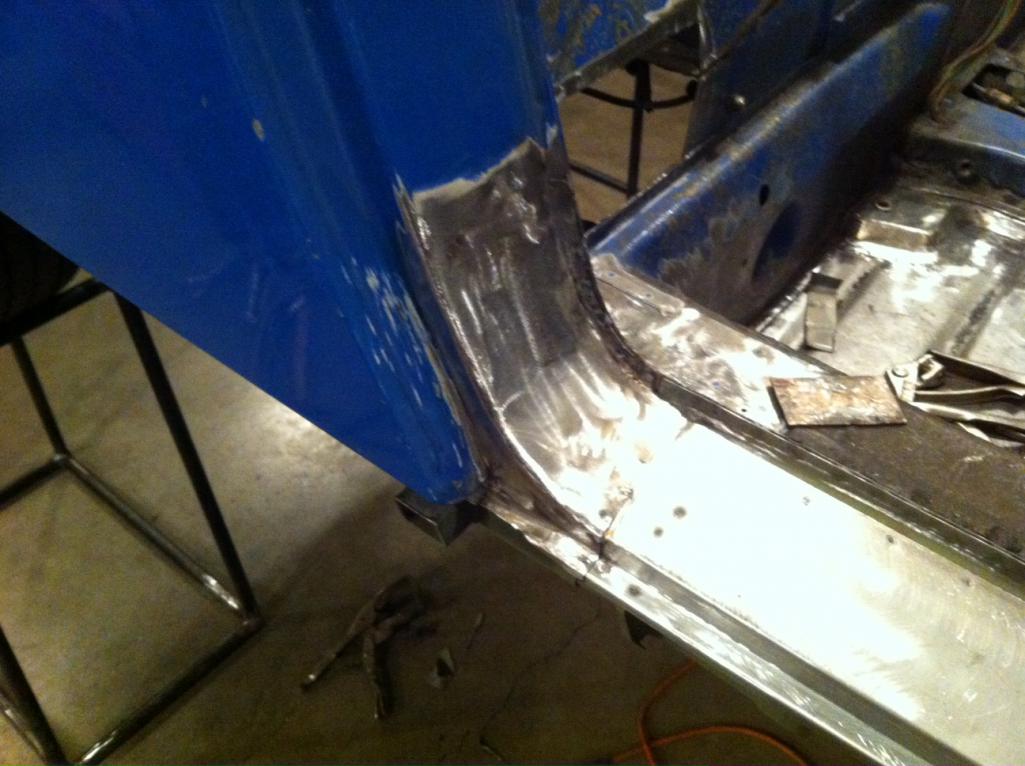
I wasn't happy with the restoration design panel and the way it was fitting. I have used the panel as a whole section before but as a partial repair it was easier to just fab up a small section. So I fabricated a panel instead.
    |
|
|
|
| vintage914racer |
Feb 6 2014, 10:01 PM
Post
#93
|
|
Member Group: Members Posts: 463 Joined: 28-December 03 From: Minneapolis, MN Member No.: 1,473 |
Can't wait to see the car in person tomorrow.
|
|
|
|
| r_towle |
Feb 6 2014, 10:13 PM
Post
#94
|
|
Custom Member Group: Members Posts: 24,705 Joined: 9-January 03 From: Taxachusetts Member No.: 124 Region Association: North East States |
|
|
|
|
| CptTripps |
Feb 7 2014, 07:49 AM
Post
#95
|
|
:: Punch and Pie :: Group: Members Posts: 3,586 Joined: 26-December 04 From: Tuscaloosa, AL and Akron, OH Member No.: 3,342 Region Association: Upper MidWest |
Nicely done sir...
|
|
|
|
| rick 918-S |
Feb 16 2014, 08:28 AM
Post
#96
|
|
Hey nice rack! -Celette Group: Members Posts: 21,296 Joined: 30-December 02 From: Now in Superior WI Member No.: 43 Region Association: Northstar Region |
Not much progress. I closed in the firewall this weekend in preparation for the engine shelf. As I was shutting down for the night I think my new compressor pump blew up. (IMG:style_emoticons/default/dry.gif)
  |
|
|
|
| euro911 |
Feb 16 2014, 01:15 PM
Post
#97
|
|
Retired & living the dream. God help me if I wake up! Group: Members Posts: 8,937 Joined: 2-December 06 From: So.Cal. & No.AZ (USA) Member No.: 7,300 Region Association: Southern California |
Quit buying Harbor Freight S#IT tools (IMG:style_emoticons/default/poke.gif)
|
|
|
|
| rick 918-S |
Feb 16 2014, 04:50 PM
Post
#98
|
|
Hey nice rack! -Celette Group: Members Posts: 21,296 Joined: 30-December 02 From: Now in Superior WI Member No.: 43 Region Association: Northstar Region |
QUOTE(euro911 @ Feb 16 2014, 01:15 PM) Northern Tools. My original purchase was at least 10 years ago. The replacement pump is exactly the same as the original so I expected more from it. I went out this morning and the overload on the electric motor was tripped. I reset it and it fired up like nothing was wrong. I'm changing the oil today to see if it's just from the break in oil I used. (IMG:style_emoticons/default/unsure.gif) |
|
|
|
| rick 918-S |
Feb 23 2014, 06:39 PM
Post
#99
|
|
Hey nice rack! -Celette Group: Members Posts: 21,296 Joined: 30-December 02 From: Now in Superior WI Member No.: 43 Region Association: Northstar Region |
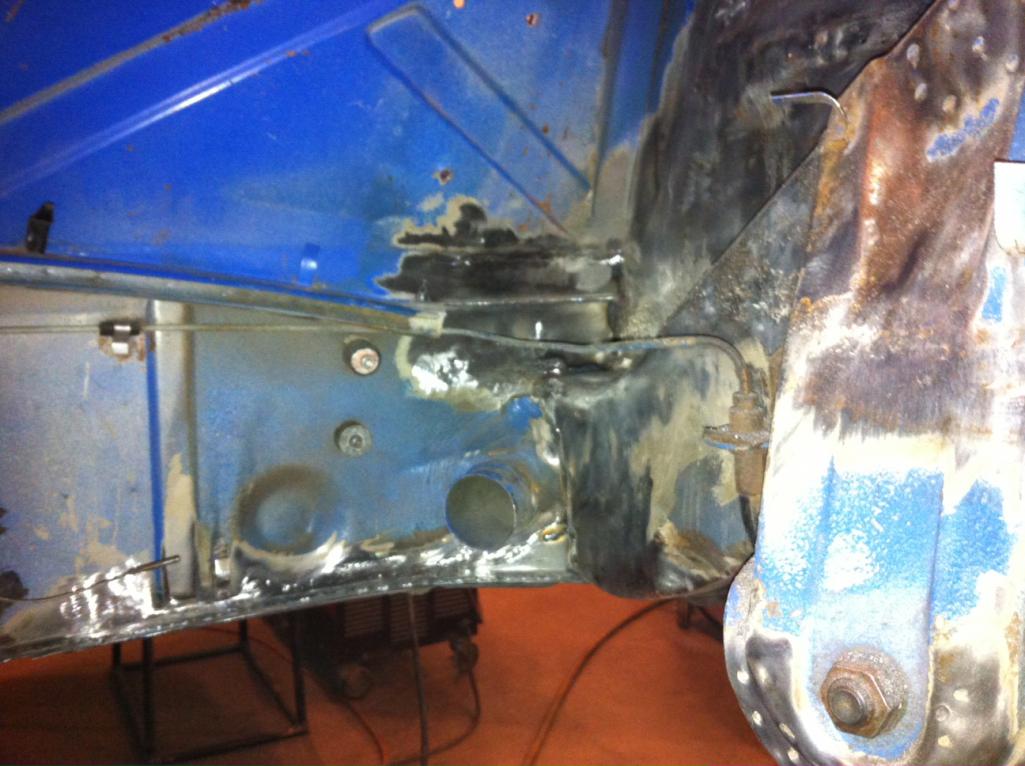
Finished up the engine bay including the rear lid pivot mount. Shot some self etching primer, Added seam sealer and Gravitex. Still lots to do but I feel like I'm getting somewhere now.
I'm not adding the battery tray until I paint the back of the stand and engine bay. there is no way to get some good paint protection with the tray on. Once I have color on I will use my spot welder and spot weld the painted tray to the stand. 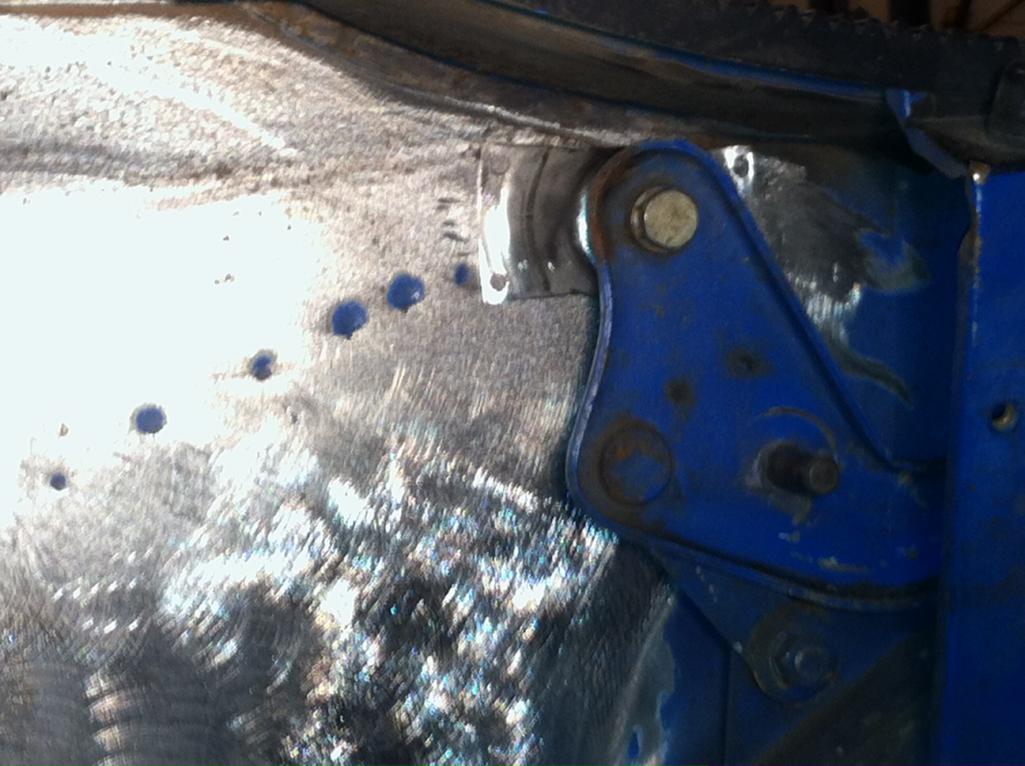 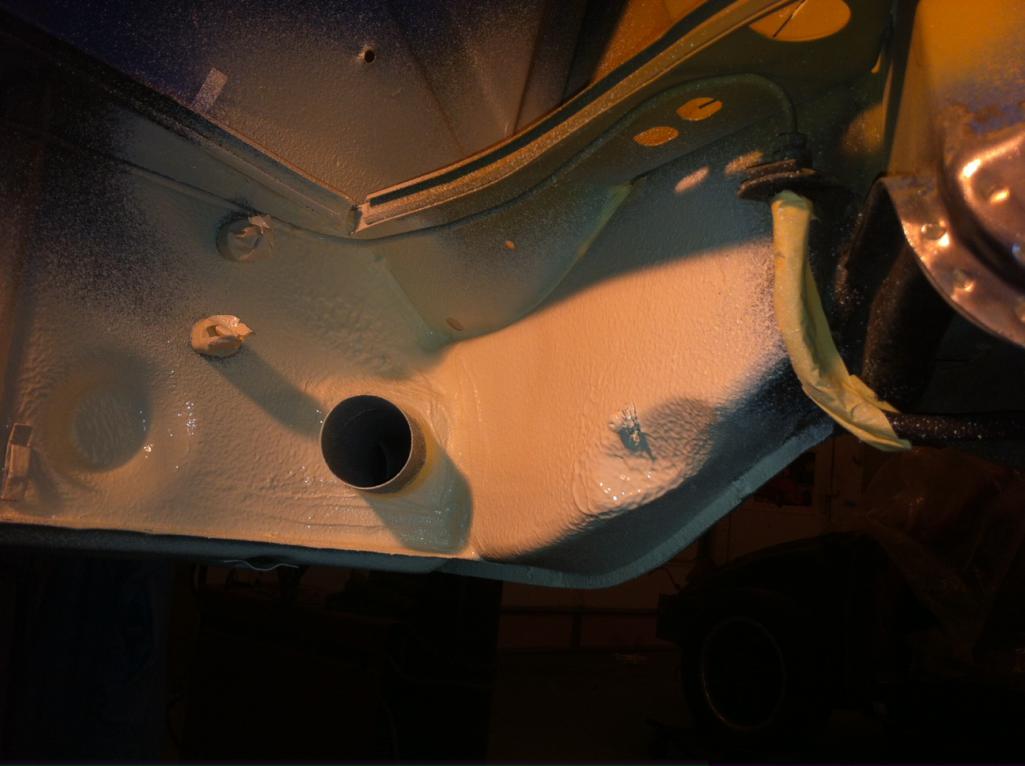 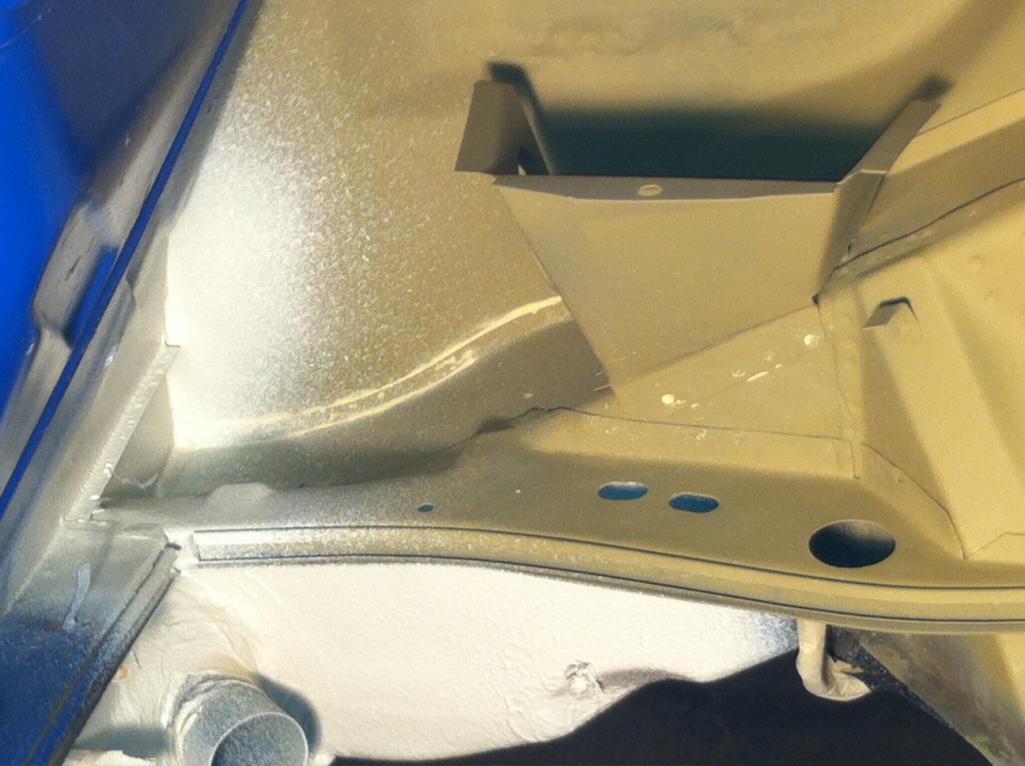 |
|
|
|
| sixnotfour |
Feb 23 2014, 06:43 PM
Post
#100
|
|
914 Wizard Group: Members Posts: 11,275 Joined: 12-September 04 Member No.: 2,744 Region Association: NineFourteenerVille |
NICE ..
|
|
|
|
|
2 User(s) are reading this topic (2 Guests and 0 Anonymous Users)
0 Members:

|
Lo-Fi Version | Time is now: 3rd July 2026 - 09:14 AM |
Invision Power Board
v9.1.4 © 2026 IPS, Inc.