|
|
|
Porsche, and the Porsche crest are registered trademarks of Dr. Ing. h.c. F. Porsche AG.
This site is not affiliated with Porsche in any way. Its only purpose is to provide an online forum for car enthusiasts. All other trademarks are property of their respective owners. |
|
|

  |

| mrholland2 |
 May 20 2014, 02:28 PM May 20 2014, 02:28 PM
Post
#61
|
|
Senior Member  Group: Members Posts: 750 Joined: 7-September 11 From: Santa Maria,CA Member No.: 13,531 Region Association: Central California |
QUOTE(mobymutt @ May 20 2014, 01:11 PM)  I now have my washer wired into a pushbutton switch, and the wipers wired into a temporary toggle switch until I can source a new wiper switch. A bit of progress. I have no idea how the rest of you guys can accomplish insane amounts of work in a single day. Next up is the defrost blowers. I am still confused about the whole heat/defrost system. I understand there is supposed to be a fan in the engine compartment that will push air through the heat exchangers. I also see what looks like two fans below the windshield -- are these the defroster fans? Do they run off a separate circuit and switch? The heater blower/fresh air/defroster blower set up is very interesting. So interesting that I completely don't get it.! (IMG:style_emoticons/default/screwy.gif) Do you have fog lights? That whole set up is interesting too. Apparently (or at least this is what I've been told) the fogs ground THRU the high beam filaments so when the high beams come on, the ground is gone and the fogs go out?? I dunno .. LOL |
   |

 
|
| mobymutt |
May 20 2014, 02:44 PM
Post
#62
|
|
Senior Member Group: Members Posts: 548 Joined: 16-December 13 From: Kingston, Ontario, Canada Member No.: 16,770 Region Association: Canada |
QUOTE(mrholland2 @ May 20 2014, 04:28 PM) Do you have fog lights? That whole set up is interesting too. Apparently (or at least this is what I've been told) the fogs ground THRU the high beam filaments so when the high beams come on, the ground is gone and the fogs go out?? I dunno .. LOL I do have fog lights, and I don't think they are working either! I'm pretty sure that I don't need them to get my safety though. |
|
|
|
| jmill |
May 20 2014, 06:29 PM
Post
#63
|
|
Green Hornet Group: Members Posts: 2,449 Joined: 9-May 08 From: Racine, Wisconsin Member No.: 9,038 Region Association: Upper MidWest |
Looks like it was originally painted Zambezi green. My favorite color. (IMG:style_emoticons/default/piratenanner.gif)
|
|
|
|
| mobymutt |
May 20 2014, 06:41 PM
Post
#64
|
|
Senior Member Group: Members Posts: 548 Joined: 16-December 13 From: Kingston, Ontario, Canada Member No.: 16,770 Region Association: Canada |
QUOTE(jmill @ May 20 2014, 08:29 PM) Looks like it was originally painted Zambezi green. My favorite color. (IMG:style_emoticons/default/piratenanner.gif) Yep! Maybe I'll go back to the original next time, although I'm torn between the Zambezi and the Ravenna greens. |
|
|
|
| Dave_Darling |
May 20 2014, 07:55 PM
Post
#65
|
|
914 Idiot Group: Members Posts: 14,981 Joined: 9-January 03 From: Silicon Valley / Kailua-Kona Member No.: 121 Region Association: Northern California |
QUOTE(mobymutt @ May 20 2014, 01:11 PM) Next up is the defrost blowers. I am still confused about the whole heat/defrost system. I understand there is supposed to be a fan in the engine compartment that will push air through the heat exchangers. I also see what looks like two fans below the windshield -- are these the defroster fans? Do they run off a separate circuit and switch? There are a number of valves in the system that are controlled by push-pull cables, as well as the fans. The engine fan blows air into the heat exchangers. If the heater lever is pulled up all the way, the heater blower also blows air into the exchangers. The air gets warmed up, and then the "flapper valves" will either dump it out under the car, or will direct it into the hoses running through the longs. Those go up into the dash, into the distribution system. That uses valves that either direct the air down into the footwell, or up to the windshield. Those are controlled by the red slider on the dash. There are separate valves that control the fresh-air system. Similar to the hot air, the middle slider on the dash directs the fresh air up to the windshield or down to the footwell. The upper slider opens a valve that lets air in from the inlet on the cowl, and when you slide it far enough to the right it turns on the fresh air blower that lives up in the dash. (There's only one of those, BTW.) There are a bunch of bits, and getting the cables right can be pretty fiddly. But it's reasonably straight-forward in concept. --DD |
|
|
|
| mobymutt |
May 21 2014, 12:01 PM
Post
#66
|
|
Senior Member Group: Members Posts: 548 Joined: 16-December 13 From: Kingston, Ontario, Canada Member No.: 16,770 Region Association: Canada |
QUOTE(Dave_Darling @ May 20 2014, 09:55 PM) There are a number of valves in the system that are controlled by push-pull cables, as well as the fans. The engine fan blows air into the heat exchangers. If the heater lever is pulled up all the way, the heater blower also blows air into the exchangers. The air gets warmed up, and then the "flapper valves" will either dump it out under the car, or will direct it into the hoses running through the longs. Those go up into the dash, into the distribution system. That uses valves that either direct the air down into the footwell, or up to the windshield. Those are controlled by the red slider on the dash. There are separate valves that control the fresh-air system. Similar to the hot air, the middle slider on the dash directs the fresh air up to the windshield or down to the footwell. The upper slider opens a valve that lets air in from the inlet on the cowl, and when you slide it far enough to the right it turns on the fresh air blower that lives up in the dash. (There's only one of those, BTW.) There are a bunch of bits, and getting the cables right can be pretty fiddly. But it's reasonably straight-forward in concept. --DD I don't have the hot air blower, but I need to get air blowing on the windshield in order to pass the safety inspection. Should the fresh air blower work with the stock wiring setup, but with the heater blower disconnected? I am attempting to follow the current flow diagram, but I only partially understand it. |
|
|
|
| mobymutt |
May 21 2014, 02:08 PM
Post
#67
|
|
Senior Member Group: Members Posts: 548 Joined: 16-December 13 From: Kingston, Ontario, Canada Member No.: 16,770 Region Association: Canada |
Well, success! I was able to get the fresh air blower to work on the slow and medium speeds, which is good enough for now!
Now to put everything back together and see if it will pass inspection! |
|
|
|
| bdstone914 |
May 21 2014, 03:03 PM
Post
#68
|
|
bdstone914 Group: Members Posts: 4,514 Joined: 8-November 03 From: Riverside CA Member No.: 1,319 |
QUOTE(mobymutt @ May 21 2014, 01:08 PM) Well, success! I was able to get the fresh air blower to work on the slow and medium speeds, which is good enough for now! Now to put everything back together and see if it will pass inspection! Having no Hi speed on the fan is often a problem on the control. The plastic melts and raises up keeping the slider contact from touching the board. You might be able to undo the bolt that holds the control and slide it out enough to access it. Will try to get a picture. Bruce Edit. This one is starting to melt. Attached thumbnail(s) 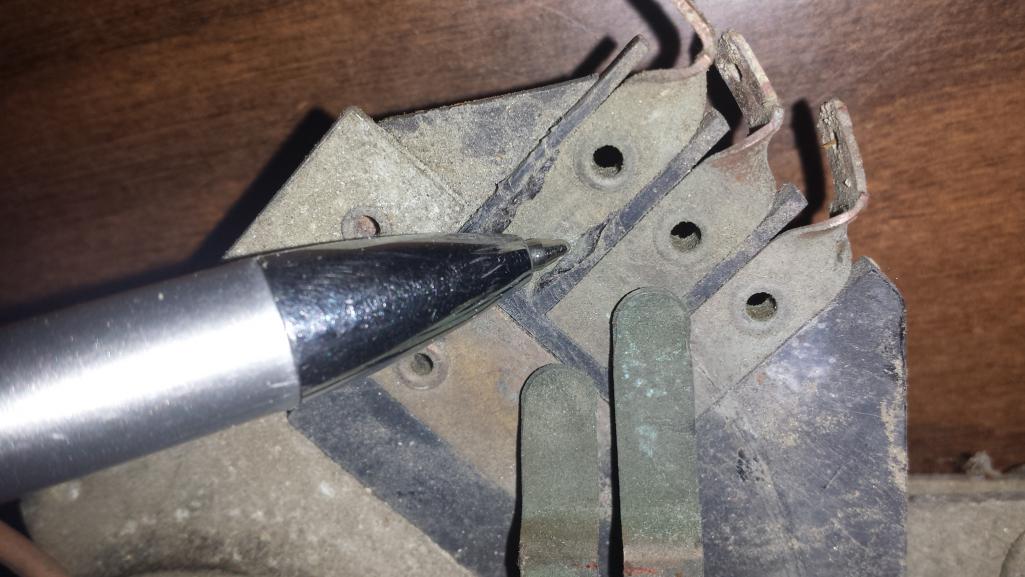
|
|
|
|
| mobymutt |
May 22 2014, 06:11 AM
Post
#69
|
|
Senior Member Group: Members Posts: 548 Joined: 16-December 13 From: Kingston, Ontario, Canada Member No.: 16,770 Region Association: Canada |
Where is the bolt located for removing the control?
|
|
|
|
| Rob-O |
May 22 2014, 10:14 PM
Post
#70
|
|
Senior Member Group: Members Posts: 1,251 Joined: 5-December 03 From: Mansfield, TX Member No.: 1,419 Region Association: Southwest Region |
It is located under the dash right behind the blower/air mixture controls. It is a bolt that has a 10mm head (as are many of the bolts on the 914). The tab that holds the controls onto the inner firewall is actually just out of the picture that Bruce posted above. If you put your head under the dash, you'll see the tab and the bolt holding the controls to the firewall right next to where the radio is.
|
|
|
|
| mobymutt |
May 25 2014, 03:05 PM
Post
#71
|
|
Senior Member Group: Members Posts: 548 Joined: 16-December 13 From: Kingston, Ontario, Canada Member No.: 16,770 Region Association: Canada |
I think I discovered why my reverse lights aren't working. I assume this is the switch:
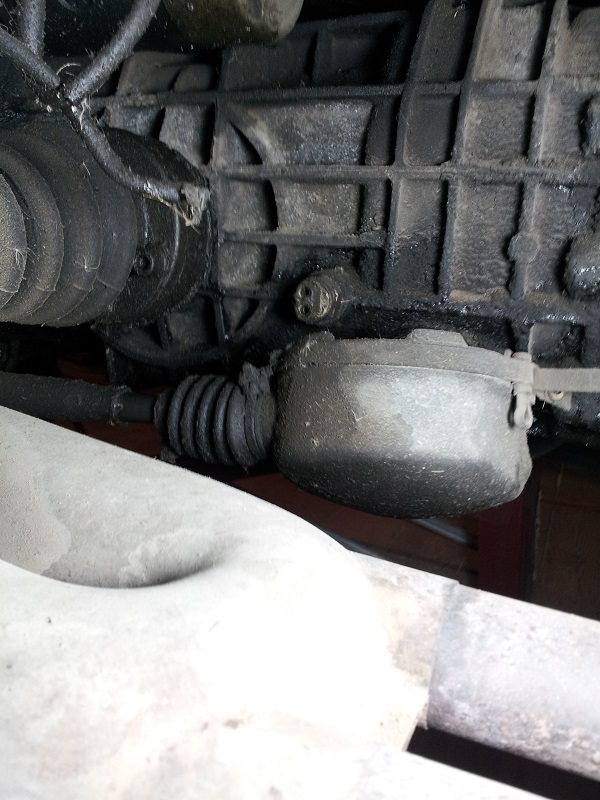 The wires are either cut, or just torn. Do I just need a standard round crimp on push-in connector on each of the two individual wires? If the switch doesn't work once I reconnect the wires, can it be removed without any special precautions (ie without any little parts falling out, or transmission fluid draining)? |
|
|
|
| Jeffs9146 |
May 25 2014, 03:17 PM
Post
#72
|
|
Ski Bum Group: Members Posts: 4,062 Joined: 10-January 03 From: Discovery Bay, Ca Member No.: 128 |
QUOTE The wires are either cut, or just torn. Do I just need a standard round crimp on push-in connector on each of the two individual wires? Yep just connect them up no perticular wire it is just a ground switch! QUOTE can it be removed without any special precautions (ie without any little parts falling out, or transmission fluid draining)? There is a pin so be careful not to loose it! And yes you can loose some fluid! |
|
|
|
| green914 |
May 25 2014, 03:29 PM
Post
#73
|
|
Senior Member Group: Members Posts: 1,467 Joined: 29-March 11 From: Sacramento, California Member No.: 12,874 Region Association: Northern California |
|
|
|
|
| Dave_Darling |
May 25 2014, 06:06 PM
Post
#74
|
|
914 Idiot Group: Members Posts: 14,981 Joined: 9-January 03 From: Silicon Valley / Kailua-Kona Member No.: 121 Region Association: Northern California |
It looks a little like the wires for the reverse lights may be inside that sheathing in the upper-left of your photo. There should be two wires, gray with a brown stripe. If you touch them together, the reverse lights should turn on (if the key is on). The wires look to have been cut off short, so you will have to extend them.
You can use bullet connectors to push into the holes in the switch. I don't know where to get the OEM round-nose connectors, but I think the regular cheapie male bullet connectors work. It's nice to have the rubber boot that goes over the switch; it will help keep dirt out of it and also hold the wires a little better. --DD |
|
|
|
| zambezi |
May 25 2014, 08:16 PM
Post
#75
|
|
Senior Member Group: Members Posts: 711 Joined: 14-April 08 From: Lafayette, LA Member No.: 8,920 Region Association: South East States |
Here are the original sized solder on bullet ends
http://www.stoddard.com/356-1/electrical/b...652-102-10.html Jim |
|
|
|
| mobymutt |
May 29 2014, 07:04 PM
Post
#76
|
|
Senior Member Group: Members Posts: 548 Joined: 16-December 13 From: Kingston, Ontario, Canada Member No.: 16,770 Region Association: Canada |
Wasn't there a thread about the dumb things we've done to our 914's? I did two today.
First of all, I was trying to fix a short in the hazard/turn signal circuit. Turns out I had pinched a wire in the turn signal switch when I reassembled it back into the steering column. Secondly, I spent about 1/2 hour trying to figure out why the side marker lights weren't flashing when I turned on the turn signals. Uhhhhh, I think I've figured that one out now too... |
|
|
|
| mobymutt |
Aug 2 2014, 11:37 AM
Post
#77
|
|
Senior Member Group: Members Posts: 548 Joined: 16-December 13 From: Kingston, Ontario, Canada Member No.: 16,770 Region Association: Canada |
Well, thanks mainly to Eric's rebuild kit and how-to video, I now have working rear brakes. They aren't pretty yet, but they grab and let go!
Next step, safety certification! |
|
|
|
| mobymutt |
Sep 11 2014, 04:54 PM
Post
#78
|
|
Senior Member Group: Members Posts: 548 Joined: 16-December 13 From: Kingston, Ontario, Canada Member No.: 16,770 Region Association: Canada |
Today is a big day! The car still needs a ton of work, but at least it's now legal and back on the road!
(IMG:style_emoticons/default/piratenanner.gif) (IMG:style_emoticons/default/piratenanner.gif) (IMG:style_emoticons/default/piratenanner.gif) 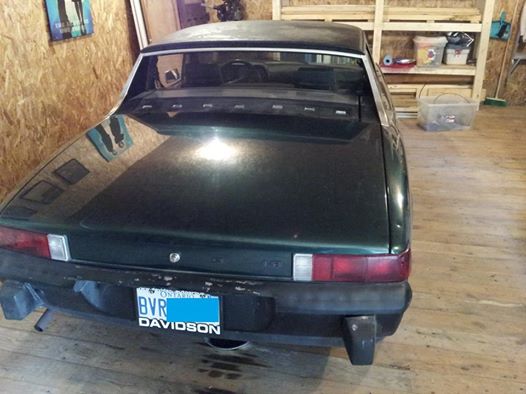 Even lucked out and got myself a nice Canadian beaver license plate! |
|
|
|
| Porschef |
Sep 11 2014, 06:53 PM
Post
#79
|
|
How you doin' Group: Members Posts: 2,165 Joined: 7-September 10 From: LawnGuyland Member No.: 12,152 Region Association: North East States |
QUOTE(mobymutt @ Sep 11 2014, 06:54 PM) Today is a big day! The car still needs a ton of work, but at least it's now legal and back on the road! (IMG:style_emoticons/default/piratenanner.gif) (IMG:style_emoticons/default/piratenanner.gif) (IMG:style_emoticons/default/piratenanner.gif) Even lucked out and got myself a nice Canadian beaver license plate! Mmm, Canadian beaver...and you can still enjoy a LaBatt's while watching... (IMG:style_emoticons/default/beer3.gif) |
|
|
|
| mobymutt |
Nov 9 2014, 06:18 PM
Post
#80
|
|
Senior Member Group: Members Posts: 548 Joined: 16-December 13 From: Kingston, Ontario, Canada Member No.: 16,770 Region Association: Canada |
Well, likely had the car out of the garage for the last day until next year. Dumped some stabilizer in the gas, ran the engine a bit, and took the battery out. Still have to fog the cylinders.
Anything else I need to do for winterizing? I am particularly worried about the brake calipers seizing up. |
|
|
|
|
1 User(s) are reading this topic (1 Guests and 0 Anonymous Users)
0 Members:

|
Lo-Fi Version | Time is now: 28th April 2024 - 01:53 PM |
Invision Power Board
v9.1.4 © 2024 IPS, Inc.