|
|
|
Porsche, and the Porsche crest are registered trademarks of Dr. Ing. h.c. F. Porsche AG.
This site is not affiliated with Porsche in any way. Its only purpose is to provide an online forum for car enthusiasts. All other trademarks are property of their respective owners. |
|
|

  |

| Mark Henry |
 Feb 14 2014, 12:23 PM Feb 14 2014, 12:23 PM
Post
#101
|
|
that's what I do!  Group: Members Posts: 20,065 Joined: 27-December 02 From: Port Hope, Ontario Member No.: 26 Region Association: Canada |
QUOTE(Justinp71 @ Feb 14 2014, 01:16 PM)  Nice thread! A carbed 3.0 is an awesome engine for a 914... Have you given any thought to what you are using to seal the case? I used triple bond 1184, great stuff and it seals very well. Have a very good understanding as to how thick you want it and where you want it before starting. Also make sure your case has the chamfers on both sides for the thru bolt o-rings and dont use rtv on the o-rings like wayne calls out!!! I had to pull my case back apart from doing that one... good luck... For the most part I'm using Supertec's sealant regime, BUT I admit I'm not a big fan of Curil T and I probably won't even open that package. The Hysol you can see on the oil galley plugs, etc. earlier in this thread, instead of using the usual JB weld for this job. Attached image(s) 
|
   |

 
|
| Justinp71 |
Feb 14 2014, 12:44 PM
Post
#102
|
|
Senior Member Group: Members Posts: 1,647 Joined: 11-October 04 From: Sacramento, CA Member No.: 2,922 Region Association: None |
Curil is a pita, like dealing with tree sap (gloves work well). But I had no leaks when I used it to replace my cams about 5 years ago.
|
|
|
|
| Mark Henry |
Feb 16 2014, 12:07 PM
Post
#103
|
|
that's what I do! Group: Members Posts: 20,065 Joined: 27-December 02 From: Port Hope, Ontario Member No.: 26 Region Association: Canada |
This was a slow go making the jigs but here is my first phenolic spacer. (IMG:style_emoticons/default/smile.gif)
5 more to go, but I'm also going to make 6 aluminum spacers to back up the injector notch so the phenolic spacer is fully supported. Attached image(s) 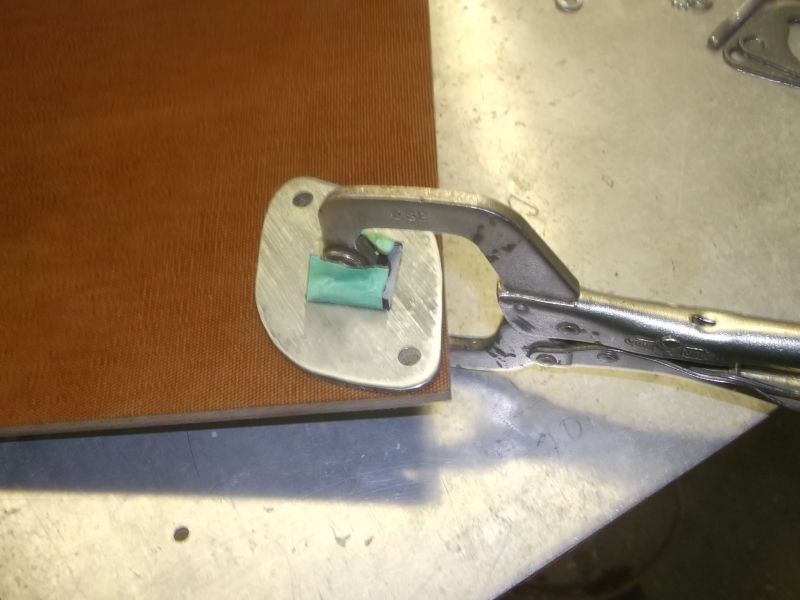 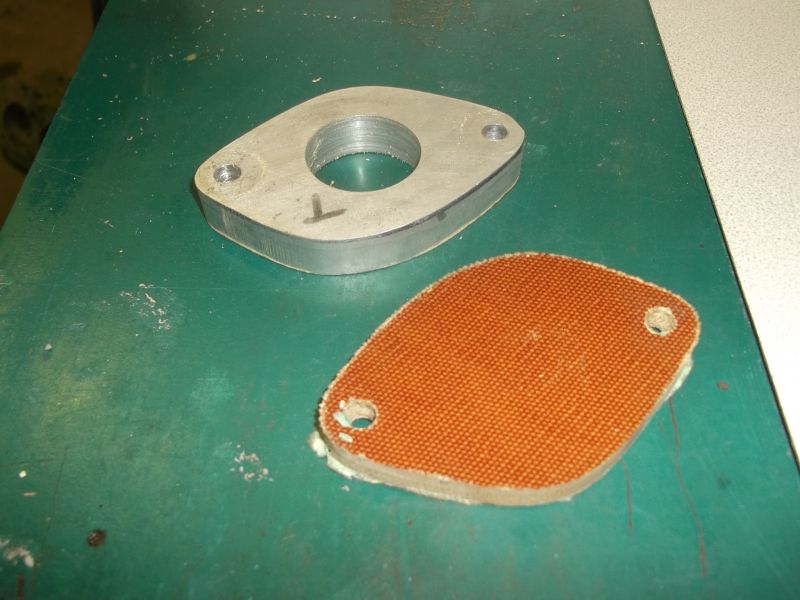
|
|
|
|
| Mark Henry |
Feb 16 2014, 12:08 PM
Post
#104
|
|
that's what I do! Group: Members Posts: 20,065 Joined: 27-December 02 From: Port Hope, Ontario Member No.: 26 Region Association: Canada |
Finished spacer
Attached image(s) 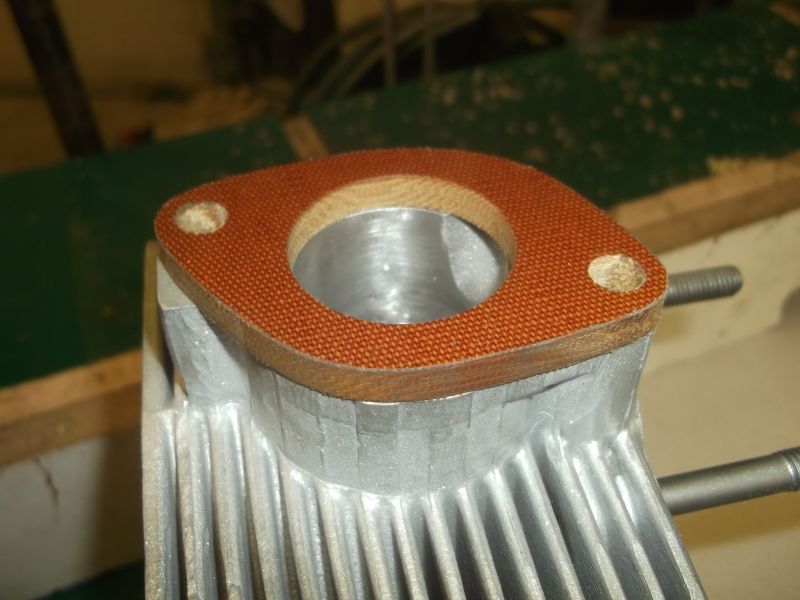 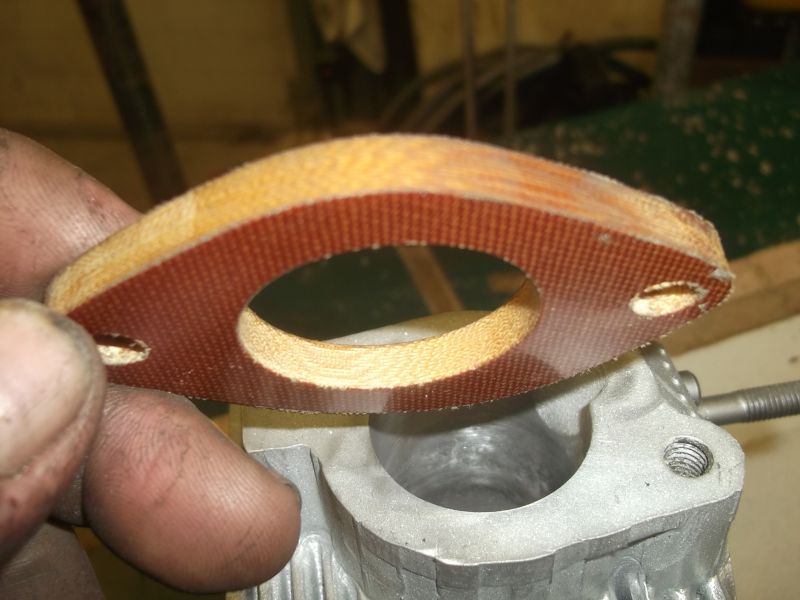
|
|
|
|
| Mark Henry |
Feb 16 2014, 06:24 PM
Post
#105
|
|
that's what I do! Group: Members Posts: 20,065 Joined: 27-December 02 From: Port Hope, Ontario Member No.: 26 Region Association: Canada |
Attached image(s) 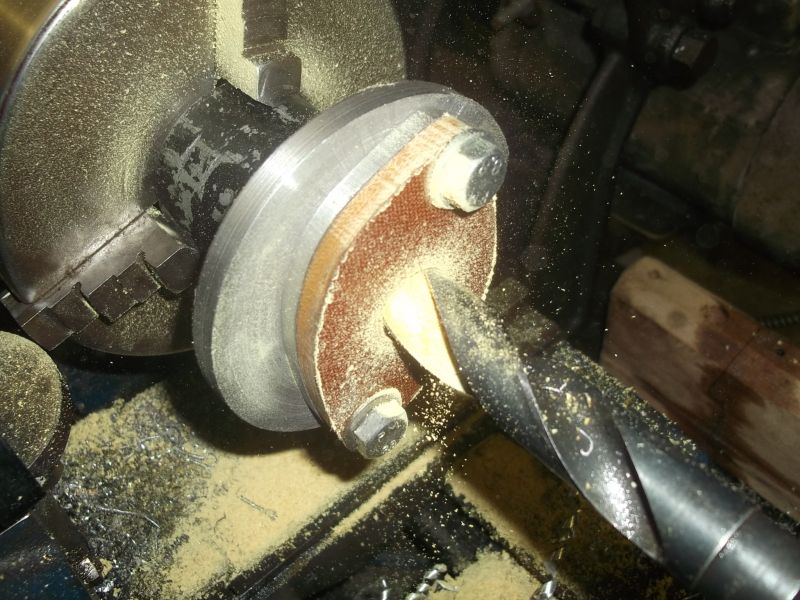 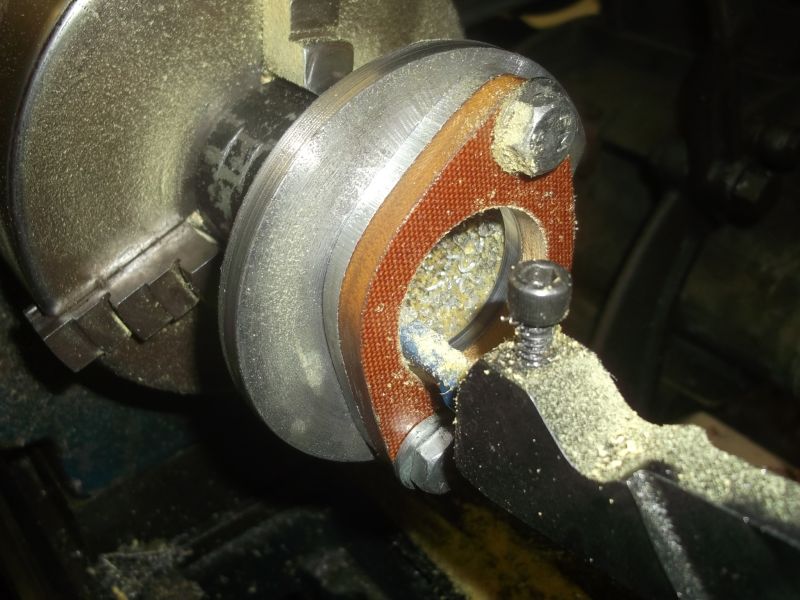
|
|
|
|
| Mark Henry |
Feb 16 2014, 06:25 PM
Post
#106
|
|
that's what I do! Group: Members Posts: 20,065 Joined: 27-December 02 From: Port Hope, Ontario Member No.: 26 Region Association: Canada |
1979 3.0 big port head
Note the injector notch. Attached image(s) 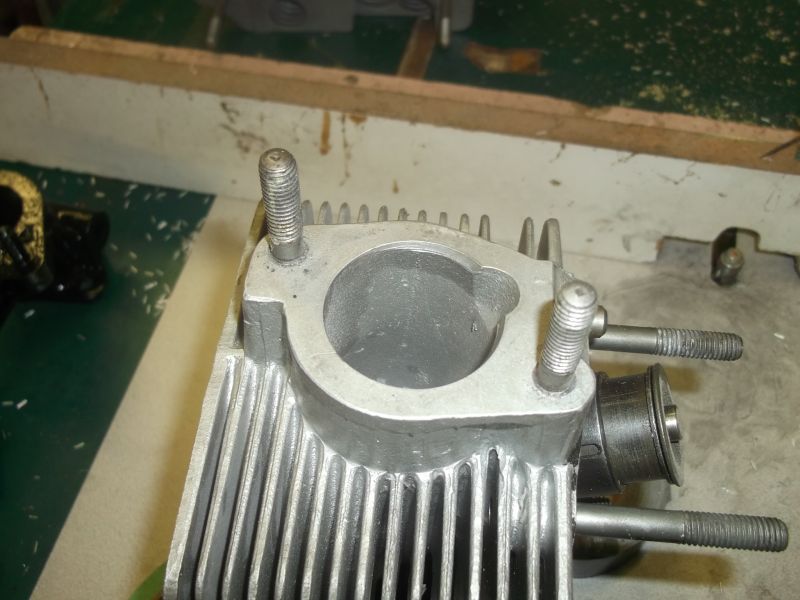
|
|
|
|
| Mark Henry |
Feb 16 2014, 06:26 PM
Post
#107
|
|
that's what I do! Group: Members Posts: 20,065 Joined: 27-December 02 From: Port Hope, Ontario Member No.: 26 Region Association: Canada |
Phenolic spacer
Attached image(s) 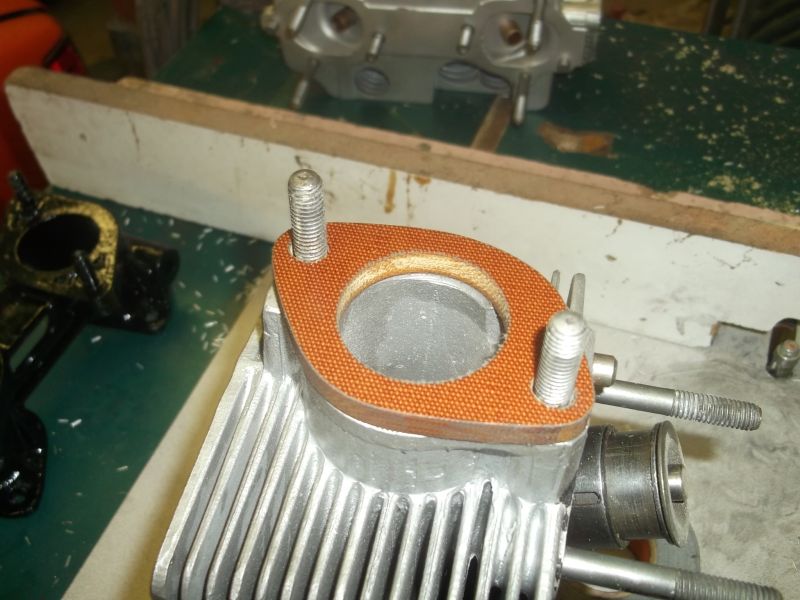
|
|
|
|
| Mark Henry |
Feb 16 2014, 06:27 PM
Post
#108
|
|
that's what I do! Group: Members Posts: 20,065 Joined: 27-December 02 From: Port Hope, Ontario Member No.: 26 Region Association: Canada |
Aluminum spacer
Attached image(s) 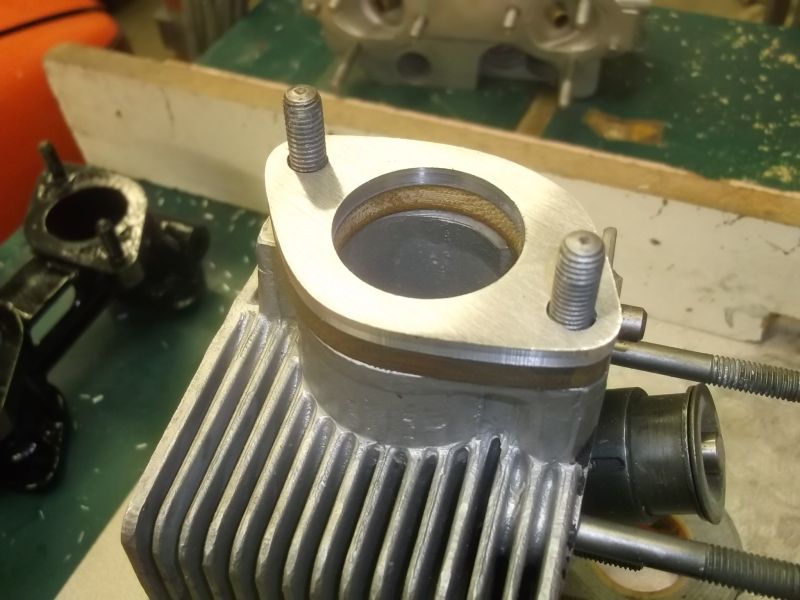
|
|
|
|
| Mark Henry |
Feb 16 2014, 06:36 PM
Post
#109
|
|
that's what I do! Group: Members Posts: 20,065 Joined: 27-December 02 From: Port Hope, Ontario Member No.: 26 Region Association: Canada |
So why am I doing this?
When using the stock weber manifold the injector notch is way to close to the edge of the manifold to ever seal proper. Also using just a phenolic spacer alone will also cause issues later on, as it will eventually leak. The phenolic spacer will also help avoid carb heat soak issues. Attached image(s) 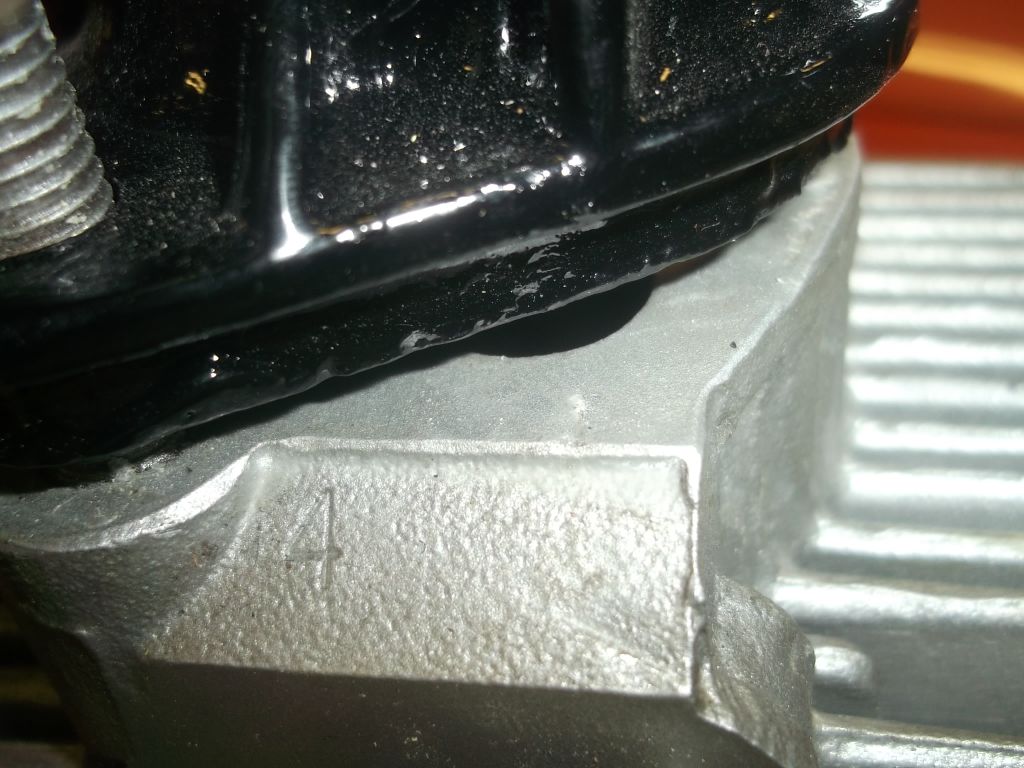
|
|
|
|
| Mark Henry |
Feb 16 2014, 06:37 PM
Post
#110
|
|
that's what I do! Group: Members Posts: 20,065 Joined: 27-December 02 From: Port Hope, Ontario Member No.: 26 Region Association: Canada |
The final product (IMG:style_emoticons/default/shades.gif)
Edit: note I have the spacers on ass backwards, the aluminum spacer goes on the bottom to cover the FI notch, then the phenolic spacer and manifold. Attached image(s) 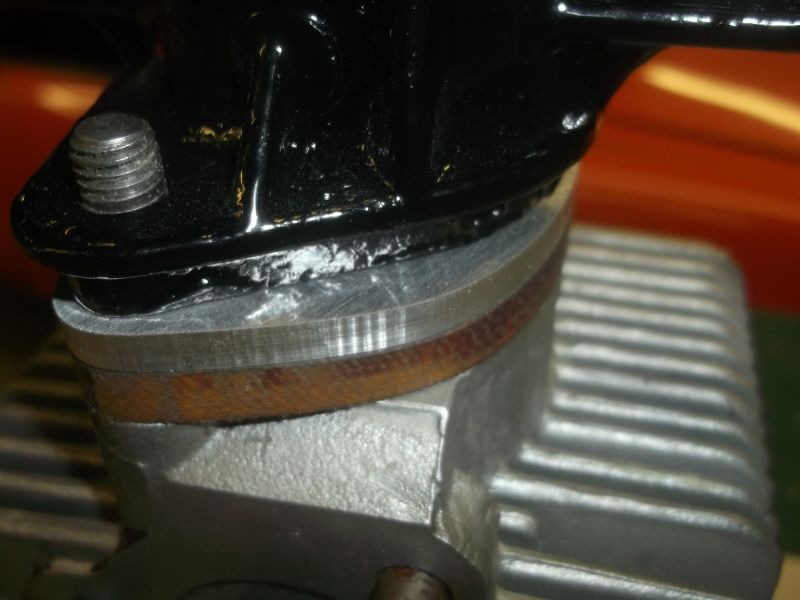 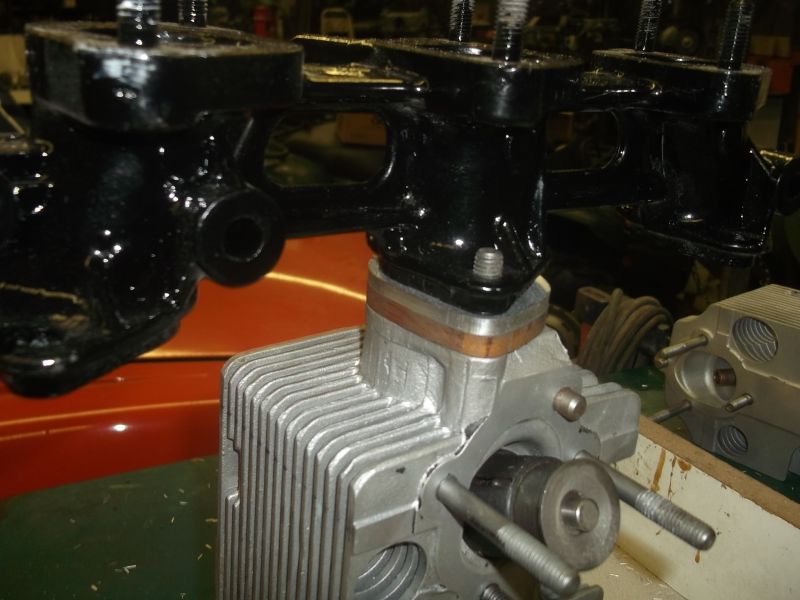
|
|
|
|
| sixnotfour |
Feb 17 2014, 03:06 AM
Post
#111
|
|
914 Wizard Group: Members Posts: 11,291 Joined: 12-September 04 Member No.: 2,744 Region Association: NineFourteenerVille |
why not just fill the notch with weld ?
|
 |
|
| Mark Henry |
Feb 17 2014, 08:27 AM
Post
#112
|
|
that's what I do! Group: Members Posts: 20,065 Joined: 27-December 02 From: Port Hope, Ontario Member No.: 26 Region Association: Canada |
QUOTE(sixnotfour @ Feb 17 2014, 04:06 AM) why not just fill the notch with weld ? Three reasons 1/ Even if I did I'd still want the phenolic spacer...seeing as it's good enough for PMO 2/ What if I decide I want to go FI later. 3/ I'm a cheap SOB and this cost me nothing but time, even the materials were free to me. 4/ welding would have also cost me mo' money...whooops...that's four reasons... |
|
|
|
| Mark Henry |
Feb 17 2014, 10:47 AM
Post
#113
|
|
that's what I do! Group: Members Posts: 20,065 Joined: 27-December 02 From: Port Hope, Ontario Member No.: 26 Region Association: Canada |
So change gears a bit, not going to get much done today, family day weekend so I have to spend some time with the kiddies.
My hell holes and tank install. I know my holes are nice, but they still have a hair of surface rust, so I'm wondering what to do. The back pad area has no rust, that's just glue. I don't want to sand blast, that shit gets everywhere. Thinking wire wheel and por-15 or something like that? Guess I should also cut off the /4 mounts? Attached image(s) 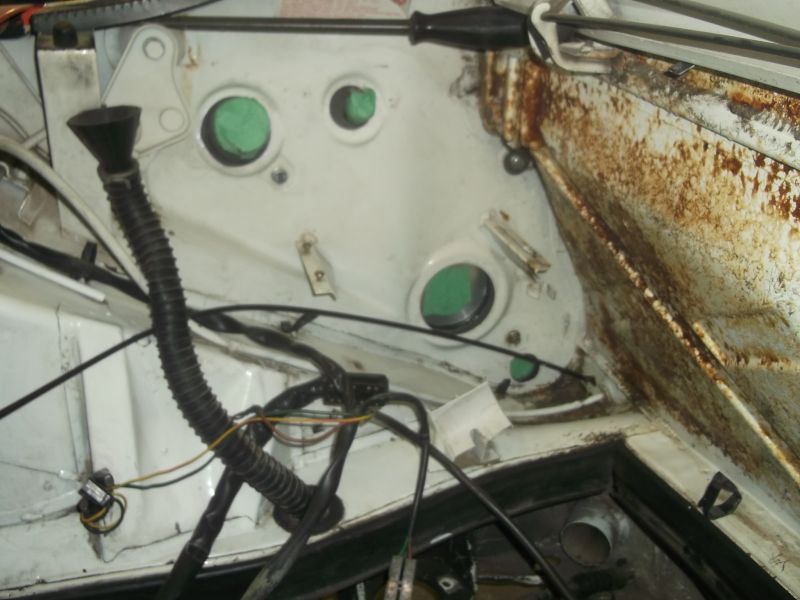 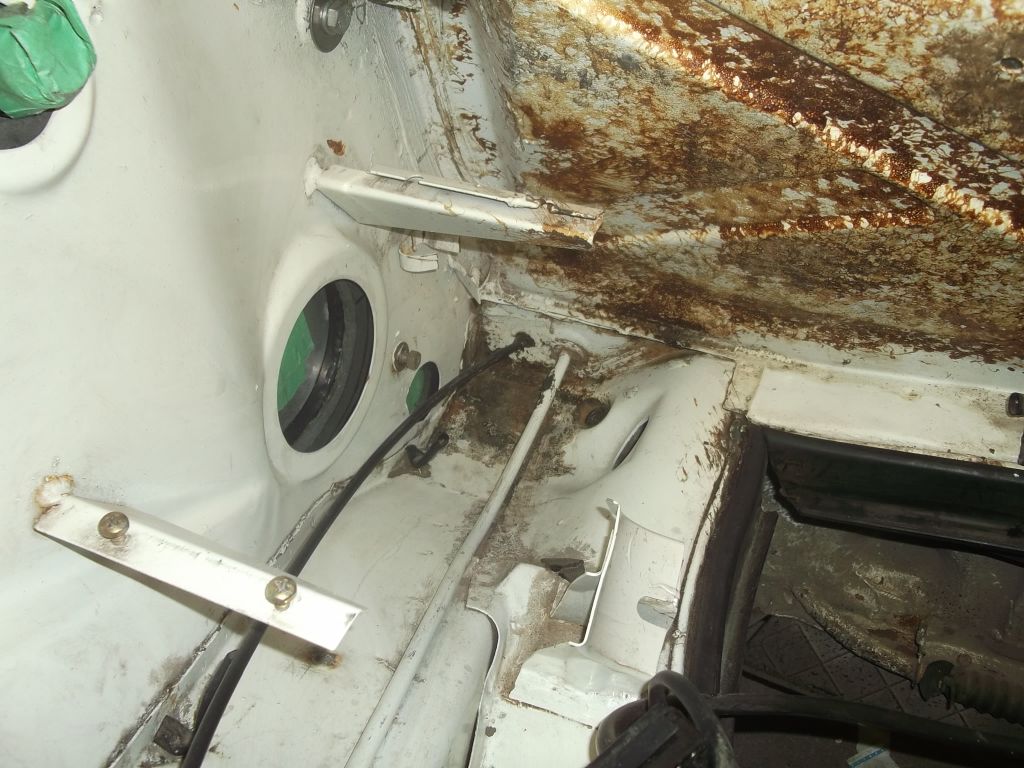 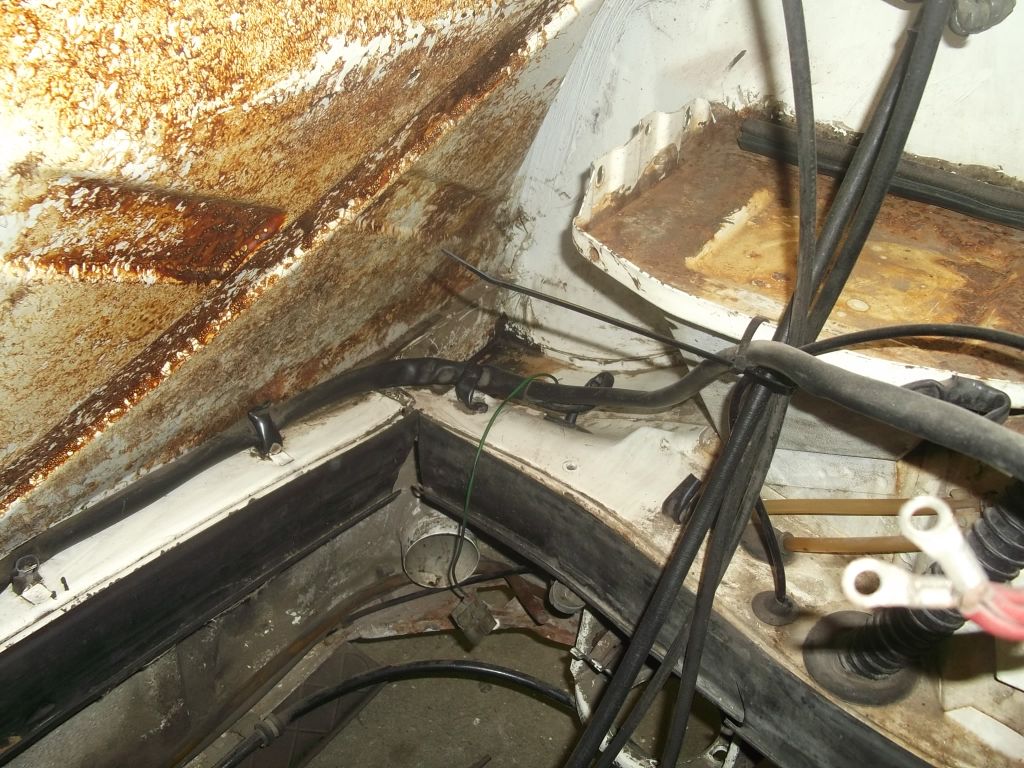 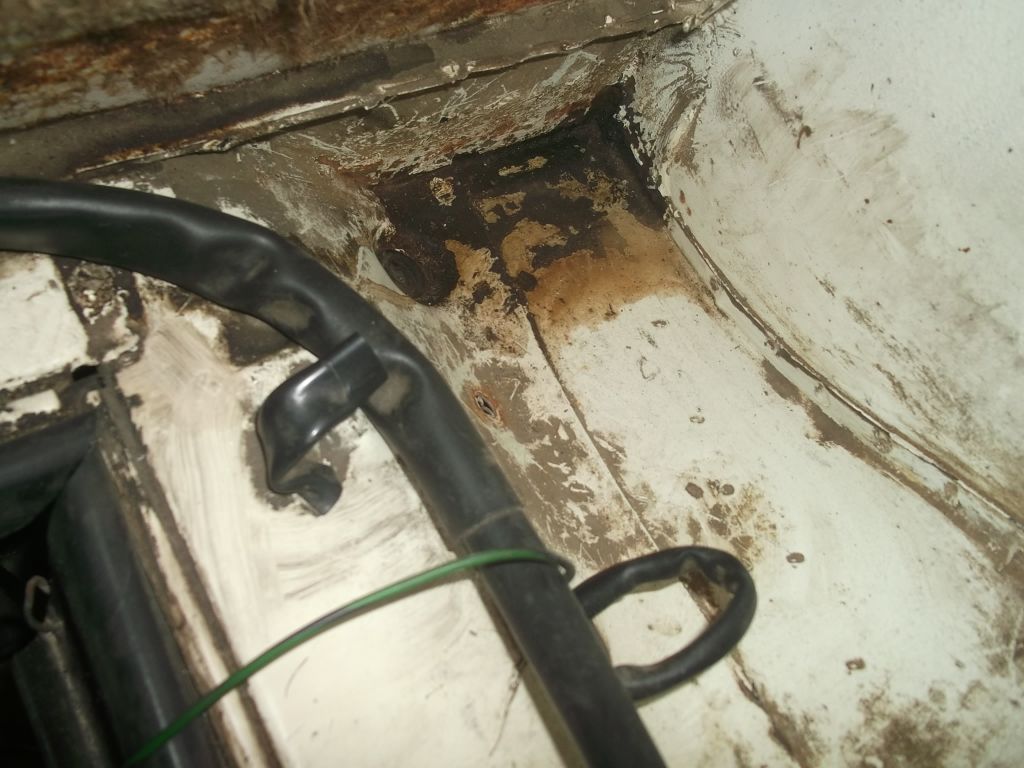
|
|
|
|
| MrHyde |
Feb 17 2014, 10:58 AM
Post
#114
|
|
Senior Member Group: Members Posts: 525 Joined: 13-October 10 From: Ontario, Canada Member No.: 12,268 Region Association: None |
I took a wire wheel on a grinder to take the paint off my entire car.. Well… the parts I didn't just cut out. :-) With YOUR hell hole you might just get away with a rag with soap and water to clean that up ! :-)
|
|
|
|
| Mark Henry |
Feb 17 2014, 11:06 AM
Post
#115
|
|
that's what I do! Group: Members Posts: 20,065 Joined: 27-December 02 From: Port Hope, Ontario Member No.: 26 Region Association: Canada |
QUOTE(MrHyde @ Feb 17 2014, 11:58 AM) I took a wire wheel on a grinder to take the paint off my entire car.. Well… the parts I didn't just cut out. :-) With YOUR hell hole you might just get away with a rag with soap and water to clean that up ! :-) Yeh I got to go at it with some LA Awesome first, but it does have some surface rust. BTW I posted those pics just to tease you Mike. (IMG:style_emoticons/default/happy11.gif) |
|
|
|
| Mark Henry |
Feb 17 2014, 11:52 AM
Post
#116
|
|
that's what I do! Group: Members Posts: 20,065 Joined: 27-December 02 From: Port Hope, Ontario Member No.: 26 Region Association: Canada |
Cleaned it up a bit...now I am just teasing Mike (IMG:style_emoticons/default/poke.gif)
Such a small area I'll do it right. I'll go at this with a wire wheel on a die grinder and epoxy it. Attached image(s) 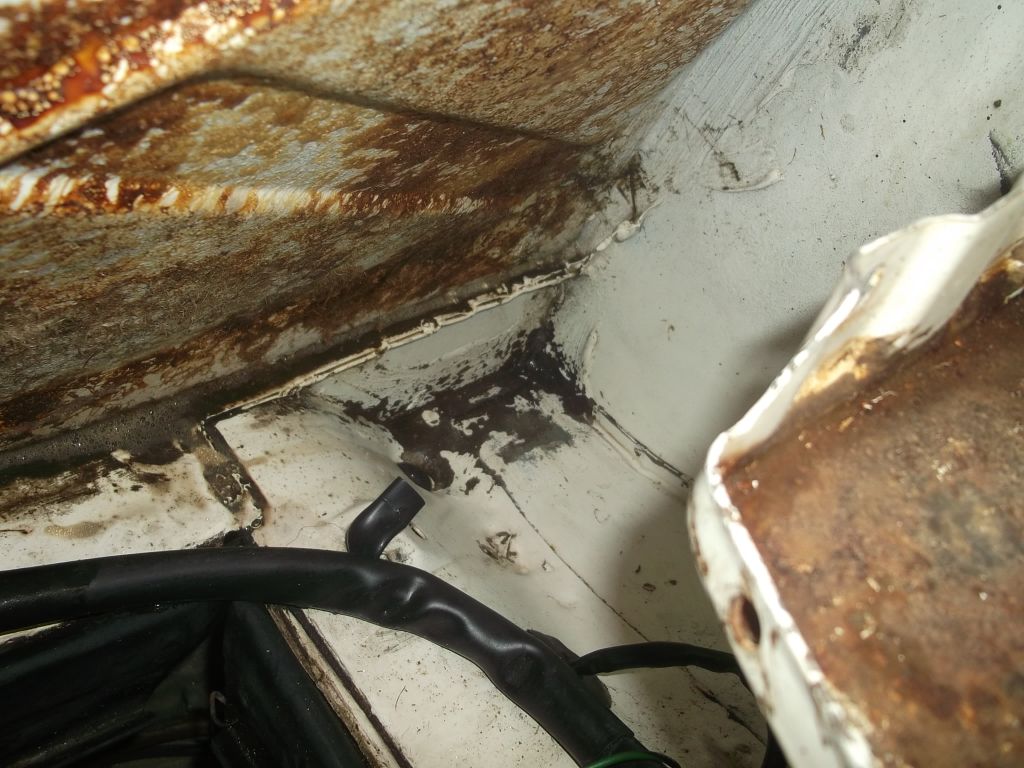
|
|
|
|
| Mark Henry |
Feb 17 2014, 11:59 AM
Post
#117
|
|
that's what I do! Group: Members Posts: 20,065 Joined: 27-December 02 From: Port Hope, Ontario Member No.: 26 Region Association: Canada |
Back to the intake for a second.
I ported and epoxy painted these a while back, just soaked these in gas to make sure they are fuel proof.....looking good! You can also see how little meat is left on the head side of the manifold after porting for the big port heads, All the more reason to back them up with those aluminum spacers. Attached image(s) 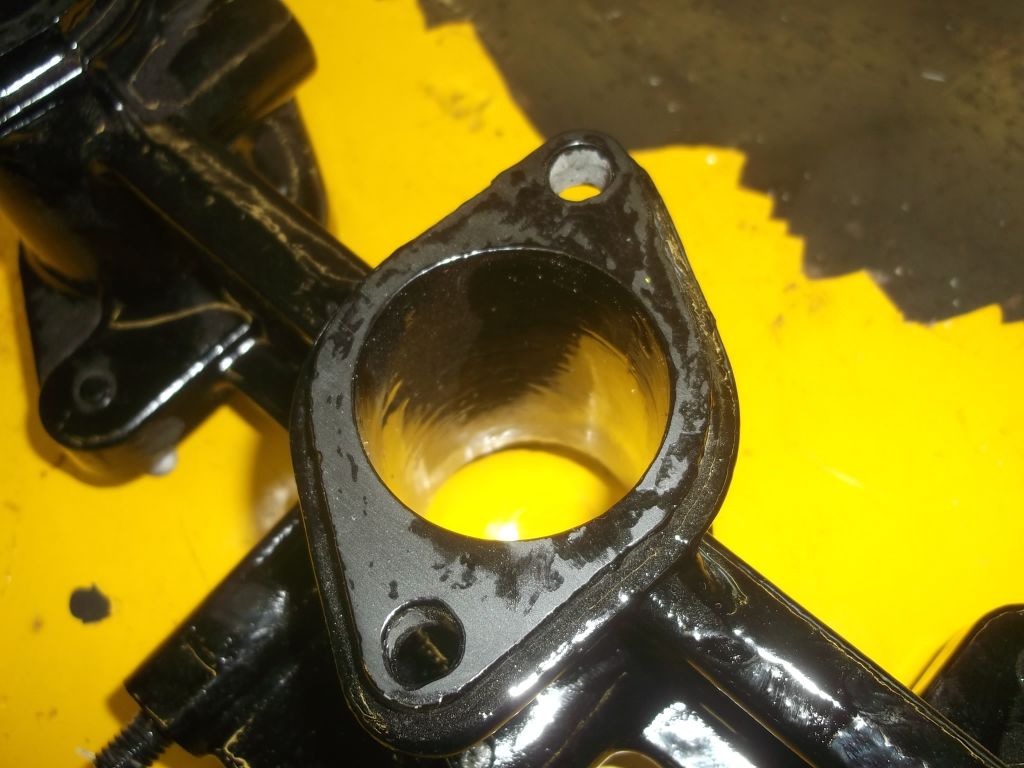 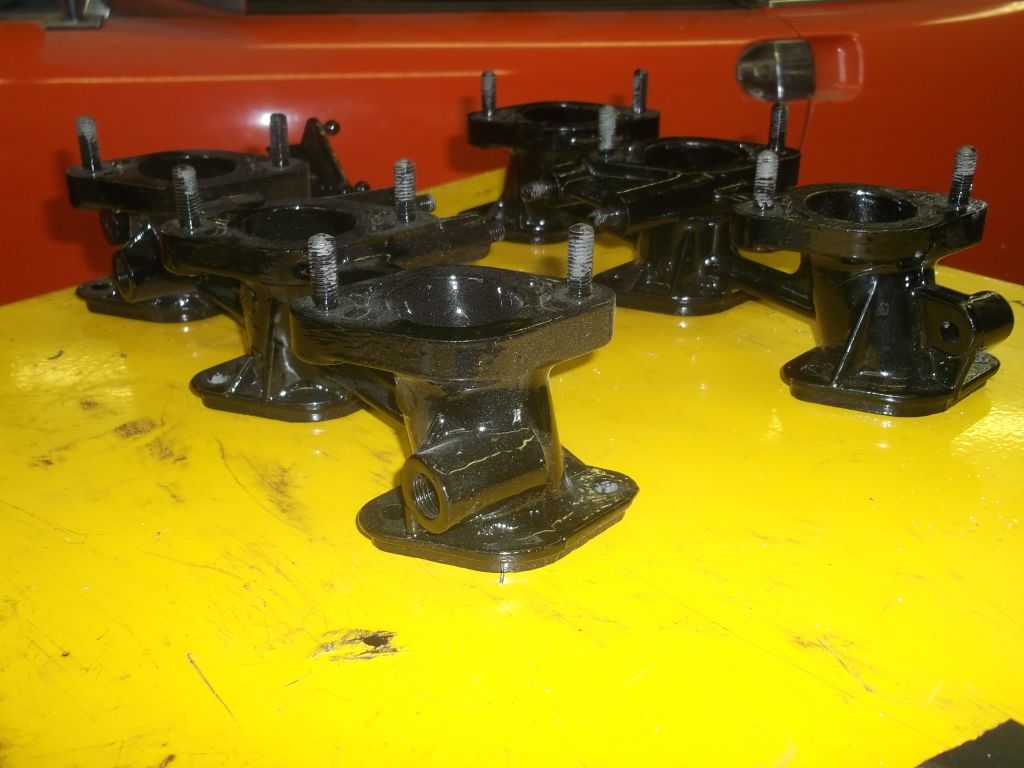
|
|
|
|
| MDG |
Feb 17 2014, 12:23 PM
Post
#118
|
|
Wolf in wolf's clothing. Group: Members Posts: 8,653 Joined: 3-February 09 From: Toronto Member No.: 10,018 Region Association: None |
QUOTE(Mark Henry @ Feb 17 2014, 11:47 AM) Guess I should also cut off the /4 mounts? They tend to get in the way if you don't . . . Also, are you going to be using the relay board? If not, get rid of those brackets too. |
|
|
|
| Mark Henry |
Feb 17 2014, 04:02 PM
Post
#119
|
|
that's what I do! Group: Members Posts: 20,065 Joined: 27-December 02 From: Port Hope, Ontario Member No.: 26 Region Association: Canada |
QUOTE(MDG @ Feb 17 2014, 01:23 PM) QUOTE(Mark Henry @ Feb 17 2014, 11:47 AM) Guess I should also cut off the /4 mounts? They tend to get in the way if you don't . . . Also, are you going to be using the relay board? If not, get rid of those brackets too. I've been wondering if I should run a board or not... How do you hook into the factory harness with out a board? |
|
|
|
| Van914 |
Feb 17 2014, 04:54 PM
Post
#120
|
|
Van914 Group: Members Posts: 702 Joined: 5-January 03 From: Cincinnati, Ohio Member No.: 90 Region Association: Upper MidWest |
Mark,
I have a connector I bought from Perry for mine. Sold the car before I completed the Relay board removal. I still have it if you are interested. Thanks Van |
|
|
|
|
2 User(s) are reading this topic (2 Guests and 0 Anonymous Users)
0 Members:

|
Lo-Fi Version | Time is now: 22nd July 2026 - 07:59 PM |
Invision Power Board
v9.1.4 © 2026 IPS, Inc.