|
|
|
Porsche, and the Porsche crest are registered trademarks of Dr. Ing. h.c. F. Porsche AG.
This site is not affiliated with Porsche in any way. Its only purpose is to provide an online forum for car enthusiasts. All other trademarks are property of their respective owners. |
|
|

  |

| Mark Henry |
 Feb 25 2014, 10:17 PM Feb 25 2014, 10:17 PM
Post
#141
|
|
that's what I do!  Group: Members Posts: 20,065 Joined: 27-December 02 From: Port Hope, Ontario Member No.: 26 Region Association: Canada |
QUOTE(balljoint @ Feb 25 2014, 11:01 PM)  What did you do to my car (IMG:style_emoticons/default/mad.gif) or are you talking aboot the TuRD..... |
   |

 
|
| balljoint |
Feb 25 2014, 10:28 PM
Post
#142
|
|
914 Wizard Group: Members Posts: 10,001 Joined: 6-April 04 Member No.: 1,897 Region Association: None |
(IMG:style_emoticons/default/confused24.gif)
Of course I was talking about the Kitty TuRD. Any other Toyota I had recently Kitty is pushing 350k. No sign of issue now, but down the road... |
|
|
|
| Mark Henry |
Feb 26 2014, 06:38 AM
Post
#143
|
|
that's what I do! Group: Members Posts: 20,065 Joined: 27-December 02 From: Port Hope, Ontario Member No.: 26 Region Association: Canada |
The TuRD engine will last the life of the truck, but if it was to crap out yes I could rebuild it.
But it would be way cheaper to get a Japanese market engine. They sell your engine, low miles, complete for something like $1500 in Toronto. |
|
|
|
| Mark Henry |
Feb 26 2014, 09:22 AM
Post
#144
|
|
that's what I do! Group: Members Posts: 20,065 Joined: 27-December 02 From: Port Hope, Ontario Member No.: 26 Region Association: Canada |
Ok, geting my process down, this is a complete 911 engine bearing job ready for the oven.
It all about prep. I'm thinking of offering this as a service, if I do I need a couple of better low pressure regulators. Attached image(s) 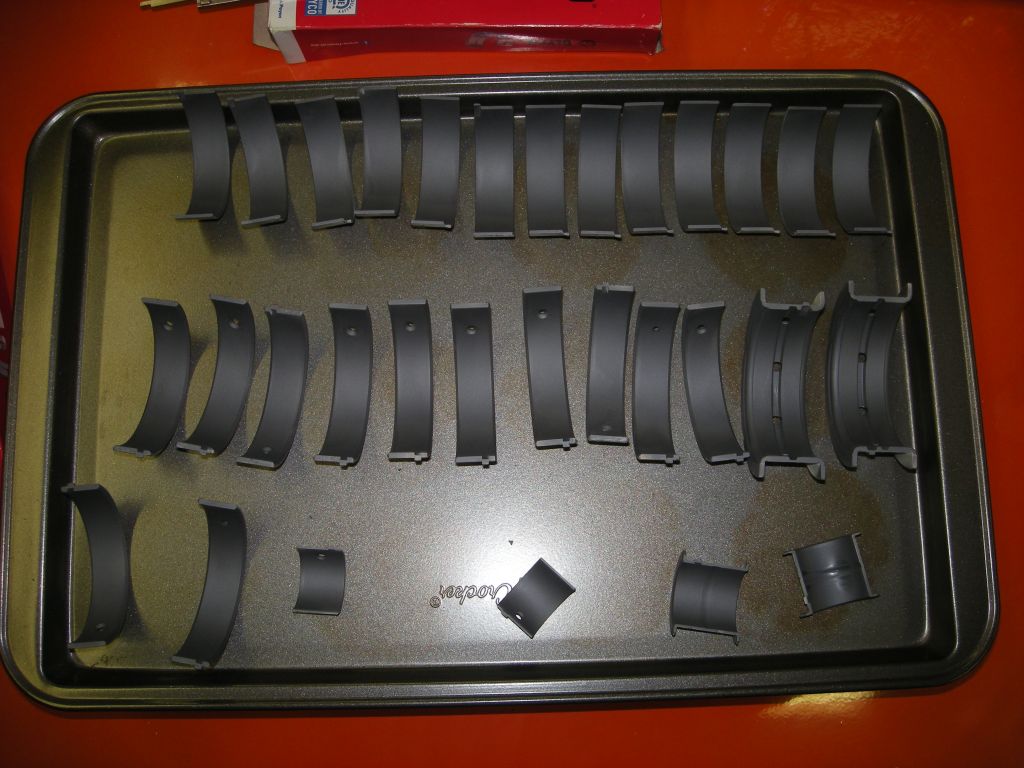
|
|
|
|
| r_towle |
Feb 26 2014, 07:41 PM
Post
#145
|
|
Custom Member Group: Members Posts: 24,705 Joined: 9-January 03 From: Taxachusetts Member No.: 124 Region Association: North East States |
Just curious.
Why are you doing this to the bearings? Mine have lasted 250k already in my 911, and as we have seen above, the TuRd has lasted even longer. Pistons i understand. What is the benefit to doing this to the bearings? Maybe a link or search term to read up would help..... |
|
|
|
| Mark Henry |
Feb 27 2014, 07:19 AM
Post
#146
|
|
that's what I do! Group: Members Posts: 20,065 Joined: 27-December 02 From: Port Hope, Ontario Member No.: 26 Region Association: Canada |
So you have looked at your bearings?
You haven't torn down the number of engines I have, the wear is often quite a bit more than you realize. My engine had less miles on it than yours and it was out of an automatic, all the bearings (except#8) were shot and the nikasil cylinders were totally out of spec. Yet it was still a running engine. Every bit helps even if this coating just lasts for break-in it's does its job. It also adds up to .0005 and seeing as this is a used standard crank (like most at the lower end of the spec) that may be a good thing. After baking the coating is quite durable, brake cleaner, lacquer thinner and acetone don't seem to harm it. Took a bit of effort to sand through it. The piston skirts, well Mahle has been graphite coating them for years. http://en.wikipedia.org/wiki/Dry_lubricant The ceramic coatings I'll be doing are to help with heat disbursement much like header coatings, I think most would agree any help in this area is a good thing. Also a buddy wanted to try this stuff so all the material is free to me to try. (IMG:style_emoticons/default/shades.gif) |
|
|
|
| McMark |
Feb 27 2014, 10:26 AM
Post
#147
|
|
914 Freak! Group: Retired Admin Posts: 20,180 Joined: 13-March 03 From: Grand Rapids, MI Member No.: 419 Region Association: None |
(IMG:style_emoticons/default/agree.gif) I agree with both sides of that argument. (IMG:style_emoticons/default/biggrin.gif)
It's not a bad thing to do (assuming it doesn't flake or gall, etc) and Mark's reasoning is totally legit. But I wouldn't pull apart an engine to install it. But since it was free, I would have done the same thing. Experimentation time! (IMG:style_emoticons/default/boldblue.gif) |
|
|
|
| Mark Henry |
Feb 27 2014, 01:36 PM
Post
#148
|
|
that's what I do! Group: Members Posts: 20,065 Joined: 27-December 02 From: Port Hope, Ontario Member No.: 26 Region Association: Canada |
I understand most flaking issues have been due to poor preparation or applying to much product. This process is all about prep and the labor is all in the prep. The spraying and baking is the easy part.
On the other side of the coin I have torn down engines and been very tempted to reuse bearings. In fact I have done this on my own engines many times with good results. But these bearings look ugly, not that they are out of spec, they are just stained. Coating these may offer a cost effective option. Look at these bearings before and after, they are within spec. Attached image(s)  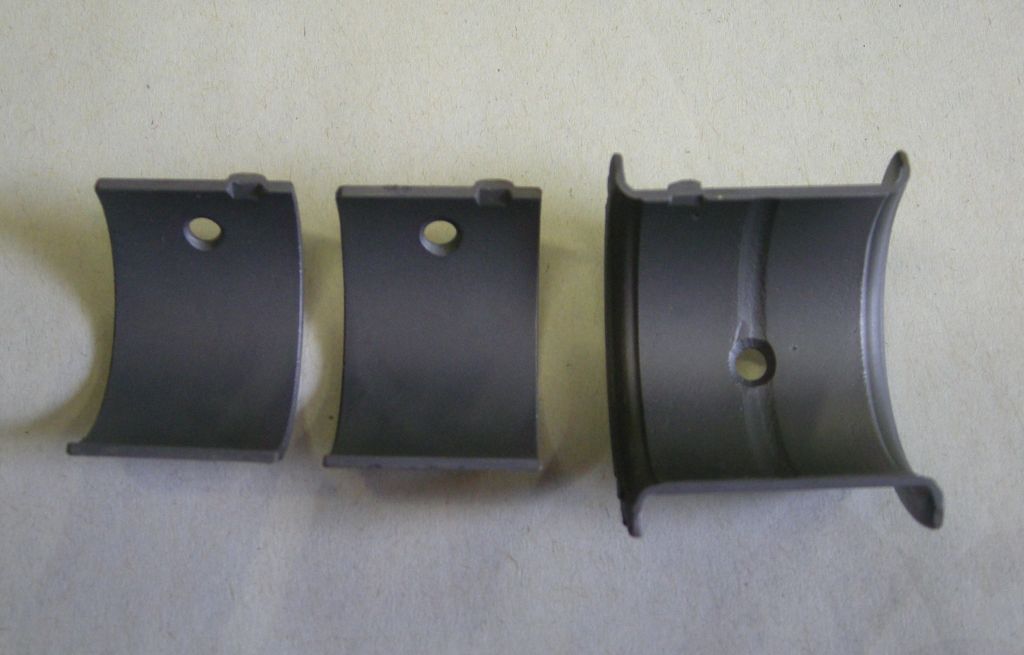
|
|
|
|
| Mark Henry |
Feb 27 2014, 01:52 PM
Post
#149
|
|
that's what I do! Group: Members Posts: 20,065 Joined: 27-December 02 From: Port Hope, Ontario Member No.: 26 Region Association: Canada |
How about these ones? These are 3.2-3.6 bearings, worth $160 new.
I've reprocessed the far right one, it is the worst one of the set. You could barely catch a a fingernail on the scratch in the center. The scratches on the other bearings you can't catch a finger nail on. BTW these have about 30,000 miles on them. If someone want's me to finish up the rest of the set I'd give a good deal on these. Attached image(s) 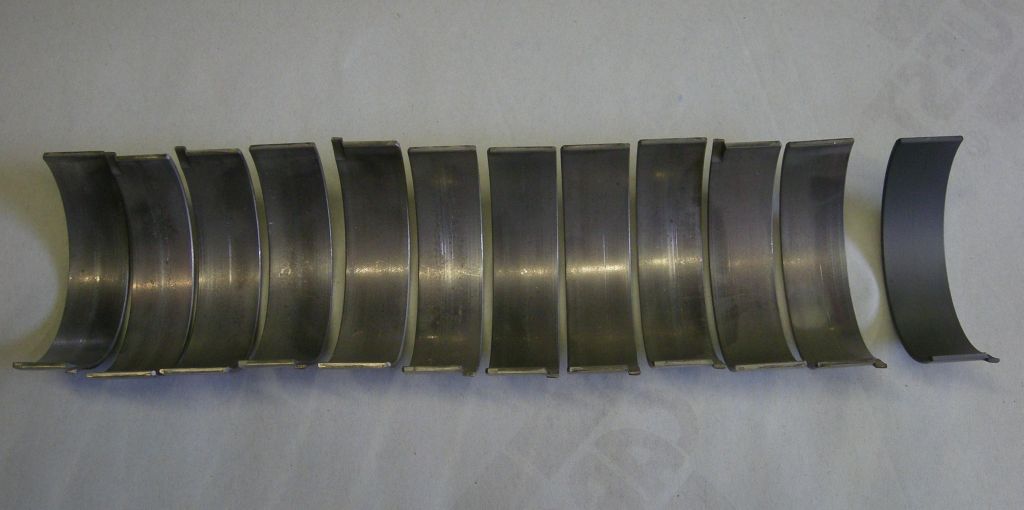 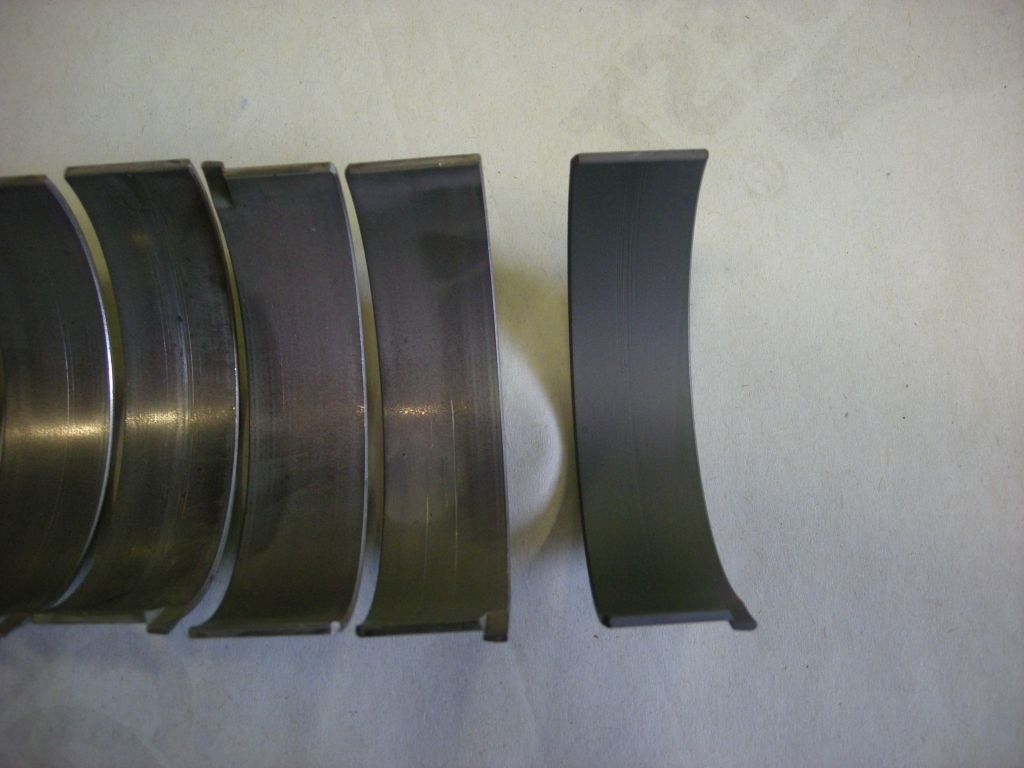
|
|
|
|
| Mark Henry |
Mar 3 2014, 03:58 PM
Post
#150
|
|
that's what I do! Group: Members Posts: 20,065 Joined: 27-December 02 From: Port Hope, Ontario Member No.: 26 Region Association: Canada |
Waiting to get my stuff back from the balance shop so I thought I'd mess with the wiring today.
I haven't got a connector and being a cheap ass I can't see paying $50 for just a connector, let alone seeing as I'm in Canada, the dollar, duty, taxes and and stupid expensive shipping the freaking thing might cost me almost $100 in my hand. (IMG:style_emoticons/default/sheeplove.gif) Fuch that (IMG:style_emoticons/default/mad.gif) So what to do (IMG:style_emoticons/default/confused24.gif) ...... don't want a hack (IMG:style_emoticons/default/dry.gif) I have spares, and I have a relay board main harness connector (and an engine harness) so I took it apart and figured I had to flip and reverse the wires to line up. That wasn't to bad...but I end up with 2 female connectors (IMG:style_emoticons/default/blink.gif) damn! Attached image(s) 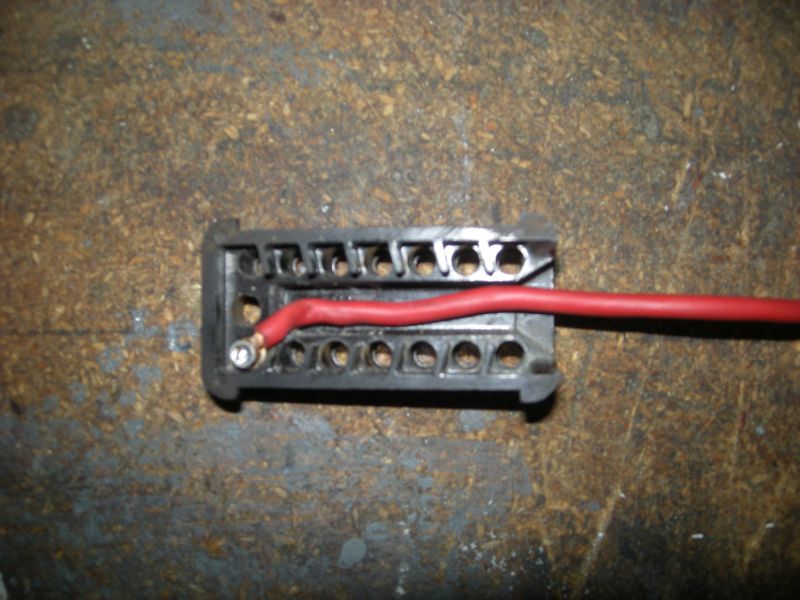 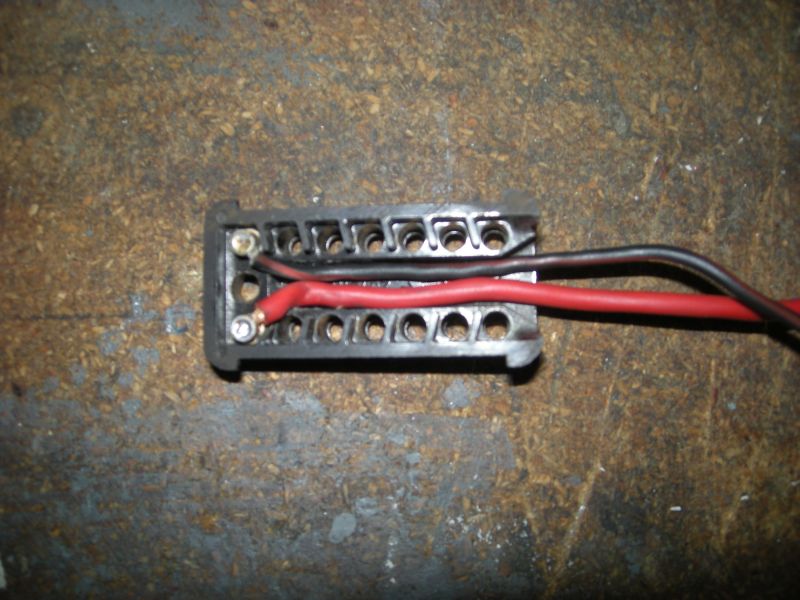 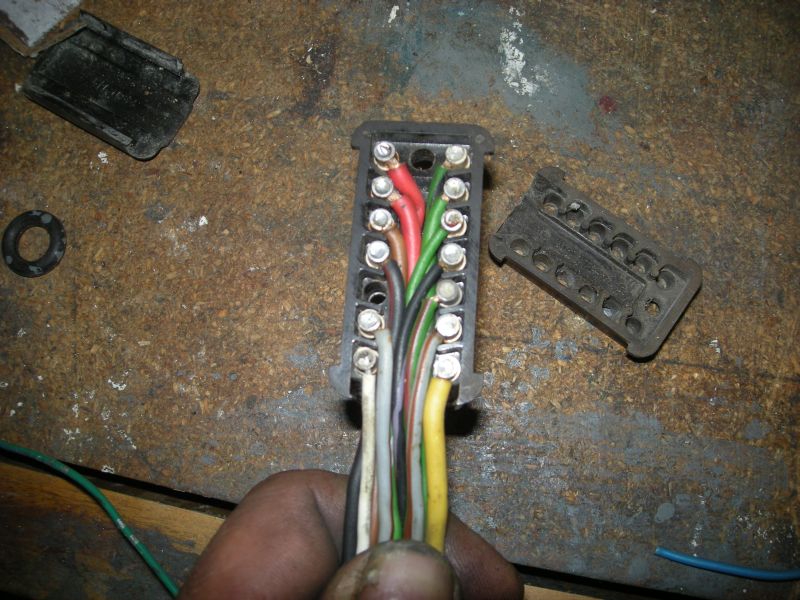
|
|
|
|
| Mark Henry |
Mar 3 2014, 04:10 PM
Post
#151
|
|
that's what I do! Group: Members Posts: 20,065 Joined: 27-December 02 From: Port Hope, Ontario Member No.: 26 Region Association: Canada |
Didn't really want to make 14 little pins. (IMG:style_emoticons/default/idea.gif) So I have a whole pail of 911 relays and they have pins that fit, so I broke them out and found the other end is a bit too big. That's better than being too small (IMG:style_emoticons/default/smile.gif) Attached image(s) 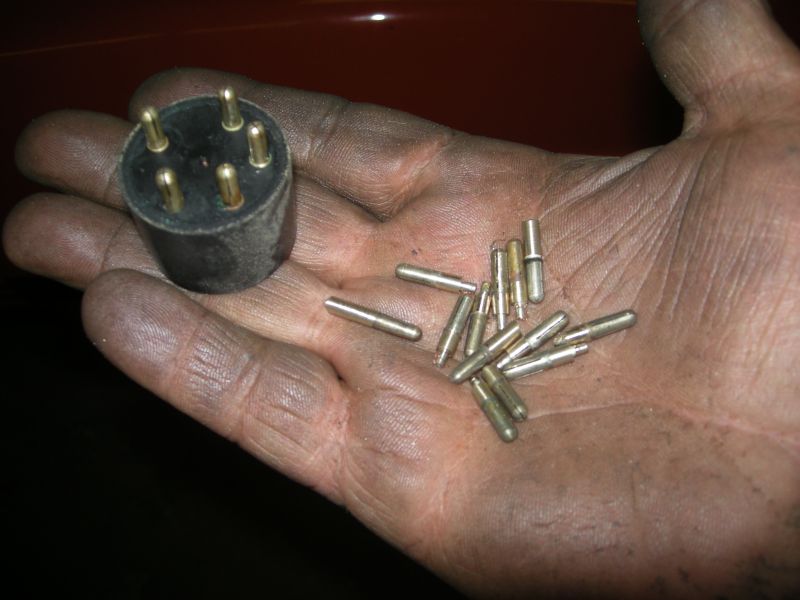
|
|
|
|
| Mark Henry |
Mar 3 2014, 04:12 PM
Post
#152
|
|
that's what I do! Group: Members Posts: 20,065 Joined: 27-December 02 From: Port Hope, Ontario Member No.: 26 Region Association: Canada |
So I turned them down on my mini model lathe. I left a bit of a press fit.
Attached image(s) 
|
|
|
|
| Mark Henry |
Mar 3 2014, 04:19 PM
Post
#153
|
|
that's what I do! Group: Members Posts: 20,065 Joined: 27-December 02 From: Port Hope, Ontario Member No.: 26 Region Association: Canada |
I think this is going to work out just fine.
I wonder if a drop of loctite on the engine harness end would be ok on the pins? I could snap it up now, but I'll wait till I get some longer red primary wire, these ones are cut a bit short. Why have a splice when you don't have to have one. Note the top pic only shows one pin installed, almost every hole has a pin pressed in the final male connector. Also I screwed up the first wiring attempt, as everything is backwards on the engine harness male connector, because that connector is flipped 180* from normal. Attached image(s)  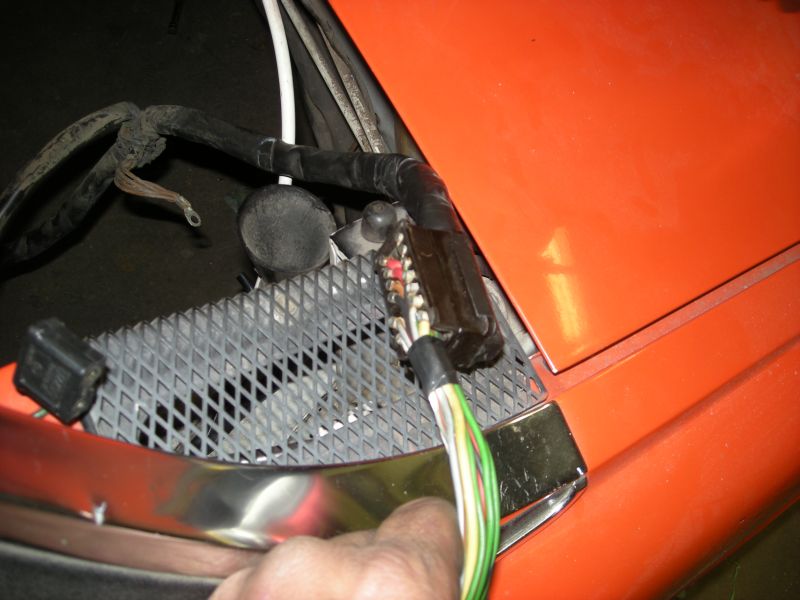
|
|
|
|
| Mark Henry |
Mar 3 2014, 04:59 PM
Post
#154
|
|
that's what I do! Group: Members Posts: 20,065 Joined: 27-December 02 From: Port Hope, Ontario Member No.: 26 Region Association: Canada |
I used this diagram to figure this out...I wonder if I need both reds?
Min'es a carbed 3.0 so I just worked from the left side of the diagram. (IMG:http://www.914world.com/bbs2/uploads/post-1536-1292045491_thumb.jpg) |
|
|
|
| Justinp71 |
Mar 3 2014, 05:43 PM
Post
#155
|
|
Senior Member Group: Members Posts: 1,647 Joined: 11-October 04 From: Sacramento, CA Member No.: 2,922 Region Association: None |
Not sure about the 2 reds, I can take a look at mine tonight.
Also keep in mind I think the 3.2 has an internal regulated alternator, where as I think the 3.0 does not? |
|
|
|
| Luke M |
Mar 3 2014, 07:53 PM
Post
#156
|
|
Senior Member Group: Members Posts: 1,560 Joined: 8-February 05 From: WNY Member No.: 3,574 Region Association: North East States |
QUOTE(Justinp71 @ Mar 3 2014, 04:43 PM) Not sure about the 2 reds, I can take a look at mine tonight. Also keep in mind I think the 3.2 has an internal regulated alternator, where as I think the 3.0 does not? My brothers 3.0 has an internal regulator and IIRC it started on the later 2.7 engines on up. |
|
|
|
| Mark Henry |
Mar 3 2014, 08:45 PM
Post
#157
|
|
that's what I do! Group: Members Posts: 20,065 Joined: 27-December 02 From: Port Hope, Ontario Member No.: 26 Region Association: Canada |
I don't think I have an internal regulator, I know for sure I'm using a fan assembly from a 2.7, I also have one from a 2.0 but that's a lower amp alternator.
I'll have to figure out were to mount a regulator. I also have to figure out the rear window defogger, but I think it just needs a fused power and a ground. |
|
|
|
| Mark Henry |
Mar 4 2014, 11:58 PM
Post
#158
|
|
that's what I do! Group: Members Posts: 20,065 Joined: 27-December 02 From: Port Hope, Ontario Member No.: 26 Region Association: Canada |
This evening I decided to look at my exhaust ports, a few studs needed some work.
This one is snapped off so I made a drill bushing and went to work on it. I made my own drill bushing but you can buy these. It's very important that you drill down the center of the stud. Attached image(s) 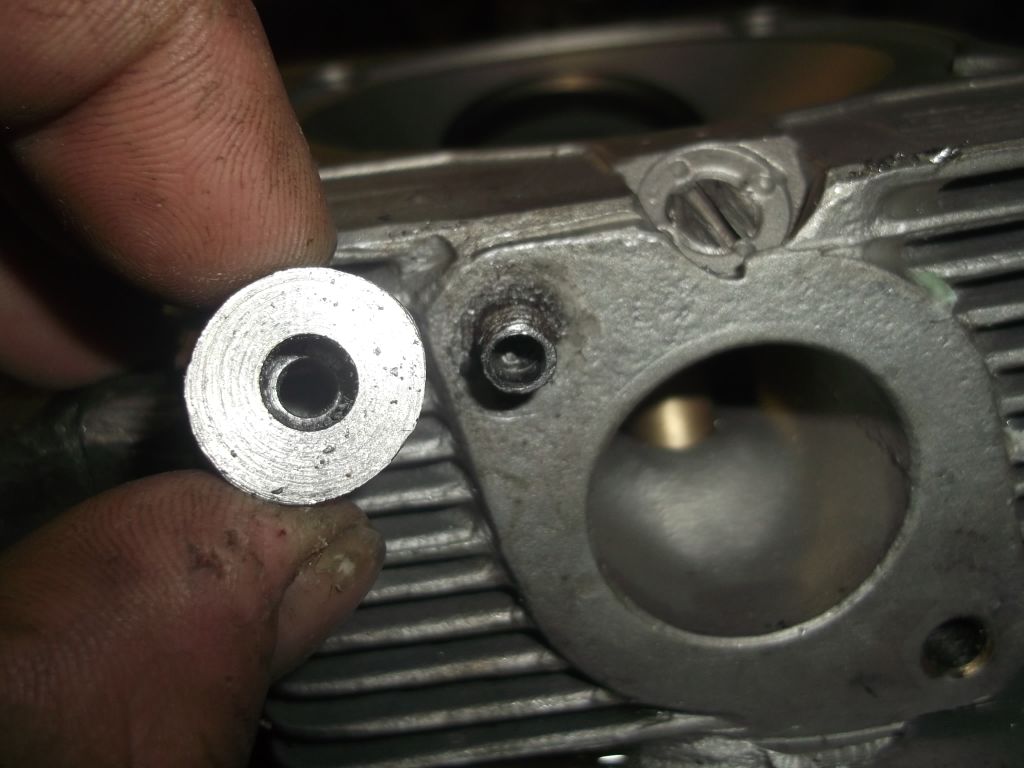 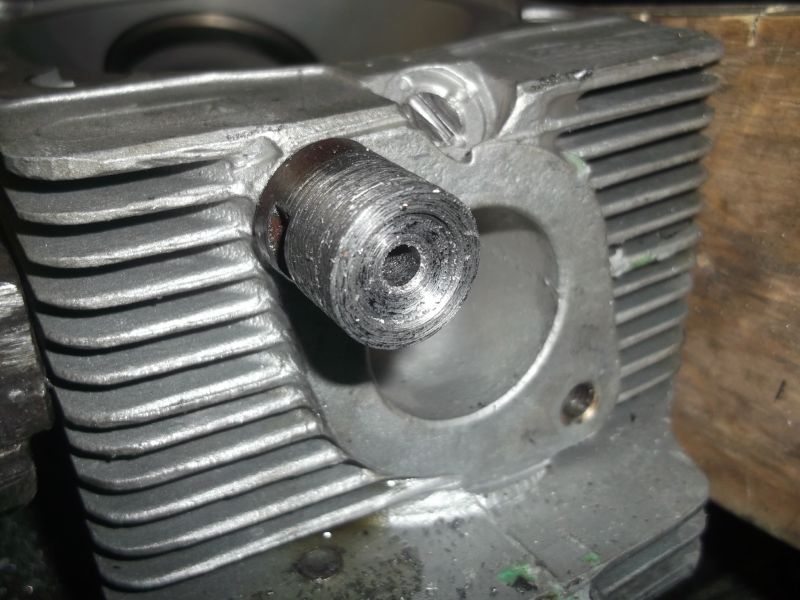 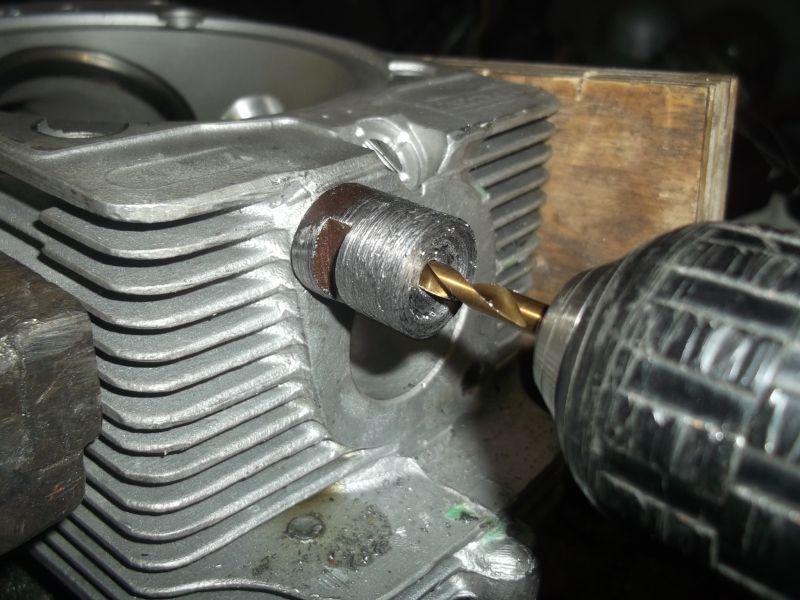 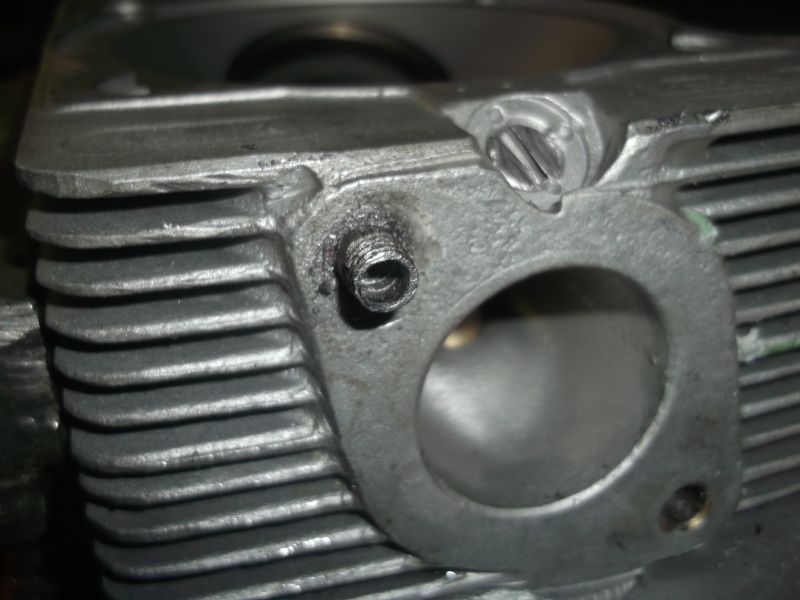
|
|
|
|
| Mark Henry |
Mar 5 2014, 12:04 AM
Post
#159
|
|
that's what I do! Group: Members Posts: 20,065 Joined: 27-December 02 From: Port Hope, Ontario Member No.: 26 Region Association: Canada |
Then you have to dig out any left over bits of the steel stud. This is real important, if you don't your repair is going to suck balls.
Drilling centered is the key, if you did that right digging these last bits of steel out should be fairly easy. Just a little patience... Attached image(s) 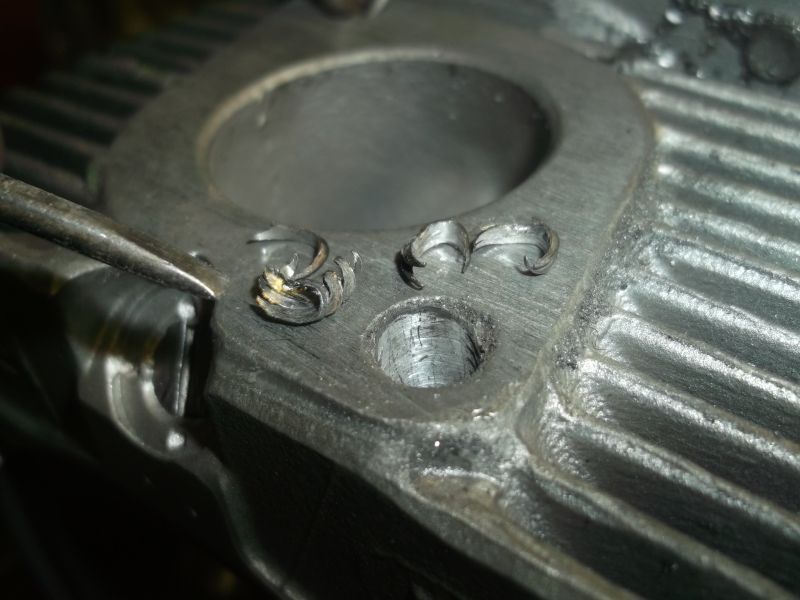
|
|
|
|
| Mark Henry |
Mar 5 2014, 12:06 AM
Post
#160
|
|
that's what I do! Group: Members Posts: 20,065 Joined: 27-December 02 From: Port Hope, Ontario Member No.: 26 Region Association: Canada |
OK that's done time for the repair...or I should say lets Time-sert the repair (IMG:style_emoticons/default/biggrin.gif)
Attached image(s) 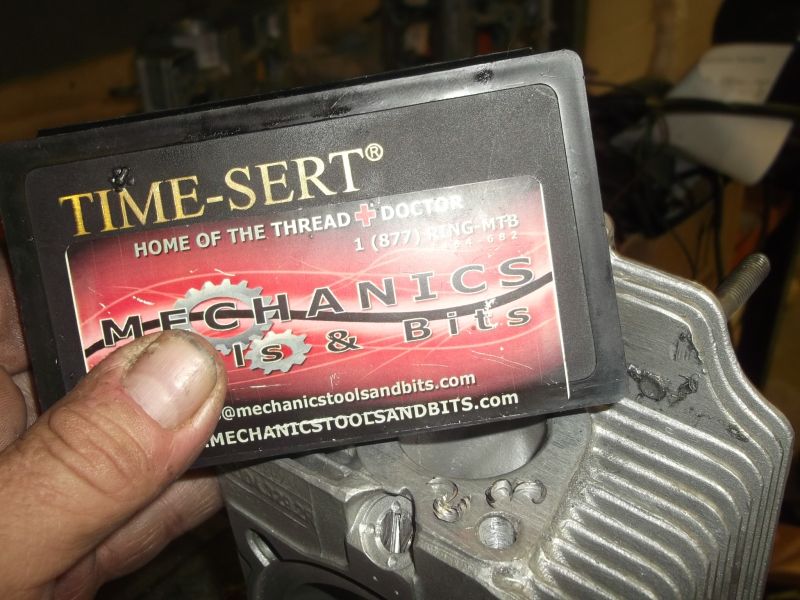
|
|
|
|
|
1 User(s) are reading this topic (1 Guests and 0 Anonymous Users)
0 Members:

|
Lo-Fi Version | Time is now: 22nd July 2026 - 07:03 PM |
Invision Power Board
v9.1.4 © 2026 IPS, Inc.