|
|
|
Porsche, and the Porsche crest are registered trademarks of Dr. Ing. h.c. F. Porsche AG.
This site is not affiliated with Porsche in any way. Its only purpose is to provide an online forum for car enthusiasts. All other trademarks are property of their respective owners. |
|
|

  |

| Mark Henry |
 Jul 14 2014, 09:58 AM Jul 14 2014, 09:58 AM
Post
#241
|
|
that's what I do!  Group: Members Posts: 20,065 Joined: 27-December 02 From: Port Hope, Ontario Member No.: 26 Region Association: Canada |
QUOTE(wobbletop @ Jul 14 2014, 10:33 AM)  Making great progress Mark! I always wondered how long those plastic chain guides last, but I guess there is no real contact with them and they are only there so they don't move when the car goes over bumps? Thanks Walter and Glenn I've torn down several engines and have never seen an issue with the plastic chain ramps. I say they have contact, they sort of have a zero load, they just barely contact the chain. The "load" is on the sprockets. It's recommended to replace them during a rebuild and they don't cost much. These ones are of course new. |
   |

 
|
| peteyd |
Jul 15 2014, 08:17 AM
Post
#242
|
|
Senior Member Group: Members Posts: 744 Joined: 27-March 08 From: Elora, Ontario, Canada Member No.: 8,858 Region Association: Canada |
QUOTE(Mark Henry @ Jul 12 2014, 10:18 PM) A bit of thinking and fabricating and here is my solution. My air die grinder in a holder that I built out of a piece of pipe and a Teig lathe slide I had. I got a bunch of dremel stones off the evilbay ($30 for 8, I used 2 of them) and resized them using a diamond dresser chucked in my lathe. Although locating the keyway isn't very critical, it was easy as the cam has a locating surface. End result I didn't save much as I hoped, but if you don't count my labour I still did save a bit. Oh well...you win some and you lose some. I like your thinking outside the box Mark. Very ingenious! |
|
|
|
| Mark Henry |
Jul 15 2014, 09:08 AM
Post
#243
|
|
that's what I do! Group: Members Posts: 20,065 Joined: 27-December 02 From: Port Hope, Ontario Member No.: 26 Region Association: Canada |
QUOTE(peteyd @ Jul 15 2014, 10:17 AM) QUOTE(Mark Henry @ Jul 12 2014, 10:18 PM) A bit of thinking and fabricating and here is my solution. My air die grinder in a holder that I built out of a piece of pipe and a Teig lathe slide I had. I got a bunch of dremel stones off the evilbay ($30 for 8, I used 2 of them) and resized them using a diamond dresser chucked in my lathe. Although locating the keyway isn't very critical, it was easy as the cam has a locating surface. End result I didn't save much as I hoped, but if you don't count my labour I still did save a bit. Oh well...you win some and you lose some. I like your thinking outside the box Mark. Very ingenious! Thanks Pete It did take a bit of head scratching for sure. The thing I was quite impressed with was the real Dremel stones, doing a heavy cut like that I was expecting to have issues with the corners rounding over. That's why I bought 8 stones. They surprisingly stayed quite sharp. The quality of the real Dremel stones are evident as that die grinder (air) is rated at 30,000rpm and lesser 1/8"shafts bend like a pretzel at that rpm. |
|
|
|
| Mark Henry |
Feb 14 2015, 06:01 PM
Post
#244
|
|
that's what I do! Group: Members Posts: 20,065 Joined: 27-December 02 From: Port Hope, Ontario Member No.: 26 Region Association: Canada |
Been a while since I have posted, but I have been making progress. It just in to test fit a few things and to tack in the mount.
Attached image(s) 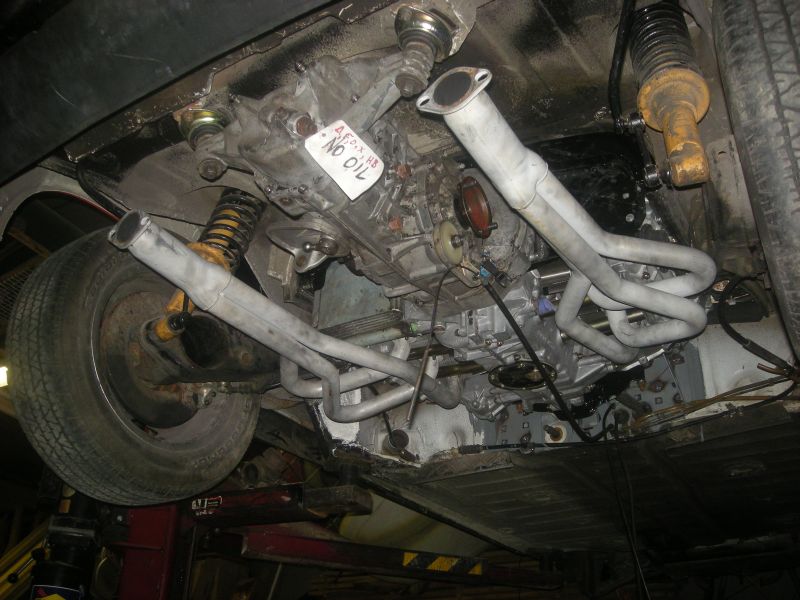
|
|
|
|
| Mark Henry |
Feb 14 2015, 06:03 PM
Post
#245
|
|
that's what I do! Group: Members Posts: 20,065 Joined: 27-December 02 From: Port Hope, Ontario Member No.: 26 Region Association: Canada |
Attached image(s) 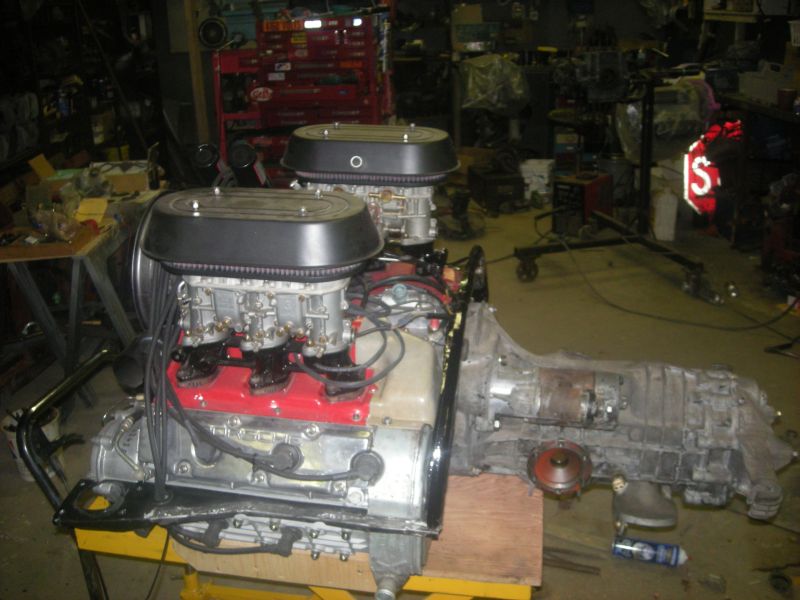
|
|
|
|
| Mark Henry |
Feb 14 2015, 06:09 PM
Post
#246
|
|
that's what I do! Group: Members Posts: 20,065 Joined: 27-December 02 From: Port Hope, Ontario Member No.: 26 Region Association: Canada |
Quicky cradle I made for my scissor table before I took it off the stand, works real good and keeps the engine stable
Attached image(s) 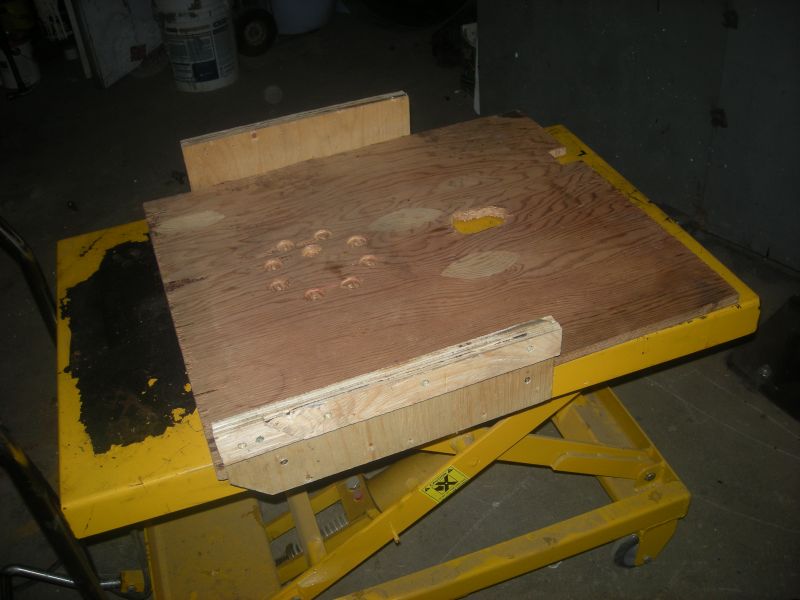 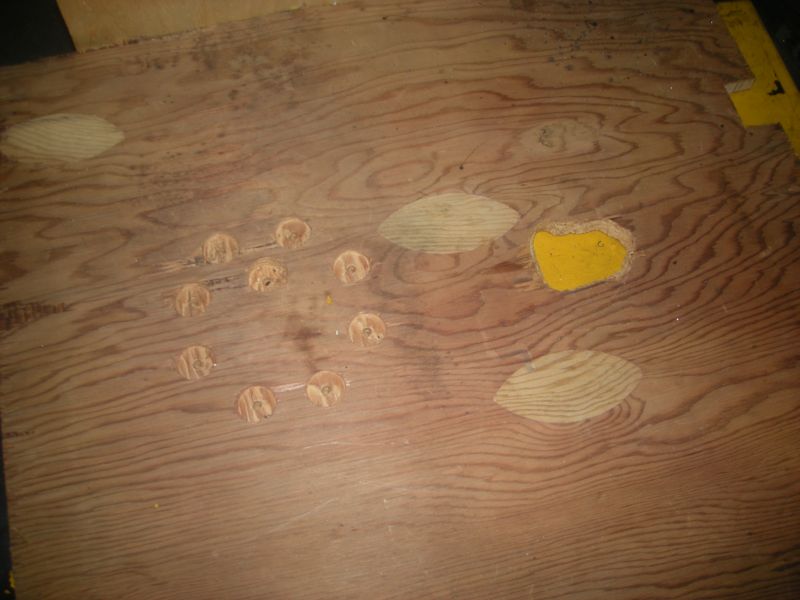 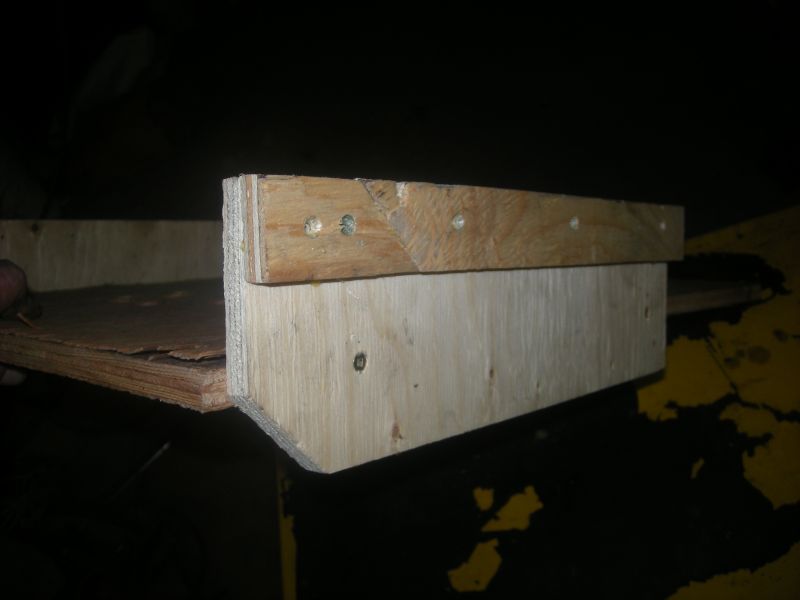
|
|
|
|
| Mark Henry |
Feb 14 2015, 06:29 PM
Post
#247
|
|
that's what I do! Group: Members Posts: 20,065 Joined: 27-December 02 From: Port Hope, Ontario Member No.: 26 Region Association: Canada |
I also have mounted the McMarks Free-Motion front A arm kit that I bought off Rick.
Here you see the fresh bead blasted arms and the bearing sleeves. the sleeves are a barely a slip fit, I measured .003". I used loctite 620 to fix them in place, this loctite is actually made for this purpose. Not shown is I then PPG epoxy primed the arms and parts and then finished with Nason black. It spray paint but I just used a brush, I don't really care if there are brush marks. Attached image(s) 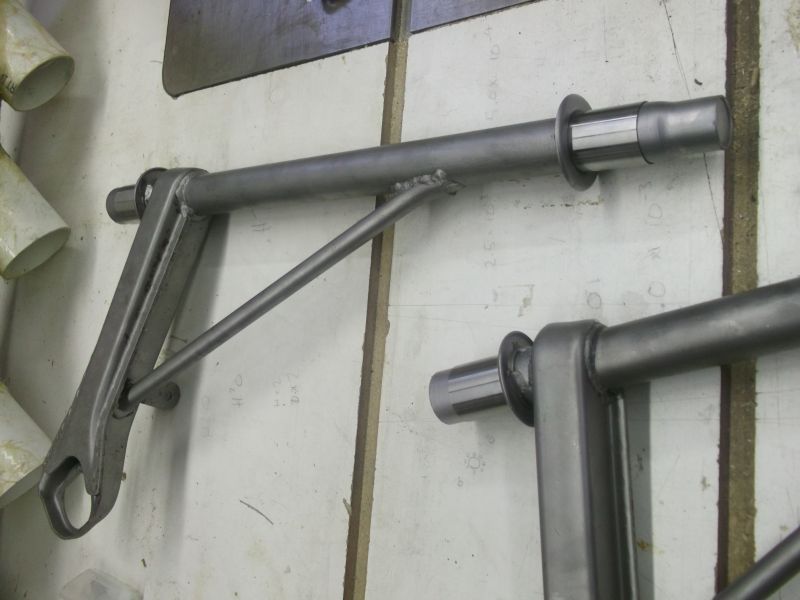 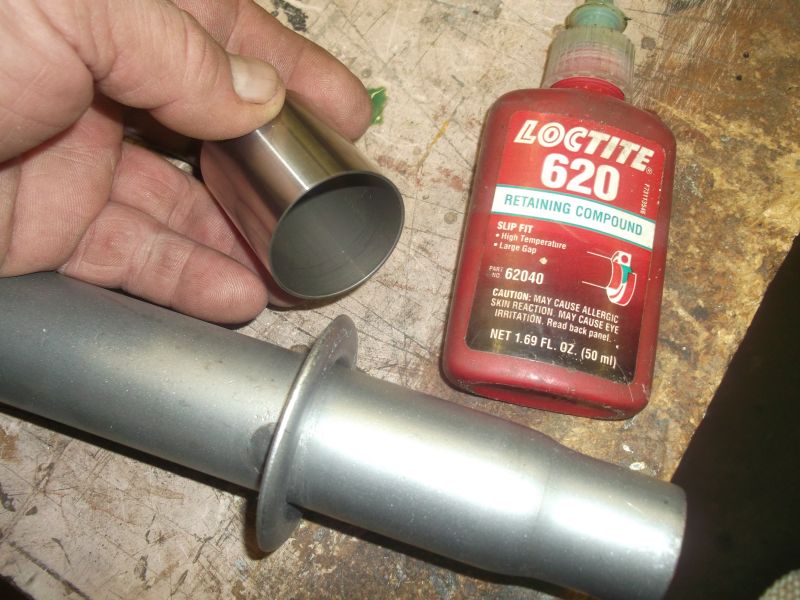 
|
|
|
|
| Mark Henry |
Feb 14 2015, 07:27 PM
Post
#248
|
|
that's what I do! Group: Members Posts: 20,065 Joined: 27-December 02 From: Port Hope, Ontario Member No.: 26 Region Association: Canada |
I never like the seals on this kit, they are just O-rings, so I'm doing some experimenting.
One is this I use the thick 911 oil tube O-ring and a slightly modified crank timing gear snap ring. Bit tight as the o-ring is a bit small on the ID, but I think it will work good. 2nd I put a beetle upper front torsion arm seal in backwards, used a bead of RTV and it closed up the gap on the bear bering very nicely. 3rd I used the heat tube grommets from a beetle to seal the thrust bearings. Attached image(s) 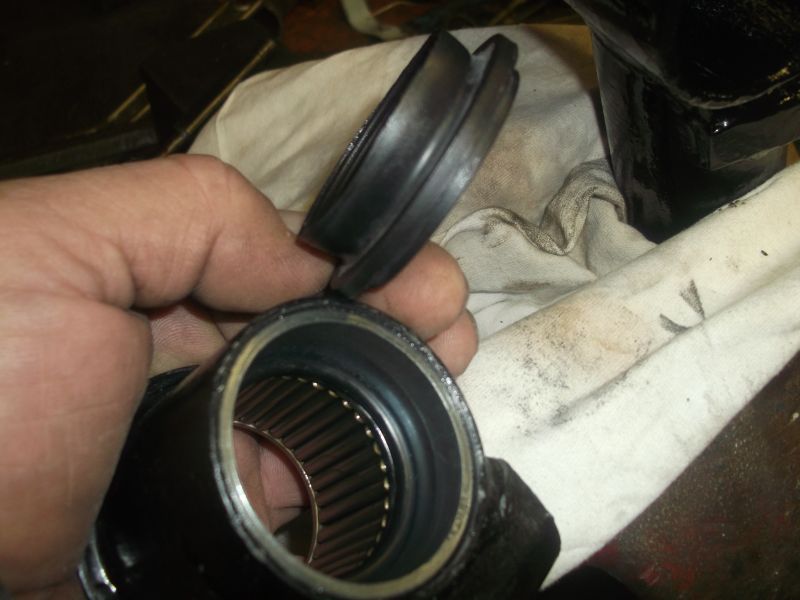 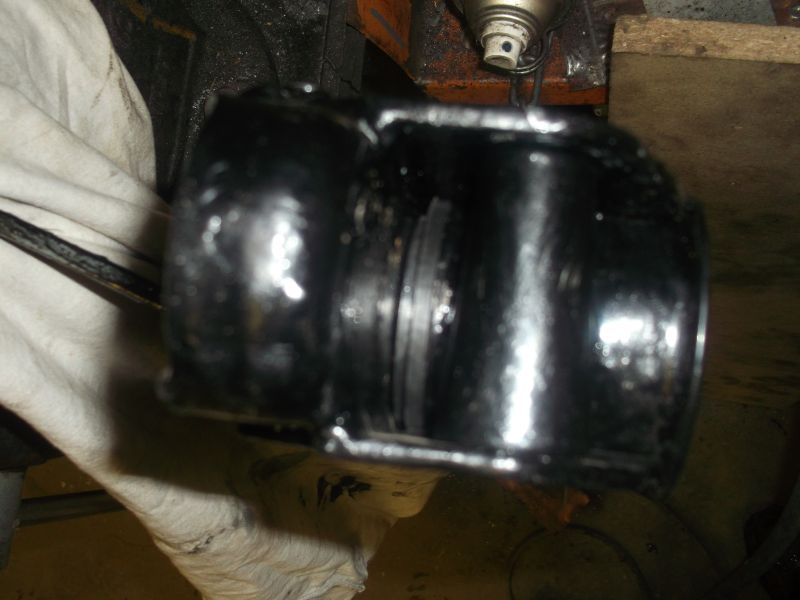 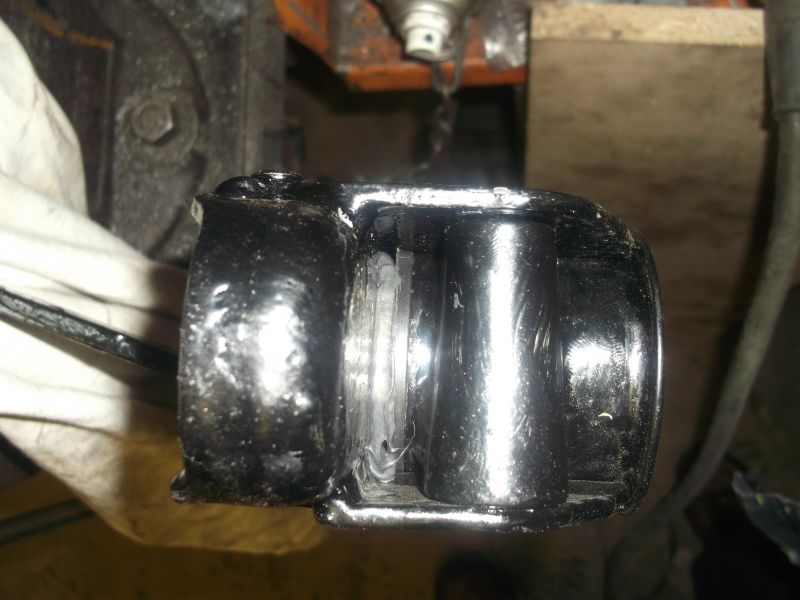 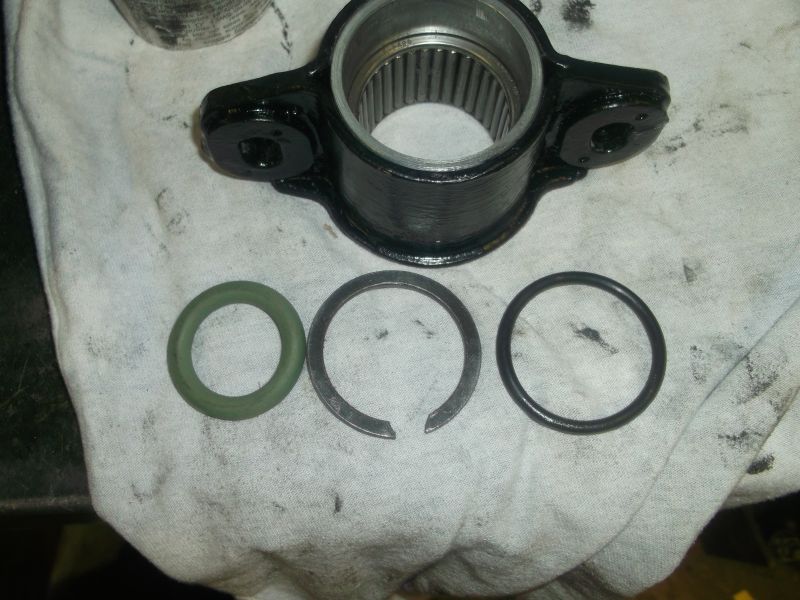 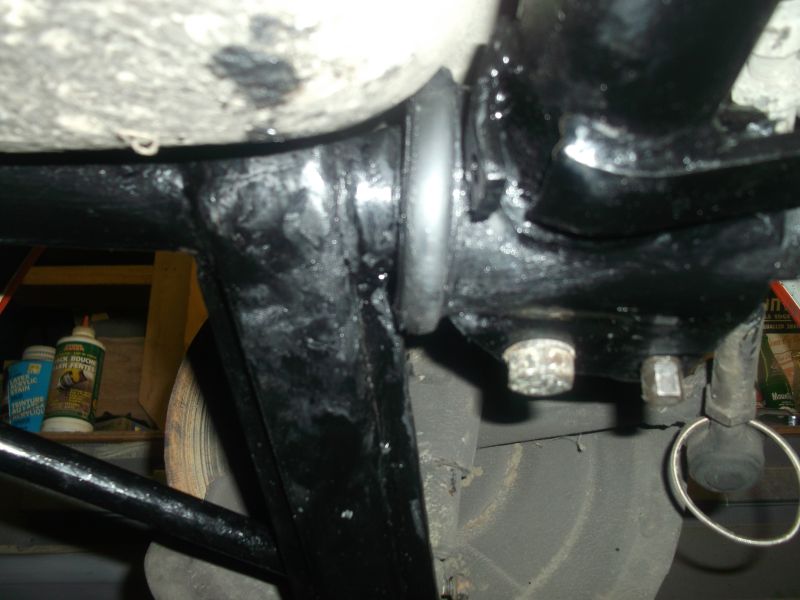
|
|
|
|
| Mark Henry |
Feb 14 2015, 08:05 PM
Post
#249
|
|
that's what I do! Group: Members Posts: 20,065 Joined: 27-December 02 From: Port Hope, Ontario Member No.: 26 Region Association: Canada |
The finished A arm rebuild, now it's time for struts.
You can also see I have added a stock sway bar, my base 1.8 didn't have swaybars. I think the sway bar drop links are too long (WTF?), so I'll wait till I get the ride height sorted before I shorten them up a bit. Note I've since replaced the stock bar with a Tarett 22mm hollow bar. Attached image(s) 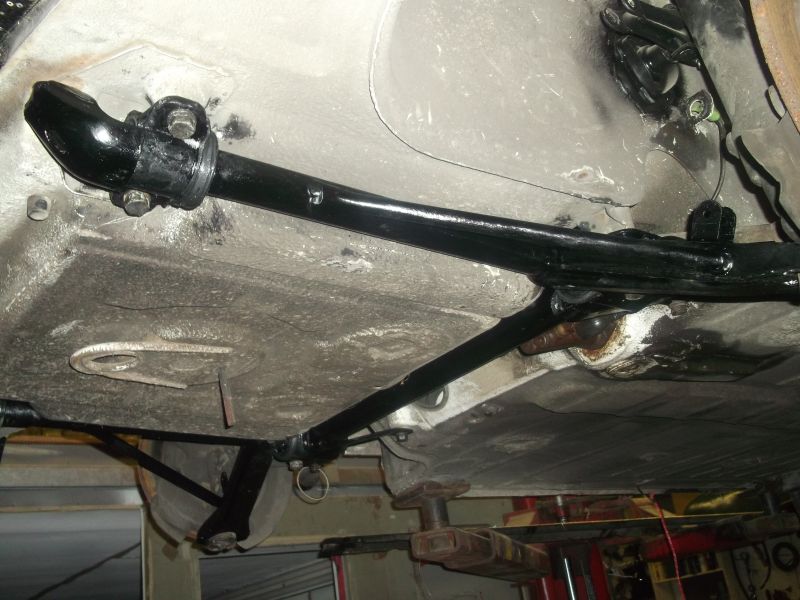
|
|
|
|
| Mark Henry |
Feb 14 2015, 08:09 PM
Post
#250
|
|
that's what I do! Group: Members Posts: 20,065 Joined: 27-December 02 From: Port Hope, Ontario Member No.: 26 Region Association: Canada |
Struts are ready to go but I have to wait till I have wheels, got to keep it rolling.
Attached image(s) 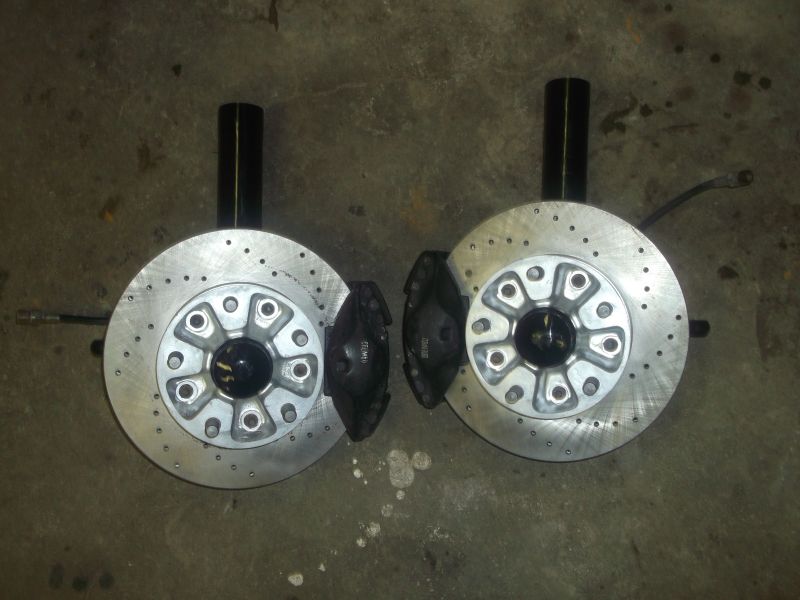
|
|
|
|
| MrHyde |
Feb 16 2015, 09:31 AM
Post
#251
|
|
Senior Member Group: Members Posts: 525 Joined: 13-October 10 From: Ontario, Canada Member No.: 12,268 Region Association: None |
Lookin good Mark... We're going to have to get a Orange 914 Ontario meet going this spring/summer... :-)
|
|
|
|
| Mark Henry |
May 1 2017, 10:19 PM
Post
#252
|
|
that's what I do! Group: Members Posts: 20,065 Joined: 27-December 02 From: Port Hope, Ontario Member No.: 26 Region Association: Canada |
Trying to get my ass back in gear and get this done for June. Want to spend at least a couple hours per day on it or the next 6 weeks, If I can it's a doable goal.
The bracket I made to mount the MSD in the stock location. Attached image(s) 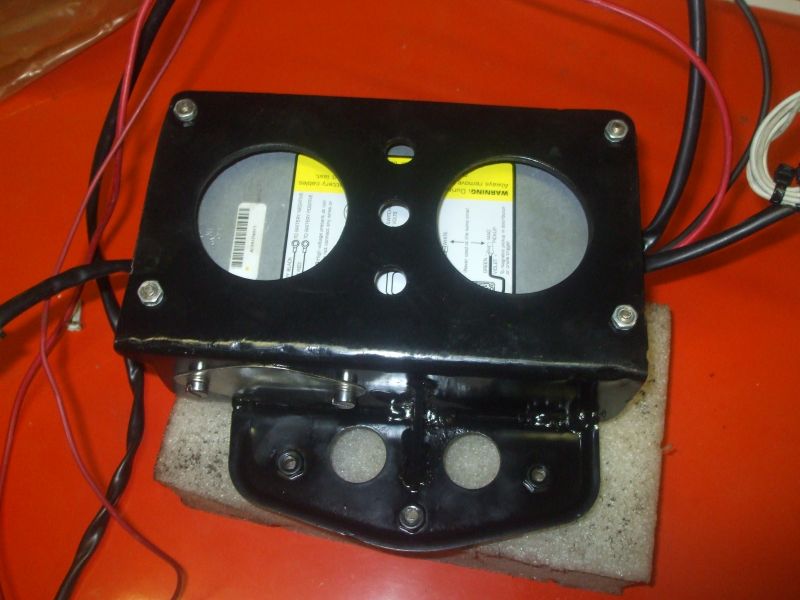 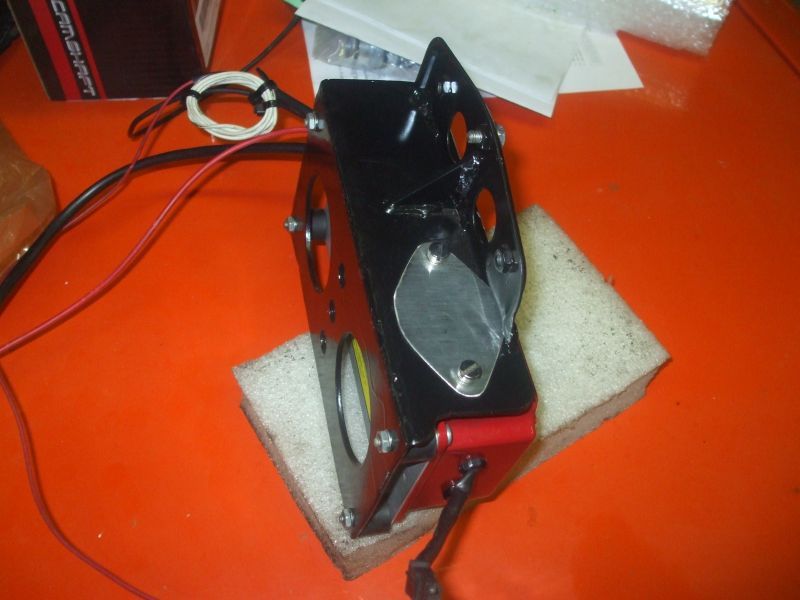 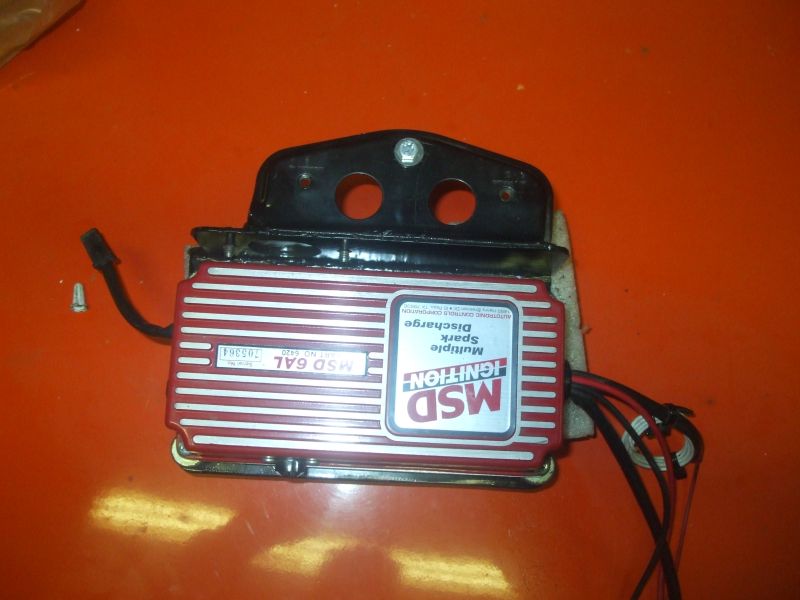
|
|
|
|
| Mark Henry |
May 1 2017, 10:23 PM
Post
#253
|
|
that's what I do! Group: Members Posts: 20,065 Joined: 27-December 02 From: Port Hope, Ontario Member No.: 26 Region Association: Canada |
My starter, Ford solenoid and backup light switch wiring.
Attached image(s) 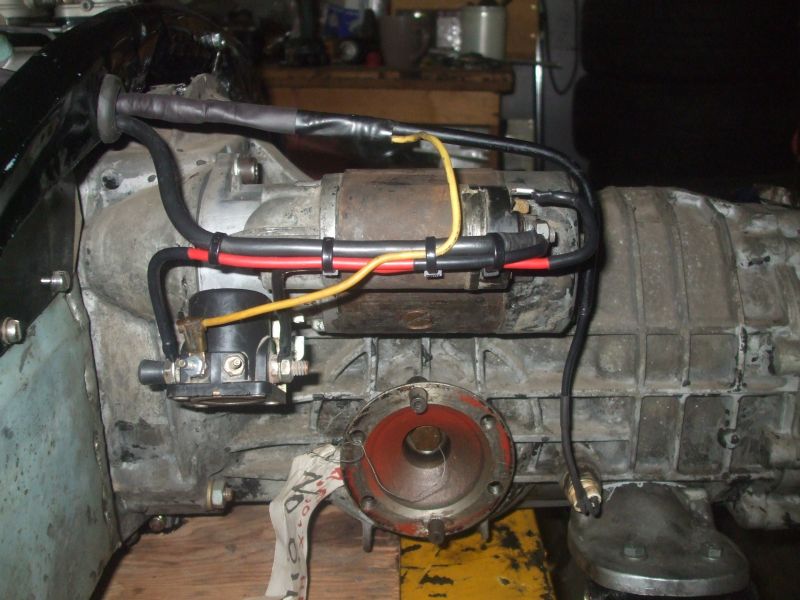
|
|
|
|
| Mark Henry |
May 1 2017, 10:25 PM
Post
#254
|
|
that's what I do! Group: Members Posts: 20,065 Joined: 27-December 02 From: Port Hope, Ontario Member No.: 26 Region Association: Canada |
My trans mount cable/carb linkage, bit of overkill but it works good.
Attached image(s) 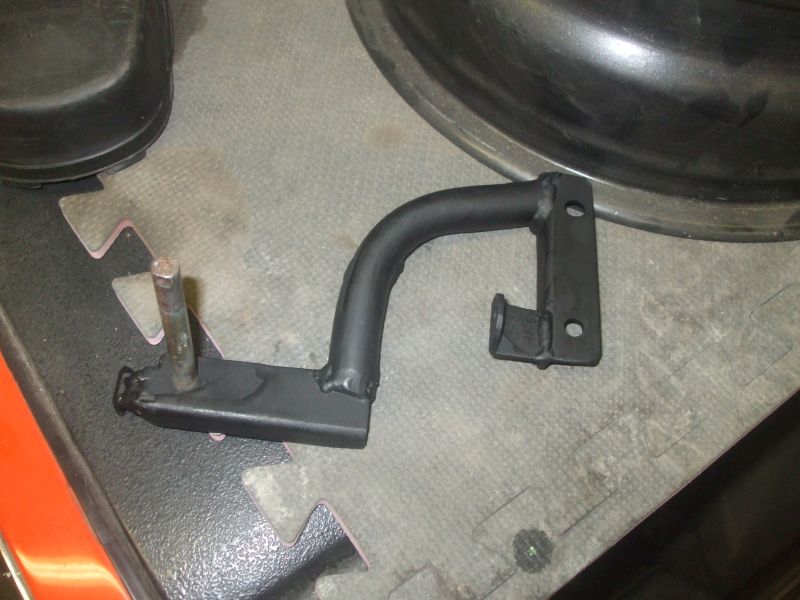 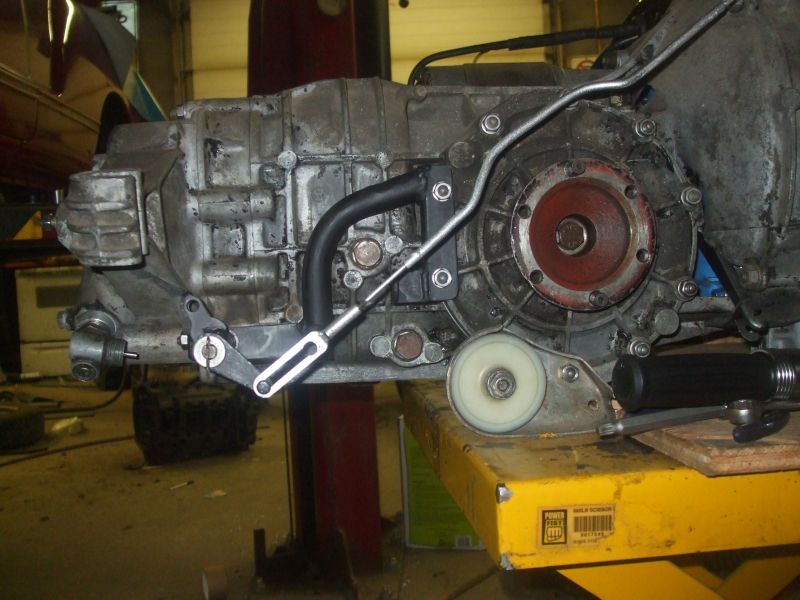 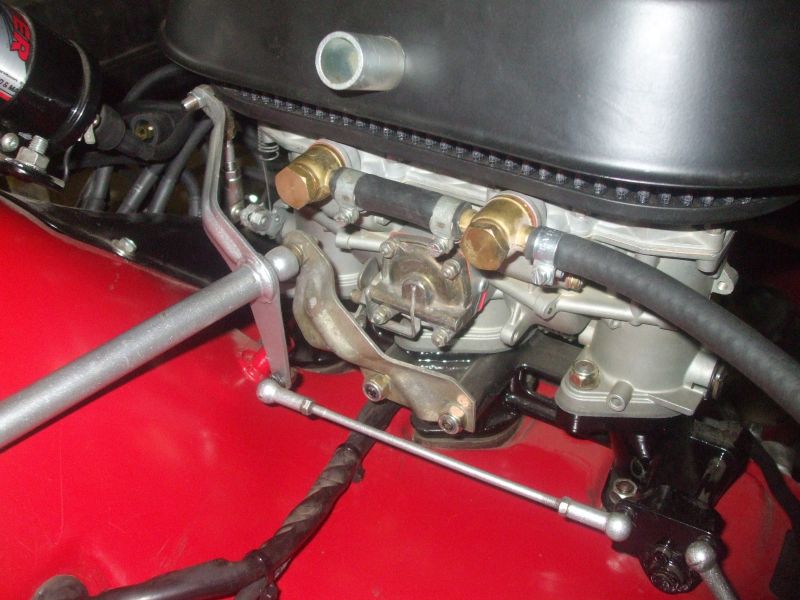
|
|
|
|
| Mark Henry |
May 1 2017, 10:38 PM
Post
#255
|
|
that's what I do! Group: Members Posts: 20,065 Joined: 27-December 02 From: Port Hope, Ontario Member No.: 26 Region Association: Canada |
Cleaned up my wiring a bit and put a sheath on the quick connect/relay board delete I had already made.
Attached image(s) 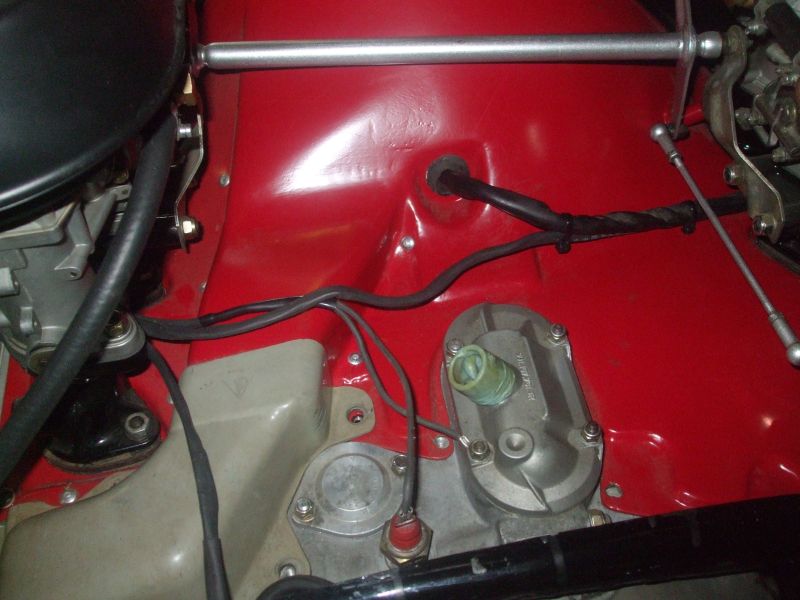 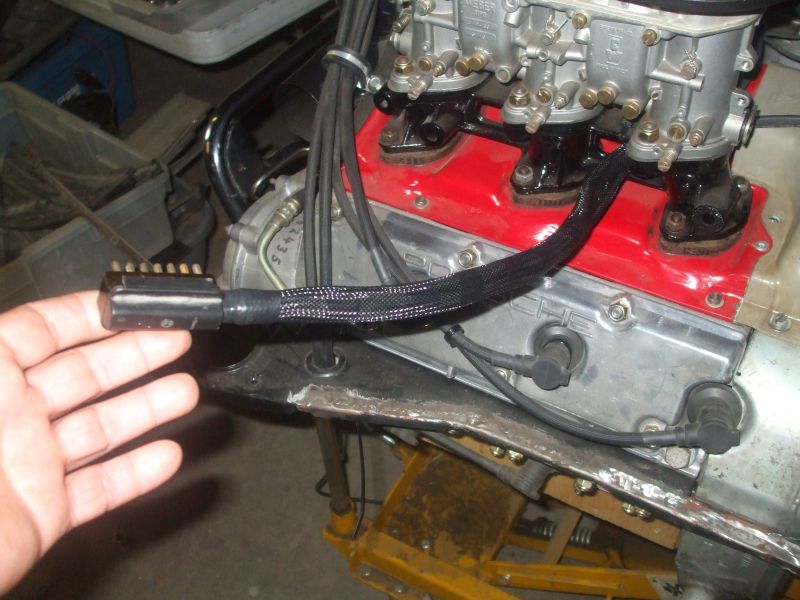
|
|
|
|
| Mark Henry |
May 1 2017, 10:44 PM
Post
#256
|
|
that's what I do! Group: Members Posts: 20,065 Joined: 27-December 02 From: Port Hope, Ontario Member No.: 26 Region Association: Canada |
Just have to figure out the other side for regulator, battery and the MSD hook-up. I don't want to cut the MSD wires so I'll loop them and tuck them away hidden behind the battery.
Attached image(s) 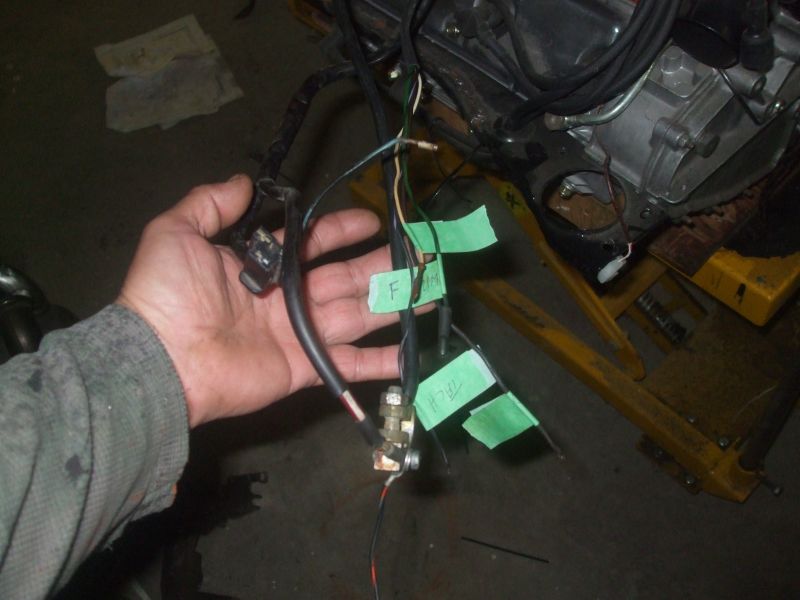
|
|
|
|
| 6freak |
May 2 2017, 02:41 PM
Post
#257
|
|
MR.C Group: Members Posts: 4,740 Joined: 19-March 08 From: Tacoma WA Member No.: 8,829 Region Association: Pacific Northwest |
QUOTE(Mark Henry @ May 1 2017, 09:25 PM) My trans mount cable/carb linkage, bit of overkill but it works good. put the PMO fuel rails on there and loose 4 possible leaks...good luck looks great (IMG:style_emoticons/default/smile.gif) |
|
|
|
| raynekat |
May 2 2017, 06:41 PM
Post
#258
|
|
Advanced Member Group: Members Posts: 2,171 Joined: 30-December 14 From: Coeur d'Alene, Idaho Member No.: 18,263 Region Association: Pacific Northwest |
Mark, where did you get the sheath for the harness? Everything is looking great on your build.
QUOTE(Mark Henry @ May 1 2017, 09:38 PM) Cleaned up my wiring a bit and put a sheath on the quick connect/relay board delete I had already made. |
|
|
|
| Mark Henry |
May 2 2017, 08:58 PM
Post
#259
|
|
that's what I do! Group: Members Posts: 20,065 Joined: 27-December 02 From: Port Hope, Ontario Member No.: 26 Region Association: Canada |
QUOTE(raynekat @ May 2 2017, 08:41 PM) Mark, where did you get the sheath for the harness? Everything is looking great on your build. QUOTE(Mark Henry @ May 1 2017, 09:38 PM) Cleaned up my wiring a bit and put a sheath on the quick connect/relay board delete I had already made. The stuff I used is just the cheap generic Expandable Braided Sleeve, the rest of my harness done in heat shrink tubing and factory hard tube. I got it from Princess Auto, the Canadian version of Harbor Freight. I found this place in the states that sells some real cool stuff. http://www.electriduct.com/Braided-Sleevin...BraidedSleeving |
|
|
|
| wndsnd |
May 2 2017, 09:18 PM
Post
#260
|
|
You wanted a horse, but got a goat. Nobody wants a goat.... Group: Members Posts: 2,861 Joined: 12-February 12 From: North Shore, MA Member No.: 14,124 Region Association: North East States |
Making good progress Mark. Looks great.
John |
|
|
|
|
1 User(s) are reading this topic (1 Guests and 0 Anonymous Users)
0 Members:

|
Lo-Fi Version | Time is now: 22nd July 2026 - 09:42 PM |
Invision Power Board
v9.1.4 © 2026 IPS, Inc.