|
|
|
Porsche, and the Porsche crest are registered trademarks of Dr. Ing. h.c. F. Porsche AG.
This site is not affiliated with Porsche in any way. Its only purpose is to provide an online forum for car enthusiasts. All other trademarks are property of their respective owners. |
|
|

  |

| IanS |
 Mar 16 2014, 08:31 PM Mar 16 2014, 08:31 PM
Post
#1
|
|
Member  Group: Members Posts: 83 Joined: 27-February 12 From: Edmond, Oklahoma Member No.: 14,190 Region Association: Southwest Region |
I have been reading the excellent past threads on the board trying to gear up for two of the more challenging tasks in my '71 restoration: removing the front suspension ball joint nut underneath the A-arm and removing the rear hub (nut, stub axle etc) and rear bearing. All of the suspension parts were already off the car.
I was successful at everything I tried this weekend which is so rare I figured I'd write up some of the tools I used in case it could help someone else. First on the ball joint nut, I didn't want to spend $40 - 50 on the Porsche-specific tool and I don't weld so I couldn't make my own. Looking at some of the past threads I went to the FLAPS and got a 2 1/4" (which equates to 57.15mm) socket that's normally used on 'merican 4x4 spindles. It's a couple millimeters larger in diameter than the ball joint nut but it gets just enough purchase to hold on if you press it on there. I stood on top of the A-arm and used an air gun. It took a minute or so of repeated hitting it with the gun using my weight to keep the socket from slipping off the nut. Lots of PB Blaster too. But it worked. the part has the number W1269 under various manufacturers and it was about $10. 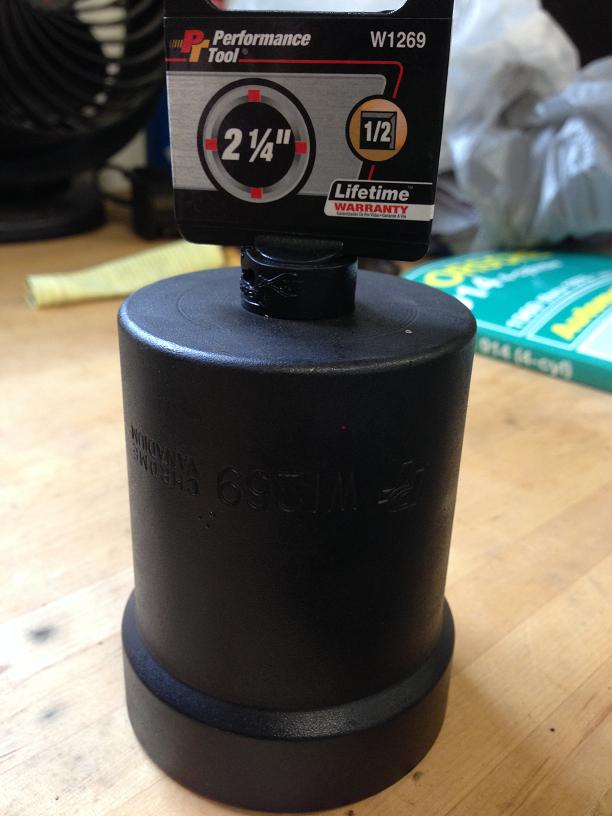 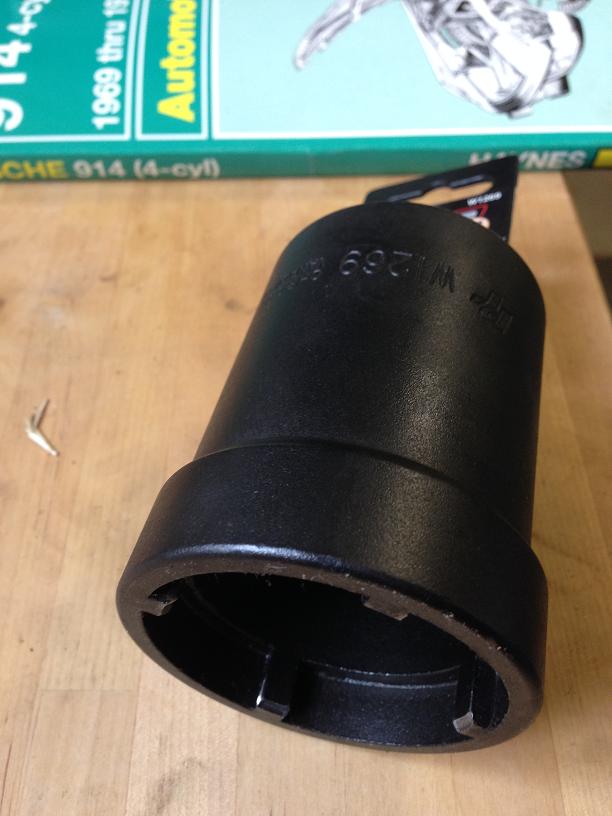 Removing the rear axle castellated nut is well documented on the site, get a 30mm deep 1/4" socket and air gun, lots of PB Blaster and have at it. I used an old wheel attached to the hub to keep it from spinning away. The next big challenge was finding a "suitable drift" for the rear hub removal. I searched all over my shop and was annoyed that I didn't have any good metal rods to put into an inverted socket and hammer on it. Then I found the parts I ended up using: an old spare A-arm and a part called a "draw pin" leftover from a tractor I used to have. You can get these draw pins at Tractor Supply or Atwoods or similar farm supply stores. Draw Pin The draw pin has a tapered collar that fits right into the back of the hub. The threaded end fits right into the A-Arm with the dust cap removed from the front end. Then you can hold the other leg of the A-arm and whack the end with a big a hammer as you want. Here's the hub, draw pin and arm 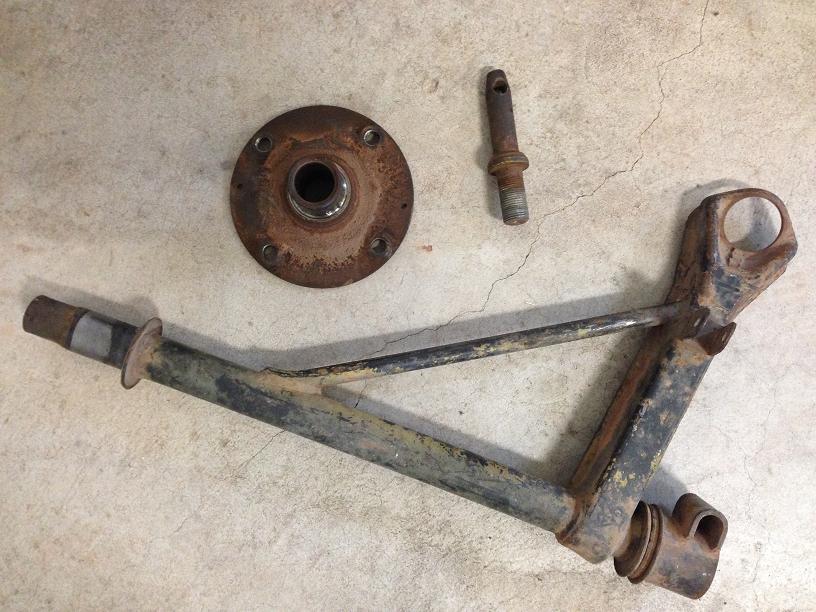 Here's the hub with the pin sitting on the floor just above it. The tapered collar matches the hub taper nicely. 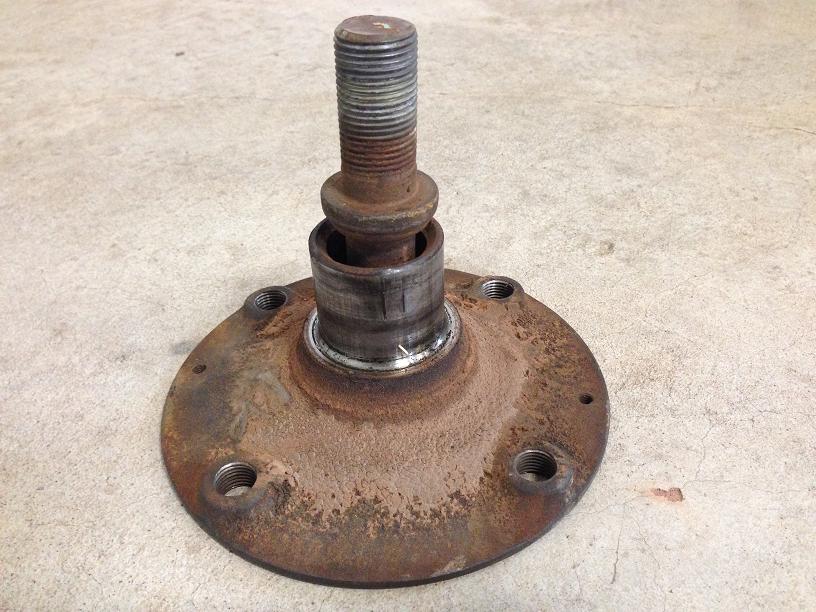 Here's the pin in the end of the arm with the tip of the front cap off 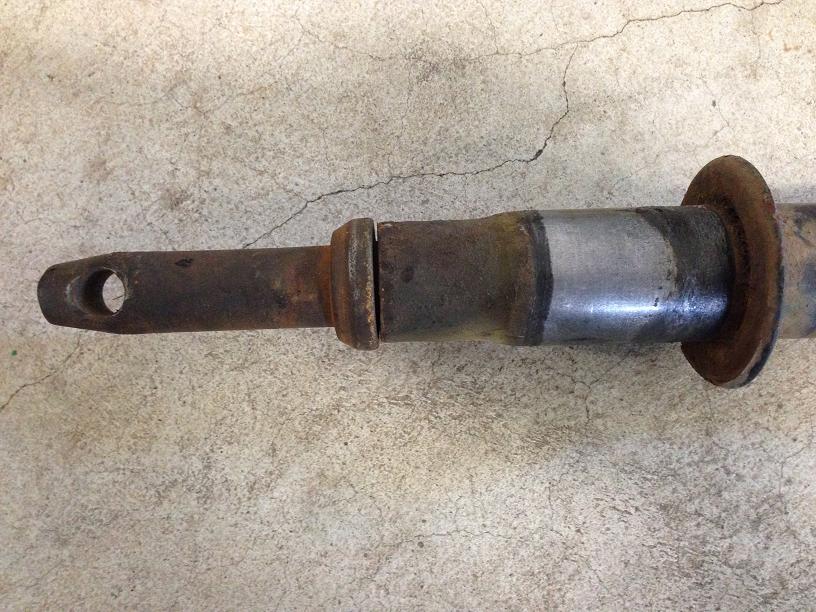 I happened to have a pallet lying around so I rigged up the control arm on top of the pallet so I could whack at it and not damage anything. 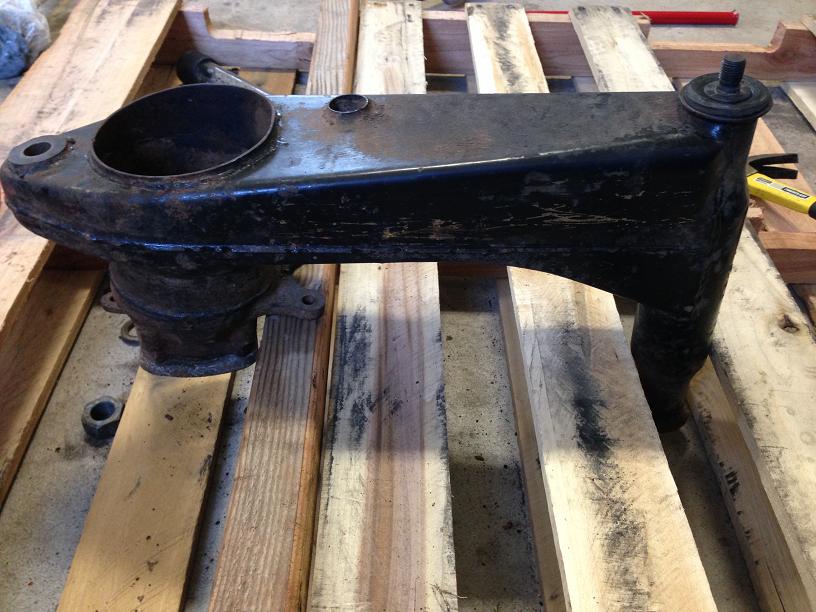 This combo drove the hub out without splitting the rear bearing or damaging it in any way. Not that I'm gonna reuse it but I didn't fancy having to get that off the hub later. Finally to remove the rear wheel bearing I needed a big drift and it turns out the giant socket I used to remove the front ball joint nut was just about the perfect size! Here it is sitting on one of the bearings after removal. 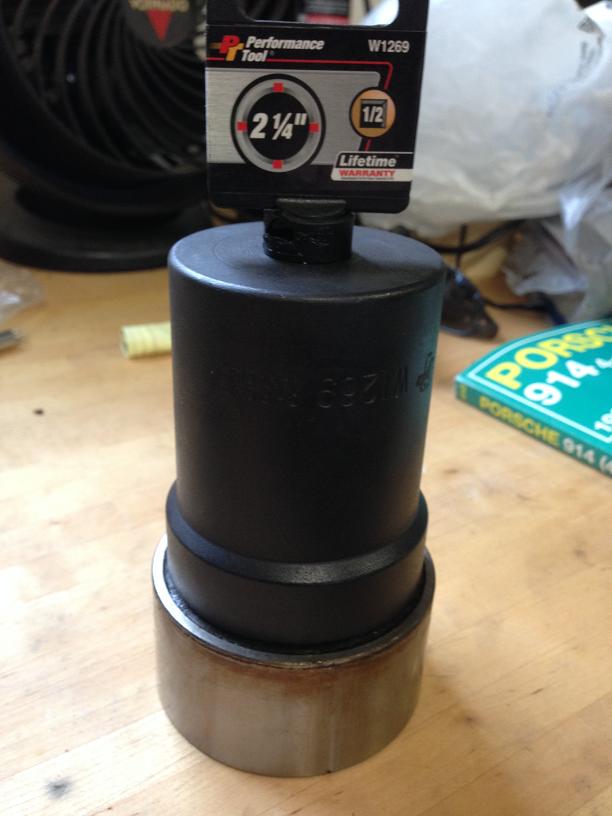 I used my shop press to push the bearing out from the back side using this giant socket. Again no visible damage to the bearing, still not gonna reuse it. So I know you probably don't have a spare A-arm sitting about or a draw pin, but if you get the pin from a farm supply store and get the big socket from your flaps you can probably piece together the rest. It worked for me anyway without damaging anything so that's a rare victory for me! |
   |

 
|
| TargaToy |
Mar 17 2014, 05:46 PM
Post
#2
|
|
-NONSOLIS RADIOS SEDIOUIS FULMINA MITTO- Group: Members Posts: 692 Joined: 26-March 10 From: DelMarVa Peninsula Member No.: 11,509 Region Association: MidAtlantic Region |
Wait. You didn't break something or end up bleeding and you consider that successful?
(IMG:style_emoticons/default/lol-2.gif) |
|
|
|
| Cap'n Krusty |
Mar 17 2014, 06:26 PM
Post
#3
|
|
Cap'n Krusty Group: Members Posts: 10,794 Joined: 24-June 04 From: Santa Maria, CA Member No.: 2,246 Region Association: Central California |
If you pushed, pulled, beat, or otherwise removed the hub from the bearing, it's gonna be a LOT easier to replace the bearing now than after you've reassembled the arm, 'cause that's most likely what you're going to have to do ............................
The Cap'n |
|
|
|
| IanS |
Mar 18 2014, 11:22 AM
Post
#4
|
|
Member Group: Members Posts: 83 Joined: 27-February 12 From: Edmond, Oklahoma Member No.: 14,190 Region Association: Southwest Region |
What do you mean by that Cap'n? I'm not catching your "drift"
|
|
|
|
| ThePaintedMan |
Mar 18 2014, 11:38 AM
Post
#5
|
|
Advanced Member Group: Members Posts: 3,885 Joined: 6-September 11 From: St. Petersburg, FL Member No.: 13,527 Region Association: South East States |
QUOTE(IanS @ Mar 18 2014, 01:22 PM)  What do you mean by that Cap'n? I'm not catching your "drift" He means that the bearing(s) is now likely trashed. Beating on these bearings is a no-no, but also usually necessary to get them out. They ideally need to be pressed back in along with the hub to prevent destroying them. However, they're very likely the original 40 year old bearings and probably need to be replaced anyway. |
|
|
|
| IanS |
Mar 18 2014, 12:51 PM
Post
#6
|
|
Member Group: Members Posts: 83 Joined: 27-February 12 From: Edmond, Oklahoma Member No.: 14,190 Region Association: Southwest Region |
Oh right, I planned on getting new ones, as all the threads recommended that anyway. I did mention twice that I was NOT gonna reuse them but understand if no one read my rambling. I could have pressed them out using the same tools.
I will press them in as gently as possible when I reassemble for sure. |
|
|
|
| Cap'n Krusty |
Mar 18 2014, 01:16 PM
Post
#7
|
|
Cap'n Krusty Group: Members Posts: 10,794 Joined: 24-June 04 From: Santa Maria, CA Member No.: 2,246 Region Association: Central California |
Reviewing what you wrote, I see that I misread the text. My error, sorry. Now, on to pressing. You press the outer race into the arm making contact ONLY with the OUTER lip. When you install the hub, pull it through the inner races, making contact ONLY with the inner race. Before you do this, make sure the surface of the hub is undamaged. If it came apart even moderately easily, the integrity if the surface is suspect. Have fun!
The Cap'n |
|
|
|
| ThePaintedMan |
Mar 18 2014, 01:40 PM
Post
#8
|
|
Advanced Member Group: Members Posts: 3,885 Joined: 6-September 11 From: St. Petersburg, FL Member No.: 13,527 Region Association: South East States |
Yeah sorry, I missed that too. Looks like you got it down right. Of course the best way is to do it with a press, but since I didn't have one, I used a threaded rod, nuts and the appropriate sockets to do exactly what the Cap'N said. I've actually done it on three different cars now and it works like a charm. Didn't even use an impact.
|
|
|
|
| IanS |
Mar 18 2014, 02:18 PM
Post
#9
|
|
Member Group: Members Posts: 83 Joined: 27-February 12 From: Edmond, Oklahoma Member No.: 14,190 Region Association: Southwest Region |
Thanks guys. I've been looking at Eric Shea's videos on the subject and I plan on pressing in the bearing with the arm upside down like his video (pressing the arm onto the bearing once you freeze it and gently tap the edges in to line it up), and using the threaded rod for the hub once the bearing is warmed up again. Cheers!
|
|
|
|
|
1 User(s) are reading this topic (1 Guests and 0 Anonymous Users)
0 Members:

|
Lo-Fi Version | Time is now: 18th April 2024 - 09:01 PM |
Invision Power Board
v9.1.4 © 2024 IPS, Inc.