|
|
|
Porsche, and the Porsche crest are registered trademarks of Dr. Ing. h.c. F. Porsche AG.
This site is not affiliated with Porsche in any way. Its only purpose is to provide an online forum for car enthusiasts. All other trademarks are property of their respective owners. |
|
|

  |

| Cuda911 |
 Aug 9 2014, 03:23 PM Aug 9 2014, 03:23 PM
Post
#141
|
|
Senior Member  Group: Members Posts: 1,489 Joined: 20-May 14 From: Oceanside (N. San Diego County), CA Member No.: 17,376 Region Association: Southern California |
It's the original trim. It came off easily during the windshield replacement (I was a bit worried it would get bent).
I was wondering about the trim> When these cars were new, did it have an extreme mirror-like shine, or a more dulled finish like currently? I'm pretty sure the wiper arms are correct. In fact, I replaced them with new ones a few weeks ago, and I studied the arms that were on the car before I replaced them the same way that the old ones were. Then, a week ago someone told me that they were on wrong (I assumed that the previous owner had them on wrong), so I just swapped them a few days ago to the current configuration. It doesn't really drag on the trim, as it extends over the side, but not touching the trim. I asked another "914 guy" about that, and he said that's normal. I guess the older 911s use the same wiper arms and fit the same way (extending off the side a bit). So, now I'm confused again. Are they on right? Attached image(s) 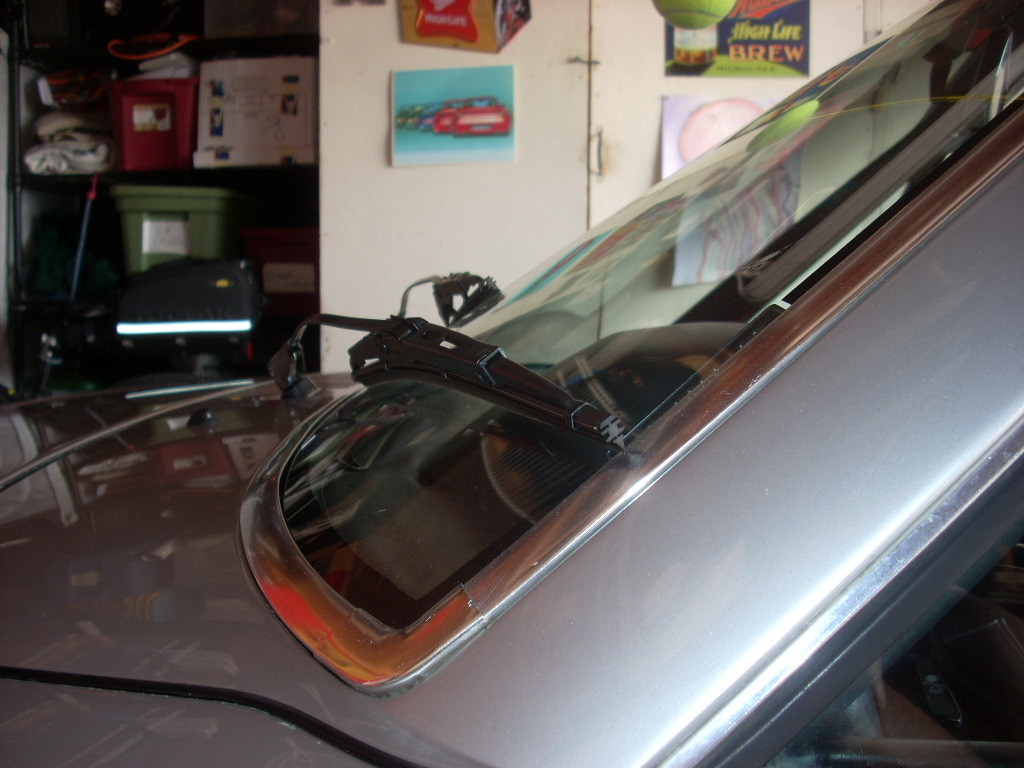 
|
   |

 
|
| mepstein |
Aug 9 2014, 03:58 PM
Post
#142
|
|
914-6 GT in waiting Group: Members Posts: 20,778 Joined: 19-September 09 From: Landenberg, PA/Wilmington, DE Member No.: 10,825 Region Association: MidAtlantic Region |
Mine fit the same way.
|
|
|
|
| Cuda911 |
Aug 18 2014, 02:23 AM
Post
#143
|
|
Senior Member Group: Members Posts: 1,489 Joined: 20-May 14 From: Oceanside (N. San Diego County), CA Member No.: 17,376 Region Association: Southern California |
OK, so I think the wipers are on correctly.
Today I finished de-rustifying the trunk. There was some surface rust along the rear edge. Sanded it down to bare metal, treated the exposed metal with a rust converter as a precautionary measure, primed it, and painted it. Also, detailed and polished the wiring harness in the trunk, and polished the muffler. . Attached image(s) 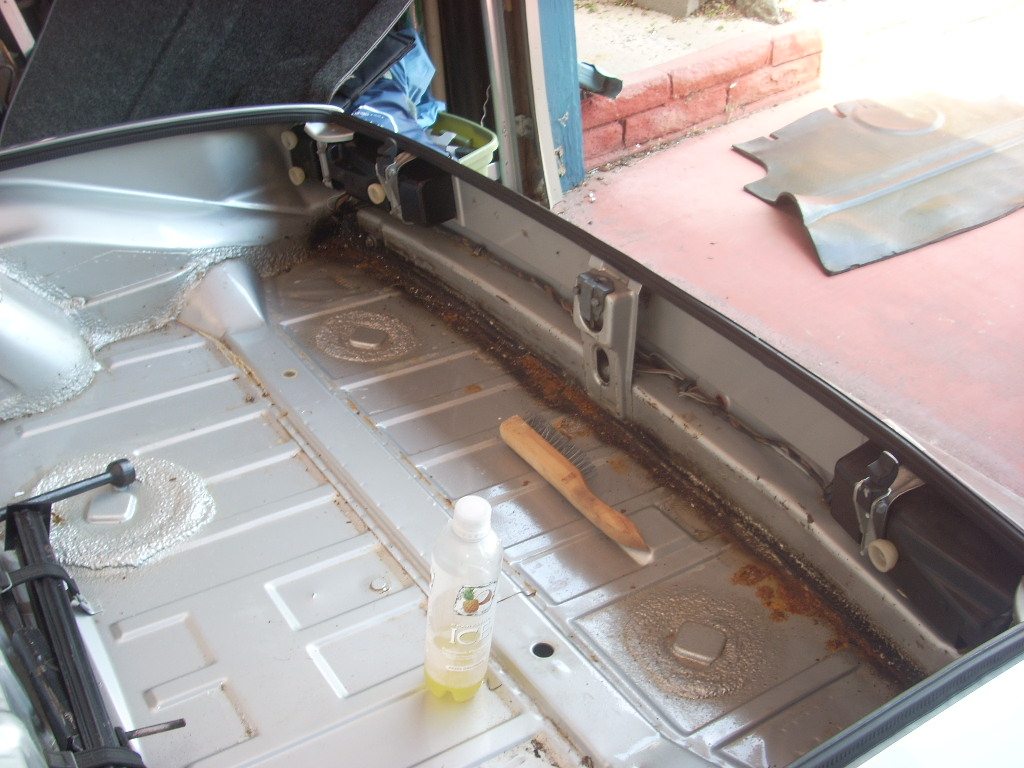 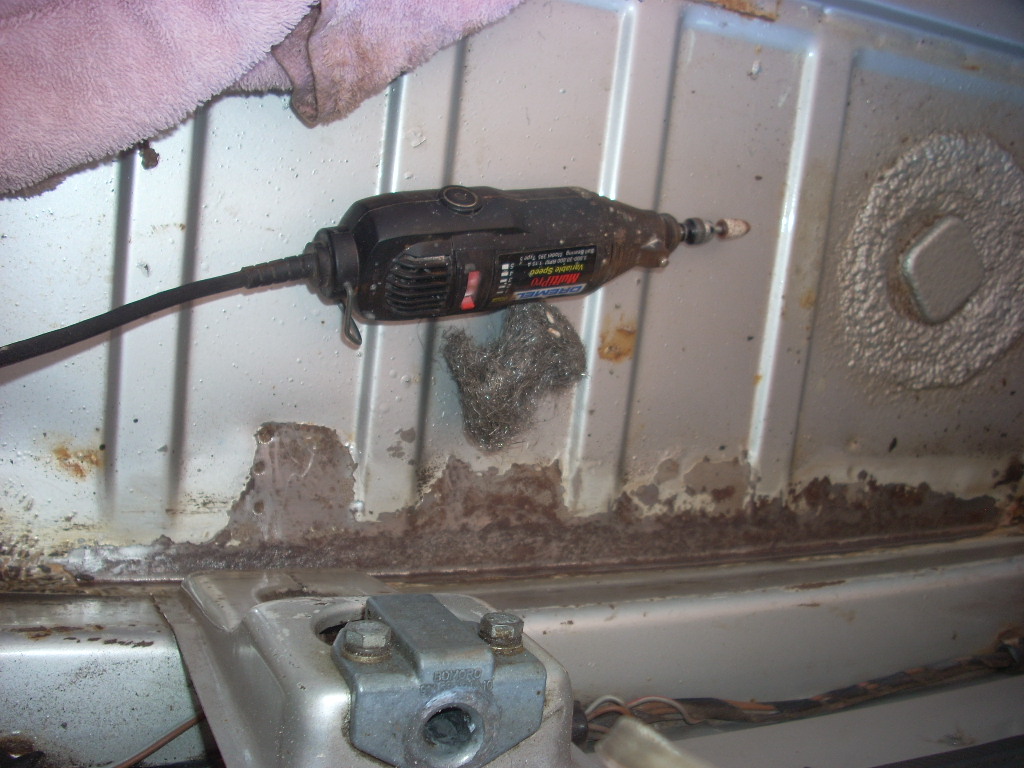 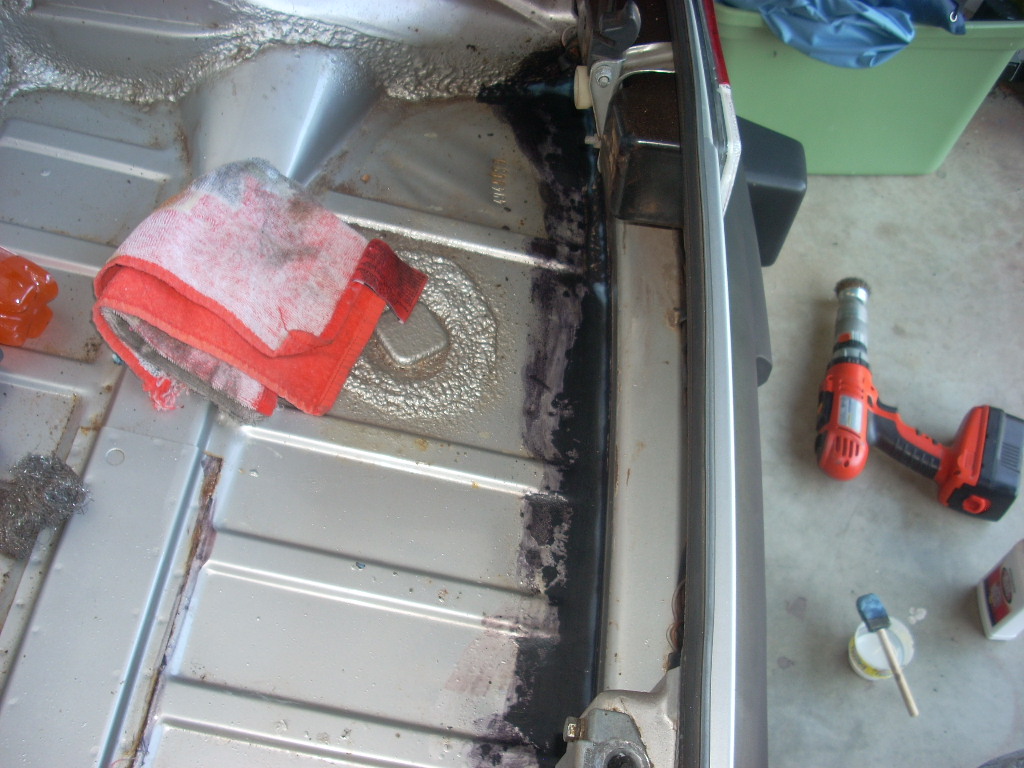 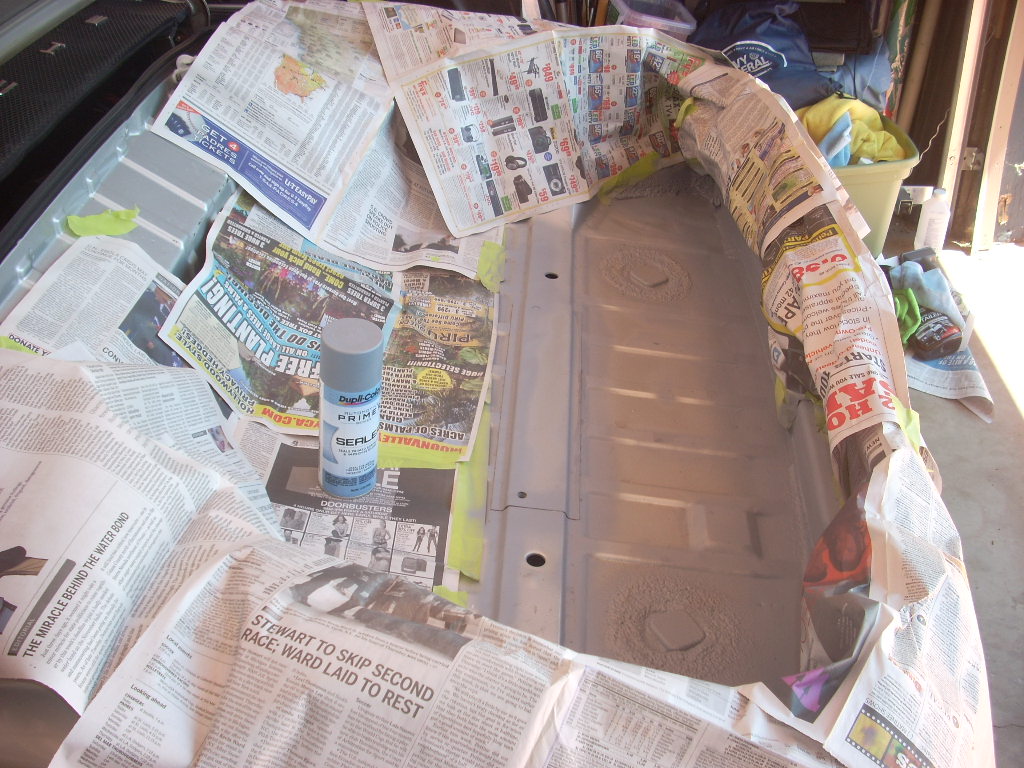 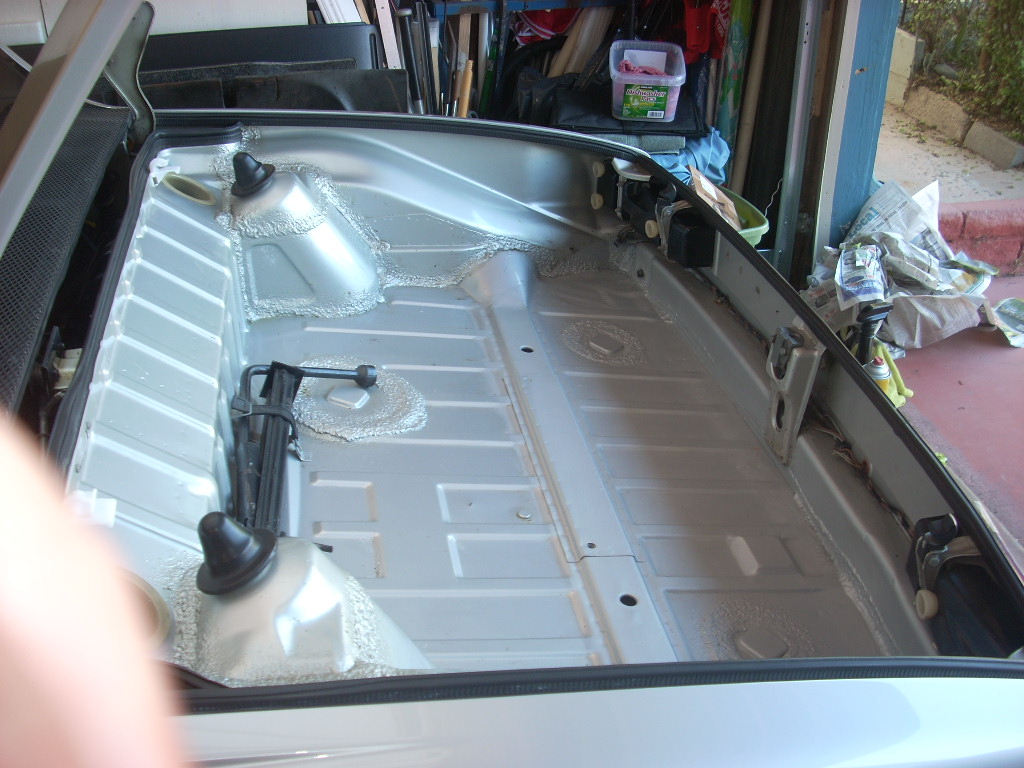
|
|
|
|
| dlkawashima |
Aug 18 2014, 03:48 AM
Post
#144
|
|
914 Guru Group: Members Posts: 9,749 Joined: 1-October 10 From: San Jose Member No.: 12,234 Region Association: Northern California |
Looking good Mike! As a precaution, I recommend carrying your jack with the base nearest the corner of your trunk so as to prevent it from slicing into your carpet.
(IMG:http://www.914world.com/bbs2/uploads/post-6212-1154292375.jpg) |
|
|
|
| Cuda911 |
Aug 18 2014, 10:34 AM
Post
#145
|
|
Senior Member Group: Members Posts: 1,489 Joined: 20-May 14 From: Oceanside (N. San Diego County), CA Member No.: 17,376 Region Association: Southern California |
Thanks for the tip, Dave!
After I took out the jack and tire iron, for the life of me I couldn't recall how they belonged back in the clips. My tire iron still doesn't seem right to me. |
|
|
|
| dlkawashima |
Aug 18 2014, 12:44 PM
Post
#146
|
|
914 Guru Group: Members Posts: 9,749 Joined: 1-October 10 From: San Jose Member No.: 12,234 Region Association: Northern California |
QUOTE(Cuda911 @ Aug 18 2014, 09:34 AM)  My tire iron still doesn't seem right to me. You're correct, the tire iron isn't original. An original "tire iron" actually consists of two parts: a socket and a tommy bar. See image below for reference: 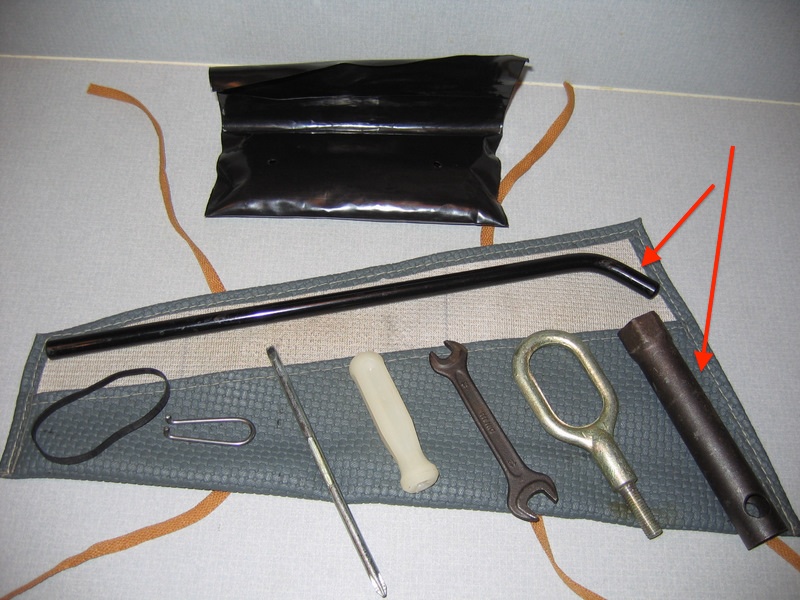 |
|
|
|
| Cuda911 |
Aug 18 2014, 03:00 PM
Post
#147
|
|
Senior Member Group: Members Posts: 1,489 Joined: 20-May 14 From: Oceanside (N. San Diego County), CA Member No.: 17,376 Region Association: Southern California |
Ah, OK, that makes sense.
I've been looking all over for an original tool kit. I've found an original tow hook, but that's all. What's the little wire clip-shaped tool for? Looks similar to the current center cap removal tool for other cars. The black rubber band is to hold the rolled up tool kit together? Or to use as a fan belt? Not a whole lot of fixin' to be done with that kit! Not even any pliers? Does anyone have a tool kit they want to sell? |
|
|
|
| SKL1 |
Aug 18 2014, 04:07 PM
Post
#148
|
|
Senior Member Group: Members Posts: 1,813 Joined: 19-February 11 From: north Scottsdale Member No.: 12,732 Region Association: Upper MidWest |
Boy Mike you're on the slippery slope aren't you??? (IMG:style_emoticons/default/smile.gif)
|
|
|
|
| Cuda911 |
Aug 18 2014, 05:06 PM
Post
#149
|
|
Senior Member Group: Members Posts: 1,489 Joined: 20-May 14 From: Oceanside (N. San Diego County), CA Member No.: 17,376 Region Association: Southern California |
Slipperier than a greased pig on ice.
This afternoon I cleaned up and polished the trunk latches. Attached image(s) 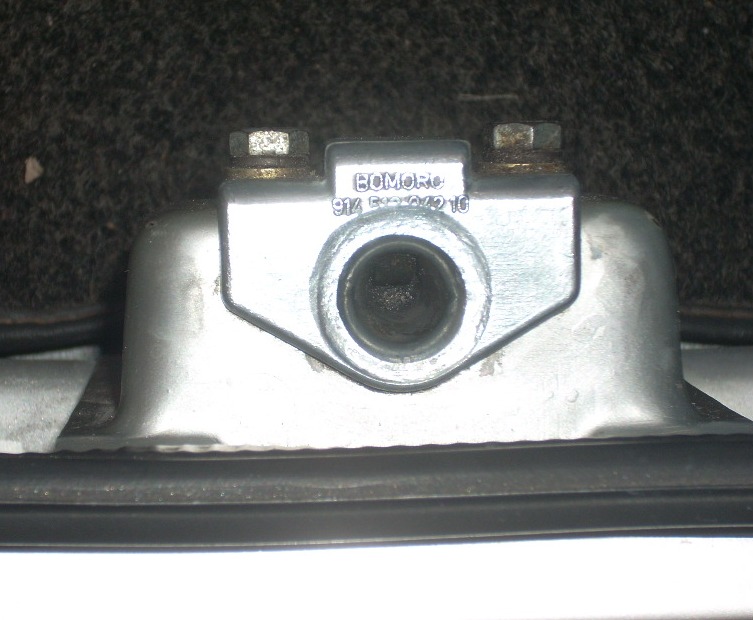
|
|
|
|
| mepstein |
Aug 18 2014, 08:31 PM
Post
#150
|
|
914-6 GT in waiting Group: Members Posts: 20,778 Joined: 19-September 09 From: Landenberg, PA/Wilmington, DE Member No.: 10,825 Region Association: MidAtlantic Region |
the little u shaped wire is there to pull the large chrome covers off steel wheels.
|
|
|
|
| Cuda911 |
Aug 22 2014, 11:12 PM
Post
#151
|
|
Senior Member Group: Members Posts: 1,489 Joined: 20-May 14 From: Oceanside (N. San Diego County), CA Member No.: 17,376 Region Association: Southern California |
Thanks, Mepstein!... I figured it was a puller of some sort.
Today's project: Replaced the outer door seal, the adjacent carpet strips, and put on the re-covered visors. Parts all from 914rubber.com. Great stuff, thanks Mark... much appreciated!!! Attached image(s) 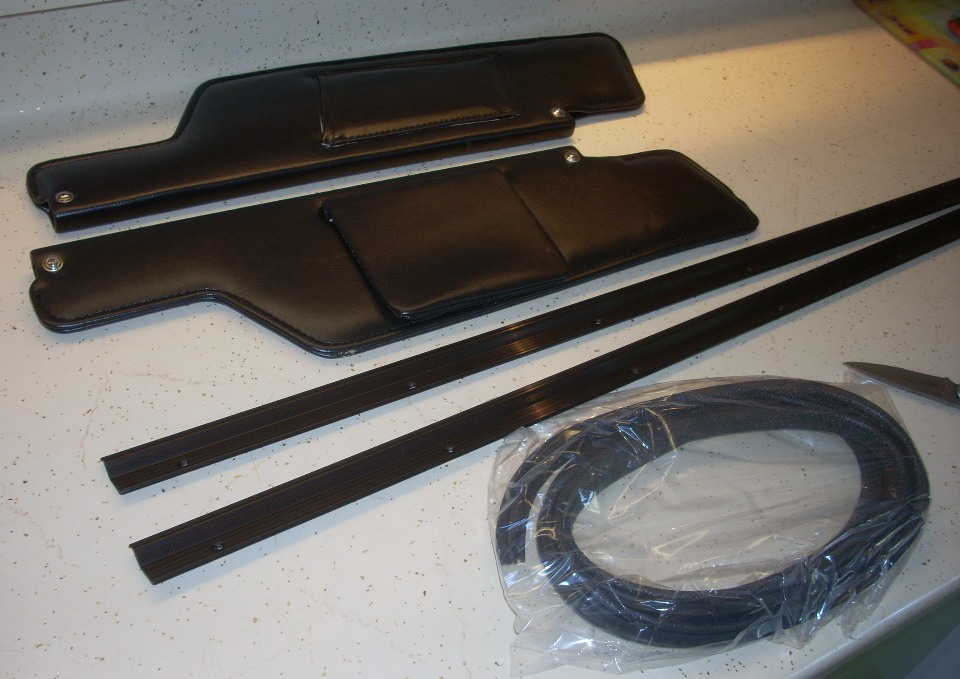 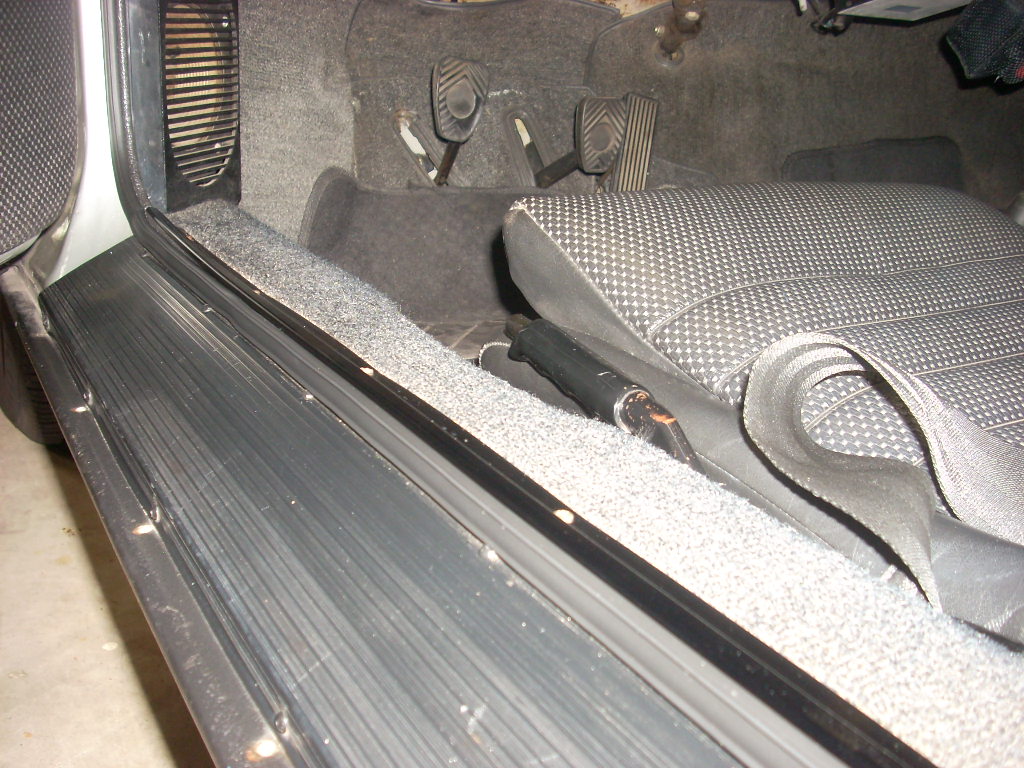 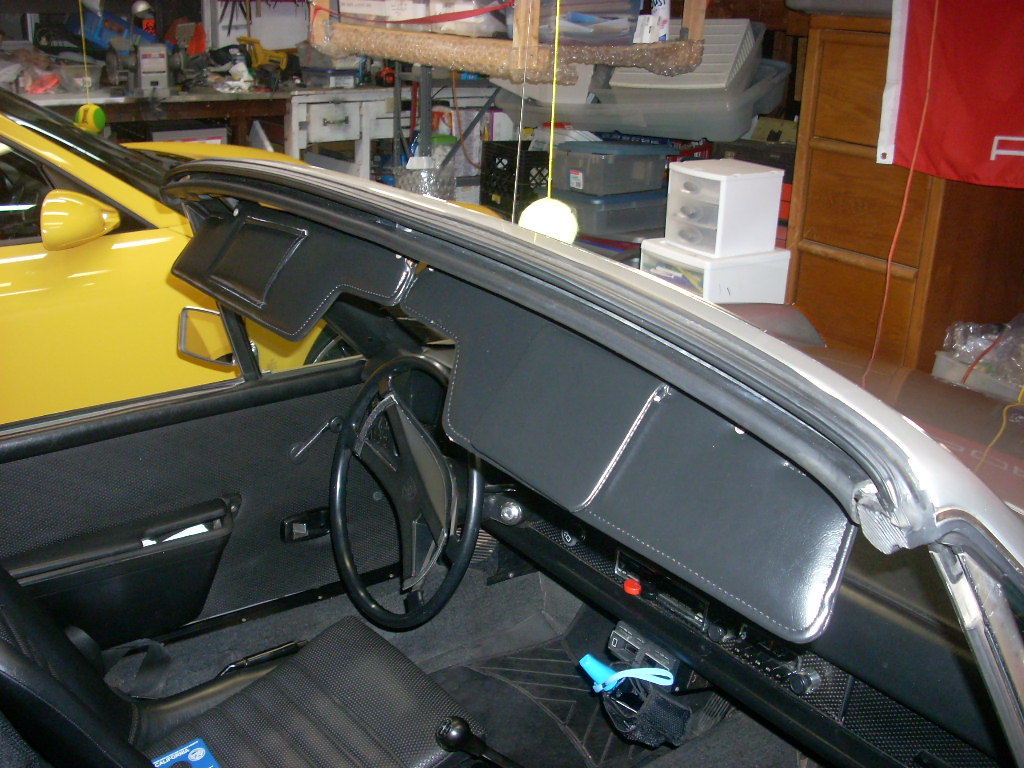 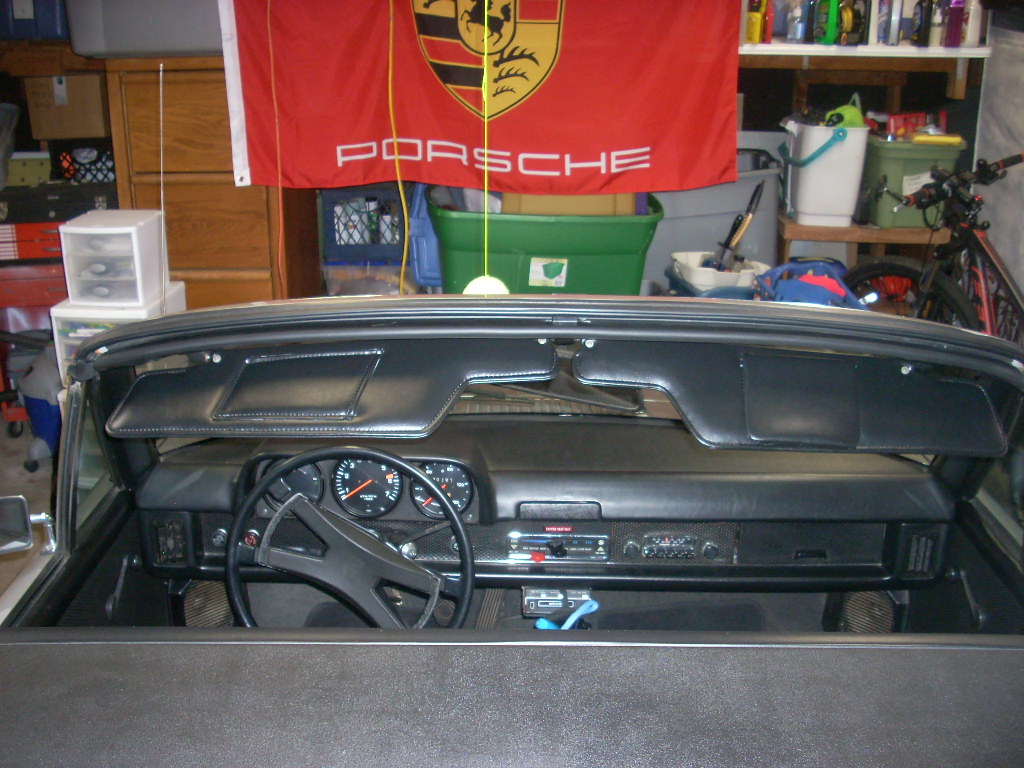
|
|
|
|
| mepstein |
Aug 23 2014, 08:01 AM
Post
#152
|
|
914-6 GT in waiting Group: Members Posts: 20,778 Joined: 19-September 09 From: Landenberg, PA/Wilmington, DE Member No.: 10,825 Region Association: MidAtlantic Region |
QUOTE(Cuda911 @ Aug 18 2014, 04:23 AM) OK, so I think the wipers are on correctly. Today I finished de-rustifying the trunk. There was some surface rust along the rear edge. Sanded it down to bare metal, treated the exposed metal with a rust converter as a precautionary measure, primed it, and painted it. Also, detailed and polished the wiring harness in the trunk, and polished the muffler. . Nice job! |
|
|
|
| 76-914 |
Sep 4 2014, 09:48 PM
Post
#153
|
|
Repeat Offender & Resident Subaru Antagonist Group: Members Posts: 13,901 Joined: 23-January 09 From: Temecula, CA Member No.: 9,964 Region Association: Southern California |
QUOTE(mepstein @ Aug 18 2014, 07:31 PM) the little u shaped wire is there to pull the large chrome covers off steel wheels. Probably Porsche hub caps, too. I know that tool fits Karmann Ghia Hub caps, as well. |
|
|
|
| orthobiz |
Sep 5 2014, 04:43 AM
Post
#154
|
|
Senior Member Group: Members Posts: 1,772 Joined: 8-January 07 From: Cadillac, Michigan Member No.: 7,438 Region Association: Upper MidWest |
QUOTE(KELTY360 @ Jul 10 2014, 11:45 PM) QUOTE(Eric_Shea @ Jul 10 2014, 07:15 PM) (IMG:style_emoticons/default/agree.gif) BTW, the wheels look great on your car. Glad they found a good home. Actually, it's those HUBCAPS that make the car! Paul |
|
|
|
| Cuda911 |
Sep 5 2014, 11:08 AM
Post
#155
|
|
Senior Member Group: Members Posts: 1,489 Joined: 20-May 14 From: Oceanside (N. San Diego County), CA Member No.: 17,376 Region Association: Southern California |
^^^^ (IMG:style_emoticons/default/smile.gif) (IMG:style_emoticons/default/smile.gif)
Yep, I love the wheels and center caps, thanks, guys!! I think I have parts from maybe 10 other 914world members on my car now. Interesting to see side-by-side pix of the car from the day I bought it vs now. Almost looks like two different cars: . Attached image(s) 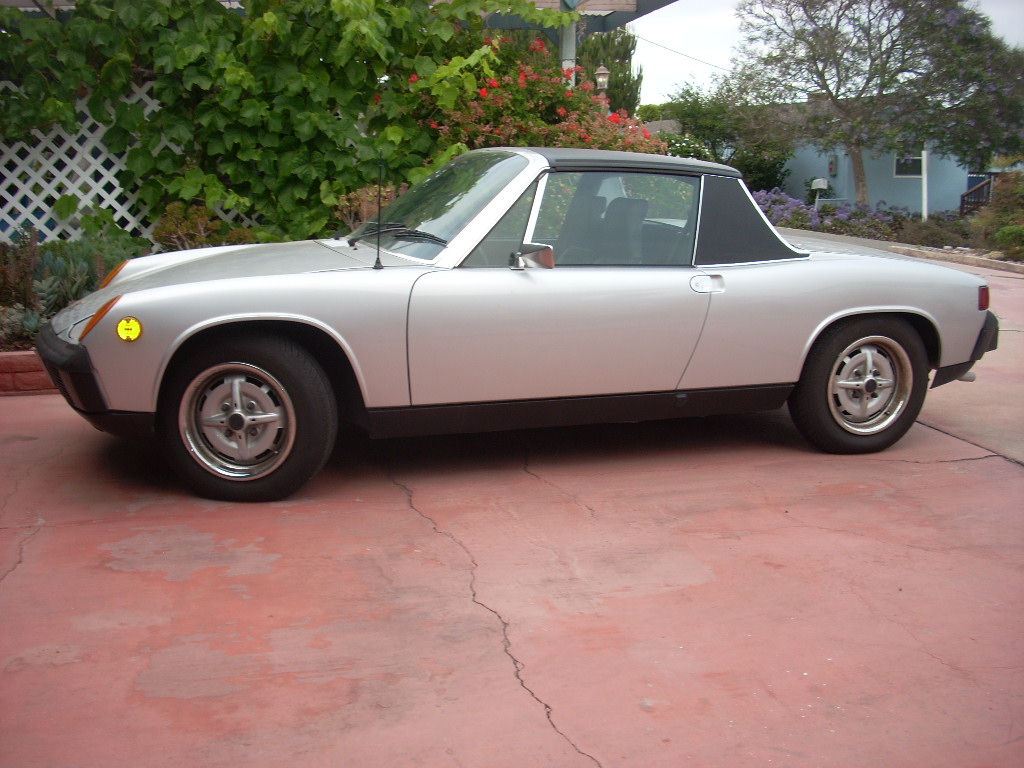 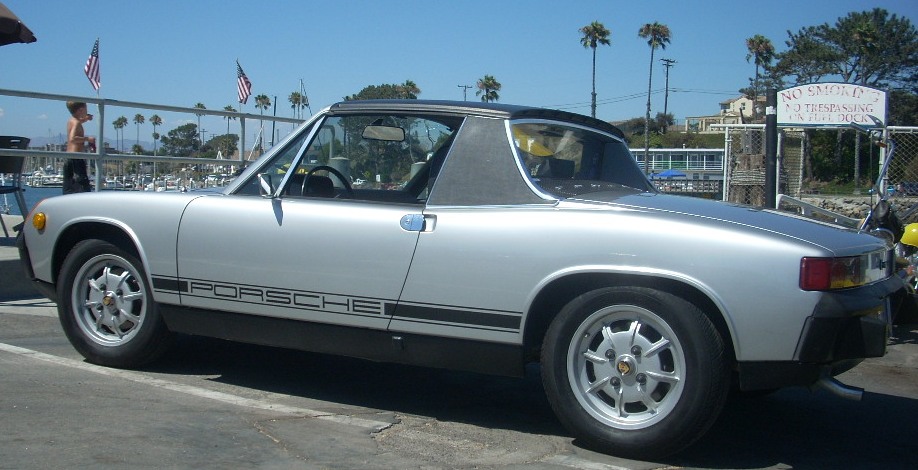
|
|
|
|
| Cuda911 |
Sep 14 2014, 11:28 PM
Post
#156
|
|
Senior Member Group: Members Posts: 1,489 Joined: 20-May 14 From: Oceanside (N. San Diego County), CA Member No.: 17,376 Region Association: Southern California |
Today I replaced the dash bulbs with LEDs, since it is so hard to read the gauges at night.
The bulbs, designation BA7s-W, can be obtained from superbrightleds.com http://www.superbrightleds.com/cat/ba9s-ba7s/ A few tips for other newbies: 1. Take out the screws that hold the cluster face plate and pull out the plate. But, you won't be able to pull it out far enough because of the speedometer cable. So, lift the cable off of the clip in the footwell. This will give enough "play" in the cable to let you pull out the face plate far enough to access the back of the gauges. 2. Push each gauge out of the faceplate from behind. 3. OK, a total newbie error, but might as well pass it on... to get the old bulb out, push in and turn. Sheesh, busted the first bulb trying to pull it straight out. Duh! 4. The metal bulb housings ground to the gauge cases, so once you replace a bulb you need to hold the bulb housing against the gauge case to test it. 5. Do not drop a bulb into the housing by accident, or you will have to disconnect everything to get it back out. (Ask how I know) 6. Those spade connectors are brittle. One of them broke, so I had to splice in a new female side. 7. DO NOT Replace the alternator bulb with LED!!!. Your alternator will quit charging. Has something to do with how the current goes through the bulb. Went for a drive tonight to see what difference it made. For the speedometer, makes a very significant improvement. Definitely worth it. For the tachometer, the left side is much brighter. Right side is still pretty dark. I'm wondering if one of the LEDs isn't working, so will take it apart again and check. Left gauge... parking brake warning light is much brighter. Fuel guage is still nearly unreadable at night (I think that has one of the tiny bulbs that is not the type that can be replaced with LED... I forgot.. Here's some pics and two videos. The first shows the OEM turn signal bulb, and the second shows it replaced with an LED. https://www.youtube.com/watch?v=fSvEb_r7BXo https://www.youtube.com/watch?v=5IphOdeOVTc Attached image(s) 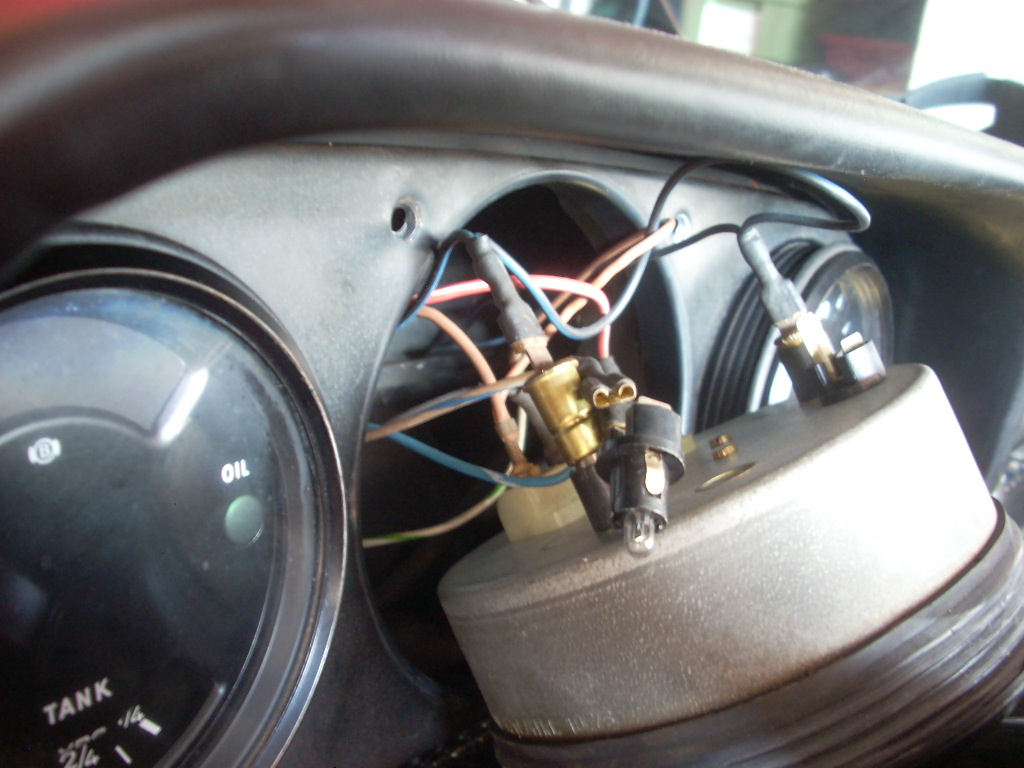 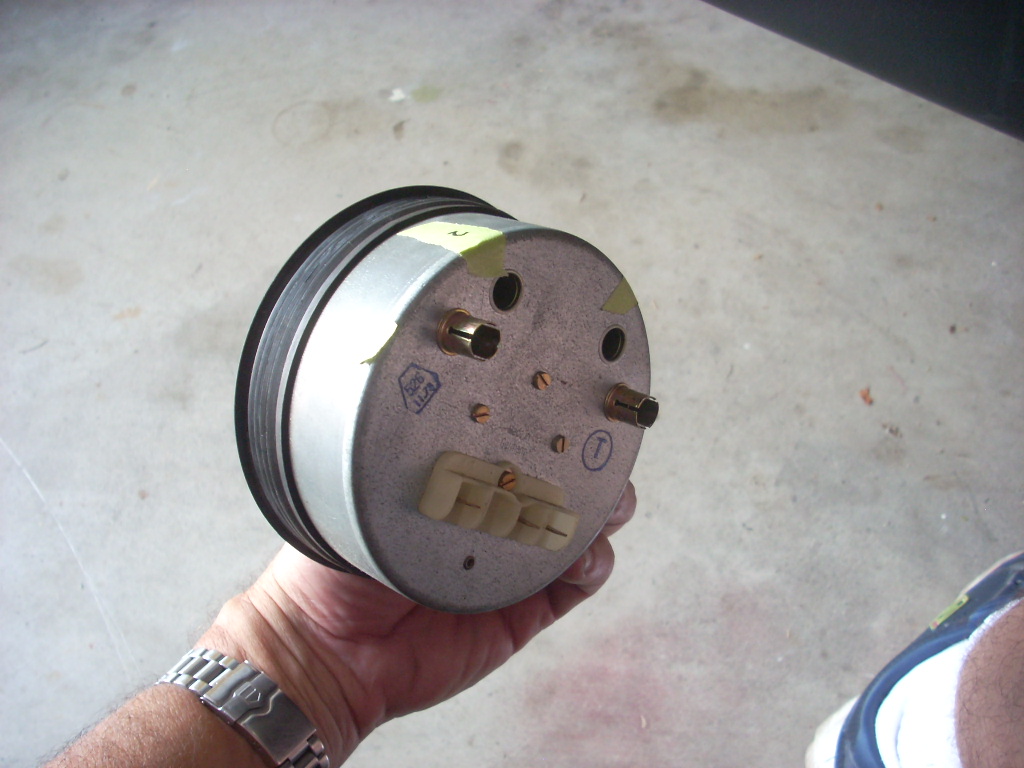 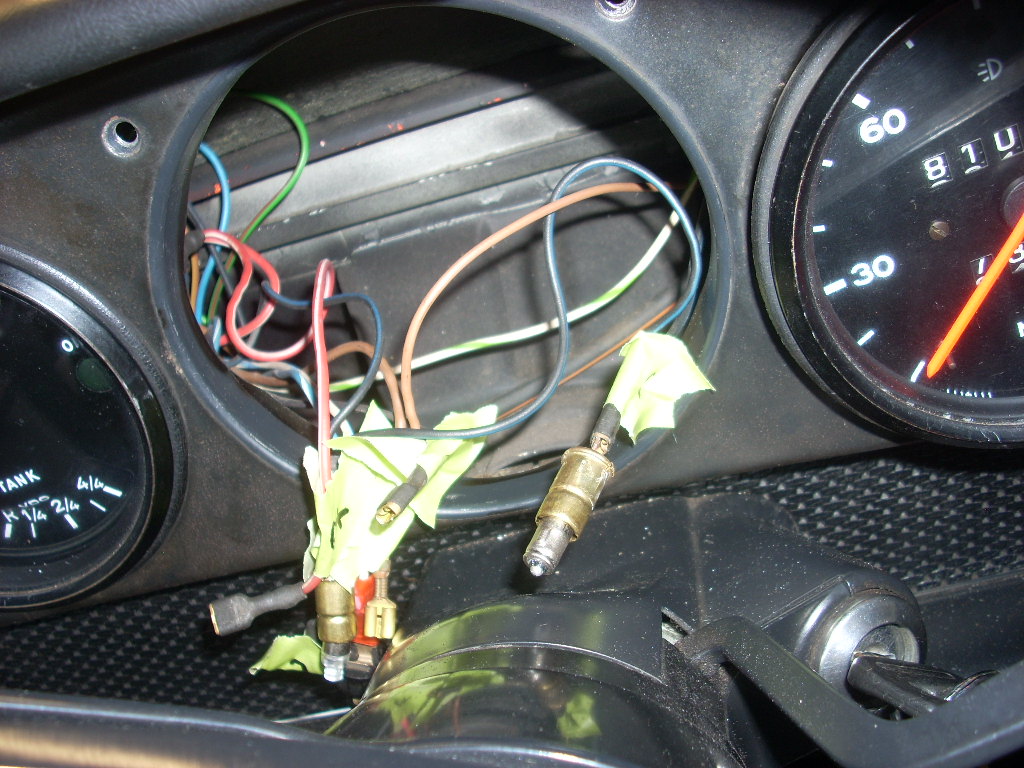
|
|
|
|
| Cuda911 |
Sep 29 2014, 10:00 PM
Post
#157
|
|
Senior Member Group: Members Posts: 1,489 Joined: 20-May 14 From: Oceanside (N. San Diego County), CA Member No.: 17,376 Region Association: Southern California |
My new cocomats from Cocomats.com showed up today. Very pleased with them. Excellent quality mats, and their customer service has been phenomenal.
They offer a zillion color combos, and I have a terrible time choosing colors. but, I think the red works very well for my car. Attached image(s) 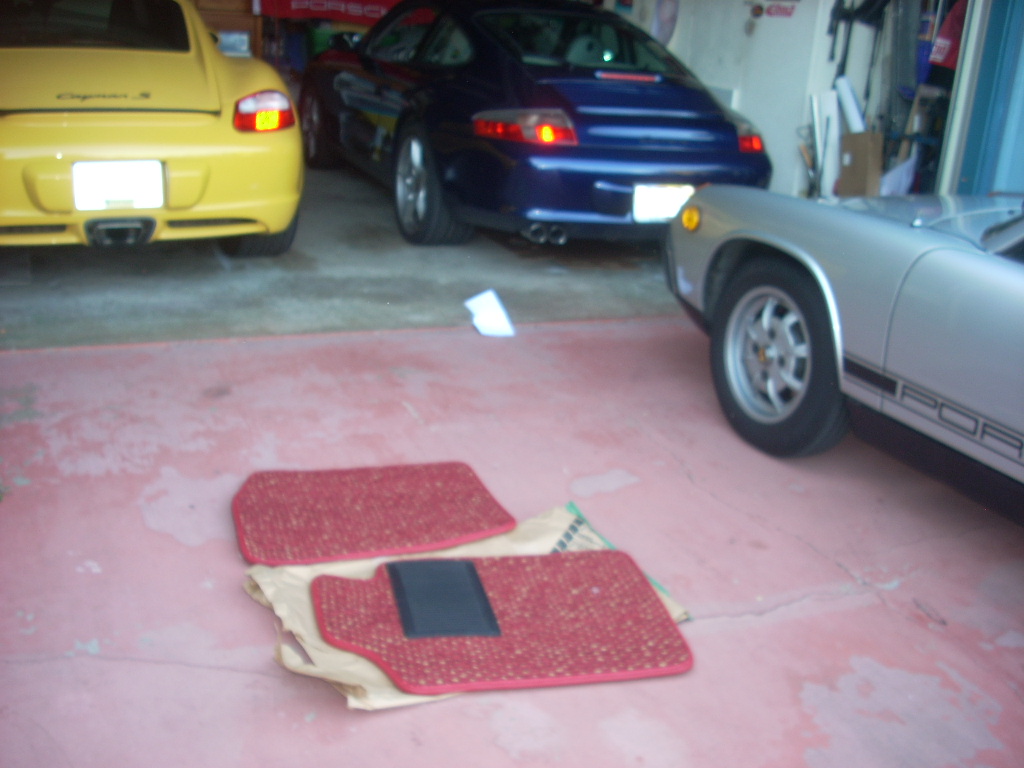 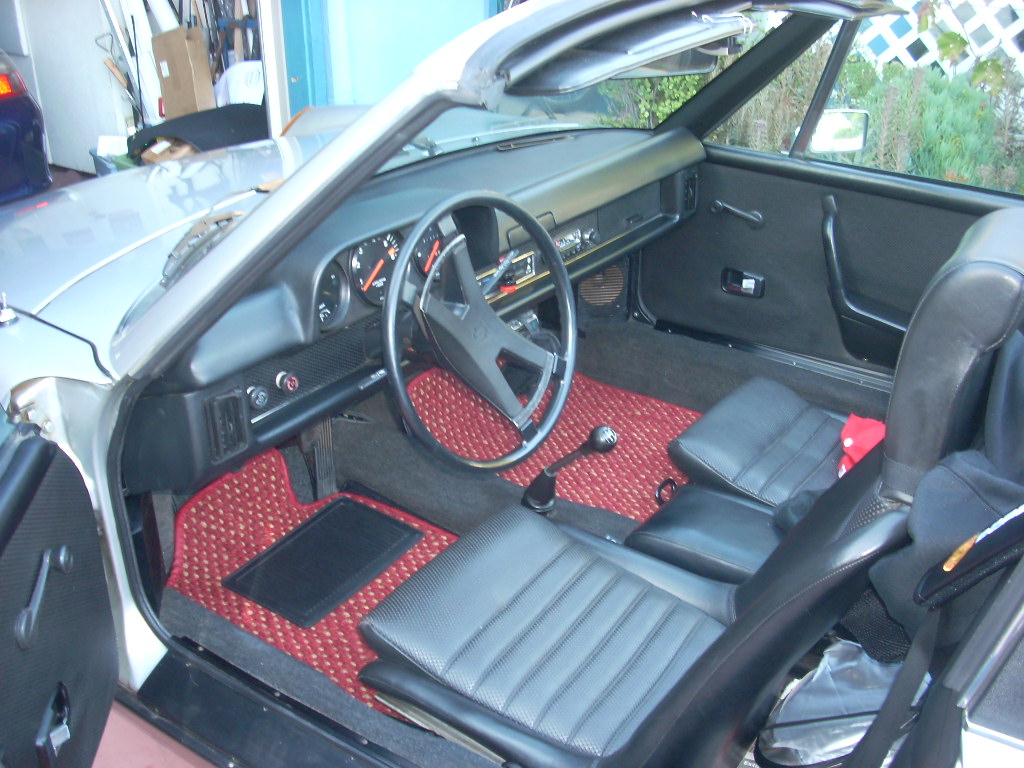 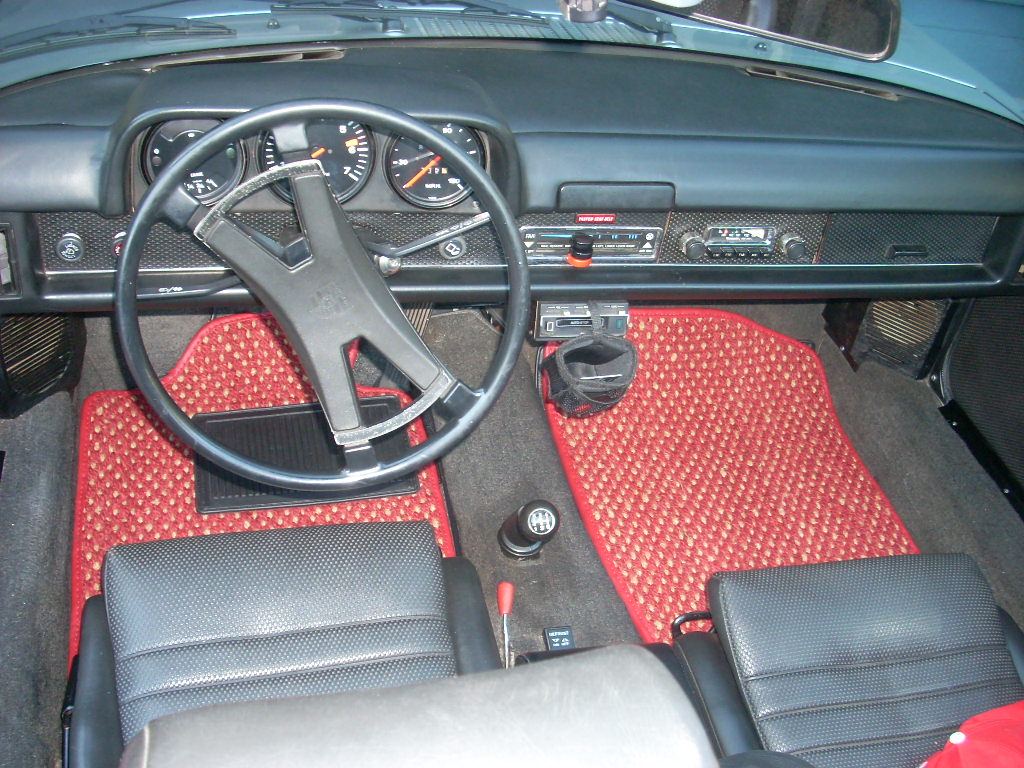
|
|
|
|
| arkitect |
Sep 30 2014, 06:11 AM
Post
#158
|
|
Senior Member Group: Members Posts: 617 Joined: 3-March 10 From: Stockton, CA Member No.: 11,426 Region Association: None |
QUOTE(Cuda911 @ Sep 29 2014, 09:00 PM) My new cocomats from Cocomats.com showed up today. Very pleased with them. Excellent quality mats, and their customer service has been phenomenal. They offer a zillion color combos, and I have a terrible time choosing colors. but, I think the red works very well for my car. Mike, I like your selection of cars to drive, all porsche. New and now old. Your teener looks great. Dave |
|
|
|
| Big Len |
Sep 30 2014, 09:25 AM
Post
#159
|
|
Senior Member Group: Members Posts: 1,787 Joined: 16-July 13 From: Edgewood, New Mexico Member No.: 16,126 Region Association: Southwest Region |
Mats look great.
You might want to think about lowering your front end a bit. Unless every picture is taken on a hill pointing up, it looks a little high. |
|
|
|
| Cuda911 |
Sep 30 2014, 11:24 AM
Post
#160
|
|
Senior Member Group: Members Posts: 1,489 Joined: 20-May 14 From: Oceanside (N. San Diego County), CA Member No.: 17,376 Region Association: Southern California |
Thanks, Arkitect. Yeah, I really like the Porsche line, in all of its forms.
Big Len, I guess the camera was tilted... dashed outside to take a few pix to post. Car is level. |
|
|
|
|
2 User(s) are reading this topic (2 Guests and 0 Anonymous Users)
0 Members:

|
Lo-Fi Version | Time is now: 21st June 2026 - 10:43 PM |
Invision Power Board
v9.1.4 © 2026 IPS, Inc.