|
|
|
Porsche, and the Porsche crest are registered trademarks of Dr. Ing. h.c. F. Porsche AG.
This site is not affiliated with Porsche in any way. Its only purpose is to provide an online forum for car enthusiasts. All other trademarks are property of their respective owners. |
|
|


| Eric_Shea |
 Jan 25 2005, 11:07 PM Jan 25 2005, 11:07 PM
Post
#1
|
|
PMB Performance  Group: Admin Posts: 19,304 Joined: 3-September 03 From: Salt Lake City, UT Member No.: 1,110 Region Association: Rocky Mountains |
In an earlier thread I was asked to write a “How-To” thread on the rear caliper rebuild. I had to get some pictures together before this made sense.
I’m starting this thinking you’ve already gotten them off the car and you understand how to reinstall them and bleed your brakes. This is all about the caliper rebuild. This is also about a “top-end” caliper rebuild. If your caliper is leaking through the handbrake lever I would consider getting a new core at least. Why? Rebuild kits are around $22.00. Handbrake rebuild kits are around $50.00. Now you’re in it for close to $80.00 with shipping etc. A rebuildable core should go for $20-$40 bucks… as these get scarce you may want to reconsider but currently they’re not too scarce. This job is not fun and it’s not all that easy. It’s not too tough either, it just requires some mechanical ability, patience, special tools and some “tricks of the trade”. Yes, I rebuild these so I’m either loosing customers or gaining customers by writing this (I’m obviously not too concerned). Follow the thread. If it’s something you want to tackle then dive in. If not, you know where to go. Here are some of the tools you’ll need: Dental Pick T27 Torx Driver (early single bleeder style) Torque Wrench 4mm Hex key Small and Large Locking Pliers Brake Grease Brake Cleaner Large Screwdriver Small Wire Brush 13mm Socket 11mm Deep Well Socket (to press the spring and cover into the inner caliper half) 11mm Socket MAP Torch Air Wrench Pistol Grip Clamp Brake Caliper Hone Hand Drill Two Rear Caliper Rebuild Kits from Your Favorite Vendor (they must include all seals) 7mm Wrench (for the bleeder valve. I prefer to use a small pair if locking pliers though…) Here’s the “How-To” 1. Drain it. You’ll want to get all the fluid out of these before you dig into the task at hand. As mentioned above, take a pair of locking pliers and snug them down on the bleeders. Most are stuck and this is the only way to go. The 7mm wrench will rarely do the trick. Once you get them off, try to blow some air through them. 2. I like to mount these in a vise before I start the dismantling process. Next I start with the caliper half bolts. These are 11mm bolts on the later style (dual bleeder) or T27 Torx bolts on the early calipers (single bleeder). The early calipers have 11mm nuts on them. These will seem impossible to remove. Here’s where the MAP torch comes into play. Don’t worry too much about heating these puppies up. First of all, brakes get hot. Second, you have new seals in your rebuild kits. You just don’t want to heat up the parking brake area because as discussed earlier, that’s another $50.00 in parts and another rebuild. Heat the bolts and use your air wrench to hammer these off. Split the caliper and remove the inner seals. While you’re at it, remove the dust boots and clamps using the dental pick. Attached image(s) 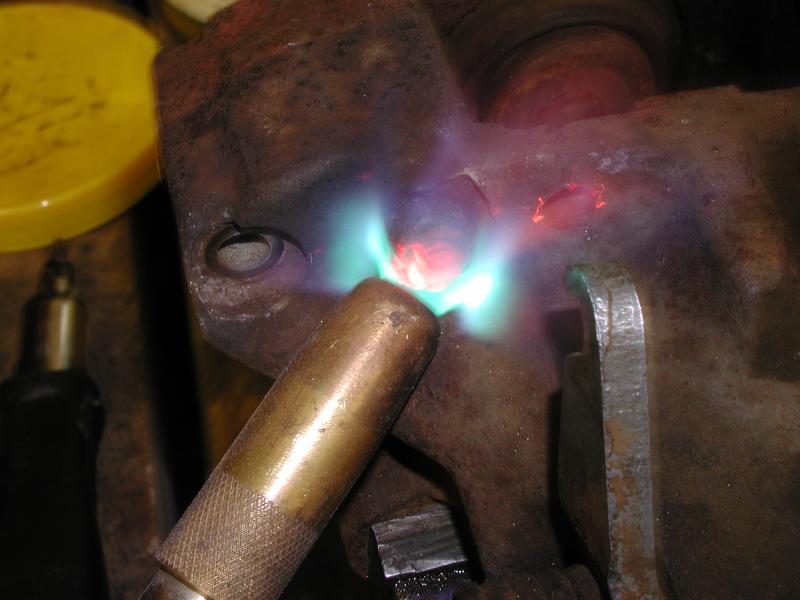
|
   |

 
|
  |
Replies(1 - 19)
| Eric_Shea |
Jan 25 2005, 11:08 PM
Post
#2
|
|
PMB Performance Group: Admin Posts: 19,304 Joined: 3-September 03 From: Salt Lake City, UT Member No.: 1,110 Region Association: Rocky Mountains |
3. Turn out the pistons. The heat you used on the caliper half bolts may have helped you on the piston side. Many have complained about stuck pistons that have the internals “spinning” (you’ll see what that means when you get one out). I’ve found “heat” to be a “major” factor in getting out these types of pistons. Keep your MAP torch handy. I mention “Inner” and “Outer” caliper halves; The inner halves have the parking brake arm attached. For the “Inner” piston you need to spin the adjuster “CLOCKWISE”. “Outer” pistons turn COUNTER CLOCKWISE. For the outer adjuster you’ll need to loosen the 13mm lock nut and spin the adjuster with a 4mm hex wrench. For the inner adjuster you’ll need to use the 4mm hex wrench to remove the adjuster cover. Many times this is stuck and the 4mm slot is stripped (has something to do with thread surface area and wrech surface area). If this is the case you’ll need to slot the cover and pop it with a large screwdriver or chisel (see picture) Turning out the pistons is the part that I feel is “easier” than any other caliper rebuild. If your calipers are in decent shape the pistons should simply spin right out to the edge. Once you get the adjuster screws turned out to their limit (you’ll feel it and the piston will stop moving), you’ll need to pull the piston out the rest of the way. Do this by placing a shop rag over the piston and use a large pair of locking pliers to grab the top edge. Don’t dig into it and destroy the lip. Just snug. Now “rock” the piston back and forth while pulling. It only has about 1/8th of an inch to go.
Here's a picture of the "inner" adjuster cover and the modification discussed above that is "usually" needed to get them off Attached image(s) 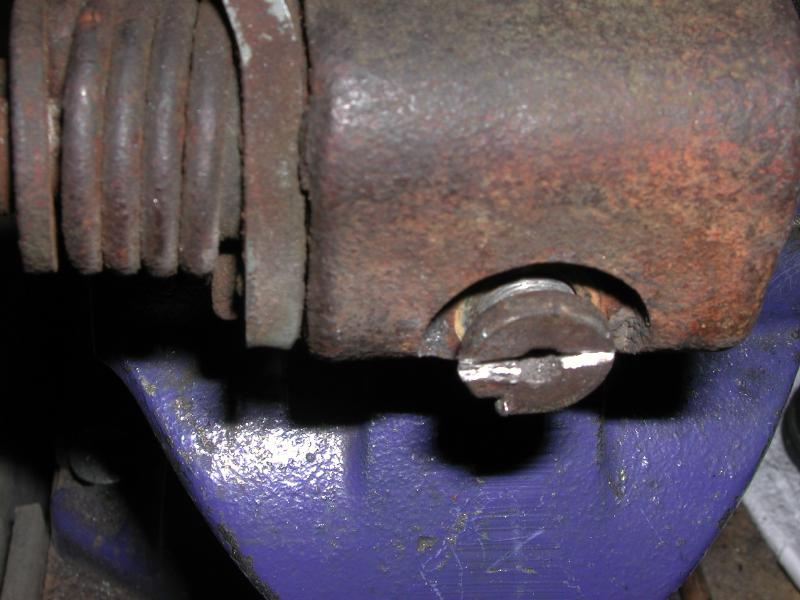
|
|
|
|
| Eric_Shea |
Jan 25 2005, 11:09 PM
Post
#3
|
|
PMB Performance Group: Admin Posts: 19,304 Joined: 3-September 03 From: Salt Lake City, UT Member No.: 1,110 Region Association: Rocky Mountains |
Turning out the piston... (and yes, these will clean up to like new condition)
Attached image(s) 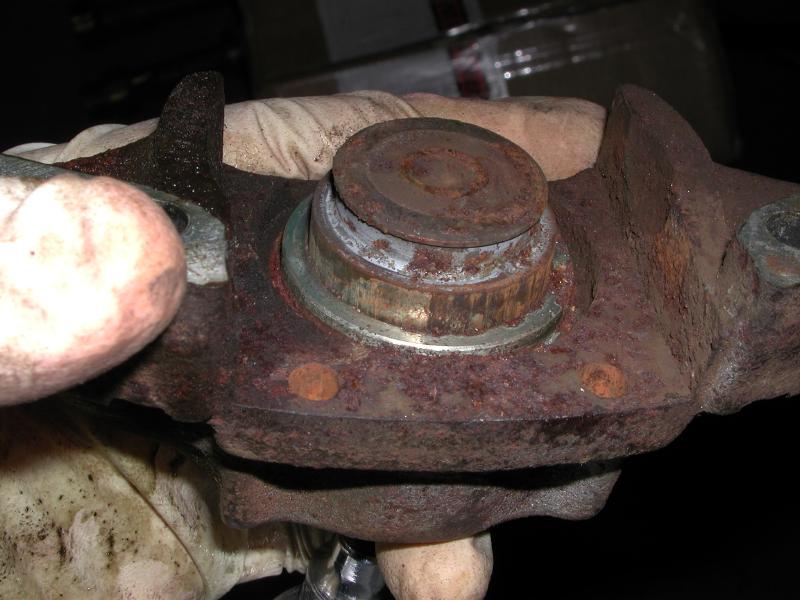
|
|
|
|
| Eric_Shea |
Jan 25 2005, 11:10 PM
Post
#4
|
|
PMB Performance Group: Admin Posts: 19,304 Joined: 3-September 03 From: Salt Lake City, UT Member No.: 1,110 Region Association: Rocky Mountains |
Gently rock back and forth.
Attached image(s) 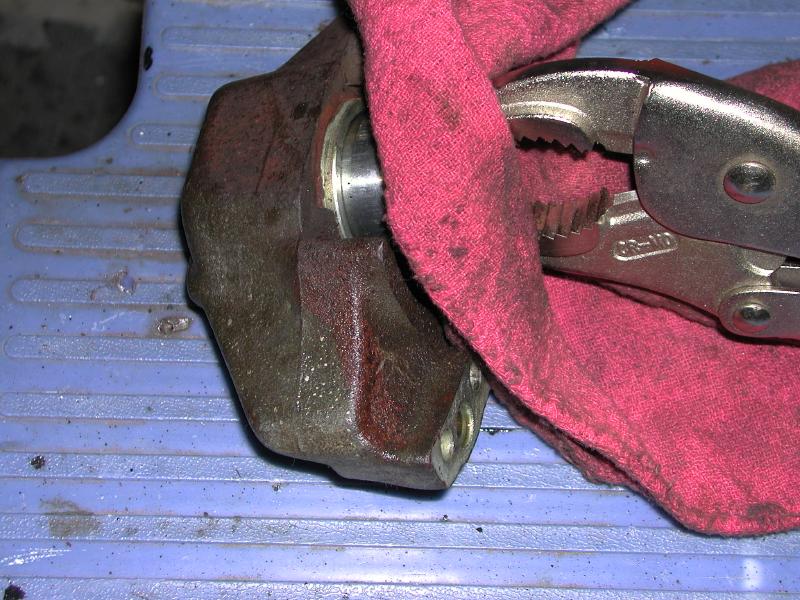
|
|
|
|
| Eric_Shea |
Jan 25 2005, 11:11 PM
Post
#5
|
|
PMB Performance Group: Admin Posts: 19,304 Joined: 3-September 03 From: Salt Lake City, UT Member No.: 1,110 Region Association: Rocky Mountains |
4. Remove the adjusters. The outer adjuster will pop out after you remove the “clip” that is on the shaft just above the 13mm nut and the nut itself. Once the nut is off the adjuster simply pushes into the piston cavity. The inner adjuster is a bit tricky. It is set in with a hat, a spring and a clip that holds all that in there. Are you sure you want to do this? It’s “really” fun putting it back! (IMG:http://www.914world.com/bbs2/html/emoticons/wink.gif) Use the dental pick again and pull the clip inward and upward. I like to cover the piston cavity with a shop rag so the clip doesn’t go flying. Once the clip is out of it’s groove the adjuster, hat and spring should pull out. It comes out hard but it comes out. There should be a little “sausage” attached to the bottom of it with grease. The “sausage” may stay in the lever assembly but most come out with the adjuster. The “sausage” (as I like to call it) goes into a recess in the rod and pushes against the adjuster when you pull your handbrake lever. Next time you pull up on the handbrake, thank the “sausage”. Pull the adjuster gear out when you remove the 4mm hex key.
Attached image(s) 
|
|
|
|
| Eric_Shea |
Jan 25 2005, 11:12 PM
Post
#6
|
|
PMB Performance Group: Admin Posts: 19,304 Joined: 3-September 03 From: Salt Lake City, UT Member No.: 1,110 Region Association: Rocky Mountains |
Inner...
Attached image(s) 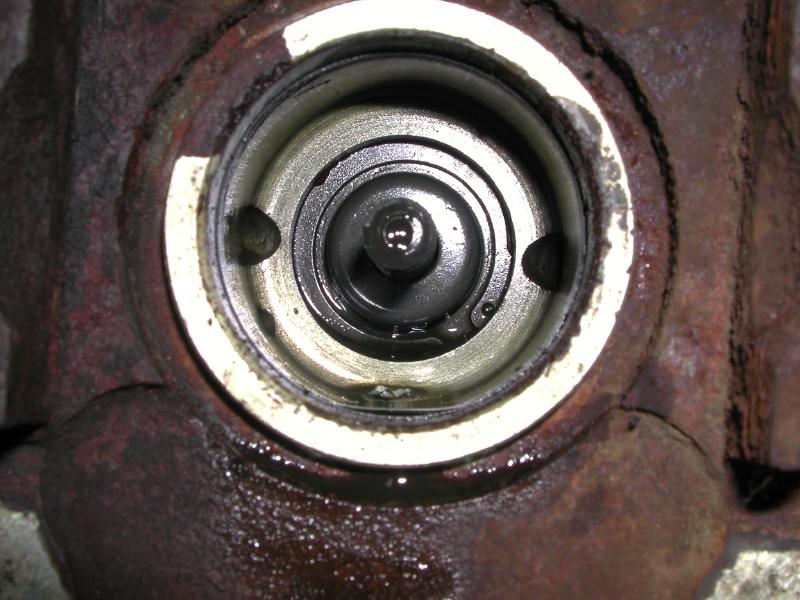
|
|
|
|
| Eric_Shea |
Jan 25 2005, 11:13 PM
Post
#7
|
|
PMB Performance Group: Admin Posts: 19,304 Joined: 3-September 03 From: Salt Lake City, UT Member No.: 1,110 Region Association: Rocky Mountains |
Inner adjuster pulled out... see the sausage? (IMG:http://www.914world.com/bbs2/html/emoticons/biggrin.gif)
Attached image(s) 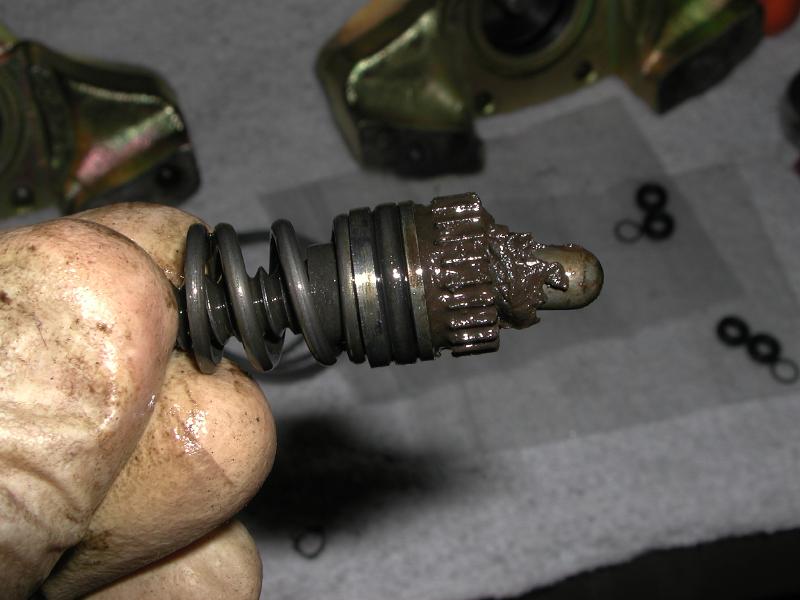
|
|
|
|
| Eric_Shea |
Jan 25 2005, 11:14 PM
Post
#8
|
|
PMB Performance Group: Admin Posts: 19,304 Joined: 3-September 03 From: Salt Lake City, UT Member No.: 1,110 Region Association: Rocky Mountains |
5. Use the ever so handy dental pick to remove the piston seals.
Attached image(s) 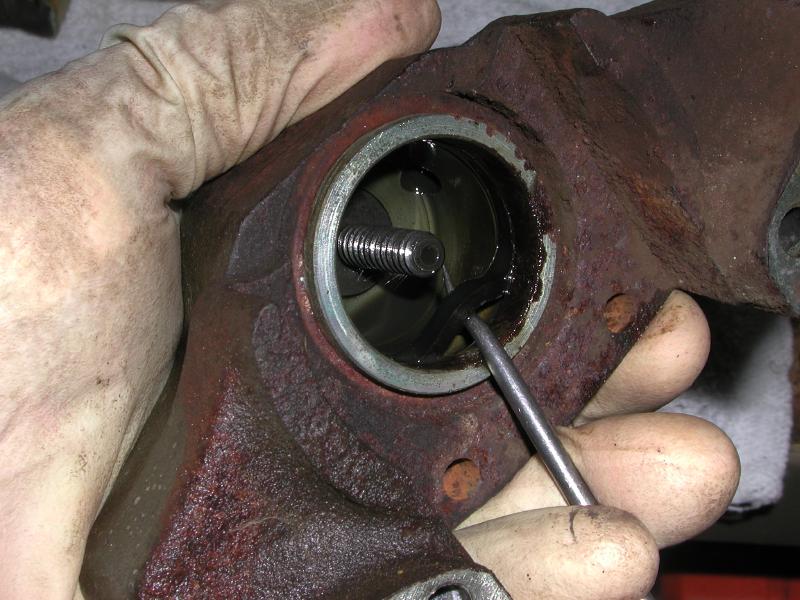
|
|
|
|
| Eric_Shea |
Jan 25 2005, 11:15 PM
Post
#9
|
|
PMB Performance Group: Admin Posts: 19,304 Joined: 3-September 03 From: Salt Lake City, UT Member No.: 1,110 Region Association: Rocky Mountains |
6. Optional. If you’re going to plate or paint your calipers (and why wouldn’t you while they’re apart) then you’ll probably want to take the handbrake spring off. To do this you’ll need to remove yet another clip (ATE seems to love clips), slide off the washer and then use the small locking pliers and grab the spring just past the bend and pull up. The tension is not that great so don’t worry about it flying across the garage. Next remove the spring rest from the shaft.
Attached image(s) 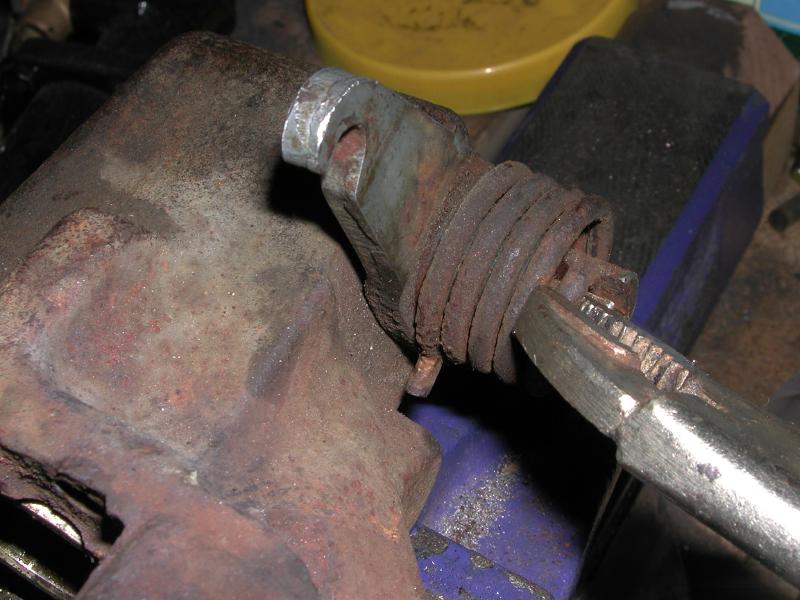
|
|
|
|
| Eric_Shea |
Jan 25 2005, 11:17 PM
Post
#10
|
|
PMB Performance Group: Admin Posts: 19,304 Joined: 3-September 03 From: Salt Lake City, UT Member No.: 1,110 Region Association: Rocky Mountains |
7. You Decide. You now have a totally stripped pair of caliper halves (or two pair). This is where I loosely bolt them back together and bead blast them. I then take them off to a local plater and have them “yellow” zinc plated to replicate the factory finish. Clear zinc will net you a silver caliper. If you decide to paint at this point, use a very high temperature paint. Rotor temperatures can exceed 1400. If you decide not to plate or paint this is where the wire brush and brake cleaner comes in handy. Spray and clean. Spray and clean. Spray and clean.
8. Ready to reassemble? |
|
|
|
| Aaron Cox |
Jan 25 2005, 11:18 PM
Post
#11
|
|
Professional Tinkerer Group: Retired Admin Posts: 24,548 Joined: 1-February 03 From: Corona, CA Member No.: 219 Region Association: Southern California |
sissy boy - uses latex gloves.... (IMG:http://www.914world.com/bbs2/html/emoticons/ohmy.gif) (IMG:http://www.914world.com/bbs2/html/emoticons/laugh.gif)
|
|
|
|
| drgchapman |
Jan 25 2005, 11:19 PM
Post
#12
|
|
Current Stable Group: NoClassifiedAccess Posts: 922 Joined: 20-September 04 From: Portland, OR Member No.: 2,789 Region Association: Pacific Northwest |
Looks like I won't try this at home, calipers shipped out yesterday. Do me gud! (IMG:http://www.914world.com/bbs2/html/emoticons/clap.gif)
Gary |
|
|
|
| Eric_Shea |
Jan 25 2005, 11:20 PM
Post
#13
|
|
PMB Performance Group: Admin Posts: 19,304 Joined: 3-September 03 From: Salt Lake City, UT Member No.: 1,110 Region Association: Rocky Mountains |
9. Install the piston seals from your kit. They don’t seem like they’ll fit but keep pressing them around and use that handy dental pick to position them. Soon enough they’ll drop right in the groove. I lube them up with brake fluid before I install them (as I do with all the seals).
10. Install the adjusters. Clean them up with the brake cleaner and the wire brush first. Remove the old seals and install the new seals from your rebuild kit. The outer adjuster simply pushes right in (use brake fluid as a lube on the seal). Install the 13mm nut and then reinstall the clip. The inner adjuster is a bit more complicated (remember… you wanted to do this). Use the brake caliper grease and load up the hole at the base of the adjuster where the famous “sausage” goes. Insert the sausage and spread some of the extra grease on the gear. Push the adjuster into position and make sure it drops fully into place. Place the spring over the adjuster and follow it up with the hat. Place the clip over the hat and your ready for the real fun stuff. Use the 11mm deep well socket and use the “Pistol Grip Clamp” to press the assembly in to place. Dental pick time again; use the pick to press the clip back into the groove. Once you know for sure that it’s snapped into place, release the clamp. Install the adjuster gear and use some new adjuster covers for the inner halves. Attached image(s) 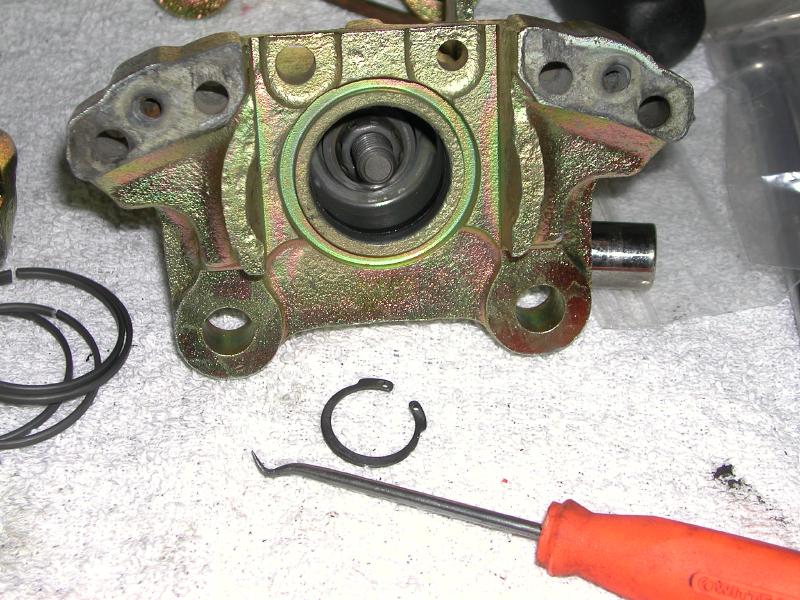
|
|
|
|
| Eric_Shea |
Jan 25 2005, 11:22 PM
Post
#14
|
|
PMB Performance Group: Admin Posts: 19,304 Joined: 3-September 03 From: Salt Lake City, UT Member No.: 1,110 Region Association: Rocky Mountains |
Inner Adjuster Rig...
Attached image(s) 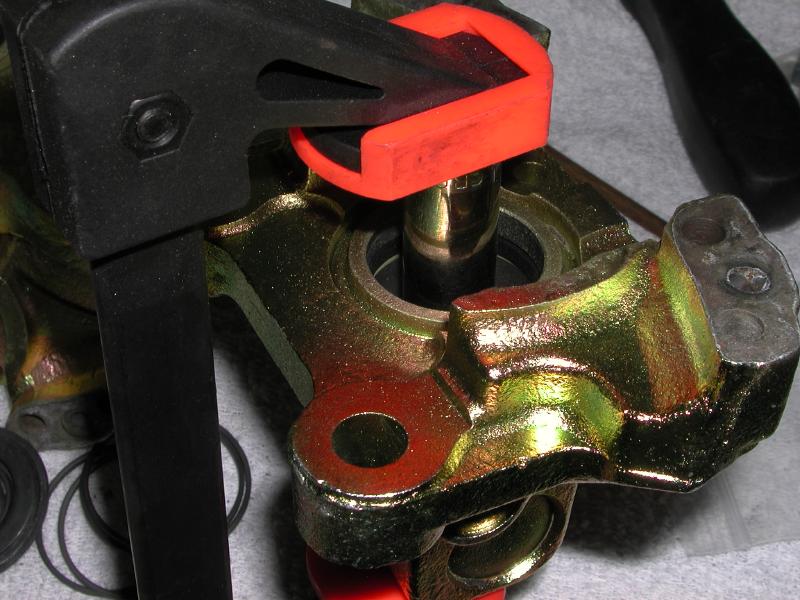
|
|
|
|
| Eric_Shea |
Jan 25 2005, 11:23 PM
Post
#15
|
|
PMB Performance Group: Admin Posts: 19,304 Joined: 3-September 03 From: Salt Lake City, UT Member No.: 1,110 Region Association: Rocky Mountains |
11. Install the pistons. I tape them off and bead blast the tops to bare metal. They tend to be a bit rusty. While they’re still tapped I put a coat of high-temp gray on them to replicate the factory finish. Once they’re dry you can remove the tape and use 600 grit wet-or-dry to polish the edges. Now you’ve got some nice pistons and they’re ready to “pull” into the cylinders. Here comes a little trick; install the dust boot now. Next, use the caliper grease and put a light film on the piston and the cylinder wall. The adjusters go in the reverse direction to install the pistons (ya think?) Outer adjusters turn CLOCKWISE, inner go COUNTER CLOCKWISE. Turn the pistons in all the way but don’t crank them down too far. You can bust the springs on the inner piston assemblies (you don’t want to do that). When they stop moving, stop turning. Install the dust boot clamps. Tip: Dust boot clamps are now coming untrimmed -or- a bit too large. Take a pair of stout wire cutters and trim them down to the appropriate size.
Attached image(s) 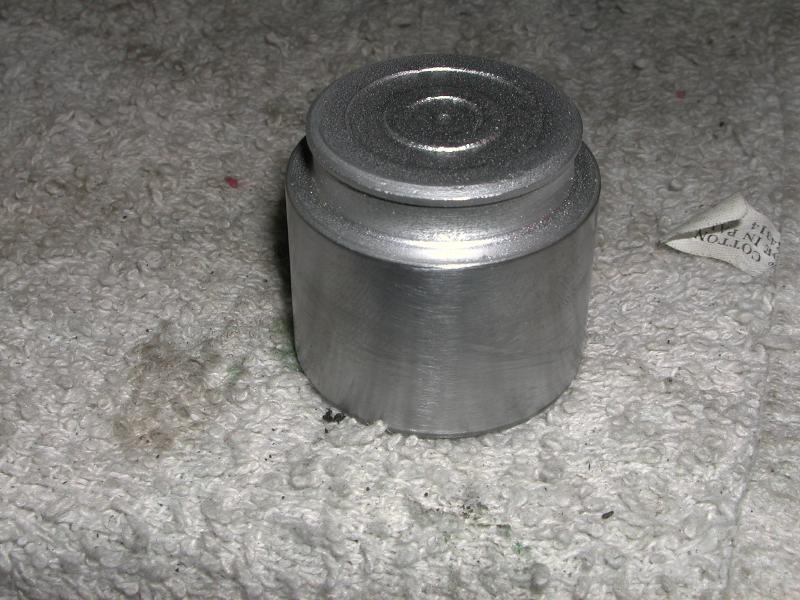
|
|
|
|
| swood |
Jan 25 2005, 11:23 PM
Post
#16
|
||
|
Senior Member Group: Members Posts: 1,845 Joined: 6-February 03 From: Strong Beach Member No.: 251 Region Association: None |
Ok, Eric. Here's where I say "THANK YOU!" (IMG:http://www.914world.com/bbs2/html/emoticons/pray.gif) (IMG:http://www.914world.com/bbs2/html/emoticons/clap.gif) |
||
|
|
|
||
| Eric_Shea |
Jan 25 2005, 11:24 PM
Post
#17
|
|
PMB Performance Group: Admin Posts: 19,304 Joined: 3-September 03 From: Salt Lake City, UT Member No.: 1,110 Region Association: Rocky Mountains |
Dust Boot Trick...
Attached image(s) 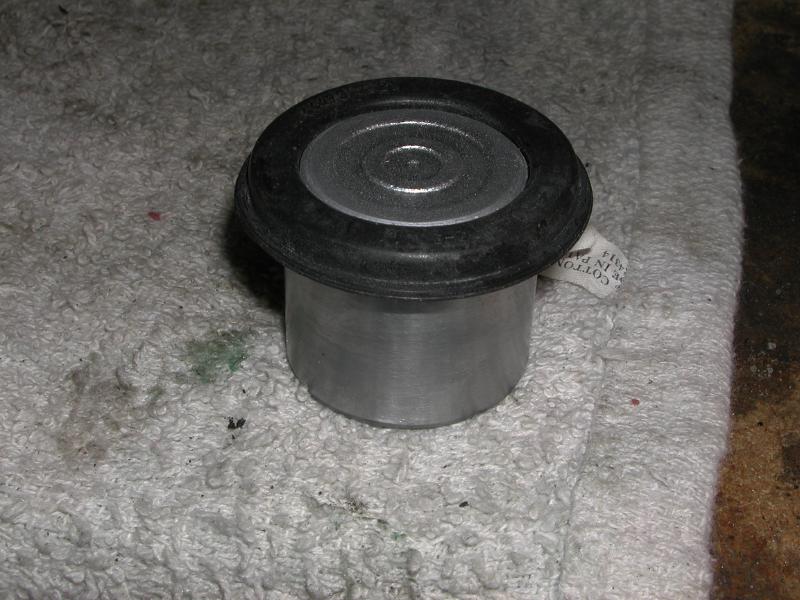
|
|
|
|
| Eric_Shea |
Jan 25 2005, 11:25 PM
Post
#18
|
|
PMB Performance Group: Admin Posts: 19,304 Joined: 3-September 03 From: Salt Lake City, UT Member No.: 1,110 Region Association: Rocky Mountains |
Pulling in...
Attached image(s) 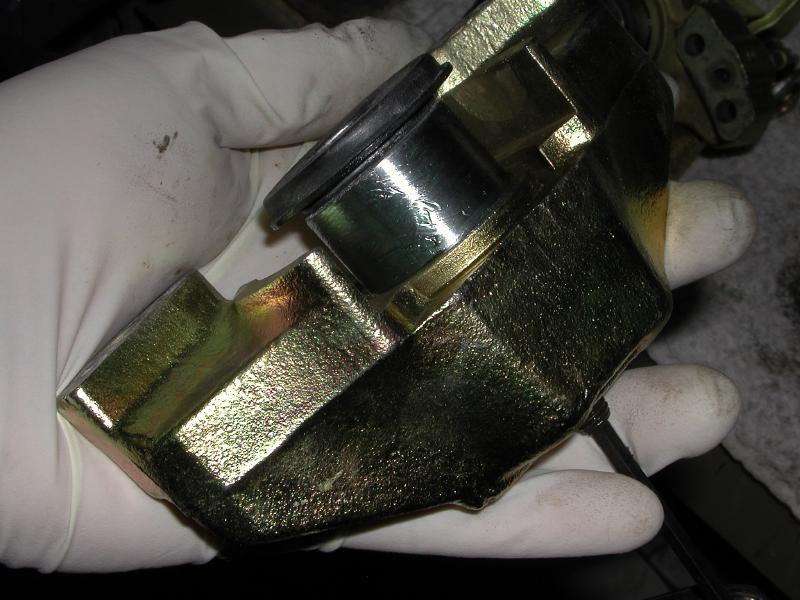
|
|
|
|
| Eric_Shea |
Jan 25 2005, 11:26 PM
Post
#19
|
|
PMB Performance Group: Admin Posts: 19,304 Joined: 3-September 03 From: Salt Lake City, UT Member No.: 1,110 Region Association: Rocky Mountains |
More...
Attached image(s) 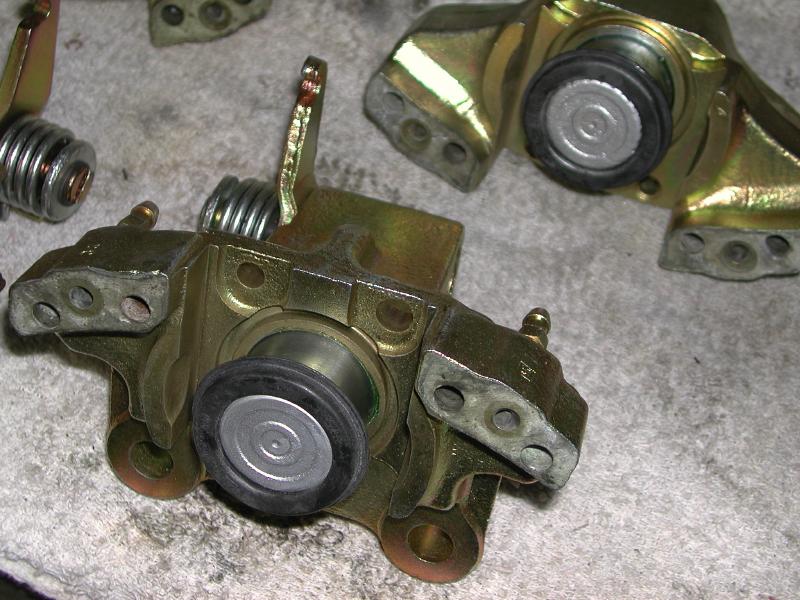
|
|
|
|
| Eric_Shea |
Jan 25 2005, 11:26 PM
Post
#20
|
|
PMB Performance Group: Admin Posts: 19,304 Joined: 3-September 03 From: Salt Lake City, UT Member No.: 1,110 Region Association: Rocky Mountains |
12. Reassemble the caliper halves. Use the two seals in the rebuild kit. Lubricate them with brake fluid. Position the half with the détentes horizontally in a vise, put the seals in and drop the other half on top. Install the bolts and torque to 7lbs. starting with the two inner bolts and then the two outer bolts. Next, go back and re-torque to 17lbs. using the same pattern.
Attached image(s) 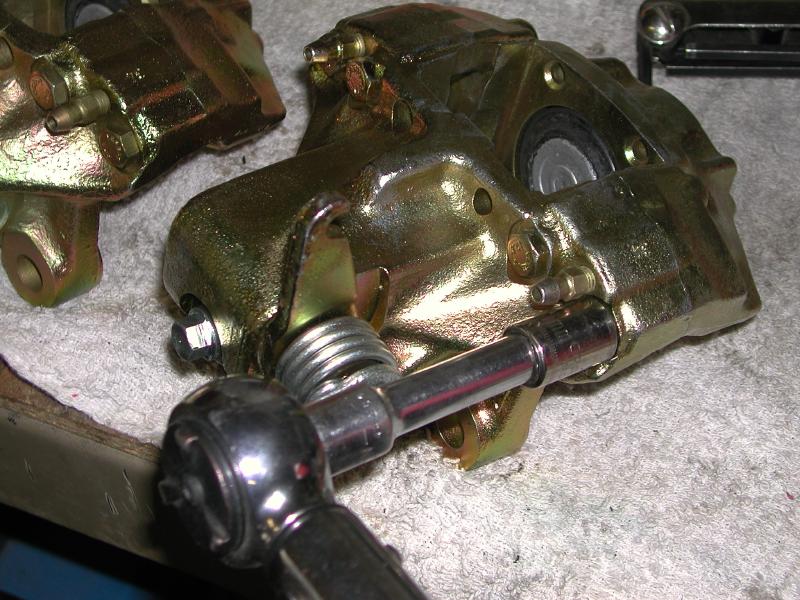
|
|
|
|
|
1 User(s) are reading this topic (1 Guests and 0 Anonymous Users)
0 Members:

|
Lo-Fi Version | Time is now: 2nd May 2026 - 06:14 AM |
Invision Power Board
v9.1.4 © 2026 IPS, Inc.