|
|
|
Porsche, and the Porsche crest are registered trademarks of Dr. Ing. h.c. F. Porsche AG.
This site is not affiliated with Porsche in any way. Its only purpose is to provide an online forum for car enthusiasts. All other trademarks are property of their respective owners. |
|
|

  |

| raynekat |
 Oct 23 2016, 08:12 PM Oct 23 2016, 08:12 PM
Post
#101
|
|
Advanced Member  Group: Members Posts: 2,171 Joined: 30-December 14 From: Coeur d'Alene, Idaho Member No.: 18,263 Region Association: Pacific Northwest |
Finally, a real NOS 914-6 oil tank also from Stoddards.
Added an early 911 filter console and a nifty 914-6 GT style filler neck. It's the same one you see advertised on Ebay or Sierra Madre, but I purchased mine from the manufacturer in Europe before they were being sold her in the States. They also make a more authentic version that has the "blow-off" tap for those with all the real 914-6 GT oil plumbing....I didn't need that. The hardest thing to find was the factory clamp for the filler neck. I did source one eventually.... 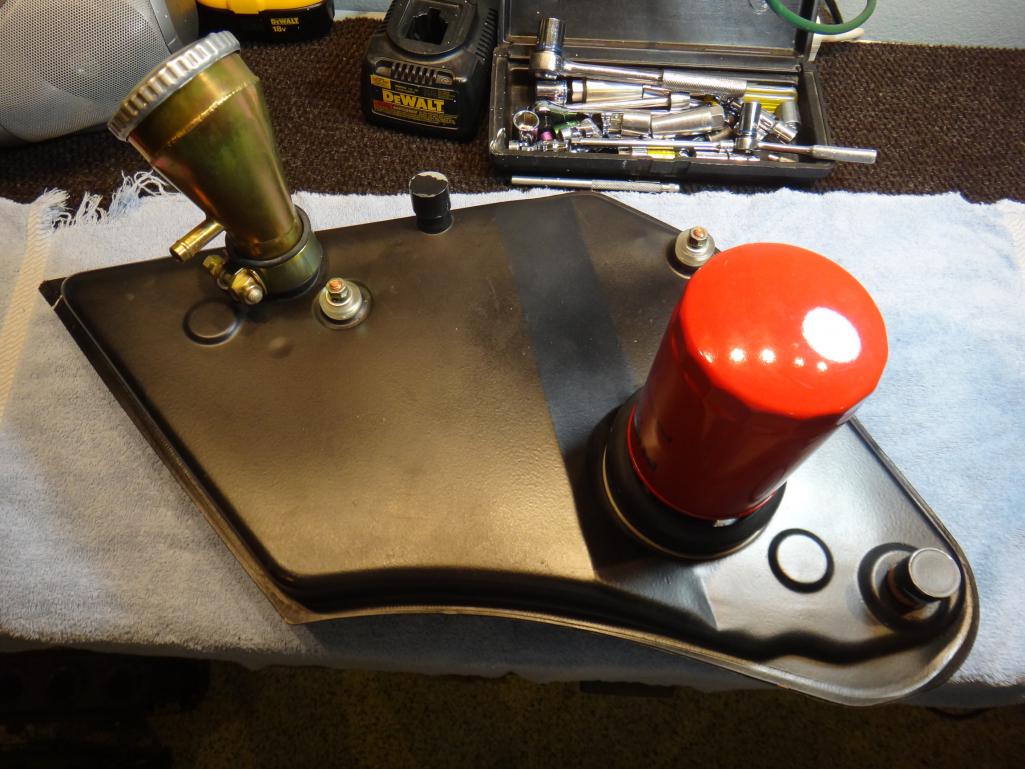 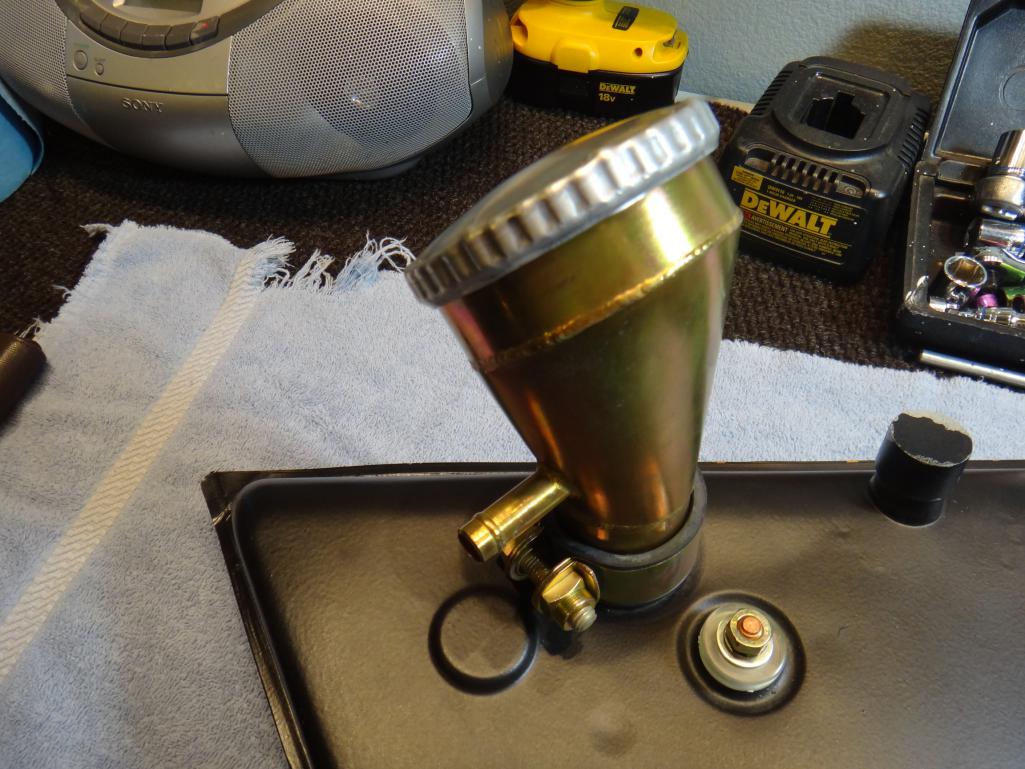 |
   |

 
|
| cary |
Oct 27 2016, 10:58 PM
Post
#102
|
|
Advanced Member Group: Members Posts: 3,900 Joined: 26-January 04 From: Sherwood Oregon Member No.: 1,608 Region Association: Pacific Northwest |
Spent the morning at Rothsport finishing up the rear sway bar mount on a vintage race car. Bar rotates like butter. Gave it a couple coats of paint and met the wife and Super In law for lunch. Then off to Forest Grove ..............
Plan was to strip the paint off both qtr. panel cut patches. Ran into a little hillbilly work on the first one I worked on. Picture doesn't really show the extent of the crease and trench. Looks like they tried to pull it out with a hook without a slide hammer and they failed .......... (IMG:style_emoticons/default/mad.gif) 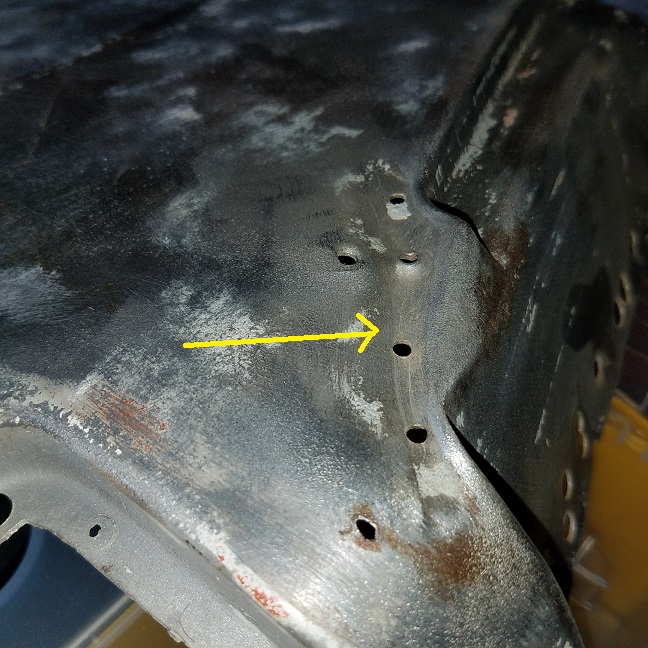 Backside hump shows up a little better on the back. 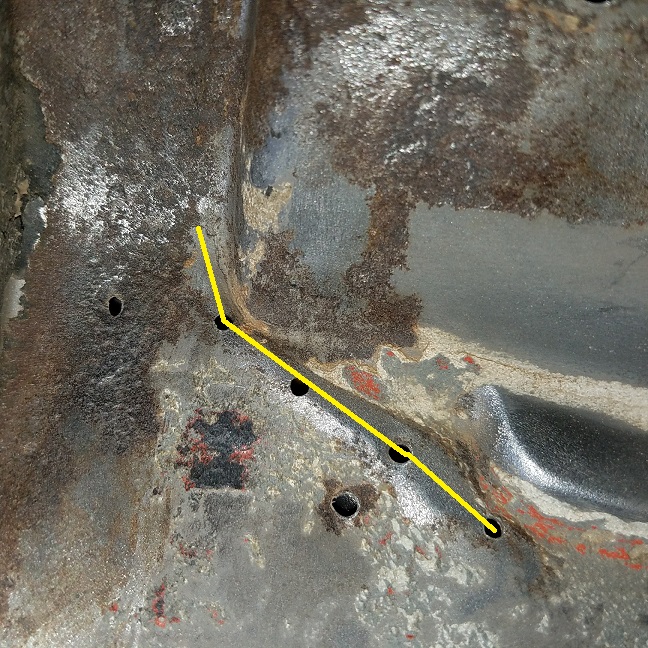 Put the dolly in the vice and went to work. Pretty easy work when you can hold the panel in your hand. Gave it a soft touch and out she came. First shot is the area shot with guide coat. 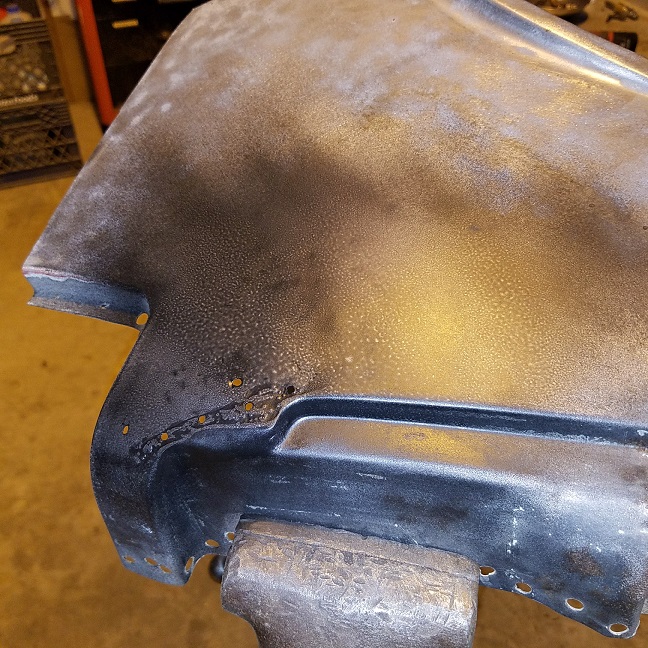 After getting cleaned up with the 3" DA. 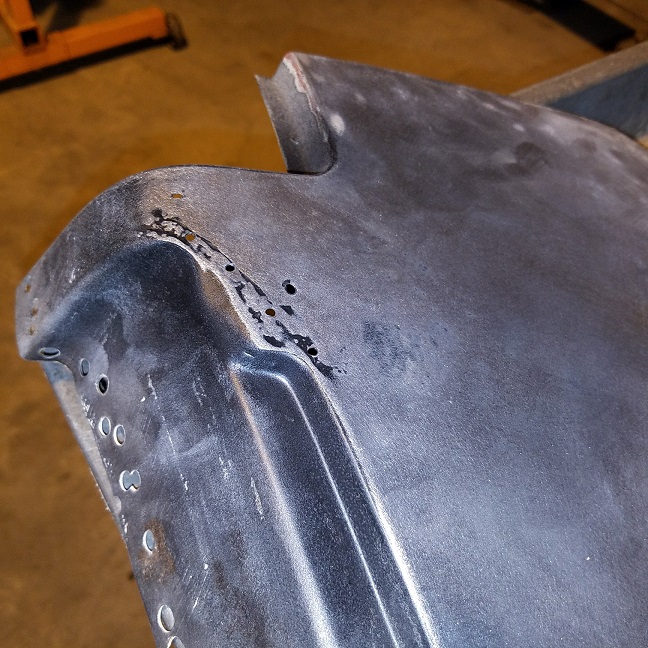 I'll weld up the holes and blast out the guide coat in the am. That will leave just a slight depression for the paint shop to fill in. (IMG:style_emoticons/default/welder.gif) |
|
|
|
| cary |
Oct 28 2016, 10:23 PM
Post
#103
|
|
Advanced Member Group: Members Posts: 3,900 Joined: 26-January 04 From: Sherwood Oregon Member No.: 1,608 Region Association: Pacific Northwest |
Forgot to shoot pictures of the panels after they were finished up. (IMG:style_emoticons/default/sad.gif)
Went back to the garnet in the blast cabinet. Not real impressed with walnuts. 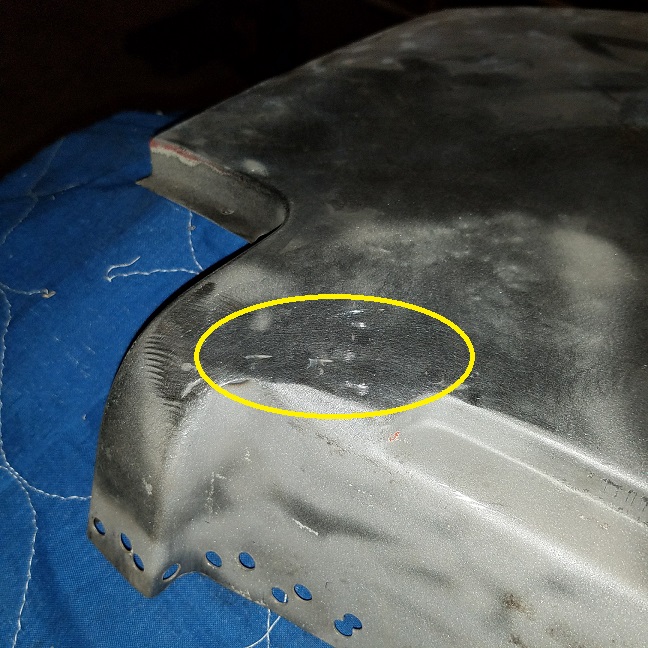 This was the damaged one. It will need just a smidgen of mud. 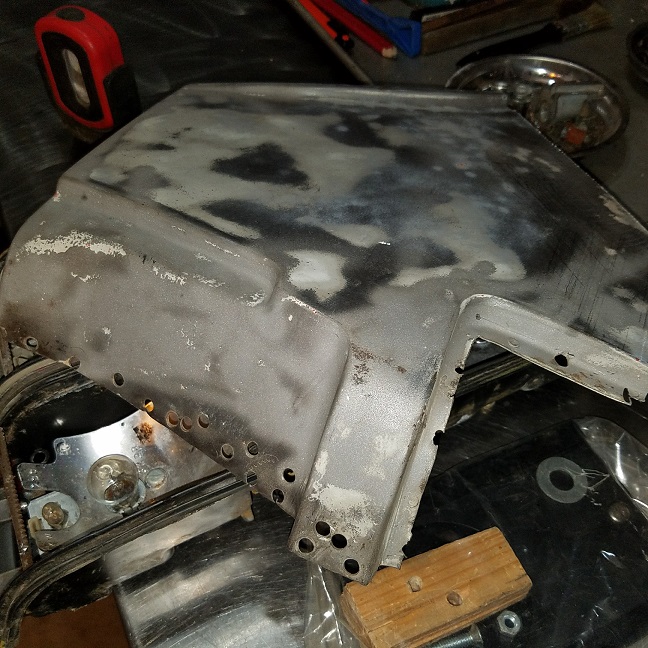 The other side didn't have any surprises. (IMG:style_emoticons/default/biggrin.gif) The side we were working on tidied real nice after I welded in the holes. Then on to fitting and measuring before I cut.  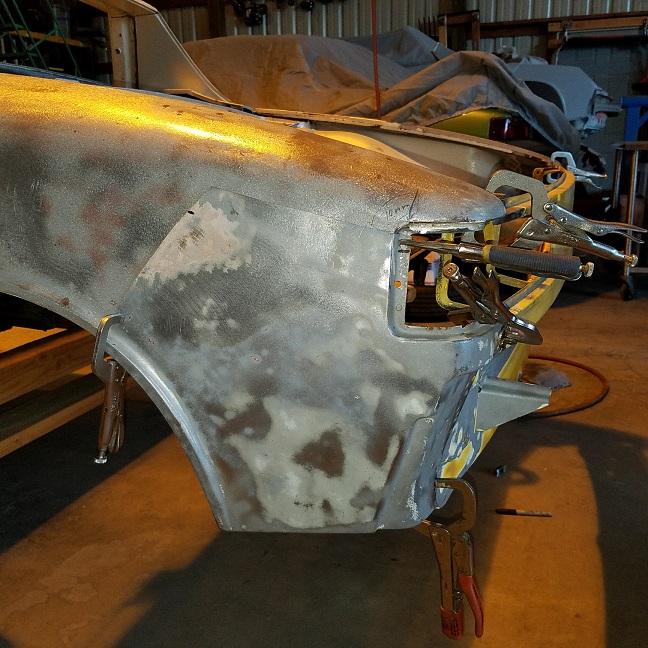 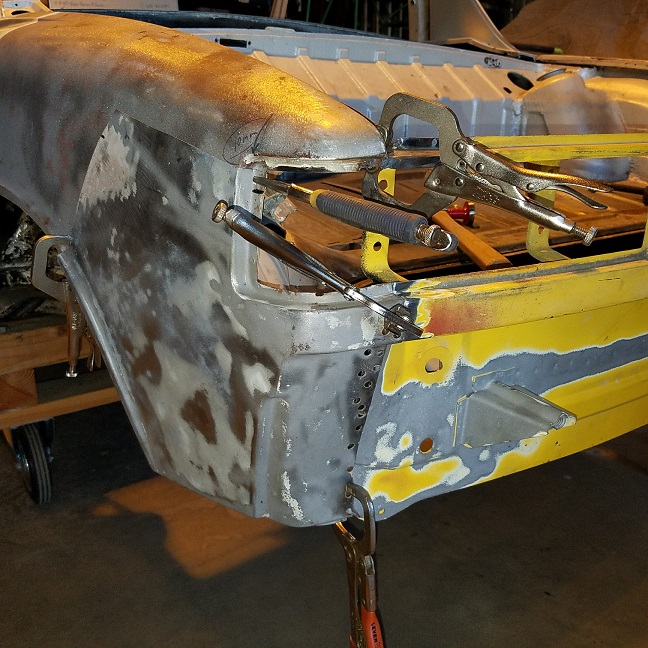 |
|
|
|
| cary |
Oct 28 2016, 10:30 PM
Post
#104
|
|
Advanced Member Group: Members Posts: 3,900 Joined: 26-January 04 From: Sherwood Oregon Member No.: 1,608 Region Association: Pacific Northwest |
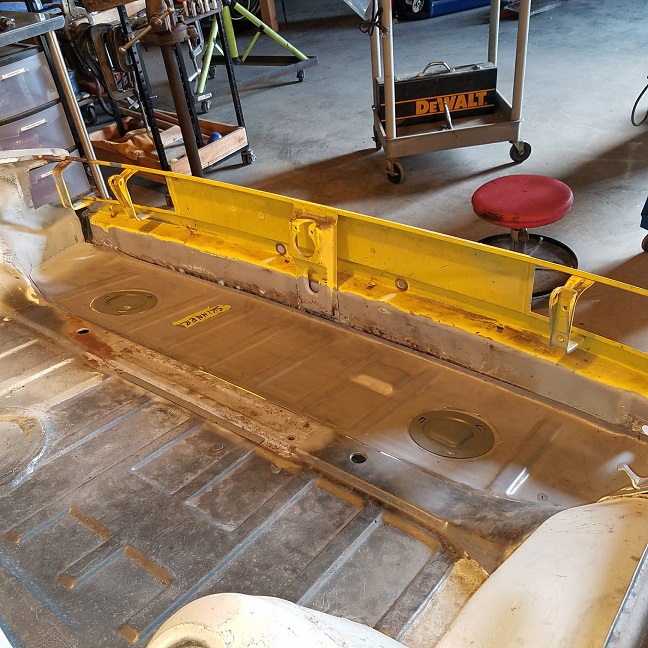
Here's what I'm working on.
#1 needs to be 10 cm. I'll dig out some taillight buckets in the am. #2 needs to be a flat line. Using a machinists ruler as a guide. #3 & #4 both need about a 2-3mm gap to the rolled portion of the beaded flange. I have about 20 pairs of small vice grips. I hope it is enough.  |
|
|
|
| raynekat |
Oct 29 2016, 01:15 PM
Post
#105
|
|
Advanced Member Group: Members Posts: 2,171 Joined: 30-December 14 From: Coeur d'Alene, Idaho Member No.: 18,263 Region Association: Pacific Northwest |
I can loan you a slide rule and protractor....
(IMG:style_emoticons/default/wink.gif) Looking good there Cary. |
|
|
|
| cary |
Oct 29 2016, 09:31 PM
Post
#106
|
|
Advanced Member Group: Members Posts: 3,900 Joined: 26-January 04 From: Sherwood Oregon Member No.: 1,608 Region Association: Pacific Northwest |
Only have time for a Saturday 1/2 day. Need to get home and prep the car and trailer for tomorrows season ending AX. (IMG:style_emoticons/default/driving.gif)
Grabbed my tote of taillights to use for fitting the fender patches and taillight panel.  Spent some time fiddling and cutting the fender patches down to within an inch. Then I decided it was time to start putting it back together. We'll start with the taillight panel first, like the factory did it. That way the fender patch will lay on top. I'm only going to tack the flat portion of the seal channel. That will allow me lots of room for movement. So I coated both corners with weld thru primer. 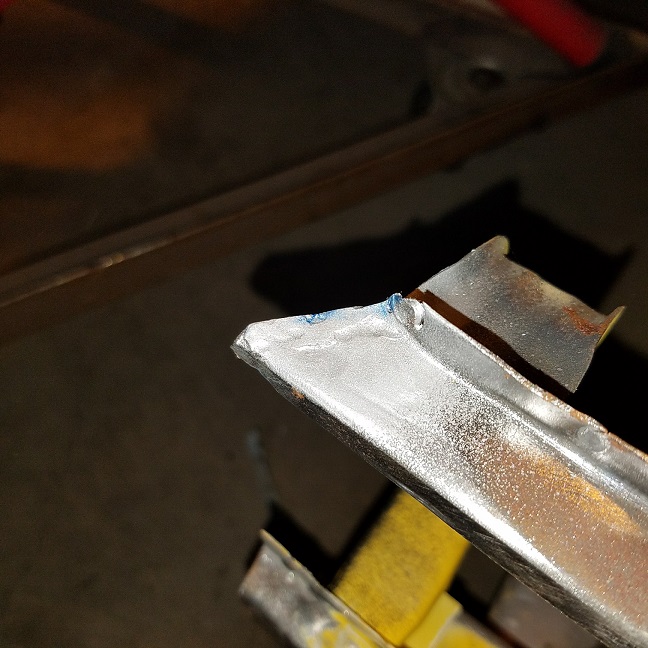 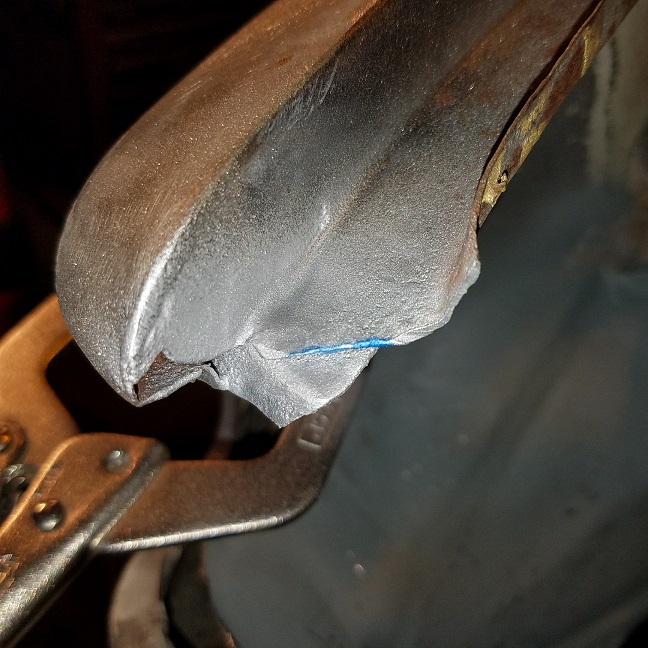 Tacked in .................. 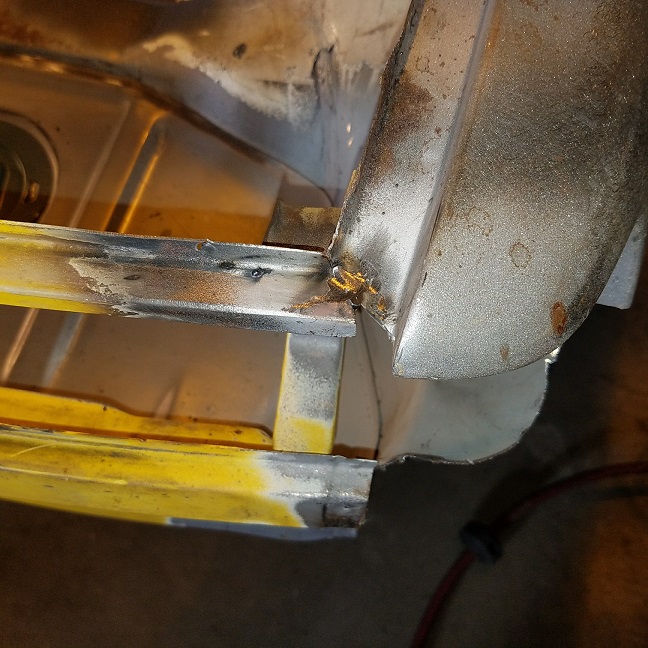 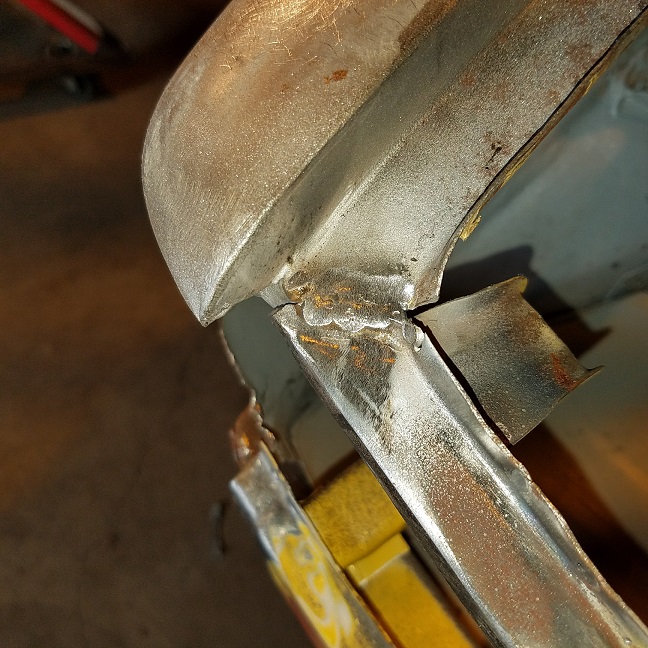 After we're all put together I'll dig some of the weld out and braze finish the corner. |
|
|
|
| cary |
Oct 29 2016, 10:01 PM
Post
#107
|
|
Advanced Member Group: Members Posts: 3,900 Joined: 26-January 04 From: Sherwood Oregon Member No.: 1,608 Region Association: Pacific Northwest |
After the taillight panel was tacked in it was time to fit and measure ................
  Grabbed a spare trunk lid off the rack ................. 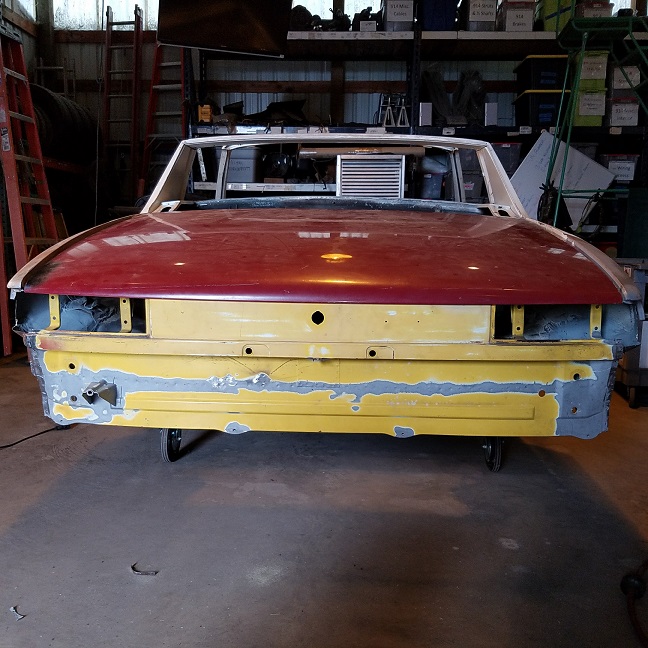 Then the eyeball work begins .................. 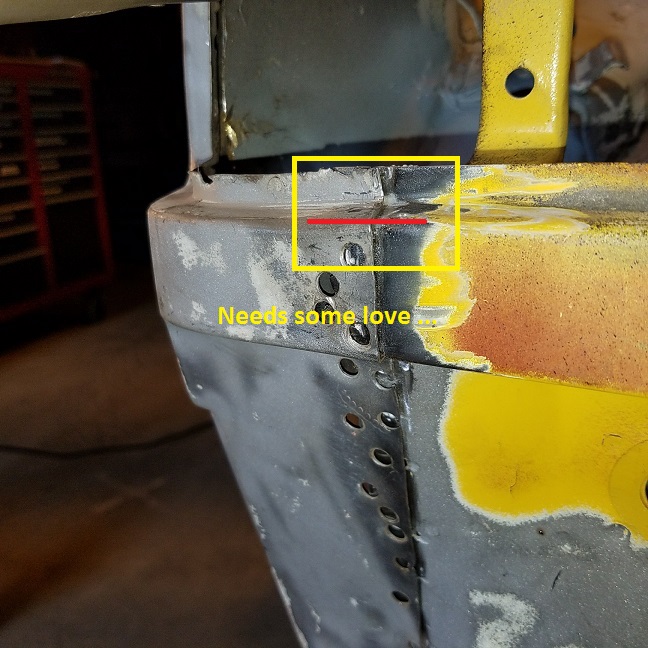 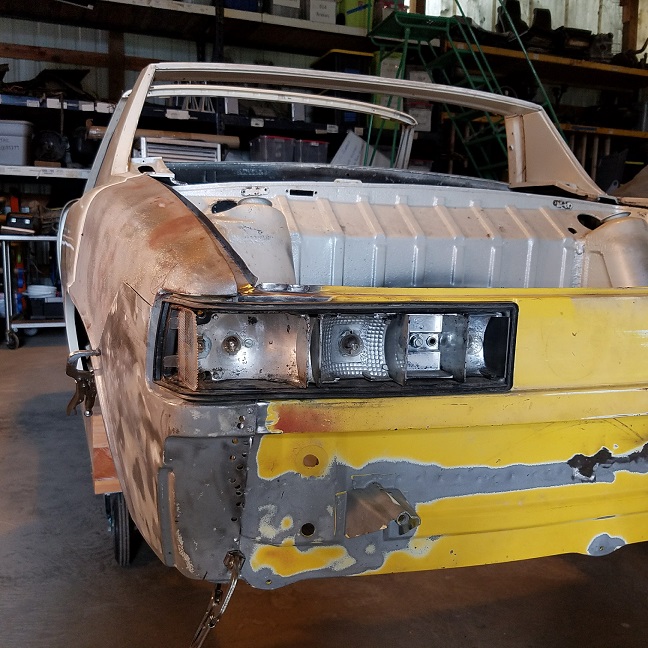 |
|
|
|
| cary |
Nov 3 2016, 09:23 PM
Post
#108
|
|
Advanced Member Group: Members Posts: 3,900 Joined: 26-January 04 From: Sherwood Oregon Member No.: 1,608 Region Association: Pacific Northwest |
The sun finally came back out so I drug out the blaster tank. Doug's replacement heat shield needed a little rust removal. Rust was pretty thick. Pretty pitted. But I think with some love with the wire cup brush it will be usable.
Doug are you still thinking about ceramic coating the shield? Before: 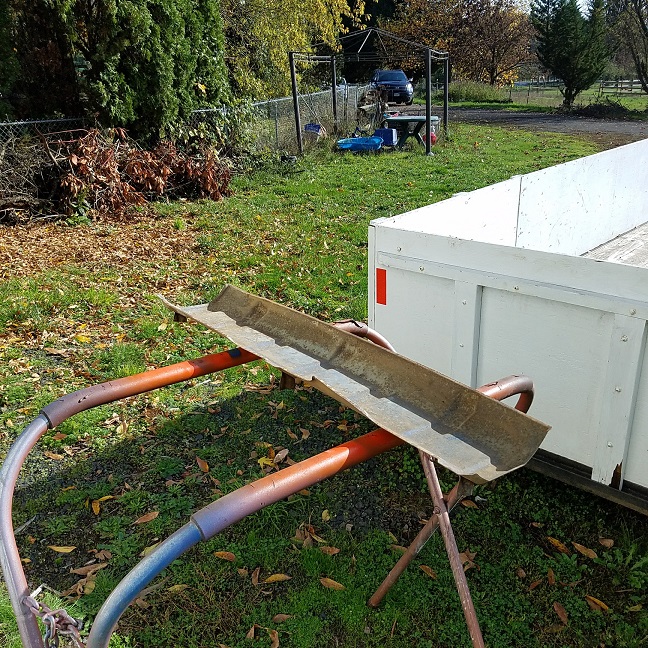 After: 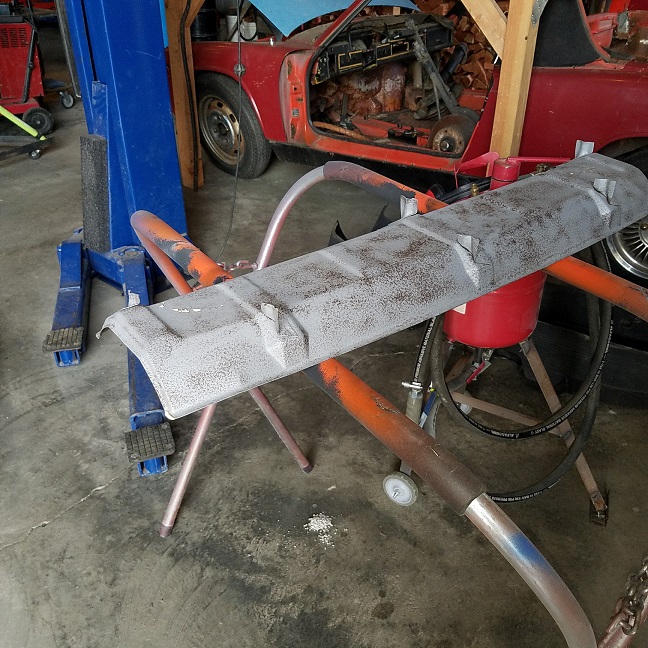 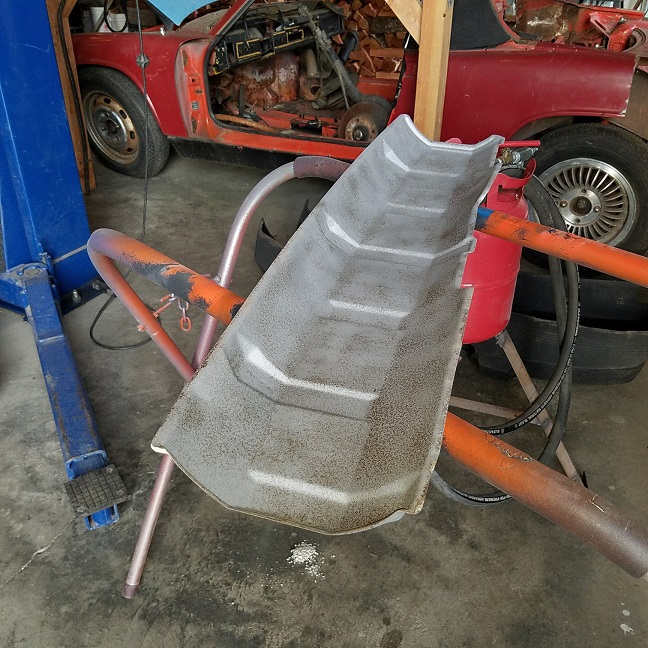 |
|
|
|
| cary |
Nov 3 2016, 10:07 PM
Post
#109
|
|
Advanced Member Group: Members Posts: 3,900 Joined: 26-January 04 From: Sherwood Oregon Member No.: 1,608 Region Association: Pacific Northwest |
Then on to cutting the left qtr. panel patch to fit. Measured from the back. When I cut, I left the line. I should have cut right thru the line. Lots of trips back and forth to the belt/disk sander. In the words of Mr. Gamroth. I'm in my Rembrandt mode. If I cut too much I can't glue it back on.
But at the end of the day I'm happy with the fit. 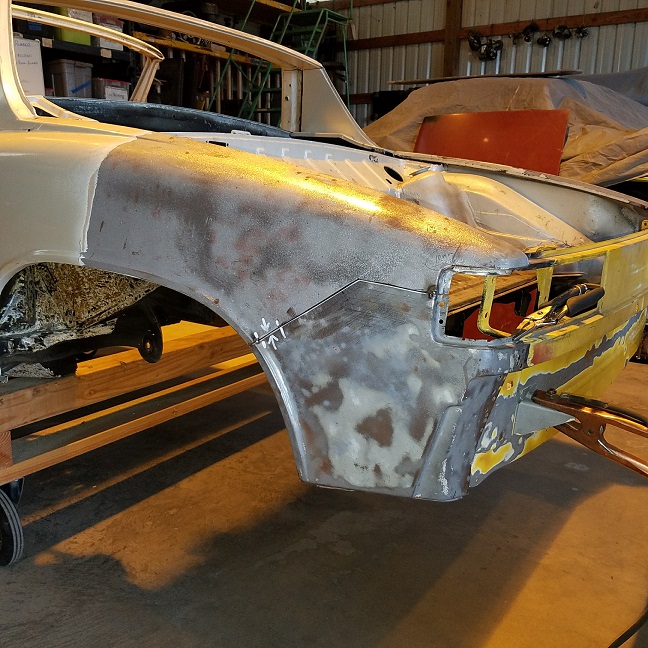 We do have one spot that will take some more Rembrandt work. The outside flat portion of the fender lip fits perfect. The rolled radius to the flat panel don't quite match. 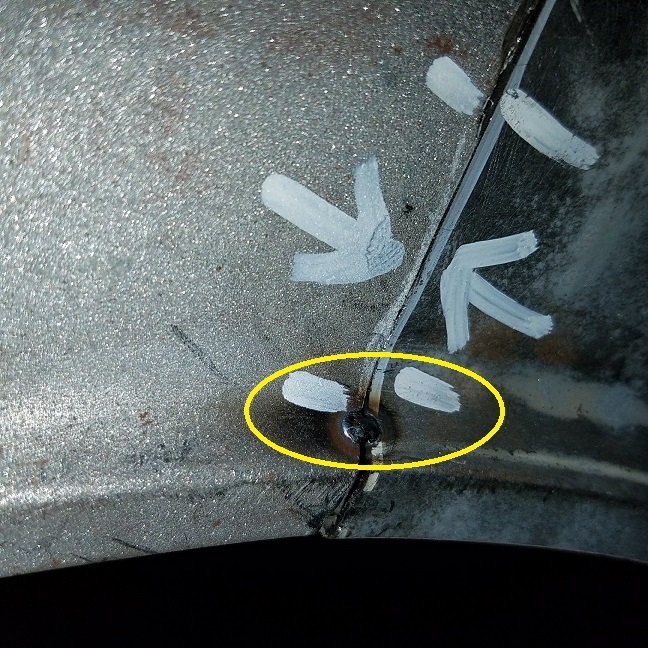 |
|
|
|
| raynekat |
Nov 3 2016, 11:32 PM
Post
#110
|
|
Advanced Member Group: Members Posts: 2,171 Joined: 30-December 14 From: Coeur d'Alene, Idaho Member No.: 18,263 Region Association: Pacific Northwest |
Yes to the question if the heat shield will be ceramic coated.
Still the plan....unless condition of the part prevents that. What's your schedule for Saturday? Will be out that direction late morning/noon-ish.... |
|
|
|
| falcor75 |
Nov 4 2016, 04:32 AM
Post
#111
|
|
Senior Member Group: Members Posts: 1,579 Joined: 22-November 12 From: Sweden Member No.: 15,176 Region Association: Scandinavia |
I approve of this thread... (IMG:style_emoticons/default/wub.gif)
(ok a small minus for the -6, just because I'm a lil jealous) (IMG:style_emoticons/default/biggrin.gif) |
|
|
|
| cary |
Nov 4 2016, 10:38 PM
Post
#112
|
|
Advanced Member Group: Members Posts: 3,900 Joined: 26-January 04 From: Sherwood Oregon Member No.: 1,608 Region Association: Pacific Northwest |
Friday 11/4
Welding in the left qtr. panel patch panel. Started at the taillight and worked my way down to the fender lip. Added a few more stacked spot welds to the edge of the taillight bucket. Could have been a smidgen hotter. Then I cleaned her up a bit. 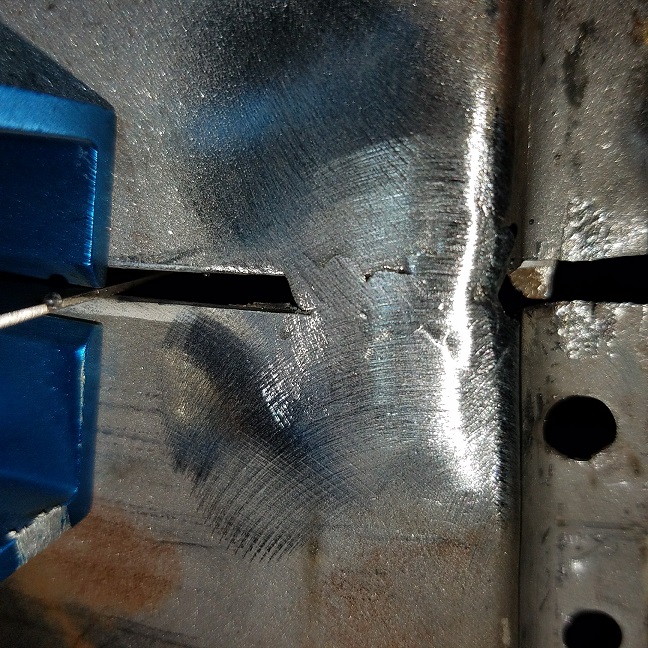 Slow and steady wins the race .......... Continuous us of the Fix It butt weld clamps and my 6" machinists straight edge. Let it cool to the touch after each weld. (IMG:style_emoticons/default/sad.gif) Maybe a smidgen hotter and faster still. (IMG:style_emoticons/default/welder.gif) But I don't want any distortion. 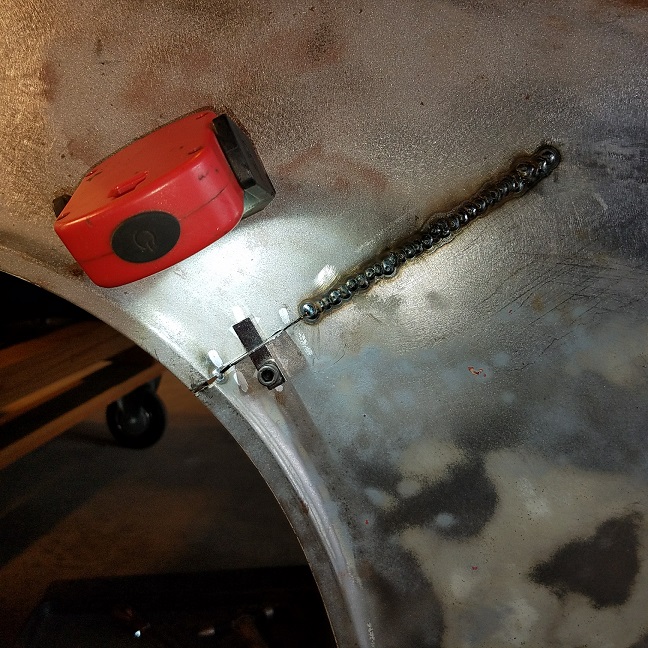 Used a couple tools to get this done ................ 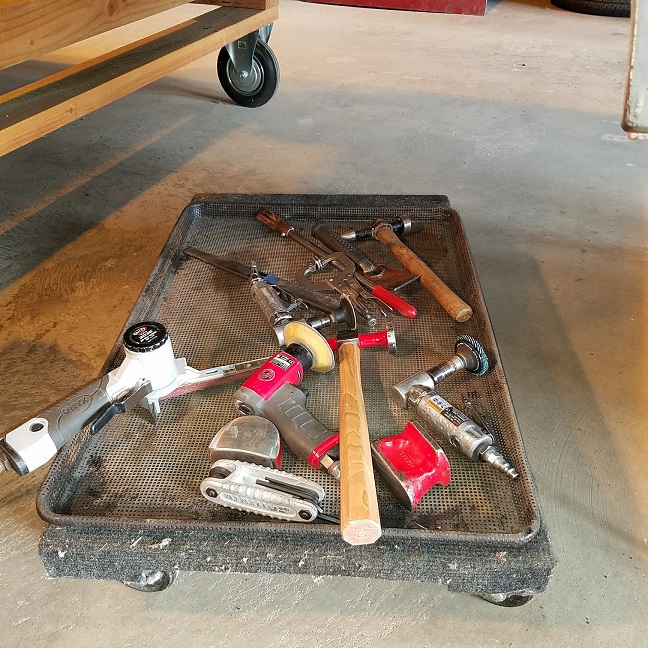 After working it with grinders and sanders. 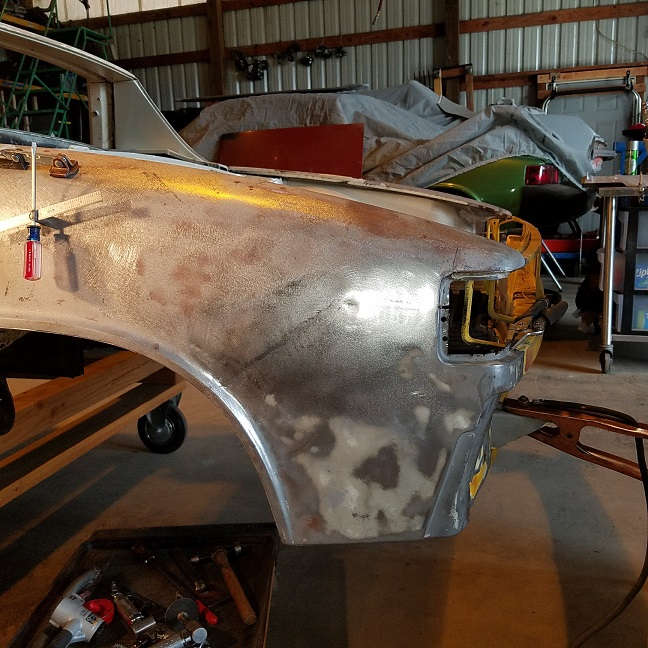 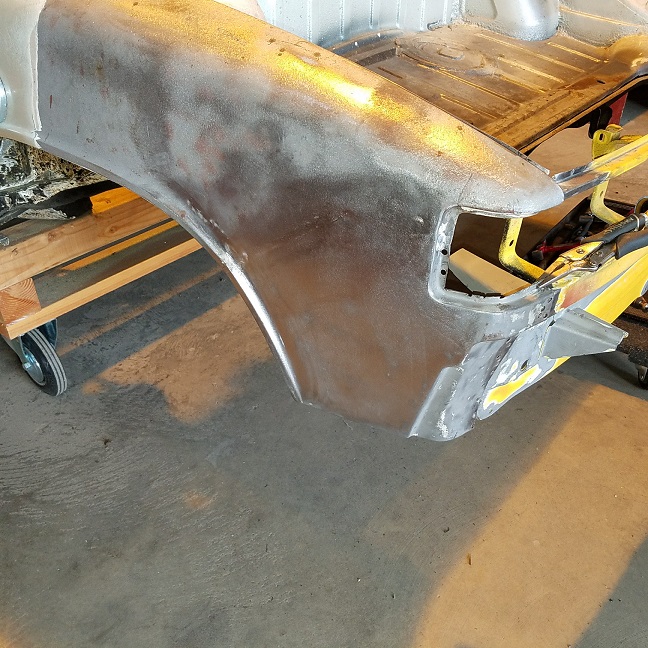 |
|
|
|
| raynekat |
Nov 5 2016, 03:14 PM
Post
#113
|
|
Advanced Member Group: Members Posts: 2,171 Joined: 30-December 14 From: Coeur d'Alene, Idaho Member No.: 18,263 Region Association: Pacific Northwest |
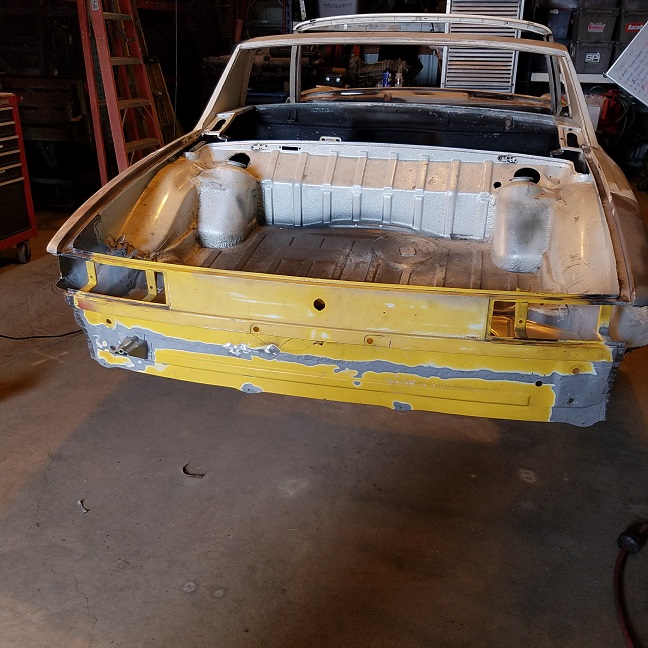
Stopped by the shop today to see Cary and the FIL (father in law).
Making steady progress. The rear end is sprouting straight rust free metal for a change. Previous rear ender had left a lot of crumpled metal and misalignments. The opening for the tail light had been compromised (now fixed) such that the light wouldn't fit into the opening easily... the tail lights themselves had been cracked and broken, etc. Looking good courtesy of the A-team. (IMG:style_emoticons/default/smile.gif) And that new (2nd hand) monster parts washer is killer. Wish I had the room and the need for that kind of machinery. |
|
|
|
| cary |
Nov 5 2016, 03:33 PM
Post
#114
|
|
Advanced Member Group: Members Posts: 3,900 Joined: 26-January 04 From: Sherwood Oregon Member No.: 1,608 Region Association: Pacific Northwest |
Stopped by Rothsport. Jeff was there.
He said your MFI gears are fine. Took two days off and there's 5 new cars ....... Carl was there doing a corner balance / alignment on that bitchn black on black turbo. I'll shoot a couple shots on Monday am. |
|
|
|
| raynekat |
Nov 5 2016, 08:50 PM
Post
#115
|
|
Advanced Member Group: Members Posts: 2,171 Joined: 30-December 14 From: Coeur d'Alene, Idaho Member No.: 18,263 Region Association: Pacific Northwest |
QUOTE(cary @ Nov 5 2016, 02:33 PM)  Stopped by Rothsport. Jeff was there. He said your MFI gears are fine. Took two days off and there's 5 new cars ....... Carl was there doing a corner balance / alignment on that bitchn black on black turbo. I'll shoot a couple shots on Monday am. You're living the good life now Man.... |
|
|
|
| cary |
Nov 6 2016, 09:36 AM
Post
#116
|
|
Advanced Member Group: Members Posts: 3,900 Joined: 26-January 04 From: Sherwood Oregon Member No.: 1,608 Region Association: Pacific Northwest |
Yes, I have to say life is good ...................
1. The honor of being part of you 914-6 project. 2. The honor of working at Rothsport. I'm back working on what we call 89 Red Safari. I'm hoping after there's a press release so I can mention who's car it will be. It will be driven by two very prominent members of the USA Porsche community. Even though Saturday was a short day I did get a couple hours in on Doug's car. Job #1. Get the stand offs removed from the exhaust heat shield. That way Doug can get it sent off/out for ceramic coating. 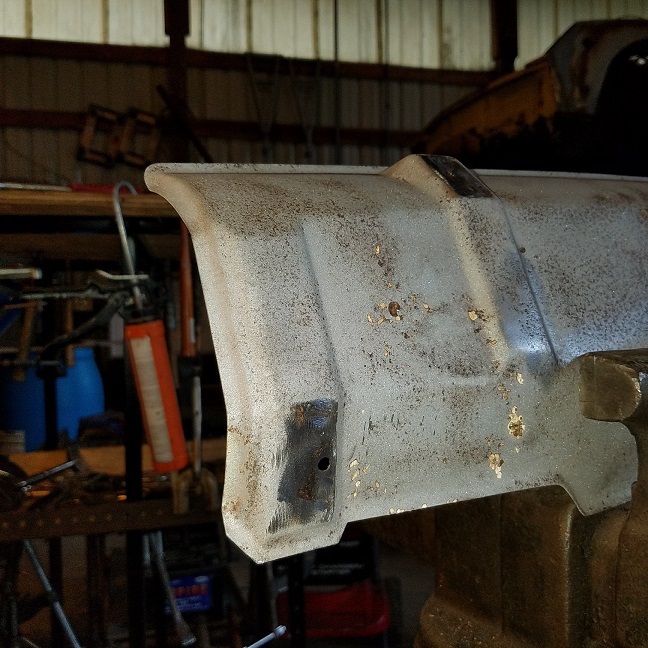 Now with the stand offs are out of the way I'll give it a good rub down with the cup brush. Then another shot with the outside blaster. Job #2. I cut down the right patch panel in preparation for welding in. Gap is still a little too wide. It was what I thought too tight. But at the end of the fitting. Not so. The problem I'm running into is trying to keep the light bucket at a 100.50 mm opening and the perfect fit/look at the fender well. Curved surface, yada, yada ,yada. Next time, rather than free handing it I'll use 3-4 of my cheaper butt weld clamps and stick them to the upper/primary surface with magnets to use as a guide. Might work. 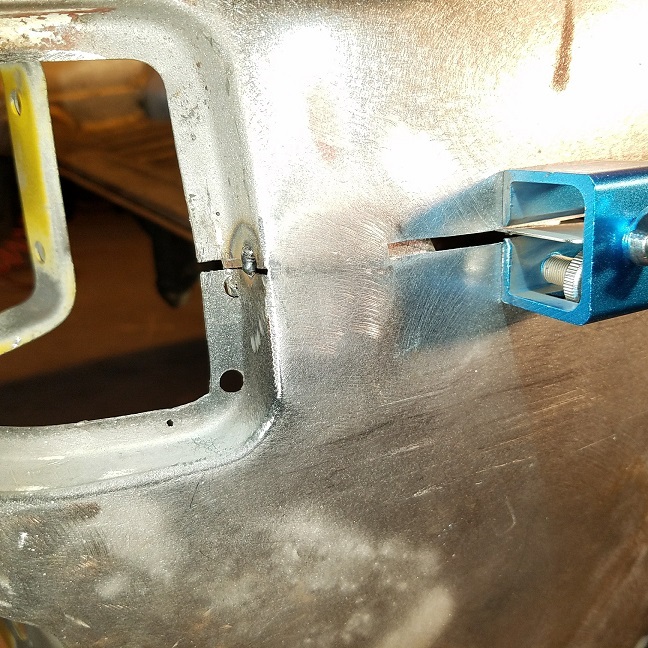 I do use a brass backer it absorb the heat. Which helps with the wider opening issue. You can see it behind the metal inside the gap. I stitch very slowly. Finger touch and straight edge EVERY weld. http://www.eastwood.com/magnetic-hole-plug...-gas-welde.html I do have a couple of these too. http://www.eastwood.com/magnetic-plug-weld...horizontal.html That's all for this week. I'll be back next Thursday. |
|
|
|
| cary |
Nov 11 2016, 01:00 AM
Post
#117
|
|
Advanced Member Group: Members Posts: 3,900 Joined: 26-January 04 From: Sherwood Oregon Member No.: 1,608 Region Association: Pacific Northwest |
I'm back. During the past week Doug had a conversation with a media blasting company here is Forest Grove. So I took a couple minutes for a quick tour and chat with the owner. I like what I saw. Definitely a car guy.
He had a 240Z that he had just finished. The fenders and hood were stripped with what he called fine grit. That sheet metal is considerably thicker than ours. Then he showed me the roof that was stripped with glass, like what we'd use on the 914. There was a VW bug getting ready for stripping. |
|
|
|
| cary |
Nov 11 2016, 08:48 AM
Post
#118
|
|
Advanced Member Group: Members Posts: 3,900 Joined: 26-January 04 From: Sherwood Oregon Member No.: 1,608 Region Association: Pacific Northwest |
Thursday 11/10
Hit the ground running. Time to finish up the slow and tedious process of welding on he right patch panel. 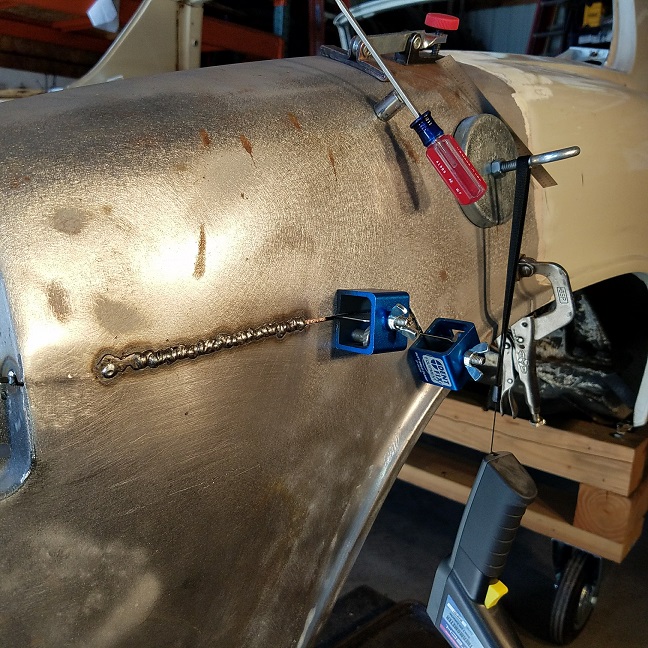 Stitch by stitch. Cool down to 80 degrees with air hose after each stitch. 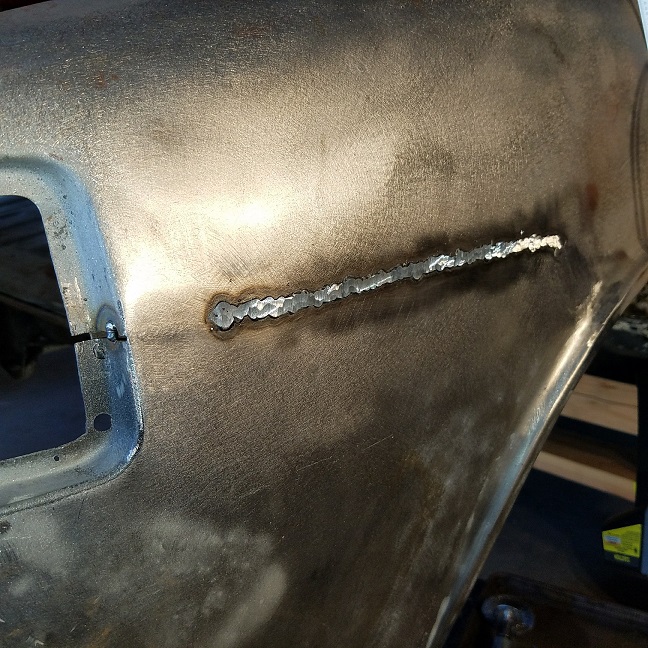 Very carefully cut off the proud of the weld bead with a 90 degree cut off wheel. Then carefully and delicately grind it flush. 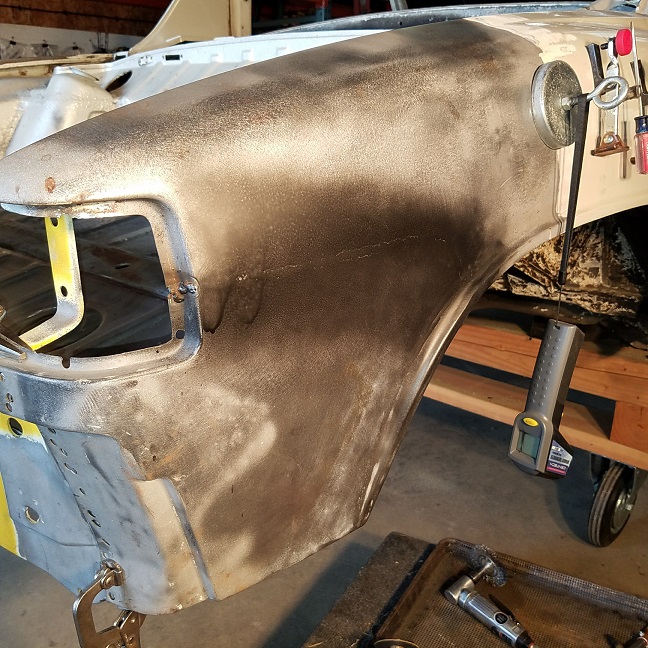 After grinding, check your work with a couple guide coats. 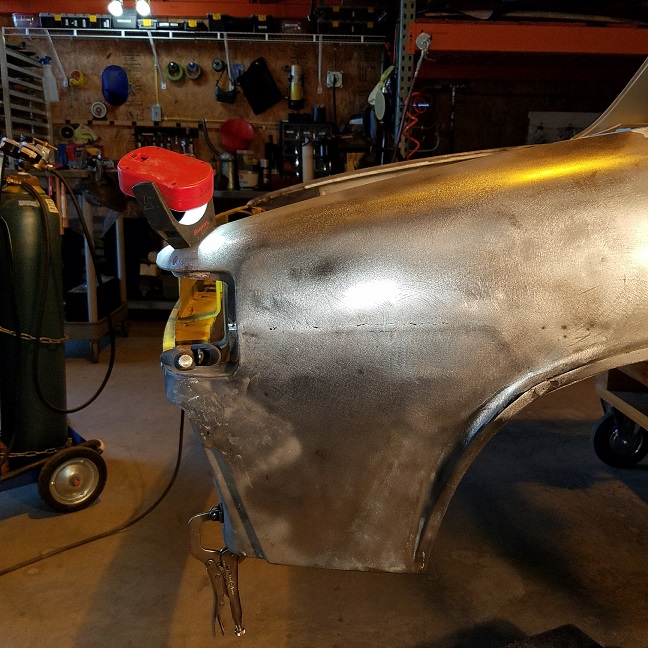 Next on to checking the fit and alignment of the rear taillights. Make no assumptions. The metal in these cars in very, lets say flexible. 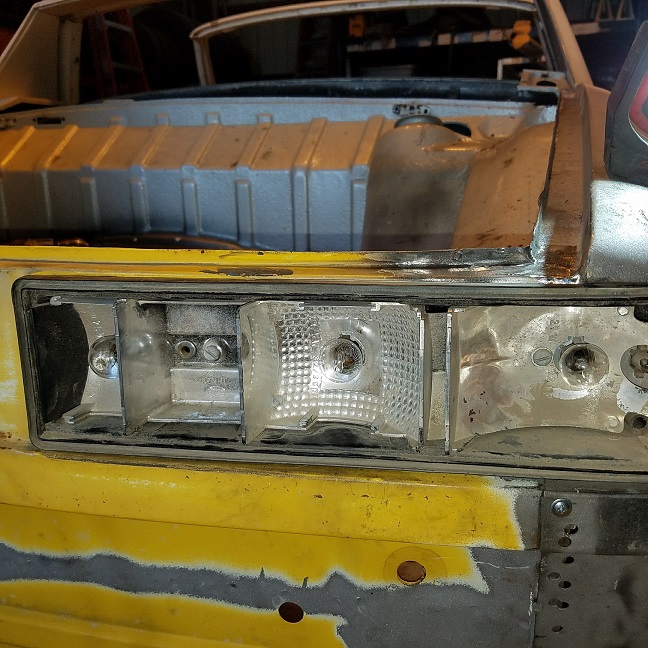 I did shoot the picture after I finished welding in the corner. The work was done prior to the welding. 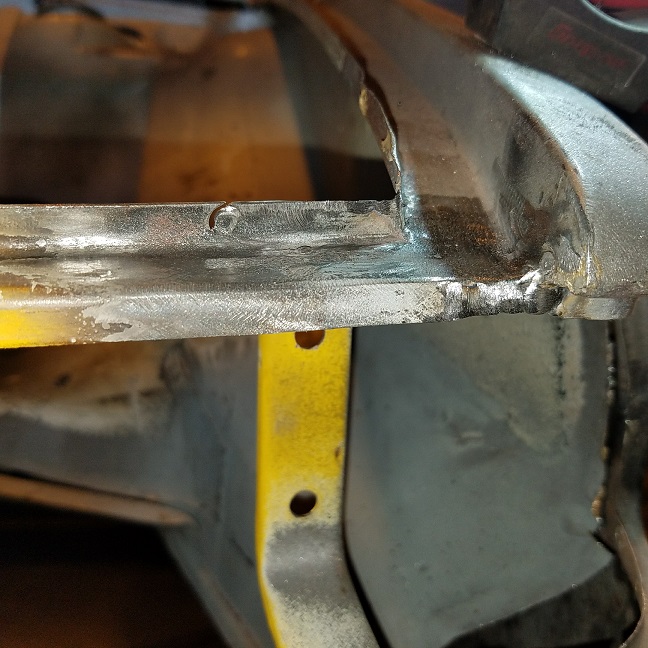 Decided against just brazing the corner. The car hangs from the taillight panel when its on the rotisserie. Most of the load is on the trunk. But just to be safe. Kind of slowed down my grinding when I found all the brazing going out the end. |
|
|
|
| cary |
Nov 13 2016, 10:27 AM
Post
#119
|
|
Advanced Member Group: Members Posts: 3,900 Joined: 26-January 04 From: Sherwood Oregon Member No.: 1,608 Region Association: Pacific Northwest |
Got to the shop an hour earlier than Mike's planned arrival time so I went to work on the left qtr. to taillight panel corner weld in.
Not quite all finished and tidied up, but back together. Only shot I took. 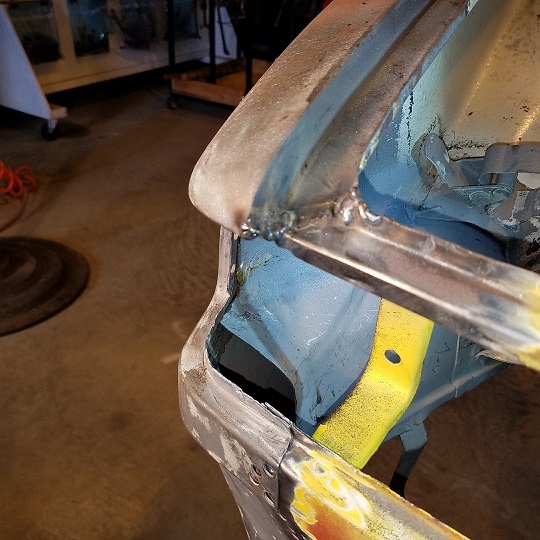 After welding I checked the taillight alignment again ................. don't want any future surprises. Then I spent a couple hours with Mike (Warpig) sorting thru his engine cleanup pile. After that we headed to lunch. After returning from lunch I began to work on fitting the trunk panel. I start tweaking the rear flange to get the fit I want for a great weld in. 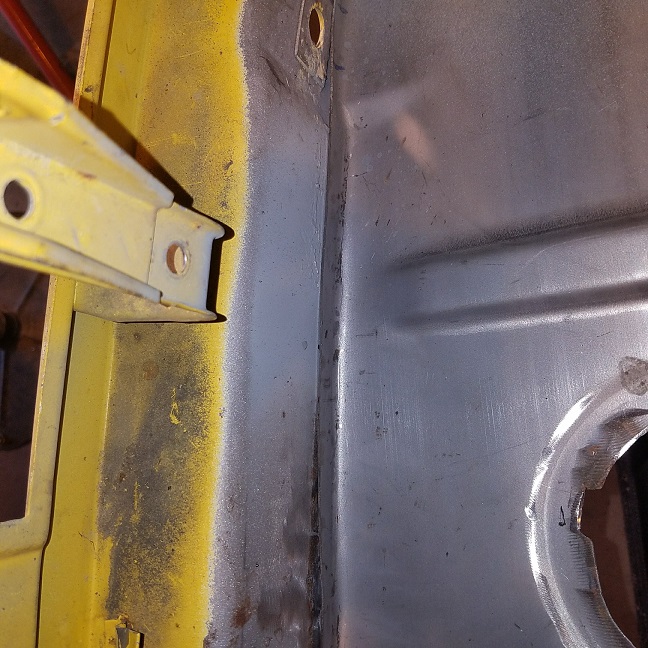 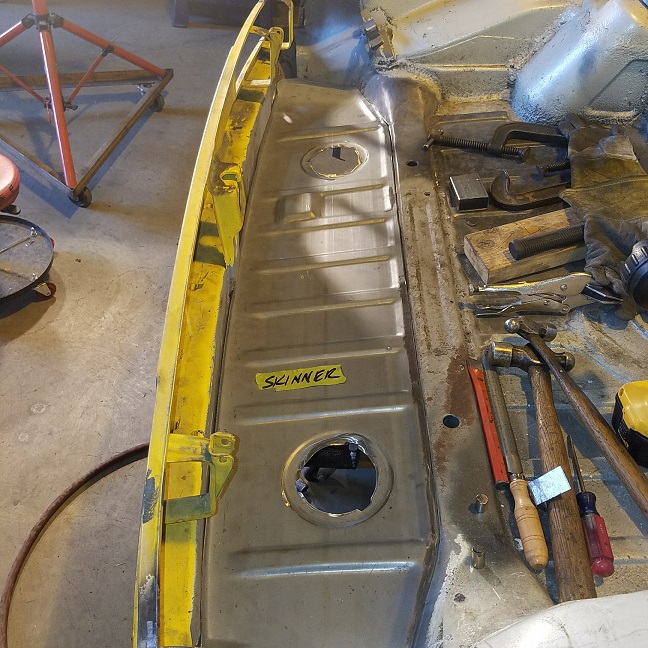 After I feel that I have the trunk pan in the correct place I begin the work of creating the removal exhaust shield. Panel just fitted, not welded. This time I'll do the work with the trunk pan on the work bench. Which is much easier to work with. But nothing to measure too. Which creates its own issues. 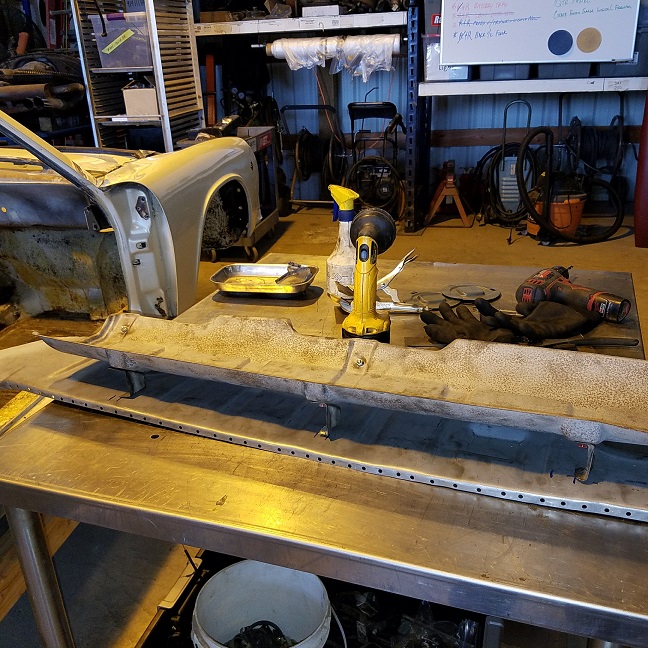 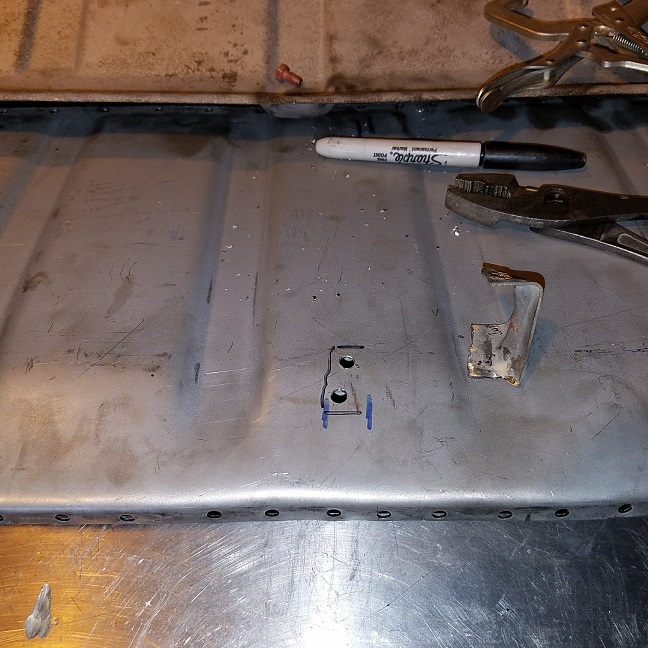 I should have crawled under Mark's car in the other room for measurements. (IMG:style_emoticons/default/sad.gif) My first swing at it it was too close to the tranny mounts. Its going to be moved a 1/2 closer to the taillight panel. This afternoon we're going run out for a couple more hours of work and I'll go under the other car to compare notes. While I'm working on the trunk Super In Law has been creating the two new inside trunk/fender corners. Lots of trial and error. One would think I could have got them from the donor part. But the spot weld cutting and delayering didn't leave too much. And we're fitting it to the work we did prior to deciding to replace the sheet metal. So time for some welding ............... 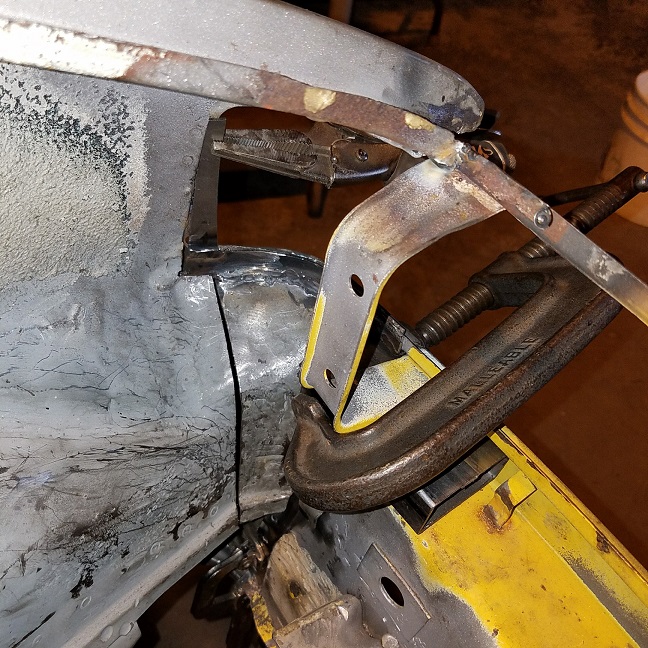 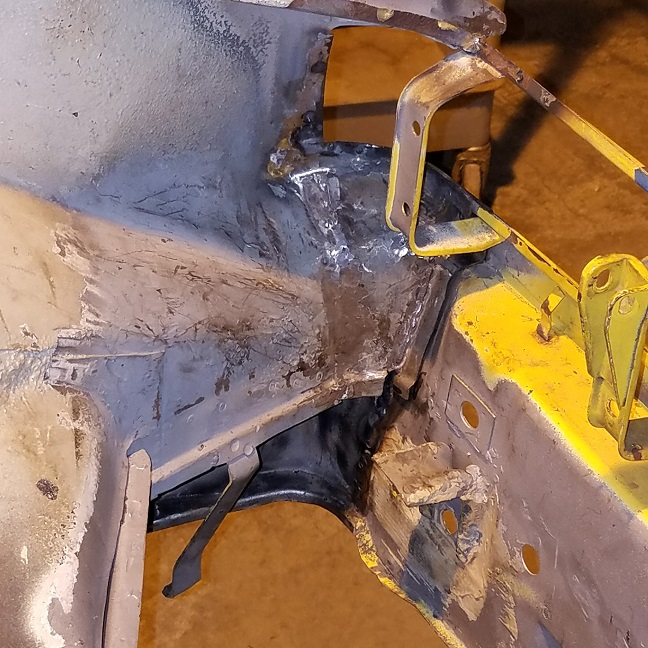 Welding was a little bumpy with all the left over factory brazing to work around. Prior to the inside corner weld in I did get the bottom portion of the taillight panel and qtr. panel welded together and tidied up. But I forgot to shoot a couple pictures. |
|
|
|
| raynekat |
Nov 13 2016, 09:43 PM
Post
#120
|
|
Advanced Member Group: Members Posts: 2,171 Joined: 30-December 14 From: Coeur d'Alene, Idaho Member No.: 18,263 Region Association: Pacific Northwest |
Working on a nice amber fan shroud for the 2.7 RS MFI engine.
These are made by Damon Series 900. 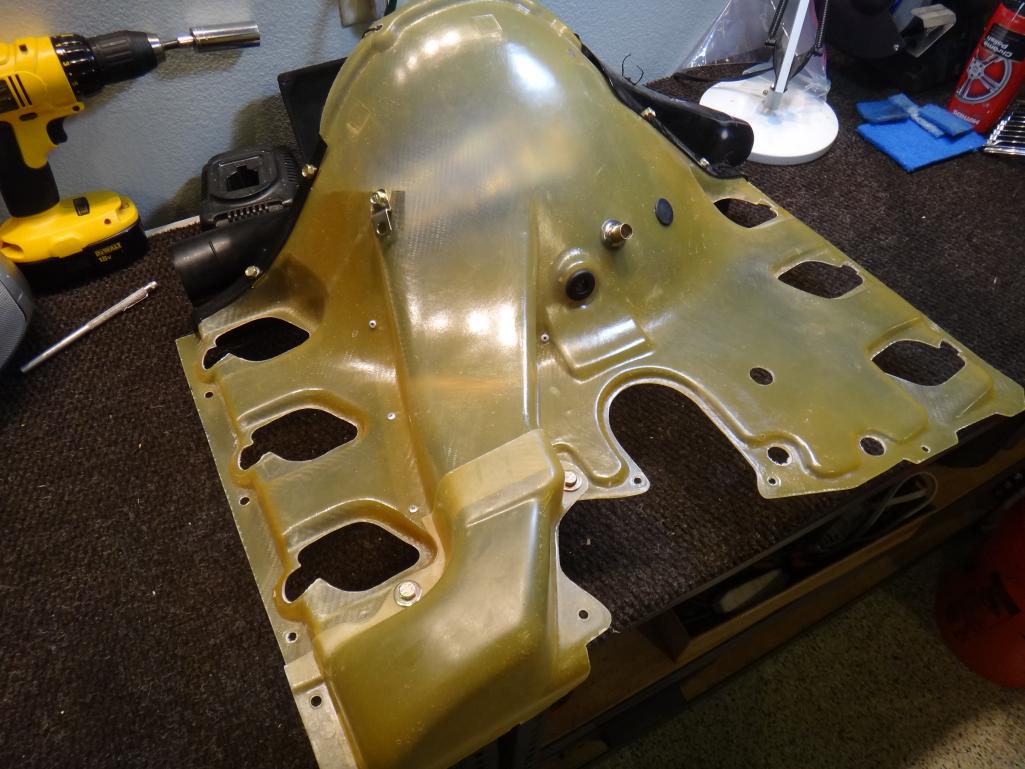 |
|
|
|
|
1 User(s) are reading this topic (1 Guests and 0 Anonymous Users)
0 Members:

|
Lo-Fi Version | Time is now: 17th July 2026 - 05:32 PM |
Invision Power Board
v9.1.4 © 2026 IPS, Inc.