|
|
|
Porsche, and the Porsche crest are registered trademarks of Dr. Ing. h.c. F. Porsche AG.
This site is not affiliated with Porsche in any way. Its only purpose is to provide an online forum for car enthusiasts. All other trademarks are property of their respective owners. |
|
|

  |

| cary |
 Nov 25 2016, 10:22 PM Nov 25 2016, 10:22 PM
Post
#141
|
|
Advanced Member  Group: Members Posts: 3,900 Joined: 26-January 04 From: Sherwood Oregon Member No.: 1,608 Region Association: Pacific Northwest |
Looked at re-sawing the oil tank holes with the new hole saws. Not.
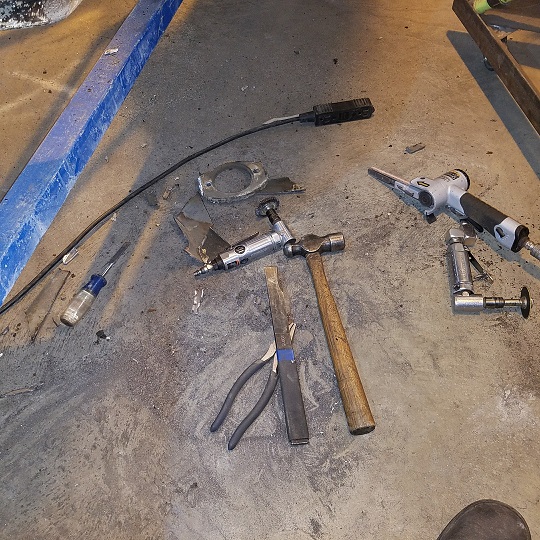
Traced the correct size with the new saws. Then cut them out with the carbide burr cutter on a die grinder. 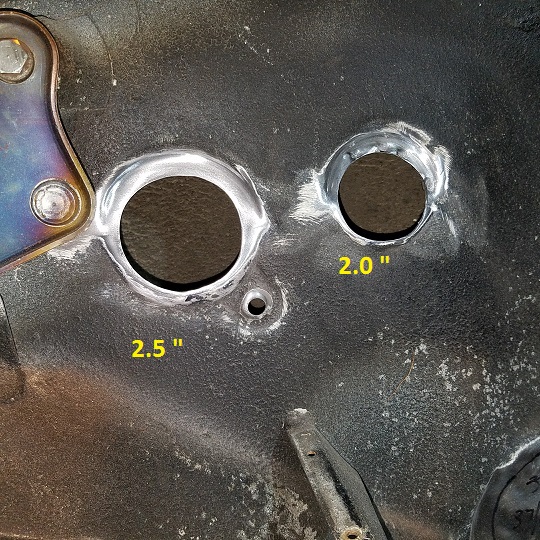 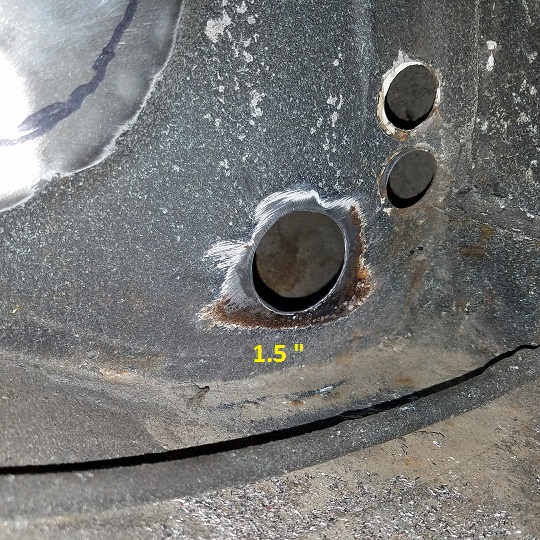 Then I went thru the Restoration Design parts box to remind myself of all the bits that still need to be dealt with. Then it was time to dig into the donor car and cut out the left seat belt retractor pocket. Second time around took about half as long. Still tough to get at the third layer.   Tomorrow will be the delicate cut out of the tight spot welds. |
   |

 
|
| cary |
Nov 27 2016, 09:54 AM
Post
#142
|
|
Advanced Member Group: Members Posts: 3,900 Joined: 26-January 04 From: Sherwood Oregon Member No.: 1,608 Region Association: Pacific Northwest |
Decided to start the day with fiddling with the 6 motor mount. I needed to shave the URO mount just a bit to get it to fit. Depending on the finish on the motor/body mounts it will need a bit more. But for now it fits together nicely.
 Then on to removing the excess from the left seat belt pocket. Kind of tedious. Primary objective is to get the unneeded material off without damaging the primary part. No new pictures, same process as the other side. Now both side are ready to go. No particular reason on the size difference, freehand. 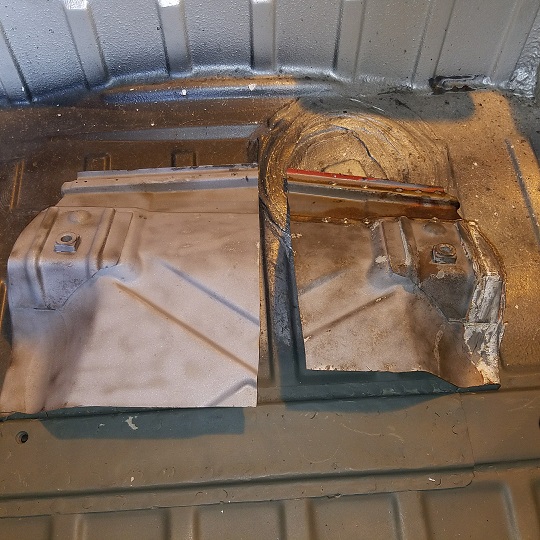 Forgot to shoot a shot of the marked out cut. I'll get it on the other side. But the cut out was pretty uneventful, just slow and careful. The only real issue was the top corner where the short engine cover piece and the firewall come together. It had 3-4 pieces come together and it was brazed. Where on the 72 it had 3 spot welds. The only scary part was lightly cutting across the brace. It's a feel thing. The shots below is the only modification I'll need to make to the bracing. The later piece is flatter to accommodate the backing plate I assume. 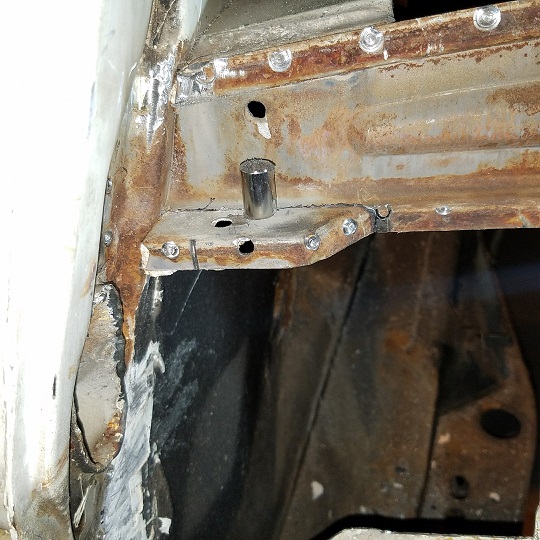 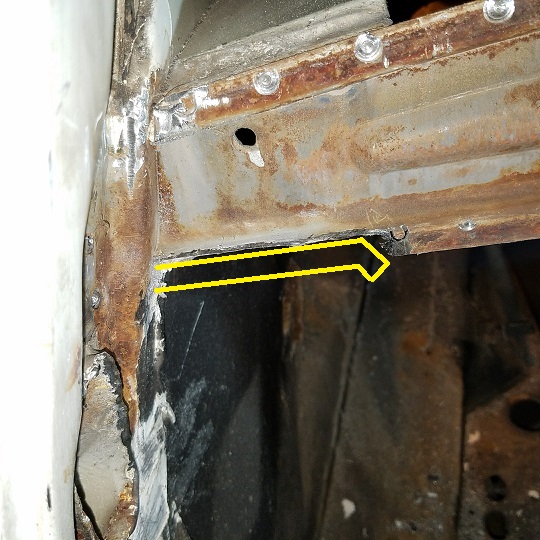 Here's where I ended the day and week. Along with a Beavers win at the Civil War game. (IMG:style_emoticons/default/piratenanner.gif) (IMG:style_emoticons/default/piratenanner.gif) 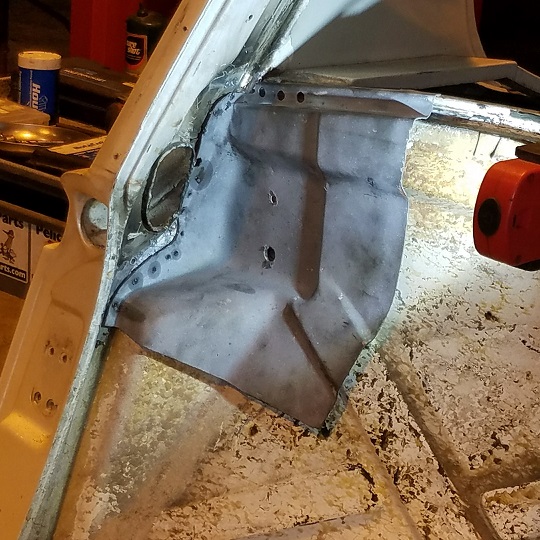 I won't weld it in until after it comes back from the media blaster. Lots of nasty stuff on the engine side of the firewall. For those wondering my plan of attack when it comes to welding. It will be lap welded on the firewall surfaces. With both a seam and 1/4" rosettes. I'll then mask off the inertia reel seat and spray the area with seam sealer to make the seams go away. |
|
|
|
| raynekat |
Nov 30 2016, 02:24 PM
Post
#143
|
|
Advanced Member Group: Members Posts: 2,171 Joined: 30-December 14 From: Coeur d'Alene, Idaho Member No.: 18,263 Region Association: Pacific Northwest |
Recently purchased a 2nd hand Leistritz muffler.
Decided to put a more sturdy coating on it than the existing paint that was pealing off in many places. Lestritz is the muffler of choice for early 911's and 914-6's. Their build quality and sound are 2nd to none. They are tough to find as new ones have not been manufactured since the 1980's and the prices of early 911's has gone stratospheric. Paint remover, scotch pad and wire brushing got me to this stage...bare metal. 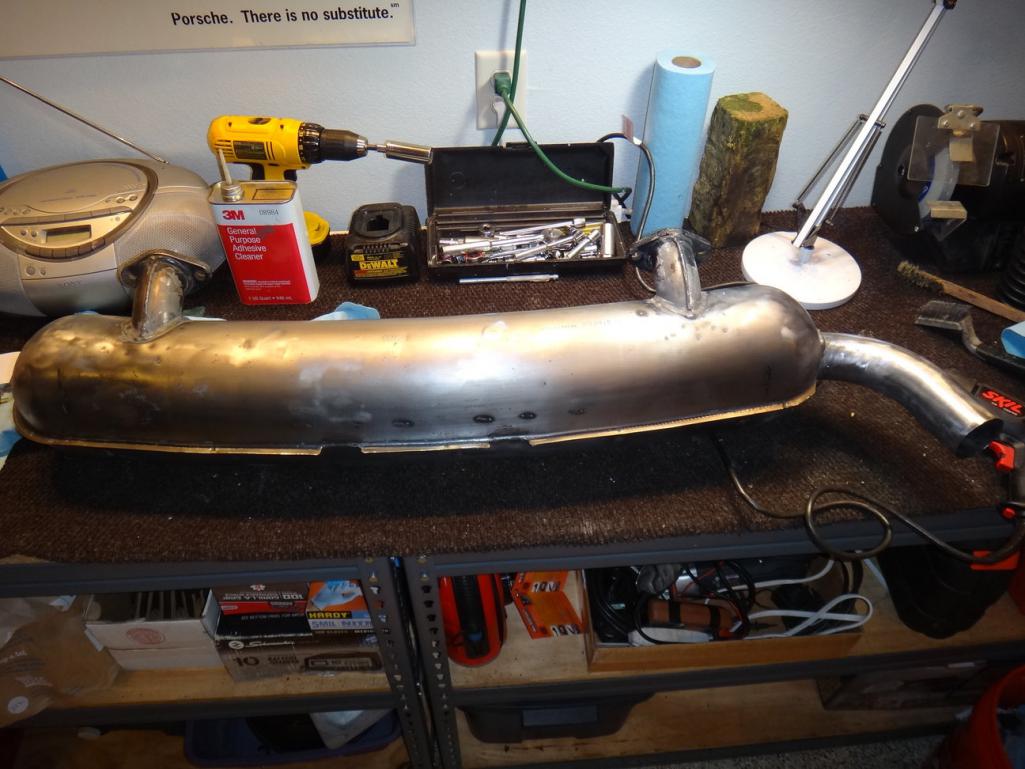 Truly an authentic Lestritz. 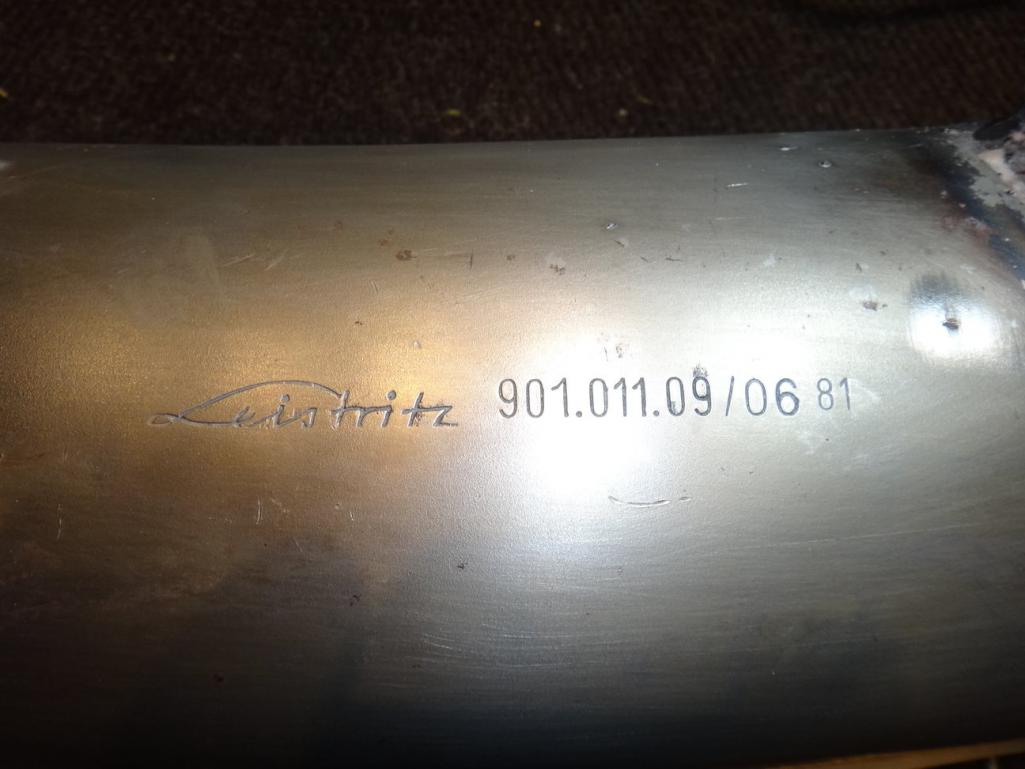 Back from the coaters with a titanium colored ceramic applied. Just thousands of an inch thick, but basically good for the life of the car. Won't discolor with heat.  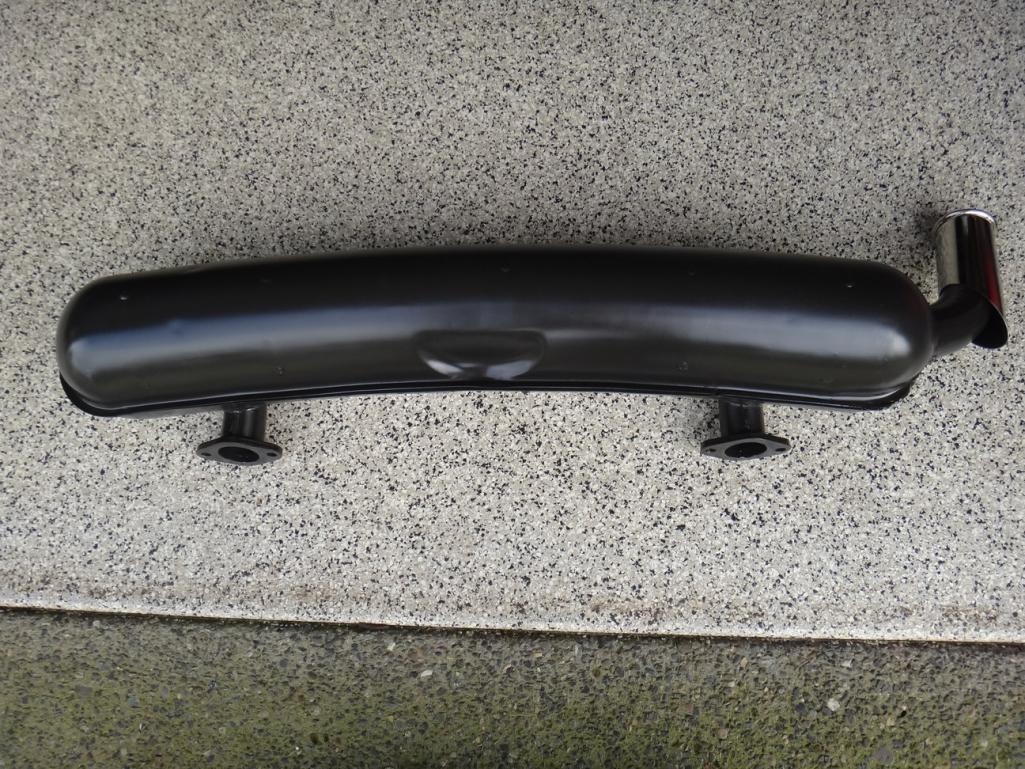 Found a nice stainless steel muffler tip on Ebay for a great price. One more thing that won't easily rust on this car. 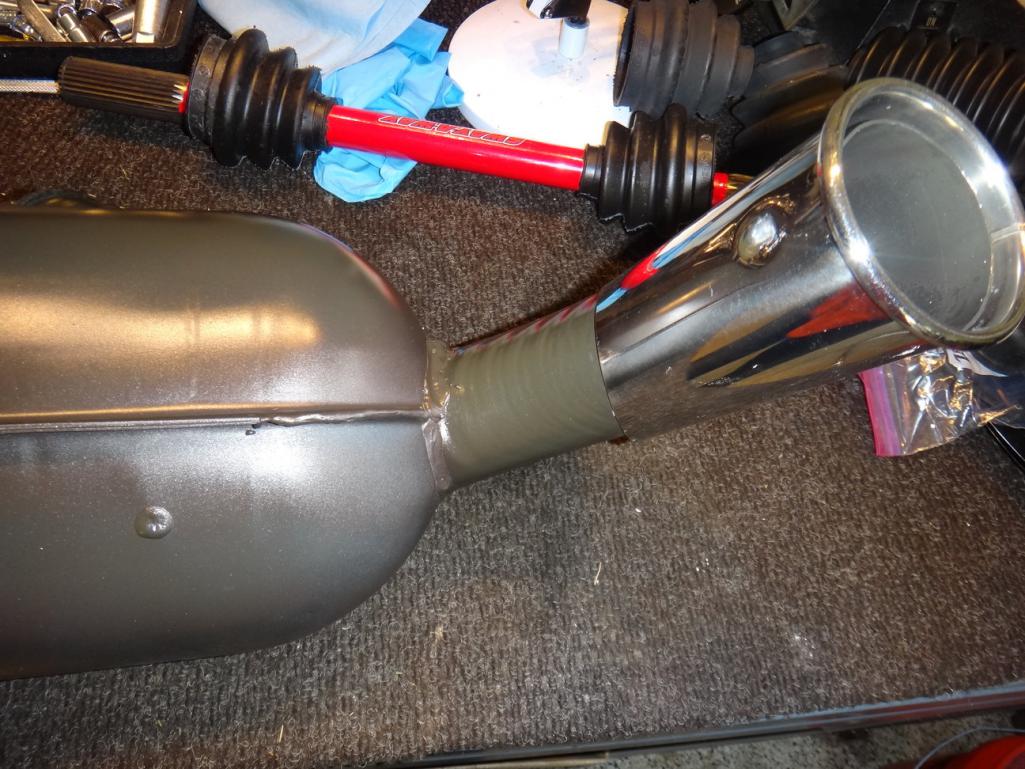 The ceramic coating is so thin that all the lettering on the muffler still easily shows. 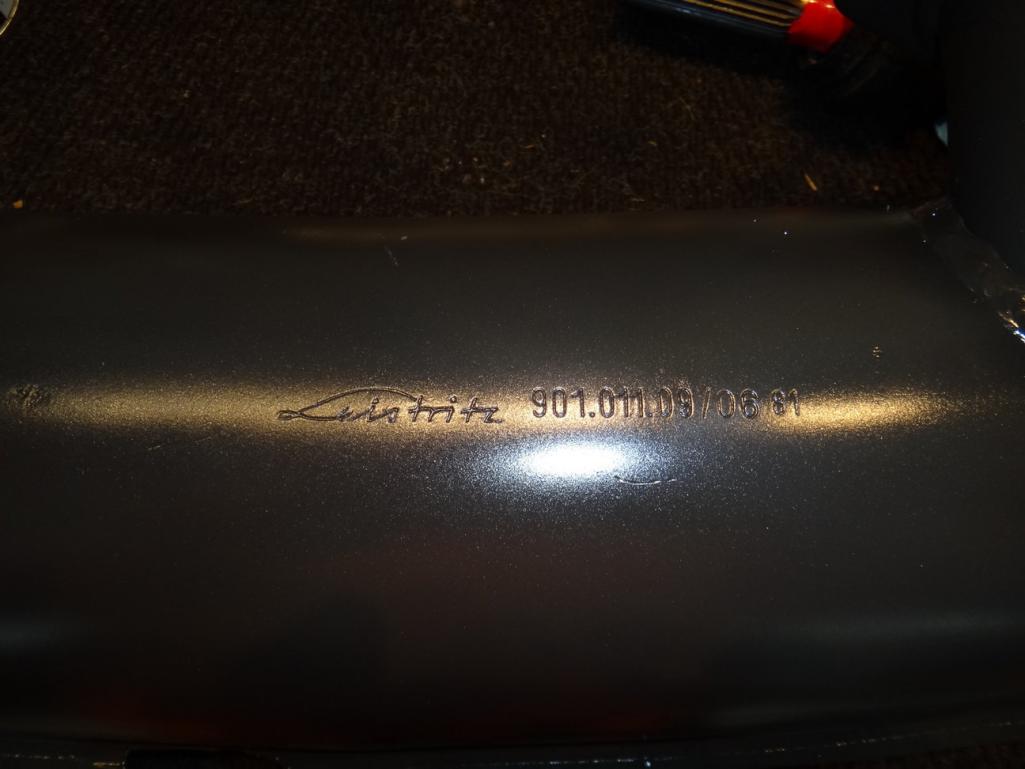 |
|
|
|
| cary |
Dec 3 2016, 11:48 PM
Post
#144
|
|
Advanced Member Group: Members Posts: 3,900 Joined: 26-January 04 From: Sherwood Oregon Member No.: 1,608 Region Association: Pacific Northwest |
Busy week at Rothsport. Getting the first 3 Mexican 1000 rally cars ready for media blasting.
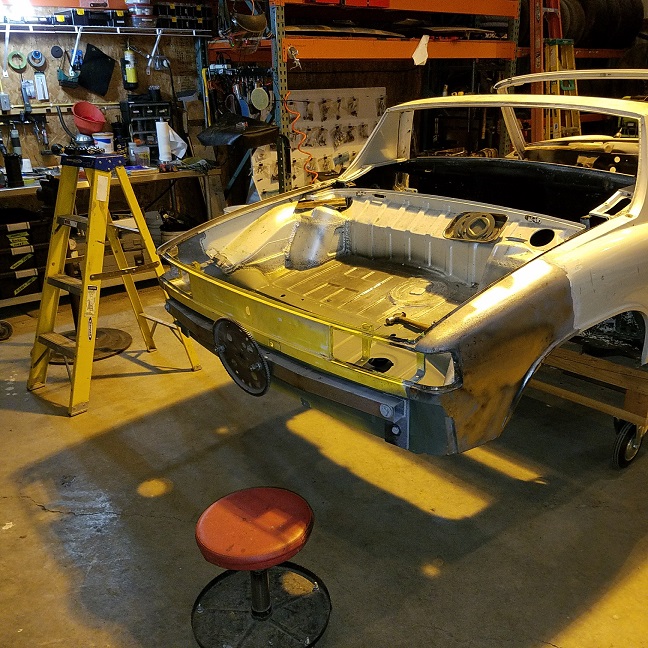
Now its time to get Doug's car ready for media blasting. That starts with taking my project car off the rotisserie and setting it on the frame bench. (IMG:style_emoticons/default/beer.gif) This is the first car to go onto the bench fixtures since building them for Mark's project car. Dropped right into the long pinch weld stand ups. 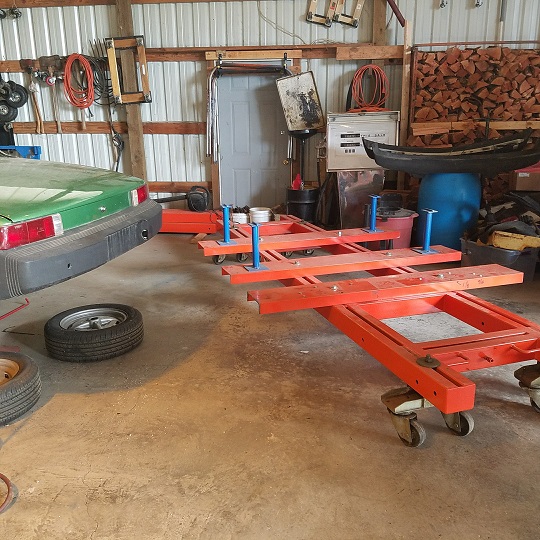 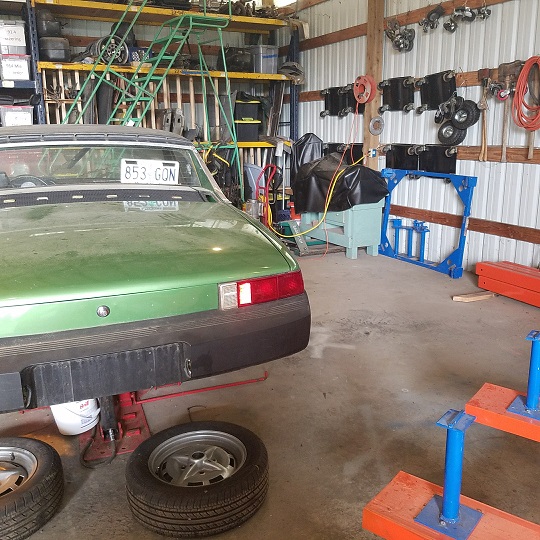 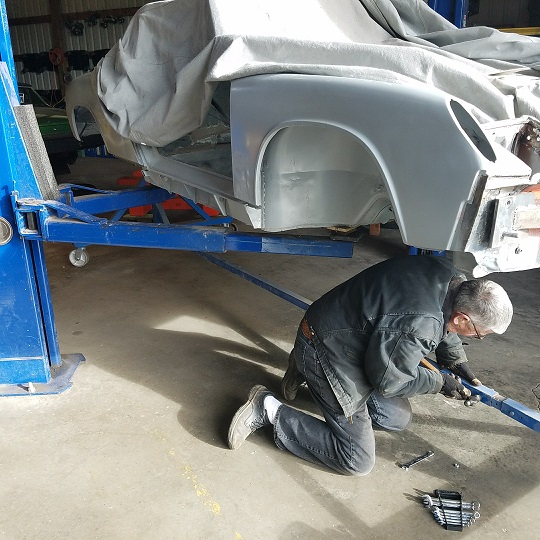 Both the rotisserie and frame bench slide by the low rise lift with moving Mark's for sale car. |
|
|
|
| cary |
Dec 4 2016, 12:17 AM
Post
#145
|
|
Advanced Member Group: Members Posts: 3,900 Joined: 26-January 04 From: Sherwood Oregon Member No.: 1,608 Region Association: Pacific Northwest |
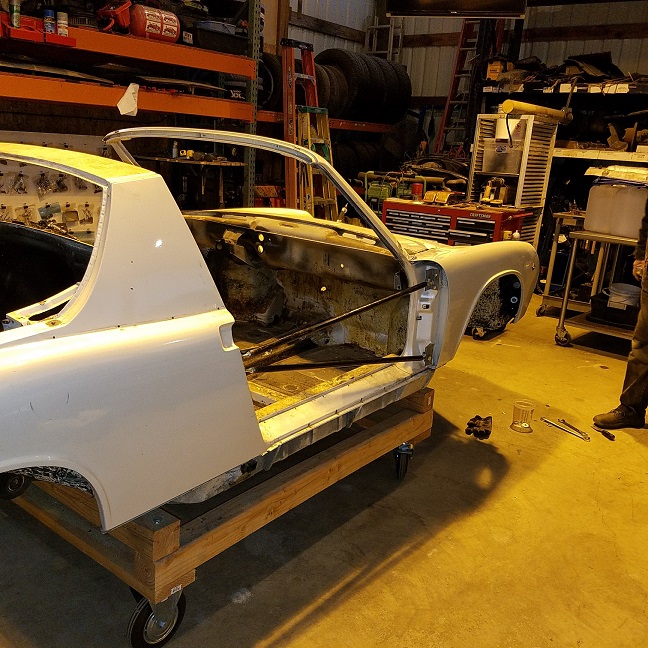
So with getting Doug's car ready for the rotisserie we'll need another set of door braces.
One set is in Mark's project car. 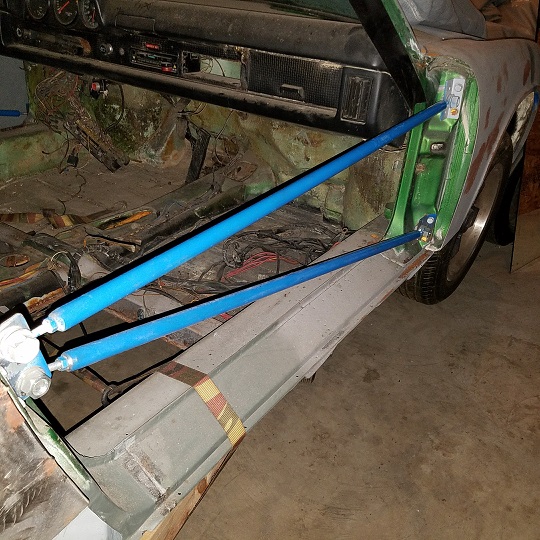 My project car has the Jeff Hail door alignment style set in it. 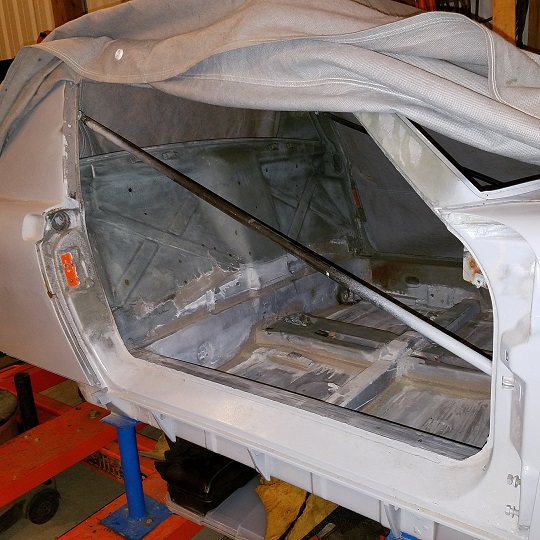 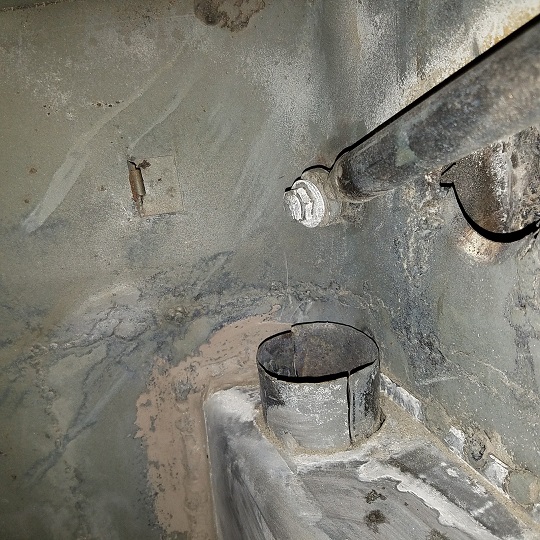 So we stopped by Ace after lunch. I decided as long as were doing all the measuring and cutting we'll make two sets. Price tag $121. 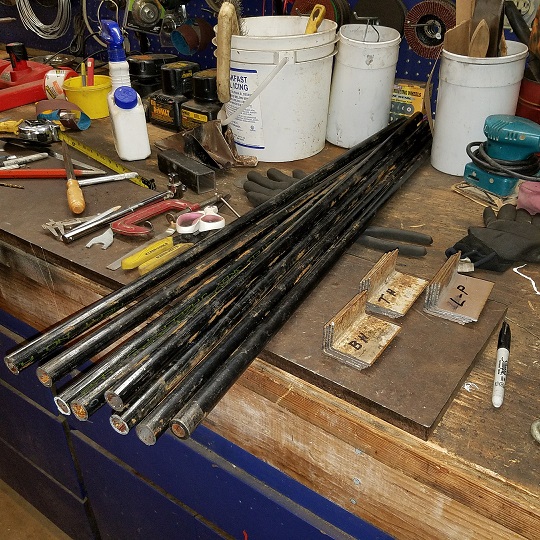 Three 10' pieces of 1/2" black pipe. Cut into 38" long pieces.  Pile of hardware. Might have saved some if I'd looked for L & R eye bolts instead of turnbuckles. Super In Law is all set up to come out and play by himself while I'm at Rothsport next week. He was dressed and ready to go at 8am this morning. (IMG:style_emoticons/default/biggrin.gif) Note : He isn't out there all by himself. Mike, one of the horse trainers is in the next building (barn). He and Super In Law are tight. |
|
|
|
| cary |
Dec 4 2016, 12:40 AM
Post
#146
|
|
Advanced Member Group: Members Posts: 3,900 Joined: 26-January 04 From: Sherwood Oregon Member No.: 1,608 Region Association: Pacific Northwest |
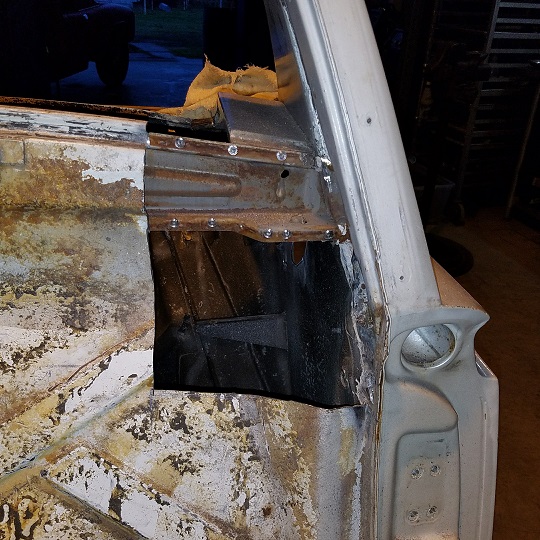
While Super In law was in the other room cutting metal I went about cutting out the other upper firewall corner. Don't need any more detail pictures. I changed my attack in round two. I cut it out like a piece of crust-less toast. Cut out the center. Then worked around the outside drilling out the spot welds.
  Just as I was finishing these up Doug stopped by with the oil filter console and hardware bits for the oil tank so I have more hands on info before I cut out the big hole. He also brought out the tail lights and lenses so I can tweak the taillight panel for the perfect taillight alignment, before paint. Nip & Tuck. Left, I need to sand/grind a bit inside the fender bucket. Need to tighten the top of the corner portion about 2mm. Right, need to tweak the bucket mounts just a smidgen. Not quite vertical. 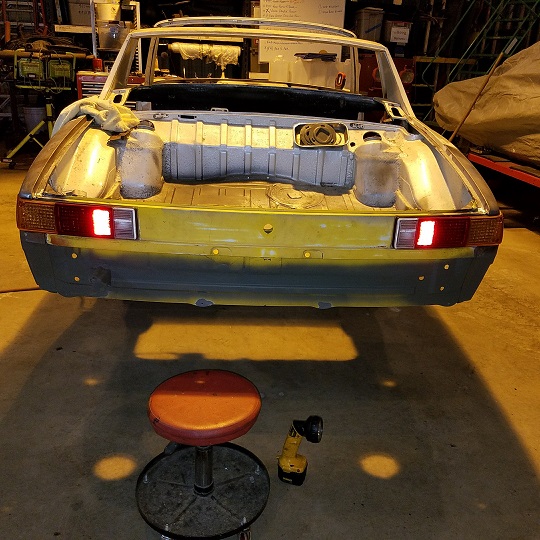 Like the other parts Doug has refurbished they are a thing of beauty. They already have Spoke's LED taillights installed. I love mine. We also discussed adding an LED brake light bar into/onto the targa bar for safety. |
|
|
|
| 0396 |
Dec 4 2016, 09:09 AM
Post
#147
|
|
Advanced Member Group: Members Posts: 2,046 Joined: 13-October 03 From: L.A. Calif Member No.: 1,245 Region Association: Southern California |
Cary, your one talented individual. Based on some of your projects, on some cars, your practically replacing 50% of the sheet metal. It reminds me of a 356 in Pano where they replaced 95% of the car. If I had the deep pockets and needed one worked on, you will be in the running. (IMG:style_emoticons/default/pray.gif)
|
|
|
|
| mbseto |
Dec 4 2016, 09:39 AM
Post
#148
|
|
Senior Member Group: Members Posts: 1,257 Joined: 6-August 14 From: Cincy Member No.: 17,743 Region Association: North East States |
QUOTE(cary @ Dec 4 2016, 01:40 AM)  I cut it out like a piece of crust-less toast. You have a knack for explaining things with an economy of words. |
|
|
|
| cary |
Dec 4 2016, 07:13 PM
Post
#149
|
|
Advanced Member Group: Members Posts: 3,900 Joined: 26-January 04 From: Sherwood Oregon Member No.: 1,608 Region Association: Pacific Northwest |
QUOTE(396 @ Dec 4 2016, 07:09 AM) Cary, your one talented individual. Based on some of your projects, on some cars, your practically replacing 50% of the sheet metal. It reminds me of a 356 in Pano where they replaced 95% of the car. If I had the deep pockets and needed one worked on, you will be in the running. (IMG:style_emoticons/default/pray.gif) Thanks for the compliment. I love these little cars and wish I could save them all .................... |
|
|
|
| cary |
Dec 10 2016, 01:11 AM
Post
#150
|
|
Advanced Member Group: Members Posts: 3,900 Joined: 26-January 04 From: Sherwood Oregon Member No.: 1,608 Region Association: Pacific Northwest |
Ready to put the car on the rotisserie tomorrow if the rain slows down. Mike's car will need to roll outside for a bit while we use the lift to mount the car on the rotisserie.
  While Super In Law was finishing up the door braces I blasted the 32 valve covers Mark had dropped off a while ago. I cleaned the gasket seat on the inside and the prepared the outside for paint. |
|
|
|
| cary |
Dec 11 2016, 08:23 AM
Post
#151
|
|
Advanced Member Group: Members Posts: 3,900 Joined: 26-January 04 From: Sherwood Oregon Member No.: 1,608 Region Association: Pacific Northwest |
On to the lift she goes ..................
 Doubled checked the window frame gap before she was set onto the rotisserie wheels. Right side needed to be drawn in 1mm. 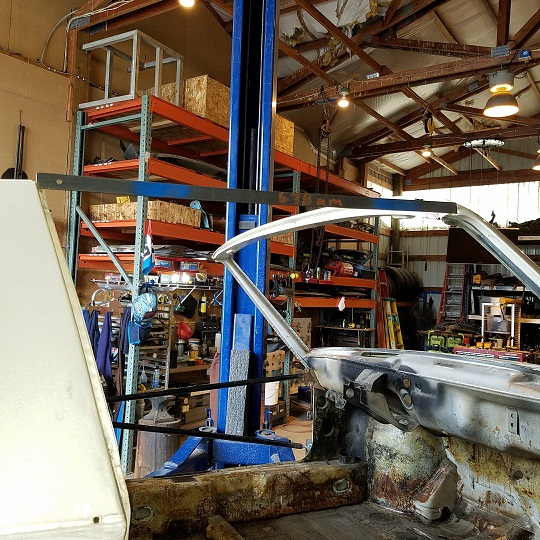 Ready for business ................ 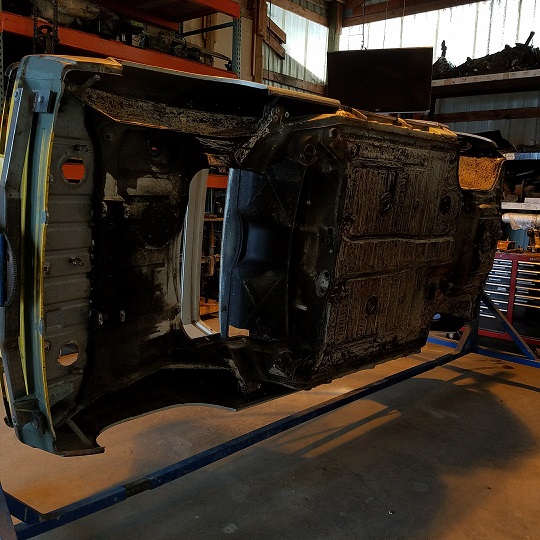 |
|
|
|
| cary |
Dec 11 2016, 09:50 AM
Post
#152
|
|
Advanced Member Group: Members Posts: 3,900 Joined: 26-January 04 From: Sherwood Oregon Member No.: 1,608 Region Association: Pacific Northwest |
I went thru the detail of removing the left jack post on my rustoration thread.
http://www.914world.com/bbs2/index.php?s=&...t&p=2432695 Here's where we ended the day. 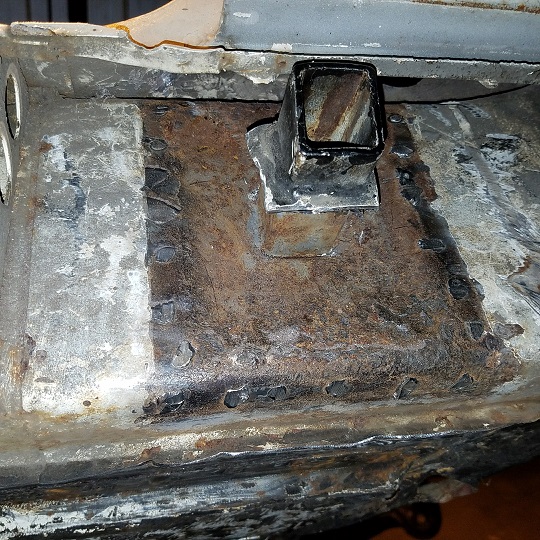 I'm going to leave the grinding till after the car gets blasted. Doug and I'll make determination on the rust after the blasting too. Being on the rotisserie will make cutting the oil filter console hole much easier. 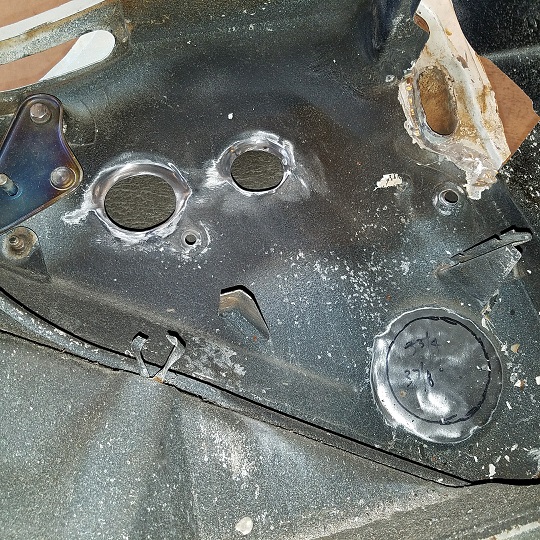 I forgot how much easier things are on the rotisserie. (IMG:style_emoticons/default/biggrin.gif) 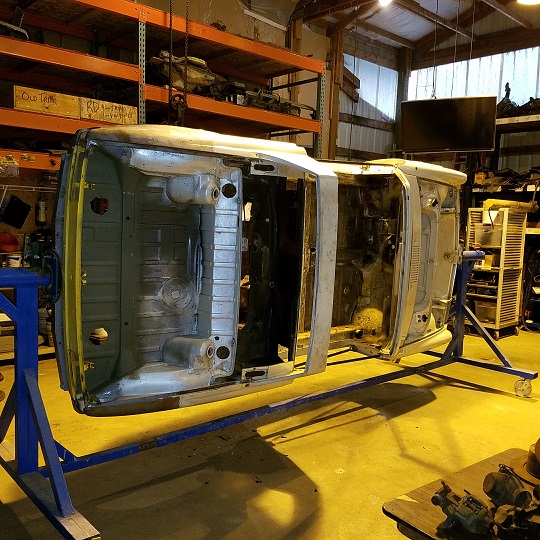 Here's a shot of the exhaust shield stand off / mounts. 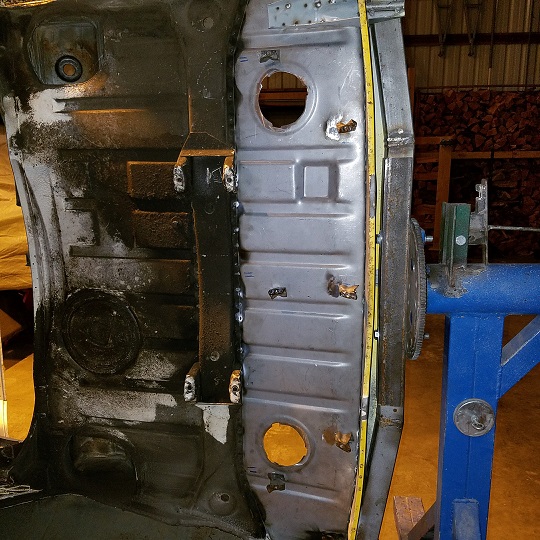 |
|
|
|
| cary |
Dec 17 2016, 11:15 AM
Post
#153
|
|
Advanced Member Group: Members Posts: 3,900 Joined: 26-January 04 From: Sherwood Oregon Member No.: 1,608 Region Association: Pacific Northwest |
Friday 12.16.15
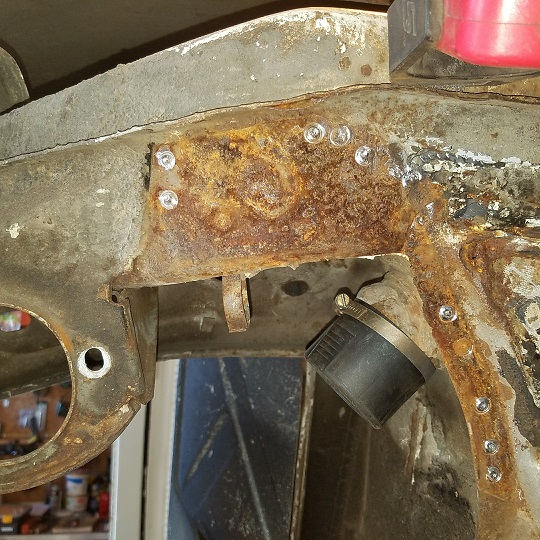
Selfie .............. 46 degrees when we arrive. Better than I thought it would be.  Starting point. 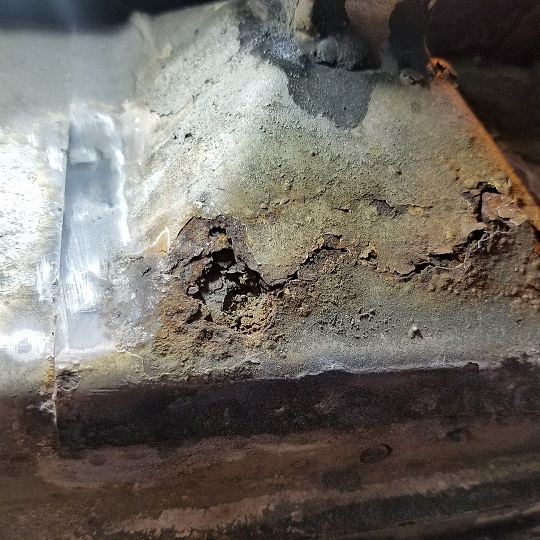 Here's a shot of the bottom radius cut out. Be careful not to tear off/out the spot welds. 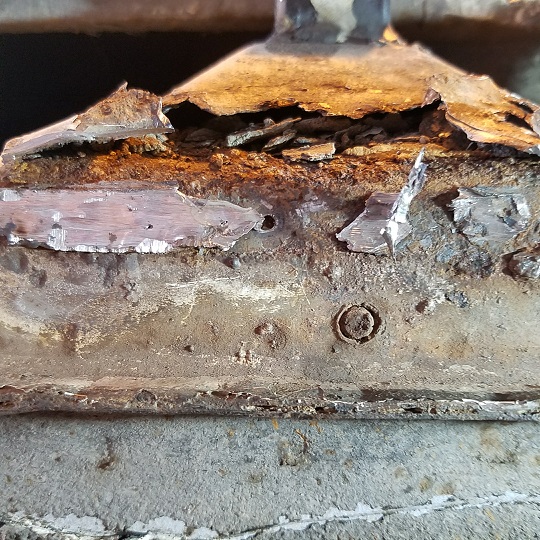 As discussed in my rustoration thread. I cut it out in small bites. 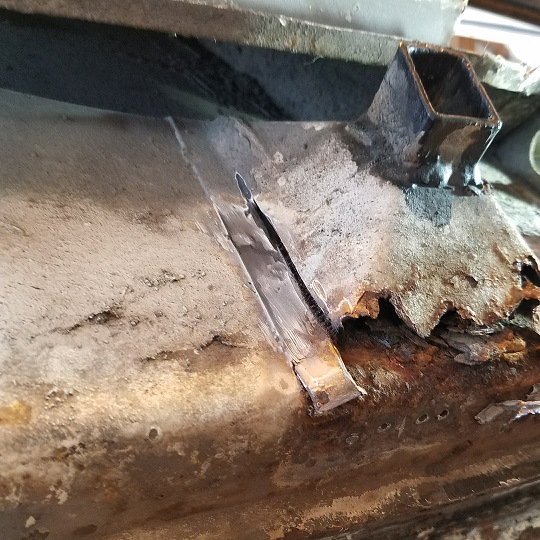 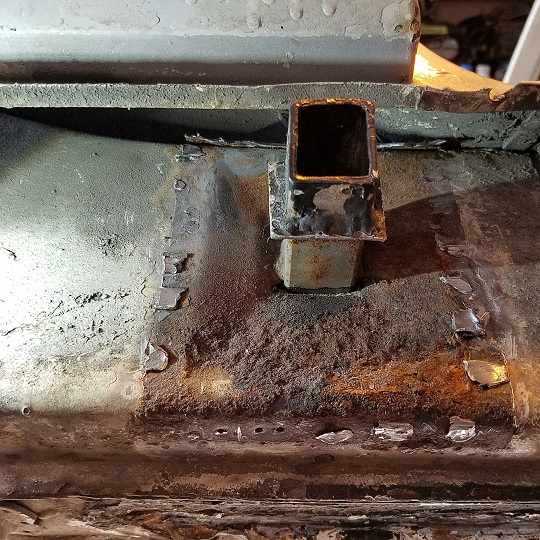 Top of the long is all tidied up. Still want to brush it up with the new 24" sander after it arrives. This time I used a shorter coned carbide cutter to remove the remainder of the spot welds. I think I like it better. 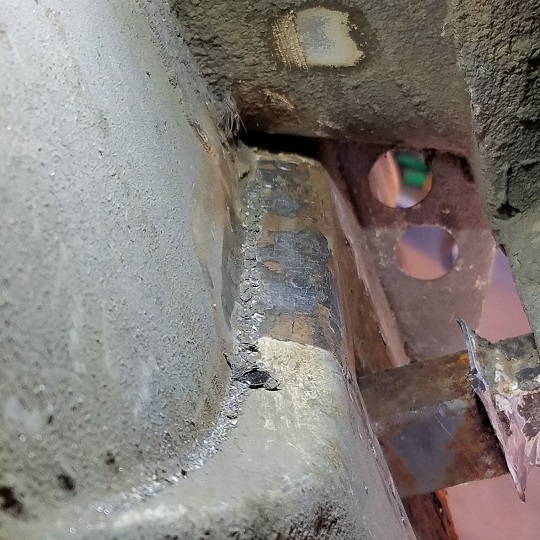 Moment of truth. 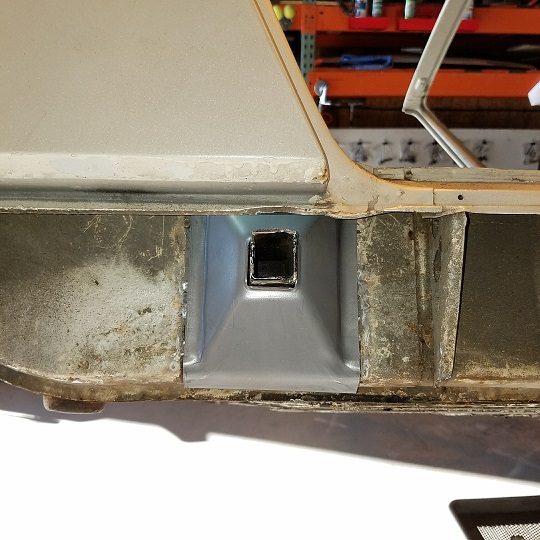 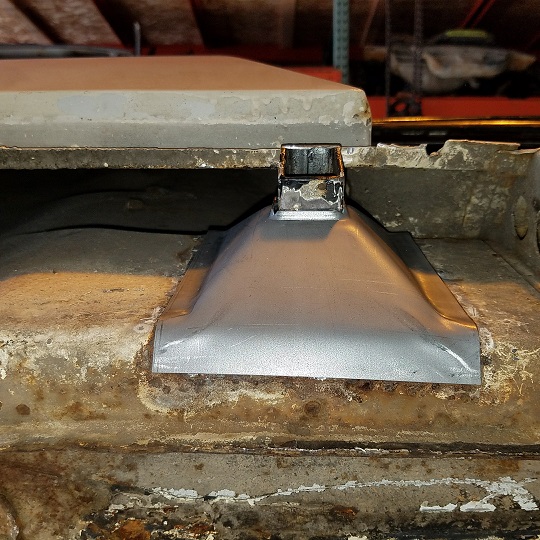 I'll finish the remainder of Friday tonight or Sunday. Super In Law is chopping at the bit to get going. And Warpig should be there around 10am. |
|
|
|
| cary |
Dec 17 2016, 11:39 PM
Post
#154
|
|
Advanced Member Group: Members Posts: 3,900 Joined: 26-January 04 From: Sherwood Oregon Member No.: 1,608 Region Association: Pacific Northwest |
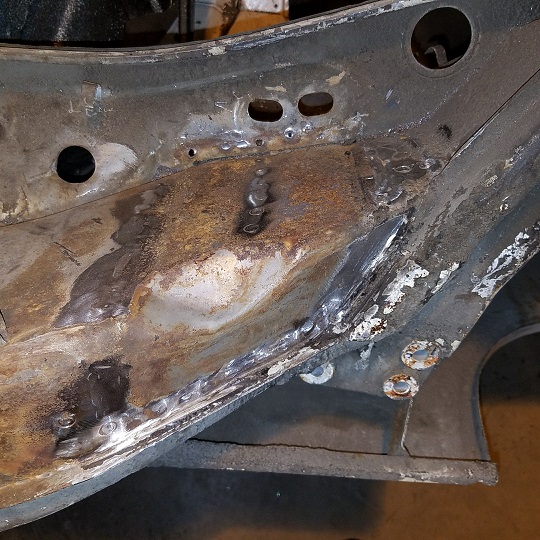
I'll probably look at peeling off the outer layer in the square box after it returns from media blasting.
I need to take a look at all the rocker panel bolts also. The one in the circle is snapped off. 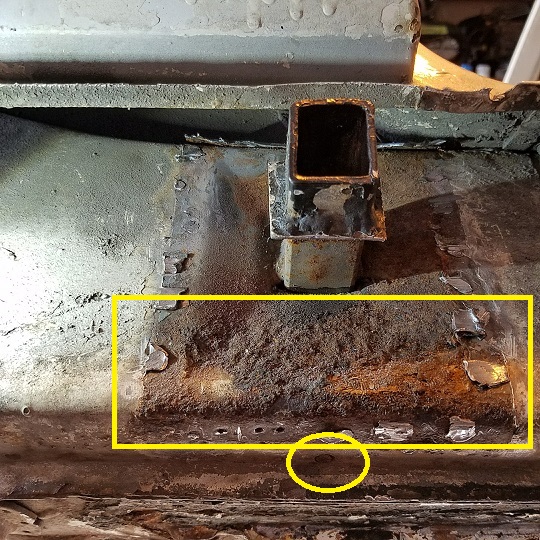 |
|
|
|
| cary |
Dec 17 2016, 11:50 PM
Post
#155
|
|
Advanced Member Group: Members Posts: 3,900 Joined: 26-January 04 From: Sherwood Oregon Member No.: 1,608 Region Association: Pacific Northwest |
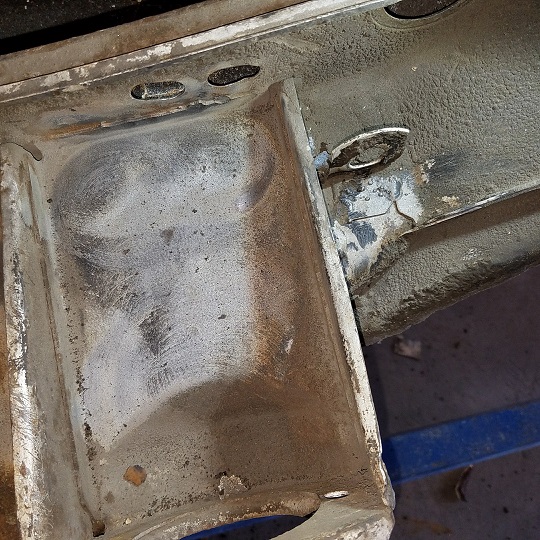
Then I moved on to removing the jack point triangles. No real issues.
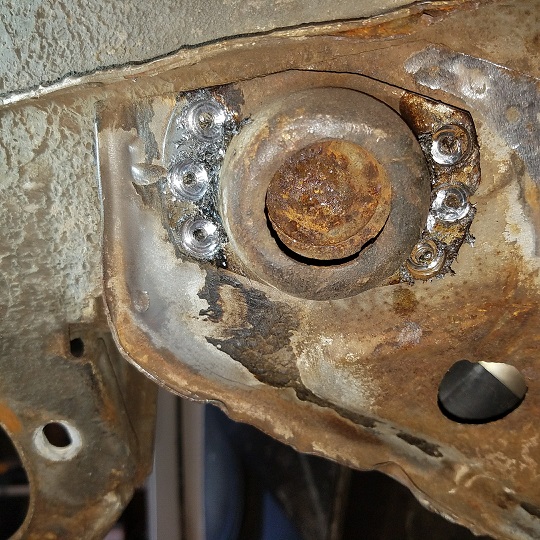  Heater tube blocked off and ready for the media blaster. 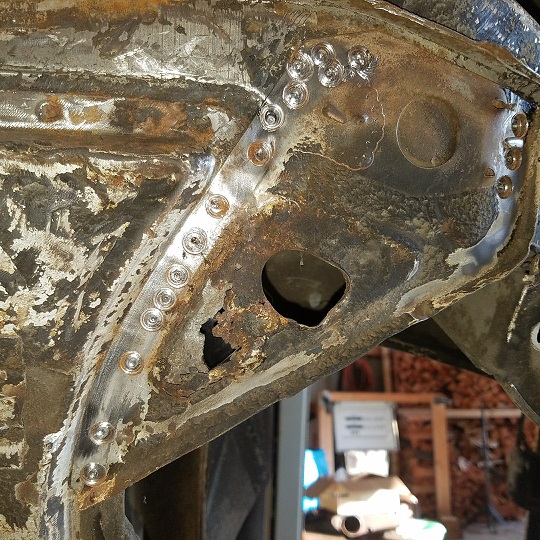 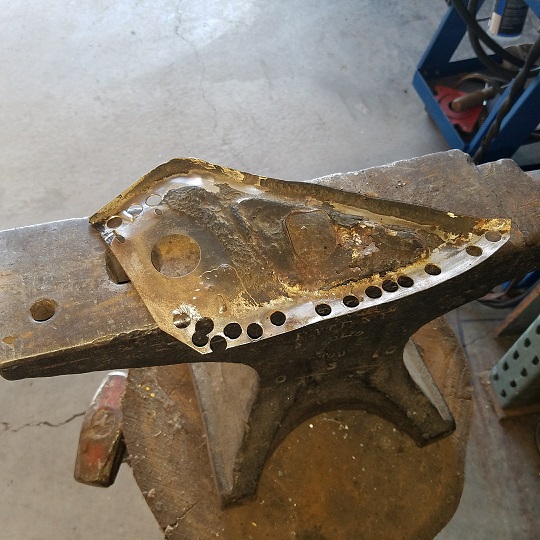 |
|
|
|
| cary |
Dec 18 2016, 12:14 AM
Post
#156
|
|
Advanced Member Group: Members Posts: 3,900 Joined: 26-January 04 From: Sherwood Oregon Member No.: 1,608 Region Association: Pacific Northwest |
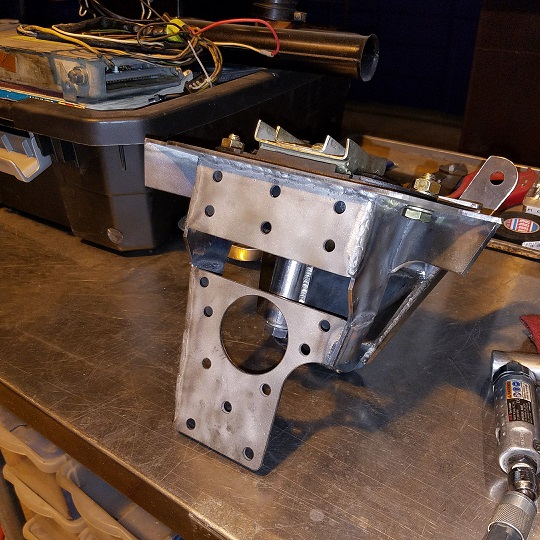
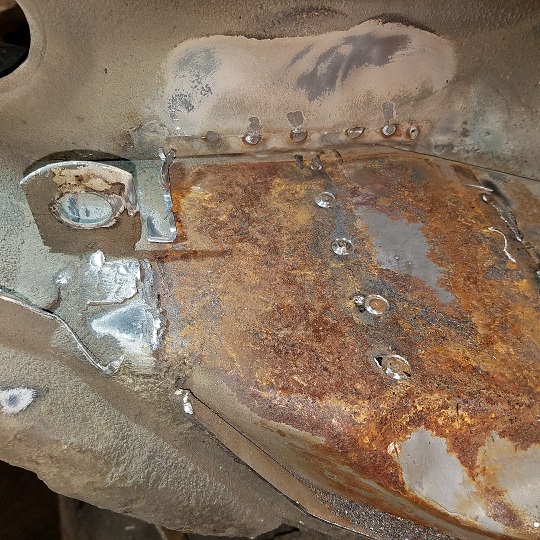
Then set about removing the right T4 motor mount. I was hoping to save it for Mark's project car. But it would take too much time. And cause too much damage to the parent material. I'll have to get the one I need off one of the donor cars. Cutting away the long from behind.
  I felt bad cutting it into pieces. But I had preserve the parent material on the long. On a sour note. Now that I have it on the rotisserie I found a hillbilly patch in the hell hole. 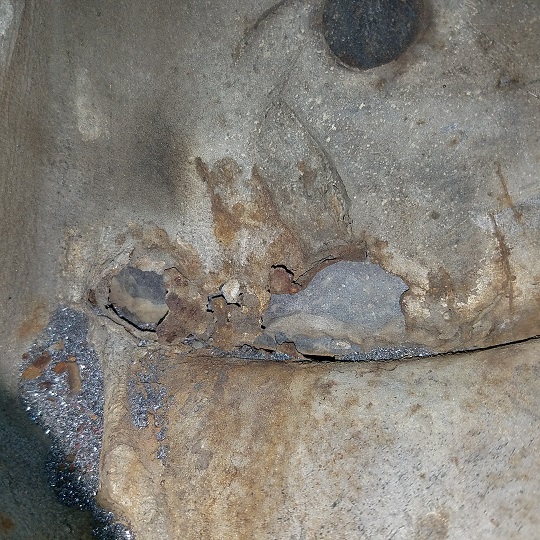 Very productive day .................... |
|
|
|
| cary |
Dec 18 2016, 12:17 AM
Post
#157
|
|
Advanced Member Group: Members Posts: 3,900 Joined: 26-January 04 From: Sherwood Oregon Member No.: 1,608 Region Association: Pacific Northwest |
Test fit ..................
 |
|
|
|
| cary |
Dec 18 2016, 12:38 AM
Post
#158
|
|
Advanced Member Group: Members Posts: 3,900 Joined: 26-January 04 From: Sherwood Oregon Member No.: 1,608 Region Association: Pacific Northwest |
Saturday AM. Off comes the left T4 motor mount. Nothing new. Cut it into pieces to get it out of the way.
  |
|
|
|
| cary |
Dec 18 2016, 12:54 AM
Post
#159
|
|
Advanced Member Group: Members Posts: 3,900 Joined: 26-January 04 From: Sherwood Oregon Member No.: 1,608 Region Association: Pacific Northwest |
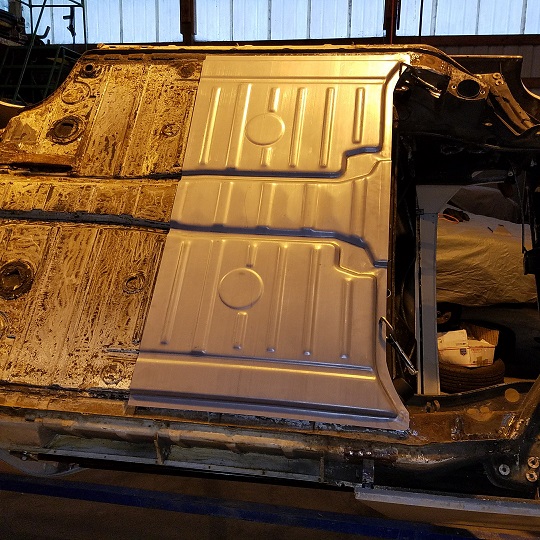
Wilma !!!!!!!!!!
Next was the removal of the field portion of the rear floor plan. 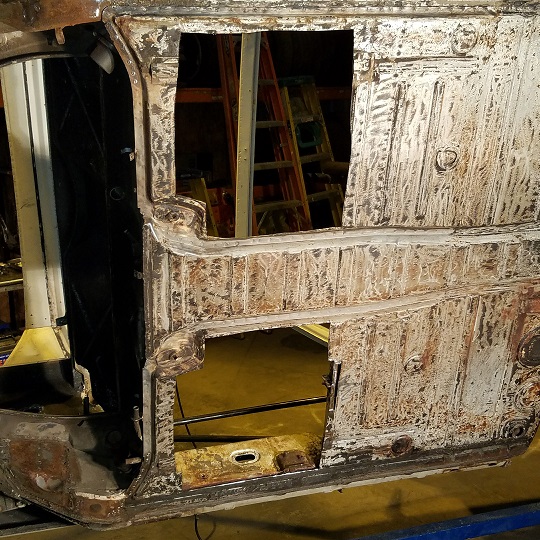 Before I cut out the field portion I took multiple measurements and pictures. Here's one shot. 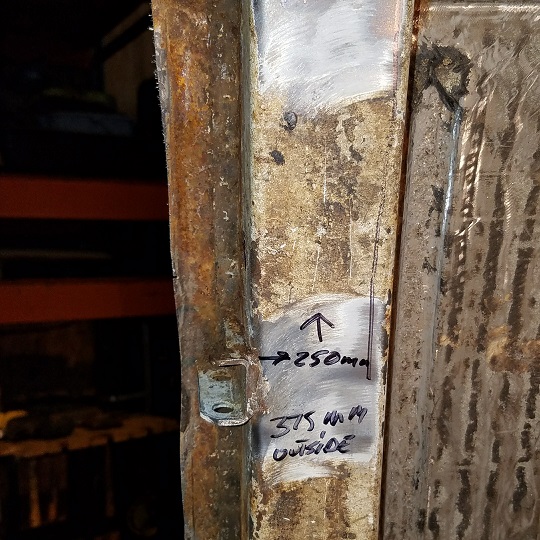 Once I got the field out of the way I could get at all the detail pieces. First. Cut the floor away from the e-brake bracket. 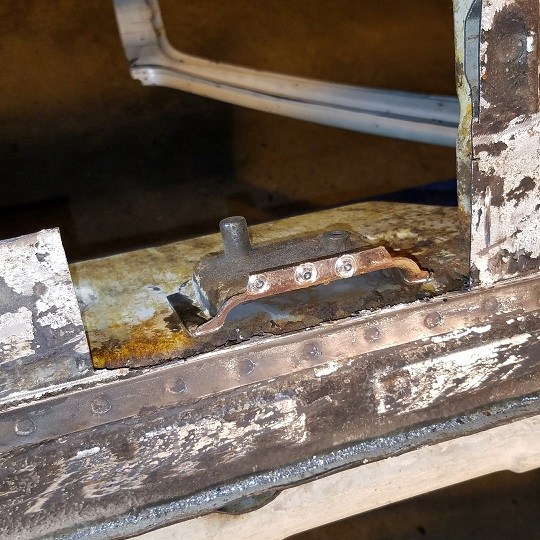 #2, trim off the e-brake cable tunnel. 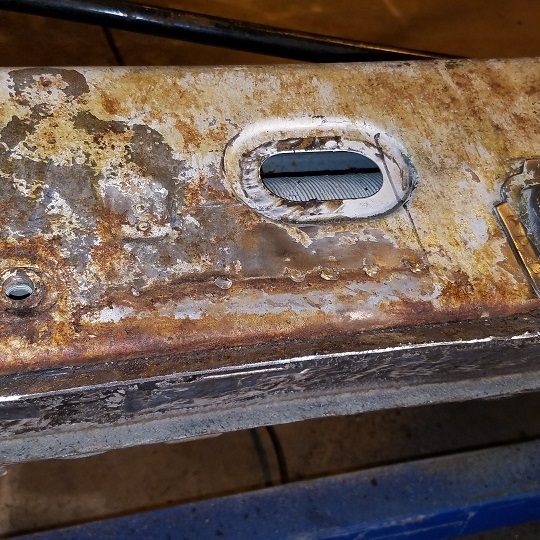 Finally. Cut the floor away from the seat adjuster bracket. 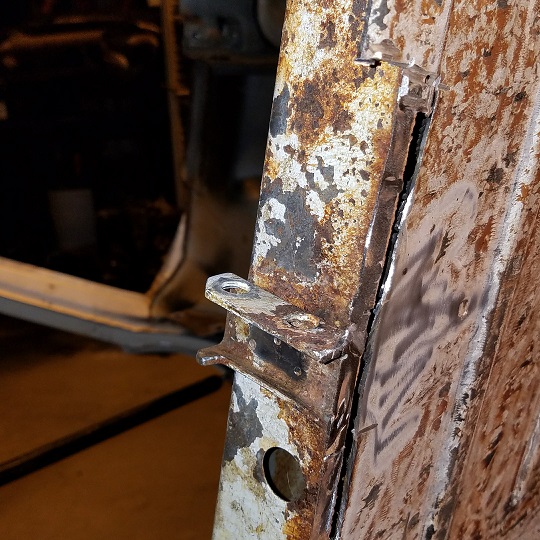 Another great day ..................... |
|
|
|
| raynekat |
Dec 18 2016, 01:04 AM
Post
#160
|
|
Advanced Member Group: Members Posts: 2,171 Joined: 30-December 14 From: Coeur d'Alene, Idaho Member No.: 18,263 Region Association: Pacific Northwest |
Looking good Cary.
And it looks like I've got some more new metal coming or needed on this car. As the saying goes...all these cars have rust, just differing in the amount that's all. You'll be getting lots of practice on mine. |
|
|
|
|
1 User(s) are reading this topic (1 Guests and 0 Anonymous Users)
0 Members:

|
Lo-Fi Version | Time is now: 17th July 2026 - 06:15 PM |
Invision Power Board
v9.1.4 © 2026 IPS, Inc.