|
|
|
Porsche, and the Porsche crest are registered trademarks of Dr. Ing. h.c. F. Porsche AG.
This site is not affiliated with Porsche in any way. Its only purpose is to provide an online forum for car enthusiasts. All other trademarks are property of their respective owners. |
|
|

  |

| raynekat |
 Dec 18 2016, 01:19 AM Dec 18 2016, 01:19 AM
Post
#161
|
|
Advanced Member  Group: Members Posts: 2,171 Joined: 30-December 14 From: Coeur d'Alene, Idaho Member No.: 18,263 Region Association: Pacific Northwest |
We've recently had a good amount of snow here in the Portland area.
Nice time for some inside projects? 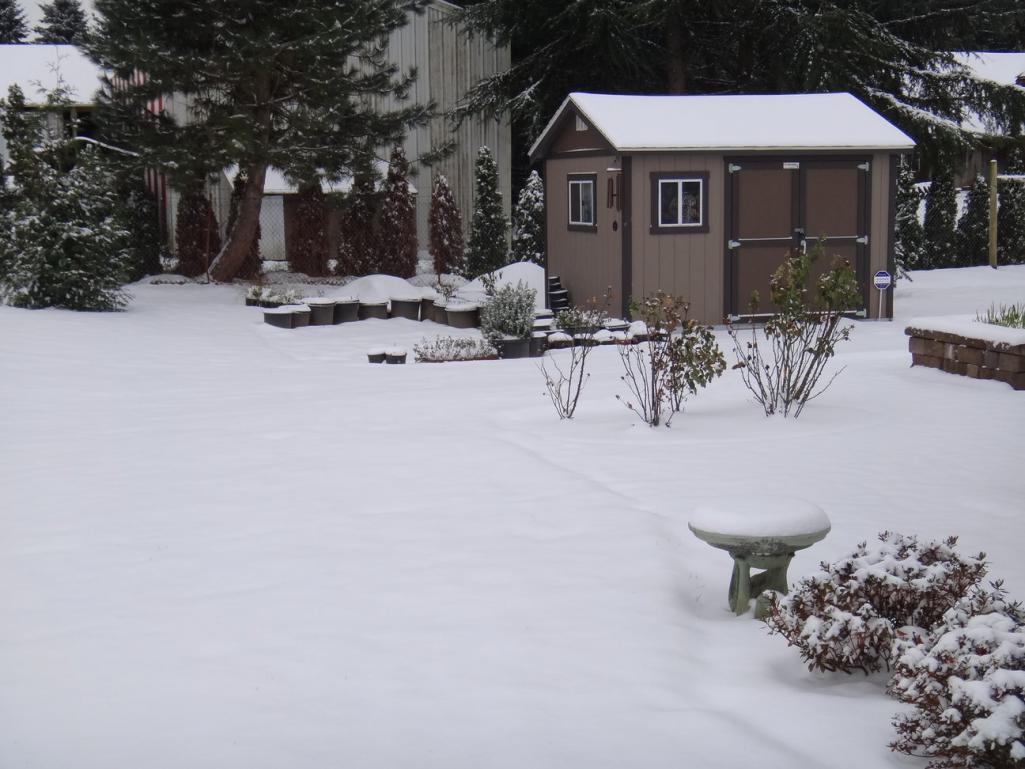 What's a person to do? Could make miniature snowmen with the wifey? Or.... 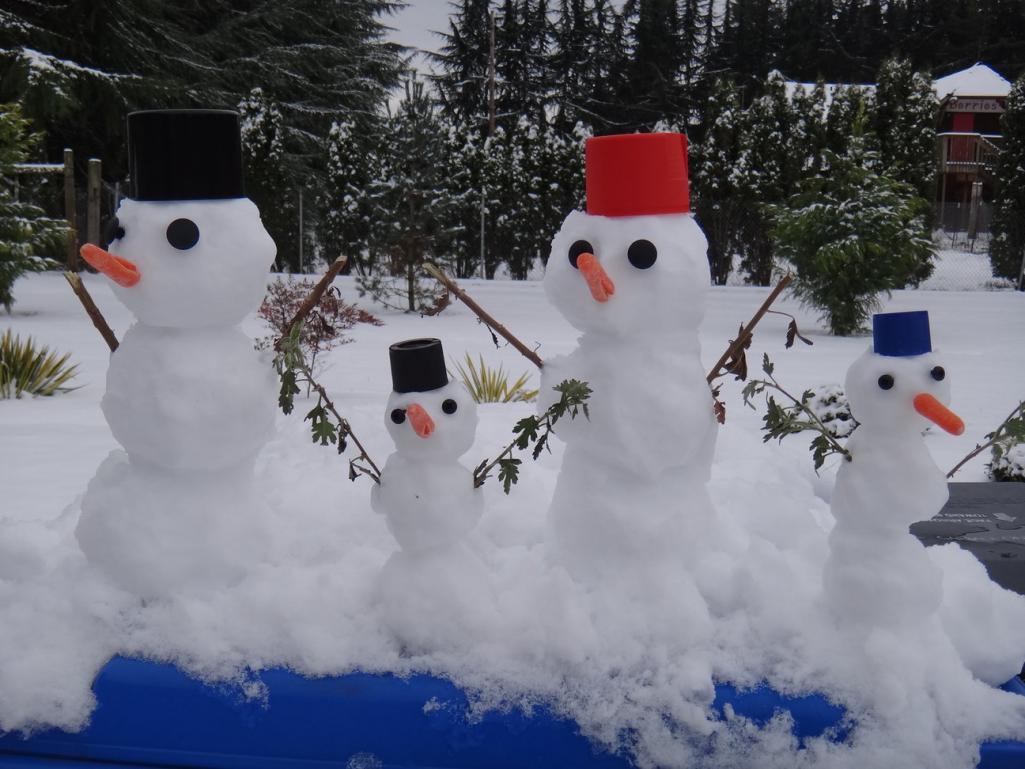 Finally get around to putting this mess of parts together! 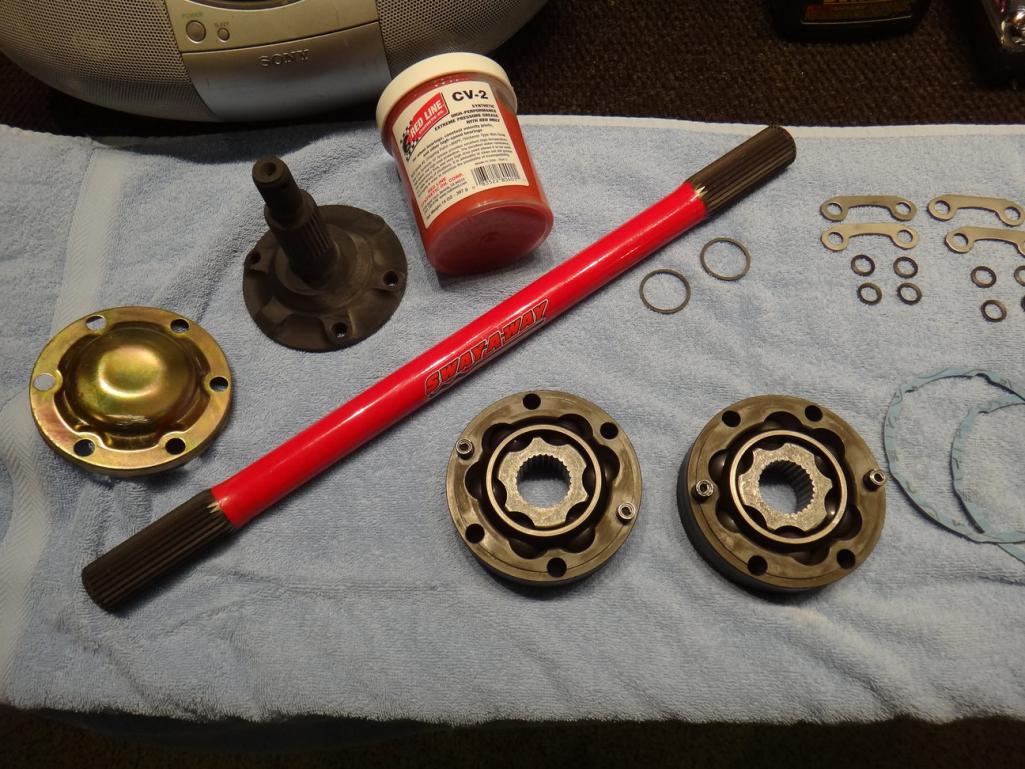 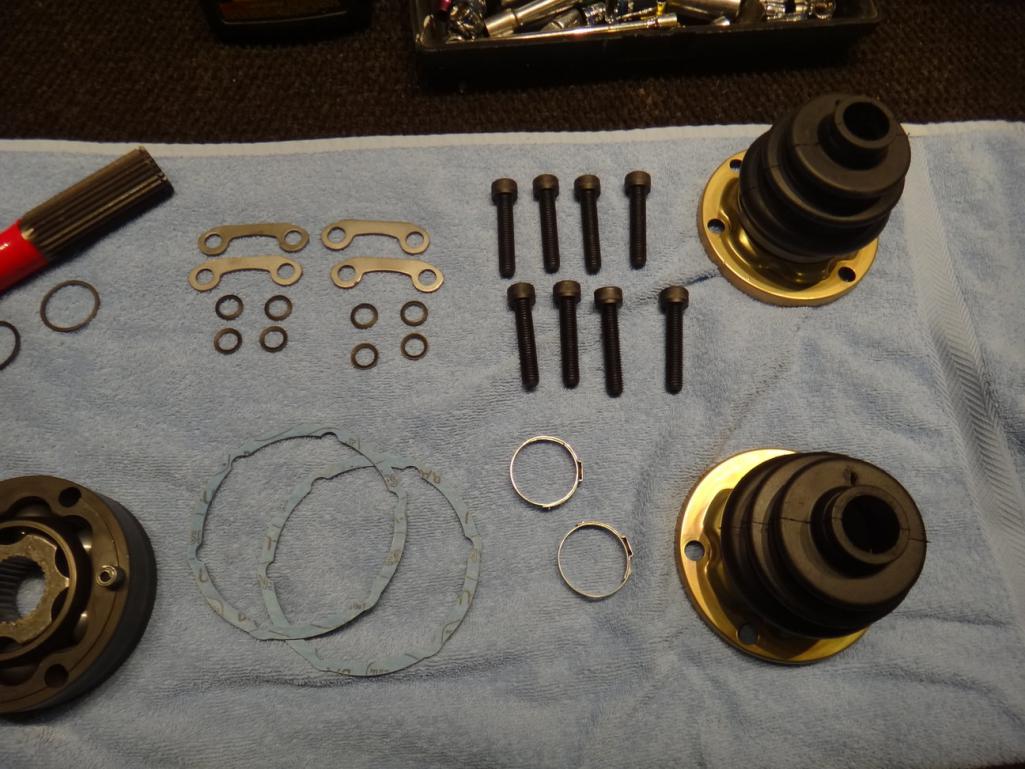 Doing the PMB classic high hp axle build up. Purchased the Sway-A-Way axles, located a good set of 2nd hand 911 axles, got everything cleaned up & replated, purchased the necessary new items and I was ready. New CV boots and gaskets off Ebay. Belmetric sent me the Oetiker ear clamps (74mm and 35mm), M10 zinc plated Schnorr washers, and the Grade 12.9 M10x50 CV bolts. |
   |

 
|
| raynekat |
Dec 18 2016, 01:32 AM
Post
#162
|
|
Advanced Member Group: Members Posts: 2,171 Joined: 30-December 14 From: Coeur d'Alene, Idaho Member No.: 18,263 Region Association: Pacific Northwest |
The 911 CV joints were cleaned and inspected (in great shape) and put back together in the correct manner....short to long.
 Install the boots on the newly plated flanges, tighten up the big Oetiker clamps and slide the boot assemblies on the axles (not a trivial undertaking) with the small clamps ready to go at a later date. 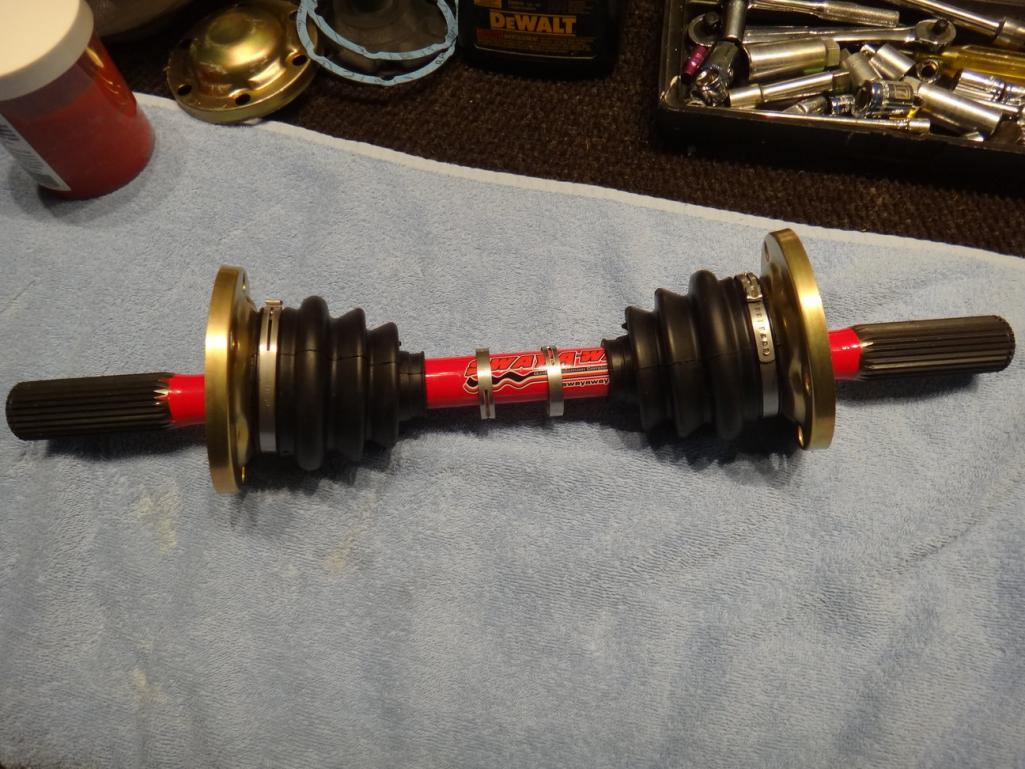 After loading up the CV joint with plenty of Redline CV-2 high performance extreme pressure grease, I started to assemble the CV joints onto the axles. A ring clip goes on the end of the axle. New black phosphate coating on the 911 stub axles and new gaskets evident. Also the M10x50 bolts are just the right length to barely come out the back side of the stub axle. 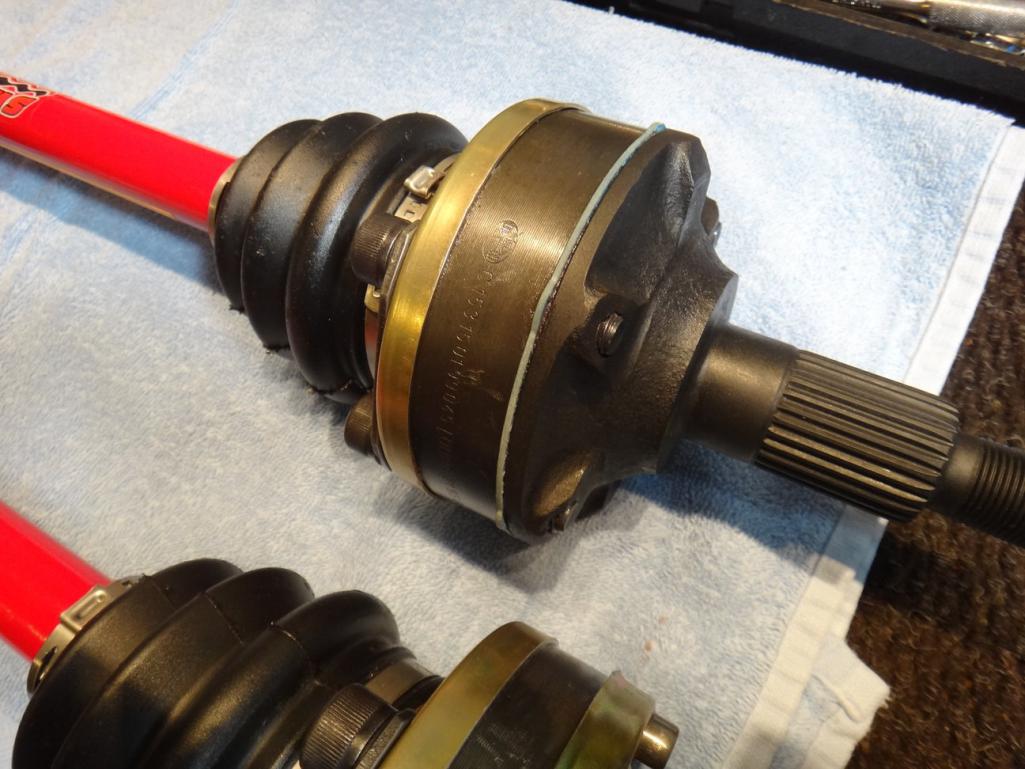 Freshly replated boot flanges, new boots, clamps, bolts and washers all make for a nearly new looking axle assembly. 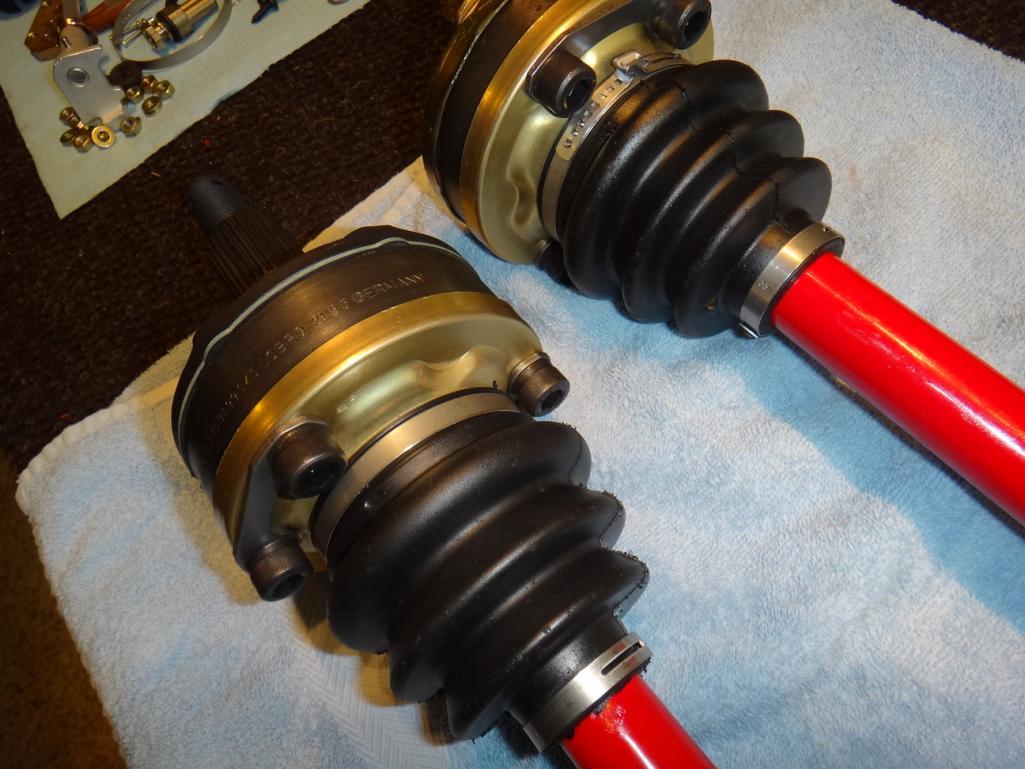 |
|
|
|
| raynekat |
Dec 18 2016, 01:35 AM
Post
#163
|
|
Advanced Member Group: Members Posts: 2,171 Joined: 30-December 14 From: Coeur d'Alene, Idaho Member No.: 18,263 Region Association: Pacific Northwest |
Finished product goes on the shelf with other parts for later installation.
I'll torque them up later These should handle the 200+ hp that my 911 engine will be putting out....at a much later date. 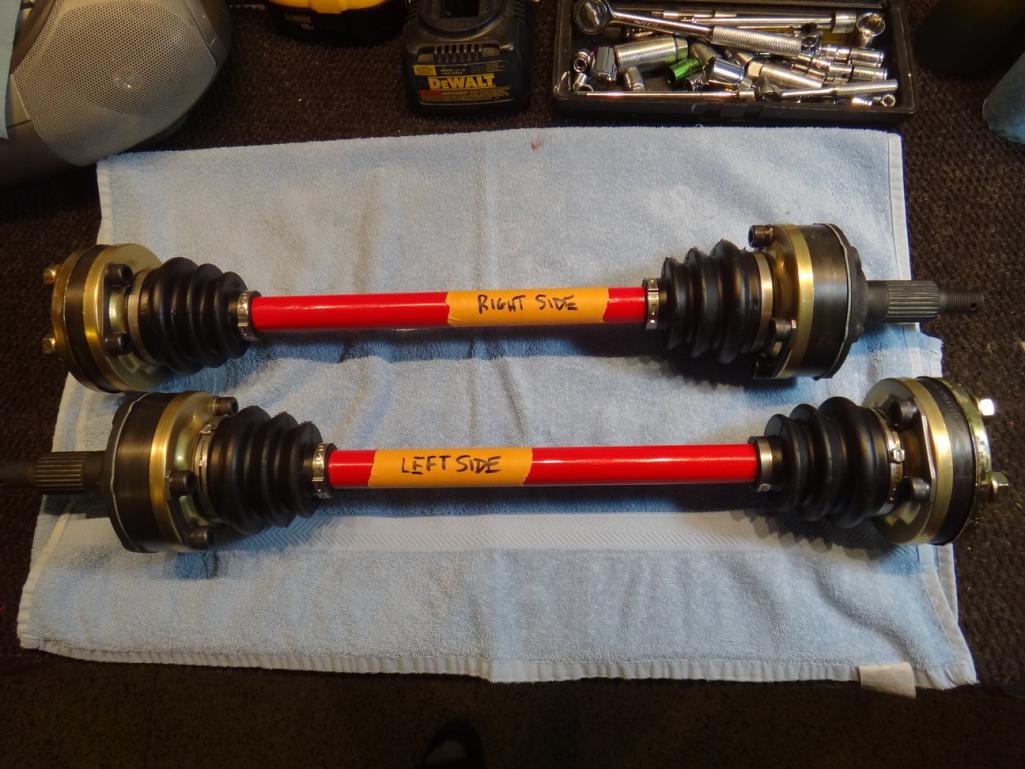 |
|
|
|
| cary |
Dec 18 2016, 10:33 AM
Post
#164
|
|
Advanced Member Group: Members Posts: 3,900 Joined: 26-January 04 From: Sherwood Oregon Member No.: 1,608 Region Association: Pacific Northwest |
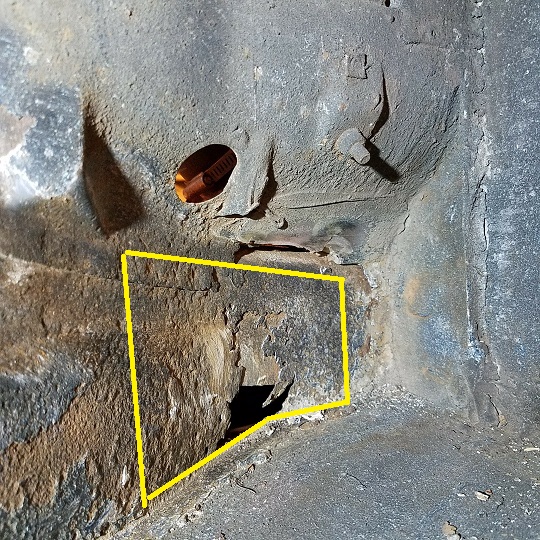
QUOTE(raynekat @ Dec 17 2016, 11:04 PM)  Looking good Cary. And it looks like I've got some more new metal coming or needed on this car. As the saying goes...all these cars have rust, just differing in the amount that's all. You'll be getting lots of practice on mine. We'll take a hard look at the area in blue after we get it back from the blaster. 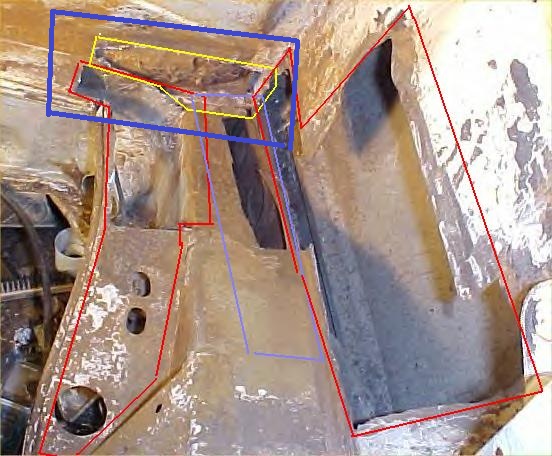 With my assortment of weapons I should be able to cut the section out cleanly. Mad Dog has an assortment of patch panels we could use, or I could cut them out. With this being a DD I don't think we'd need to remove the entire engine shelf. 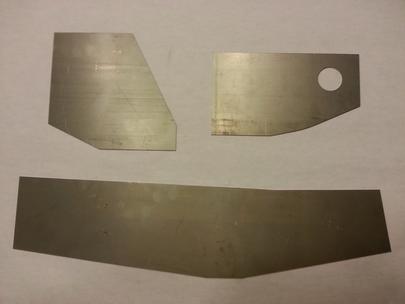 |
|
|
|
| cary |
Dec 20 2016, 09:06 AM
Post
#165
|
|
Advanced Member Group: Members Posts: 3,900 Joined: 26-January 04 From: Sherwood Oregon Member No.: 1,608 Region Association: Pacific Northwest |
Side Note :
We did save the floor plugs from the cut out section of the floor. Trimmed down the panel and ran them thru the wood stove. Good as new. File photo: 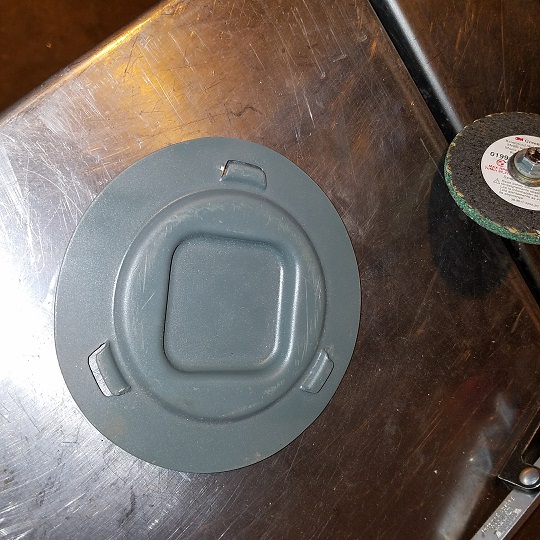 Now that I already have the big Lenox mandrel I'll buy the correct size hole saw for the floor pan when the time comes. |
|
|
|
| cary |
Dec 28 2016, 08:34 AM
Post
#166
|
|
Advanced Member Group: Members Posts: 3,900 Joined: 26-January 04 From: Sherwood Oregon Member No.: 1,608 Region Association: Pacific Northwest |
Things at Rothsport are wrapped up for a bit, so back to Doug's car.
Plan to get the spot welds around the cut out floor removed today. Then off to get blasted. Tried contacting the blaster yesterday, no call back. (IMG:style_emoticons/default/sad.gif) |
|
|
|
| cary |
Dec 28 2016, 11:09 PM
Post
#167
|
|
Advanced Member Group: Members Posts: 3,900 Joined: 26-January 04 From: Sherwood Oregon Member No.: 1,608 Region Association: Pacific Northwest |
Cut out/off the center tunnel cover. Once again one must be very careful when cutting the cover off. The tubes lay right against the bottom of the pan.
 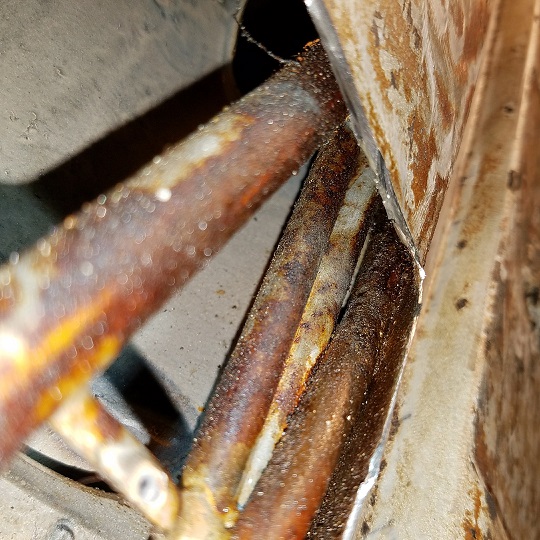 The tunnel is in very nice shape. (IMG:style_emoticons/default/piratenanner.gif) (IMG:style_emoticons/default/piratenanner.gif) Don't see any issues. Even the tub brace looks like new. 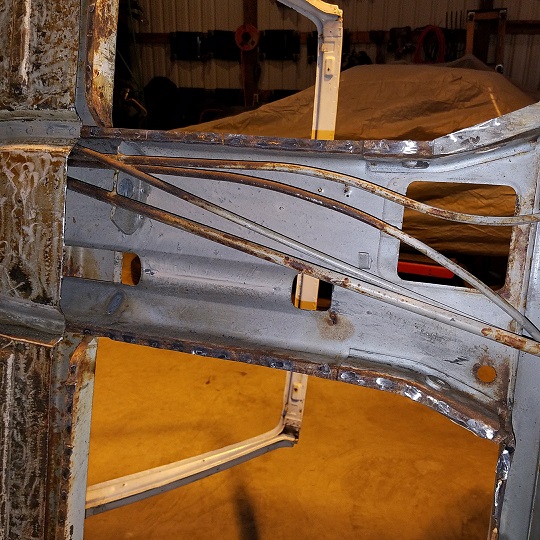 Just about have it ready to go. Just the area's marked in yellow left to go. No spot weld cutter has been used. Just grinding them down and popping them off. We do have one tiny rust thru spot on the bottom of the right long. I mean tiny. There will be a couple inches of bottom lip that will need to be created.  Super In Law cut out four patches for the vent holes in the longs. I'm going to tack them in to help keep media from getting in the longs. They'll also get a Gorilla tape cover laid over them for additional protection. |
|
|
|
| cary |
Dec 29 2016, 11:17 PM
Post
#168
|
|
Advanced Member Group: Members Posts: 3,900 Joined: 26-January 04 From: Sherwood Oregon Member No.: 1,608 Region Association: Pacific Northwest |
Thursday 12.29.16
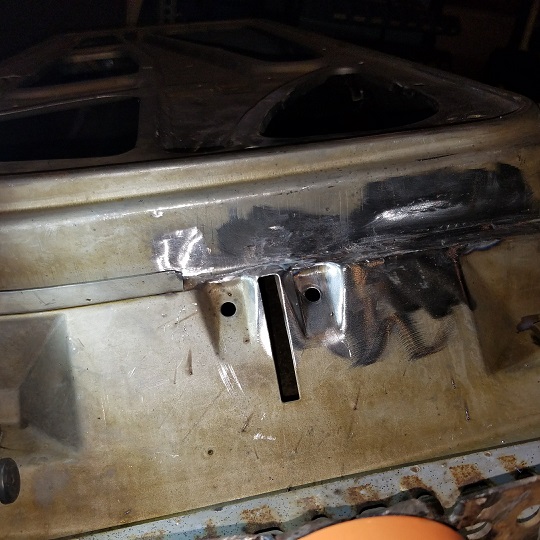
Finished up the trim out of the rear floor pan. (IMG:style_emoticons/default/smile.gif) Then moved on to removing the MPS bracket. Not needed on the 6. 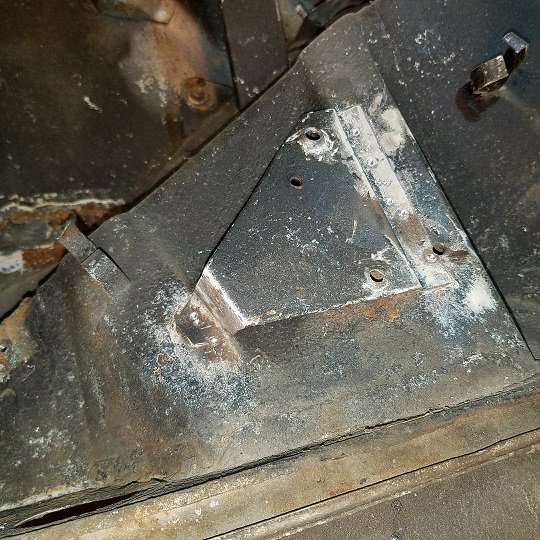 Then I removed the buggered up trunk pivot. Lots of measurement pictures if anyone needs them. 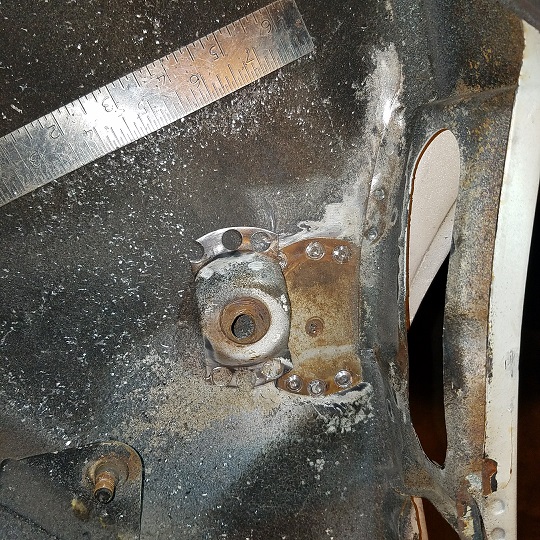 Next was the busted off engine lid hinge brackets. Once again, lots of measurement photos. 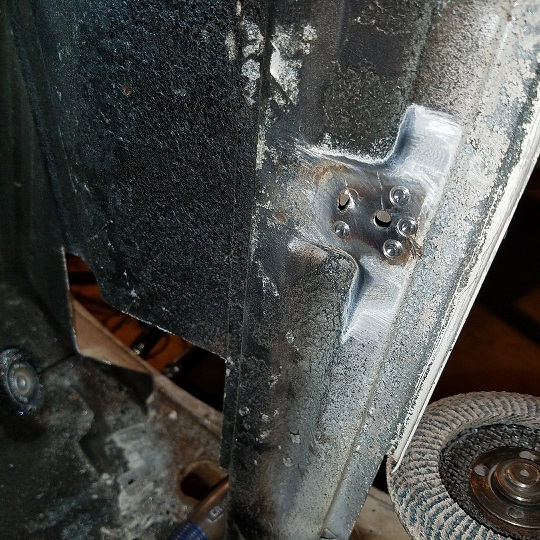 Then off came the remnants of the rusted off battery tray. 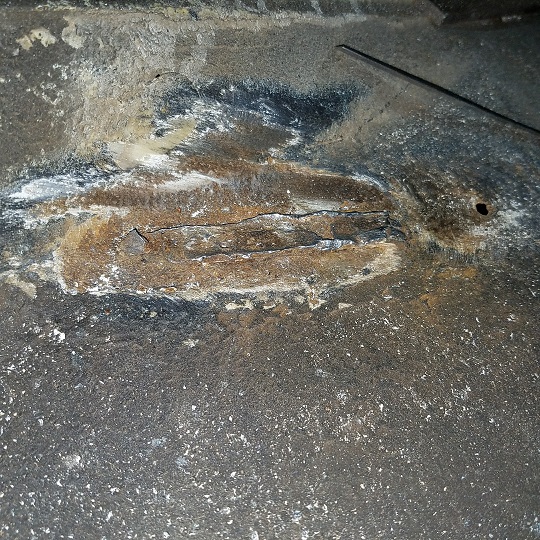 As Doug suspected there will be a little more work in the hell hole.  But a pretty simple fix using the Mad Dog panels. |
|
|
|
| cary |
Dec 29 2016, 11:24 PM
Post
#169
|
|
Advanced Member Group: Members Posts: 3,900 Joined: 26-January 04 From: Sherwood Oregon Member No.: 1,608 Region Association: Pacific Northwest |
I then worked on sealing up the long getting it ready for media blasting.
 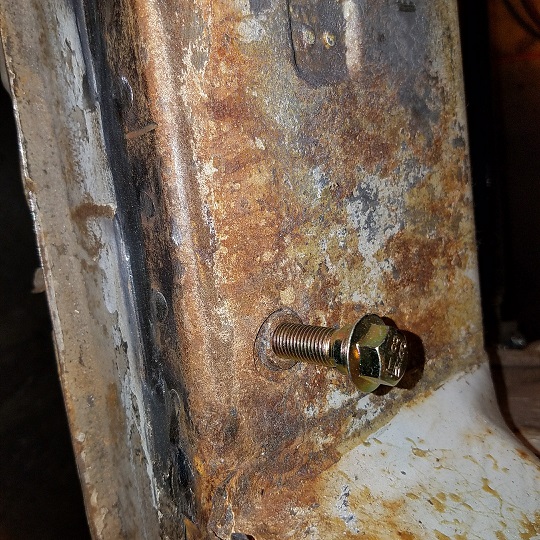 Ready for blasting ................. 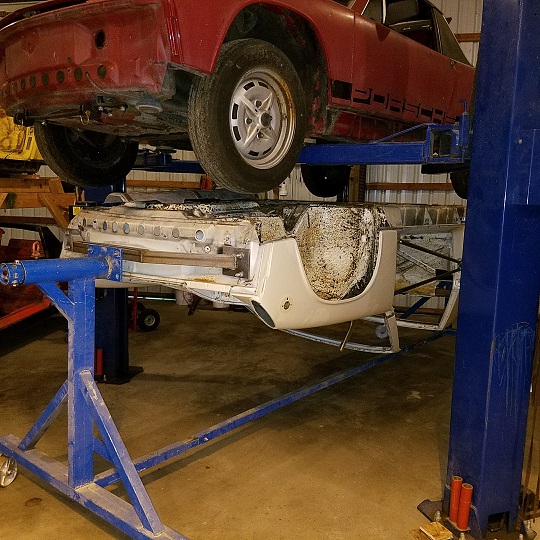 |
|
|
|
| cary |
Dec 31 2016, 10:55 PM
Post
#170
|
|
Advanced Member Group: Members Posts: 3,900 Joined: 26-January 04 From: Sherwood Oregon Member No.: 1,608 Region Association: Pacific Northwest |
New Years Eve Day
Start the day setting up the doors so Super In Law can begin the speaker hole repairs. Engine stand and BBQ brackets. 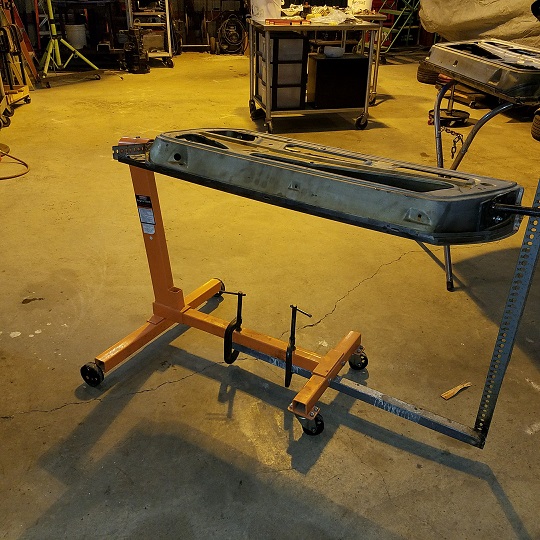 Here's what we want to repair/tidy up. 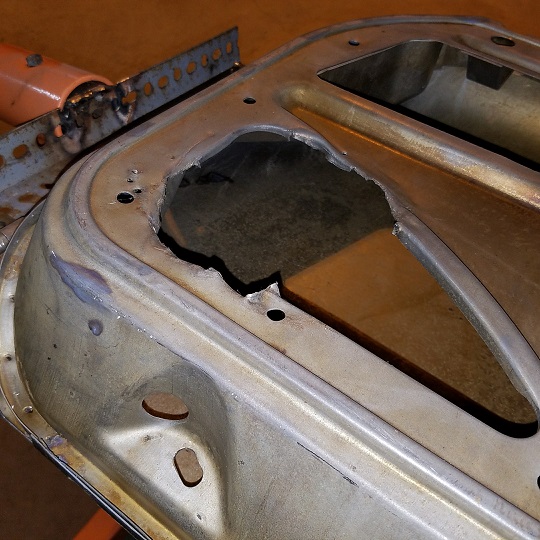 Trying to bring it back to this ............... 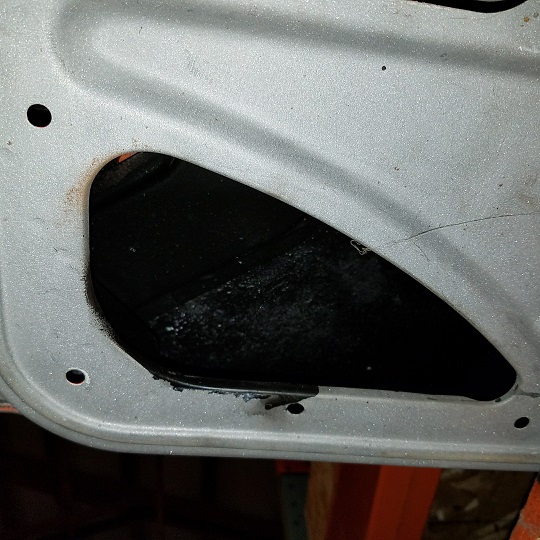 There's also 3-4 door seal rust holes that I'll need to remove and replace. 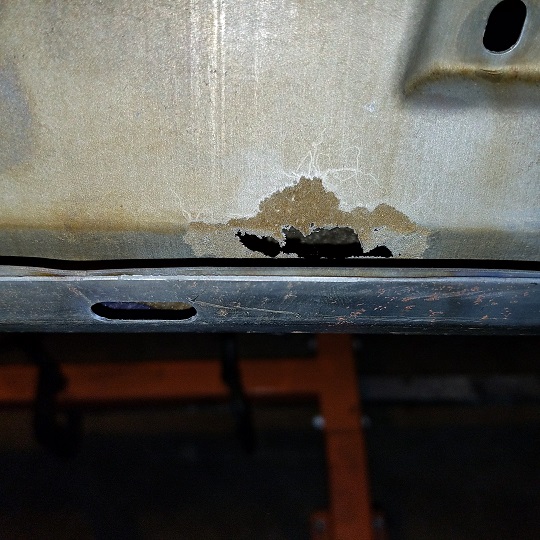 Having some fun ..................... 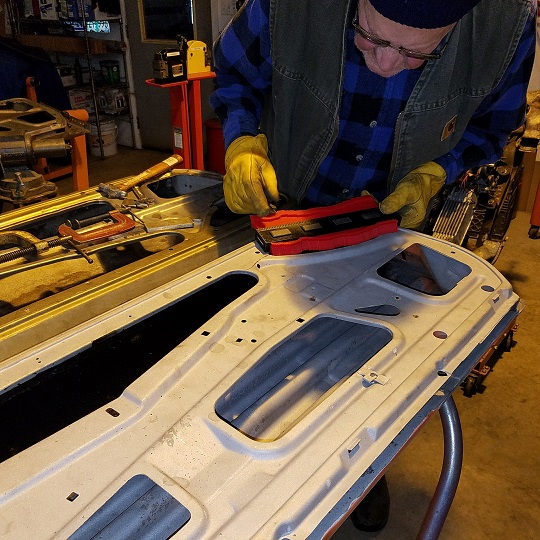 He made a tool and rolled the flange back up. 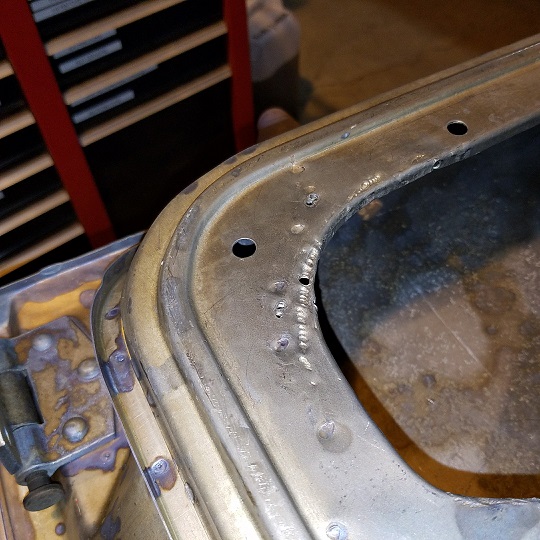 Because of the radiuses the patch was created in three pieces. Some day when we have more time we'll build some bucks we can use in the press. Just a friendly reminder I don't charge for Super In Law's time. At the end of the day I took over and tacked the 3 pieces together and started the fiddling and fitting. Just about ready to be welded in. 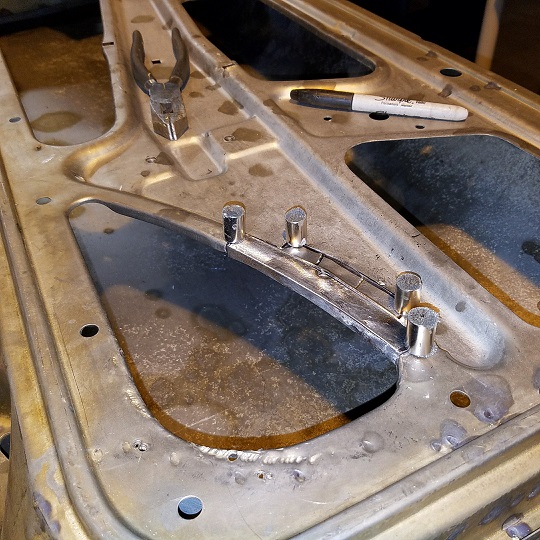 |
|
|
|
| cary |
Dec 31 2016, 11:20 PM
Post
#171
|
|
Advanced Member Group: Members Posts: 3,900 Joined: 26-January 04 From: Sherwood Oregon Member No.: 1,608 Region Association: Pacific Northwest |
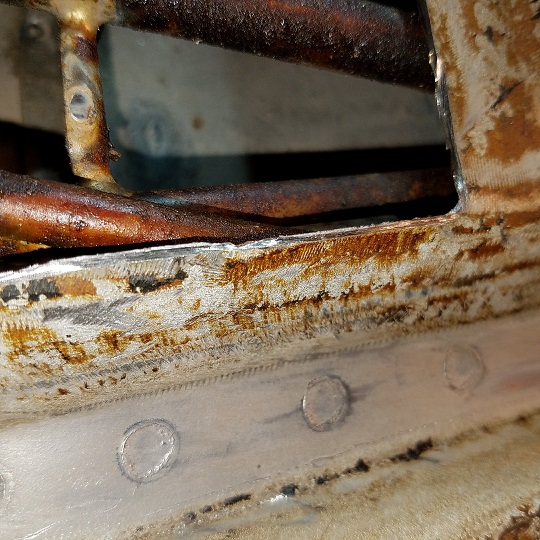
After getting him going I set about patching the hole in the hell hole.
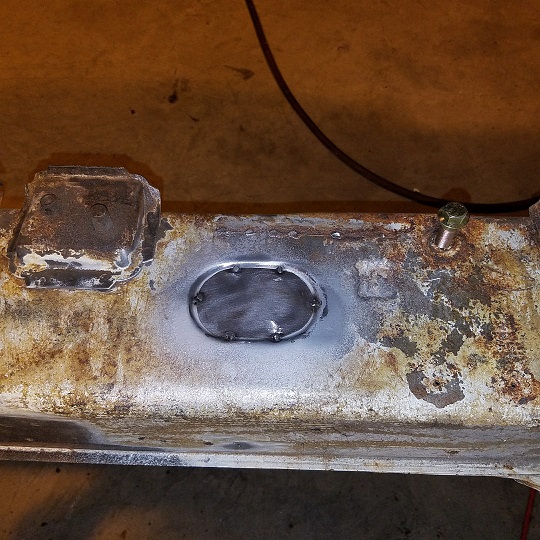
 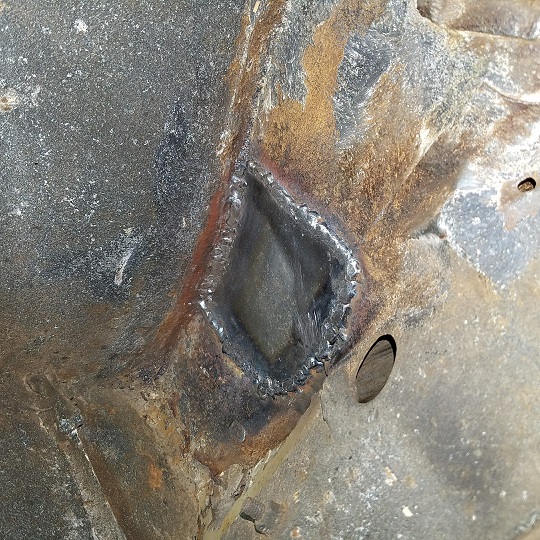 The hours of seam welding thru pockets of seam sealer on the 964 helped with the welding to the rust. (IMG:style_emoticons/default/welder.gif) After the car is media blasted the patch will be removed. Then gave it a good lather of brush on seam sealer. 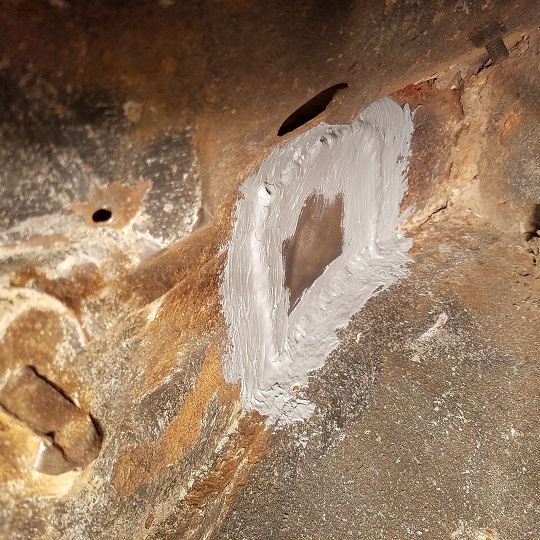 Then I repaired the window regulator ..............    |
|
|
|
| raynekat |
Jan 1 2017, 12:21 AM
Post
#172
|
|
Advanced Member Group: Members Posts: 2,171 Joined: 30-December 14 From: Coeur d'Alene, Idaho Member No.: 18,263 Region Association: Pacific Northwest |
Looking excellent there maestro welder/reconstruction team. (IMG:style_emoticons/default/wink.gif)
|
|
|
|
| cary |
Jan 14 2017, 10:55 PM
Post
#173
|
|
Advanced Member Group: Members Posts: 3,900 Joined: 26-January 04 From: Sherwood Oregon Member No.: 1,608 Region Association: Pacific Northwest |
Even though it was 20 degrees when we got up, we still headed out to Forest Grove.
First order of business was starting the fire and getting the middle shop warmed up. Within an hour I was down to a sweatshirt only. I was so excited to get back to work I didn't take any pictures before lunch. (IMG:style_emoticons/default/welder.gif) I got the left speaker hole butcher job repaired. 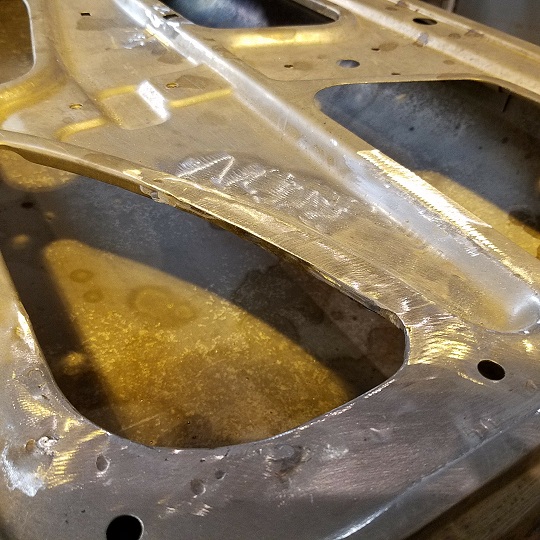 Looks like they had some issues with the cage nut. Split or cut. (IMG:style_emoticons/default/mad.gif) 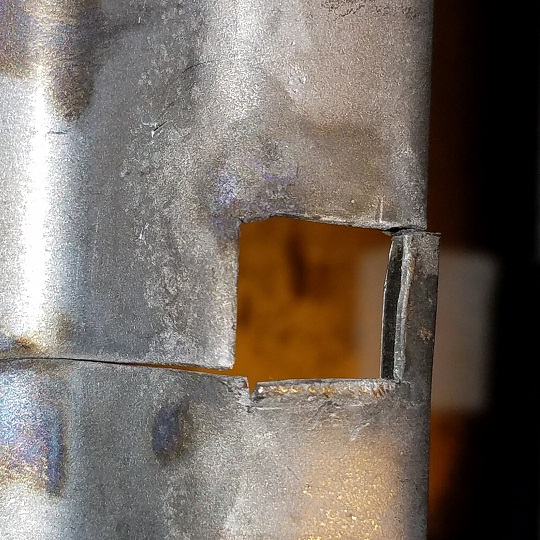 Welded that up. The left door has some good (bad) examples of why we now use weld thru primer. 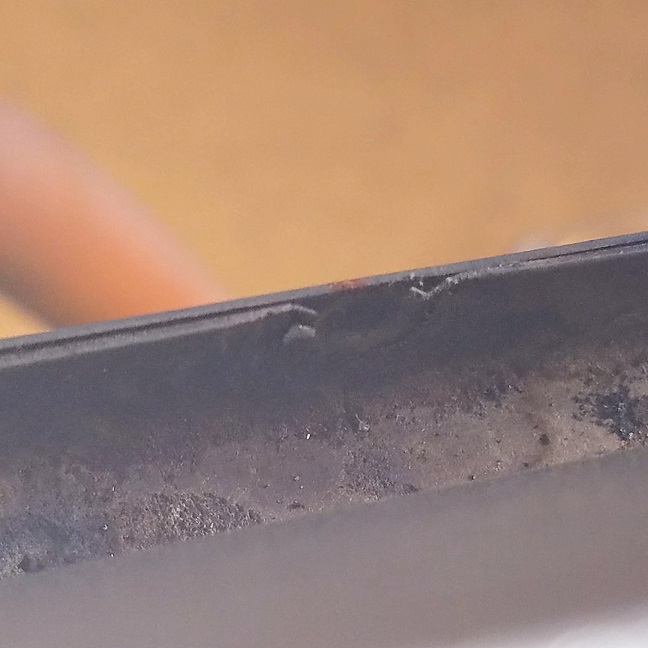 I also went over the door and filled all the sheet metal screw holes. This post has been edited by cary: Jan 18 2017, 12:55 AM |
|
|
|
| cary |
Jan 14 2017, 11:18 PM
Post
#174
|
|
Advanced Member Group: Members Posts: 3,900 Joined: 26-January 04 From: Sherwood Oregon Member No.: 1,608 Region Association: Pacific Northwest |
Then it was time to go to work on the door seal channel. It is very nice to work on these doors that have been dipped, real easy to see what needs to be done.
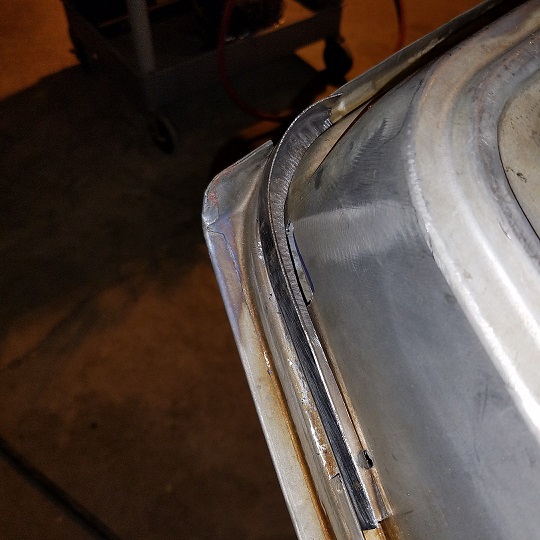
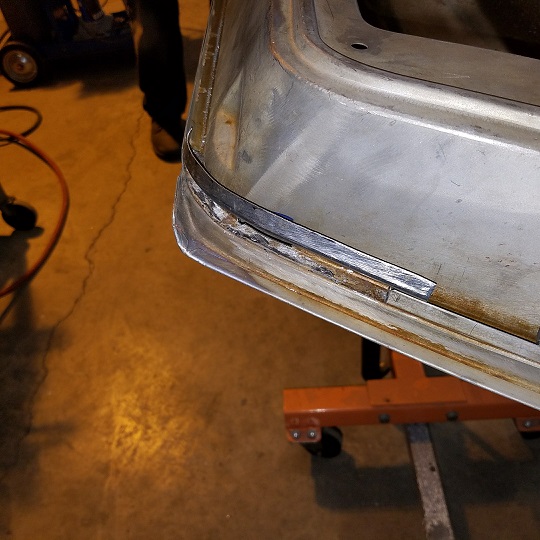
What I found pretty much replicates what I found on both mine and Mark's project car. Four spots rusted thru. One 3" section of degradation. So I elected to make one long patch piece. Rather than 4 small ones. It will easier to keep the weld nice and flat.  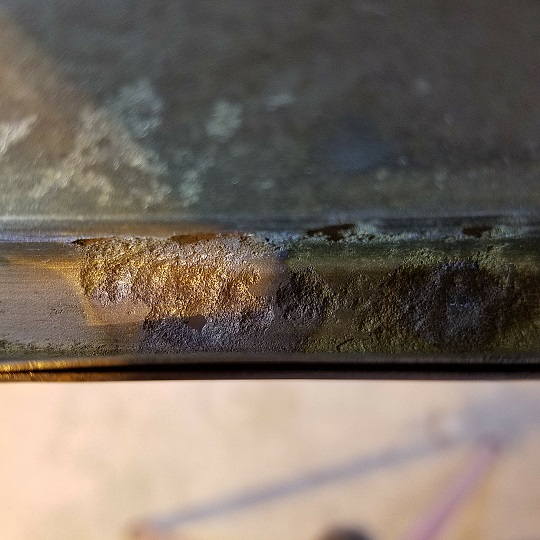 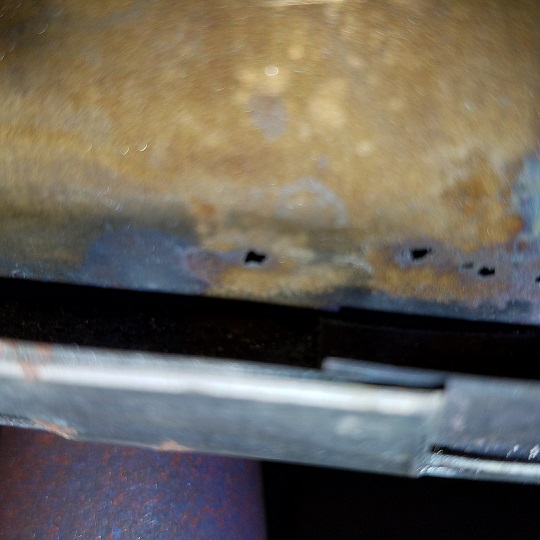 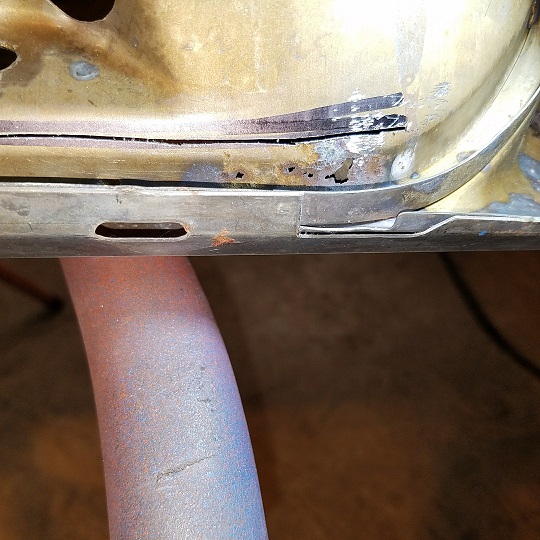 Here's a shot of the area cut out. 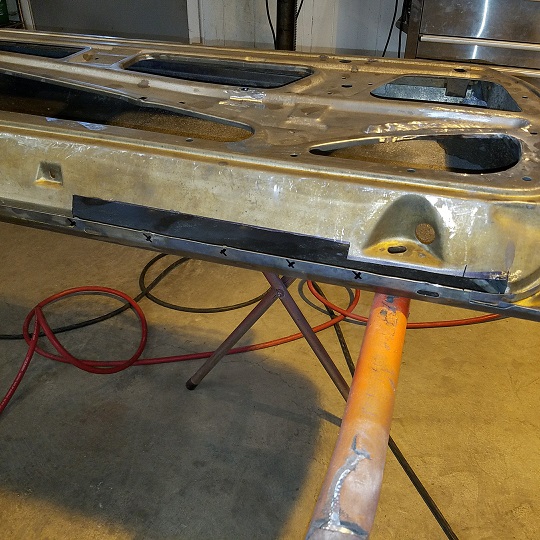 Patch piece is fabricated and ready to be trimmed up. X's show the location of the spot welds. After the patch is fitted I'll drill out the spot weld locations with the 1/4" Rotacut. This post has been edited by cary: Jan 18 2017, 12:59 AM |
|
|
|
| raynekat |
Jan 15 2017, 04:10 AM
Post
#175
|
|
Advanced Member Group: Members Posts: 2,171 Joined: 30-December 14 From: Coeur d'Alene, Idaho Member No.: 18,263 Region Association: Pacific Northwest |
Cary, I'm happy you're working on my car.
Your care and expertise is easy to see. Very happy you are taking all this care and knowledge to fix my car up correctly. I owe you and your father in law a lot of beers and a great dinner one day.... Thx Man.... |
|
|
|
| cary |
Jan 18 2017, 01:22 AM
Post
#176
|
|
Advanced Member Group: Members Posts: 3,900 Joined: 26-January 04 From: Sherwood Oregon Member No.: 1,608 Region Association: Pacific Northwest |
Monday 1/16/17
Here's a shot of the repair patch on the right door that was done on Saturday. 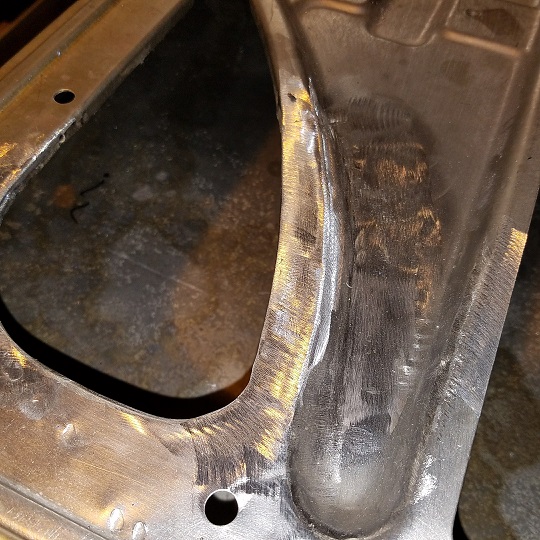 Here's the next butchered up area we'll get after. 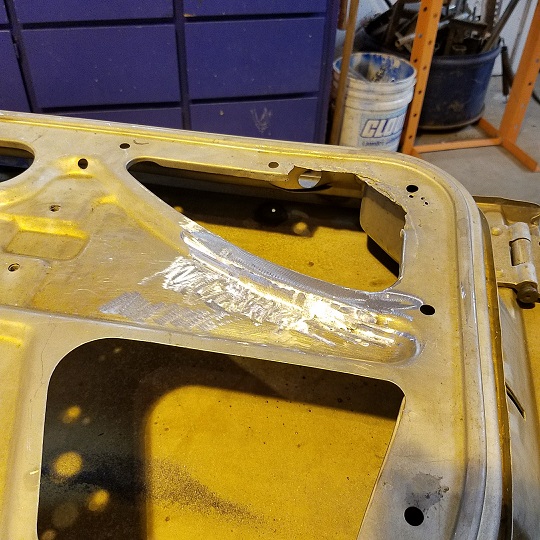 Spent the day welding in the left door seal channel patch. Slow and steady wins the race. Hammer and dolly'd to maintain a flat surface. 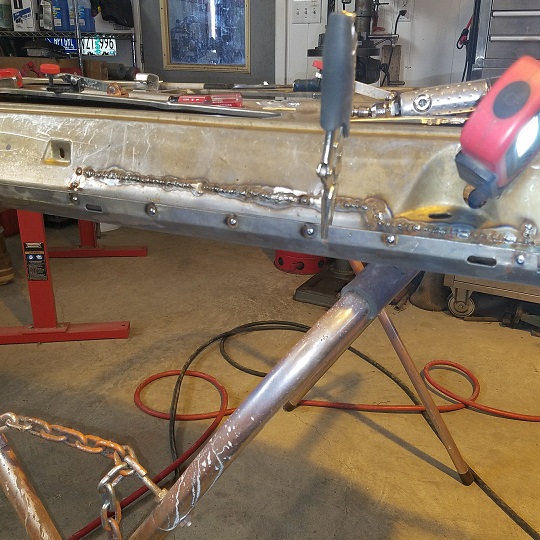 1/8" spot welds. Welding the patch back to the door frame. A shot of the bottom right corner after grinding and sanding. 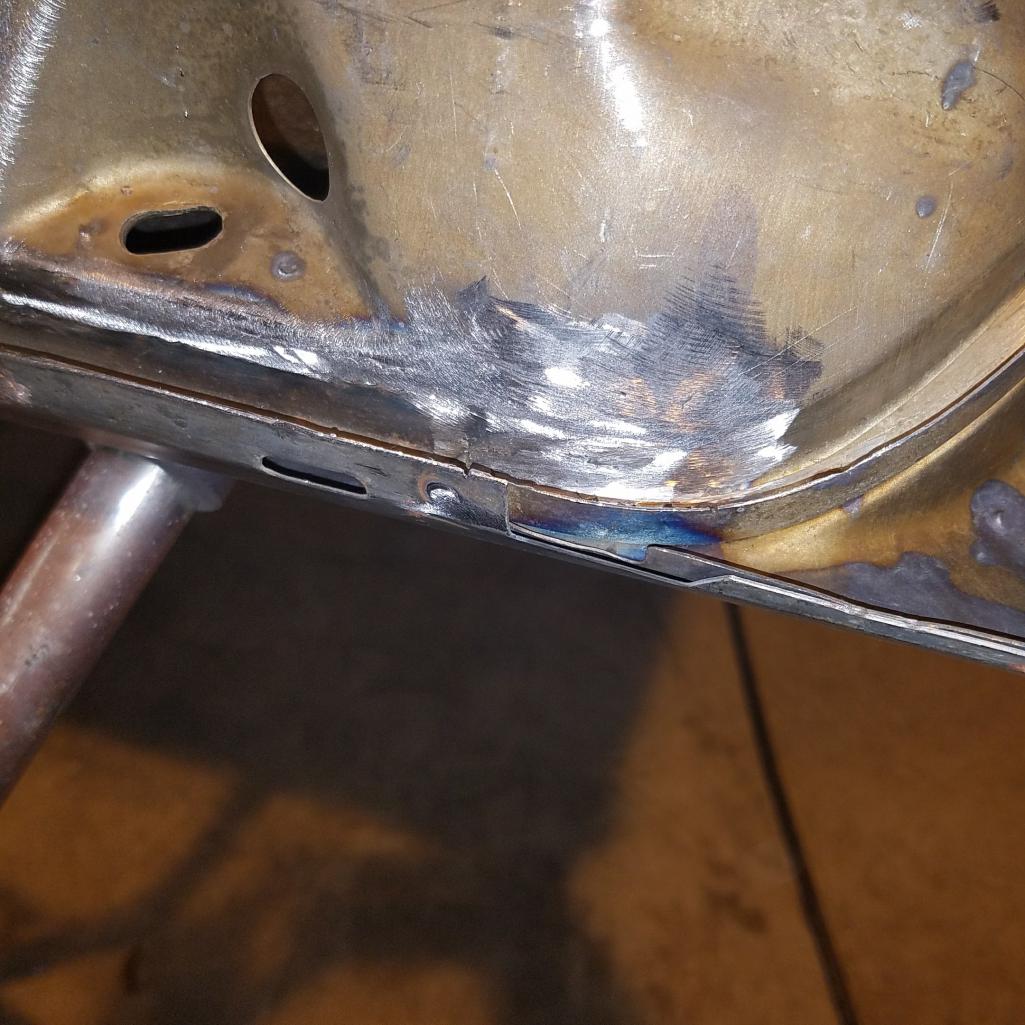 Was about ready to return it to the storage rack when I found a couple holes. Not exactly sure what they were for. Maybe they were going to pull out the dent under them with a slide hammer. But never did the pulling. Just filled it with mud. Got out woody woodpecker and starting working the dent. 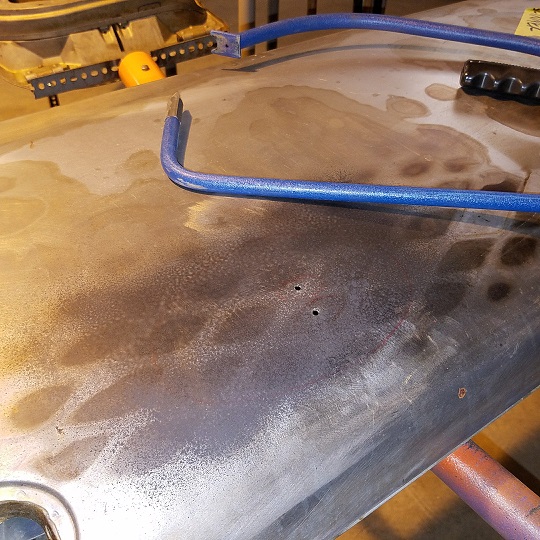 |
|
|
|
| cary |
Jan 25 2017, 12:06 AM
Post
#177
|
|
Advanced Member Group: Members Posts: 3,900 Joined: 26-January 04 From: Sherwood Oregon Member No.: 1,608 Region Association: Pacific Northwest |
Snuck out Sunday afternoon for a 1/2 day.
Went to work on the damaged upper portion of the speaker hole on the right door. I don't get why it had all the hammer and punch marks too. Oh well, we'll just fill them in. Super In Law cut out the patch in two pieces. It's been a while since we used the shrinker/stretcher. 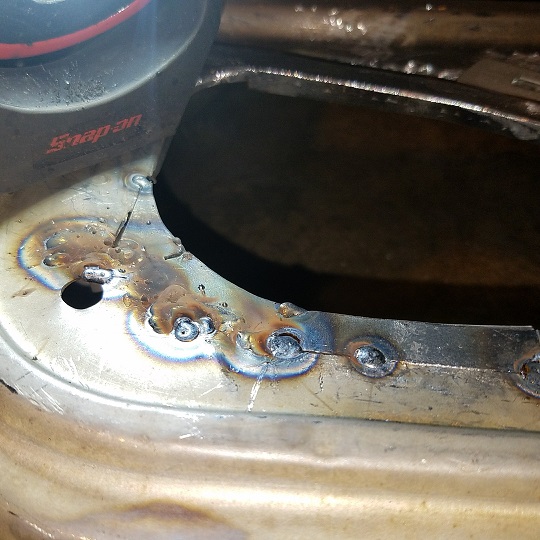 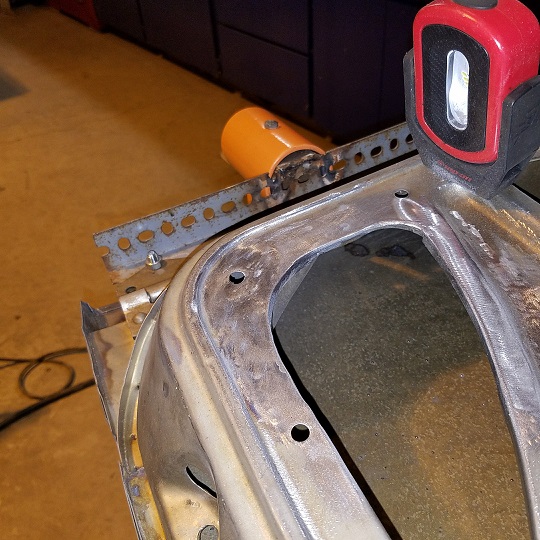 Next on to surveying the rust damage to the seal channel. Once again, I'd like to say how nice it is to work on this stripped door. Best I could tell the metal under the channel wasn't damaged. So I decided to remove just the channel flange. 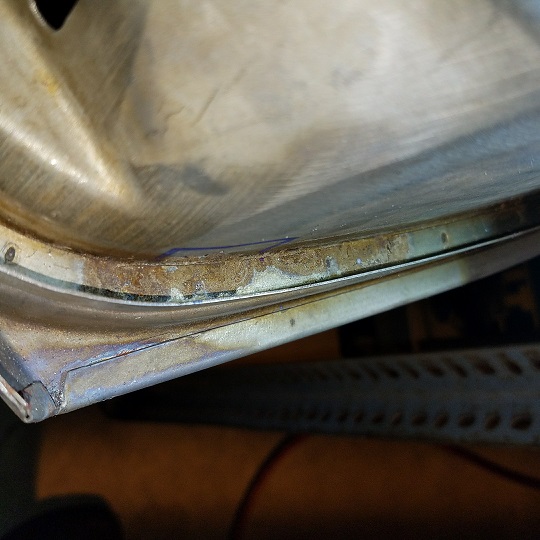 The only issue was figuring how to cut the section out. So I decided to go old school. Drilled a starter hole, just like you would for a jigsaw cut. Except being metal I can weld the hole and slice closed. 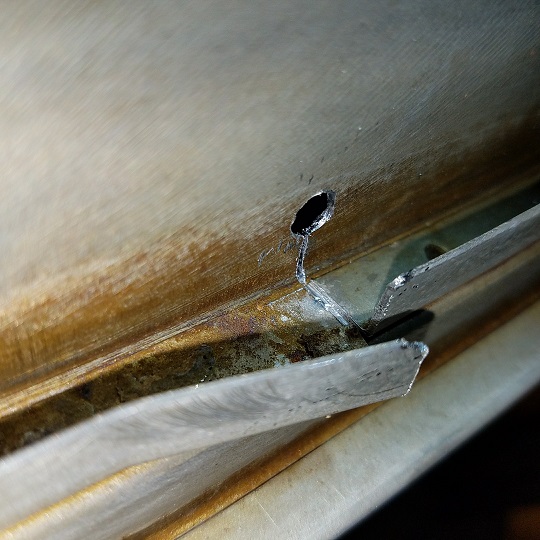 Once again I cut down the spot welds with the cutting disc on the mandrel. We'll start calling it the Johnny wheel. After cutting it almost down to the parent material I pop it off with the narrow wood chisel.  Then onto the other end. 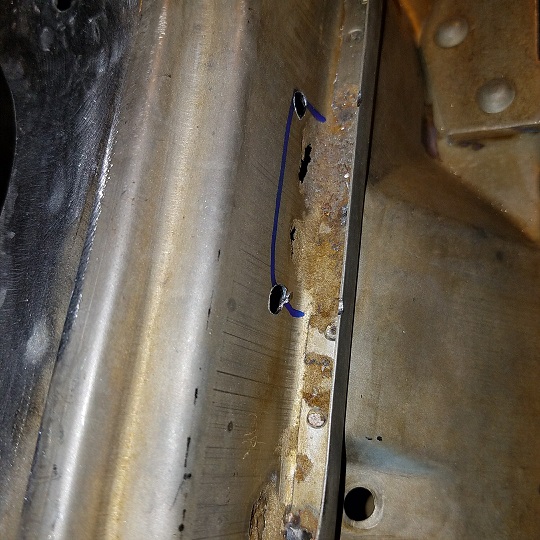 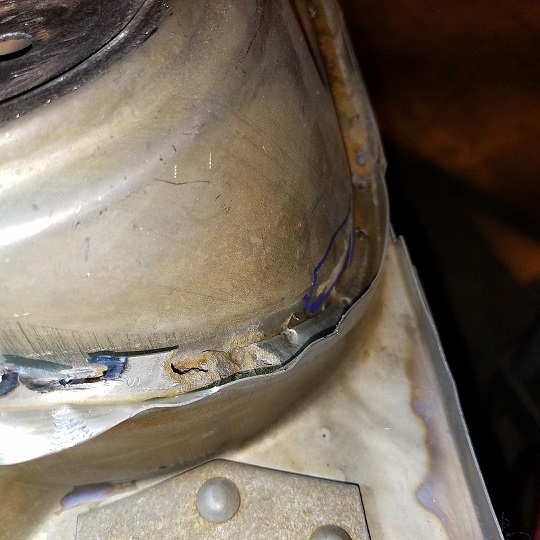 End cut. 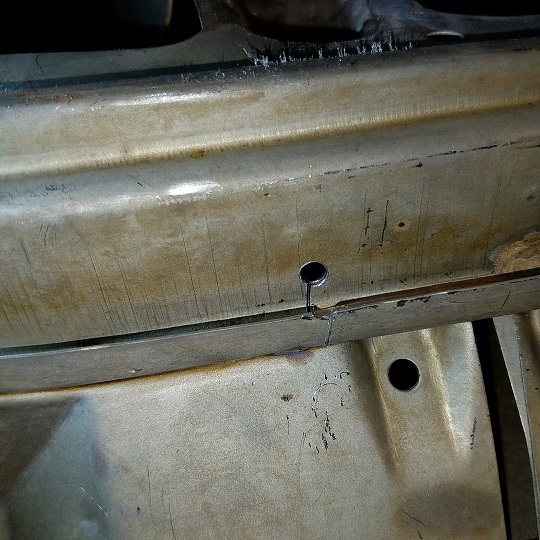 First patch was in a double layered area. (IMG:style_emoticons/default/mad.gif) I delicately cut open the outer layer. 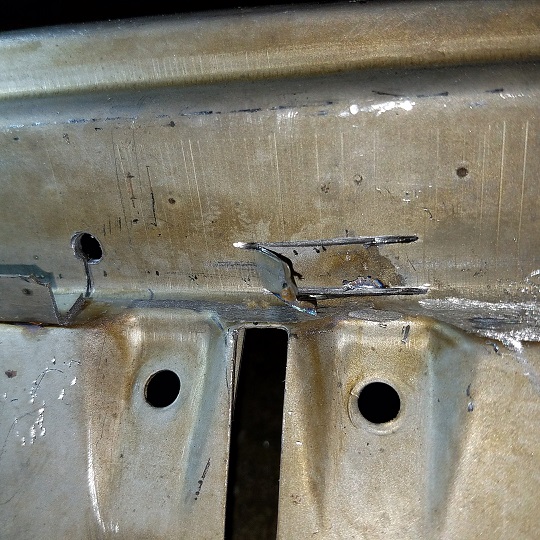 Using the same method to cut out the rusted sections. This will allow me to make smaller patches. 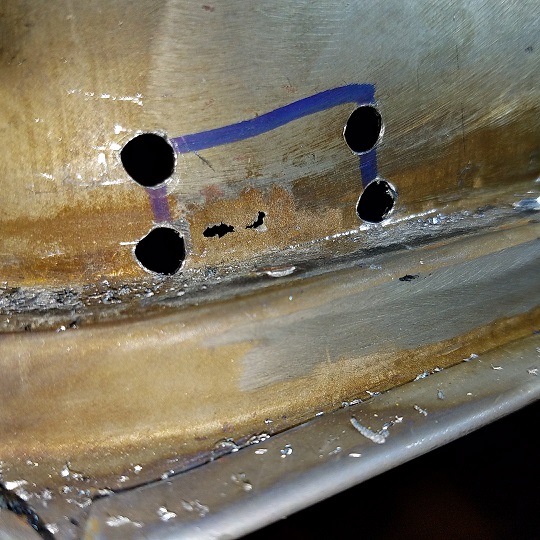 |
|
|
|
| cary |
Jan 25 2017, 12:10 AM
Post
#178
|
|
Advanced Member Group: Members Posts: 3,900 Joined: 26-January 04 From: Sherwood Oregon Member No.: 1,608 Region Association: Pacific Northwest |
While I'm working over the door. Super In Law was creating the new seal channel with the shrinker.
  |
|
|
|
| cary |
Jan 27 2017, 08:48 AM
Post
#179
|
|
Advanced Member Group: Members Posts: 3,900 Joined: 26-January 04 From: Sherwood Oregon Member No.: 1,608 Region Association: Pacific Northwest |
Three holes down, four to go.
 |
|
|
|
| cary |
Feb 2 2017, 11:50 PM
Post
#180
|
|
Advanced Member Group: Members Posts: 3,900 Joined: 26-January 04 From: Sherwood Oregon Member No.: 1,608 Region Association: Pacific Northwest |
Finally getting back to Doug's car. Between the workload at Rothsport and cold weather I'm getting behind the schedule I'd proposed. (IMG:style_emoticons/default/sad.gif)
Got the fire started and got to work ................. Left Super In Law at home. We have company from Minnesota visiting. 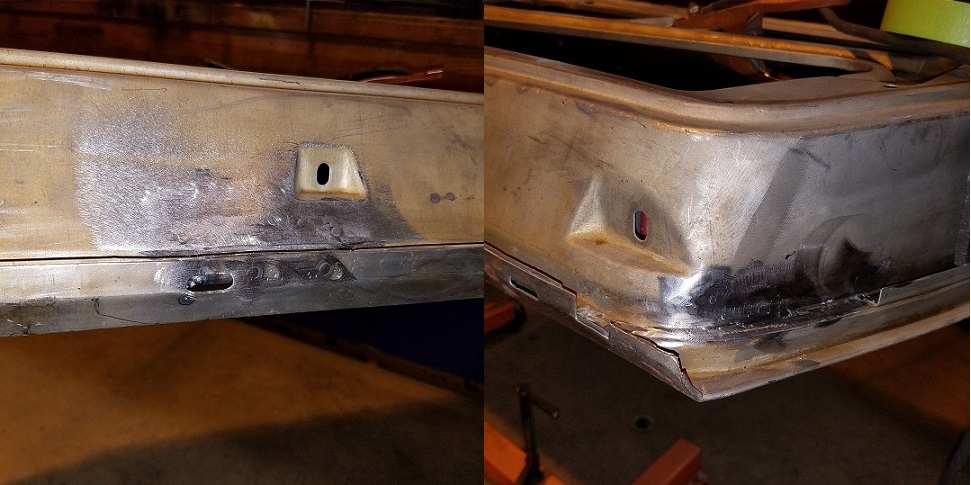 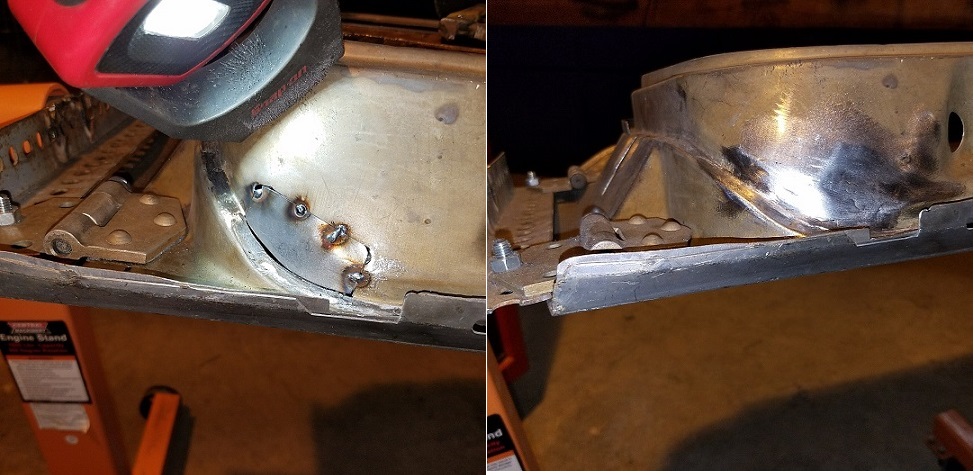 All of the holes I cut out have been patched and welded up. All that remains is the two pieces of channel .................... I'll weld in the small piece SIL created last week, tomorrow. I did also weld up a split out hole that holds the inner window seal. 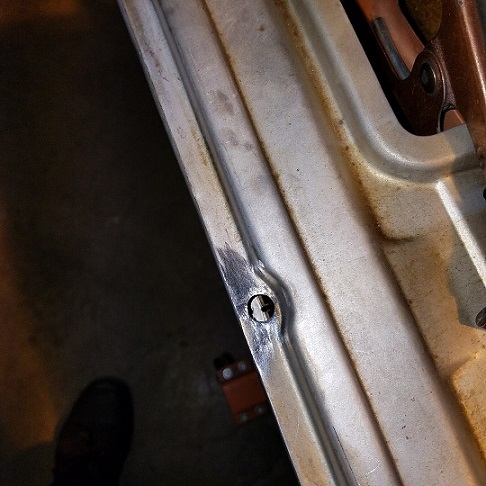 Doug stopped by right before lunch to check on the progress. At the end of the visit we kind of came to the consensus that I'll probably be doing the blasting/stripping myself. Looks like I might be ordering a Texas Blaster. https://www.texasblaster.com/index.php?disp...p;product_id=25 I guess we'll be giving my new air compressor its first test. Doug also brought a couple brake dust shields that had split out bolt holes. Welded those up so he can get them powder coated. |
|
|
|
|
1 User(s) are reading this topic (1 Guests and 0 Anonymous Users)
0 Members:

|
Lo-Fi Version | Time is now: 17th July 2026 - 06:54 PM |
Invision Power Board
v9.1.4 © 2026 IPS, Inc.