|
|
|
Porsche, and the Porsche crest are registered trademarks of Dr. Ing. h.c. F. Porsche AG.
This site is not affiliated with Porsche in any way. Its only purpose is to provide an online forum for car enthusiasts. All other trademarks are property of their respective owners. |
|
|

  |

| cary |
 Feb 3 2017, 11:53 PM Feb 3 2017, 11:53 PM
Post
#181
|
|
Advanced Member  Group: Members Posts: 3,900 Joined: 26-January 04 From: Sherwood Oregon Member No.: 1,608 Region Association: Pacific Northwest |
Livin the Dream ........................
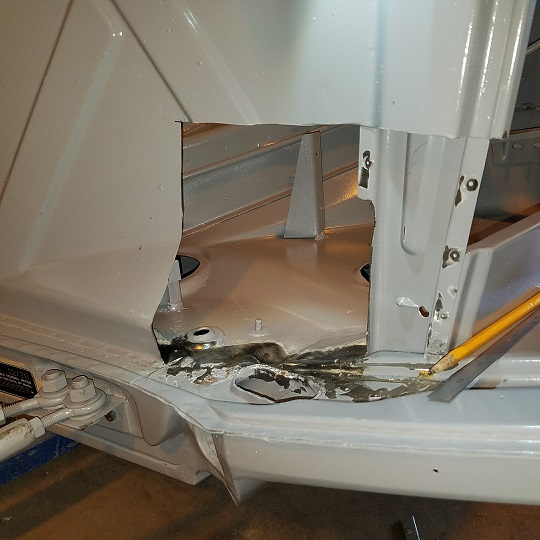
Ran out to Kleen Blast in North Portland to pick up some Garnet for the blast cabinet. Drove thru the Freezing Rain I-5 carnage on my way. Other than the debris on the side of the road, the drive was uneventful. Lit a fire and started a 1/2 pot of coffee when I arrived. (IMG:style_emoticons/default/biggrin.gif) Time to get to work ......................... 1st. order of business was to spot weld in the first replacement door seal channel. 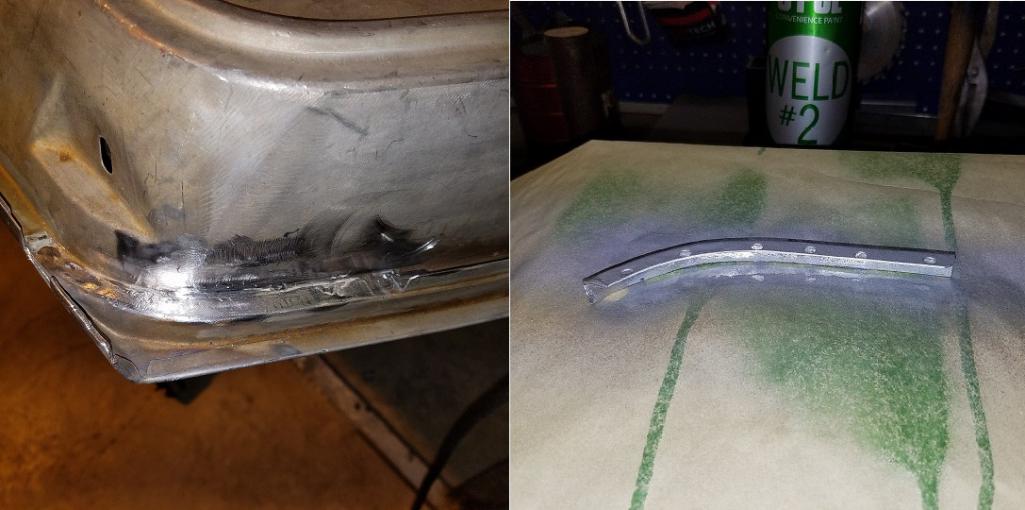 Gave the bottom of the channel patch a shot of weld thru primer. Should be good for another 50 years. 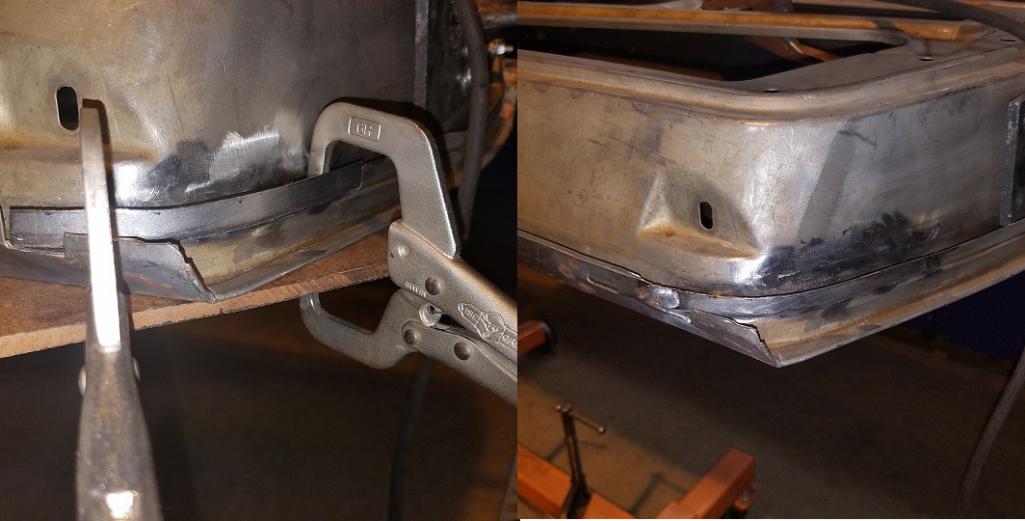 You'll notice the plywood backer against the door skin to keep from dimpling the skin. Then I welded up the split/cracked window seal fastener hole on the right door. 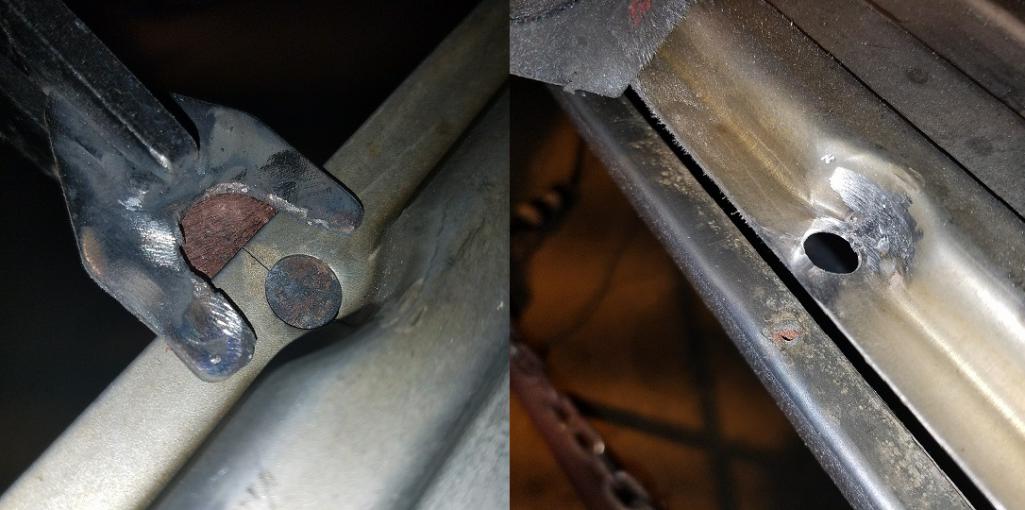 Doug, I found another drilled hole on the left door ................ (IMG:style_emoticons/default/idea.gif)  Then I cut out the 5th rust spot. This time the seal channel is in the way. (IMG:style_emoticons/default/mad.gif) 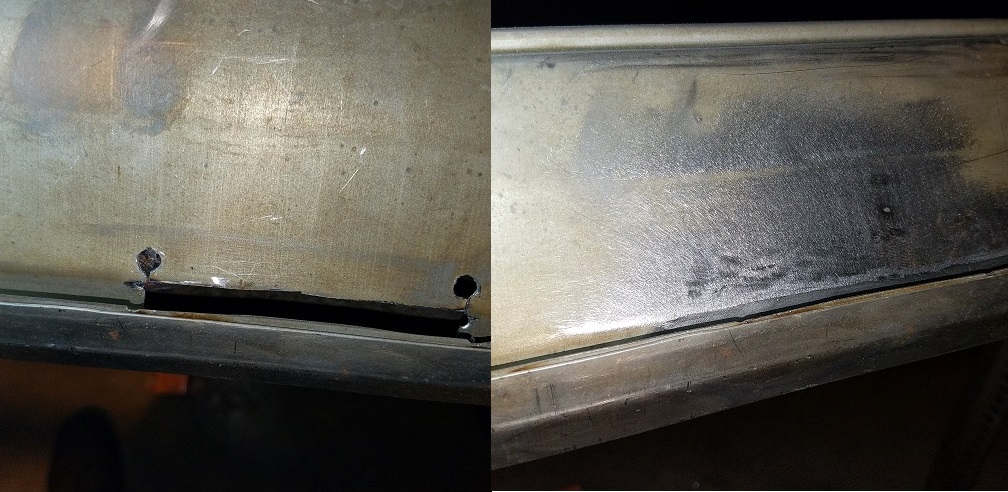 At the end of the day I started tinkering with seal channel patch #2. Looks almost like a roller coaster ................ Follow the yellow line. 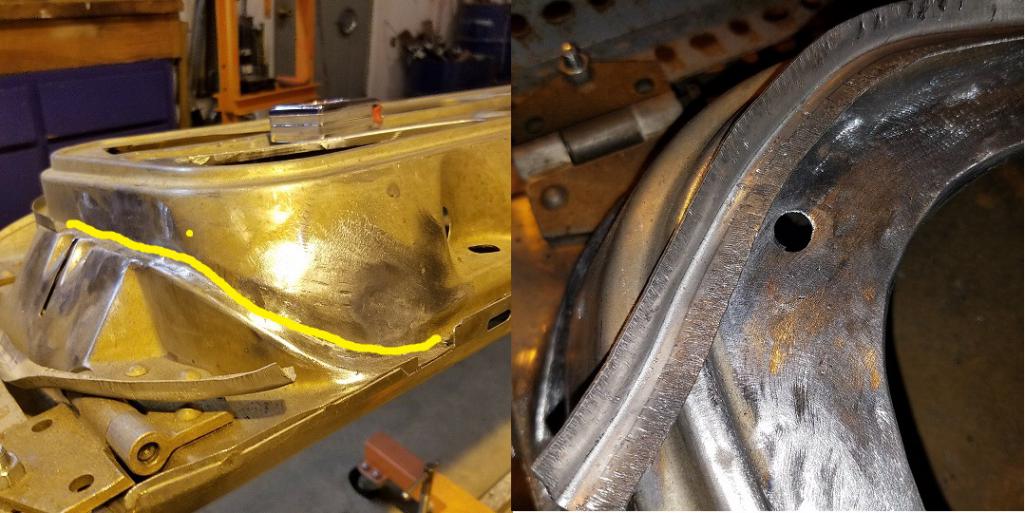 All in all a very productive 1/2 day ...................... (IMG:style_emoticons/default/smile.gif) |
   |

 
|
| cary |
Mar 6 2017, 12:14 AM
Post
#182
|
|
Advanced Member Group: Members Posts: 3,900 Joined: 26-January 04 From: Sherwood Oregon Member No.: 1,608 Region Association: Pacific Northwest |
Sunday March 5th.
Doug came out to do a little more undercoating removal before I deliver the car to our NEW media blaster in the am.  He brought his new to him 914-6 engine tin out so I can take it along to the media blaster. Once blasted it will get a little more tuning up before getting powder coated.  He also brought me a new to him LEISTRITZ muffler out for a little dent removal. 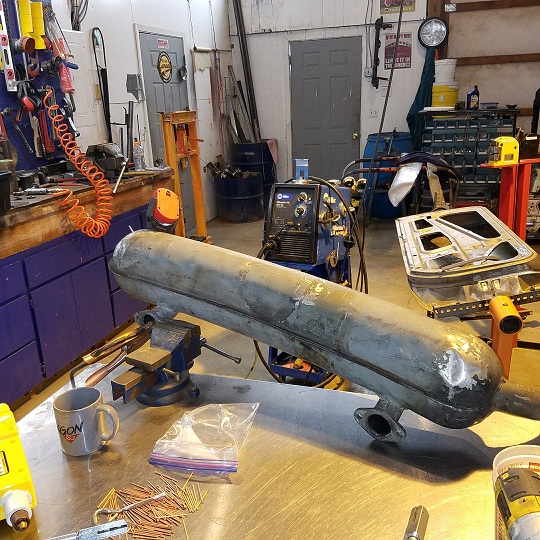 |
|
|
|
| cary |
Mar 6 2017, 07:58 PM
Post
#183
|
|
Advanced Member Group: Members Posts: 3,900 Joined: 26-January 04 From: Sherwood Oregon Member No.: 1,608 Region Association: Pacific Northwest |
Finally ............................. (IMG:style_emoticons/default/cheer.gif) (IMG:style_emoticons/default/cheer.gif)
I dropped the car off at the new media blasters this morning. Impressive shop. Nice and tidy. Hopefully done by Friday .............. I noticed everything in his shop in epoxy primered. So I asked, does he spray epoxy too? Answer, No but my brother has a booth on the other side of Sherwood. They neutralize the soda first, then spray two coats of epoxy. I'll let Doug discuss it with him. |
|
|
|
| cary |
Mar 12 2017, 10:00 PM
Post
#184
|
|
Advanced Member Group: Members Posts: 3,900 Joined: 26-January 04 From: Sherwood Oregon Member No.: 1,608 Region Association: Pacific Northwest |
Stopped by the blaster on the way home from instructing at the Tire Street Survival event at PIR.
 Was treated with Hold Tight this afternoon. 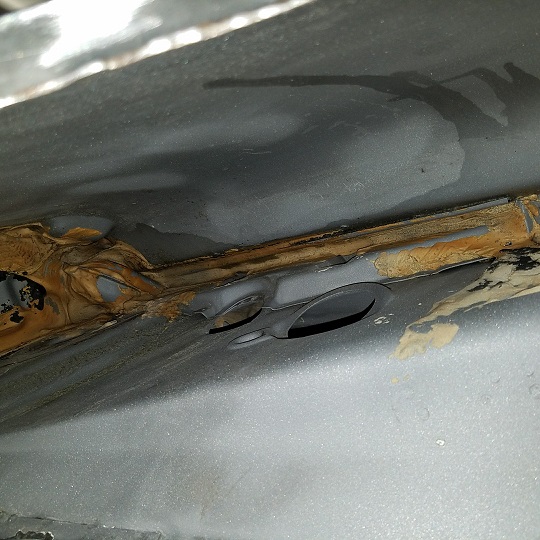 Fender that will contain the oil tank. 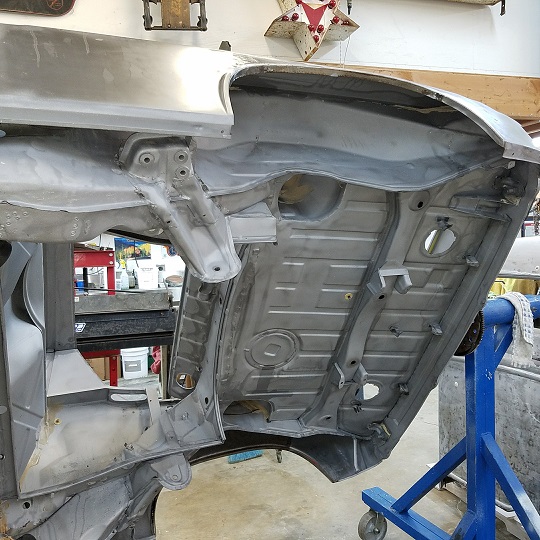 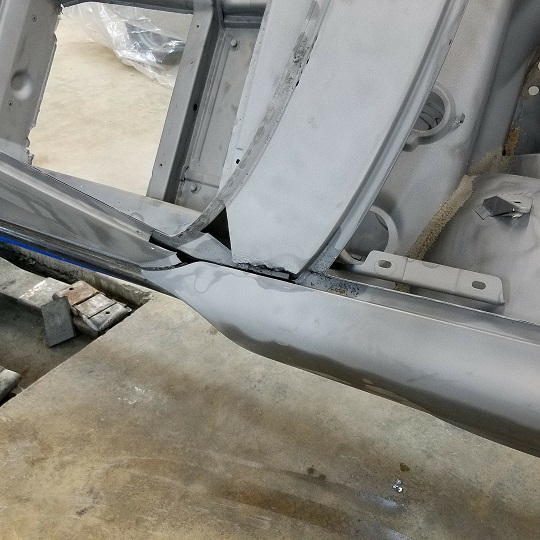 |
|
|
|
| raynekat |
Mar 13 2017, 05:42 PM
Post
#185
|
|
Advanced Member Group: Members Posts: 2,171 Joined: 30-December 14 From: Coeur d'Alene, Idaho Member No.: 18,263 Region Association: Pacific Northwest |
QUOTE(cary @ Mar 12 2017, 09:00 PM)  All this yellow-tan looking stuff is just seam sealer. I thought it was the foam that the factory puts up in the rear corners at first. Nothing to worry here...just funny how cameras distort colors at times. Will be getting epoxy primed in the next couple days, then back to Cary's shop to finish out the rest of the metal work. Main things are finishing up the floors and doing the repairs around the windshield cowling. |
|
|
|
| cary |
Mar 17 2017, 09:41 PM
Post
#186
|
|
Advanced Member Group: Members Posts: 3,900 Joined: 26-January 04 From: Sherwood Oregon Member No.: 1,608 Region Association: Pacific Northwest |
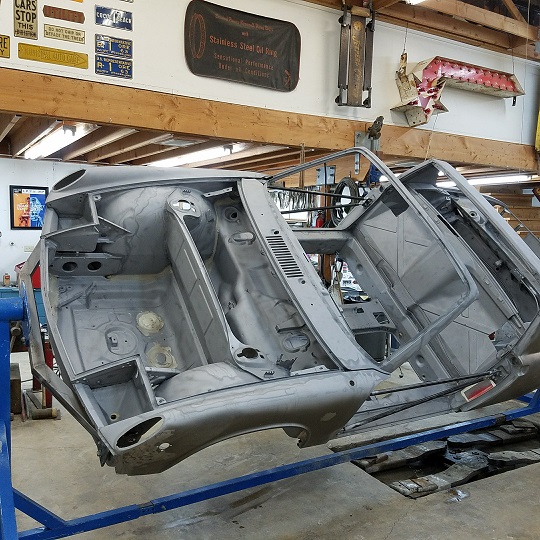
Today was the big day. Time to pick up the car from the paint booth. (IMG:style_emoticons/default/piratenanner.gif)
The car looked stunning. Another stroke of luck, the blaster/primer painter shot the car with the same SPI primer I use.  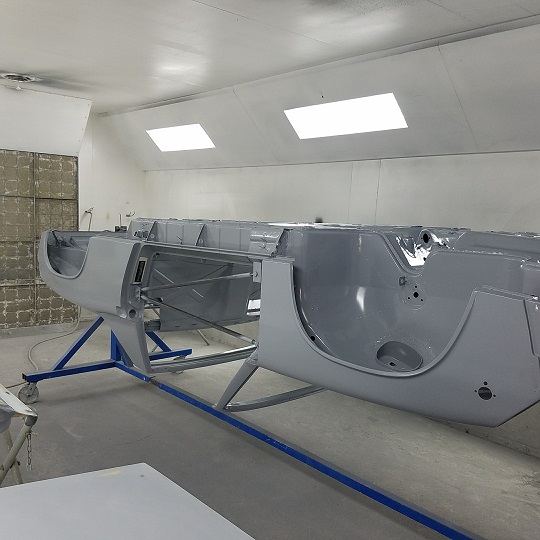 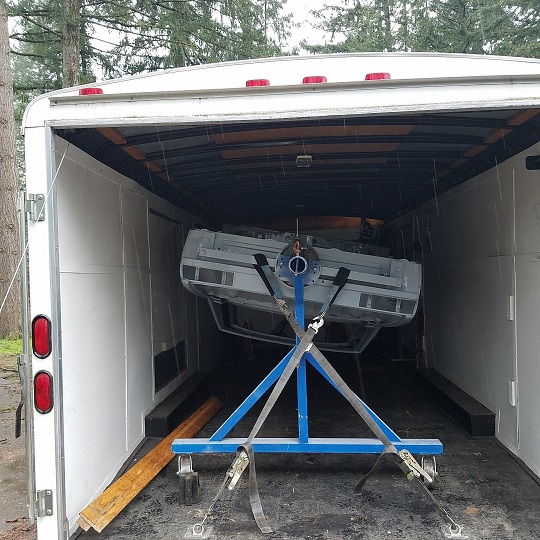 |
|
|
|
| cary |
Mar 18 2017, 07:44 AM
Post
#187
|
|
Advanced Member Group: Members Posts: 3,900 Joined: 26-January 04 From: Sherwood Oregon Member No.: 1,608 Region Association: Pacific Northwest |
A couple shots after being unloaded into my shop.
No real surprises after being blasted. A few screw/bolt holes here and there. A couple more soft dents. Hell hole is better than I thought it would be. I'll still need a Mad Dog kit. Chomping at the bit to get going ............ tried to take Monday off at Rothsport, no go. Fender liners and mud flaps before the following weeks testing. 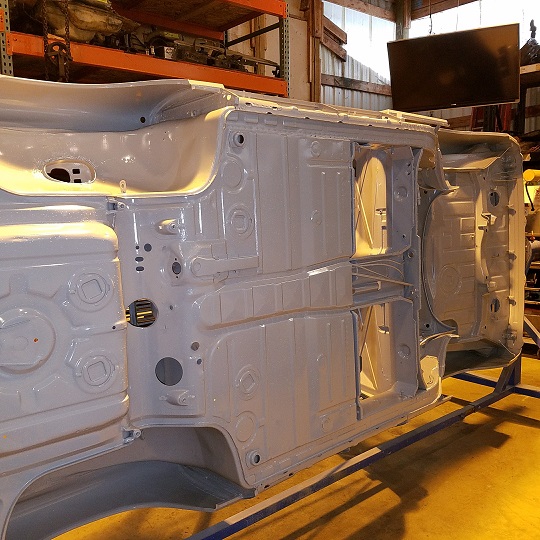 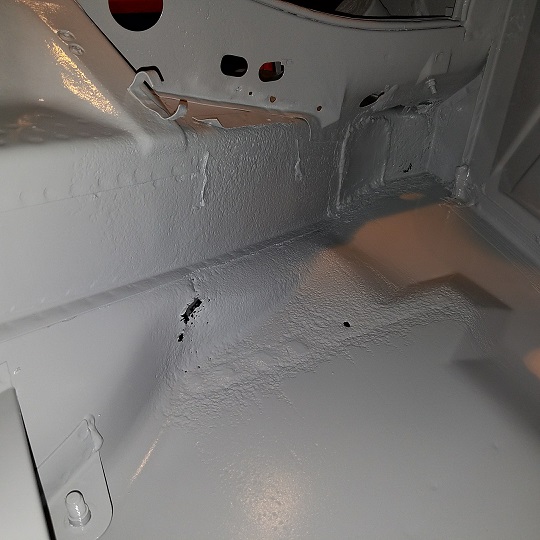 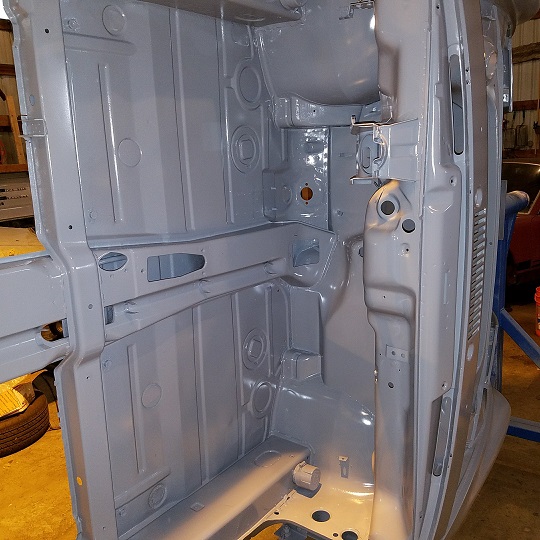 Up early to retrieve Matt Whitesell's car from the paint shop. 8am appointment. http://www.914world.com/bbs2/index.php?s=&...t&p=2464316  |
|
|
|
| cary |
Mar 19 2017, 11:25 PM
Post
#188
|
|
Advanced Member Group: Members Posts: 3,900 Joined: 26-January 04 From: Sherwood Oregon Member No.: 1,608 Region Association: Pacific Northwest |
Finally back to work .....................
Started with the sheet metal hole cutting test for the oil filter. I used the hood off the POS parts cars that was cut into pieces. The outside edges were totally rotten. Started with the 3 7/8 hole. The grommet fits, but the oil filter won't go thru it. This is the one we thought would work. The seal alone would not slide around the hole.  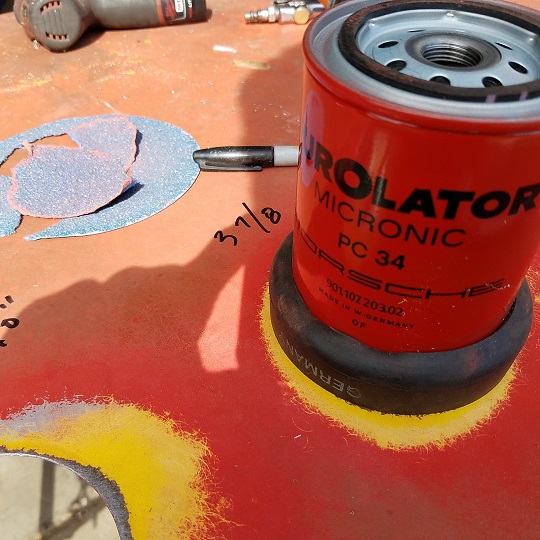 The next one was 4". Empty, the seal would slide around the hole. The oil filter would slide in but the not pass entirely thru. It would hang up on rolled bottom lip. 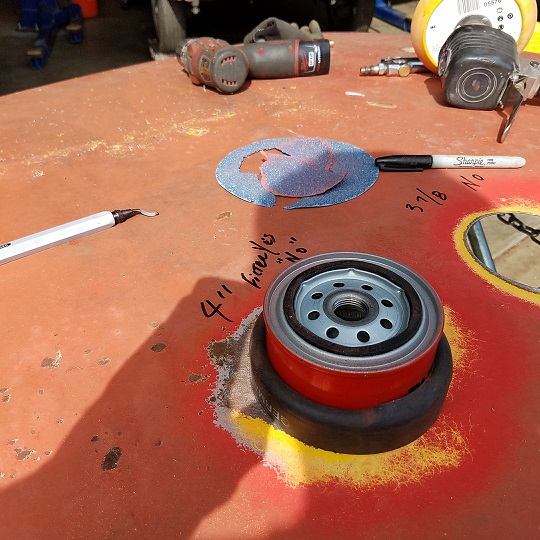 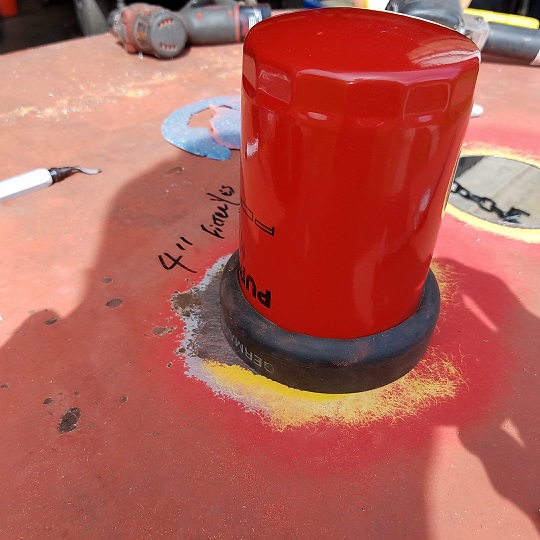 But it would pass thru the seal with a light application of Sil-Glyde. I think once the seal heat cycles a few times it will be fine. I think 4 1/8th. would become to loose over time. 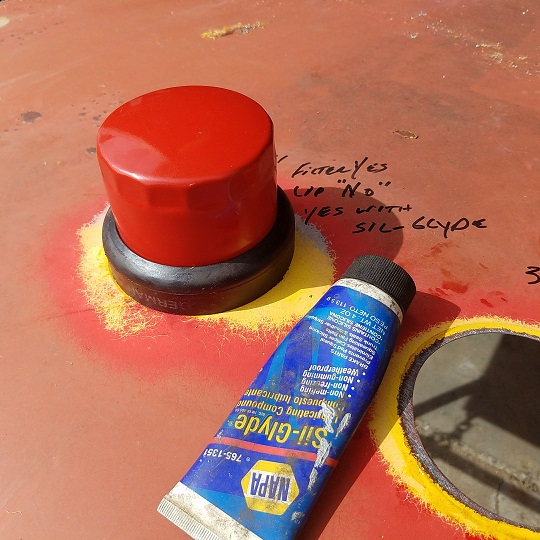 |
|
|
|
| cary |
Mar 19 2017, 11:56 PM
Post
#189
|
|
Advanced Member Group: Members Posts: 3,900 Joined: 26-January 04 From: Sherwood Oregon Member No.: 1,608 Region Association: Pacific Northwest |
Next onto filling in all the sheet metal screws holes in the trunk that were bondo'd over. I assume the battery was mounted in the trunk for a while.
 Then it was time to patch up the hacked in battery cable hole. 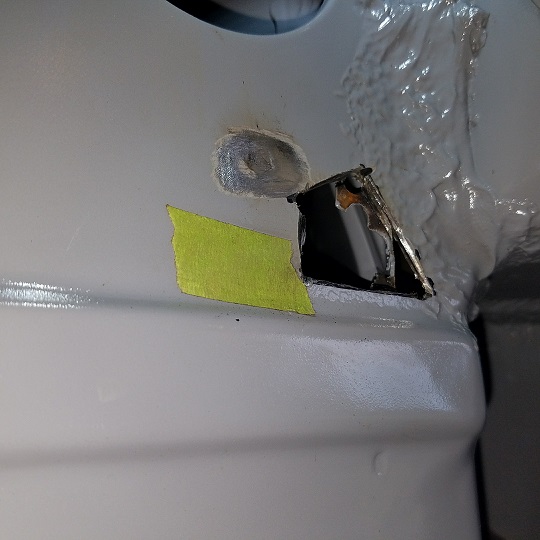 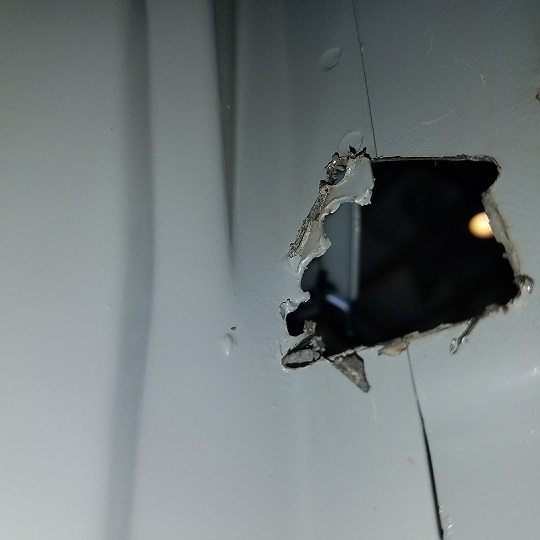 Shot from the backside, double sided seam Used the Edd China (Wheeler Dealers) tape patch pattern technique.  I decided to use the 110 volt welder for less wire and less heat. Hopefully it will have less burn back on the epoxy primer. 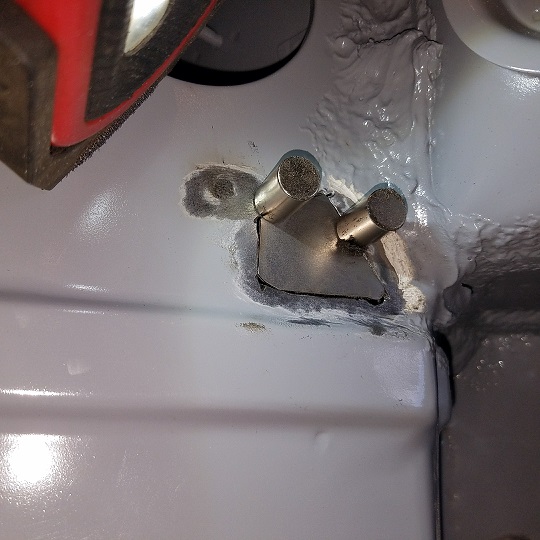 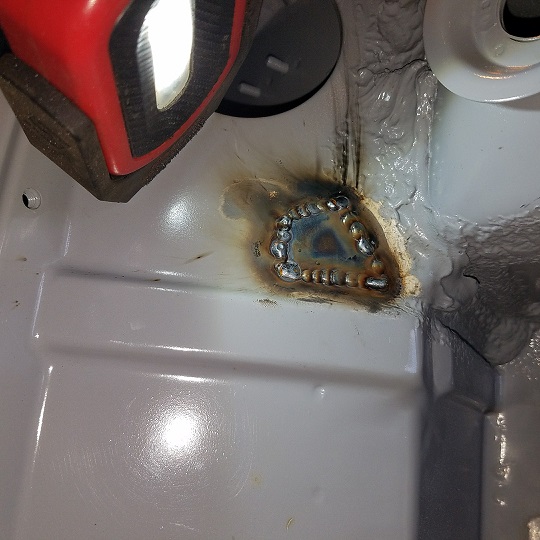 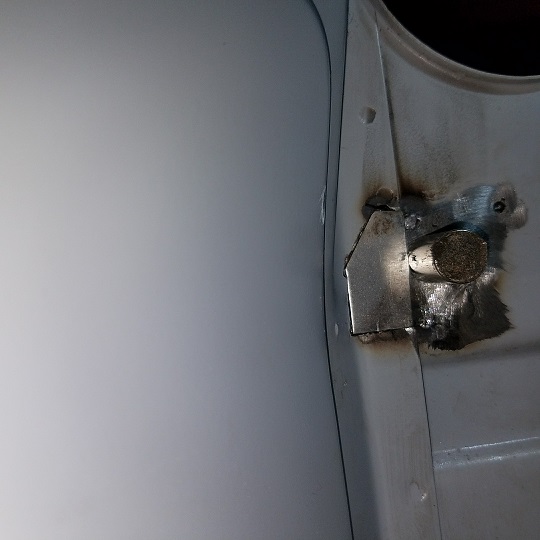 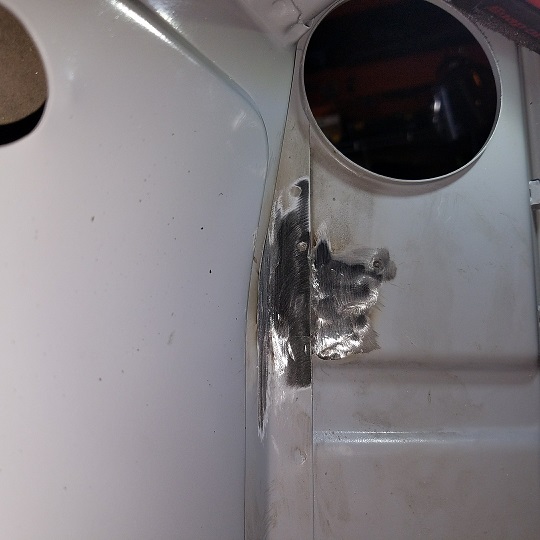 |
|
|
|
| cary |
Mar 23 2017, 07:16 PM
Post
#190
|
|
Advanced Member Group: Members Posts: 3,900 Joined: 26-January 04 From: Sherwood Oregon Member No.: 1,608 Region Association: Pacific Northwest |
Moonlighting Wednesday 3/22/17
Matt Whitesell came out to keep removing fuel and brake lines. Doug came out to check on his epoxied project. He also brought by his fuel pump and the CDI unit. Drill holes for the fuel pump bracket and do some creative addition to the battery tray for the CDI unit. I started the night with a project review with Doug. Then I proceeded to unpack the boxes of parts that need to be welded in. (IMG:style_emoticons/default/welder.gif) 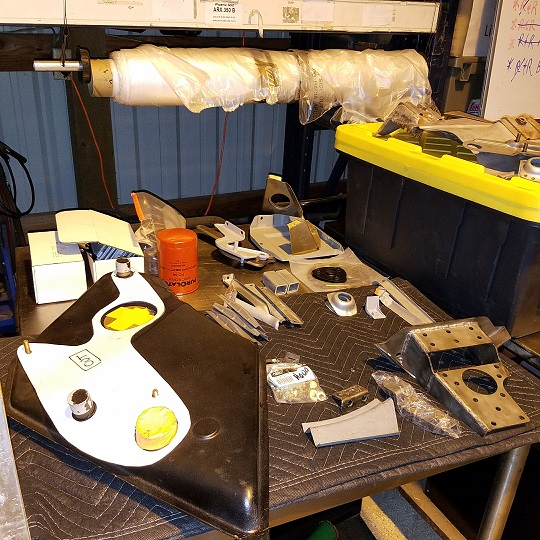 Start with welding in the pivot threaded bushing. 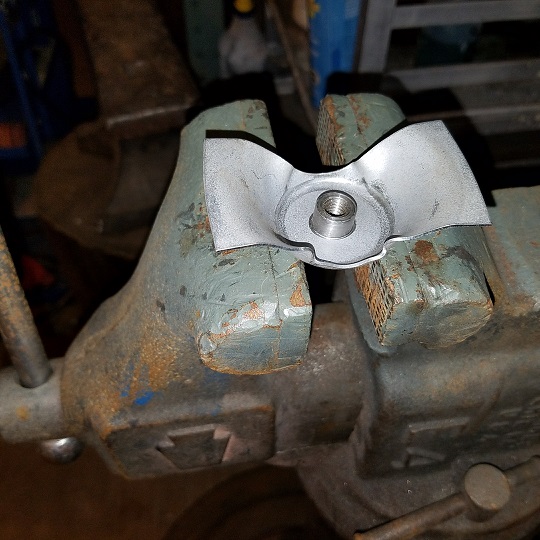 The replacement part needs a little tuning up to make it look a little more like the factory piece. Round the corners and flex it up a bit to make it the same height. 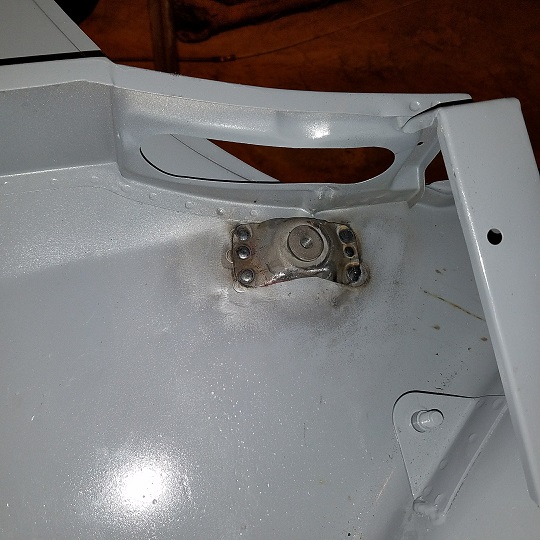 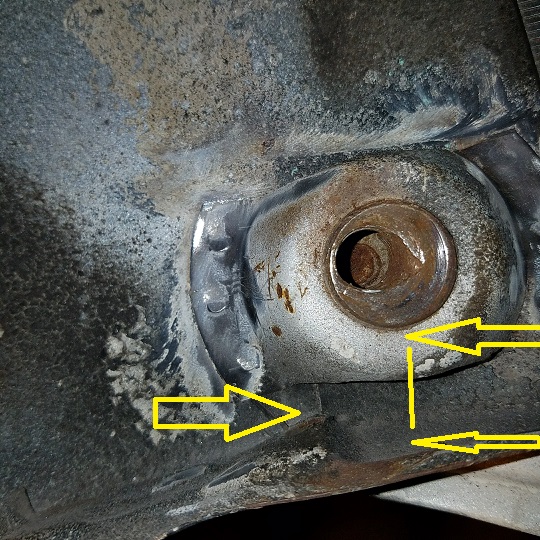 Lots of measurements to check and use for getting it in the correct location. Next ...................... rear sway bar mounts 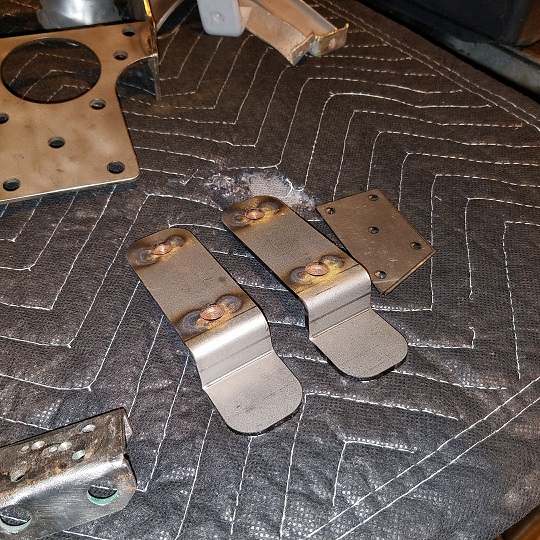 |
|
|
|
| cary |
Apr 5 2017, 08:33 AM
Post
#191
|
|
Advanced Member Group: Members Posts: 3,900 Joined: 26-January 04 From: Sherwood Oregon Member No.: 1,608 Region Association: Pacific Northwest |
I did get in a little moonlighting from my work at Rothsport. Didn't get as far as I'd have liked too. Dad's Garage oil change for the daughter. Then when we through Matt's front struts in the parts washer. It made a horrible racket and shot sparks. (IMG:style_emoticons/default/sad.gif) . So we had to pull that apart. Needs to be dropped off at the irrigation pump shop for diagnosis.
Pump and motor turn freely. I'm thinking a brush of some sort sort wore down and turned sideways. Over my pay grade ................ Decided to round up a rear sway bar and get the rear sway bar tabs correctly located and aligned. Used Matt's sway bar and Mark's brackets. The bottom of the brackets are sprayed with weld thru primer and ready for welding in tomorrow night. 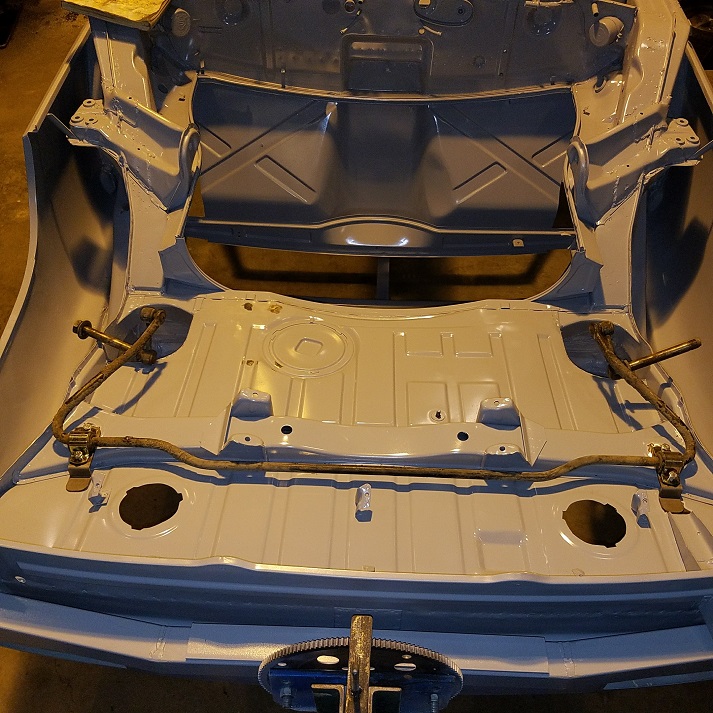 |
|
|
|
| cary |
Apr 7 2017, 08:23 AM
Post
#192
|
|
Advanced Member Group: Members Posts: 3,900 Joined: 26-January 04 From: Sherwood Oregon Member No.: 1,608 Region Association: Pacific Northwest |
Thursday 4/6/17 Moonlighting
Double checking the sway bar alignment after welding in the first side. 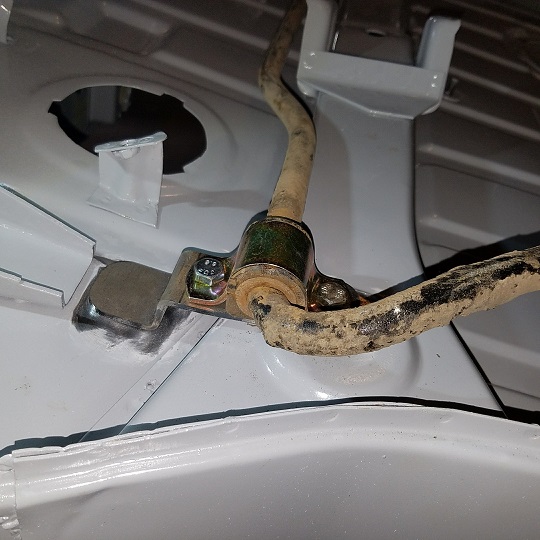 Welded into place. Once it warms up a bit I'll get everything recovered with epoxy. 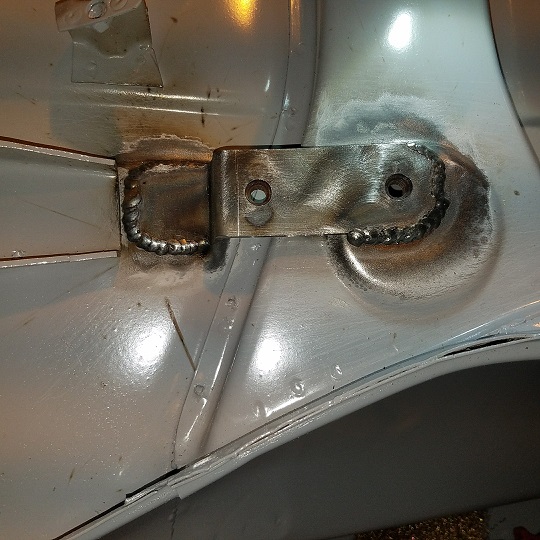 Trunk side ................. 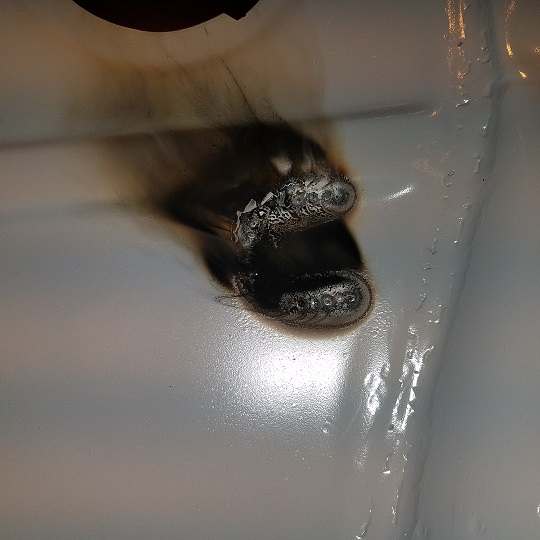 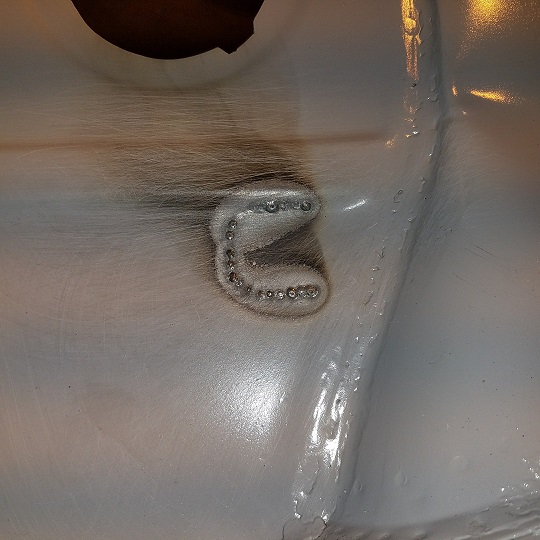 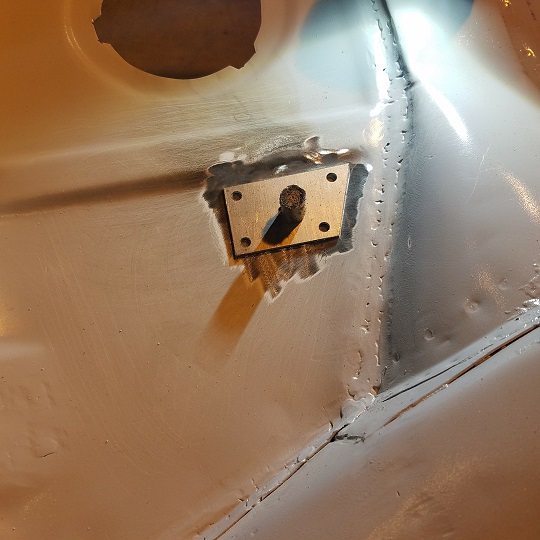  Man it's pleasant welding with new metal on both surfaces. No need to adjust the weld settings due to the metal density. The next couple steps I'll need to put on my Big Boy pants. 1st, cut the hole for the oil tank/filter grommet. Then on to installing my custom seat belt pockets. I'm getting over my aversion to cutting and drilling holes in these beautiful cars. Here's rally #2 going on the alignment rack. I alone have probably drilled 200 holes in that car. Today it will get 40 more. I'm riveting in 2 sheets of UHMW on the floor pan between the skid plates. 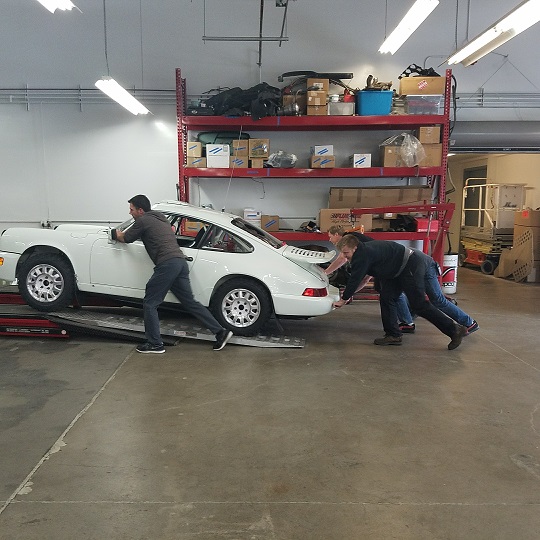 |
|
|
|
| raynekat |
Apr 7 2017, 07:39 PM
Post
#193
|
|
Advanced Member Group: Members Posts: 2,171 Joined: 30-December 14 From: Coeur d'Alene, Idaho Member No.: 18,263 Region Association: Pacific Northwest |
Received my stainless steel bumpers. Minor filing needed to fit the 914 Rubber fog light grills and the license plate bracket speed nuts.
The yellow fog light lens look pretty sharp. 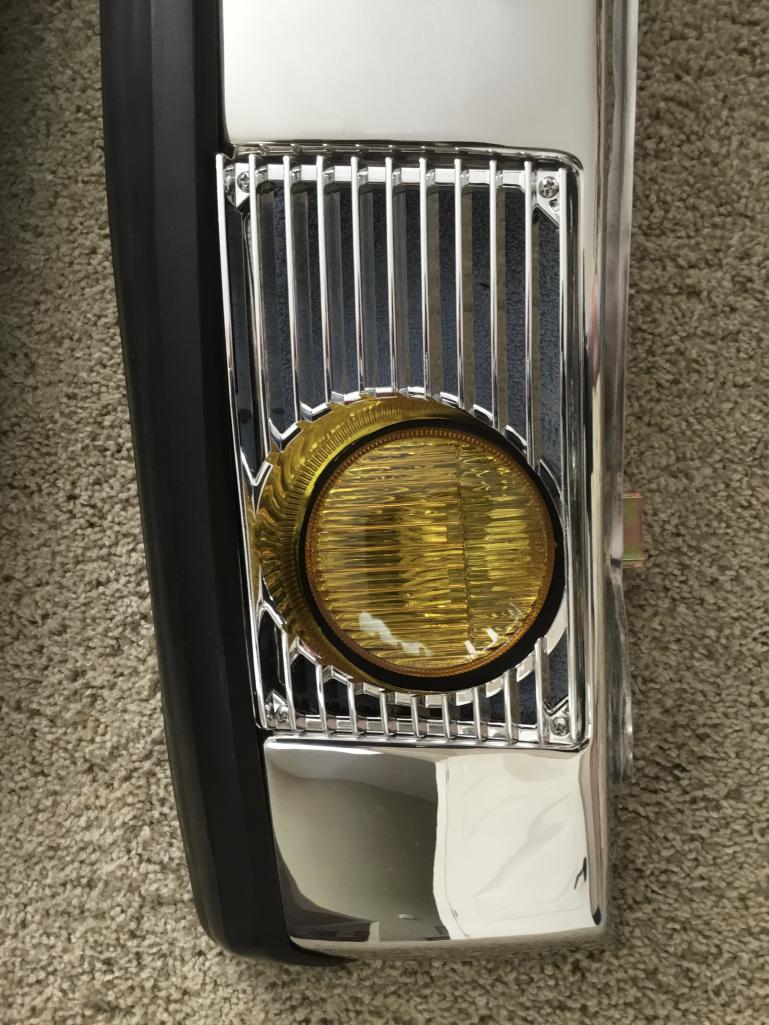 |
|
|
|
| Cairo94507 |
Apr 8 2017, 06:54 AM
Post
#194
|
|
Michael Group: Members Posts: 10,706 Joined: 1-November 08 From: Auburn, CA Member No.: 9,712 Region Association: Northern California |
The yellow lenses do look nice. (IMG:style_emoticons/default/beer.gif)
|
|
|
|
| cary |
Apr 8 2017, 10:20 PM
Post
#195
|
|
Advanced Member Group: Members Posts: 3,900 Joined: 26-January 04 From: Sherwood Oregon Member No.: 1,608 Region Association: Pacific Northwest |
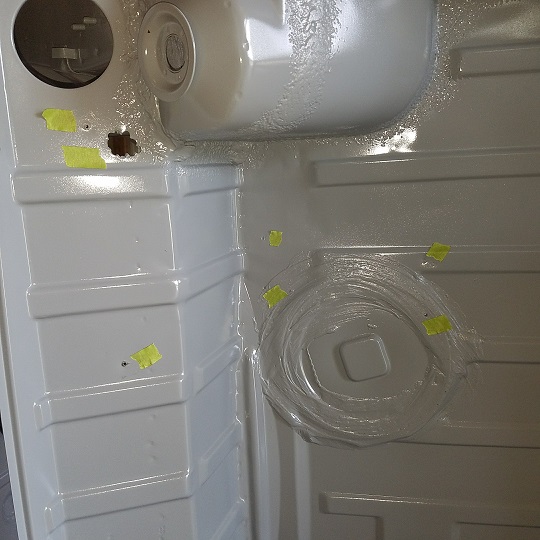
Finally a Saturday off. Spent the am doing shop chores and maintenance. After lunch it was time to drill a 4" hole in the car.
Measure about 10 times, then cut. Started with finding the center of the formed oil filter console location. 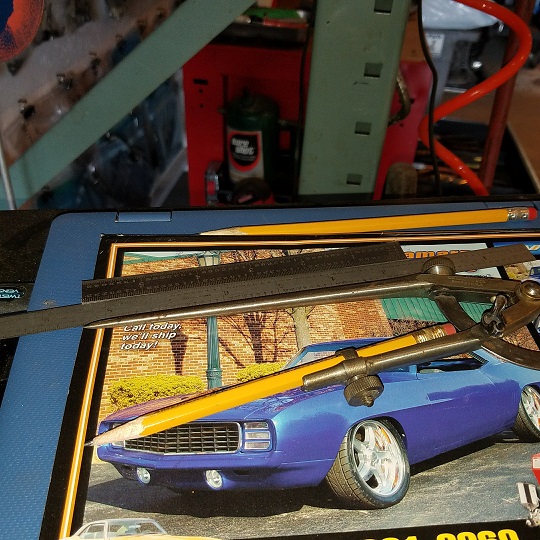 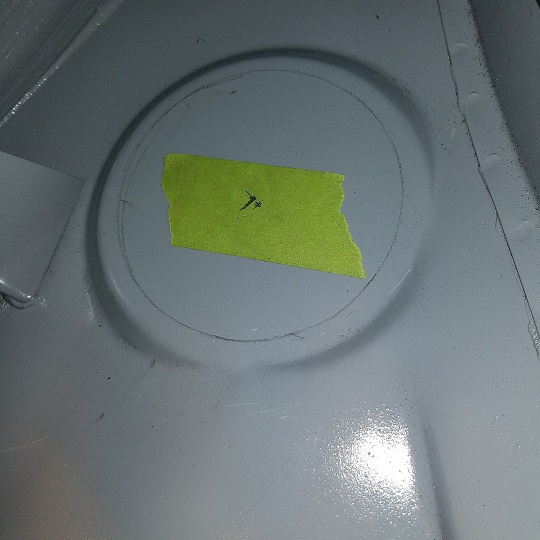 Laid out Doug's template to confirm. 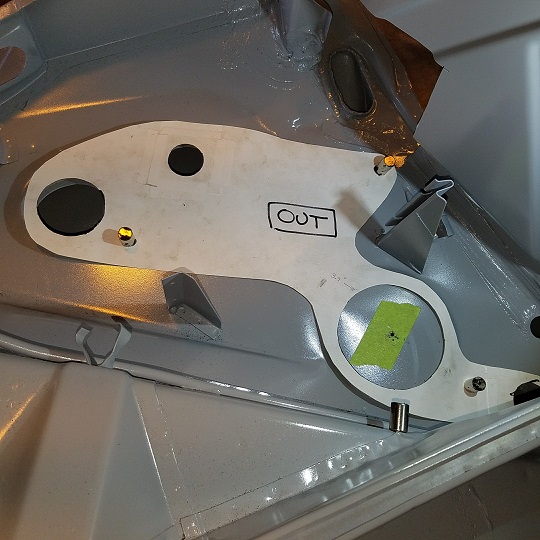 Perfect .............. Needed go to the Tool Whore weapons chest. More torque .......... 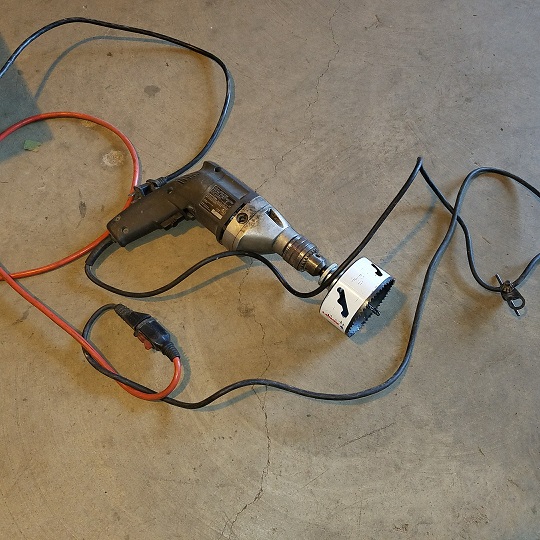 Drilling the hole was uneventful. Getting the oil tank into the fender was another story. I just couldn't get the inside stud into the hole. (IMG:style_emoticons/default/sad.gif) After alot twisting and turning I found the flange was hanging up on the striker plate backing plate. (IMG:style_emoticons/default/mad.gif) 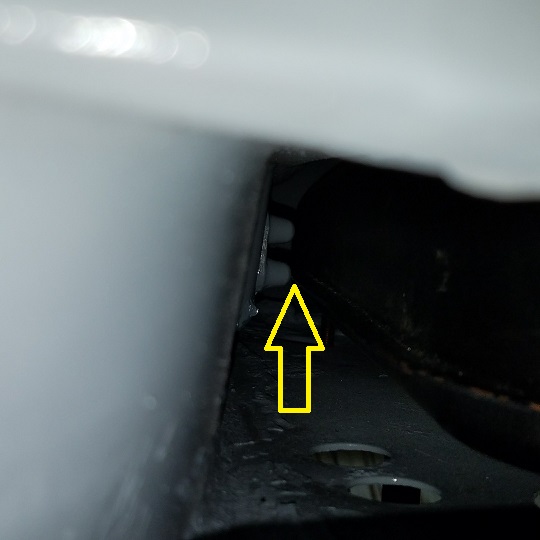 Kind of hard to see. It wanted to settle in between the two sets of nubs. So we loosed it up the striker plate and moved it about 2mm. It then slid right in. Go figure. 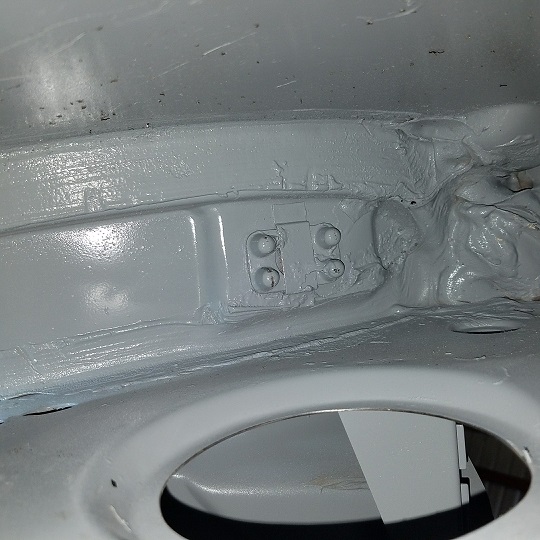 I had a bitch of a time getting it back into place so I could reinstall the M6 bolts.  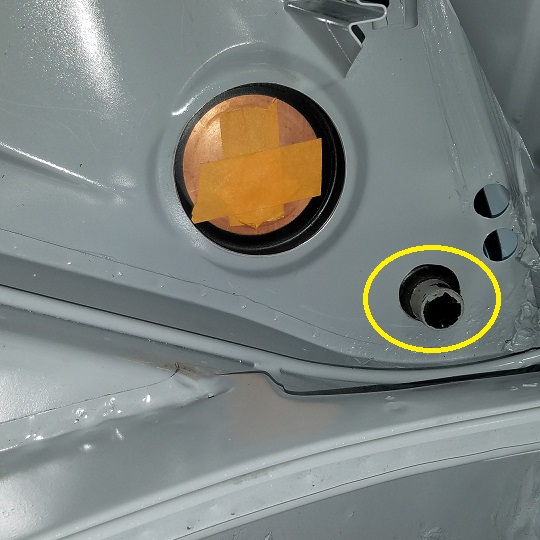 The free handed bottom hose hole will need a little more art work. |
|
|
|
| cary |
Apr 8 2017, 10:40 PM
Post
#196
|
|
Advanced Member Group: Members Posts: 3,900 Joined: 26-January 04 From: Sherwood Oregon Member No.: 1,608 Region Association: Pacific Northwest |
Then onto the left custom seat belt anchor point.
 Doug thanks for the soda blasting. It made cleaning up the area pretty simple. After a couple cut downs she's fitting pretty nice. The door frame portion will be rosette welded on the outside flange. Factory look. Same with the upper cross member. The fire wall portion will be lap welded with both seam and rosette welds. 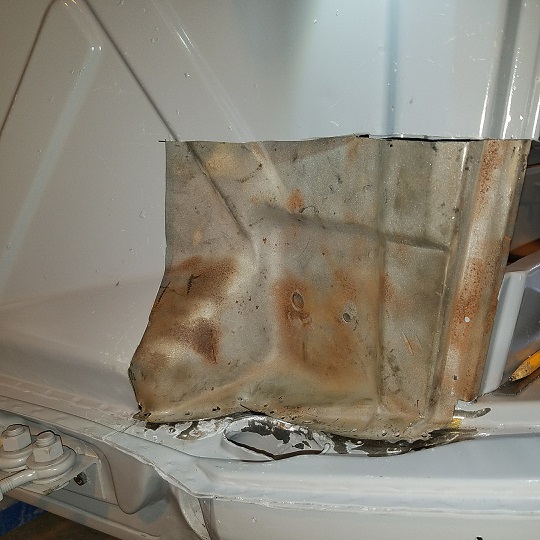 Front side 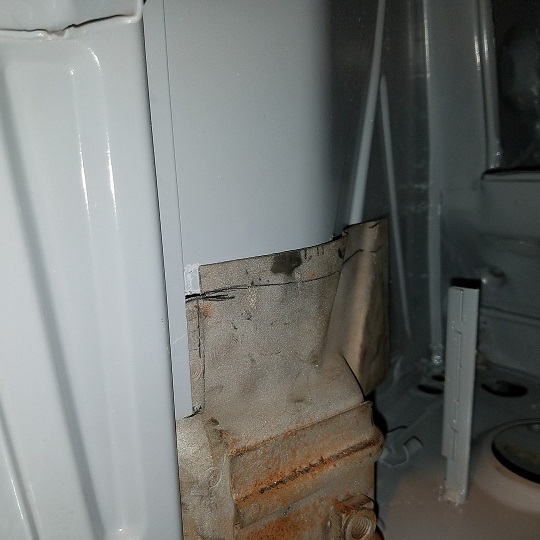 Back side. You can see the flange. Just about ready to weld. It will get another run thru the media blast cabinet before welding. |
|
|
|
| cary |
Apr 10 2017, 08:01 AM
Post
#197
|
|
Advanced Member Group: Members Posts: 3,900 Joined: 26-January 04 From: Sherwood Oregon Member No.: 1,608 Region Association: Pacific Northwest |
Forgot I do have one section of Rembrant work to do.
The radius's don't match. (IMG:style_emoticons/default/sad.gif) 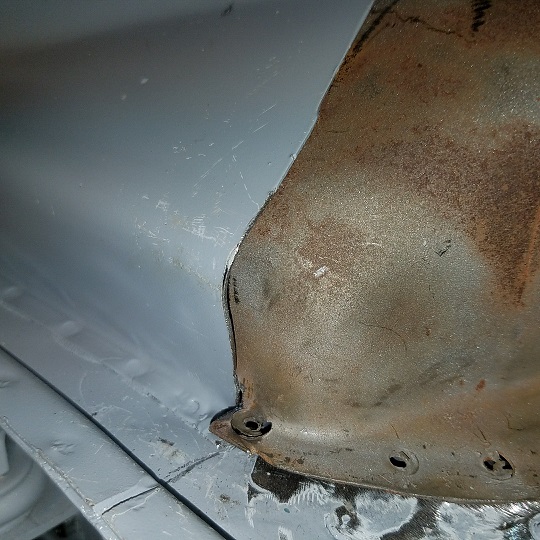 Later radius is smoother. |
|
|
|
| cary |
May 2 2017, 10:20 PM
Post
#198
|
|
Advanced Member Group: Members Posts: 3,900 Joined: 26-January 04 From: Sherwood Oregon Member No.: 1,608 Region Association: Pacific Northwest |
Now where was I ? Seems like its been forever since I've been out here.
 Beings that I'll have 4 days to work before I head to LA for Luftgekuhlt I decided to tackle the jack points first. Both sides had rust under jack point. So I needed to remove the 1st rusty layer. Both of the jack tubes where still in good shape. Left side : 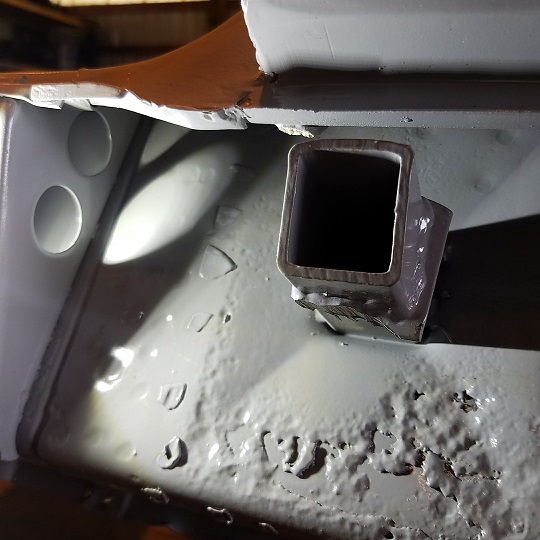 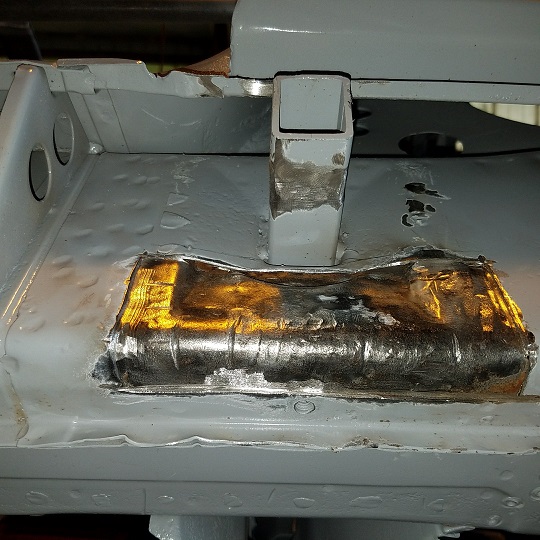 Like I've mentioned in the past. Take it out/off in small sections. Your less apt to tear a hole out from under the spot welds. I did find that one of the rocker panel nuts had a 6mm bolt broken off in it. (IMG:style_emoticons/default/mad.gif) 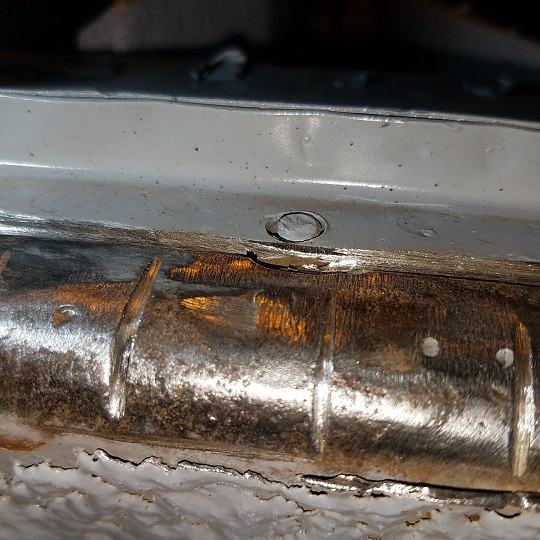 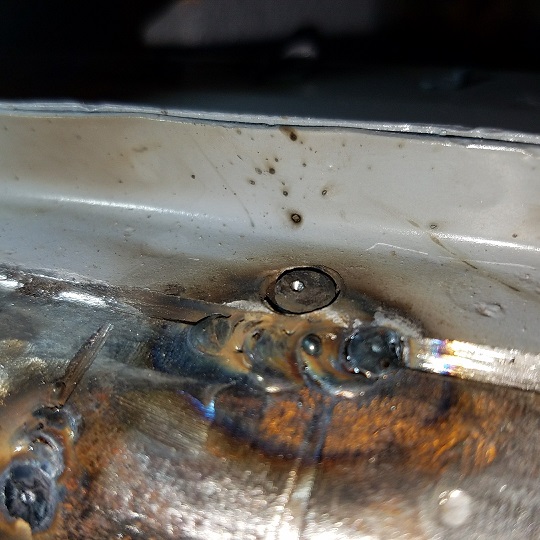 Welded up my too deep cut. 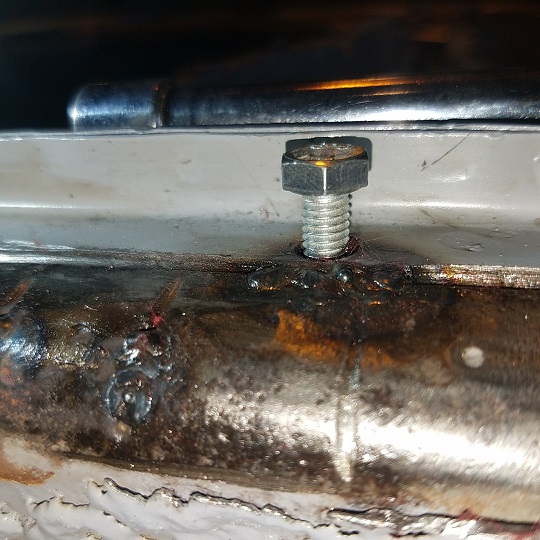 Gooder as new. Drilled and tapped. On to the right side. Same drill ....................... 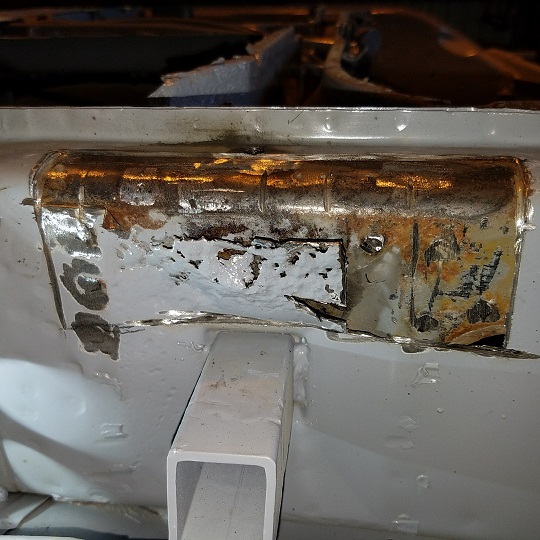 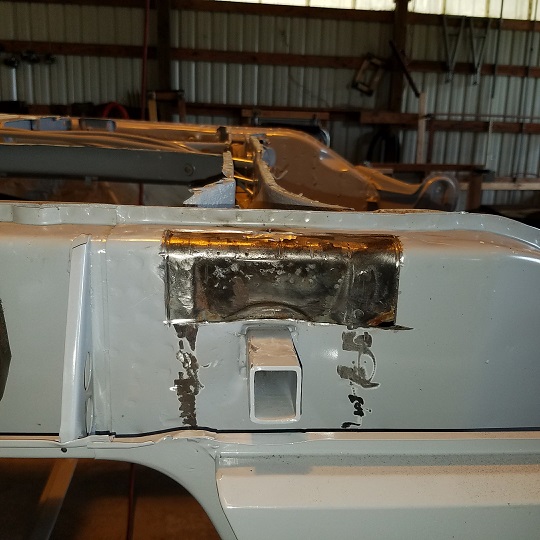 I did find another snapped off rocker panel bolt on the right side. Once again, drilled and tapped. 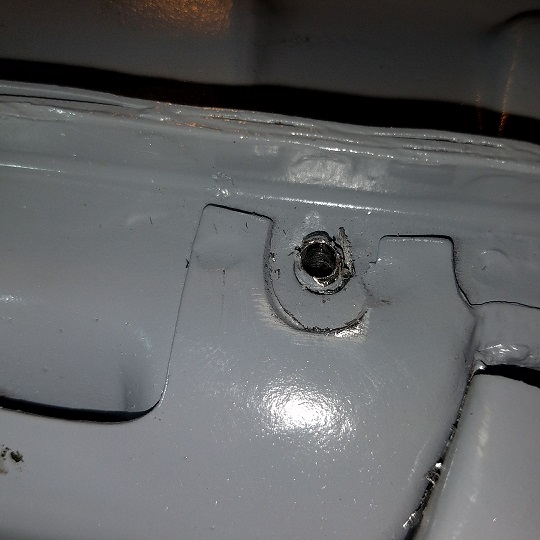 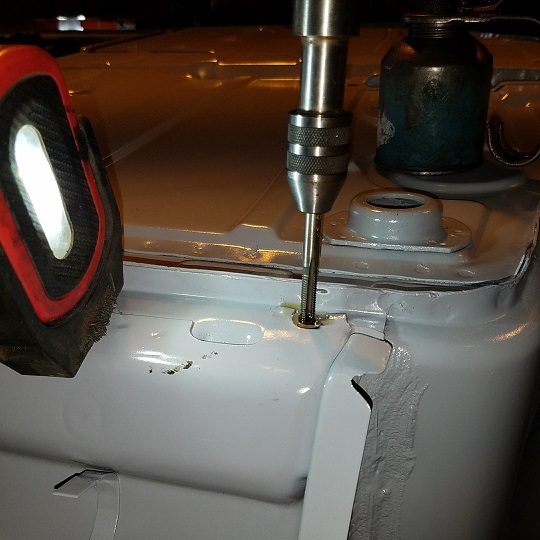 I sprayed the opened up sections with Ospho before we headed home. |
|
|
|
| cary |
May 4 2017, 09:00 AM
Post
#199
|
|
Advanced Member Group: Members Posts: 3,900 Joined: 26-January 04 From: Sherwood Oregon Member No.: 1,608 Region Association: Pacific Northwest |
Wednesday 5/3/17
Started the day cleaning the Epoxy primer out of the rocker panel cover nutserts. 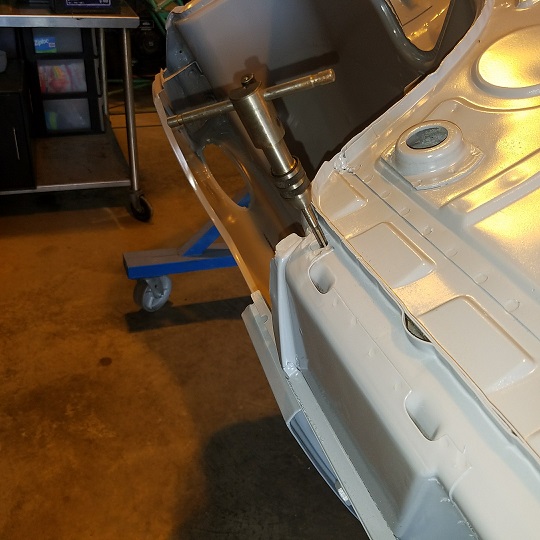 Then on to the left seat belt retractor. Next task was putting the flange on the pocket so it will lay behind the firewall for strength. https://www.harborfreight.com/air-tools/spe...-tool-1110.html Lots of Rembranting to get a nice fit. The half a dozen long reaching Vise Grip clamps came in handy again. I worked on this while Super In Law was creating the jack point sheet metal patches. The indent for the tube had to be pressed/hammered in. 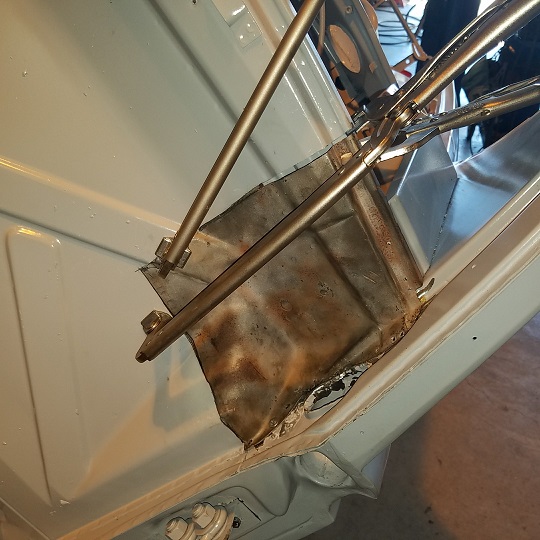 Blasted and weld thru primed and ready to go for tomorrow. I'll clean off the weld thru primer with lacquer thinner prior to respraying with epoxy primer. 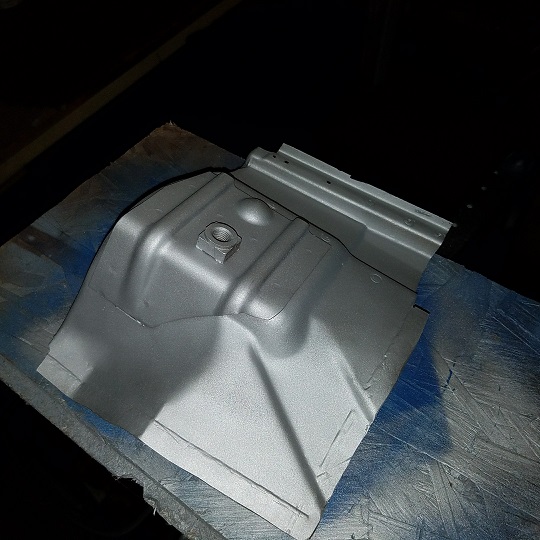 After he finished up the right patch I set out to get it welded in. Kind of over did the application of weld thru primer due to the location of the patch. Lots of splattering. (IMG:style_emoticons/default/mad.gif) But it tidied up pretty nice. 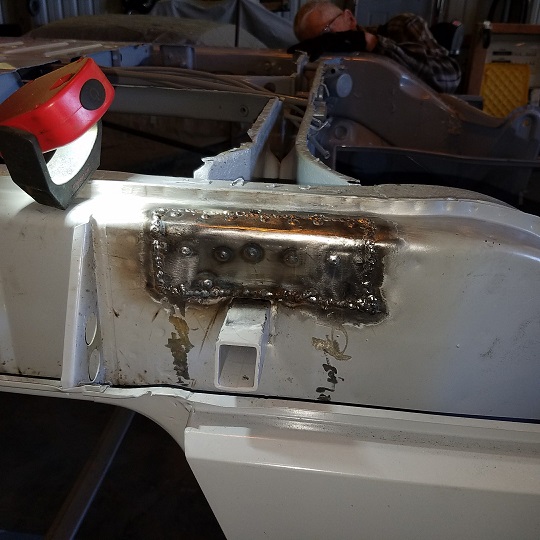 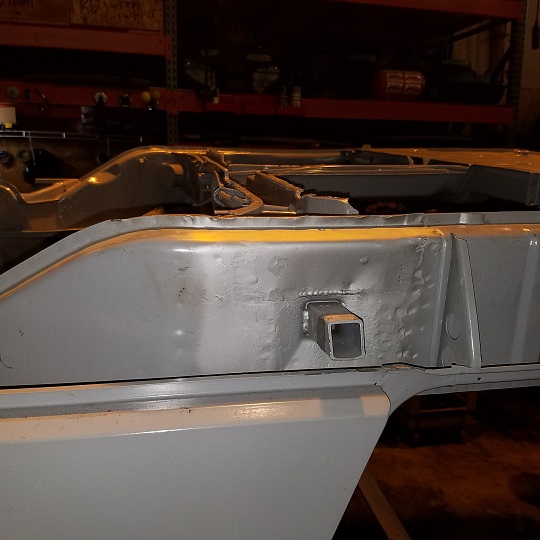 Short Episode of Tool Whore. I don't remember if I mentioned that I changed weapons for removing the proud off the welds.  Right side finished up. 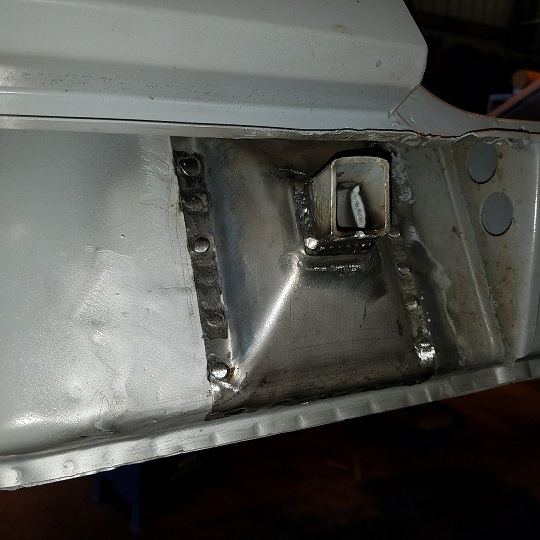 Could have welded just a smidgen hotter for flatter rosette welds. The upper weld on the tube is a bitch with the fender attached. First shot was in the upside mode. NOT. Ended up full power and a long stick out. Don't forget to turn up your welder when you get the the tube. (IMG:style_emoticons/default/dry.gif) Biggest issue was the inside fender 4 rosettes. 1. Next time tape off the area prior to spraying epoxy primer. I need a longer and wider belt sander. Getting that area down to bare metal was a bit of work. Tomorrow I'm going to try the 45 degree die grinder with a 3 inch disk. 2. I didn't want to take the time to pull the readers out of my Miller Face mask so I left hand welded it with my eyes closed. Left side all ready to go for Thursday. 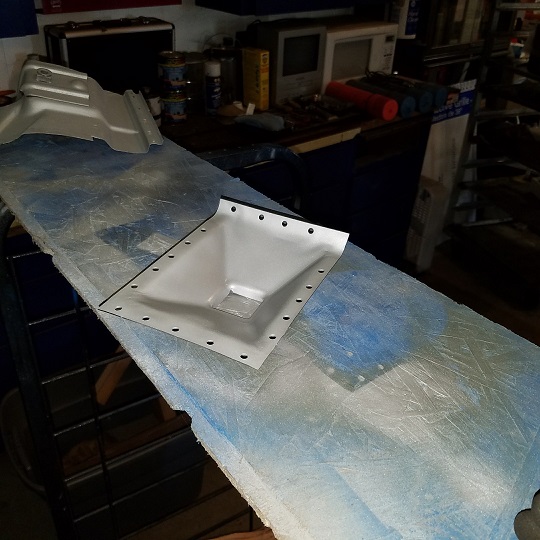 |
|
|
|
| cary |
May 5 2017, 08:39 AM
Post
#200
|
|
Advanced Member Group: Members Posts: 3,900 Joined: 26-January 04 From: Sherwood Oregon Member No.: 1,608 Region Association: Pacific Northwest |
Thursday 5/4/17.
On to the left jack cover. Reusing the tube I didn't like the way the radius met the bottom of the long so I straightened it and rebent it. I weld in the vertical rosettes first then hammer it down. 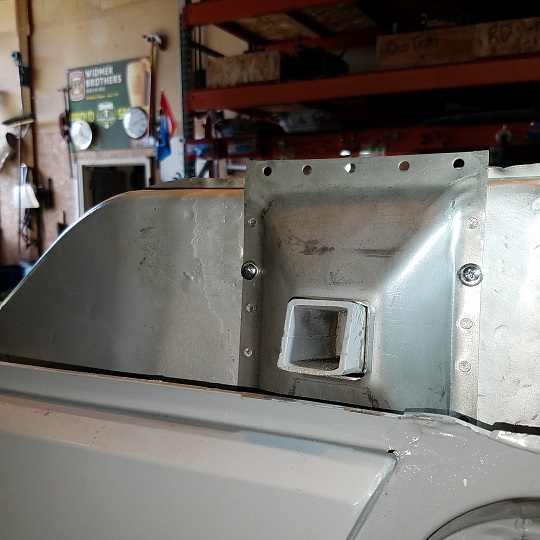 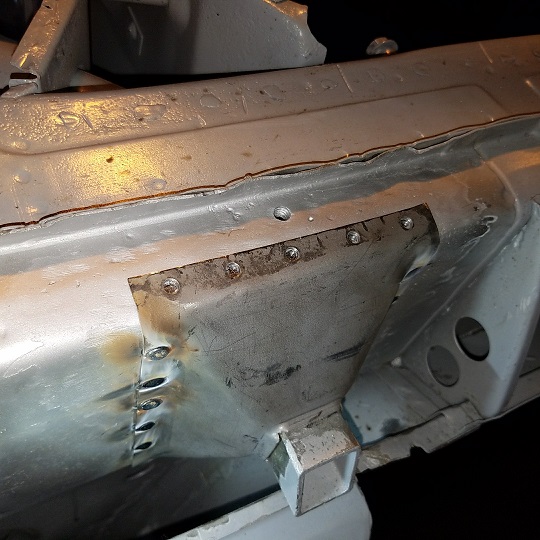 Back in business .................. 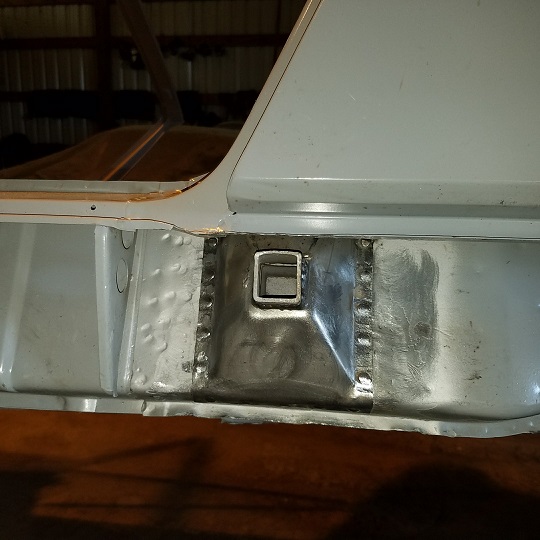 In addition to the longer belt sander I'll need to find a magnetic mirror so I can see the hole on the last 2 holes. In the future I might tinker with using the Panel Spotter in this spot. Need more practice. 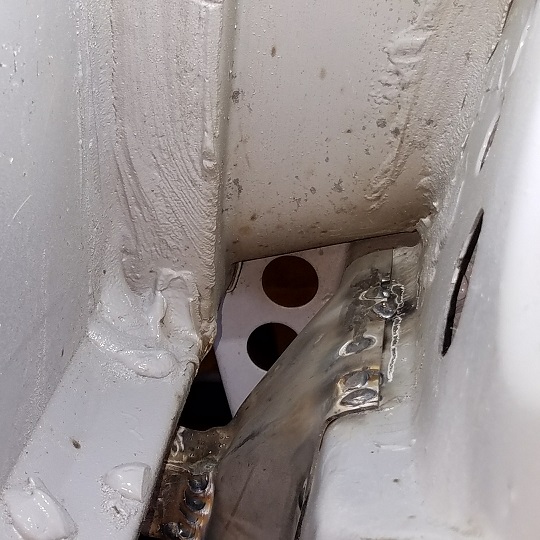 Next was welding in the left seat belt bucket. Started with fitting it tight with self taping screws. 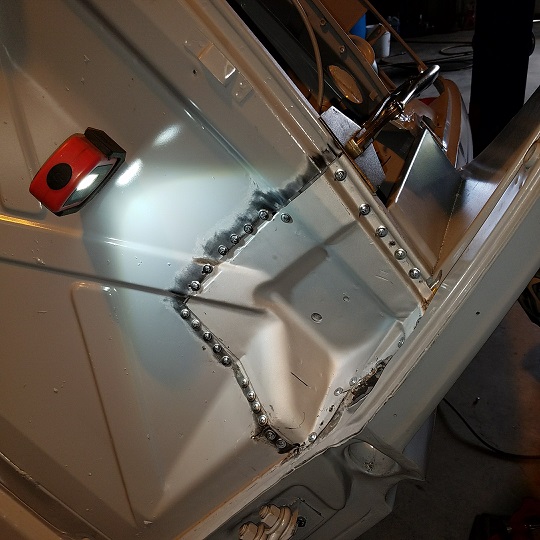 The front was rosette and seam welded. Back got some 1" stitches every other inch. Sides and top was just rosette welded like the factory part. 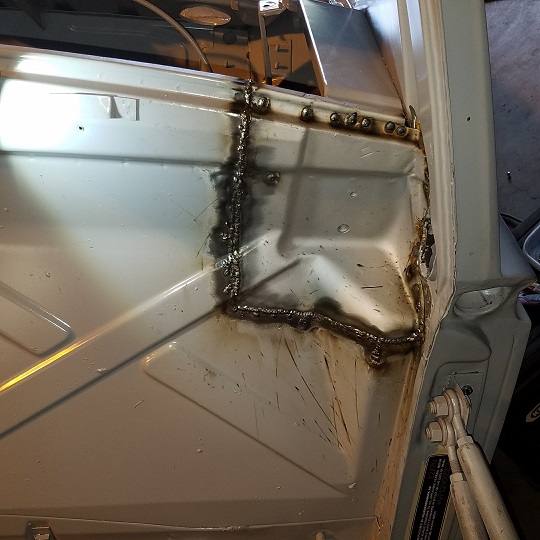 I didn't get too carried away with grinding. Basically just taking the tops off, not touching the back. My plan is to spray both front and back with a light coat of spray on seam sealer to kind of camouflage them. The dark color is from the penetration of the back side stitches. 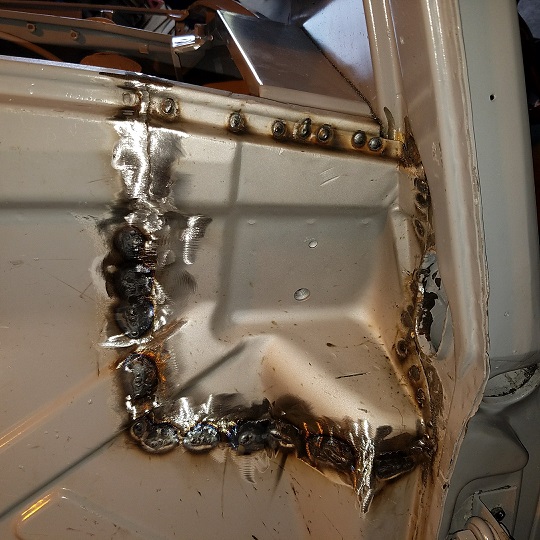 Need to detail the window seal channel in the am. Doug is coming out for a visit in the am. It will be short day, I'm leaving for Lufegekult at 5am on Saturday and need to check in at Rothsport in the afternoon. I wish I could share a photo. We left the two dirty rally cars sitting in the middle of Jeff Zwarts car collection. It is a sight to be hold. I'm pretty certain he is being his Monte Carlo 914-6 to be displayed with the 2 Mexican 1000 cars. http://blog.caranddriver.com/rennsport-ran...ith-jeff-zwart/ |
|
|
|
|
1 User(s) are reading this topic (1 Guests and 0 Anonymous Users)
0 Members:

|
Lo-Fi Version | Time is now: 17th July 2026 - 06:54 PM |
Invision Power Board
v9.1.4 © 2026 IPS, Inc.