|
|
|
Porsche, and the Porsche crest are registered trademarks of Dr. Ing. h.c. F. Porsche AG.
This site is not affiliated with Porsche in any way. Its only purpose is to provide an online forum for car enthusiasts. All other trademarks are property of their respective owners. |
|
|

  |

| raynekat |
 Aug 1 2017, 09:50 AM Aug 1 2017, 09:50 AM
Post
#261
|
|
Advanced Member  Group: Members Posts: 2,171 Joined: 30-December 14 From: Coeur d'Alene, Idaho Member No.: 18,263 Region Association: Pacific Northwest |
QUOTE(cary @ Aug 1 2017, 06:52 AM)  It's time for the throw down to begin ............ I'm taking a couple weeks off from Rothsport to focus on getting Doug's car finished up. Looks like a I could have timed it a little better. PDX forecast for the next few days, over 100. (IMG:style_emoticons/default/welder.gif) I would suggest either postponing the work during this heat wave.... or starting at 5am while it's still cool and being all done by noon/1pm at the latest over the next couple of days. We don't need any heat exhaustion cases out in Forest Grove please. |
   |

 
|
| raynekat |
Aug 1 2017, 12:20 PM
Post
#262
|
|
Advanced Member Group: Members Posts: 2,171 Joined: 30-December 14 From: Coeur d'Alene, Idaho Member No.: 18,263 Region Association: Pacific Northwest |
Latest Porsche porn to show up at my doorstep.
MFI pump rebuilt and upgraded to S/RS spec. Sent out to MFI Werks (Mark Jung) here in Oregon. He is the local wizard in rebuilding and modifying 911 MFI pumps. Went through the pump completely replacing some worn parts and putting together a new space cam (S/RS spec) that can feed the new 2.7 engine. All parts cleaned, painted, re-plated, etc. As new from the factory. All 6 injectors were checked for spray pattern, etc. Found a deficient one and replaced. Pity a lot of this wonderful stuff is pretty invisible on a 914-6 engine. (IMG:style_emoticons/default/wink.gif)  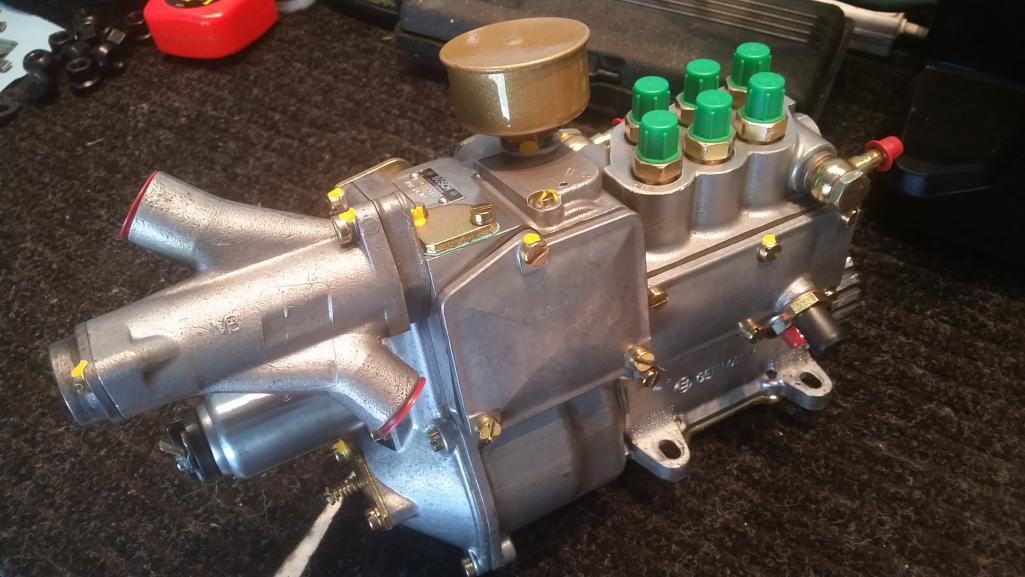 |
|
|
|
| raynekat |
Aug 1 2017, 12:21 PM
Post
#263
|
|
Advanced Member Group: Members Posts: 2,171 Joined: 30-December 14 From: Coeur d'Alene, Idaho Member No.: 18,263 Region Association: Pacific Northwest |
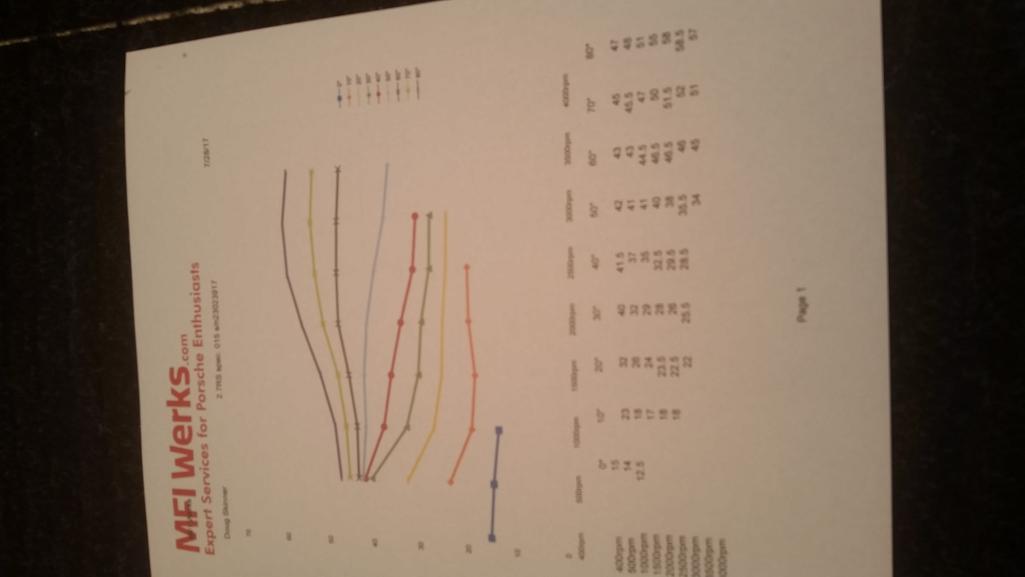
In addition, Mark supplies a nice flow chart for the pump with the new space cam configuration.
 |
|
|
|
| raynekat |
Aug 2 2017, 05:32 PM
Post
#264
|
|
Advanced Member Group: Members Posts: 2,171 Joined: 30-December 14 From: Coeur d'Alene, Idaho Member No.: 18,263 Region Association: Pacific Northwest |
Today I delivered a mountain of engine parts to Rothsport Racing here in the Portland, Oregon area.
Didn't know a disassembled 911 took up so much space in my garage, but now it's out. Yeah! Over the coming months these boxes of parts will be transformed into a 2.7 RS spec MFI engine making about 210hp. Should be just about right for the narrow bodied GT vision of a car I have. They'll also be reworking the gearbox. 904 mainshaft with some fun gearing that should make this car sing....and really move out. 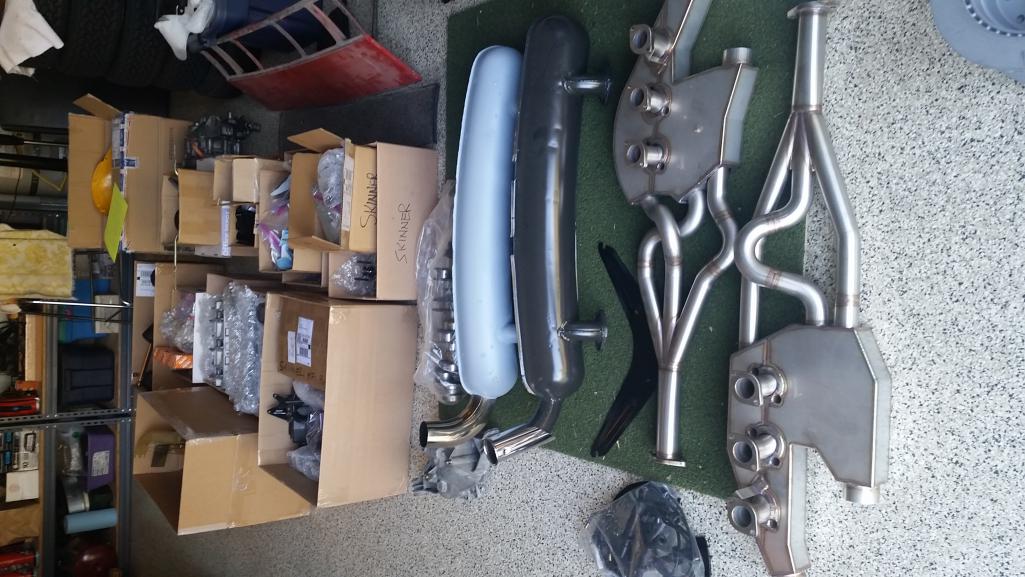 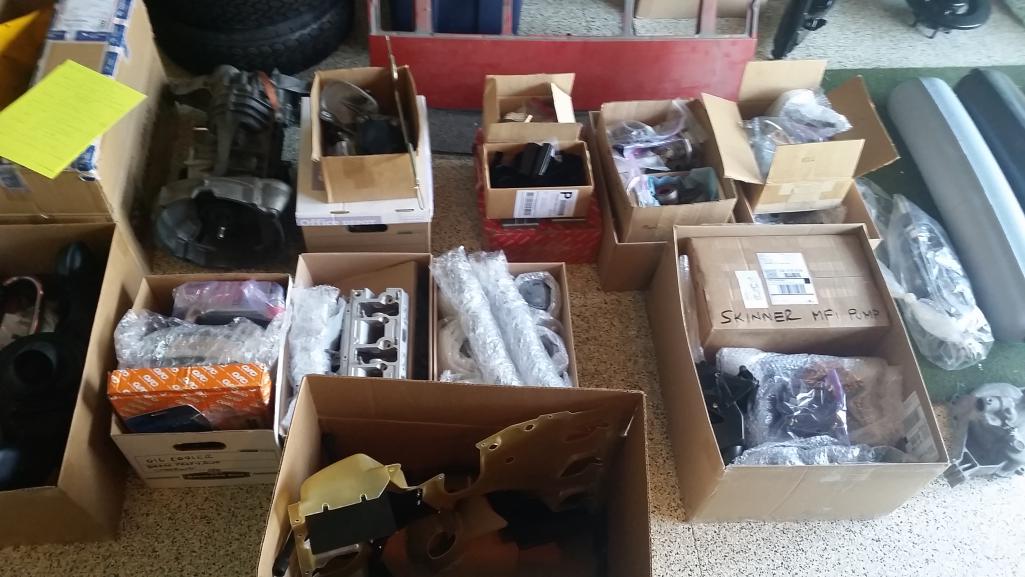 |
|
|
|
| cary |
Aug 3 2017, 06:57 AM
Post
#265
|
|
Advanced Member Group: Members Posts: 3,900 Joined: 26-January 04 From: Sherwood Oregon Member No.: 1,608 Region Association: Pacific Northwest |
Jeff (Rothsport) is adding pressure to the Throwdown .................. the day I start he calls for the engine parts. LOL.
|
|
|
|
| cary |
Aug 3 2017, 07:27 AM
Post
#266
|
|
Advanced Member Group: Members Posts: 3,900 Joined: 26-January 04 From: Sherwood Oregon Member No.: 1,608 Region Association: Pacific Northwest |
Throwdown Day #1.
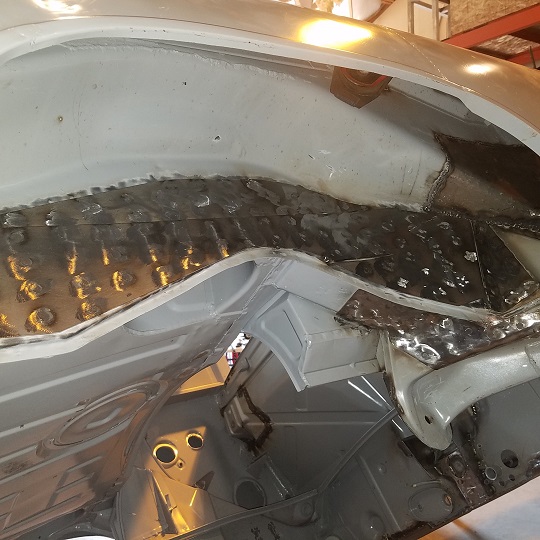
While I'm working on the floor Super In Law is working on the patches for the cowl. Which involves creating jigs for the reassembly. The last few weeks I went thru both Parts Obsolete and High Performance House and didn't find a cowl/windshield. (IMG:style_emoticons/default/sad.gif) So we'll make the donor piece gooder than new. 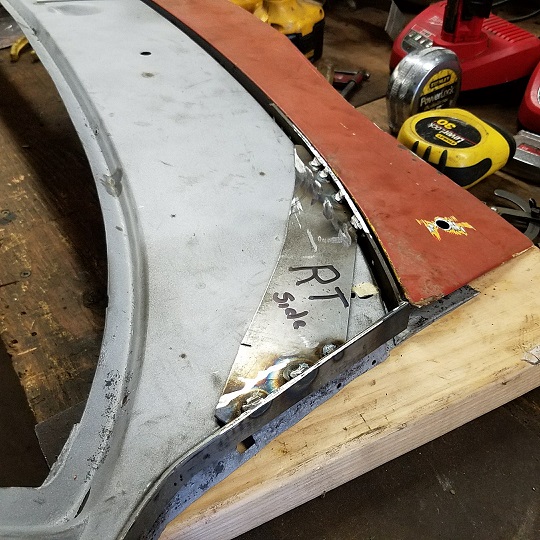 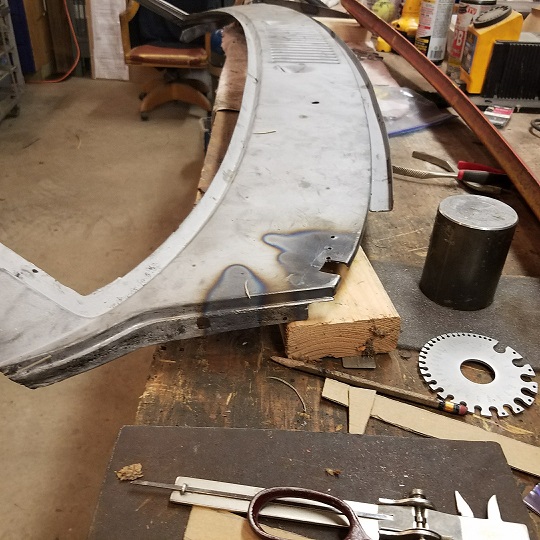 Before I continue with the floor weld in it was time to check the door gaps, all is well. I tweaked one just a smidgen to match Matt's doors. The H measurement is kind of ambiguous, the latch plate angles back. The 1039mm is basically dead center in the latch. But dead center is covered by the brace plate. One side F is a little tight, 2mm. Which throws off the X a smidgen. All still within tolerances but I'll tweak a little when the floors done and we weld in the cowl. Then back to burning metal. 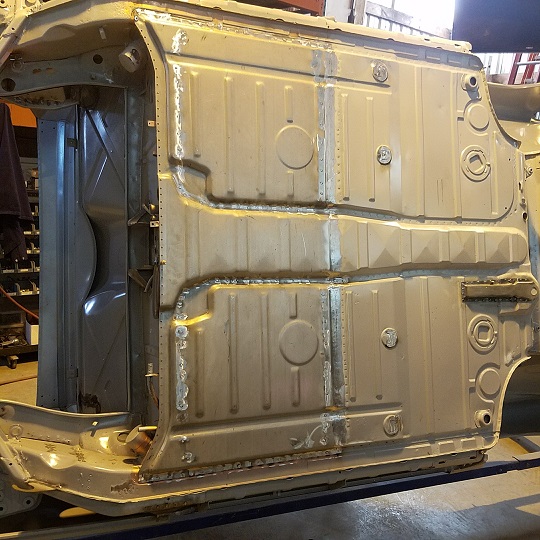 Got the inside portion of the floor all welded in. This one I welded from the old metal to the new. I might try going the other direction next time. The heat needed for the new metal is a bit much for the outside edge of the old flange. I've been called anal and Rembrandt. LOL. It really doesn't make a lot of difference it all gets covered by seam sealer. But I know ............ Primarily used the belt sander to tune up the welds. Ended the day with the inside temp at 98. Helps keep the metal warm ....... |
|
|
|
| cary |
Aug 3 2017, 07:29 AM
Post
#267
|
|
Advanced Member Group: Members Posts: 3,900 Joined: 26-January 04 From: Sherwood Oregon Member No.: 1,608 Region Association: Pacific Northwest |
Throwdown Day #2.
Patched the cut out in the corner first thing. 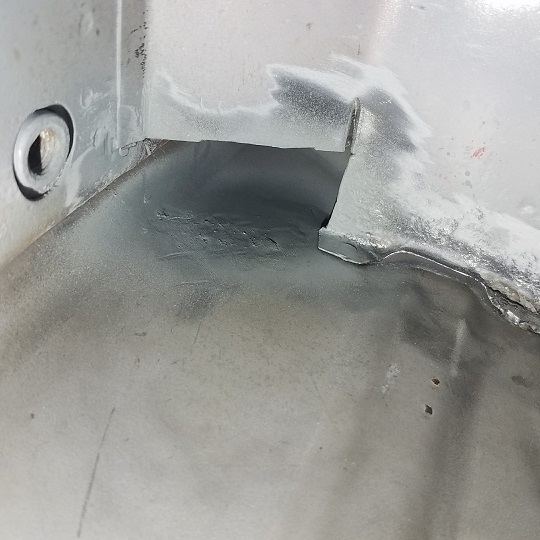 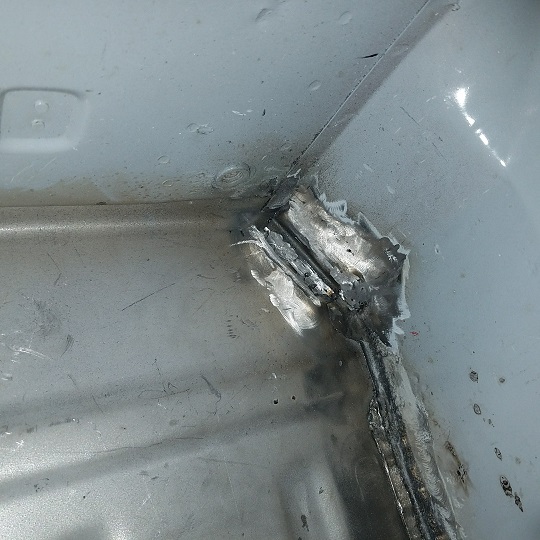 Finished up the tuning up of the welds on the inside. Then it was time to get down to business. Welding the floor to the engine firewall. Because this was a Rust Free car there wasn't too much damage/degradation to the flange. 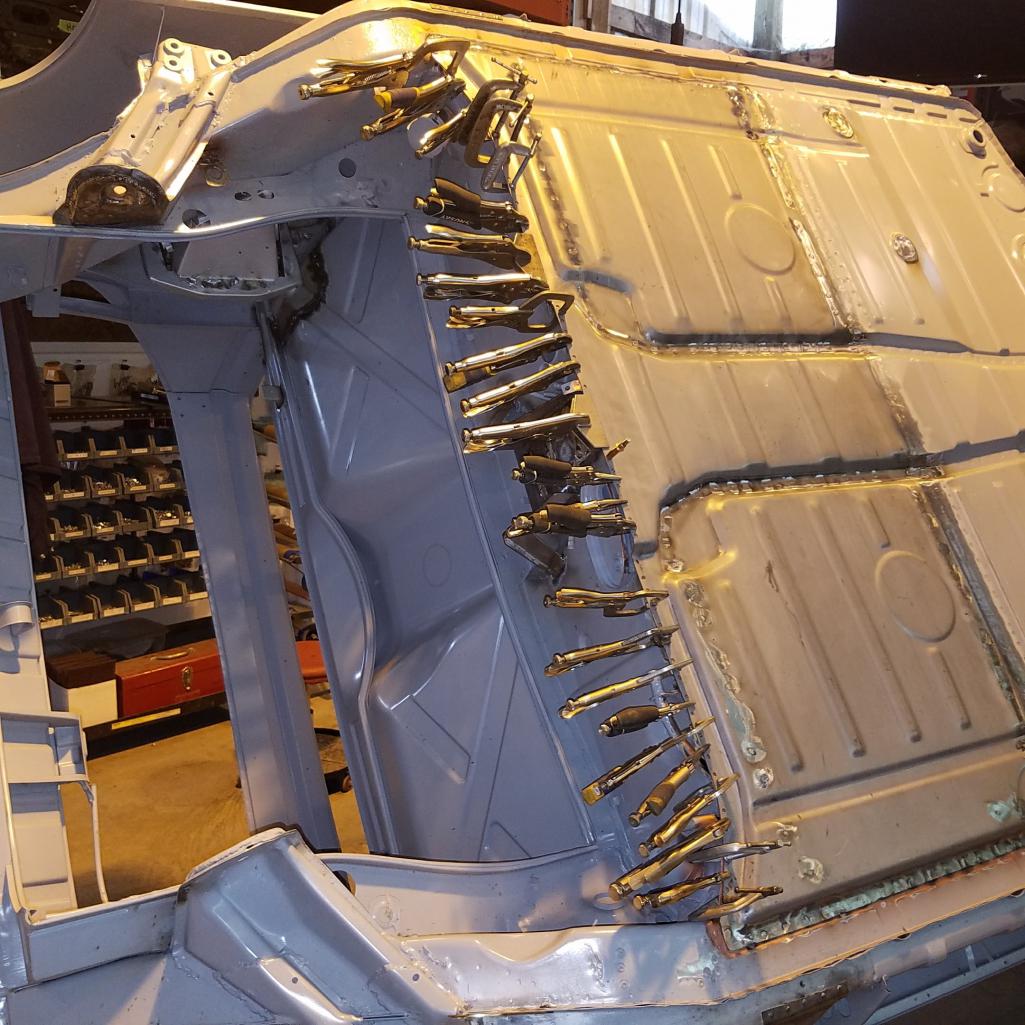 Could have used a couple more Vise Grips and clamps. LOL. All the weld thru primer seen thru the rosette holes was removed with a squared off 1/8" drill bit. 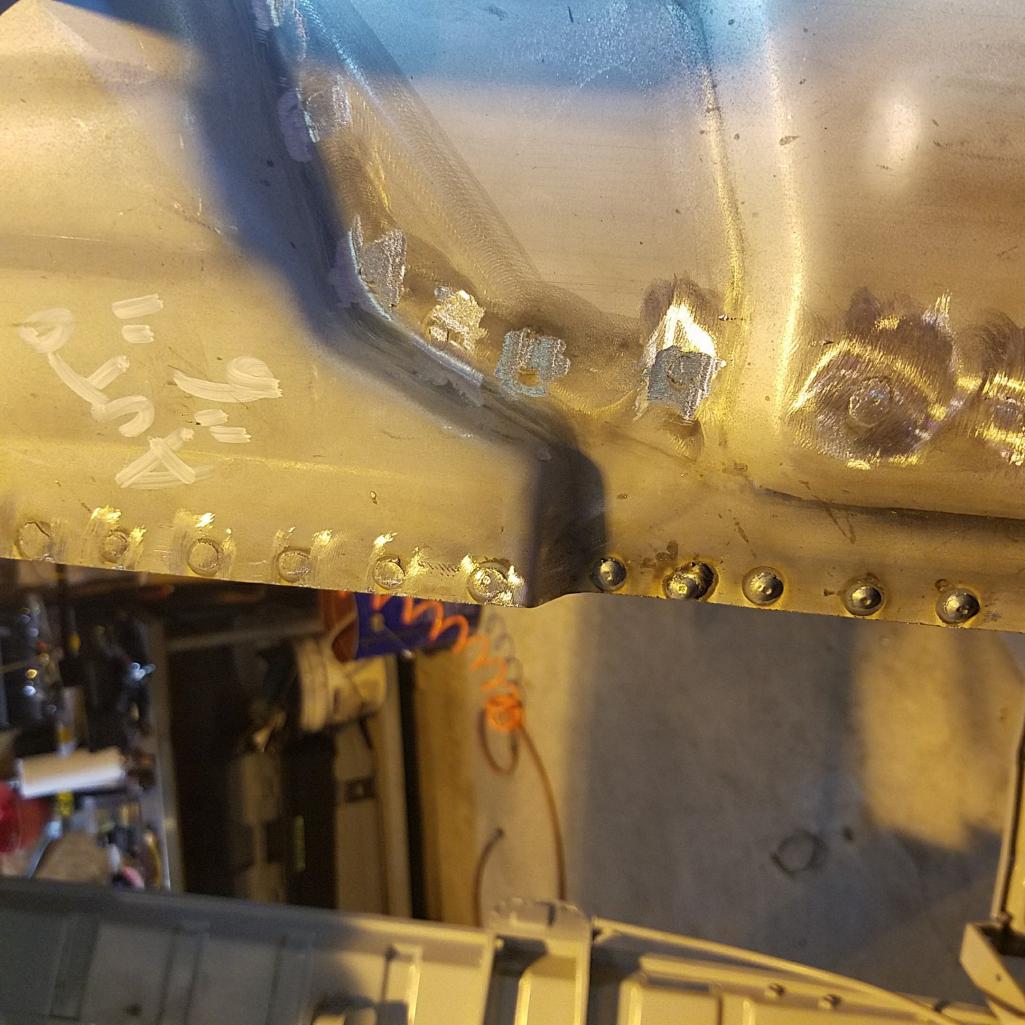 Forgot to resize. I'll leave to show the detail. 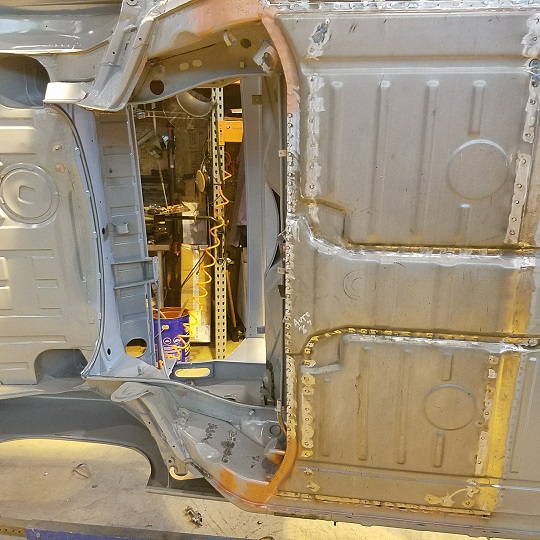 Ended the day right on schedule. At days end inside temp 100. Outside 104. Oh baby. Doug sent me a text reminding me that Rothsport has AC. LOL. Jack points ready for the AM. 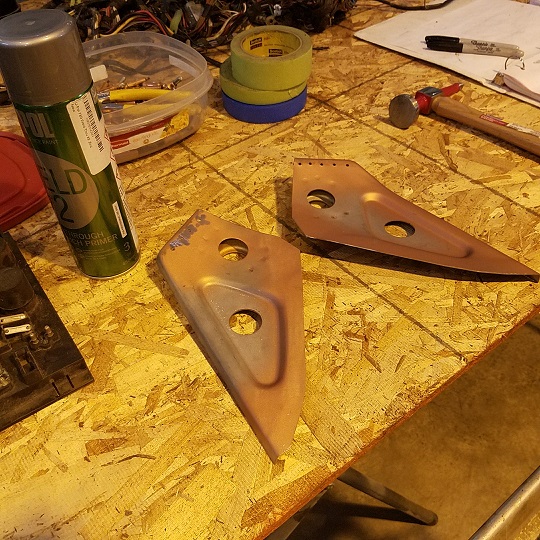 |
|
|
|
| cary |
Aug 3 2017, 07:39 PM
Post
#268
|
|
Advanced Member Group: Members Posts: 3,900 Joined: 26-January 04 From: Sherwood Oregon Member No.: 1,608 Region Association: Pacific Northwest |
Day #3 ....................
All pieces installed with U-Pol copper based weld thru primer. The new RD sheet metal was brushed with a wire wheel. Then wiped down with paint prep. Then sprayed with weld thru primer. Beginning of the day .............. 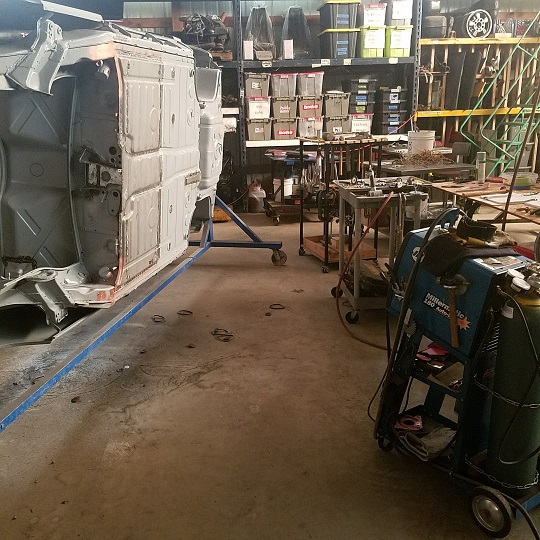 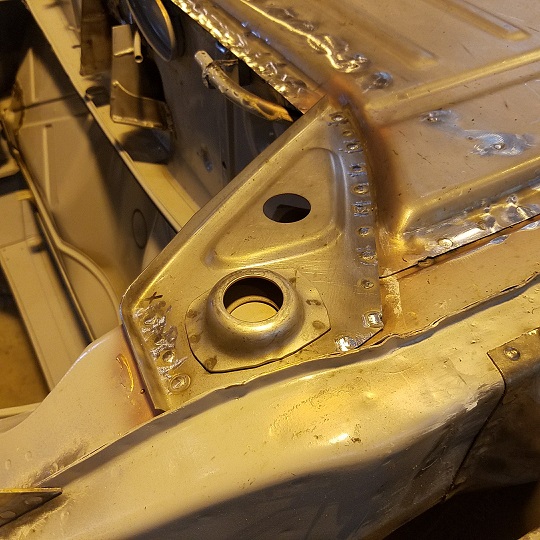  Welds not tuned up yet. I'm going to lengthen my stick out to get a little more heat. I'm getting too used to the .030 wire at Rothsport.  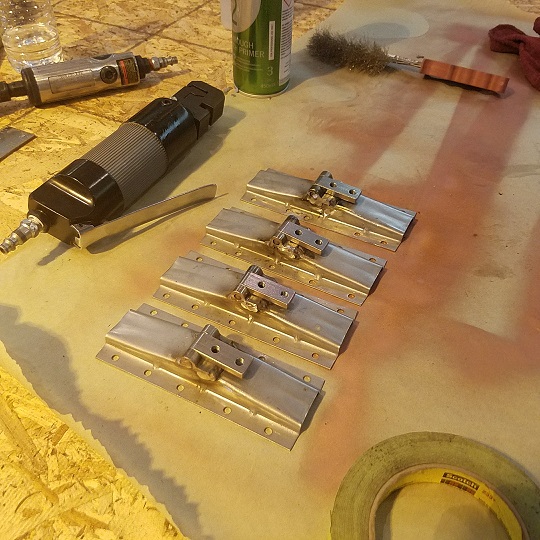 Built up seat brackets. 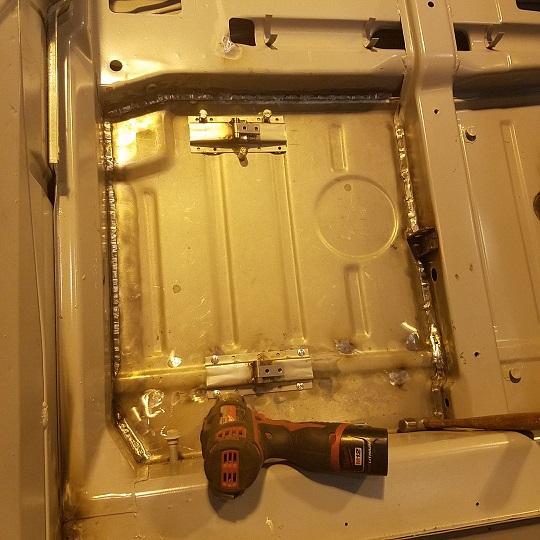 Outside brackets located and attached with self tapping screws. 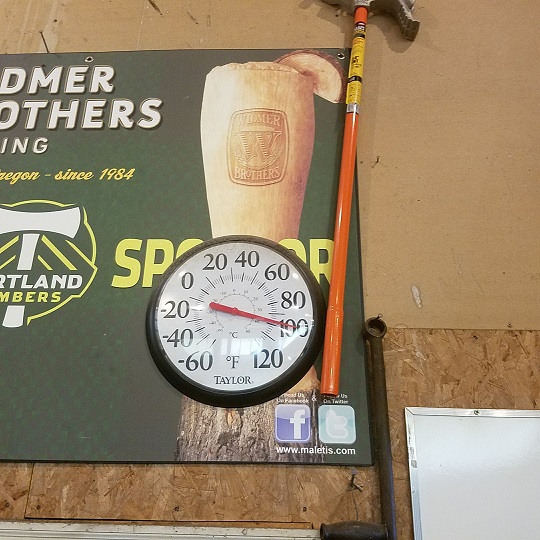 Quitting time ................... |
|
|
|
| raynekat |
Aug 3 2017, 10:01 PM
Post
#269
|
|
Advanced Member Group: Members Posts: 2,171 Joined: 30-December 14 From: Coeur d'Alene, Idaho Member No.: 18,263 Region Association: Pacific Northwest |
Everything is looking great.
After such a hot day in your shop, sure hope you and Jack had time for a nice cool one after work?  |
|
|
|
| cary |
Aug 5 2017, 10:13 AM
Post
#270
|
|
Advanced Member Group: Members Posts: 3,900 Joined: 26-January 04 From: Sherwood Oregon Member No.: 1,608 Region Association: Pacific Northwest |
Day #4 on the ThrowDown.
Worked on the reworking of the CDI bracket for mounting to the battery tray. The design. 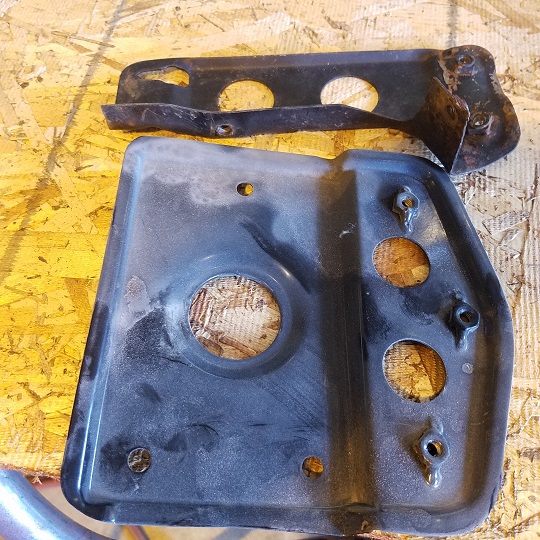 Bracket trimmed down. 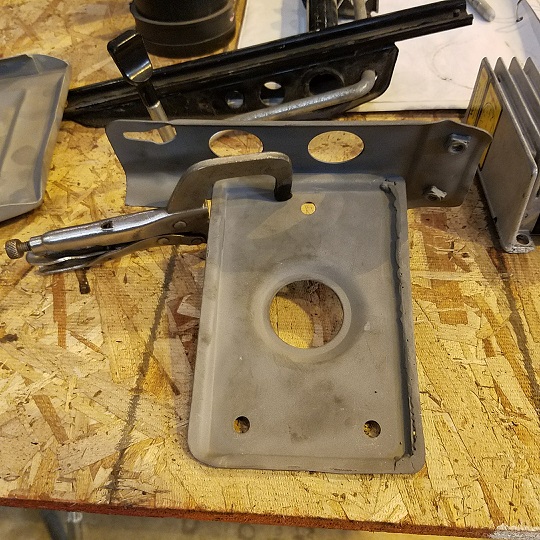 Both ends of the ECU bracket will be trimmed off and rounded. A couple more mounting nuts will be welded to the ECU bracket. Flange on the battery tray will get extended to put the corner ECU mounting hole in the right place. Plus another mounting hole. I'll give the new right side a little tune up with the belt sander. Then I'll weld the CDI bracket to the ECU bracket. Then off to powder coating. Super In Law modified the CDI bracket. Unboxed the Mad Dog 914 GT stiffening kit. Cleaned with grease and wax remover. Then sprayed with U-Pol weld thru primer. 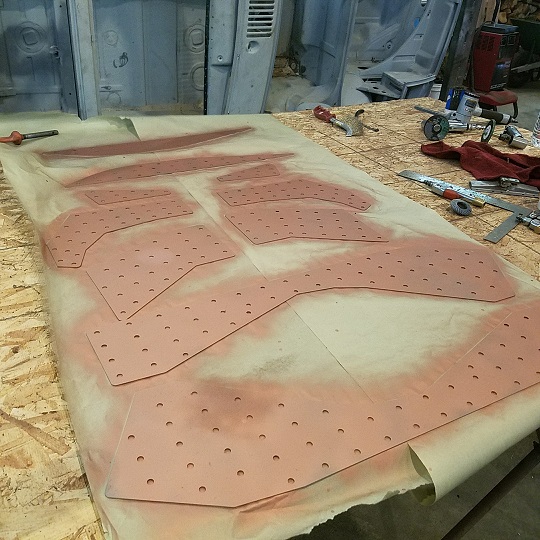 Laid out the engine tin and went back thru it again to make sure it was ready for powder coating. Doug has a new over the muffler piece coming from RD. His blasted piece had a few too many PO mods. The black piece is a pattern piece from Rothsport in case I needed to repair it. Is the new RD piece cut away for the chain tensioner lines ? That will need to be done before powder coating. 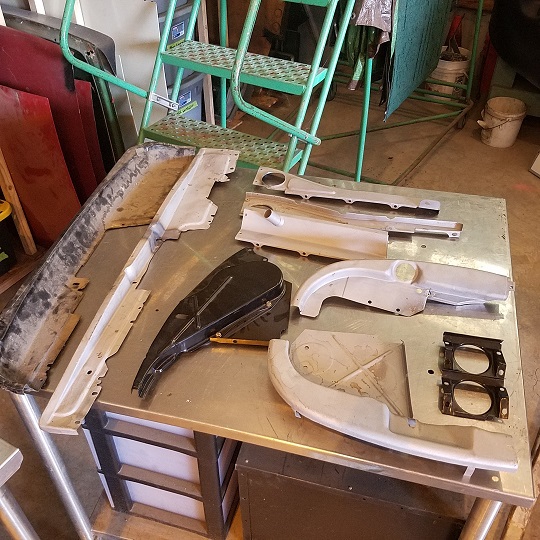 The seat belt bracket weld in will come tonight. Slept in (took wife to the movies), its time to go back out to the shop. Super In Law is chomping at the bit. |
|
|
|
| cary |
Aug 5 2017, 10:59 PM
Post
#271
|
|
Advanced Member Group: Members Posts: 3,900 Joined: 26-January 04 From: Sherwood Oregon Member No.: 1,608 Region Association: Pacific Northwest |
Now where was I. Here's Rick's measurements to get you started.
 I used the seat frame to set the alignment of the inner seat bracket. 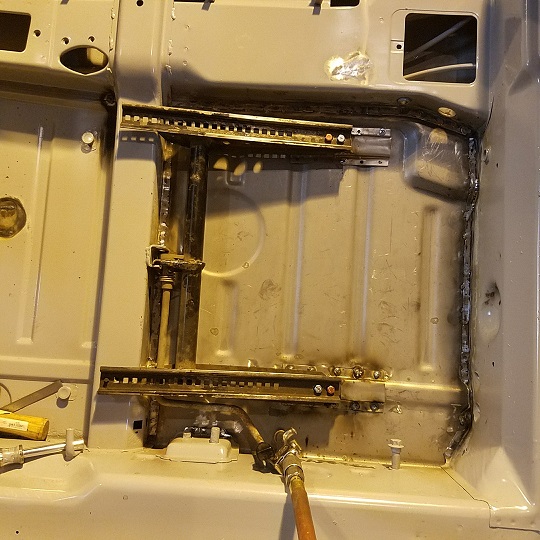 Drivers side went in without a hitch. On this early car setting the left seat is even easier. You still have the solid nutserts in the cross member. 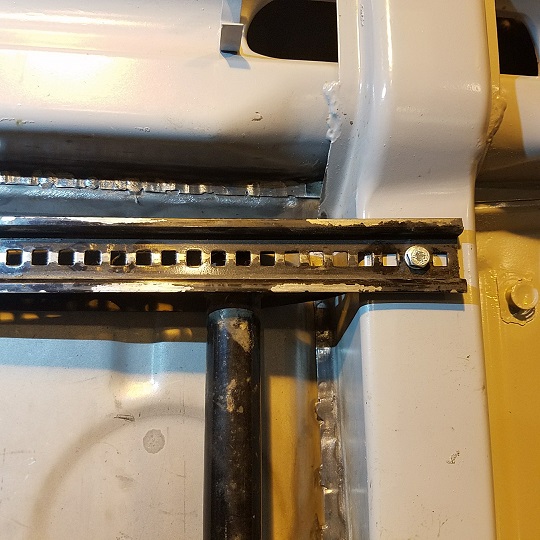 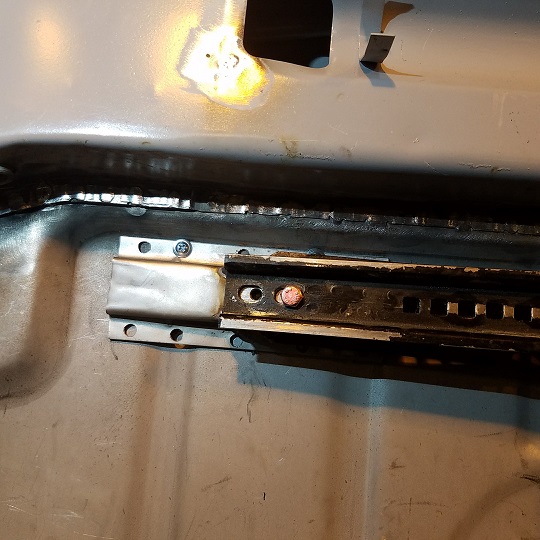 That was the end of the good times on the passenger seat. I installed (welded in) the adjustment bracket 3/32" off. (IMG:style_emoticons/default/hissyfit.gif) (IMG:style_emoticons/default/hissyfit.gif) I used the usual measurement 11" on center from the outside wall. Checked 3 other cars here on sight. But to get the seat 100% straight ahead, it was off. So it had to come out. Dammit ............ 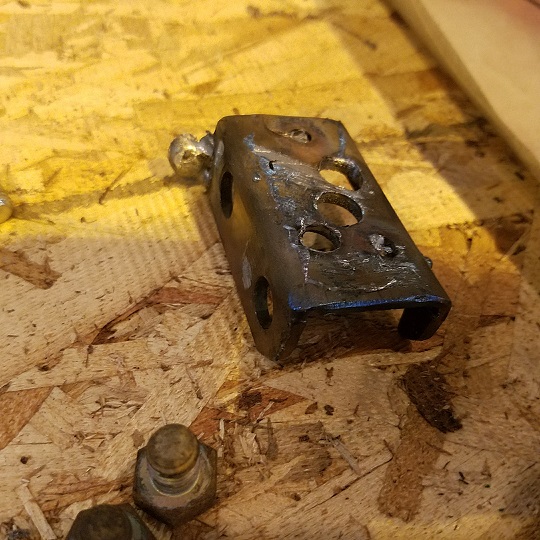 But by the end of the day I was back on track. Still pissed .................... 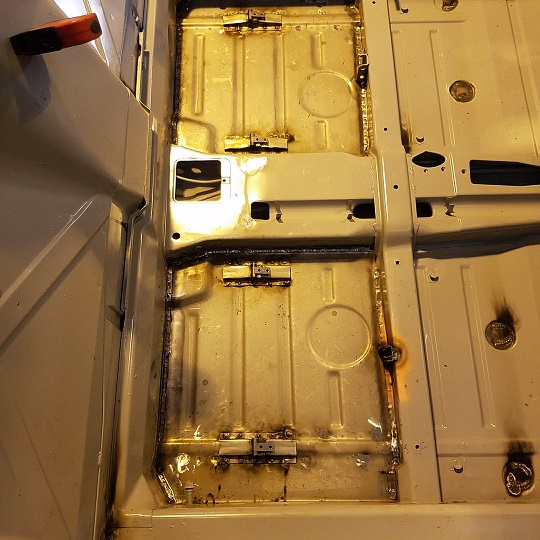 |
|
|
|
| cary |
Aug 6 2017, 12:45 AM
Post
#272
|
|
Advanced Member Group: Members Posts: 3,900 Joined: 26-January 04 From: Sherwood Oregon Member No.: 1,608 Region Association: Pacific Northwest |
Started Day #5 locating my second left seat frame to confirm the mounting alignment.
Then it was on to the preparing the right rear wheelhouse for the Mad Dog 914 GT stiffener panels. 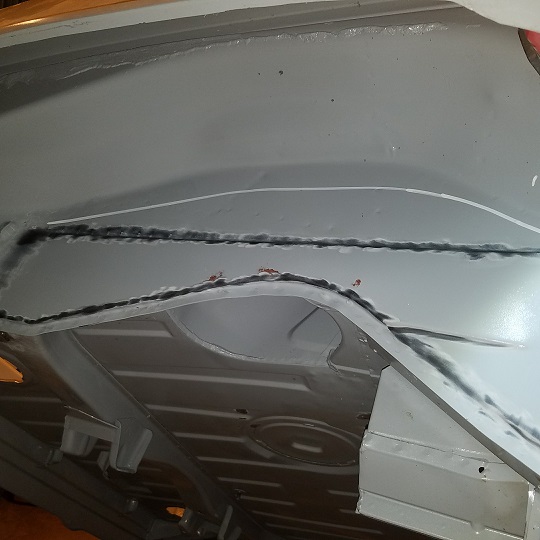 All of the epoxy primer needs to be removed from under the outside edge of the panels. If left, it would add impuritys into the weld. (IMG:style_emoticons/default/barf.gif) Then it was time to start pounding.  Needed to cut one slit ................... 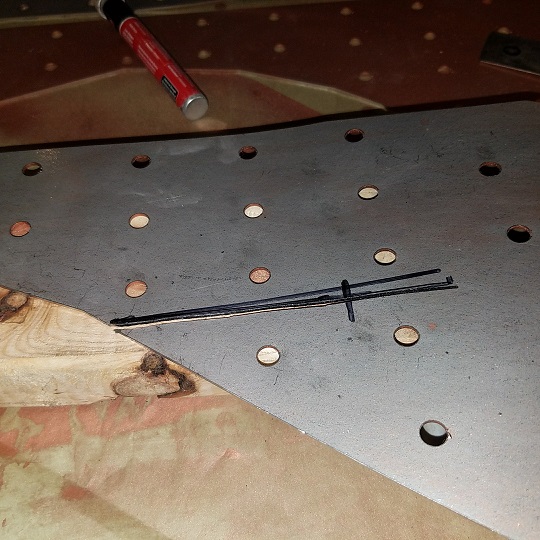 Then it was time to fit, hammer, fit, hammer, fit, hammer. Then start screwing it down tight. 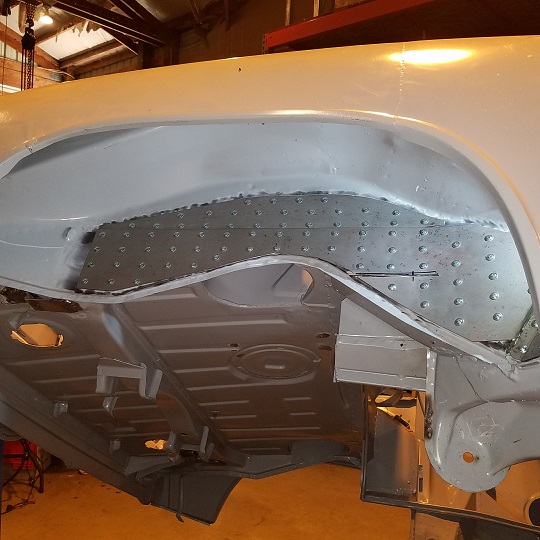 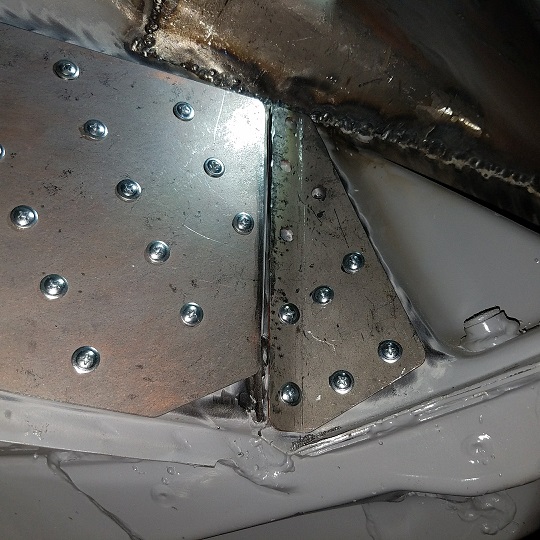 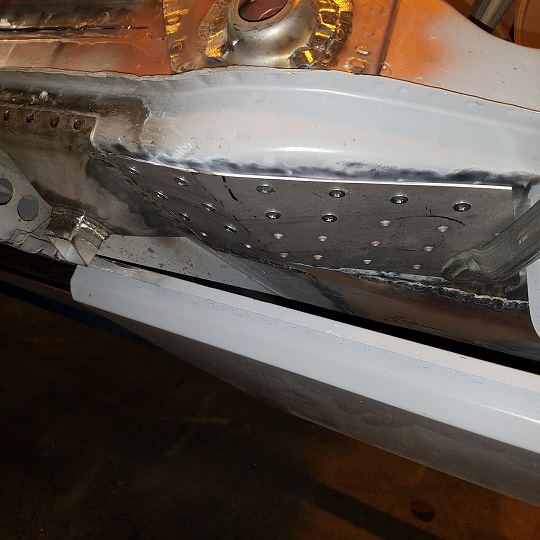 All of the above pretty simple. This one not so much. Multiple angles and quite a few nip and tucks. 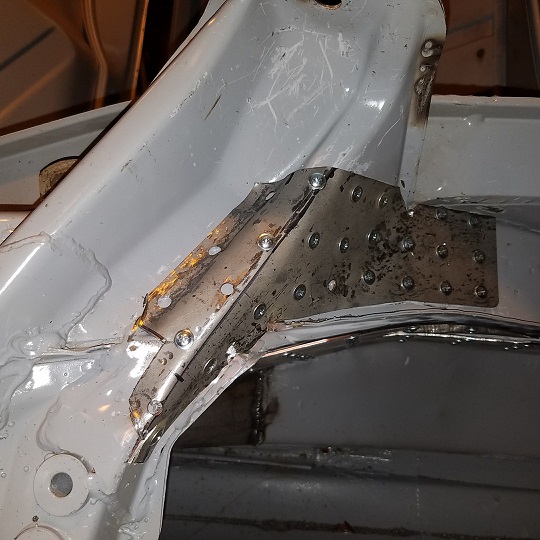 |
|
|
|
| cary |
Aug 6 2017, 08:44 AM
Post
#273
|
|
Advanced Member Group: Members Posts: 3,900 Joined: 26-January 04 From: Sherwood Oregon Member No.: 1,608 Region Association: Pacific Northwest |
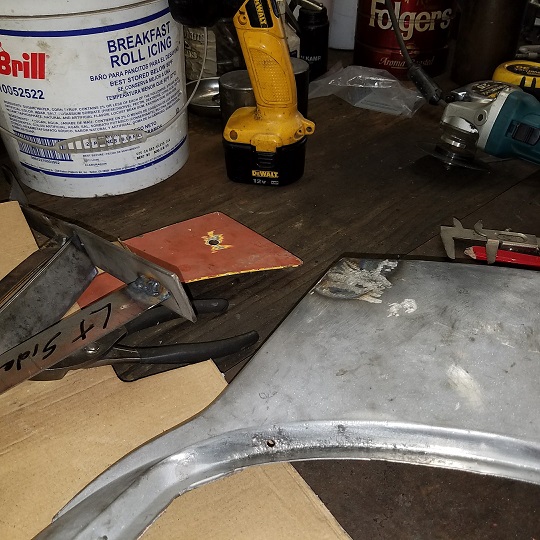
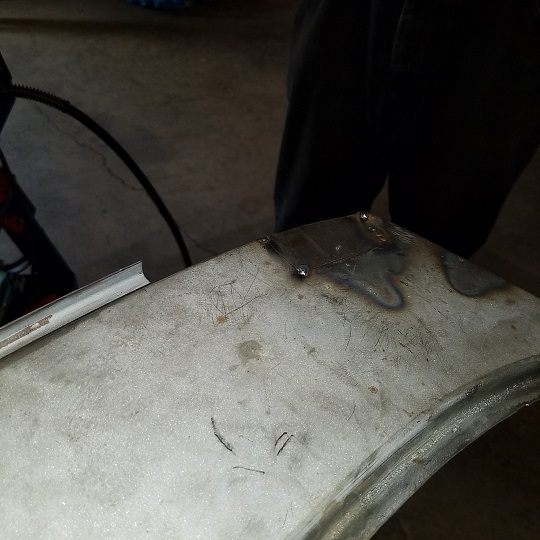
As I'm working on the chassis Super In Law is refurbishing the cowl .................
  |
|
|
|
| cary |
Aug 6 2017, 09:01 AM
Post
#274
|
|
Advanced Member Group: Members Posts: 3,900 Joined: 26-January 04 From: Sherwood Oregon Member No.: 1,608 Region Association: Pacific Northwest |
Fell asleep last night while writing the post ...........
The underneath piece is the only tricking one. It twists and turns a couple directions. I marked where I trimmed things off to get a nice tight fit. Reminds me of being in rally car build mode. 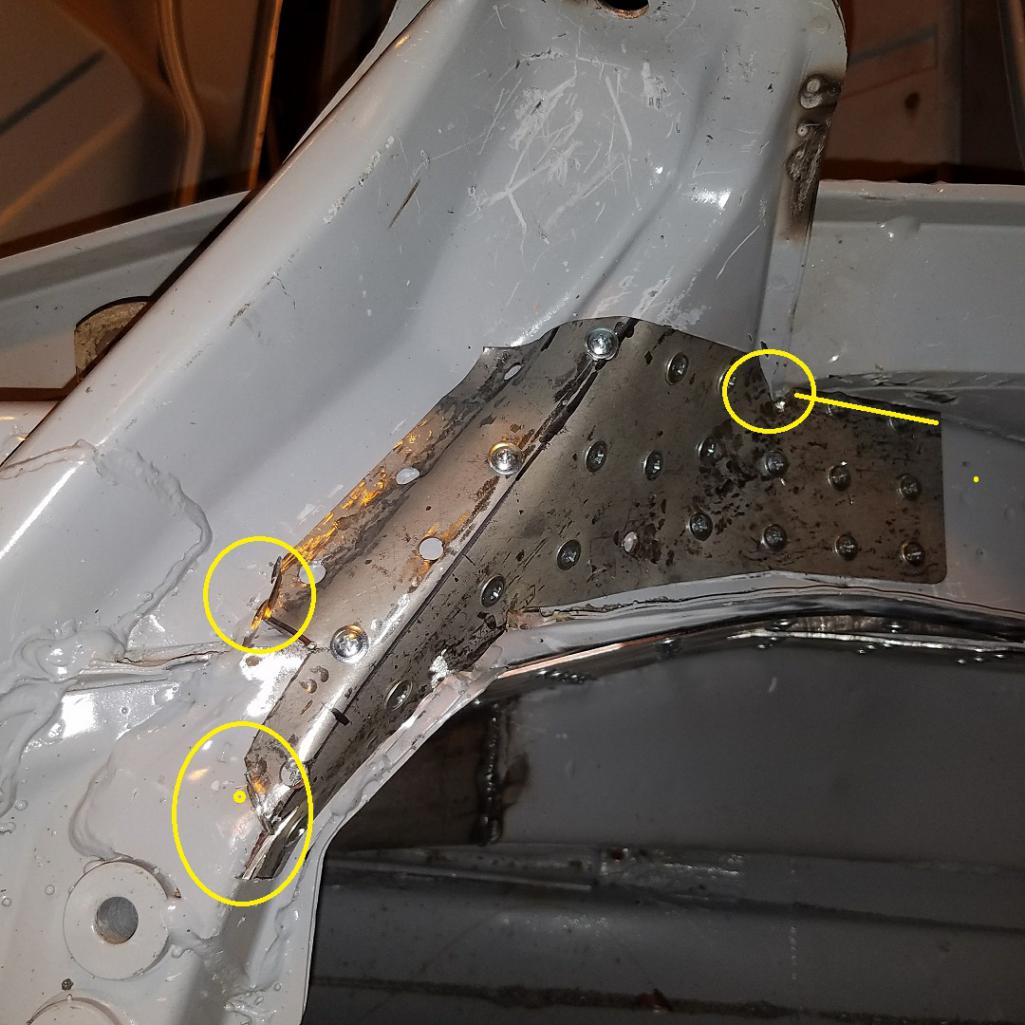 When it comes time to start welding. I'll flaten the tip of a drill bit to scrape off the epoxy as I weld each rosette. |
|
|
|
| raynekat |
Aug 7 2017, 05:17 PM
Post
#275
|
|
Advanced Member Group: Members Posts: 2,171 Joined: 30-December 14 From: Coeur d'Alene, Idaho Member No.: 18,263 Region Association: Pacific Northwest |
When these stiffening plates are welded in....is it just the rosette welds or do you also seam weld the perimeter as well? Definitely will add some strength to the tub.
Or do you just use seam sealer around the perimeter of each stiffening plate to keep moisture and corrosion away? |
|
|
|
| cary |
Aug 7 2017, 07:43 PM
Post
#276
|
|
Advanced Member Group: Members Posts: 3,900 Joined: 26-January 04 From: Sherwood Oregon Member No.: 1,608 Region Association: Pacific Northwest |
Calls out seam welded too. Edges have been prepped for seam welding.
|
|
|
|
| raynekat |
Aug 7 2017, 08:41 PM
Post
#277
|
|
Advanced Member Group: Members Posts: 2,171 Joined: 30-December 14 From: Coeur d'Alene, Idaho Member No.: 18,263 Region Association: Pacific Northwest |
QUOTE(cary @ Aug 7 2017, 06:43 PM) Calls out seam welded too. Edges have been prepped for seam welding. Whoa...that's going to take some time...and heat. Stay cool my friend. |
|
|
|
| cary |
Aug 7 2017, 10:26 PM
Post
#278
|
|
Advanced Member Group: Members Posts: 3,900 Joined: 26-January 04 From: Sherwood Oregon Member No.: 1,608 Region Association: Pacific Northwest |
You're right, I got the Miller cranked up even for the rosettes. 16ga being welded to an additional 2 layers. (IMG:style_emoticons/default/welder.gif)
I'm pretty anal about the heat build up in the steel. Every new rosette isn't welded until the area is cooled to 105 degrees or less. I use the infrared to test as I go. 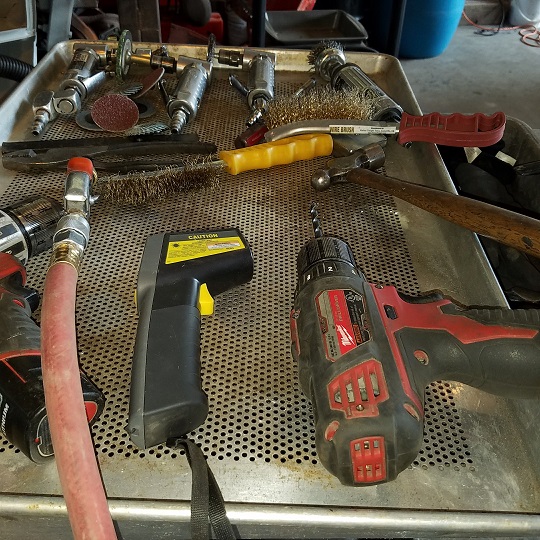 Installed the 5 right side stiffeners. Nothing new to show. Then it was time to start welding some rosettes .......................... 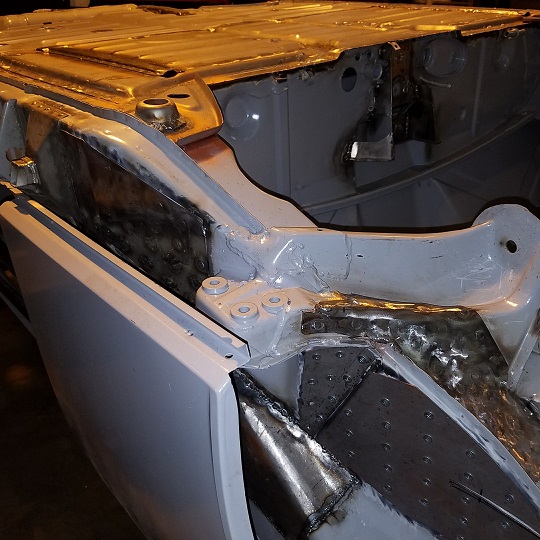 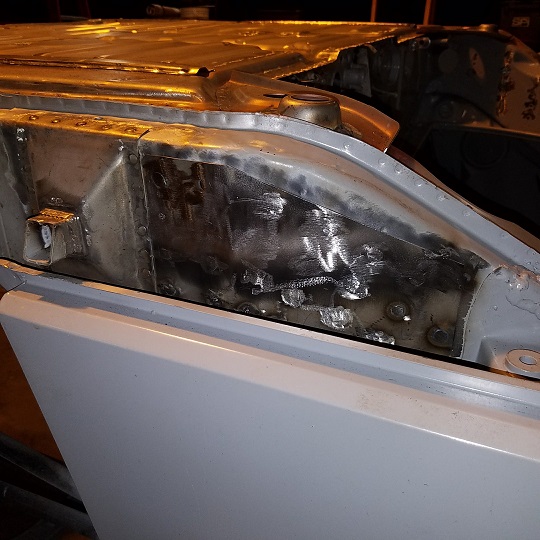 2 down and 8 pieces to go .......... (IMG:style_emoticons/default/welder.gif) Then I'll go back and do the seam welding. |
|
|
|
| cary |
Aug 8 2017, 12:20 AM
Post
#279
|
|
Advanced Member Group: Members Posts: 3,900 Joined: 26-January 04 From: Sherwood Oregon Member No.: 1,608 Region Association: Pacific Northwest |
Here's a couple shots of my door gap measurement tool.
One end on the door light switch. The other would actually sit right in the middle of the door latch. So on the outside it's a couple mm's from the radius. Tool is piece of bar stock cut to 1039mm. Easy to grab and measure. I'm checking it every time a weld in a new piece. 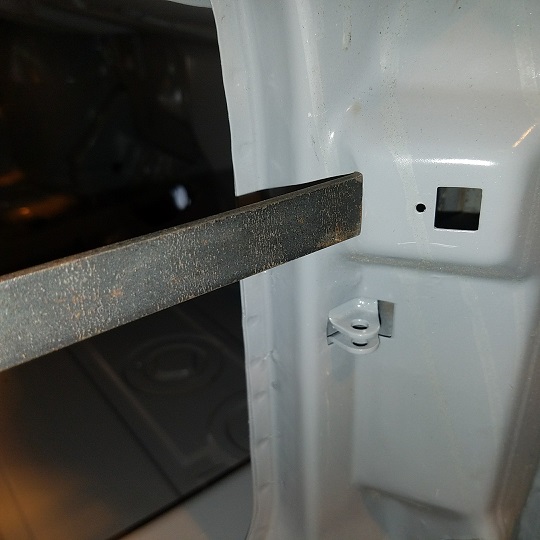  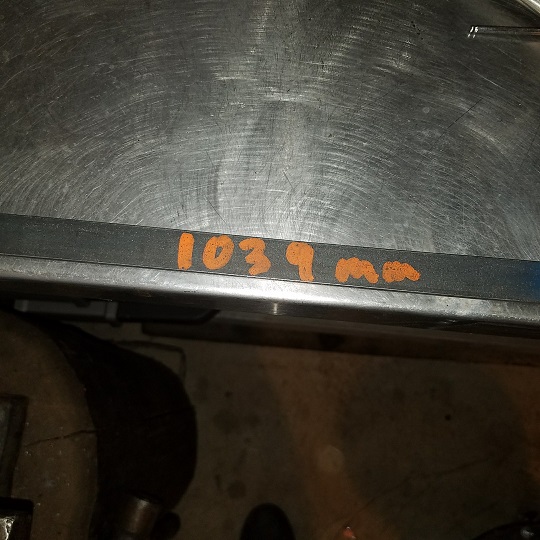 |
|
|
|
| cary |
Aug 9 2017, 07:36 AM
Post
#280
|
|
Advanced Member Group: Members Posts: 3,900 Joined: 26-January 04 From: Sherwood Oregon Member No.: 1,608 Region Association: Pacific Northwest |
Day #7. Worked a little over a half day. Finished up the rosette weld in on the right side. I have 2 of the left side welded in.
 Spent the other half of the day beginning to assemble and install the suspension and brakes on Matt's restoration.  |
|
|
|
|
2 User(s) are reading this topic (2 Guests and 0 Anonymous Users)
0 Members:

|
Lo-Fi Version | Time is now: 17th July 2026 - 08:22 PM |
Invision Power Board
v9.1.4 © 2026 IPS, Inc.