|
|
|
Porsche, and the Porsche crest are registered trademarks of Dr. Ing. h.c. F. Porsche AG.
This site is not affiliated with Porsche in any way. Its only purpose is to provide an online forum for car enthusiasts. All other trademarks are property of their respective owners. |
|
|

  |

| cary |
 Aug 10 2017, 07:58 AM Aug 10 2017, 07:58 AM
Post
#281
|
|
Advanced Member  Group: Members Posts: 3,900 Joined: 26-January 04 From: Sherwood Oregon Member No.: 1,608 Region Association: Pacific Northwest |
Day #8. Only put in a couple hours welding yesterday. I'm trying to run 2 races. Get Doug's car to paint. Get Matt's car put together so he can make it to Okteenerfest. Planning on another 2 hours this am. All the rosettes will be welded in and ground down.
|
   |

 
|
| 914_teener |
Aug 10 2017, 09:31 PM
Post
#282
|
|
914 Guru Group: Members Posts: 5,270 Joined: 31-August 08 From: So. Cal Member No.: 9,489 Region Association: Southern California |
QUOTE(raynekat @ Aug 1 2017, 11:20 AM)  Latest Porsche porn to show up at my doorstep. MFI pump rebuilt and upgraded to S/RS spec. Sent out to MFI Werks (Mark Jung) here in Oregon. He is the local wizard in rebuilding and modifying 911 MFI pumps. Went through the pump completely replacing some worn parts and putting together a new space cam (S/RS spec) that can feed the new 2.7 engine. All parts cleaned, painted, re-plated, etc. As new from the factory. All 6 injectors were checked for spray pattern, etc. Found a deficient one and replaced. Pity a lot of this wonderful stuff is pretty invisible on a 914-6 engine. (IMG:style_emoticons/default/wink.gif) Oh man......that is MFI porn...I love MFI. This is one of my favorite threads. Hope you guys can make in down to So Cal sometime so I can check out this work. It is great seeing this work. It cannot be underestimated the amount of time a patience it takes to do this work. Nice stuff Doug and great work Cary. |
|
|
|
| cary |
Aug 11 2017, 08:26 AM
Post
#283
|
|
Advanced Member Group: Members Posts: 3,900 Joined: 26-January 04 From: Sherwood Oregon Member No.: 1,608 Region Association: Pacific Northwest |
The rosette welding has been completed on both sides. (IMG:style_emoticons/default/beer.gif) Pretty tedious.
I'm thinking the seam welding will be worse. I'll do it in 1" stitches. Nice thing is I'll be able to tune the heat down. I only need to weld to the outer layer. This is the end of the Throw Down. Heading to the Eagle Cap Wilderness for a 6 day backpacking trip. 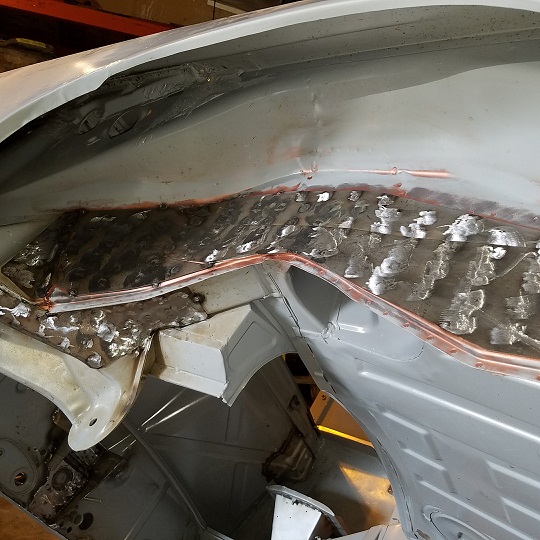 Like always, I'd didn't get as far as I wanted too. But put a good dent in it. |
|
|
|
| raynekat |
Aug 12 2017, 09:33 AM
Post
#284
|
|
Advanced Member Group: Members Posts: 2,171 Joined: 30-December 14 From: Coeur d'Alene, Idaho Member No.: 18,263 Region Association: Pacific Northwest |
While Cary's off hiking in the woods collecting mushrooms.... (IMG:style_emoticons/default/tongue.gif)
Been working on the NOS wiring harness some more. Although NOS, untouched and basically new....sitting on the shelf for 40+ years has it's issues. Most of the wrapping tape has lost it's stick-um if that's a word for it. It all needed replacing. Additionally, the NOS 1971 wiring harness doesn't come with all the little bits of aux wiring you need....like the jumper between the two horns up front. My original one, like the main wiring harness, was in rough shape. Lots of paint overspray, iffy connectors and a cracking sheath meant a new one was in order. So after about 30 minutes I came up with following replacement. Nearly factory (except for the wire colors) and will more than meet my needs. Amazing what you can do when you've got the right materials and some patience. 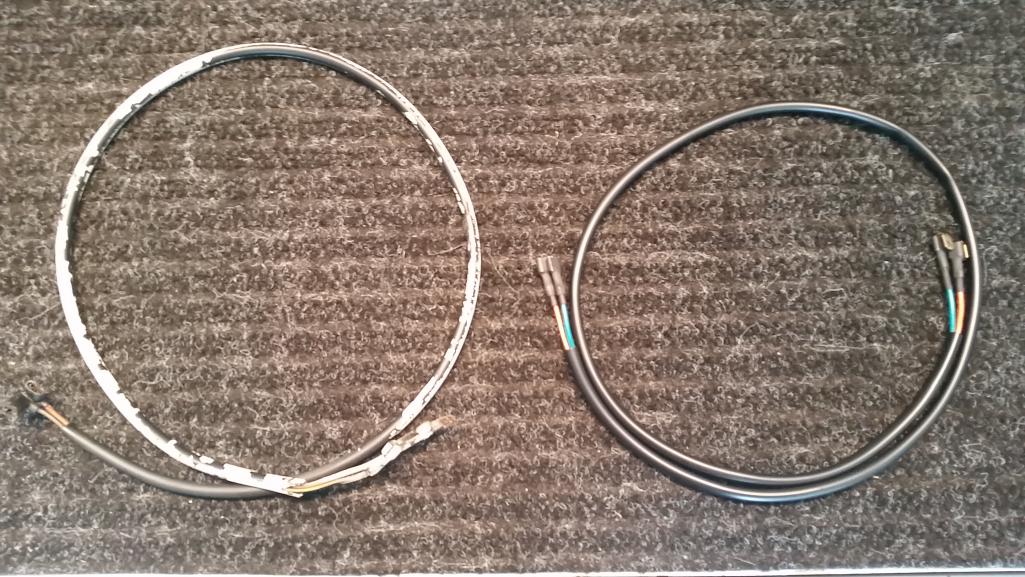 |
|
|
|
| raynekat |
Aug 12 2017, 09:37 AM
Post
#285
|
|
Advanced Member Group: Members Posts: 2,171 Joined: 30-December 14 From: Coeur d'Alene, Idaho Member No.: 18,263 Region Association: Pacific Northwest |
I've always got on hand the correct wire connectors and the right tool for the job.
Add in some heat shrink tubing from the local hardware store and you're in business. If the local hardware/auto parts store doesn't have what I need....I go to Belmetric for the electrical non-insulated connectors and McMaster-Carr for special heat shrink tubing and plastic sheathing materials. 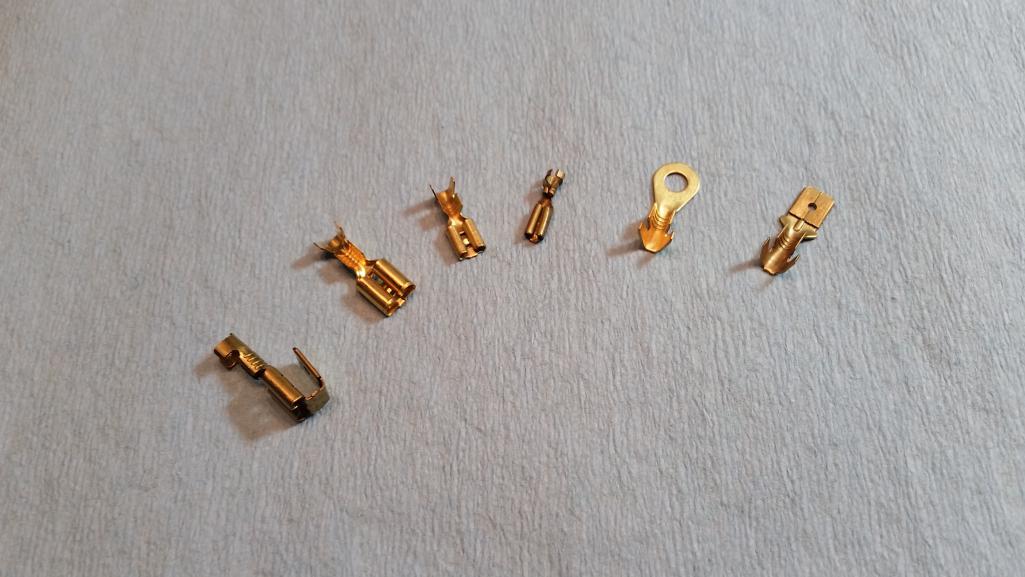 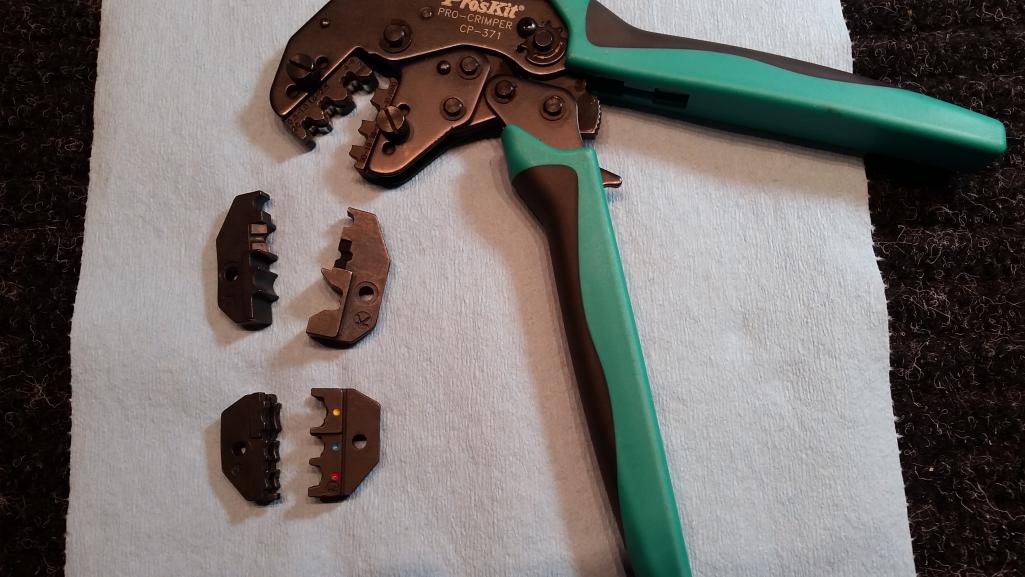 |
|
|
|
| mepstein |
Aug 12 2017, 10:05 AM
Post
#286
|
|
914-6 GT in waiting Group: Members Posts: 20,819 Joined: 19-September 09 From: Landenberg, PA/Wilmington, DE Member No.: 10,825 Region Association: MidAtlantic Region |
QUOTE(raynekat @ Aug 12 2017, 11:37 AM) I've always got on hand the correct wire connectors and the right tool for the job. Add in some heat shrink tubing from the local hardware store and you're in business. If the local hardware/auto parts store doesn't have what I need....I go to Belmetric for the electrical non-insulated connectors and McMaster-Carr for special heat shrink tubing and plastic sheathing materials. These builds are quite the journey. Thanks for posting. |
|
|
|
| raynekat |
Aug 12 2017, 03:08 PM
Post
#287
|
|
Advanced Member Group: Members Posts: 2,171 Joined: 30-December 14 From: Coeur d'Alene, Idaho Member No.: 18,263 Region Association: Pacific Northwest |
Working or mocking up the new LED headlight bulbs from 914 Rubber.
Assembling in the newly painted headlight assemblies. New plating and fasteners in most areas. 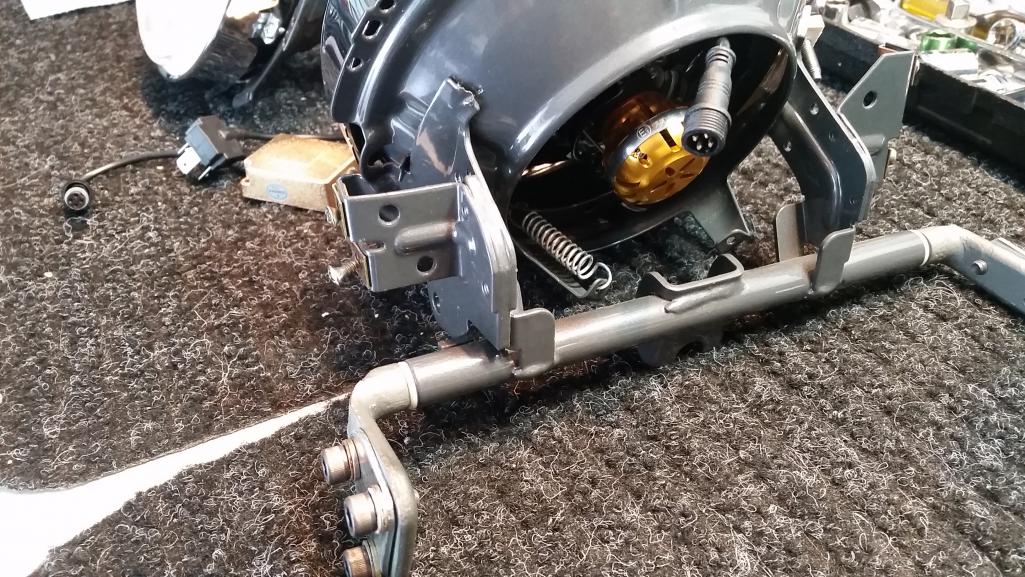 |
|
|
|
| raynekat |
Aug 12 2017, 03:10 PM
Post
#288
|
|
Advanced Member Group: Members Posts: 2,171 Joined: 30-December 14 From: Coeur d'Alene, Idaho Member No.: 18,263 Region Association: Pacific Northwest |
The H4 assemblies from 914 Rubber are quite nice.
The H4 fluting on the glass doesn't scream "LED lights." I like that. Attached thumbnail(s) 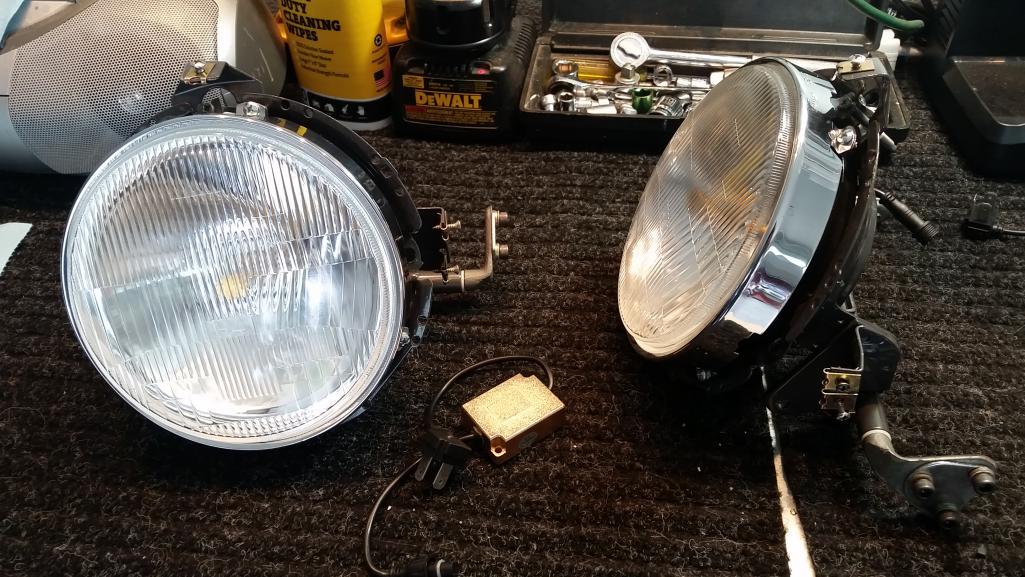
|
|
|
|
| raynekat |
Aug 12 2017, 03:14 PM
Post
#289
|
|
Advanced Member Group: Members Posts: 2,171 Joined: 30-December 14 From: Coeur d'Alene, Idaho Member No.: 18,263 Region Association: Pacific Northwest |
Wet sanded and painted my "white" headlight surrounds.
They were beyond help from a simple bleach soaking. I used a paint made for plastic and the color was heirloom white. Put a couple coats of clear on it. Should be great for a driver. 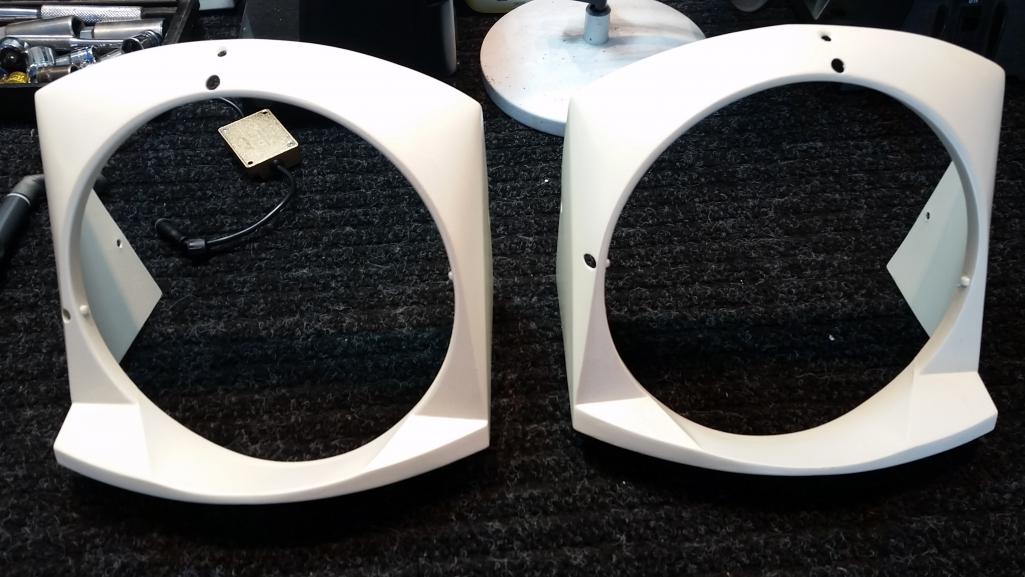 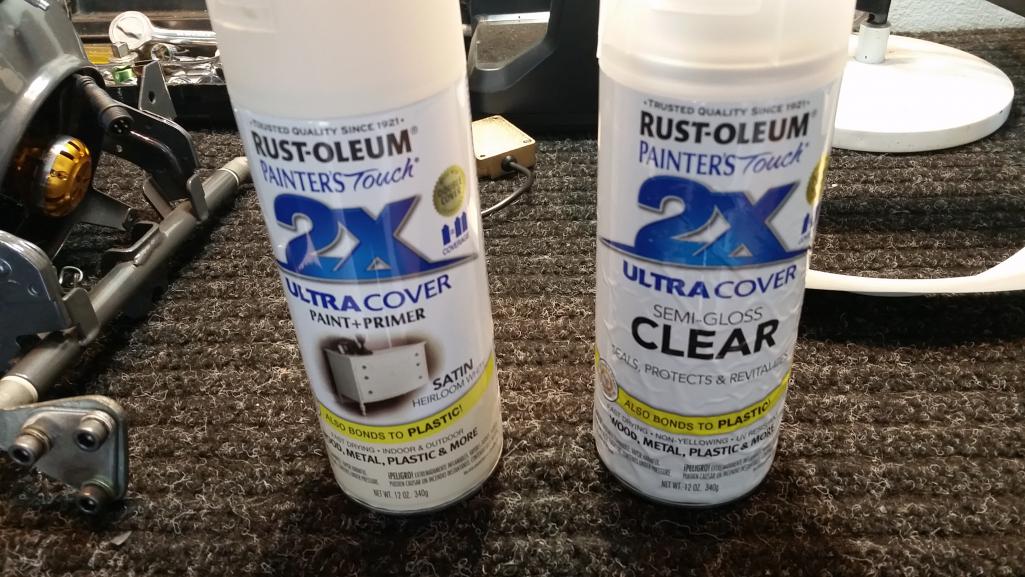 |
|
|
|
| cary |
Aug 22 2017, 07:38 AM
Post
#290
|
|
Advanced Member Group: Members Posts: 3,900 Joined: 26-January 04 From: Sherwood Oregon Member No.: 1,608 Region Association: Pacific Northwest |
Back at it. Seam welded in the left 3 fender portions of the Mad Dog GT stiffening kit.
With cooling down between welds it took about 4 hours, 3-4 stitches at a time. 5-6 and you could hear the the metal expand under the weld. Too much. 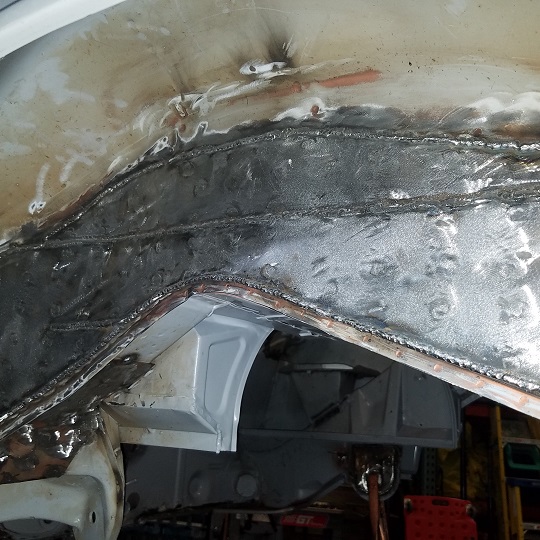 |
|
|
|
| mb911 |
Aug 22 2017, 08:06 AM
Post
#291
|
|
914 Guru Group: Members Posts: 7,794 Joined: 2-January 09 From: Burlington wi Member No.: 9,892 Region Association: Upper MidWest |
QUOTE(cary @ Aug 22 2017, 05:38 AM) Back at it. Seam welded in the left 3 fender portions of the Mad Dog GT stiffening kit. With cooling down between welds it took about 4 hours, 3-4 stitches at a time. 5-6 and you could hear the the metal expand under the weld. Too much. Yup about the same for me.. Takes awhile.. |
|
|
|
| cary |
Aug 23 2017, 08:03 AM
Post
#292
|
|
Advanced Member Group: Members Posts: 3,900 Joined: 26-January 04 From: Sherwood Oregon Member No.: 1,608 Region Association: Pacific Northwest |
It's Tuesday and back at the welder.
First piece of the day was the left suspension tie stiffener. Had a few issues with impurity's coming up thru the weld. Primarily epoxy primer down in the crack and crevices. It doesn't take that great a picture after I get it all tidied up. (IMG:style_emoticons/default/mad.gif) 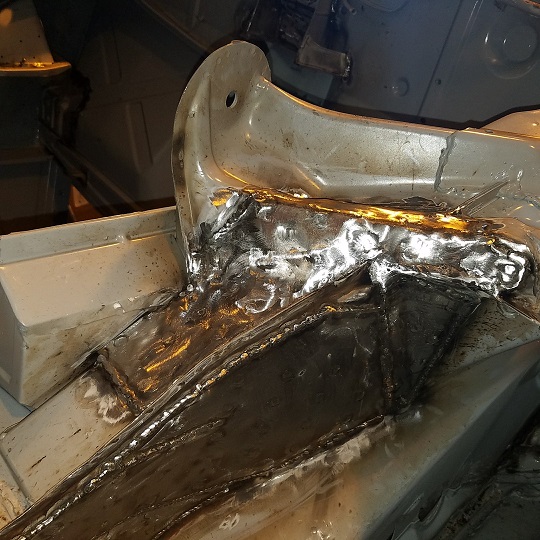 Then on to the left long "elbow" piece. Decided to do the top seam first. Might as well get the hard part out of the way. Pretty tricky getting in there. I was triggering the MIG gun with the left hand and guiding the stick out with my right. But I had to dig out my Miller scuba mask to get my head in there. The warmer weather made using the scuba mask much easier. it didn't seem to steam up. Or maybe it was the taking it off while letting it cool.   Then I seam welded the left and bottom. Decided on three stitches attaching it to the jack point. Just in case in 50 year it needs to come off. 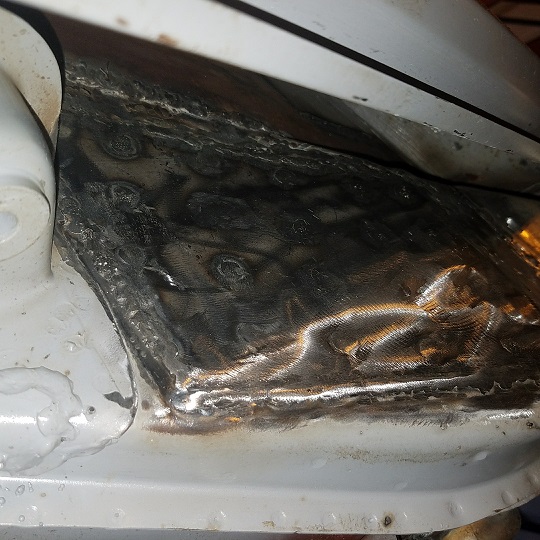 Then onto welding in the right 3 piece inner fender stiffener combo. Ended the day about half way completed. 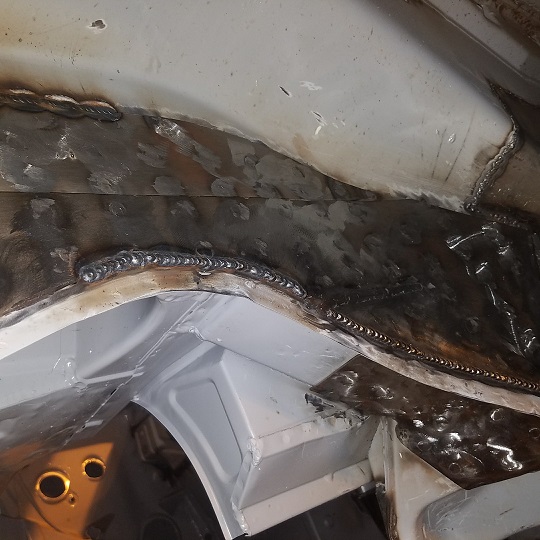 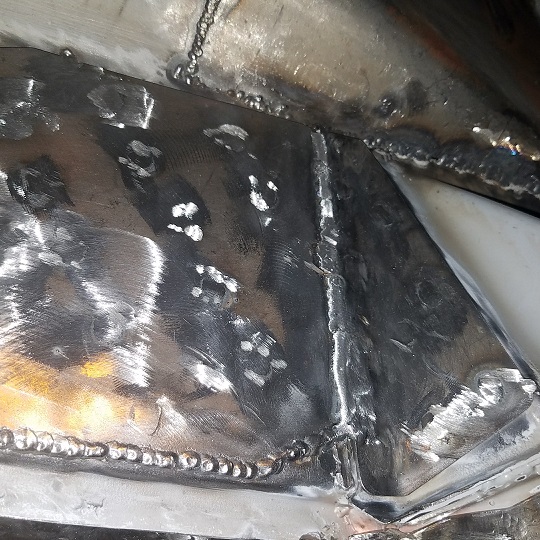 |
|
|
|
| raynekat |
Aug 31 2017, 05:18 PM
Post
#293
|
|
Advanced Member Group: Members Posts: 2,171 Joined: 30-December 14 From: Coeur d'Alene, Idaho Member No.: 18,263 Region Association: Pacific Northwest |
Fiddling around with my side shift rear rod today.
The one I had to work with was really worn badly back at the rear of the car. Obviously the plastic bushing had worn out allowing the rod to rub back and forth on the rear housing. I tried to clean it up the best I could with a file, but the rod wasn't really moving in the new plastic bushing all that smoothly. A quick search online for a new rear rod was not what I wanted to hear. AA has one for a mere $500. Ouch. I was worried that another 2nd hand rod would be worn as badly as well. Really....how many people keep that rear plastic bushing in great shape or change them out at all? So instead I removed the old end from the rod. This took some doing as I needed to cut back far enough to get through all the spot welds holding the end into the bar. But finally had success.  Next I needed to find a replacement rod end. McMaster-Carr is one of my "go to" places for tough to find items. I ended up buying a foot long piece of "tight tolerance multipurpose O1 tool steel rod." Tight tolerance is the key word here. They have a lot of different rod diameters....not just your typical 1/4, 3/8, 1/2" etc. Careful measuring yielded me purchasing the 0.6094" diameter rod. This worked fine but needed a bit of fine tuning on the ends. The 0.594" diameter would have worked better I think. But in the end, I sawed my new rod to the correct length and drilled a new hole for the conical screw. 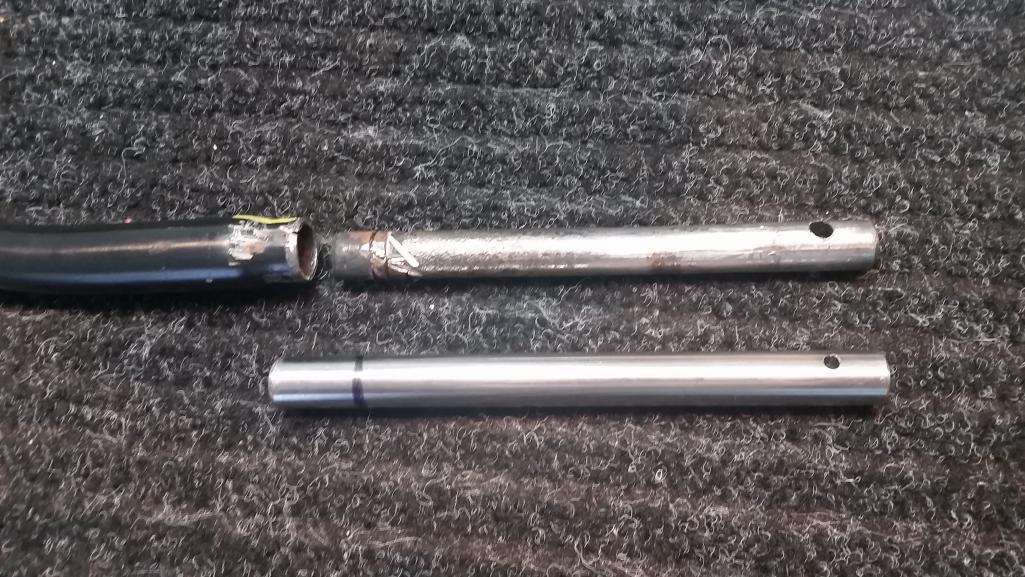 |
|
|
|
| raynekat |
Aug 31 2017, 05:22 PM
Post
#294
|
|
Advanced Member Group: Members Posts: 2,171 Joined: 30-December 14 From: Coeur d'Alene, Idaho Member No.: 18,263 Region Association: Pacific Northwest |
Then I aligned the hole for the conical screw; I had marked the rod in yellow paint where the hole was aligned previously.
Then hammered it into place. Next time I'm over at Cary's shop (MiddleMotors), I'll get him to tack weld this guy into permanent position. A coat of paint and it will be like new again. This new rod end will move in the plastic bushing like a greased pig now. Certainly ready for the next 100k miles.... And the best part....a 10 dollar fix beats a $500 new part every day of the week. 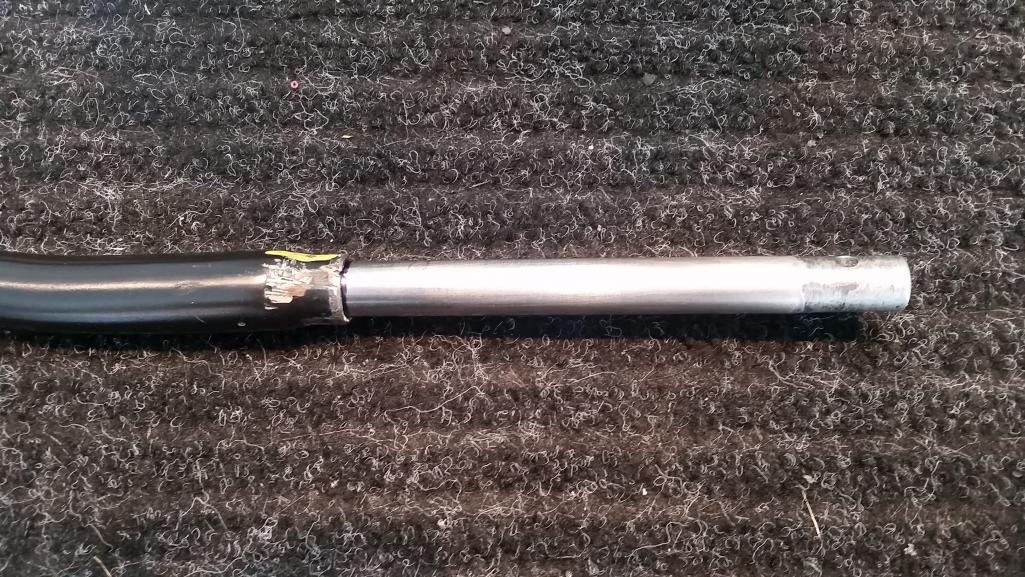 |
|
|
|
| raynekat |
Aug 31 2017, 06:39 PM
Post
#295
|
|
Advanced Member Group: Members Posts: 2,171 Joined: 30-December 14 From: Coeur d'Alene, Idaho Member No.: 18,263 Region Association: Pacific Northwest |
Quick pic sent to me today of the 2.7RS short block that Rothsport is building for me.
Case is a 7R variety. Long block should be complete in the next week (or two). Engine will have S cams and S/RS spec MFI for the induction. 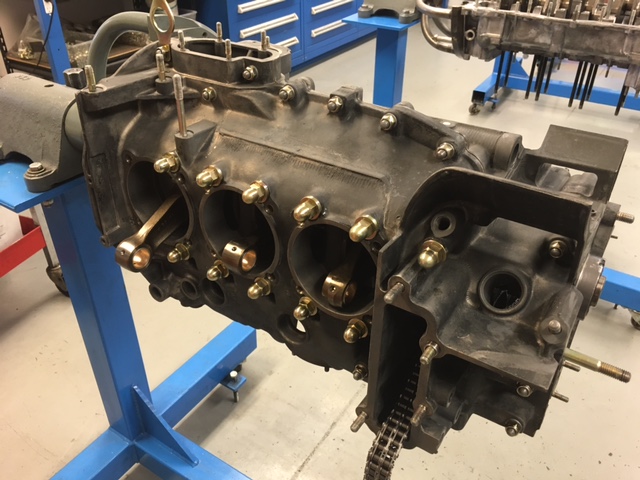 |
|
|
|
| raynekat |
Sep 1 2017, 09:29 PM
Post
#296
|
|
Advanced Member Group: Members Posts: 2,171 Joined: 30-December 14 From: Coeur d'Alene, Idaho Member No.: 18,263 Region Association: Pacific Northwest |
My new seatbelts arrived from Seatbelt Planet today.
A bit of a custom application. Sent them my tongues as I wanted to use them and the factory receivers. The belts and retractor mechanism and other hardware are all new. These will be a big improvement over the "fixed" early belts that a 71 would come with. I've had the seat belt mechanism provisions from a later car welded into my back pad sheet metal to bring the car up to modern seat belt capability. Thanks to Cary and Middle Motors for all that work. The belts I chose are navy blue to go with my tartan plaid seats. Subtle hopefully but custom and different from stock. 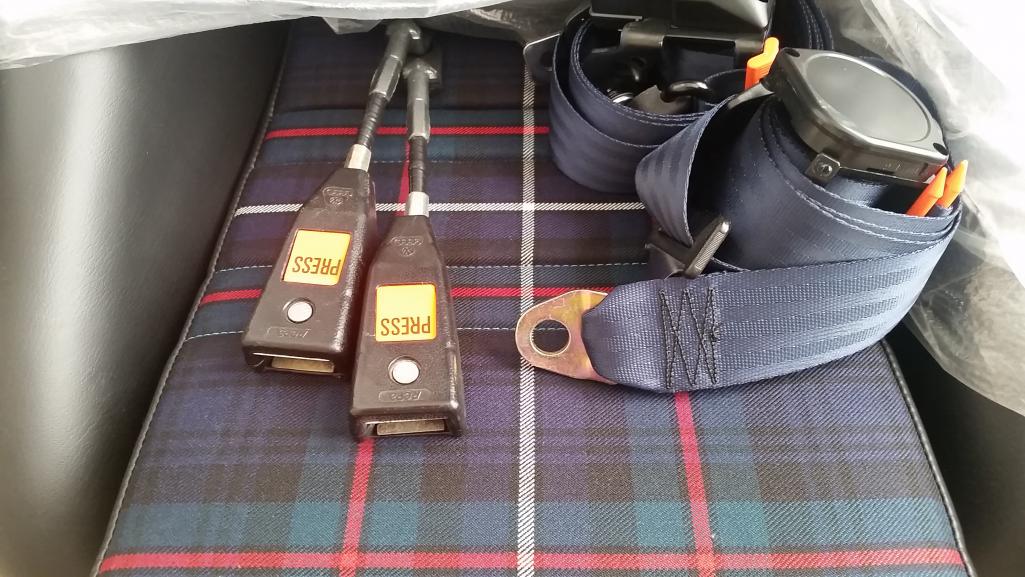 |
|
|
|
| raynekat |
Sep 1 2017, 09:34 PM
Post
#297
|
|
Advanced Member Group: Members Posts: 2,171 Joined: 30-December 14 From: Coeur d'Alene, Idaho Member No.: 18,263 Region Association: Pacific Northwest |
Also today in the mail arrived my "custom" gear shift knob.
Not sure how to describe this other than an "old world craftsman" making these. He's from Mexico and a lot of guys on the 911S Early registry put these in their cars. I saw one that caught my eye (checkered pattern) and went with that plus some of my own ideas. This guy uses exotic woods and it's all hand crafted (inlayed, laminated, the works) to come up with "one of kind" knobs. Just what my car needed I thought. Suppose you need to know where all the gears are? (IMG:style_emoticons/default/tongue.gif) Think I can handle that one. Ha Mated to my side shift transmission updates.  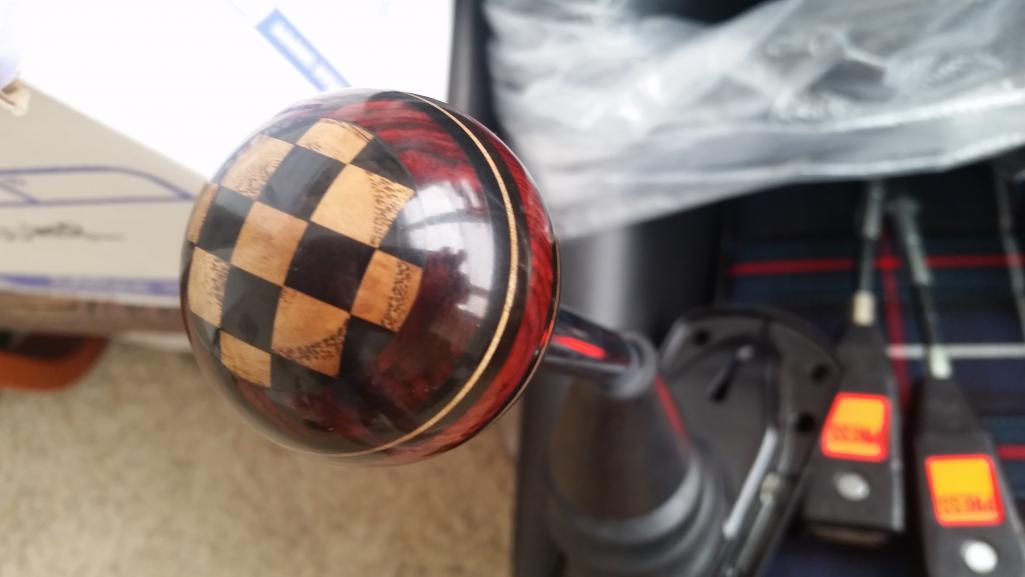 |
|
|
|
| raynekat |
Sep 1 2017, 09:40 PM
Post
#298
|
|
Advanced Member Group: Members Posts: 2,171 Joined: 30-December 14 From: Coeur d'Alene, Idaho Member No.: 18,263 Region Association: Pacific Northwest |
Last on the agenda for today was finishing up the mods to my NOS chassis wiring harness.
Finished hooking up everything to the gauges today which entailed coming up with a couple of ground "jumpers" for the 911 gauges I added. There's a bit of additional wiring that needs to happen when you're transplanting a 911 six cylinder engine into the car. My special crimpers and heat shrink plus some brown wiring took care of it. Tomorrow I'll post pics of the entire NOS harness with the new harness tape and "mods." 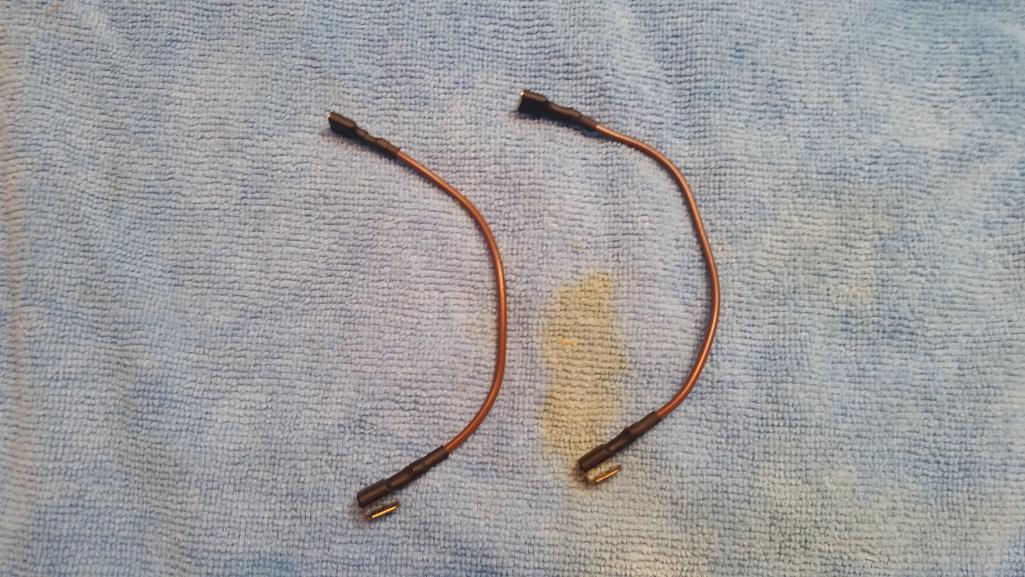 |
|
|
|
| raynekat |
Sep 2 2017, 08:35 PM
Post
#299
|
|
Advanced Member Group: Members Posts: 2,171 Joined: 30-December 14 From: Coeur d'Alene, Idaho Member No.: 18,263 Region Association: Pacific Northwest |
Worked on getting the new gauges all hooked up into the NOS 71 wiring harness.
This necessitated adding a couple of ground jumpers and additional wires. You'll see the orange wire coming in from the left. That will feed the oil pressure signal from the engine. The amber warning light will become my low fuel warning light. Since I don't have the 914-4 multi-gauge anymore, I had North Hollywood Speedo put a fuel gauge in the bottom of the tach. There was no provision anymore for a low fuel warning light. Anyway....all the terminals or bulbs have a dedicated wire now and should work as desired. Quite a busy area this is behind your gauges. 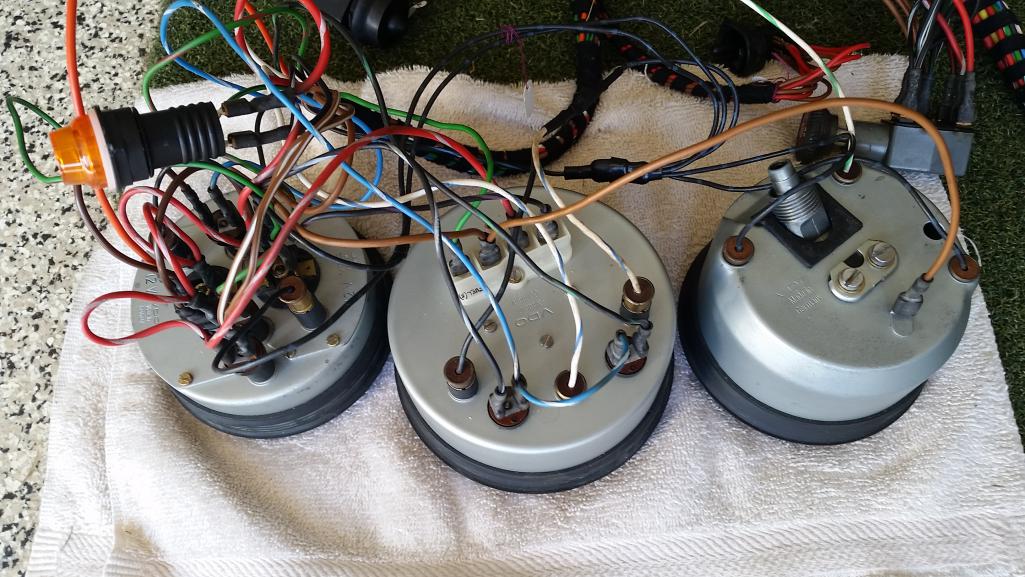 |
|
|
|
| raynekat |
Sep 2 2017, 08:48 PM
Post
#300
|
|
Advanced Member Group: Members Posts: 2,171 Joined: 30-December 14 From: Coeur d'Alene, Idaho Member No.: 18,263 Region Association: Pacific Northwest |
Refurbished the 914-6 engine relay panel I had sourced.
A thorough cleaning was necessary. A couple of the copper traces on the backside were not making good contact with the connector on the front of the board. These needed to be re-soldered. Additionally, the potting on the backside had seen it's better days. I re-potted that with some interesting stuff. It's called Magic Gel 300 and it's made by Ray Tech. A 2 part solution you mix up and "gels" up in about 10 minutes time. I like it because it's translucent....so you can see the copper traces on the backside. Finally I had to locate a couple of relays for the panel. The RPM transducer (box at the top) was spendy but necessary I thought with the MFI motor I had planned for. This electronic gizmo shuts off fuel to the MFI pump when you are coasting both saving you fuel and preventing back firing. 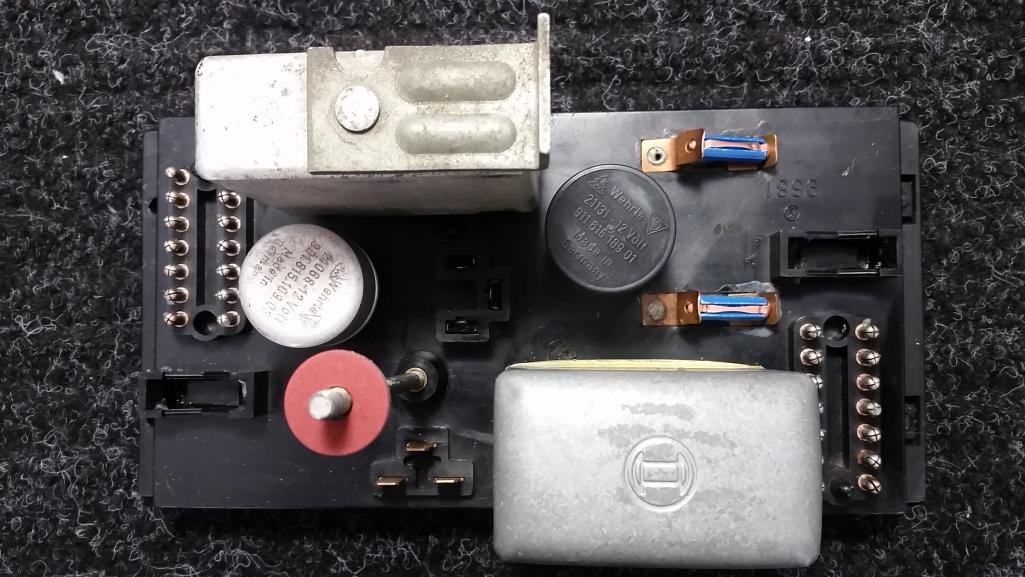 |
|
|
|
|
1 User(s) are reading this topic (1 Guests and 0 Anonymous Users)
0 Members:

|
Lo-Fi Version | Time is now: 17th July 2026 - 09:14 PM |
Invision Power Board
v9.1.4 © 2026 IPS, Inc.