|
|
|
Porsche, and the Porsche crest are registered trademarks of Dr. Ing. h.c. F. Porsche AG.
This site is not affiliated with Porsche in any way. Its only purpose is to provide an online forum for car enthusiasts. All other trademarks are property of their respective owners. |
|
|

  |

| raynekat |
 Sep 2 2017, 08:56 PM Sep 2 2017, 08:56 PM
Post
#301
|
|
Advanced Member  Group: Members Posts: 2,171 Joined: 30-December 14 From: Coeur d'Alene, Idaho Member No.: 18,263 Region Association: Pacific Northwest |
The NOS 71 wiring harness in all it's splendor.
This was purchased from Aase Porsche a couple years ago. My harness had been hacked up pretty extensively over it's lifetime. Thought it would be nice to have a fresh/virgin harness to work with. Most of the harness could be used without too many changes. Things I did change though included: 1) Relocating the fuel pump to the front trunk, so needed to add a wire into the main harness for this. 2) Added an additional wire into the main harness for the oil pressure gauge. 3) Rerouted most of the wires in the 14 pin connector that goes into the engine relay board. 4) Added a JWest fog light module. 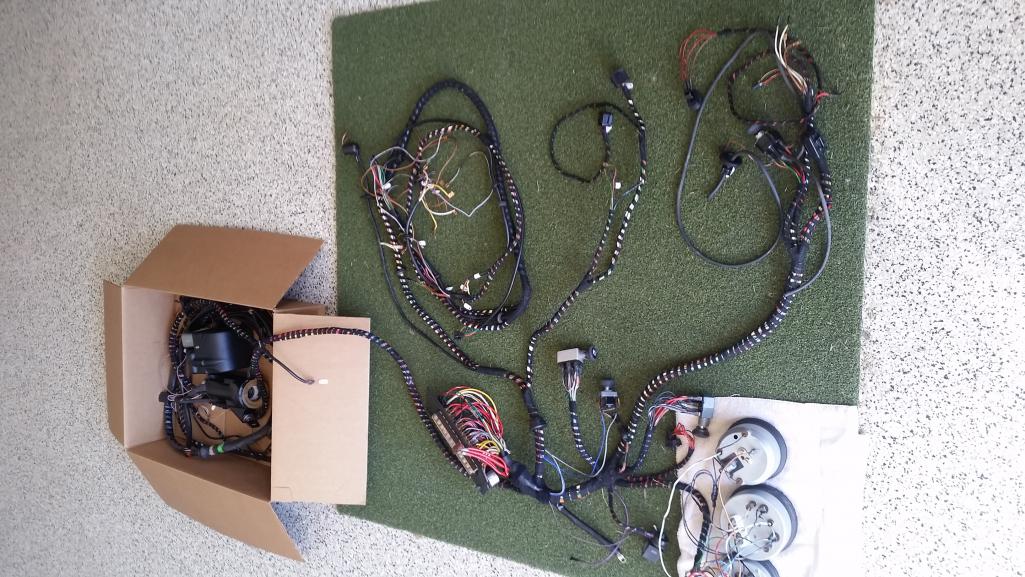 |
   |

 
|
| raynekat |
Sep 2 2017, 09:00 PM
Post
#302
|
|
Advanced Member Group: Members Posts: 2,171 Joined: 30-December 14 From: Coeur d'Alene, Idaho Member No.: 18,263 Region Association: Pacific Northwest |
All the harness wrap tape on my NOS 71 wiring harness had seen it's better days.
Most of the glue had given up many years ago I think. I removed all of the old tape and replaced with 914 Rubber's harness tape. It is the correct width and has a nice cloth topside. I augmented this with some similar tape of 1/2" width for doing the junctions and ends of the harness. 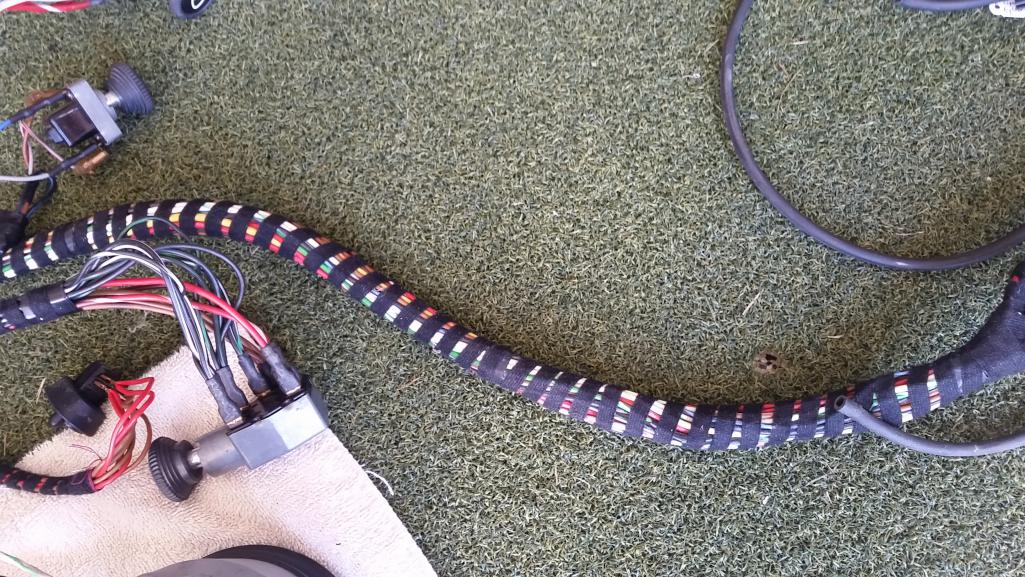 |
|
|
|
| raynekat |
Sep 2 2017, 09:03 PM
Post
#303
|
|
Advanced Member Group: Members Posts: 2,171 Joined: 30-December 14 From: Coeur d'Alene, Idaho Member No.: 18,263 Region Association: Pacific Northwest |
Finally I switched out the old fuse panel for a new one I purchased on eBay.
Installed in my newly painted fuse panel frame with new fuses and a new cover completed this part of the project. The chassis electrics are all ready to go.... As the engine gets built up, the engine wiring harness will be put together. Likely going with Kroon out of Holland for this. 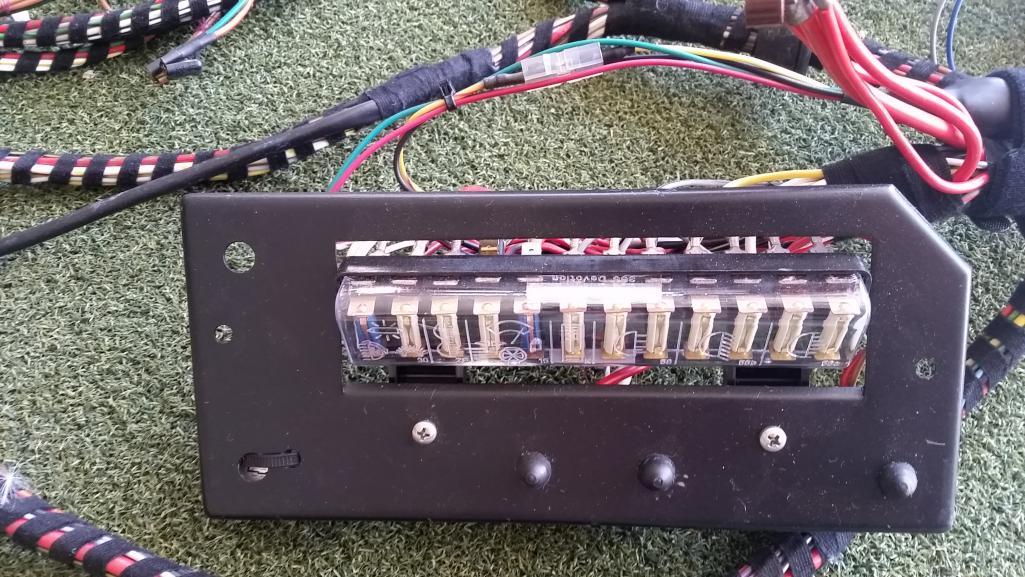 |
|
|
|
| Cairo94507 |
Sep 3 2017, 06:05 AM
Post
#304
|
|
Michael Group: Members Posts: 10,706 Joined: 1-November 08 From: Auburn, CA Member No.: 9,712 Region Association: Northern California |
Very nice work. (IMG:style_emoticons/default/smilie_pokal.gif)
|
|
|
|
| LowBridge |
Sep 3 2017, 08:10 AM
Post
#305
|
|
Member Group: Members Posts: 370 Joined: 10-August 15 From: Lunenburg, MA Member No.: 19,045 Region Association: North East States |
this is a great read... well done and keep at it
|
|
|
|
| cary |
Sep 21 2017, 09:59 PM
Post
#306
|
|
Advanced Member Group: Members Posts: 3,900 Joined: 26-January 04 From: Sherwood Oregon Member No.: 1,608 Region Association: Pacific Northwest |
I'm back. Had to rest up a bit after the throw down on Matt's car.
Task #1 today. Tune up and mount the AA 914-6 CDI hanger bracket reproduction. Needs a little work. Both sides need a little squaring up. And the corners need a little rounding. This all done on the belt/disk sander. So you don't take off too much material. 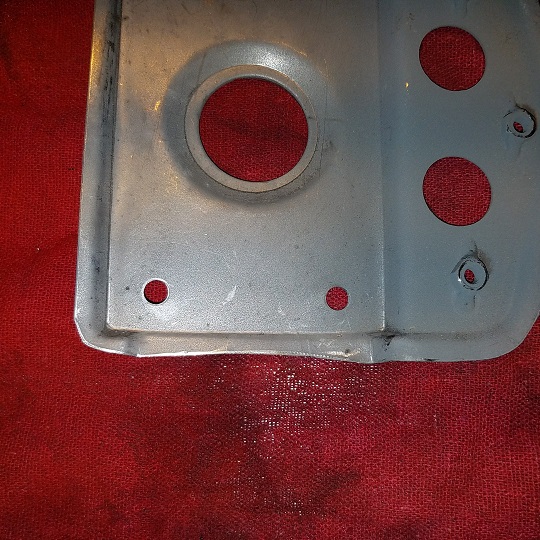 Then a new center hole needs to be drilled and a new nut welded on. But before that, the old nut needs to be removed and the hole welded in. 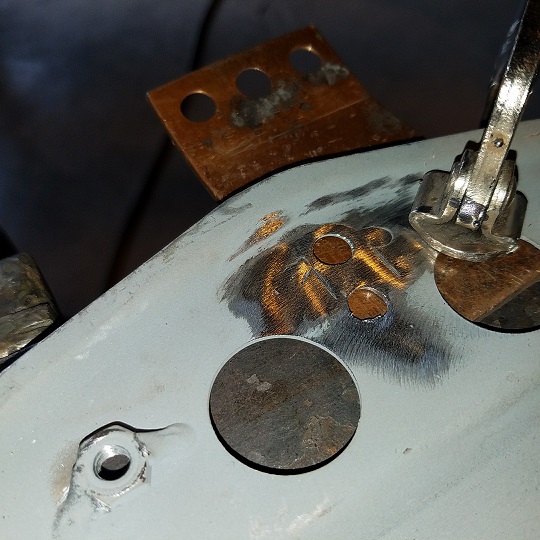 Then a test fit before it heads to Rothsport with the 914-6 engine tin for powder coating. 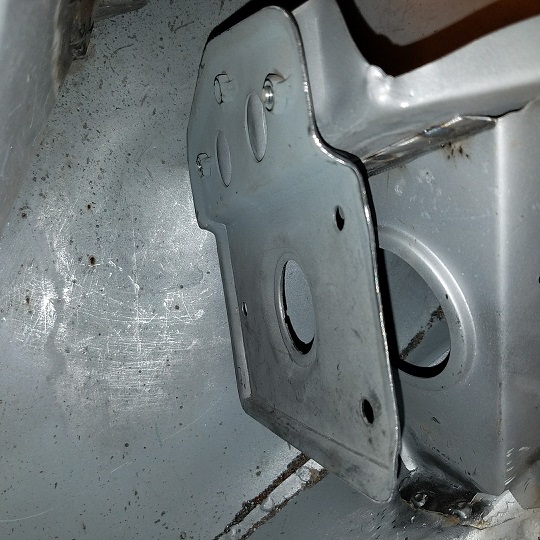  |
|
|
|
| cary |
Sep 21 2017, 10:03 PM
Post
#307
|
|
Advanced Member Group: Members Posts: 3,900 Joined: 26-January 04 From: Sherwood Oregon Member No.: 1,608 Region Association: Pacific Northwest |
Next stop, finish welding in the right rear MadDog chassis stiffener.
With the 40 degree drop in ambient temp welding went much smoother and faster. 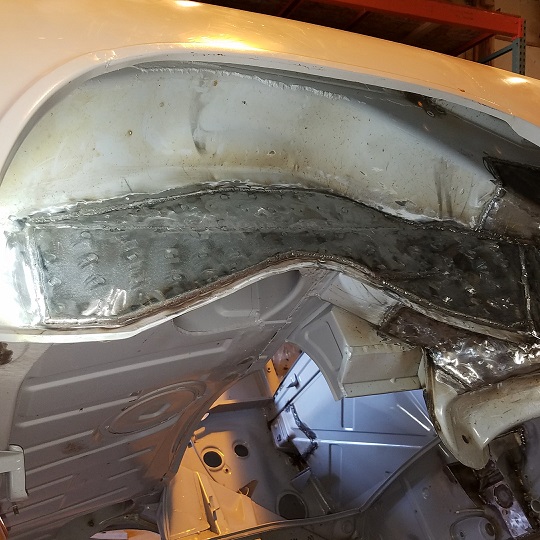 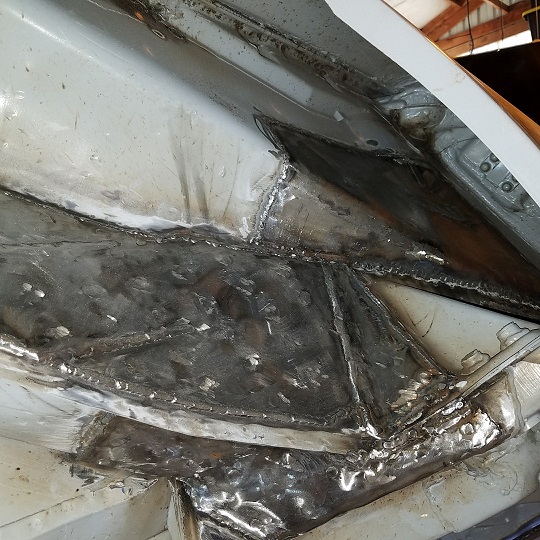 |
|
|
|
| cary |
Sep 21 2017, 10:13 PM
Post
#308
|
|
Advanced Member Group: Members Posts: 3,900 Joined: 26-January 04 From: Sherwood Oregon Member No.: 1,608 Region Association: Pacific Northwest |
Next ....................
One of the signature MiddleMotors touches. The floor pan plugs removed from the old removed floor pan and cut into the new. 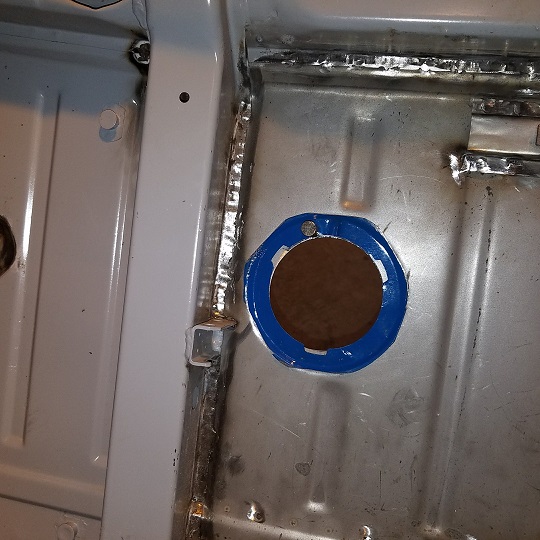 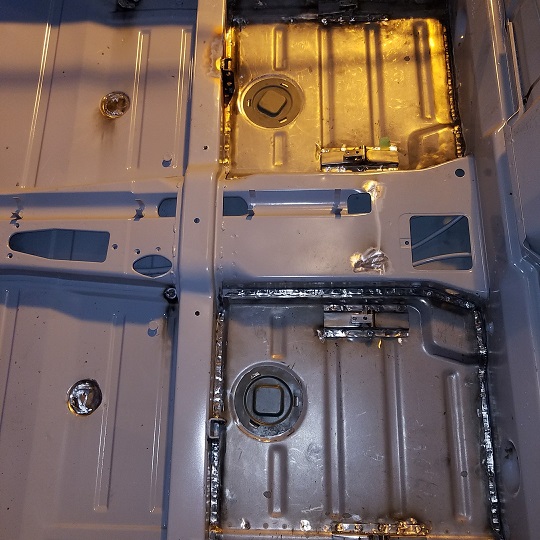 Last thing at the end of the day. Wiping down the inner long stiffening kit with wax and grease remover. That's where we'll start tomorrow. That's after we go and look at a used 2 post lift and get supplies at the welding store. 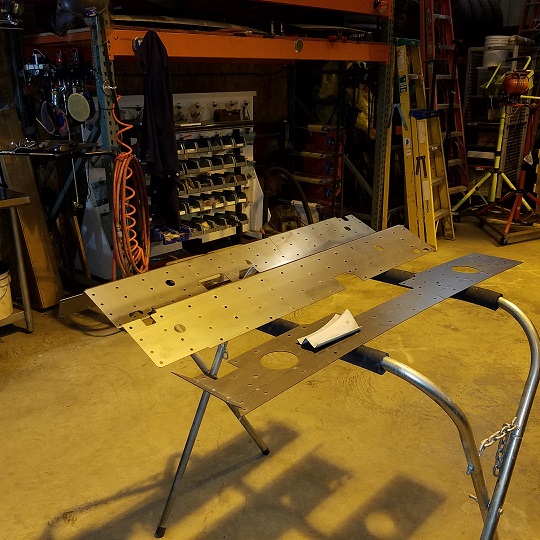 |
|
|
|
| Woodside914 |
Sep 21 2017, 11:41 PM
Post
#309
|
|
Member Group: Members Posts: 176 Joined: 19-May 10 From: Woodside, CA Member No.: 11,743 Region Association: Northern California |
Great thread!!
It's so nice to see another '71 1.7 Light Ivory to be reborn again! You're doing a fantastic job with amazing patience & attention to detail. |
|
|
|
| jmz |
Sep 22 2017, 08:09 AM
Post
#310
|
|
Member Group: Members Posts: 174 Joined: 11-April 16 From: Lone Star State Member No.: 19,886 Region Association: None |
Man o man Doug, I just love this thread and you ability to embrace scope creep!
|
|
|
|
| raynekat |
Sep 22 2017, 12:31 PM
Post
#311
|
|
Advanced Member Group: Members Posts: 2,171 Joined: 30-December 14 From: Coeur d'Alene, Idaho Member No.: 18,263 Region Association: Pacific Northwest |
QUOTE(jmz @ Sep 22 2017, 07:09 AM)  Man o man Doug, I just love this thread and you ability to embrace scope creep! Jay, it's been a long road so far. I think about 2-1/2 years since I purchased the car. You'd think with me being retired, I could knock this out a bit quicker? Steady wins the race I guess. Hopefully we'll have the metal work done this fall and the car will go to paint over the winter. The driveline (engine/gearbox) will be complete this winter as well. A nice 2.7 RS MFI engine along with a trick gearbox with all the right bits. Should be very stealthy and quick 914 narrow body and all. Hoping to have in on the road by summer 2018, so that's not all that far away. Lucky I'm a patient guy. But I'm becoming like that cartoon about the vulture....patience my xxx, I'm gonna kill something. (IMG:style_emoticons/default/biggrin.gif) |
|
|
|
| cary |
Sep 22 2017, 08:55 PM
Post
#312
|
|
Advanced Member Group: Members Posts: 3,900 Joined: 26-January 04 From: Sherwood Oregon Member No.: 1,608 Region Association: Pacific Northwest |
First order of business today was installing the e-brake cable guide/cover.
First step, coat the underside with weld thru primer. 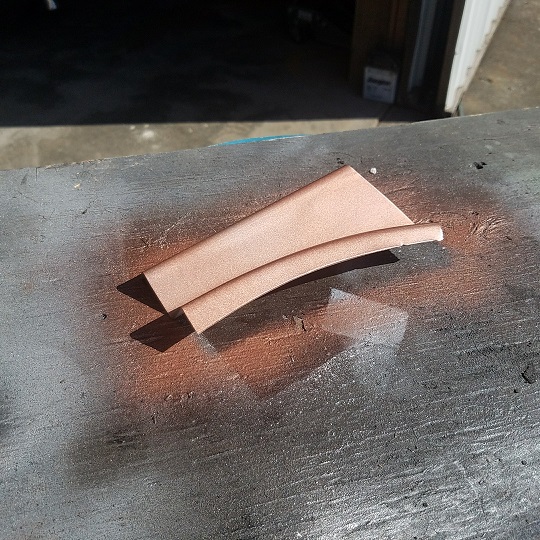 Then glue it down with the electric glue gun .............. 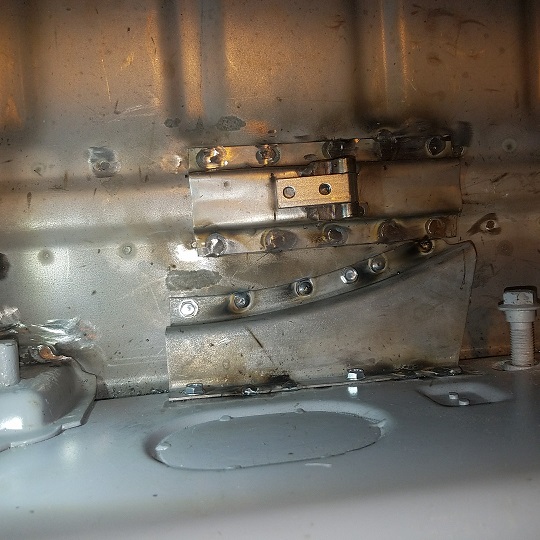 |
|
|
|
| cary |
Sep 22 2017, 09:56 PM
Post
#313
|
|
Advanced Member Group: Members Posts: 3,900 Joined: 26-January 04 From: Sherwood Oregon Member No.: 1,608 Region Association: Pacific Northwest |
Then onto installing the Mad Dog Motorsports inner long stiffener kit.
I decided to tackle the hardest side first, the left. Which has all e-brake hardware and handle cut out. It needed quite a bit of tuning to get the sanitary fit that I liked. 1st. A little more space around the rest. 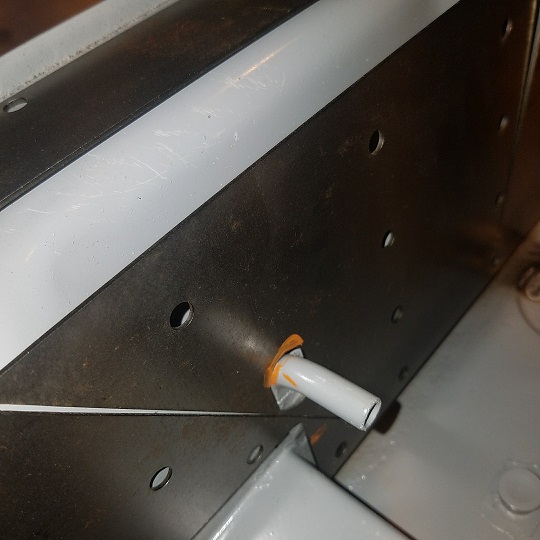 Plus I enlarged the opening for pivot. 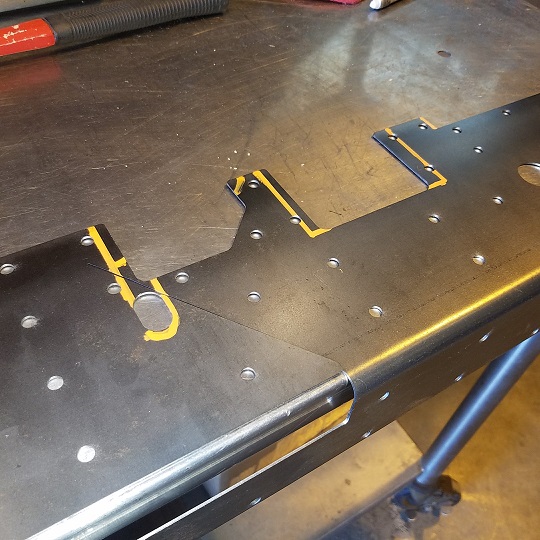 Here's a couple shots for the future showing that the inside of both the left and right sides have been coated with U-Pol copper weld thru primer, the good stuff. 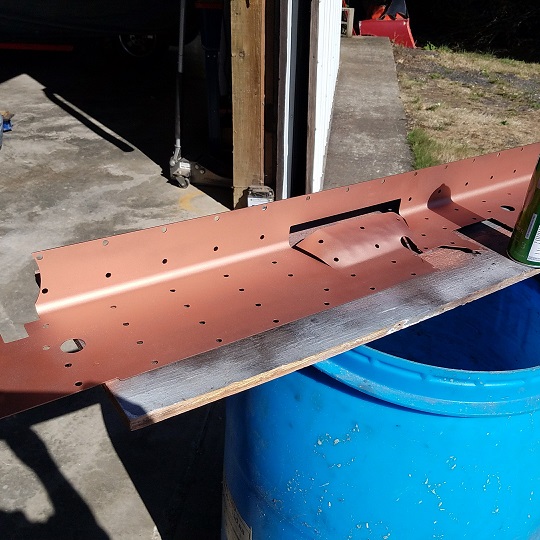 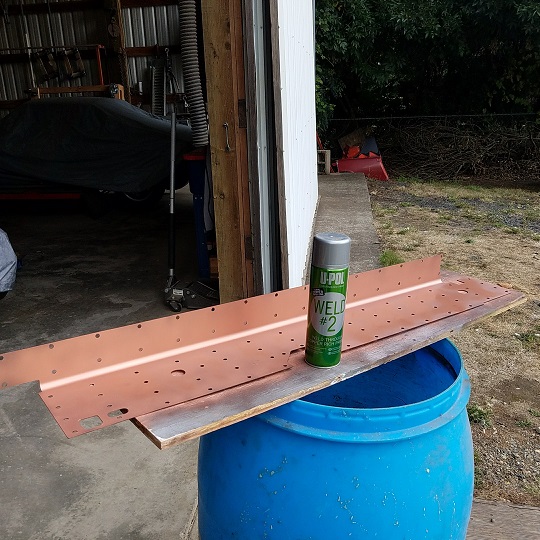 Here's a shot of the marked out rosette holes that need to have the epoxy primer sanded off so it doesn't put impurities in my welds. 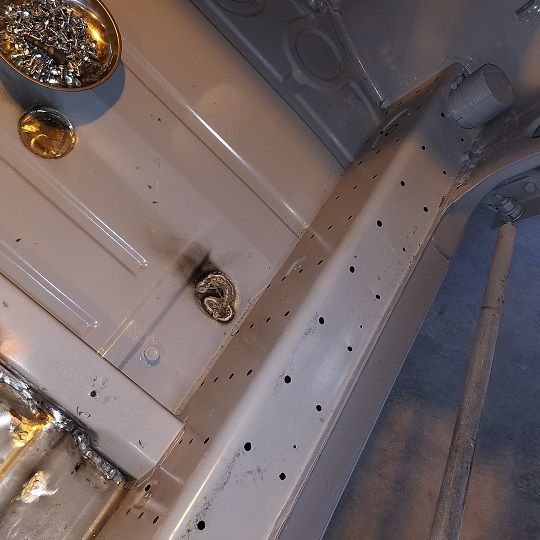 Here's where I ended the day. Both the left and right sides screwed into place and ready for welding. 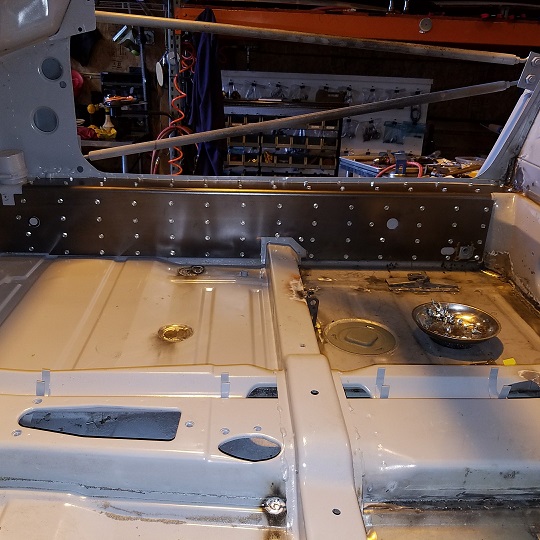 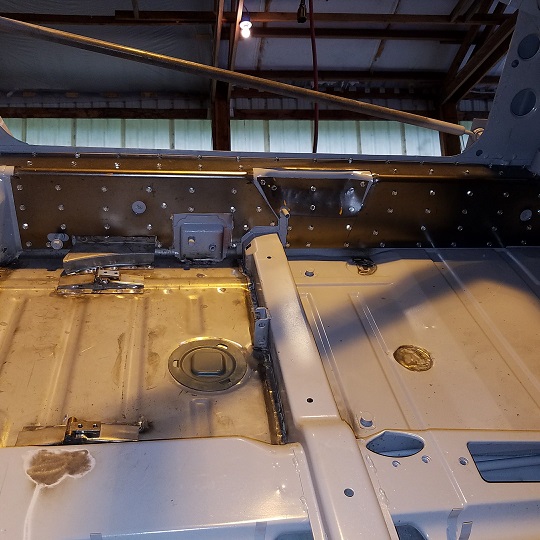 Almost 200 #10 self taping screws. |
|
|
|
| cary |
Sep 24 2017, 09:52 AM
Post
#314
|
|
Advanced Member Group: Members Posts: 3,900 Joined: 26-January 04 From: Sherwood Oregon Member No.: 1,608 Region Association: Pacific Northwest |
Must have forgot to add last night when I finished. So we'll do this again.
Saturday started with fitting and trimming the back panel on the Mad Dog inner long stiffener kit. While the piece is still flat bend the center corners out. Once you bend the long section you cant get a tool in there. 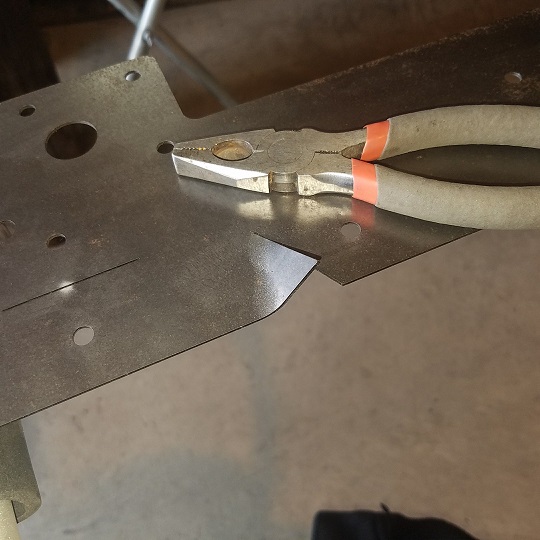 Biggest issue of the day was that the holes to mount the back pad don't line up. (IMG:style_emoticons/default/mad.gif) Always something. The left inside one was pretty close and could be used. But I decided to enlarge it too so they all matched. 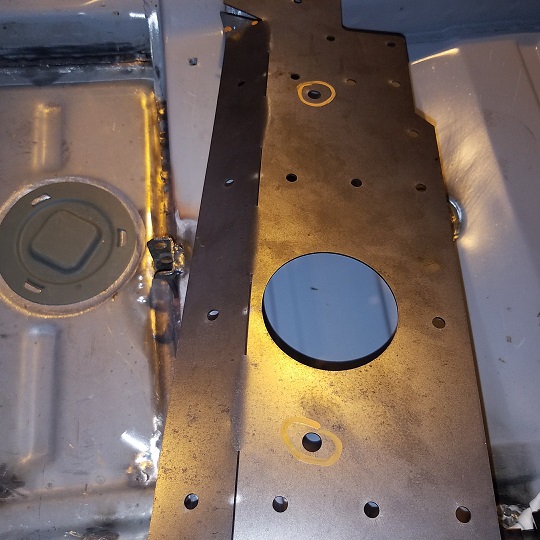 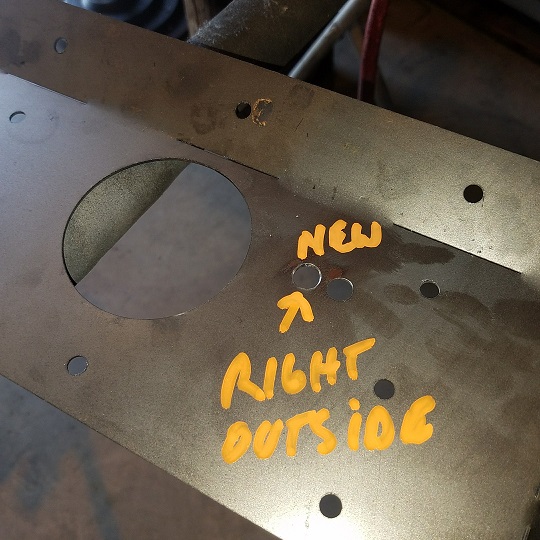 In the corners I cut down one of the ties so it would lay down nice and tight. Plus added another screw hole to keep things tight. 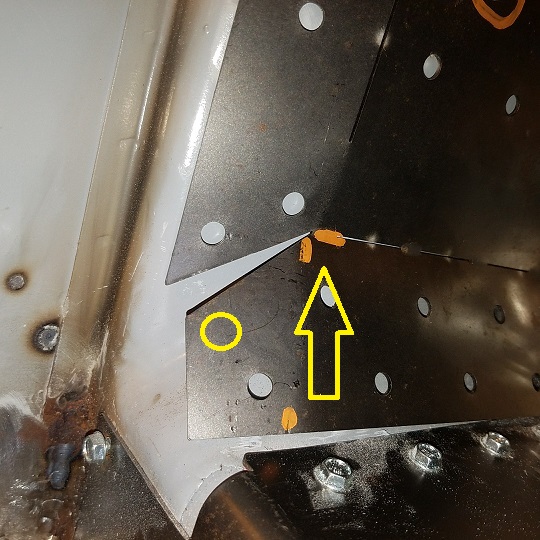 After the fitting was completed it too got a coating of weld thru primer on the back side. Plus all the rosette holes were marked and the epoxy primer was removed with 80gr on the 13" belt sander. 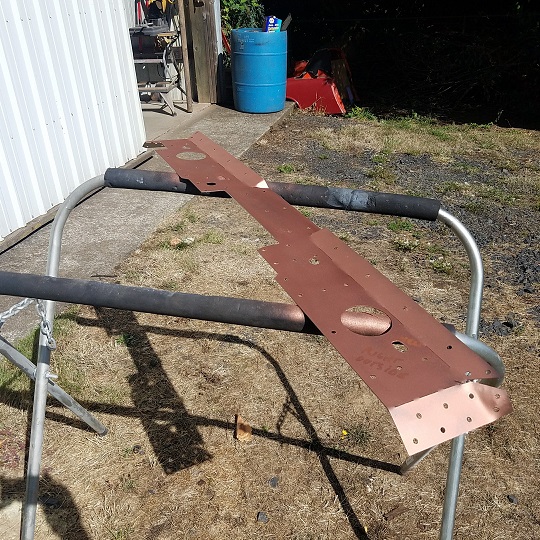 After you start installing the piece with about 50 1/2" self tapping screws you'll want to slit the cone tie holes so you can pean them down flat. Which once again gives you a tighter weld. Which takes less time and heat. 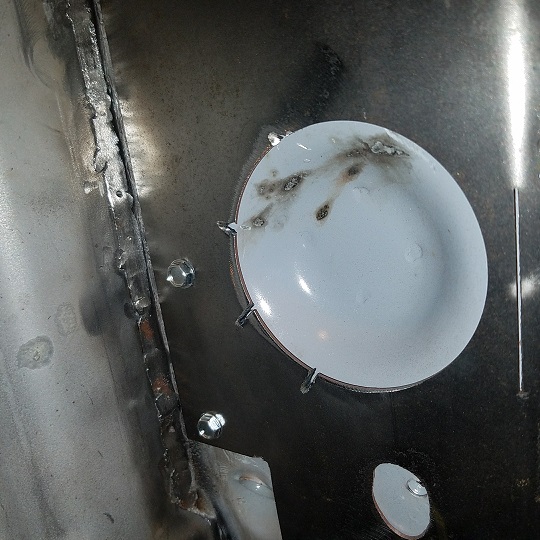 Here she is in all her glory. 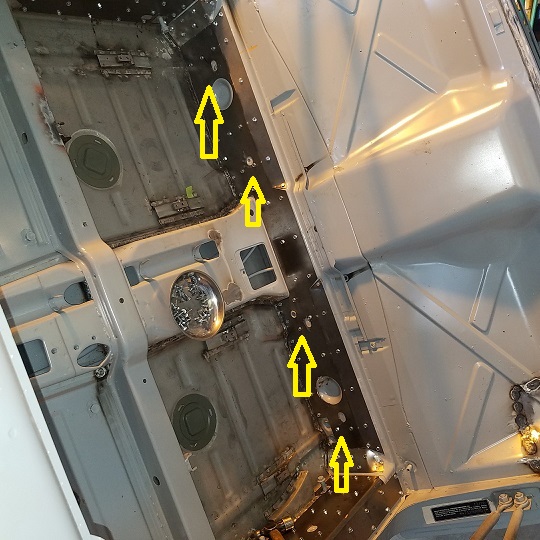 Arrows call out the elongated back pad hold down holes. |
|
|
|
| tygaboy |
Sep 24 2017, 09:58 AM
Post
#315
|
|
914 Guru Group: Members Posts: 5,844 Joined: 6-October 15 From: Petaluma, CA Member No.: 19,241 Region Association: Northern California |
Super clean install you have going there, Cary. (IMG:style_emoticons/default/smilie_pokal.gif)
Very nice... loving this build |
|
|
|
| cary |
Sep 24 2017, 10:05 AM
Post
#316
|
|
Advanced Member Group: Members Posts: 3,900 Joined: 26-January 04 From: Sherwood Oregon Member No.: 1,608 Region Association: Pacific Northwest |
Then we begin the tedious process of welding in all the rosette holes. Followed by the seam welding.
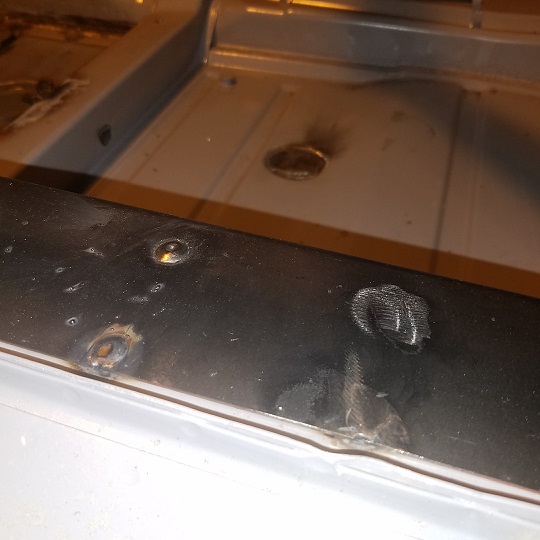 Following the instruction sheet. Weld in two on one panel then two on the next and so on. Seems to work good. By the time I get back to the first one its back to room temp. Almost wish I had two welders for speed. Doing the work on the rotisserie does have its weak points. It would take to long to climb to climb in and out. So I have a work station on both sides of the car. Edit : But beings that our rotisserie is perfectly balanced I don't have to lock it down when I switch from side to side. Only other tidbit I can add. Put a tack in the bottom of the cone hole to keep the bottom nice and tight. 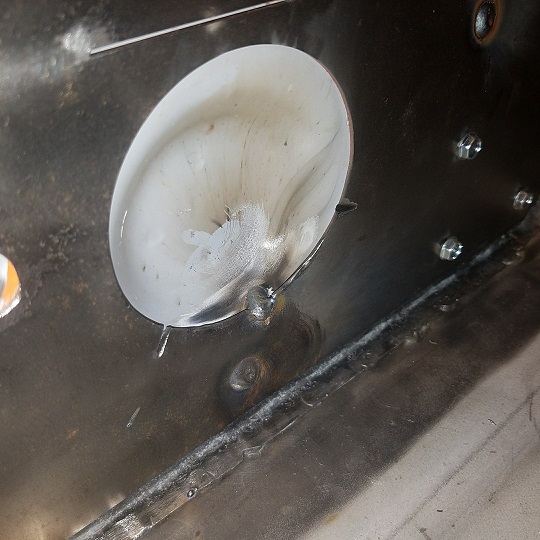 |
|
|
|
| raynekat |
Sep 25 2017, 05:29 PM
Post
#317
|
|
Advanced Member Group: Members Posts: 2,171 Joined: 30-December 14 From: Coeur d'Alene, Idaho Member No.: 18,263 Region Association: Pacific Northwest |
Scored a nice set of early 911 S aluminum calipers this past week on Ebay for a great price.
I cleaned them up (sorry no pics), and they looked nearly brand new. No corrosion on the outside. Perhaps had been rebuilt once in the past? Still sent them out to PMB Performance to get the "spa" treatment. Might need pistons, seals for sure, re-anodizing, new compensation pipe, etc. Will come back with an interesting or let's say unusual finish for an S caliper. They said these might be the only ones in the world with this finish. When I receive them, I'll post pics. The difference between these S calipers and the A calipers I currently have is shocking to say the least. Eventually I definitely want to get a set of alloy 914-6 style rear calipers as well. 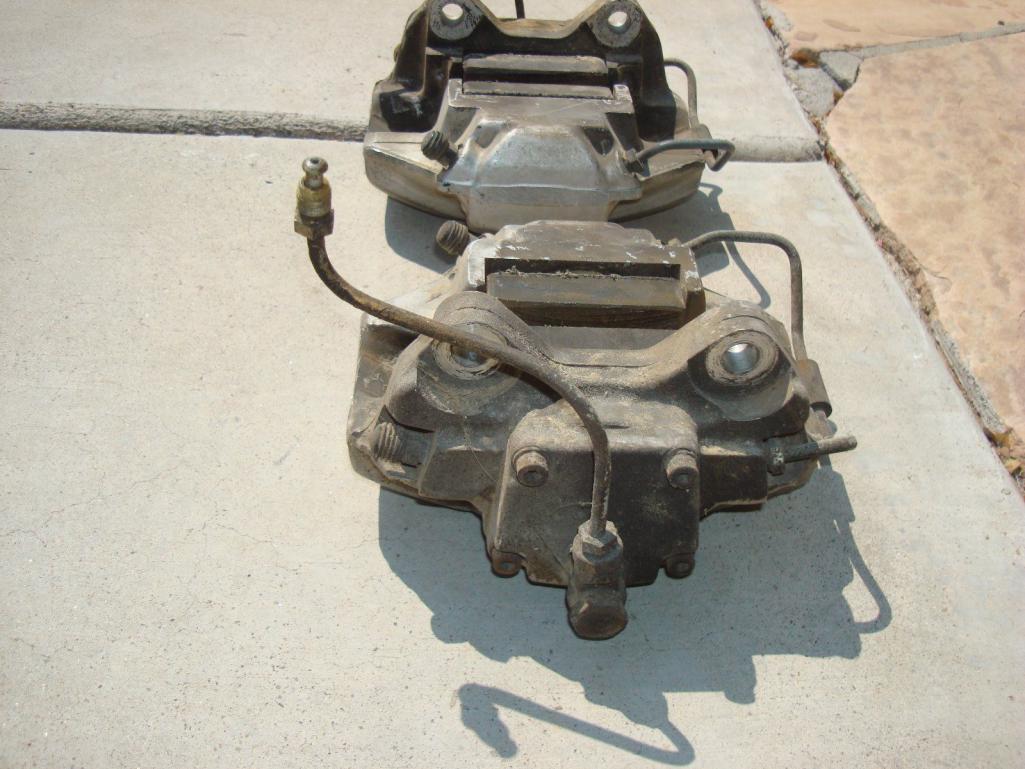 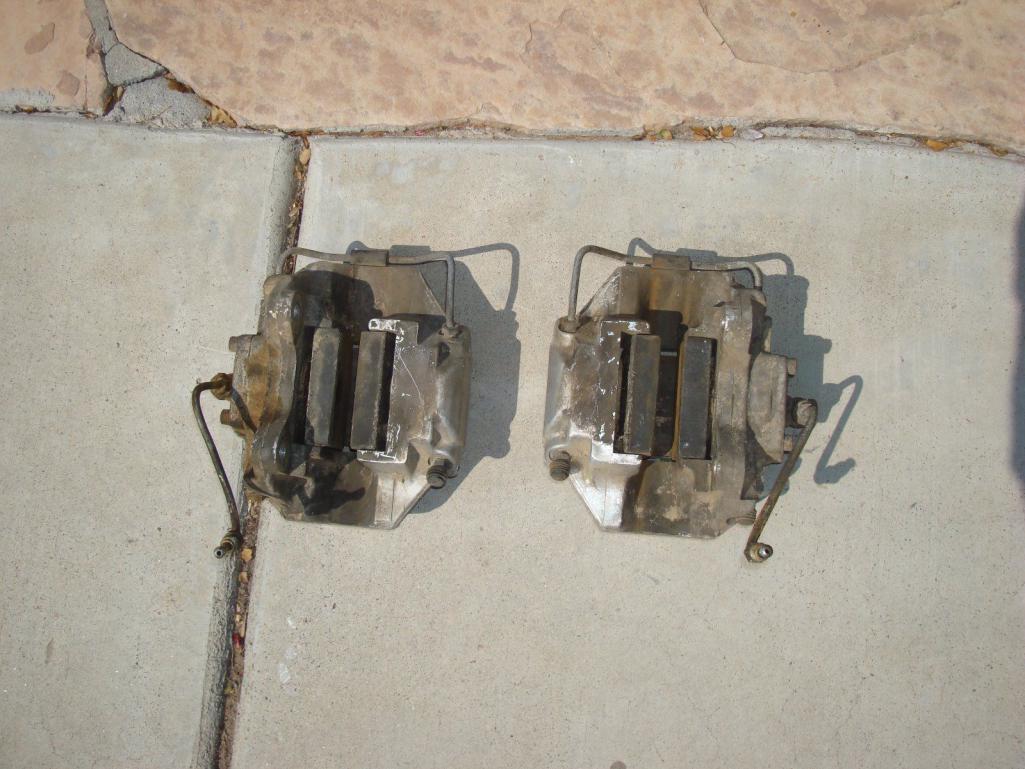 |
|
|
|
| mb911 |
Sep 25 2017, 05:42 PM
Post
#318
|
|
914 Guru Group: Members Posts: 7,794 Joined: 2-January 09 From: Burlington wi Member No.: 9,892 Region Association: Upper MidWest |
Is Eric still making alloy rear calipers?? I thought they maybe nla?
|
|
|
|
| raynekat |
Sep 25 2017, 05:45 PM
Post
#319
|
|
Advanced Member Group: Members Posts: 2,171 Joined: 30-December 14 From: Coeur d'Alene, Idaho Member No.: 18,263 Region Association: Pacific Northwest |
QUOTE(mb911 @ Sep 25 2017, 04:42 PM) Is Eric still making alloy rear calipers?? I thought they maybe nla? The guy I spoke with today at PMB says they are not making them at this time, although quite a few people want them. Guess they were very difficult and expensive to make. I'm a buyer if I can ever find a set. |
|
|
|
| mepstein |
Sep 25 2017, 06:11 PM
Post
#320
|
|
914-6 GT in waiting Group: Members Posts: 20,819 Joined: 19-September 09 From: Landenberg, PA/Wilmington, DE Member No.: 10,825 Region Association: MidAtlantic Region |
QUOTE(raynekat @ Sep 25 2017, 07:45 PM) QUOTE(mb911 @ Sep 25 2017, 04:42 PM) Is Eric still making alloy rear calipers?? I thought they maybe nla? The guy I spoke with today at PMB says they are not making them at this time, although quite a few people want them. Guess they were very difficult and expensive to make. I'm a buyer if I can ever find a set. I think Mikey / Mark still has to be set of steel reproduction 914-6 calipers. If you want alloy, you will probably need to find someone who purchased a set and stored away. |
|
|
|
|
1 User(s) are reading this topic (1 Guests and 0 Anonymous Users)
0 Members:

|
Lo-Fi Version | Time is now: 17th July 2026 - 09:14 PM |
Invision Power Board
v9.1.4 © 2026 IPS, Inc.