|
|
|
Porsche, and the Porsche crest are registered trademarks of Dr. Ing. h.c. F. Porsche AG.
This site is not affiliated with Porsche in any way. Its only purpose is to provide an online forum for car enthusiasts. All other trademarks are property of their respective owners. |
|
|

  |

| raynekat |
 Sep 25 2017, 08:40 PM Sep 25 2017, 08:40 PM
Post
#321
|
|
Advanced Member  Group: Members Posts: 2,171 Joined: 30-December 14 From: Coeur d'Alene, Idaho Member No.: 18,263 Region Association: Pacific Northwest |
QUOTE(mepstein @ Sep 25 2017, 05:11 PM)  I think Mikey / Mark still has to be set of steel reproduction 914-6 calipers. If you want alloy, you will probably need to find someone who purchased a set and stored away. Yes, I've already got the 914-6 "reproduction" steel calipers with the spacer for vented discs. Nice looking but awful heavy. BTW....somehow my "reproduction" calipers have ATE on them. How's that possible? (IMG:style_emoticons/default/idea.gif) |
   |

 
|
| cary |
Sep 27 2017, 08:16 AM
Post
#322
|
|
Advanced Member Group: Members Posts: 3,900 Joined: 26-January 04 From: Sherwood Oregon Member No.: 1,608 Region Association: Pacific Northwest |
Tuesday night Moonlighting ...........
 Three and 1/2 hours of straight rosette welding. Round and round. My MillerMatic 180 is working like dream. Running .023 wire at level 7 on Millermatic mode. Millermatic compensates for all my weird angles and stick out. 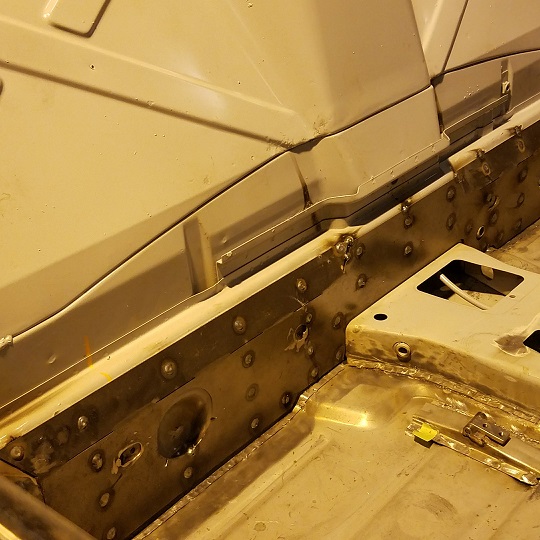 Back panel rosettes completed. Sides have about 1/3 left to go. 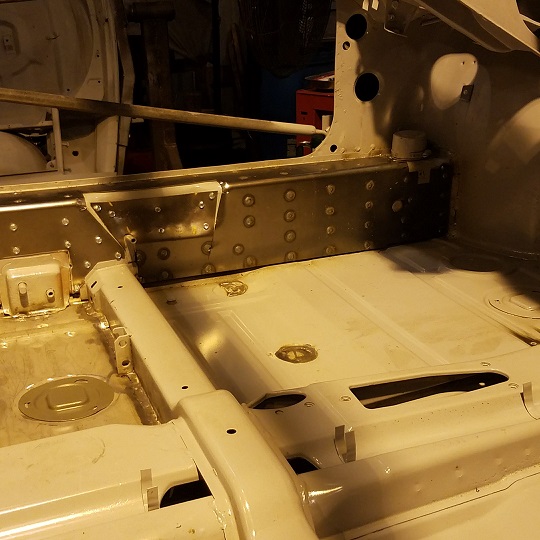  |
|
|
|
| cary |
Sep 29 2017, 06:30 AM
Post
#323
|
|
Advanced Member Group: Members Posts: 3,900 Joined: 26-January 04 From: Sherwood Oregon Member No.: 1,608 Region Association: Pacific Northwest |
Rosettes are finished. Now its time to remove the epoxy from around the edges so I can begin the seam/stitch welding. Rosettes have yet to sanded/ground down.
  Looks like 5 stitches gets me to 400 degrees. 5 stitches is about an inch. |
|
|
|
| cary |
Sep 30 2017, 08:21 AM
Post
#324
|
|
Advanced Member Group: Members Posts: 3,900 Joined: 26-January 04 From: Sherwood Oregon Member No.: 1,608 Region Association: Pacific Northwest |
Spent 3 hours yesterday welding the horizontal seams. One inch at a time.
 6" flapper on the back panel. Figuring out how I'm going to finish it. 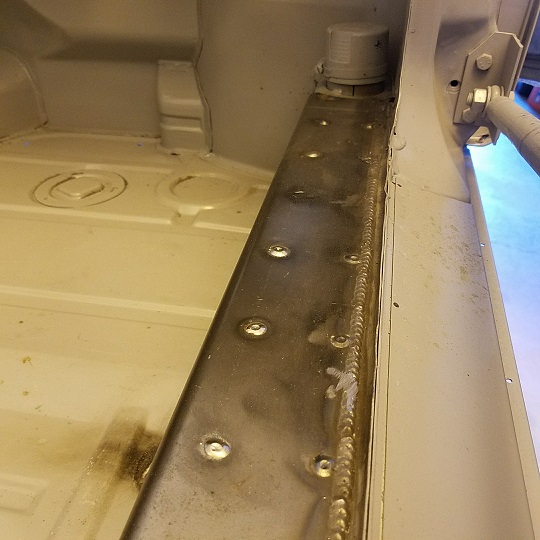 Surprising how well I got the epoxy removed. Very few spots had impurities pop thru the puddle. |
|
|
|
| cary |
Sep 30 2017, 07:30 PM
Post
#325
|
|
Advanced Member Group: Members Posts: 3,900 Joined: 26-January 04 From: Sherwood Oregon Member No.: 1,608 Region Association: Pacific Northwest |
After the morning Porsche get together I snuck out to the shop and seam welded for another 3 hours. Inch by Inch ..............
  I'll try and sneak back out there Tuesday night for another 3 hours. Should just about get it done. |
|
|
|
| cary |
Oct 3 2017, 08:14 PM
Post
#326
|
|
Advanced Member Group: Members Posts: 3,900 Joined: 26-January 04 From: Sherwood Oregon Member No.: 1,608 Region Association: Pacific Northwest |
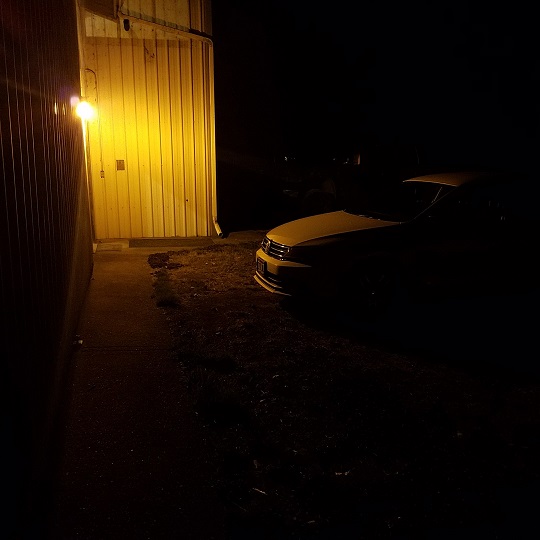
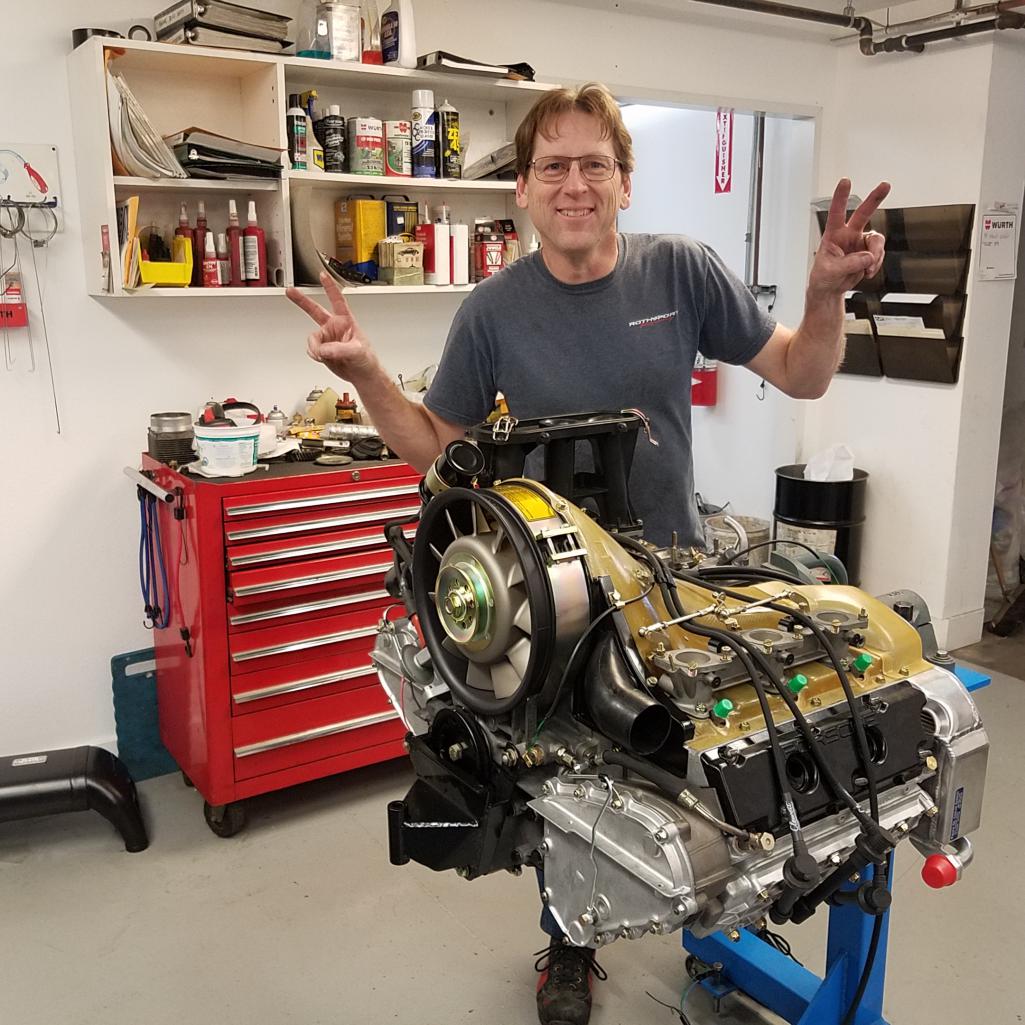
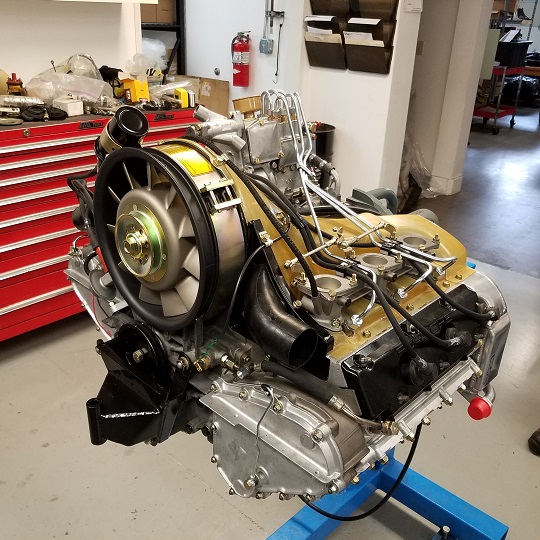
Look who's in the #1 spot in the Rothsport Racing engine room. (IMG:style_emoticons/default/biggrin.gif)
Jeff said the intake/induction goes on tomorrow. 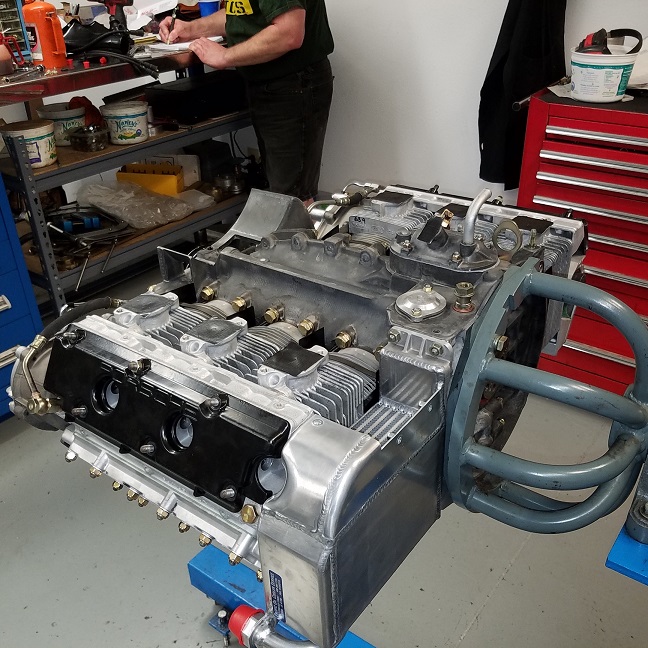 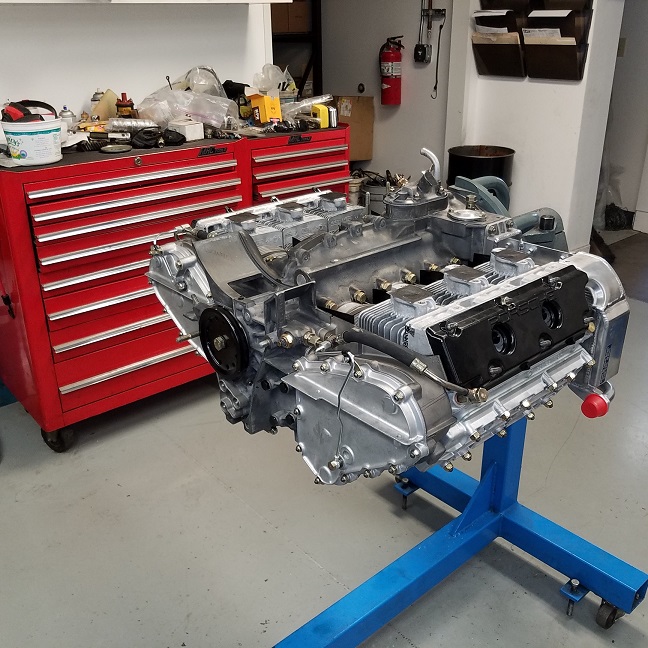 |
|
|
|
| raynekat |
Oct 3 2017, 10:13 PM
Post
#327
|
|
Advanced Member Group: Members Posts: 2,171 Joined: 30-December 14 From: Coeur d'Alene, Idaho Member No.: 18,263 Region Association: Pacific Northwest |
QUOTE(cary @ Oct 3 2017, 07:14 PM) Look who's in the #1 spot in the Rothsport Racing engine room. Jeff said the intake/induction goes on tomorrow. Now that got my attention big time... (IMG:style_emoticons/default/biggrin.gif) |
|
|
|
| cary |
Oct 4 2017, 04:18 PM
Post
#328
|
|
Advanced Member Group: Members Posts: 3,900 Joined: 26-January 04 From: Sherwood Oregon Member No.: 1,608 Region Association: Pacific Northwest |
  |
|
|
|
| Cairo94507 |
Oct 4 2017, 04:50 PM
Post
#329
|
|
Michael Group: Members Posts: 10,706 Joined: 1-November 08 From: Auburn, CA Member No.: 9,712 Region Association: Northern California |
Very pretty. (IMG:style_emoticons/default/beerchug.gif)
|
|
|
|
| raynekat |
Oct 4 2017, 05:03 PM
Post
#330
|
|
Advanced Member Group: Members Posts: 2,171 Joined: 30-December 14 From: Coeur d'Alene, Idaho Member No.: 18,263 Region Association: Pacific Northwest |
QUOTE(cary @ Oct 4 2017, 03:18 PM) Jeff Gamroth, owner of Rothsport, in the flesh.... Not much this shop can't do. |
|
|
|
| cary |
Oct 4 2017, 07:15 PM
Post
#331
|
|
Advanced Member Group: Members Posts: 3,900 Joined: 26-January 04 From: Sherwood Oregon Member No.: 1,608 Region Association: Pacific Northwest |
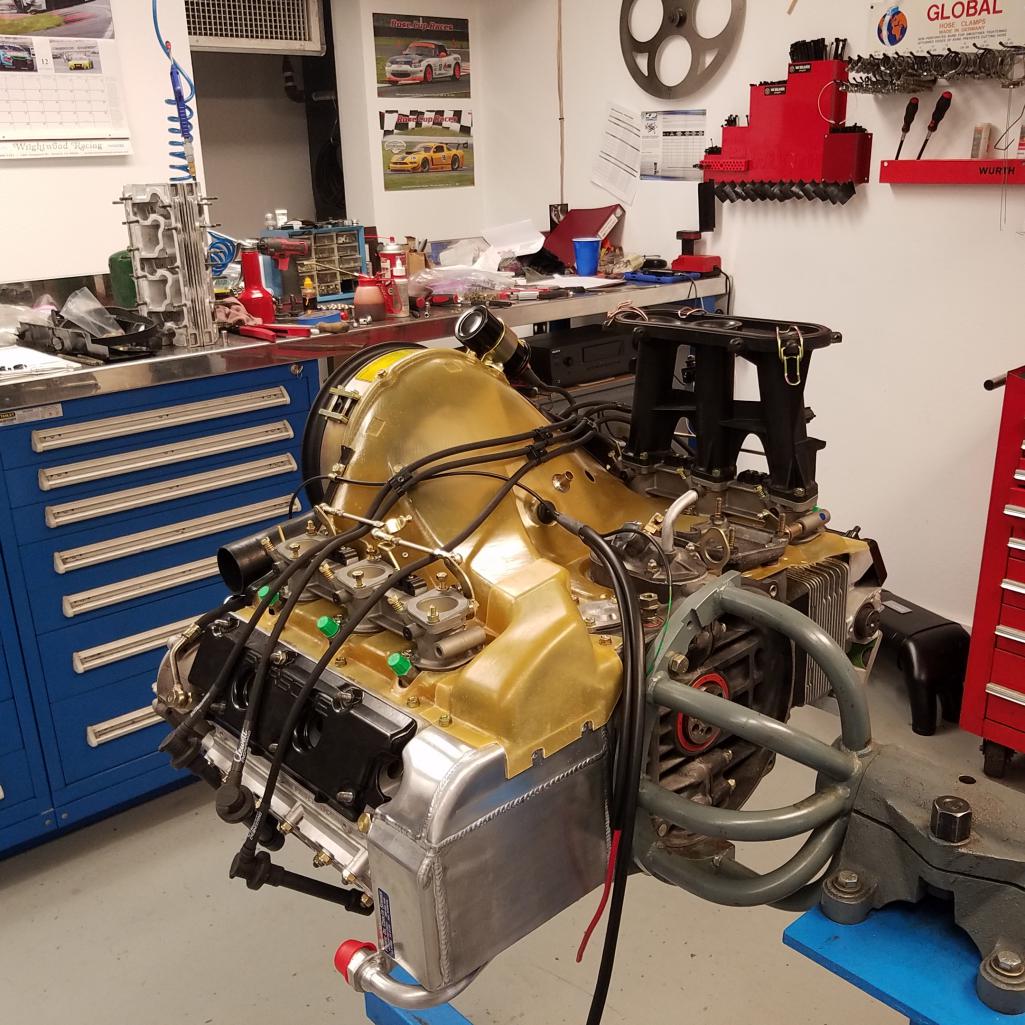
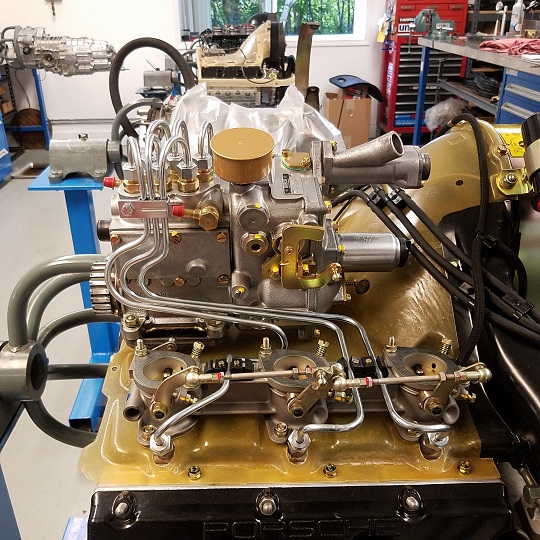
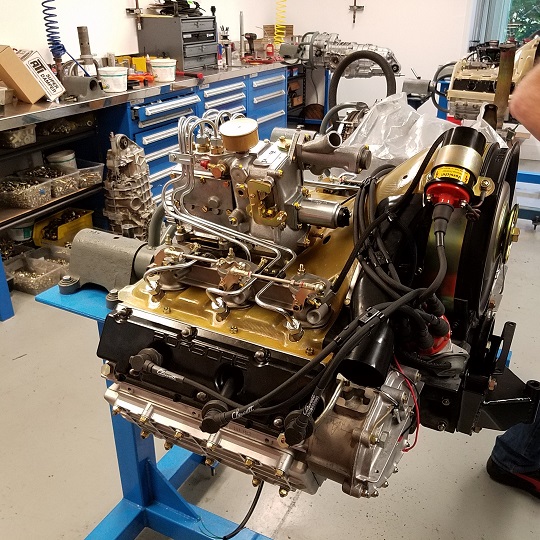
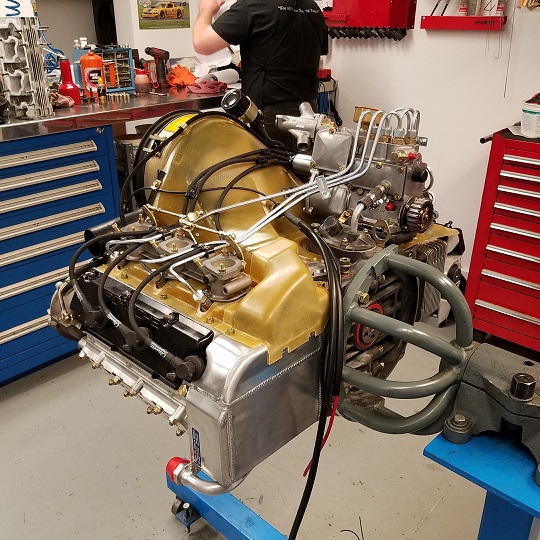
More Rothsport porn ..................
    |
|
|
|
| burton73 |
Oct 4 2017, 09:36 PM
Post
#332
|
|
Senior member, and old dude Group: Members Posts: 4,050 Joined: 2-January 07 From: Los Angeles Member No.: 7,414 Region Association: Southern California |
QUOTE(Cairo94507 @ Oct 4 2017, 03:50 PM) O yea that is a thing of beauty. Bob B |
|
|
|
| Larmo63 |
Oct 4 2017, 09:53 PM
Post
#333
|
|
Advanced Member Group: Members Posts: 4,267 Joined: 3-March 14 From: San Clemente, Ca Member No.: 17,068 Region Association: Southern California |
THAT'S not a complicated induction system.
Looks so gorgeous.....!!!!!!! |
|
|
|
| cary |
Oct 7 2017, 09:18 AM
Post
#334
|
|
Advanced Member Group: Members Posts: 3,900 Joined: 26-January 04 From: Sherwood Oregon Member No.: 1,608 Region Association: Pacific Northwest |
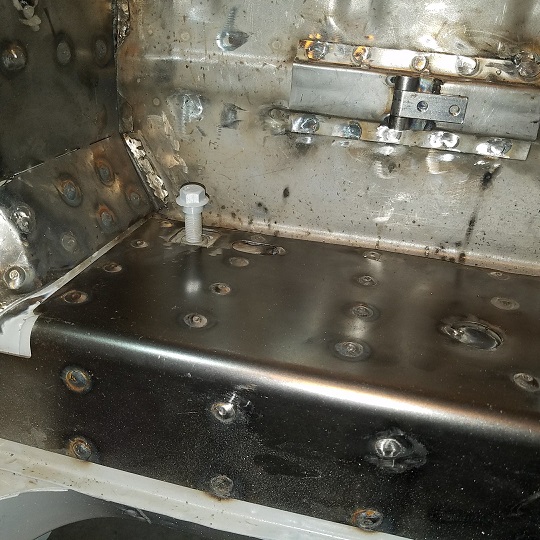
Now that the inner long stiffeners are welded in it's time to start crossing things off the list.
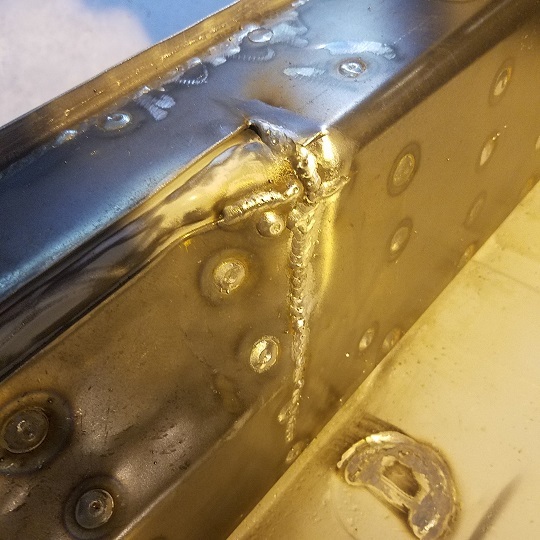
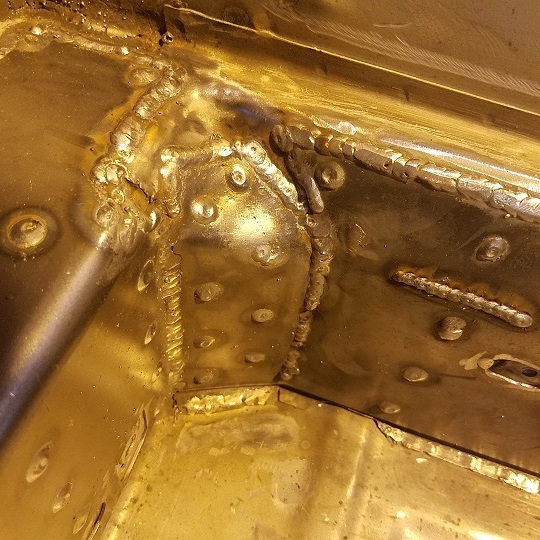
#1. Drill drain hole into new right engine shelf in Hell Hole. Your looking at it upside down on the rotisserie. 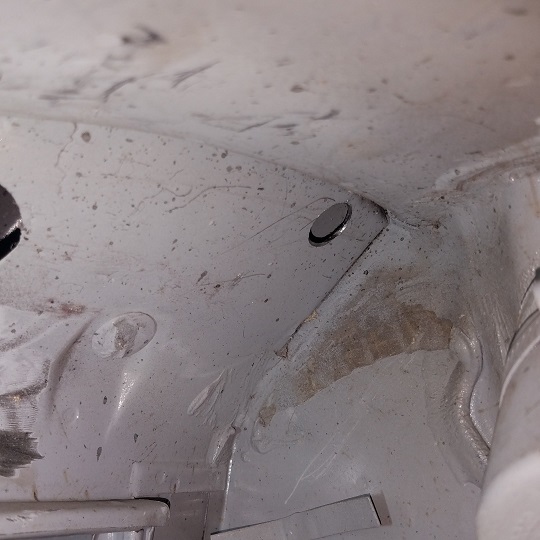 #2. Attack rust holes found in the frunk/nose panel brace. 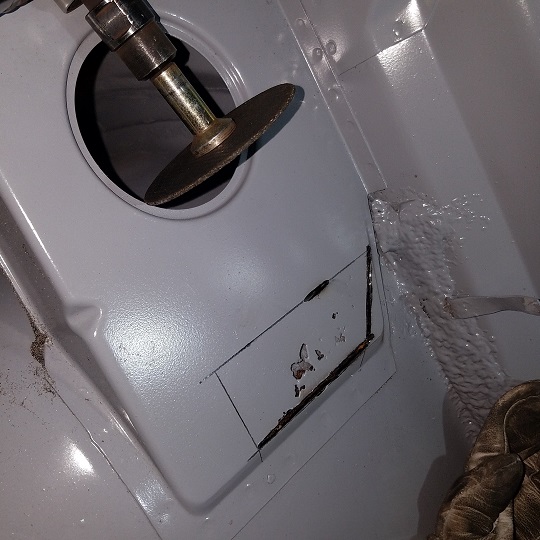 #3. After cutting out the inside and cleaning it with a knotted brush. I found holes on the inside of the fender. (IMG:style_emoticons/default/sad.gif) Once again, I feel like the bearer of bad news. Must have been packed with something that would retain moisture at some time. We'll try hand forming the rounded fender portion. But I might need to create it on the mondo slip roller at Rothsport. 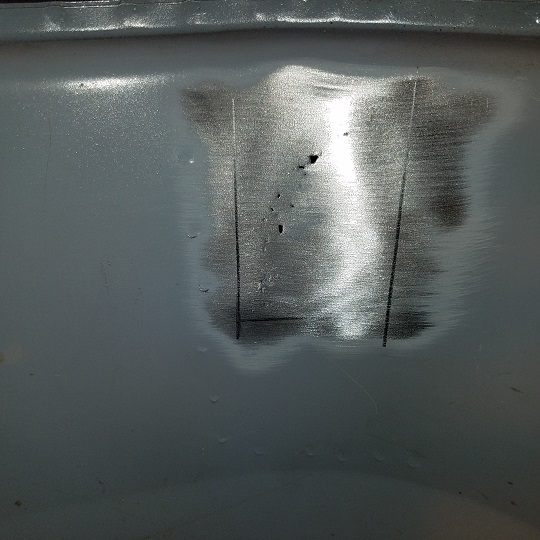 #4. Doug stopped by around noon and dropped of the shift that needs a couple welds. 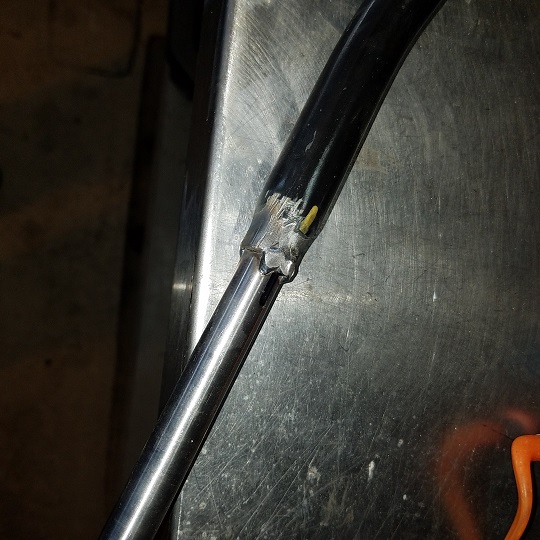 #5. Then on to the primary project of the day. Rust sections is the frunk seal channel. This is the section in front of the latch. The front fence section was removed first so I could get down to the lower layer. 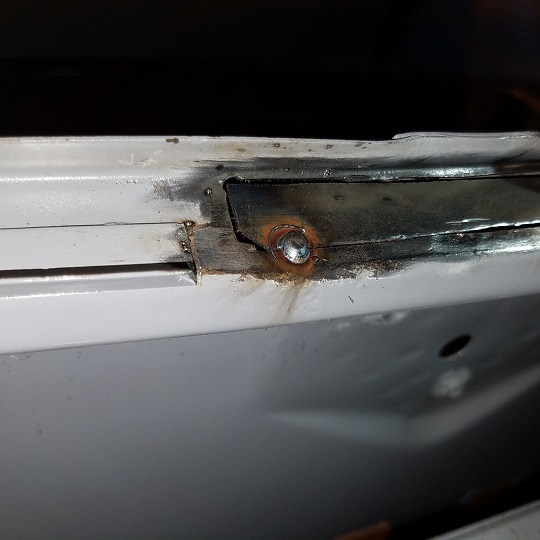  |
|
|
|
| cary |
Oct 7 2017, 08:15 PM
Post
#335
|
|
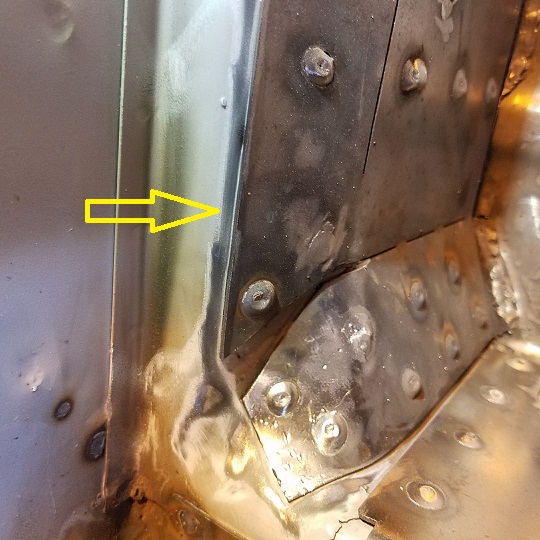
Advanced Member Group: Members Posts: 3,900 Joined: 26-January 04 From: Sherwood Oregon Member No.: 1,608 Region Association: Pacific Northwest |
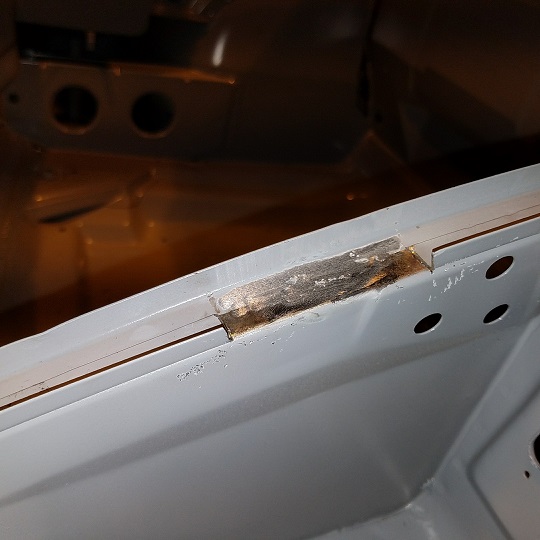
Here's a see thru shot of the frunk support/front liner fender hole.
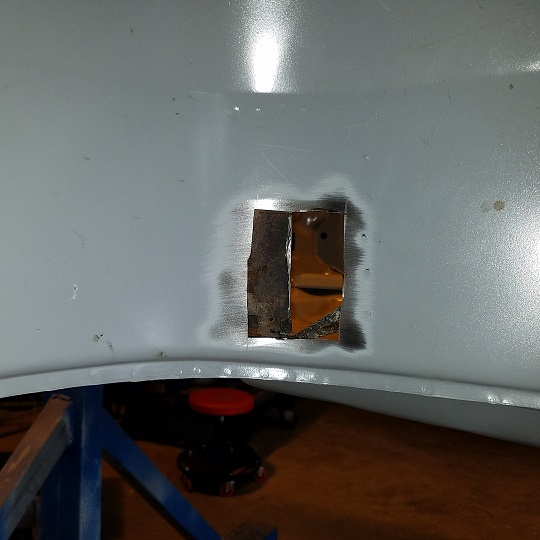 Here's a spot that I missed yesterday. (IMG:style_emoticons/default/mad.gif) 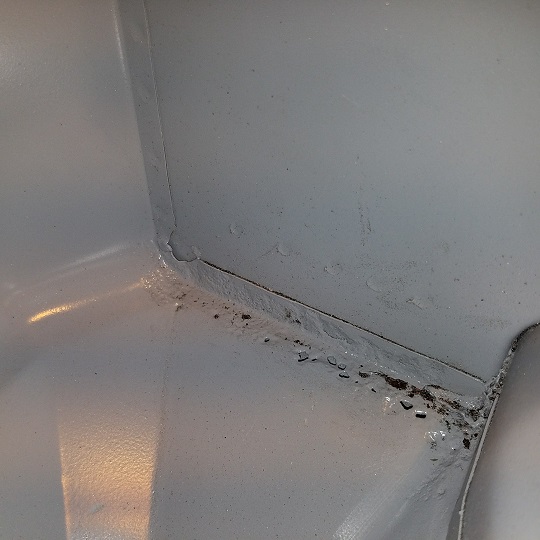 |
|
|
|
| cary |
Oct 7 2017, 08:21 PM
Post
#336
|
|
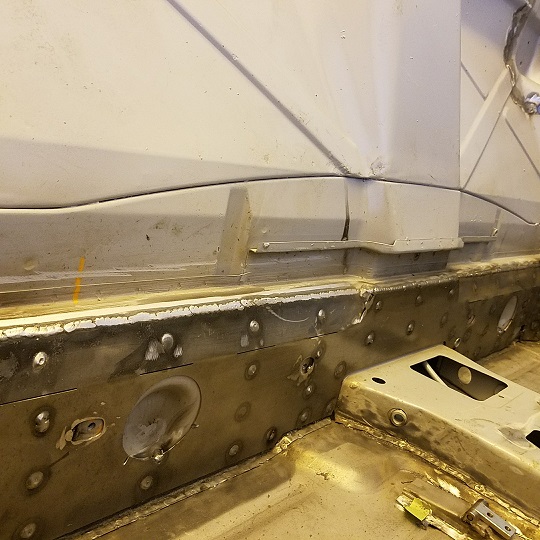
Advanced Member Group: Members Posts: 3,900 Joined: 26-January 04 From: Sherwood Oregon Member No.: 1,608 Region Association: Pacific Northwest |
Onto fixing the channel in front of the latch ...............
 Had to give my patch a little pinch on the shrinker to get the shape I wanted. 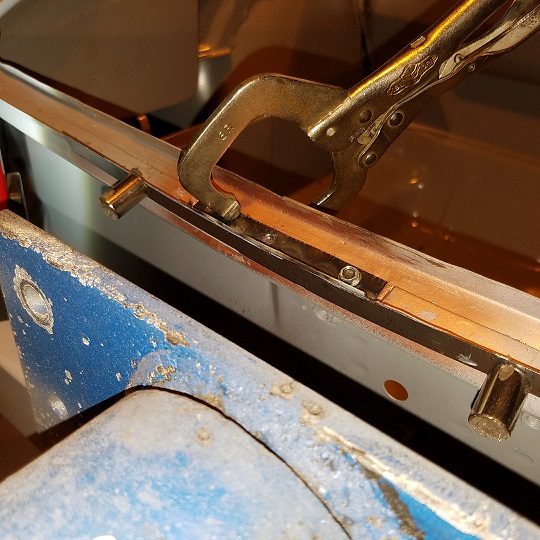 Onto the welding. 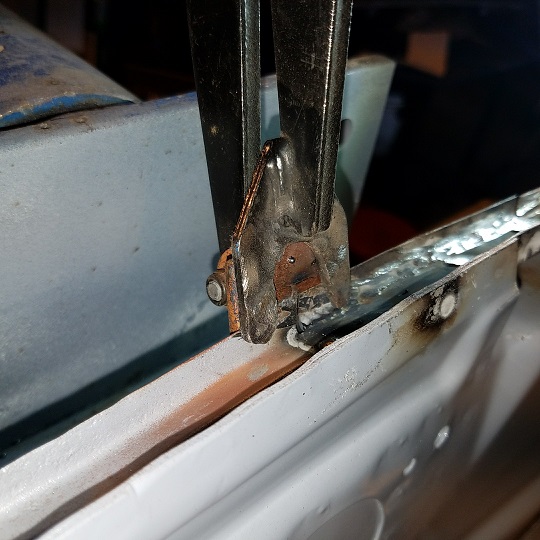 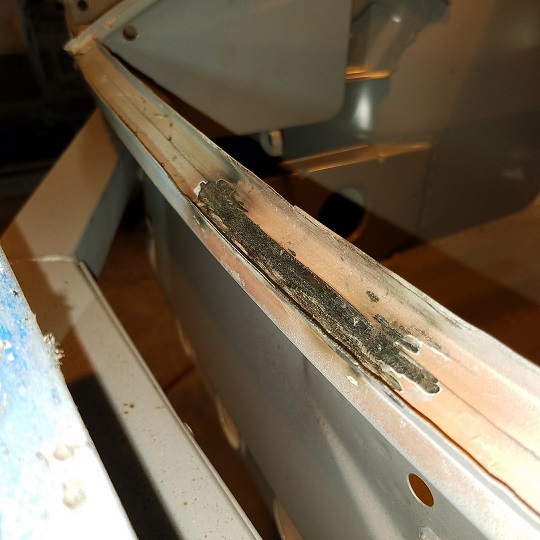 Gooder as new ................. 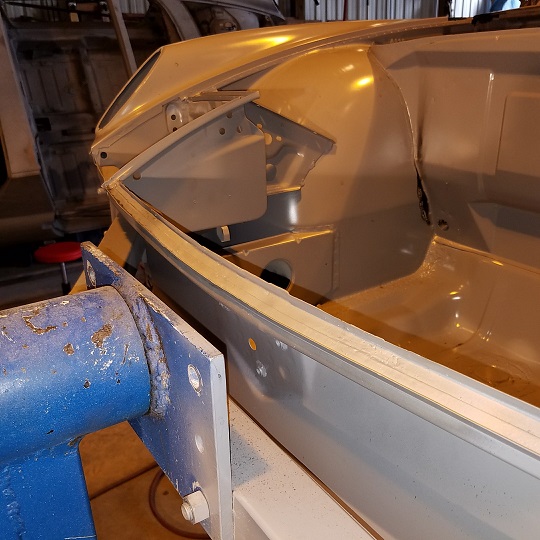 |
|
|
|
| cary |
Oct 7 2017, 09:07 PM
Post
#337
|
|
Advanced Member Group: Members Posts: 3,900 Joined: 26-January 04 From: Sherwood Oregon Member No.: 1,608 Region Association: Pacific Northwest |
Then onto trimming the cowl.
First thing was to pull the window frame off the donor cowl. 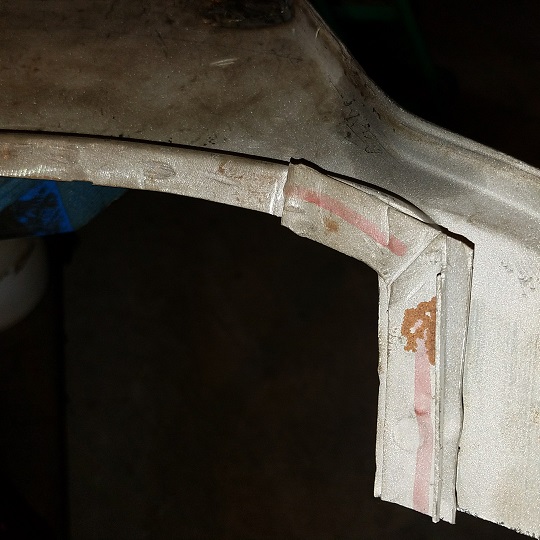 Then trimmed the cowl a couple times to get it to fit into its spot. Close, but we have another 1/4" to go. 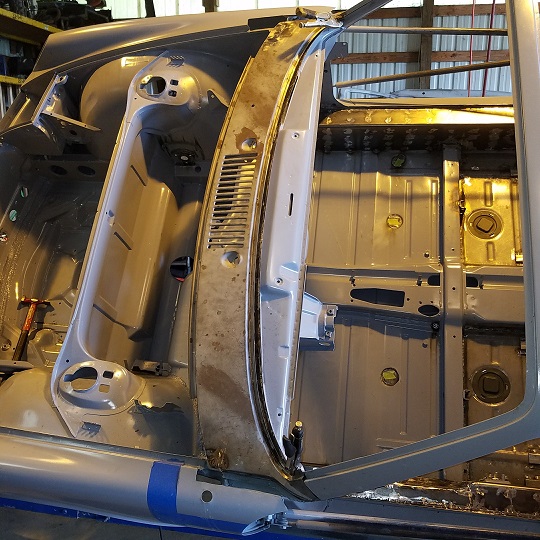 |
|
|
|
| cary |
Oct 7 2017, 09:11 PM
Post
#338
|
|
Advanced Member Group: Members Posts: 3,900 Joined: 26-January 04 From: Sherwood Oregon Member No.: 1,608 Region Association: Pacific Northwest |
Here's another spot on the left headlight bucket.
 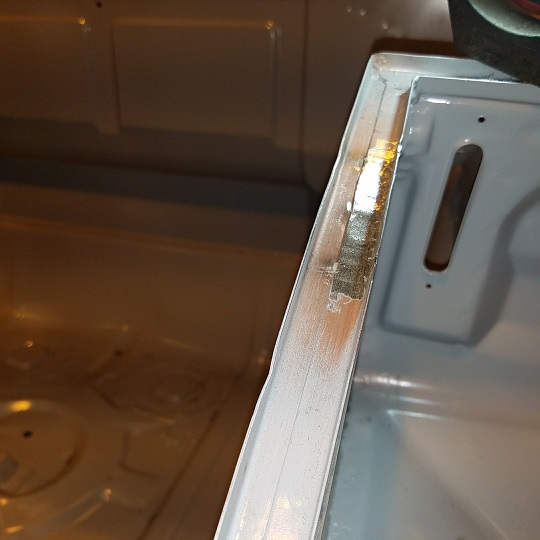 Will probably work Tuesday night to tackle this spot. 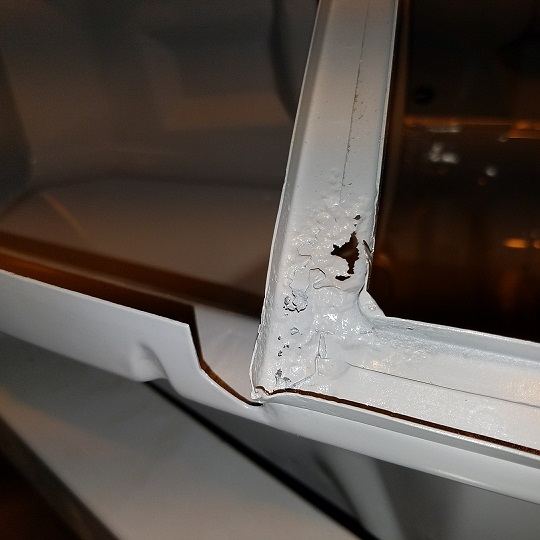 |
|
|
|
| Cairo94507 |
Oct 8 2017, 06:40 AM
Post
#339
|
|
Michael Group: Members Posts: 10,706 Joined: 1-November 08 From: Auburn, CA Member No.: 9,712 Region Association: Northern California |
Nice work. (IMG:style_emoticons/default/beerchug.gif)
|
|
|
|
| tygaboy |
Oct 8 2017, 06:05 PM
Post
#340
|
|
914 Guru Group: Members Posts: 5,844 Joined: 6-October 15 From: Petaluma, CA Member No.: 19,241 Region Association: Northern California |
Perfect timing. I have the very same set of trunk channel rust repairs as near-term to-dos. Lots of pics, please?
(IMG:style_emoticons/default/popcorn[1].gif) |
 |
|
|
1 User(s) are reading this topic (1 Guests and 0 Anonymous Users)
0 Members:

|
Lo-Fi Version | Time is now: 17th July 2026 - 10:48 PM |
Invision Power Board
v9.1.4 © 2026 IPS, Inc.