|
|
|
Porsche, and the Porsche crest are registered trademarks of Dr. Ing. h.c. F. Porsche AG.
This site is not affiliated with Porsche in any way. Its only purpose is to provide an online forum for car enthusiasts. All other trademarks are property of their respective owners. |
|
|

  |

| cary |
 Oct 11 2017, 08:13 AM Oct 11 2017, 08:13 AM
Post
#341
|
|
Advanced Member  Group: Members Posts: 3,900 Joined: 26-January 04 From: Sherwood Oregon Member No.: 1,608 Region Association: Pacific Northwest |
Tuesday Night Work :
Welded in the patch above the right light bucket. Wasn't real bad, but easily fixable. Basically cut off/out the vertical portion and replaced it.  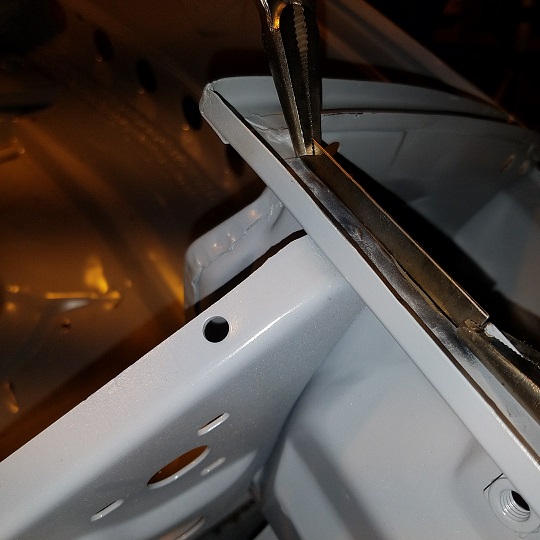 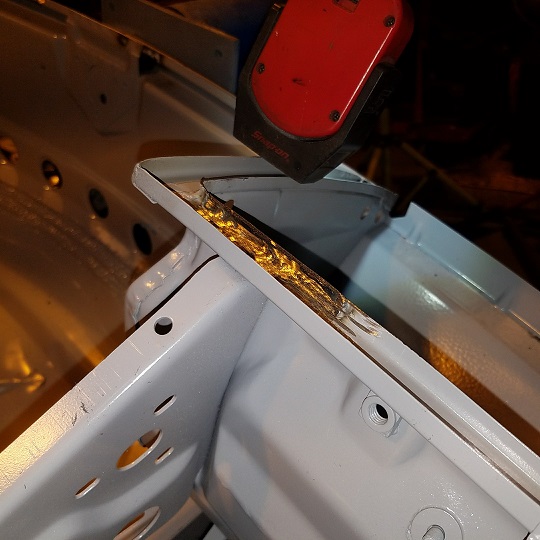 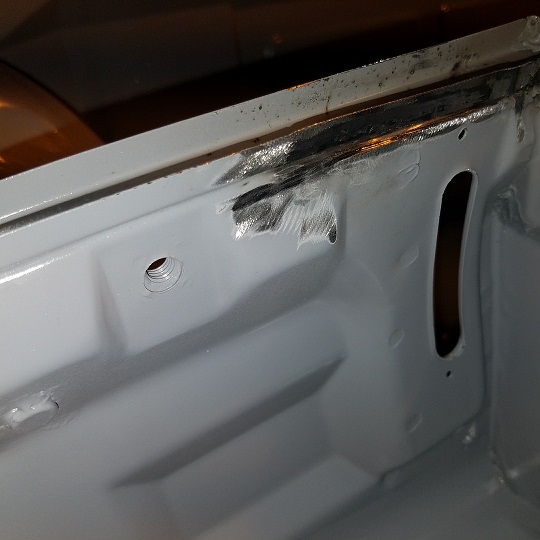 These are all hand cut. Next section I'll have sheared pieces. Cutting some various widths today at Rothsport. On to the messy one. 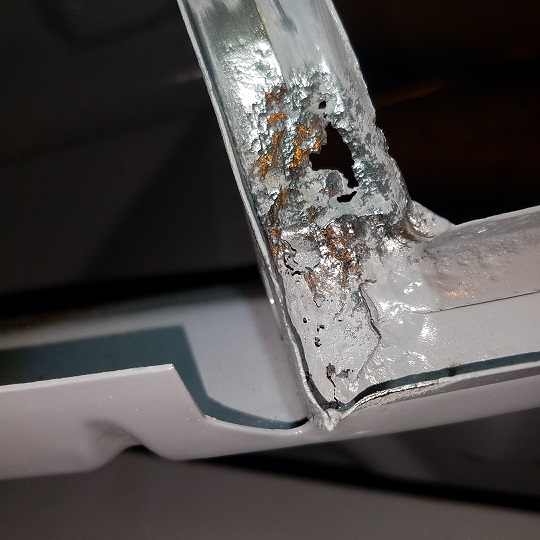 Looks like someone had been there before me ......... looks like a patch underneath. Which caused some grief while de-layering it. 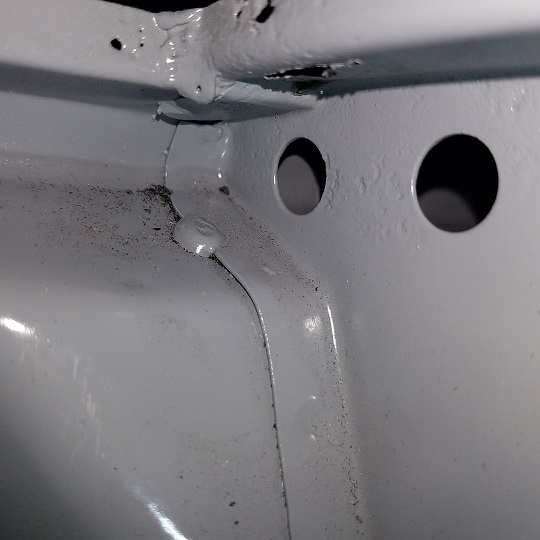 |
   |

 
|
| cary |
Oct 11 2017, 08:32 AM
Post
#342
|
|
Advanced Member Group: Members Posts: 3,900 Joined: 26-January 04 From: Sherwood Oregon Member No.: 1,608 Region Association: Pacific Northwest |
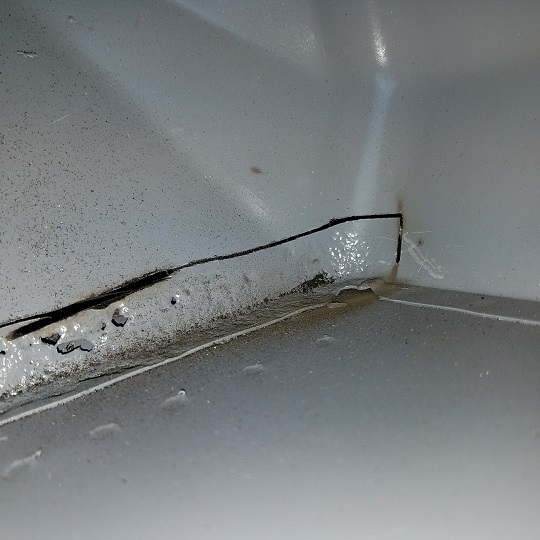
The de-layering begins. Looking from the front. The left channel was the last to go on. So its the first to come off. Basically with all the messy mig repairs and the metal degradation I just start thinning down the metal with the edge of the cutting wheel n the die grinder.
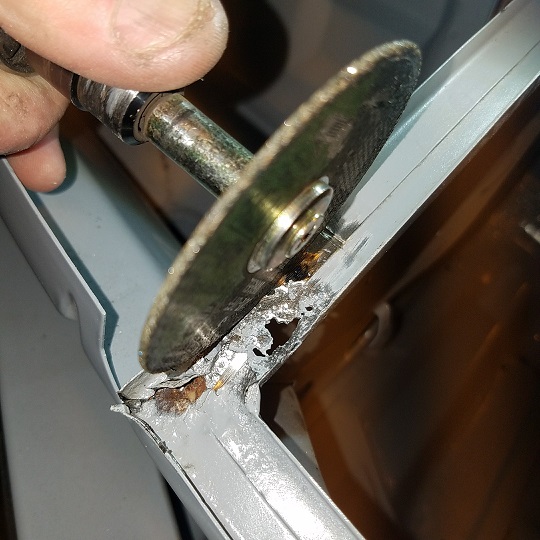 Then I test the piece with the linesman pliers. 1. to check that I've thinned it enough. 2. looking for spot welds to thin down some more. With the rust caused metal degradation on the top of the metal. Some times the spot welds can't be seen. They have to be found.  Wiggle... Wiggle. Pop goes the spot weld. 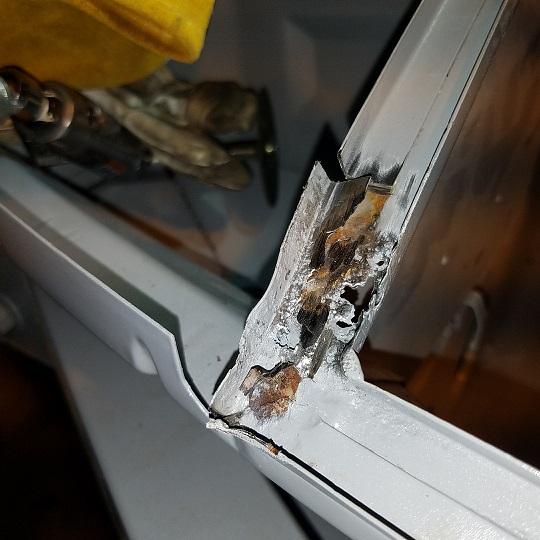 A little more work the die grinder and the left top piece is off. Except for the portion stuck in the mig repair. 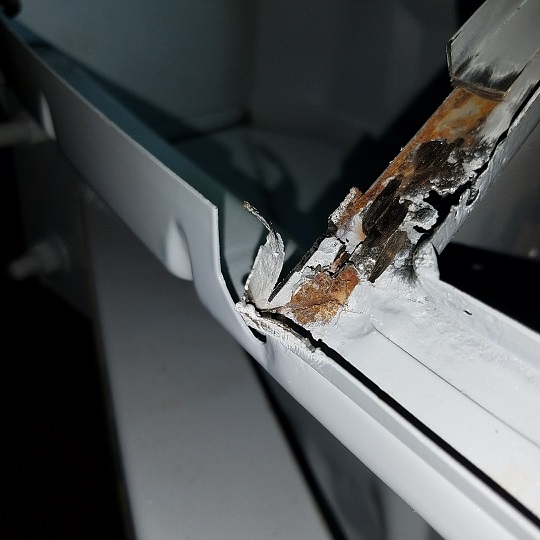 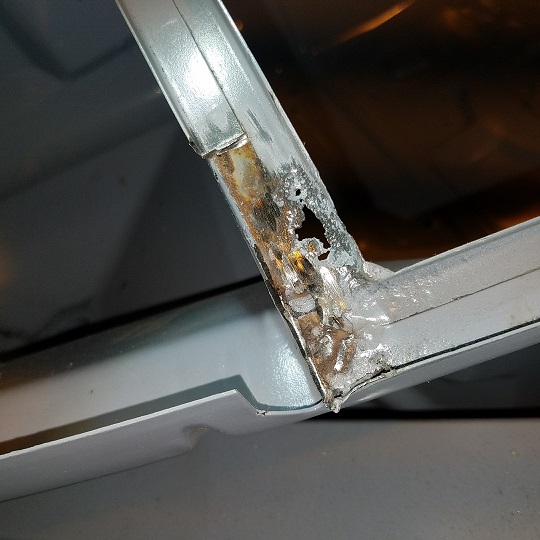 The left piece is 20 gauge. Then I begin to cut out/off the formed section of the light bucket. 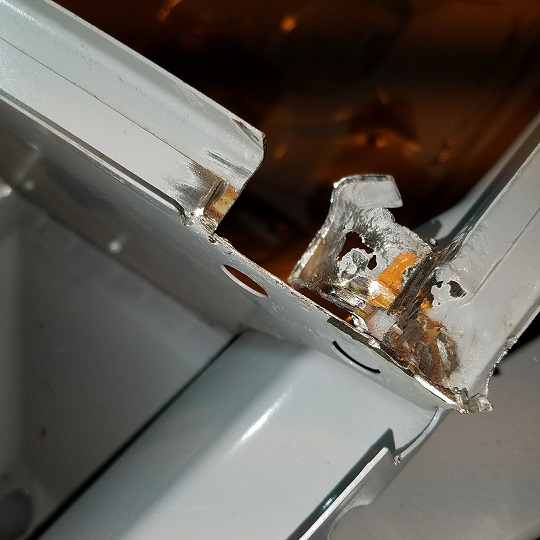 I did finish the cut out. Forgot to shoot the last picture. (IMG:style_emoticons/default/mad.gif) |
|
|
|
| cary |
Oct 11 2017, 08:42 AM
Post
#343
|
|
Advanced Member Group: Members Posts: 3,900 Joined: 26-January 04 From: Sherwood Oregon Member No.: 1,608 Region Association: Pacific Northwest |
In looking at the pictures it looks like I'll need a third size metal strip to repair the channels. I have the measurements for the ones in the yellow boxes. But the orange/red box looks to be a little wider.
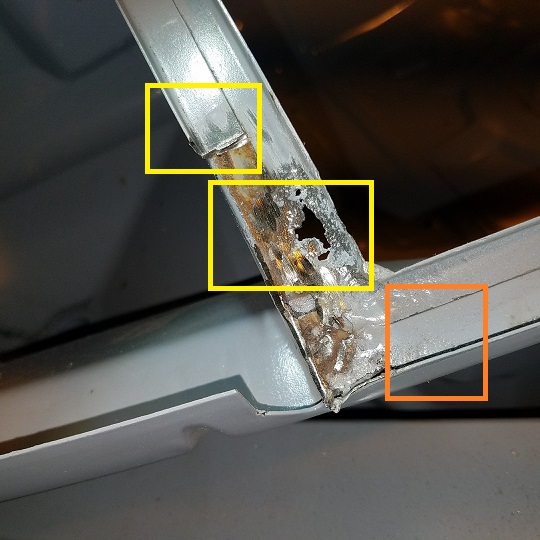 After I do these by hand and figure out the exact size. I'll have them made for future repairs. Should be available thru 914 Rubber in the future. |
|
|
|
| cary |
Oct 11 2017, 01:47 PM
Post
#344
|
|
Advanced Member Group: Members Posts: 3,900 Joined: 26-January 04 From: Sherwood Oregon Member No.: 1,608 Region Association: Pacific Northwest |
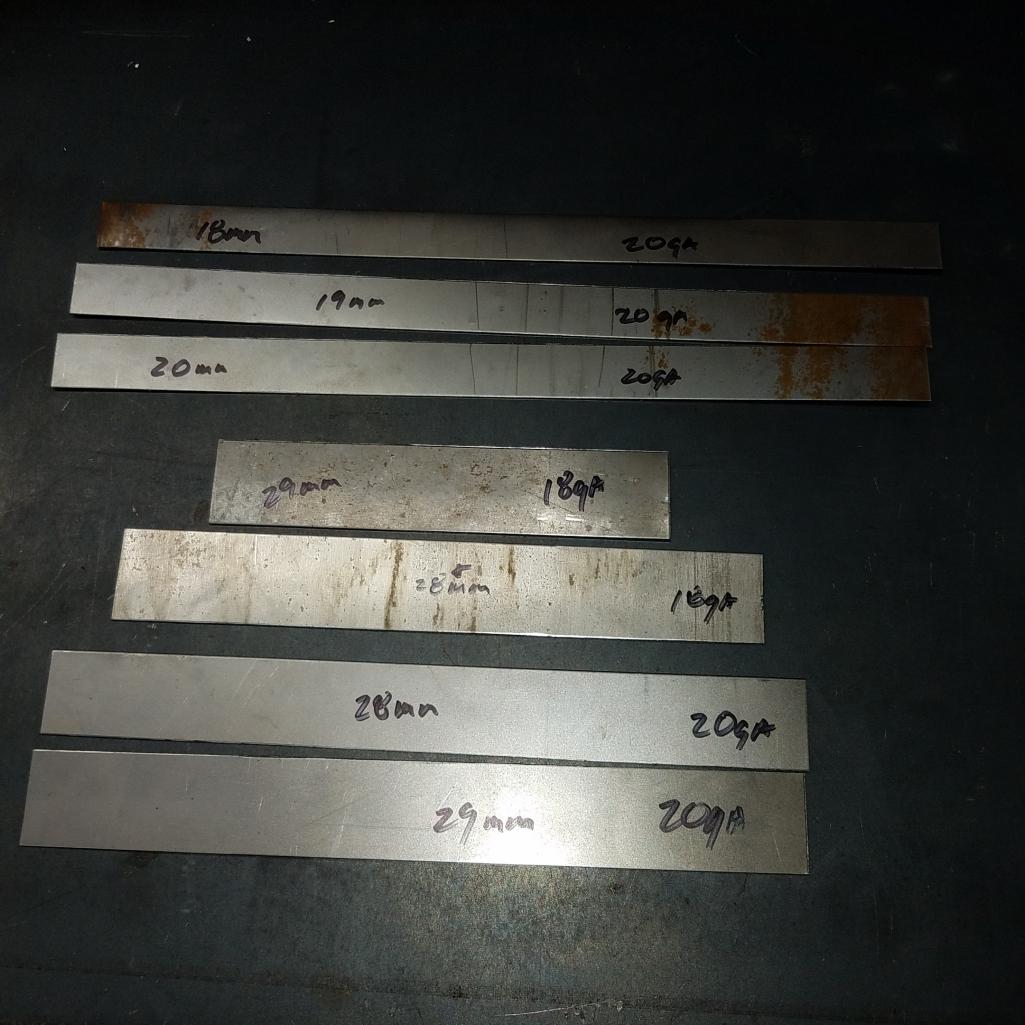
Assortment of sheared pieces for tomorrow.
 |
|
|
|
| cary |
Oct 13 2017, 08:49 AM
Post
#345
|
|
Advanced Member Group: Members Posts: 3,900 Joined: 26-January 04 From: Sherwood Oregon Member No.: 1,608 Region Association: Pacific Northwest |
Thursday 10/12/17
Super In Law work ................ Used the 75+ bracket for the fuel pump mount. Used the rubber mounts from the -74 pump. Only issue, mounts are too long and too soft. Need to be half as tall and twice as wide. I'll research on Sunday.  |
|
|
|
| cary |
Oct 13 2017, 09:13 AM
Post
#346
|
|
Advanced Member Group: Members Posts: 3,900 Joined: 26-January 04 From: Sherwood Oregon Member No.: 1,608 Region Association: Pacific Northwest |
Thursday 10/12/17
Finished up the right headlight to front panel frunk seal channel repair. 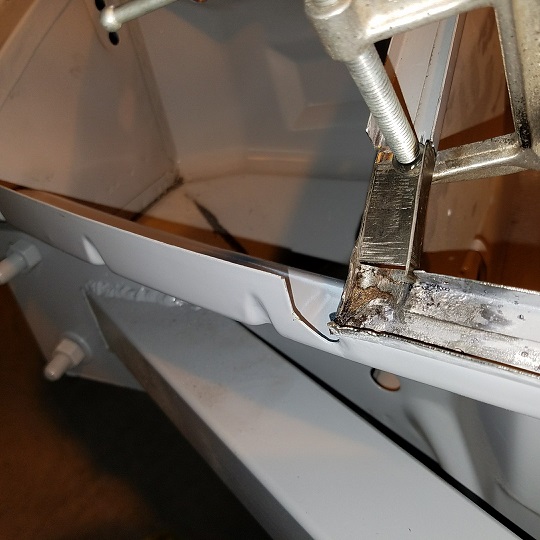 Forgot to shoot pictures making the patch pieces. (IMG:style_emoticons/default/mad.gif) After shearing them at Rothsport it was pretty easy. The HF floor brake worked great. Made the correct bend on the first pass on both pieces. (IMG:style_emoticons/default/biggrin.gif) 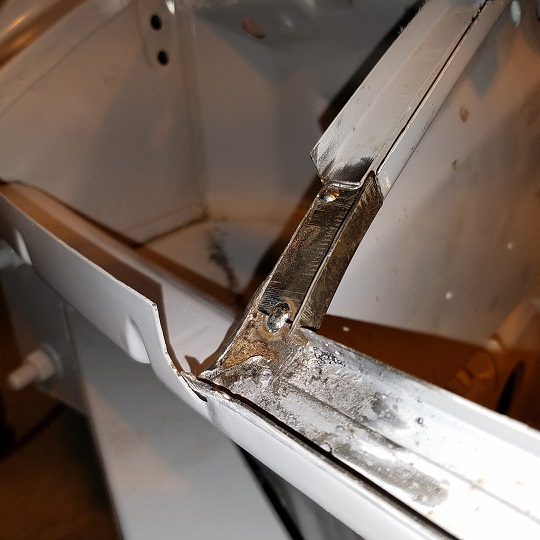 Forgot to mention the opened area was treated with OSPHO before I left on Tuesday night. 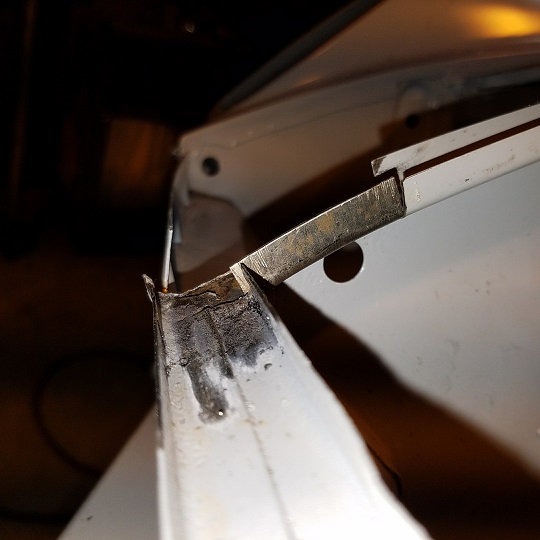 Needed just a little dab with the stretcher to get the arc. 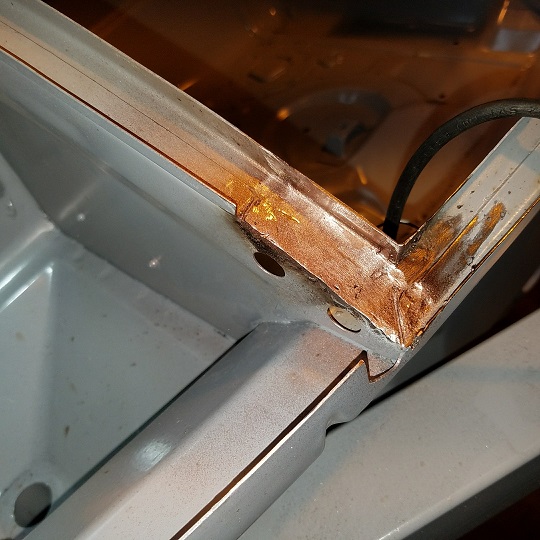 Welded in and sprayed with U-Pol cooper weld thru primer. 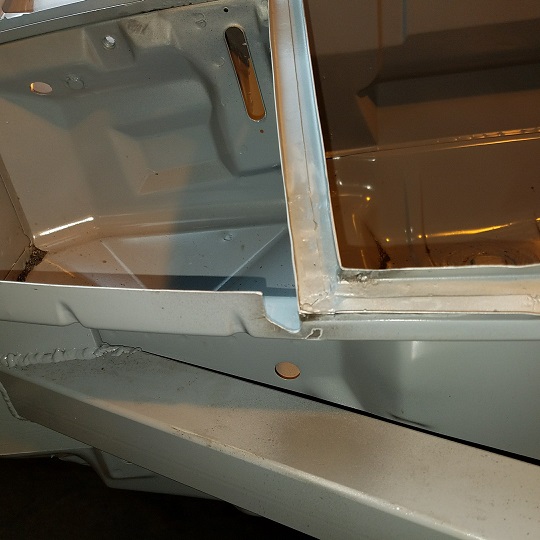 Second layer welded in and coated with cold galvanizing. Only thing I'd do different next time. Have a 1/2" mini belt sander. And only use an 80 grit belt. The 36 was a bit too much. A little wavy/bumper. Before the car leaves I'll go over the entire frunk channel and smooth out the bumpy spots with a skim coat of JB Weld. Welding Note : 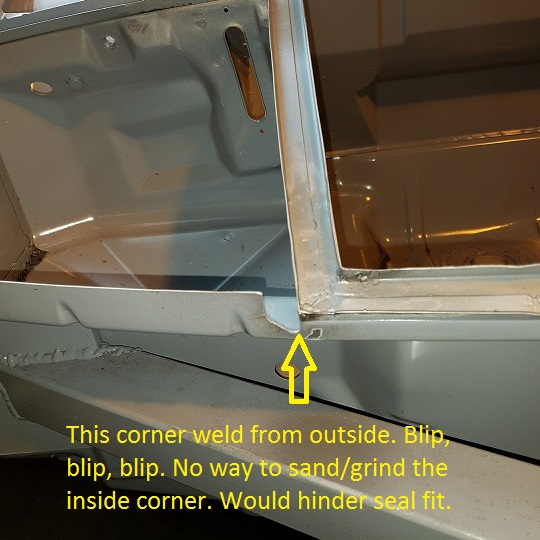 |
|
|
|
| Woodside914 |
Oct 13 2017, 09:24 AM
Post
#347
|
|
Member Group: Members Posts: 176 Joined: 19-May 10 From: Woodside, CA Member No.: 11,743 Region Association: Northern California |
Nice work....yep, those channels are always prone to rust & crud....had the same problem on mine, as probably most folks, too....just a poor design.
|
|
|
|
| tygaboy |
Oct 13 2017, 09:27 AM
Post
#348
|
|
914 Guru Group: Members Posts: 5,844 Joined: 6-October 15 From: Petaluma, CA Member No.: 19,241 Region Association: Northern California |
Cary -
Start a new thread about "Trunk Channel Repair", add all these recent pics and let's make it a Classic! (IMG:style_emoticons/default/smilie_pokal.gif) Thanks for all the detailed pics. Just what I need! Chris |
|
|
|
| cary |
Oct 13 2017, 09:34 AM
Post
#349
|
|
Advanced Member Group: Members Posts: 3,900 Joined: 26-January 04 From: Sherwood Oregon Member No.: 1,608 Region Association: Pacific Northwest |
Thursday 10/10/17
Added another seat belt anchor for the right seat. Beings that this is a 71 and had a fixed seat and we've adding the adjuster and the seat belt pockets. I thought the flexible stand up seat belt receiver should both be aligned. I'd harvested a plate off one the parts cars so away I went. 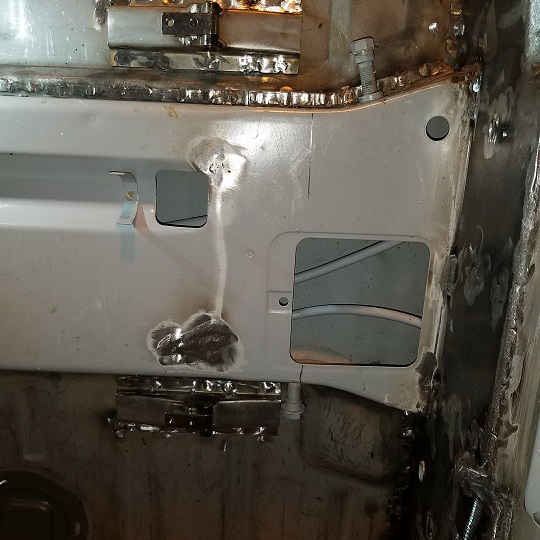 Cut the hole with the 3/4" mark on the step bit. 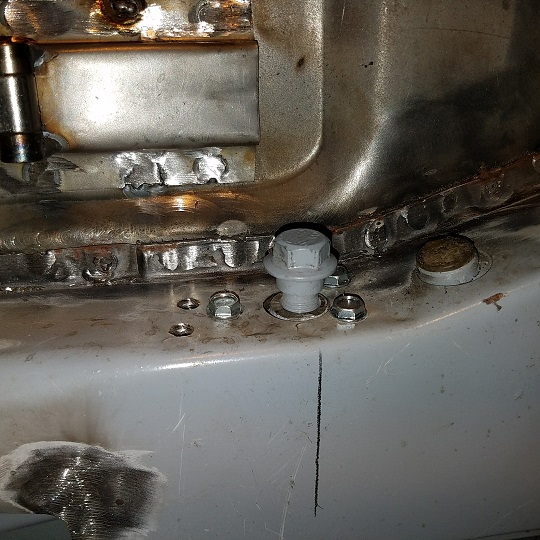 1/4" rosette holes and #10 screws. Makes for a solid weld. Start the weld with stick out at the edge of the inner screw holes and wind your way out. Bolt all the way in to protect the threads from splatter in both the hole and the bolt.  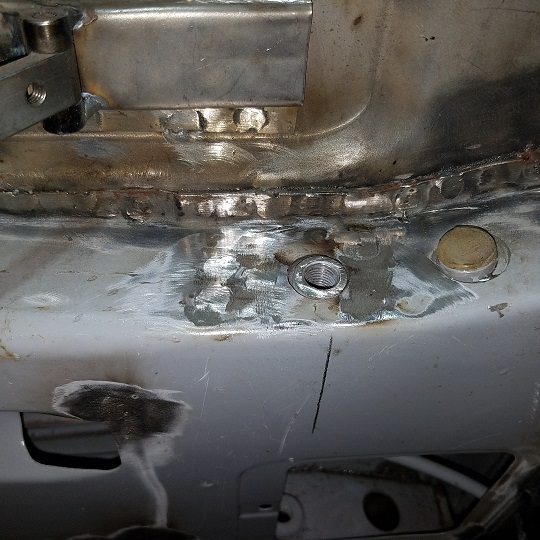 Heading to the welding store to pick up a new nozzle for the Miller welder. Friday : fender and light bucket patches. Super In Law and Taylor are going to inventory all the harness tie downs on Matt's car and make sure we have them on Doug's car. |
|
|
|
| cary |
Oct 13 2017, 10:46 PM
Post
#350
|
|
Advanced Member Group: Members Posts: 3,900 Joined: 26-January 04 From: Sherwood Oregon Member No.: 1,608 Region Association: Pacific Northwest |
Friday the 13th.
First order of business is laying the Edd China cut out pattern onto the rolled patch material that Super In Law shaped last week. 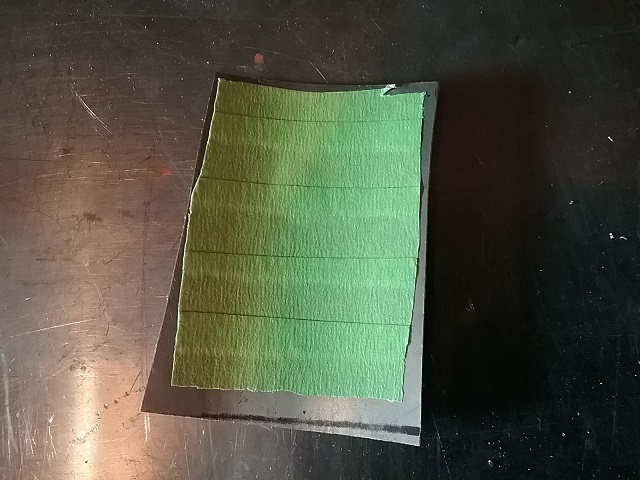 Trimmed it to fit. Then treated the backside with weld thru primer to protect it forever. 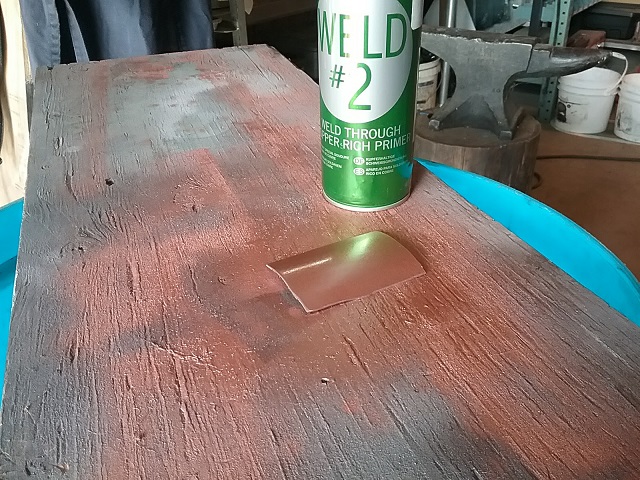 Let the fun begin. It takes quite a bit tuning to get it in there nice and flat. 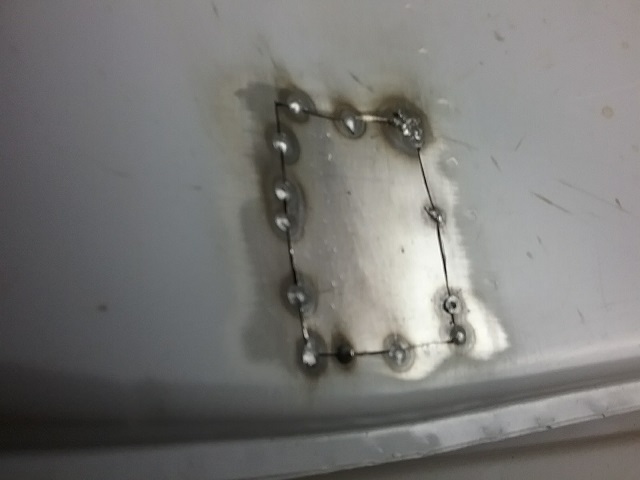 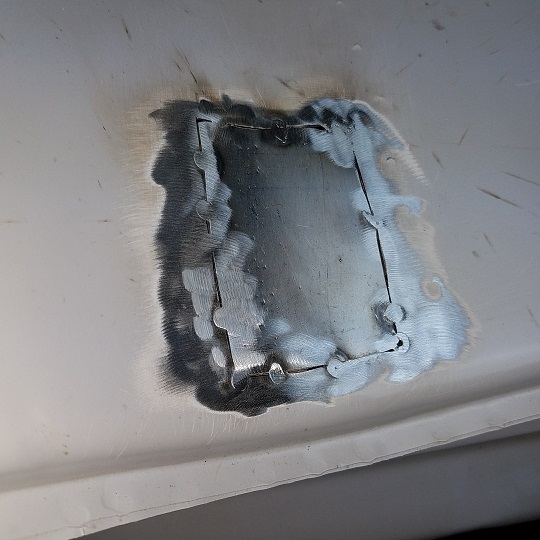 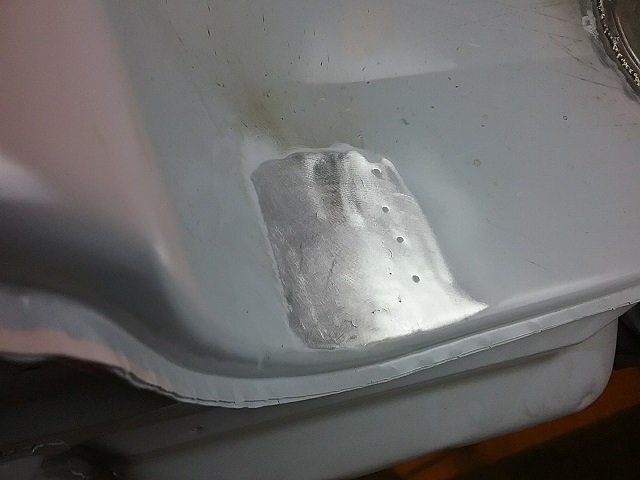 |
|
|
|
| cary |
Oct 13 2017, 10:55 PM
Post
#351
|
|
Advanced Member Group: Members Posts: 3,900 Joined: 26-January 04 From: Sherwood Oregon Member No.: 1,608 Region Association: Pacific Northwest |
Next onto the inside patch panel.
1st. order of business. Add additional weld thru primer to the inside of the cavity.  Then create the patch panel pattern with the Edd China tape method. 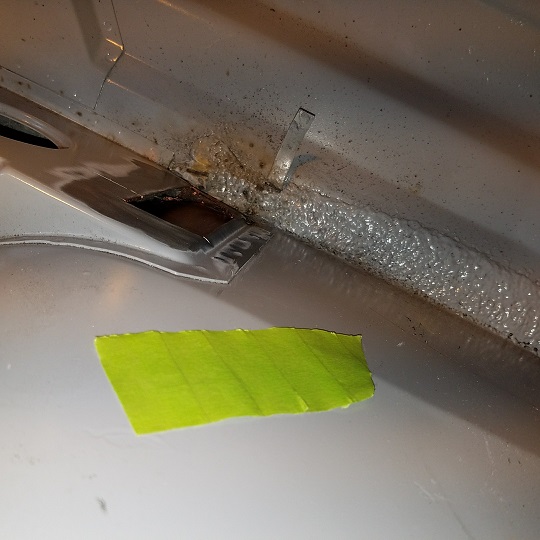 Prep the backside again with weld thru primer.  Weld her in ..................  I'll come back and add the forgotten finished shot. |
|
|
|
| cary |
Oct 13 2017, 11:01 PM
Post
#352
|
|
Advanced Member Group: Members Posts: 3,900 Joined: 26-January 04 From: Sherwood Oregon Member No.: 1,608 Region Association: Pacific Northwest |
Next the cut out of the rust inside the right headlight bucket.
  While I was welding in the fender patches Super In Law created a new patch for the headlight bucket. His first attempt was in 18ga, too thick. Re-created in 20 ga. 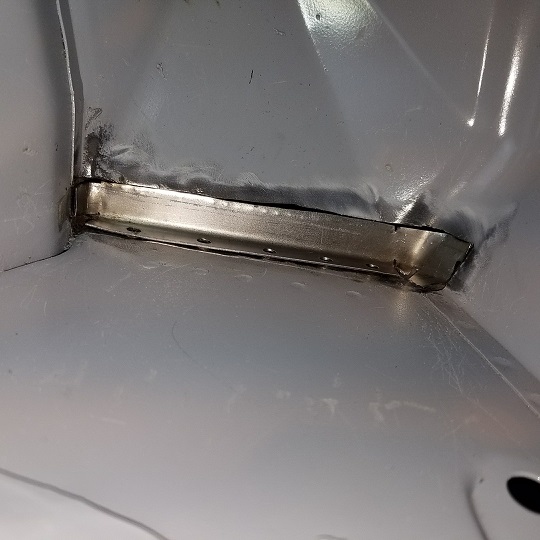 Here's where I ended the day ............ 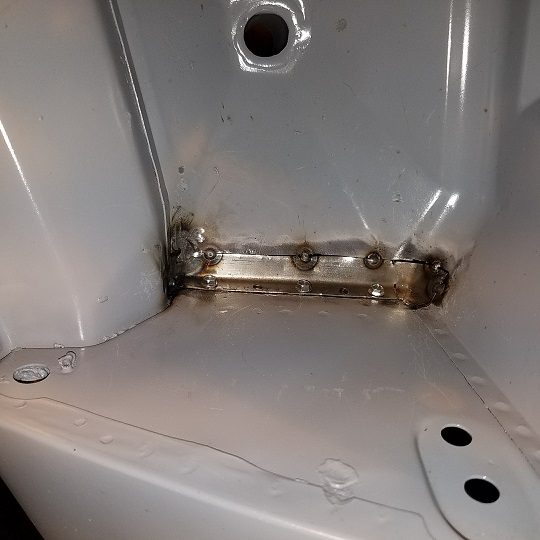 |
|
|
|
| bbrock |
Oct 13 2017, 11:04 PM
Post
#353
|
|
914 Guru Group: Members Posts: 5,269 Joined: 17-February 17 From: Montana Member No.: 20,845 Region Association: Rocky Mountains |
QUOTE(tygaboy @ Oct 13 2017, 09:27 AM)  Cary - Start a new thread about "Trunk Channel Repair", add all these recent pics and let's make it a Classic! (IMG:style_emoticons/default/smilie_pokal.gif) Thanks for all the detailed pics. Just what I need! Chris (IMG:style_emoticons/default/agree.gif) I'll be tackling channel repair over the winter and will be referencing this as I go. I'm sure many others will do the same. Let's make it easy to find. |
|
|
|
| cary |
Oct 13 2017, 11:13 PM
Post
#354
|
|
Advanced Member Group: Members Posts: 3,900 Joined: 26-January 04 From: Sherwood Oregon Member No.: 1,608 Region Association: Pacific Northwest |
QUOTE(bbrock @ Oct 13 2017, 10:04 PM) QUOTE(tygaboy @ Oct 13 2017, 09:27 AM) Cary - Start a new thread about "Trunk Channel Repair", add all these recent pics and let's make it a Classic! (IMG:style_emoticons/default/smilie_pokal.gif) Thanks for all the detailed pics. Just what I need! Chris (IMG:style_emoticons/default/agree.gif) I'll be tackling channel repair over the winter and will be referencing this as I go. I'm sure many others will do the same. Let's make it easy to find. I'm hoping to have 4' sections created at a metal fabrication shop. This should really speed up the process. They would be available thru 914 Rubber. I'll write the channel repair thread after I get the cowl repaired. Which starts tomorrow. |
|
|
|
| cary |
Oct 15 2017, 10:08 AM
Post
#355
|
|
Advanced Member Group: Members Posts: 3,900 Joined: 26-January 04 From: Sherwood Oregon Member No.: 1,608 Region Association: Pacific Northwest |
With all the traffic at MiddleMotors yesterday I didn't fire up the welder.
But I did have a little time to do some engineering work. 1st. Project Measure up the rubber isolators on the 75+ fuel pump access we're going to do. 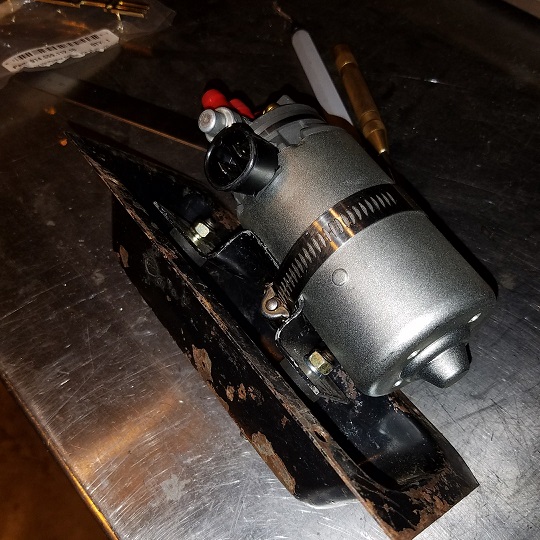 Looks like I'll order a set of these to see if I can tighten things up. https://www.belmetric.com/metric-rubber-buf...fer-p-5692.html 2nd. Project Taking measurement on Doug's 914-6 VW-Porsche emblem. But I needed to round a taillight and rear trunk lock to get the correct spacing. 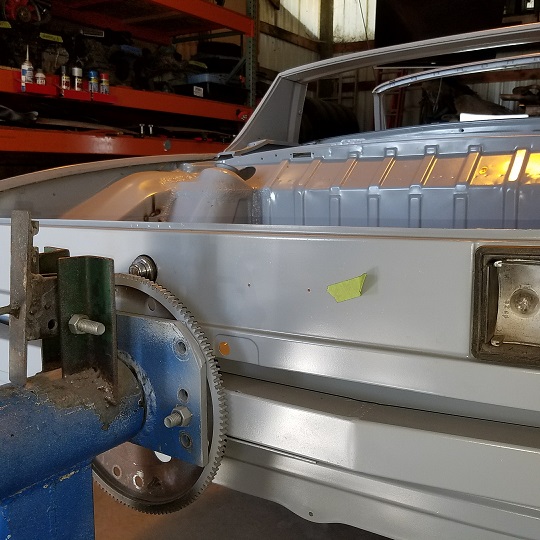 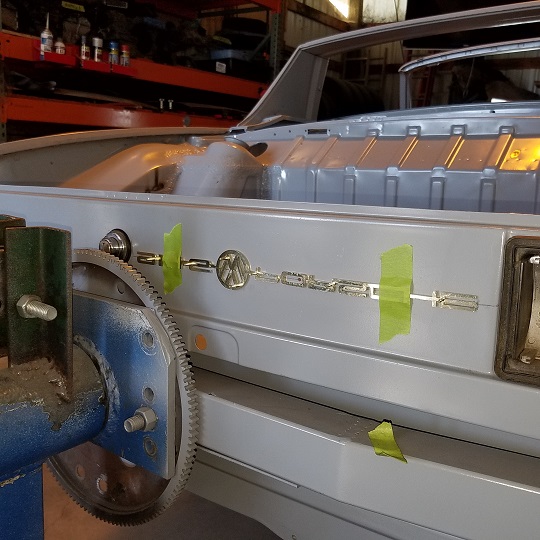 Short day, headed to the Couv for a dinner party. |
|
|
|
| raynekat |
Oct 15 2017, 06:27 PM
Post
#356
|
|
Advanced Member Group: Members Posts: 2,171 Joined: 30-December 14 From: Coeur d'Alene, Idaho Member No.: 18,263 Region Association: Pacific Northwest |
The "suspense" is killing me.
Can't wait until I see a fully functional cowling on this car again. Everything is looking great. Cary is a perfectionist....which is something I like....a lot. Now if we could only get the rear emblem right-side-up. (IMG:style_emoticons/default/tongue.gif) hahaha |
|
|
|
| cary |
Oct 15 2017, 09:31 PM
Post
#357
|
|
Advanced Member Group: Members Posts: 3,900 Joined: 26-January 04 From: Sherwood Oregon Member No.: 1,608 Region Association: Pacific Northwest |
Finish up the headlight bucket and drill the holes for the emblem and we'll be on to the cowl.
I'm kind waiting for my new Miller 115v 141 to arrive to start welding on the cowl. I'll load it with .023 Easy Grind wire for sheet metal only. Should ship on Monday. (IMG:style_emoticons/default/piratenanner.gif) But there's quite a bit of trimming and fabricating to do on the cowl before that. Primarily in the fender to cowl joint. Then recreating the 2 layers of the fender. |
|
|
|
| cary |
Oct 16 2017, 09:57 PM
Post
#358
|
|
Advanced Member Group: Members Posts: 3,900 Joined: 26-January 04 From: Sherwood Oregon Member No.: 1,608 Region Association: Pacific Northwest |
Played hooky from Rothsport today. Delivered my latest rally car dismantle to the body shop for some adjustments then out to Forest Grove.
Started with walking the car and welded up the nicks and 40 years worth of extra screw holes. 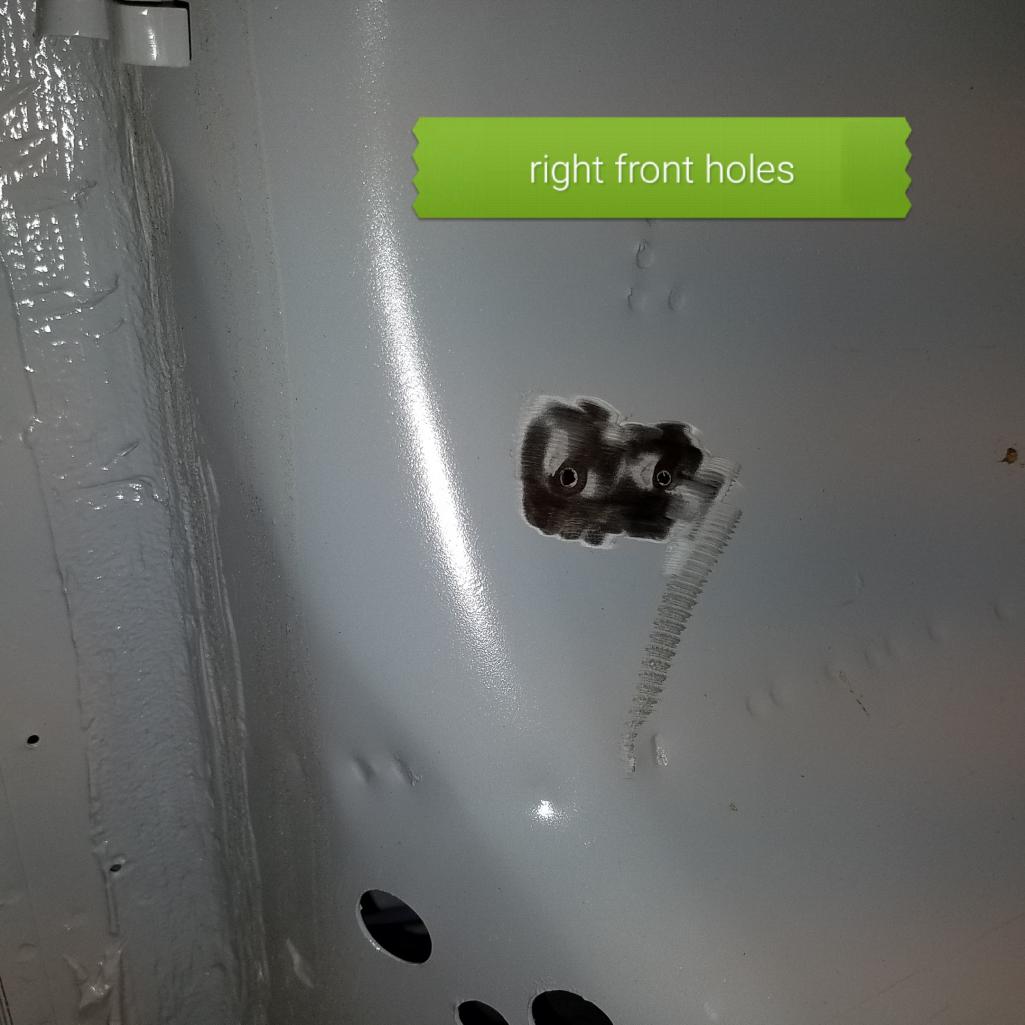   |
|
|
|
| cary |
Oct 16 2017, 10:11 PM
Post
#359
|
|
Advanced Member Group: Members Posts: 3,900 Joined: 26-January 04 From: Sherwood Oregon Member No.: 1,608 Region Association: Pacific Northwest |
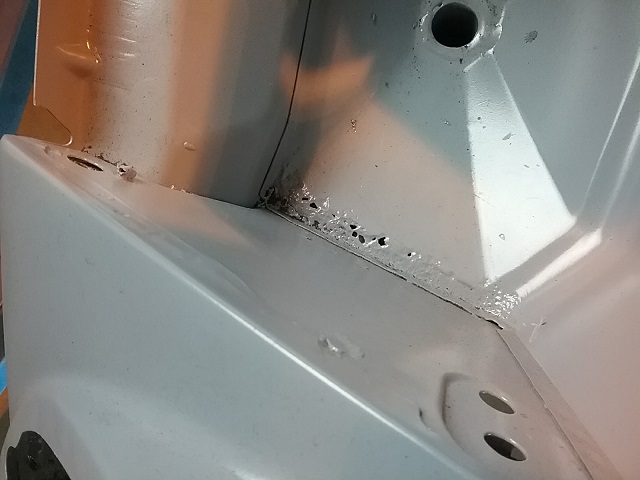
Next on the list, Doug asked that I inspect and tune up the bottom flange for dents and waves. So out came the hammers and dollies.
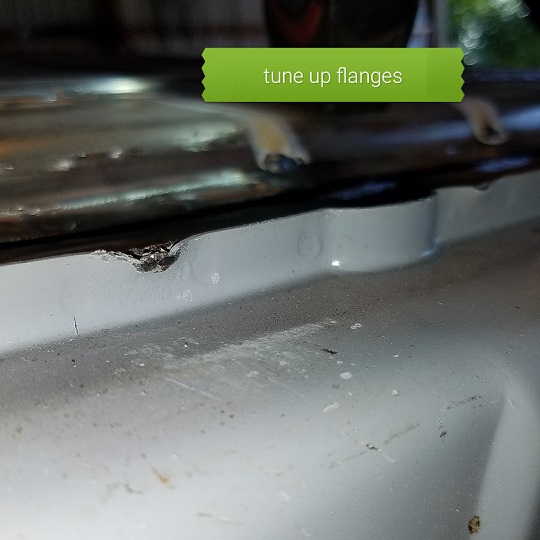 Then I tidied up the weld penetration left over form the inner long stiffener ties to the floor pan. 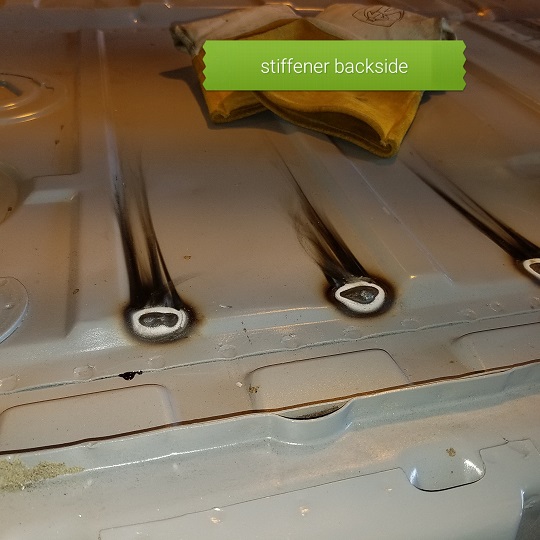 Next the $$$ work. Drilled the holes for the 914-6 VW Porsche emblem for the rear panel. Plus I filled the two holes for the old 914 emblem. 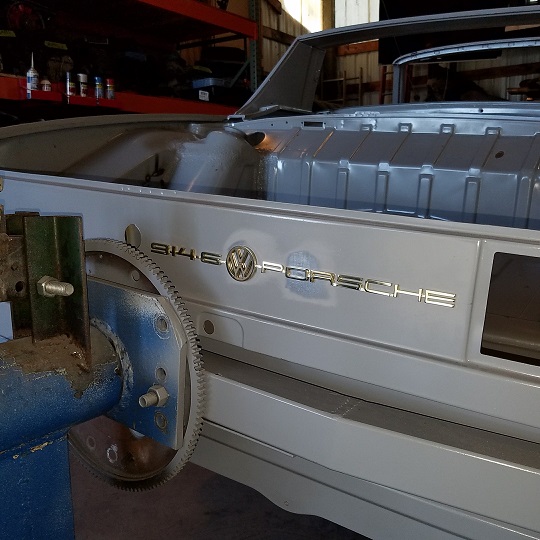 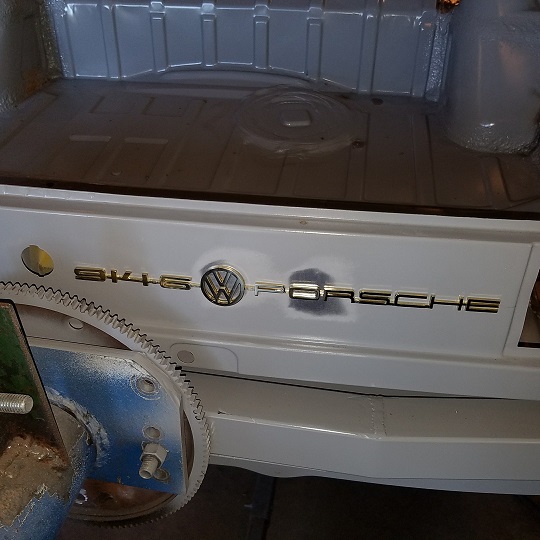 Last project for the day. Finish up the weld repair on the left headlight bucket. 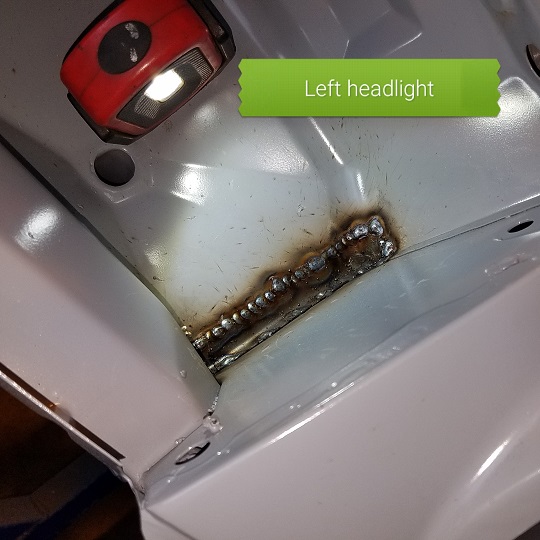 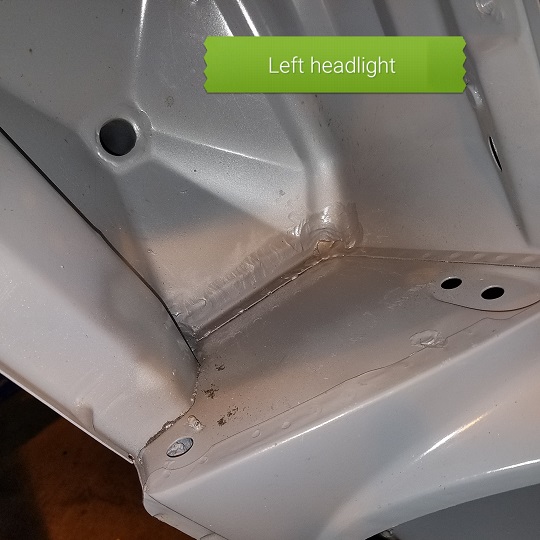 Very productive 5 hours. Fun day. |
|
|
|
| Cairo94507 |
Oct 17 2017, 07:49 AM
Post
#360
|
|
Michael Group: Members Posts: 10,706 Joined: 1-November 08 From: Auburn, CA Member No.: 9,712 Region Association: Northern California |
Amazing work. (IMG:style_emoticons/default/popcorn[1].gif) (IMG:style_emoticons/default/smilie_pokal.gif)
|
|
|
|
|
1 User(s) are reading this topic (1 Guests and 0 Anonymous Users)
0 Members:

|
Lo-Fi Version | Time is now: 17th July 2026 - 10:05 PM |
Invision Power Board
v9.1.4 © 2026 IPS, Inc.