|
|
|
Porsche, and the Porsche crest are registered trademarks of Dr. Ing. h.c. F. Porsche AG.
This site is not affiliated with Porsche in any way. Its only purpose is to provide an online forum for car enthusiasts. All other trademarks are property of their respective owners. |
|
|

  |

| cary |
 Oct 25 2017, 09:02 PM Oct 25 2017, 09:02 PM
Post
#381
|
|
Advanced Member  Group: Members Posts: 3,900 Joined: 26-January 04 From: Sherwood Oregon Member No.: 1,608 Region Association: Pacific Northwest |
|
   |

 
|
| raynekat |
Oct 25 2017, 10:12 PM
Post
#382
|
|
Advanced Member Group: Members Posts: 2,171 Joined: 30-December 14 From: Coeur d'Alene, Idaho Member No.: 18,263 Region Association: Pacific Northwest |
|
|
|
|
| cary |
Oct 25 2017, 10:32 PM
Post
#383
|
|
Advanced Member Group: Members Posts: 3,900 Joined: 26-January 04 From: Sherwood Oregon Member No.: 1,608 Region Association: Pacific Northwest |
Super In Law went to work on the patterns and test pieces for the fender tops after we went thru The Plan ......................
I went to work on inventorying all the harness cable straps. I used my 69 build and a couple 73's to compare too. 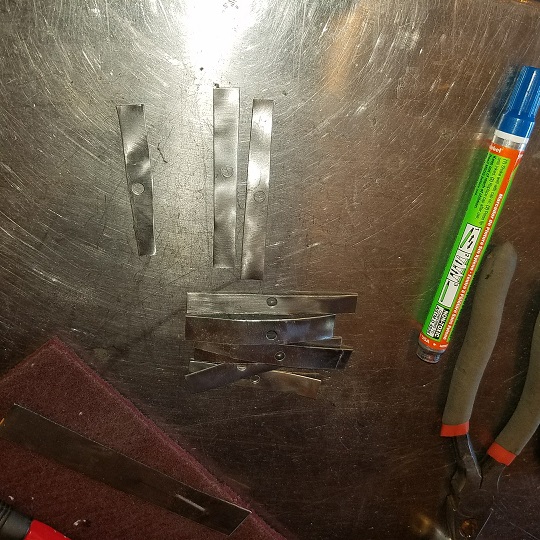 I started with the stack Super In Law created a couple years ago............. 22 gauge 10 * 40 mm. 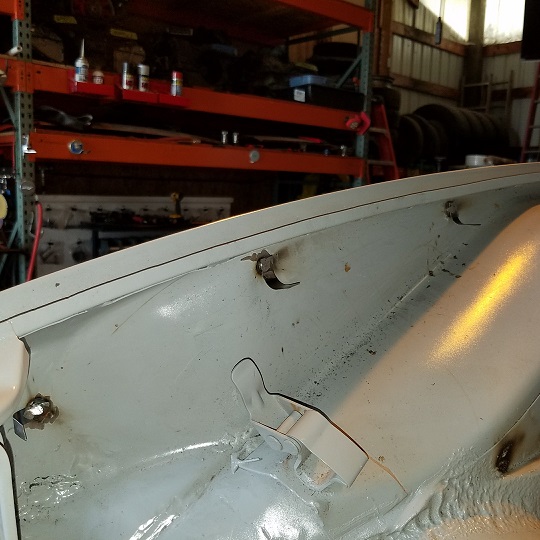  Quite a few missing |
|
|
|
| cary |
Oct 26 2017, 09:08 AM
Post
#384
|
|
Advanced Member Group: Members Posts: 3,900 Joined: 26-January 04 From: Sherwood Oregon Member No.: 1,608 Region Association: Pacific Northwest |
Something to ponder today. Where are we going to locate the "75" style fuel pump door?
Matt's and the OEM location are on the right side. two port pumps. But your's will have the third return line that will need to be dressed back to the tank. 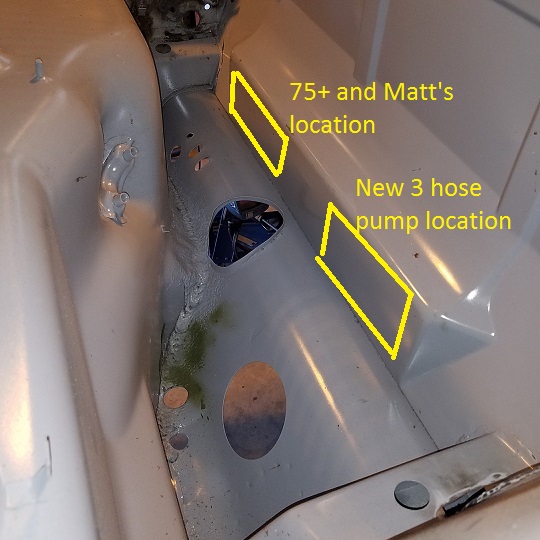 |
|
|
|
| raynekat |
Oct 26 2017, 03:45 PM
Post
#385
|
|
Advanced Member Group: Members Posts: 2,171 Joined: 30-December 14 From: Coeur d'Alene, Idaho Member No.: 18,263 Region Association: Pacific Northwest |
Not sure if this helps?
  |
|
|
|
| cary |
Oct 26 2017, 10:45 PM
Post
#386
|
|
Advanced Member Group: Members Posts: 3,900 Joined: 26-January 04 From: Sherwood Oregon Member No.: 1,608 Region Association: Pacific Northwest |
Added Doug's requested 4 extra harness hold down straps under the rear engine tray.
 Then went thru the entire car and stripped the epoxy primer off all of the ground lugs. Covered the plate with an oversize washer and secured with a nut. This will keep the body shop from coating them with beautiful light ivory. 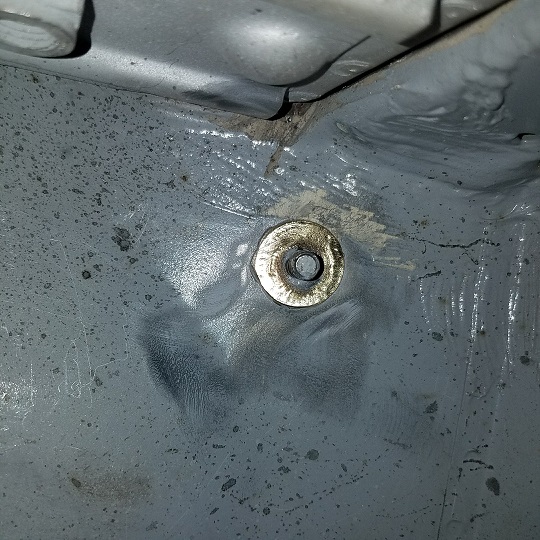 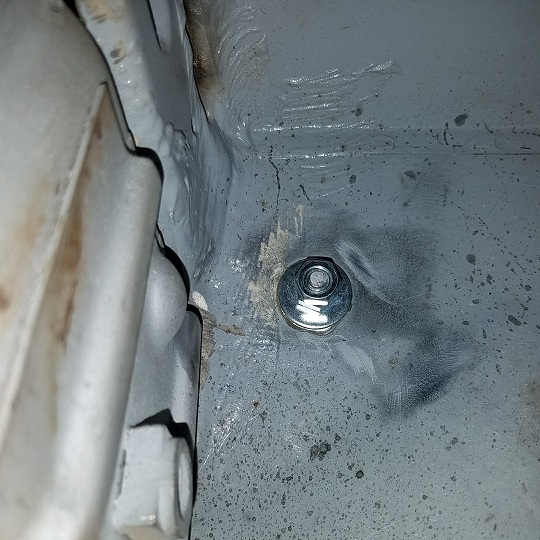 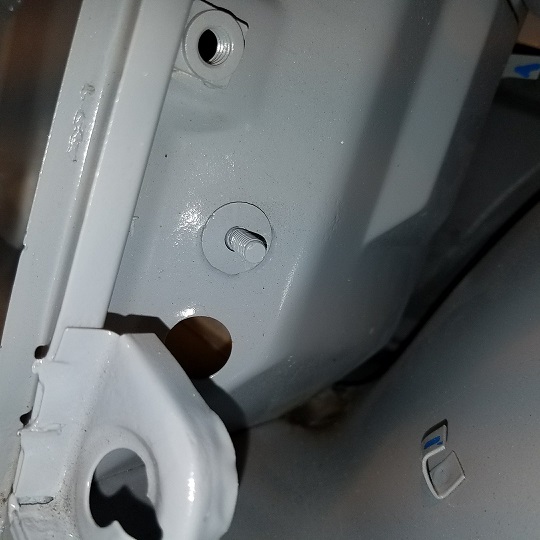 Then on to welding the flanges on the cowl. 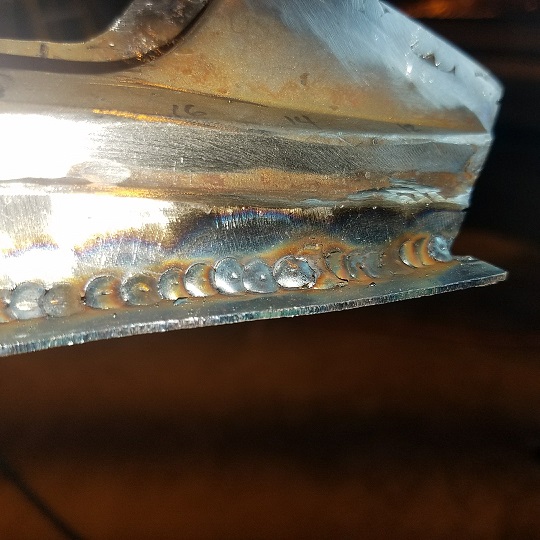 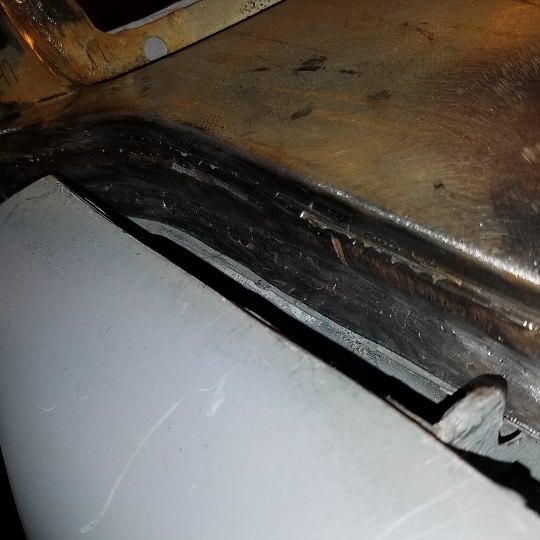 |
|
|
|
| tygaboy |
Oct 27 2017, 08:06 AM
Post
#387
|
|
914 Guru Group: Members Posts: 5,844 Joined: 6-October 15 From: Petaluma, CA Member No.: 19,241 Region Association: Northern California |
Cary - OMG... I can only imagine how many MIG trigger pulls you have into that car!
Hours and hours of "bzzzzttt..., bzzzzttt..., bzzzzttt...". (Take plenty of breaks so you don't get Car/Pull tunnel syndrome! (IMG:style_emoticons/default/lol-2.gif) ) Great work and attention to detail. The car is looking awesome! Oh, and Happy belated B-day! |
 |
|
| cary |
Oct 27 2017, 08:16 AM
Post
#388
|
|
Advanced Member Group: Members Posts: 3,900 Joined: 26-January 04 From: Sherwood Oregon Member No.: 1,608 Region Association: Pacific Northwest |
I can just begin to see the finish line on my portion of the project .....
Finish the cowl and seam sealing are the two major items left. Doug and I will inspect the old seam seal today that hasn't been removed to determine if any needs to pulled and redone. |
|
|
|
| cary |
Oct 28 2017, 08:54 AM
Post
#389
|
|
Advanced Member Group: Members Posts: 3,900 Joined: 26-January 04 From: Sherwood Oregon Member No.: 1,608 Region Association: Pacific Northwest |
Friday 10/28/17
Installed the shorter BelMetric rubber isolators on Doug's 3 port fuel pump mounted into a 75+ fuel fuel door. Much better ............... 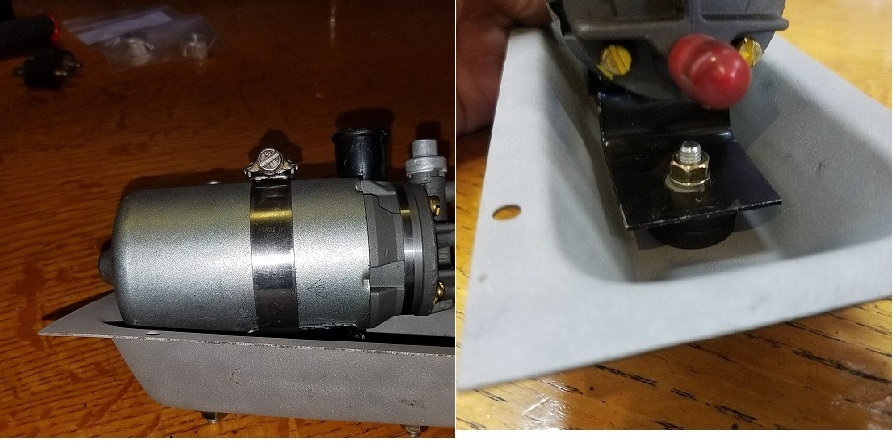 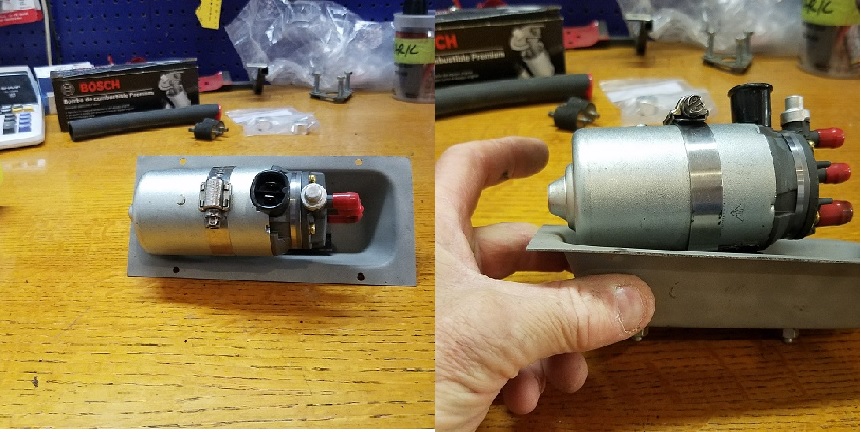 Then Doug stopped by bearing gifts ............... Item number 1. Rear fog light. It has some issues that I'll discuss on the other thread. From 25,000 ft. Light hardware to long and big. New brackets are miss matched. 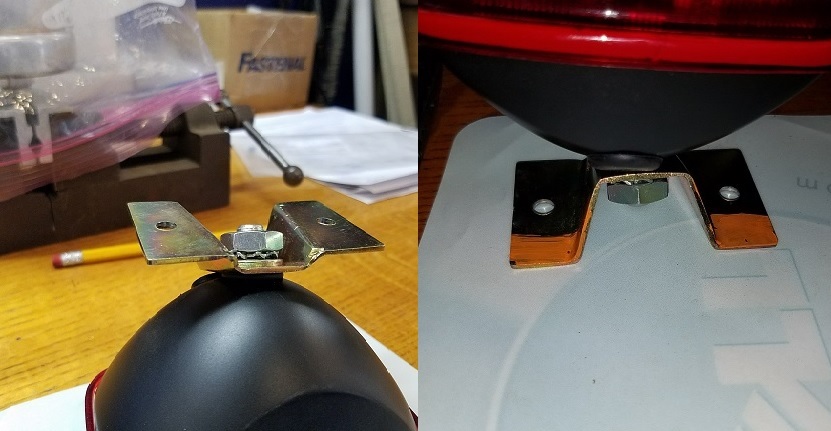 Item number 2. PMS rear toe alignment adjuster. 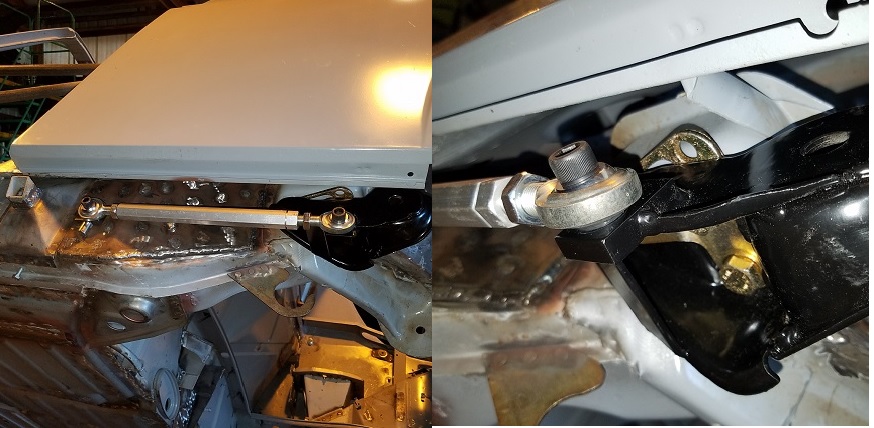 Got to use some of my shiny stuff for the mock up for welding. I have the MFI fuel filer console sitting on my desk as we determine it's location. I'll stopped by Rothsport and discuss with Jeff on Monday. 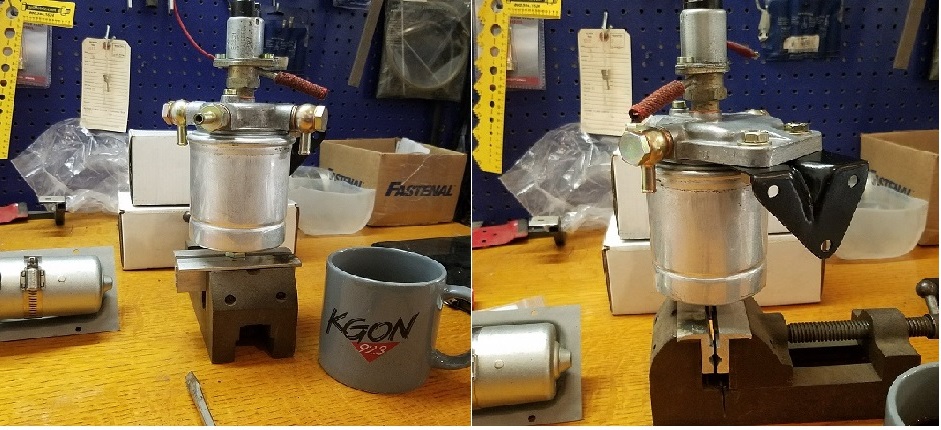 |
|
|
|
| 914_teener |
Oct 28 2017, 11:32 AM
Post
#390
|
|
914 Guru Group: Members Posts: 5,270 Joined: 31-August 08 From: So. Cal Member No.: 9,489 Region Association: Southern California |
Cary....
Always thought that is a fuel accumulator with a filter? Am I wrong? |
|
|
|
| raynekat |
Oct 28 2017, 12:31 PM
Post
#391
|
|
Advanced Member Group: Members Posts: 2,171 Joined: 30-December 14 From: Coeur d'Alene, Idaho Member No.: 18,263 Region Association: Pacific Northwest |
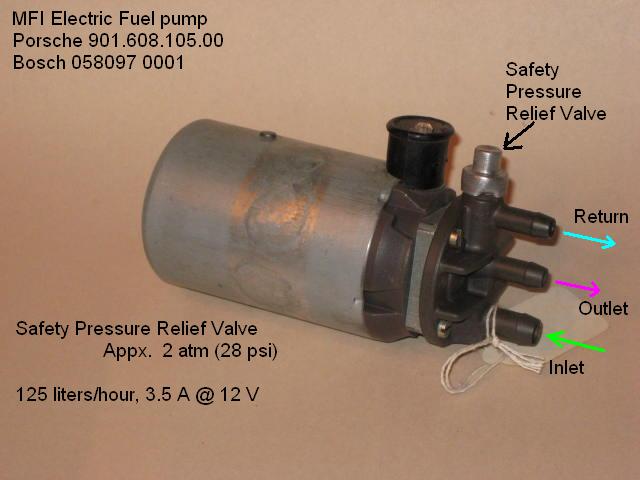
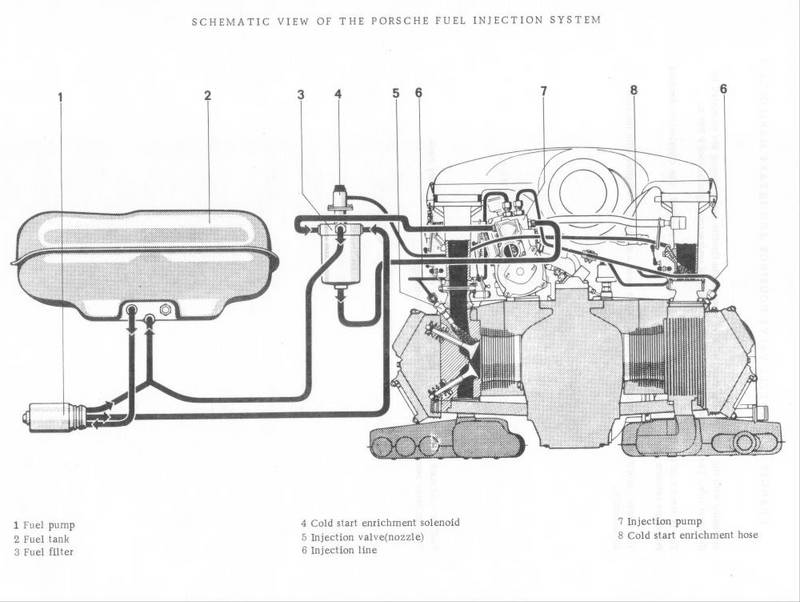
That is called the MFI micro filter (the filter screws on the bottom) for the MFI fuel system. On top is the cold start valve/solenoid for the cold start system.
You'll usually see these on the early 911's just next to the engine relay panel on the driver's side in the engine compartment. As far as I know....there is no accumulating going on there. Just the micro filter before the fuel heads off to the MFI pump and high pressure injectors and cold start bits up on top. |
|
|
|
| 914_teener |
Oct 28 2017, 12:44 PM
Post
#392
|
|
914 Guru Group: Members Posts: 5,270 Joined: 31-August 08 From: So. Cal Member No.: 9,489 Region Association: Southern California |
Oh....yes this is MFI not CIS.
What a beautiful and simplistic system MFI is. Oh yes, nice build as well. |
|
|
|
| cary |
Oct 30 2017, 10:08 PM
Post
#393
|
|
Advanced Member Group: Members Posts: 3,900 Joined: 26-January 04 From: Sherwood Oregon Member No.: 1,608 Region Association: Pacific Northwest |
Short day. Oil change on Powerstroke and mow the lawn before it rains.
Time to tackle the issues with the rear fog light. Stopped at Ace and bought a shorter 1.0 10mm jam nut and a 10mm washer. 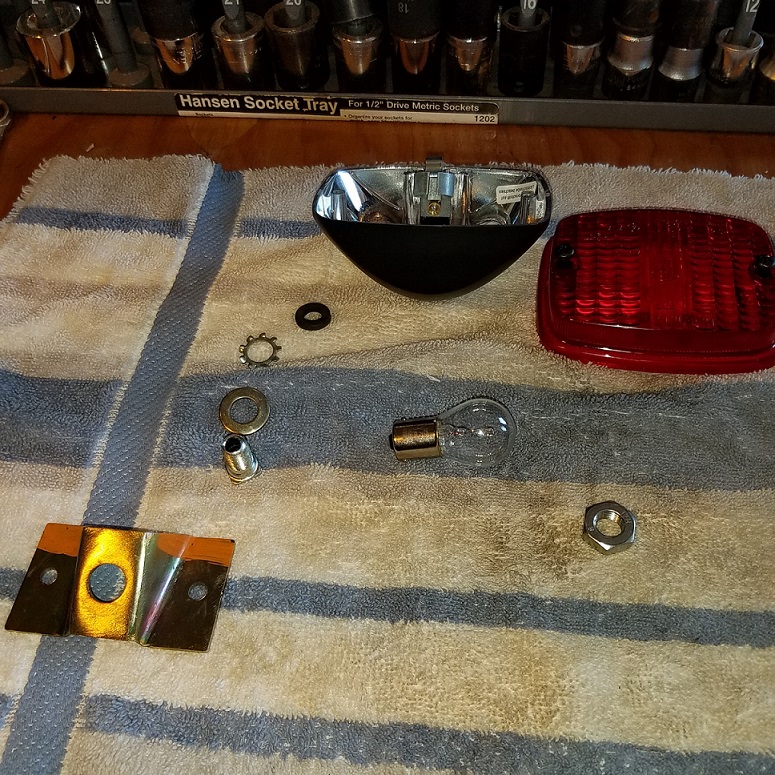 Put the new 10mm washer on the inside of the fog light to shorten the mount. It was too long and mount was pivoting on the tube. 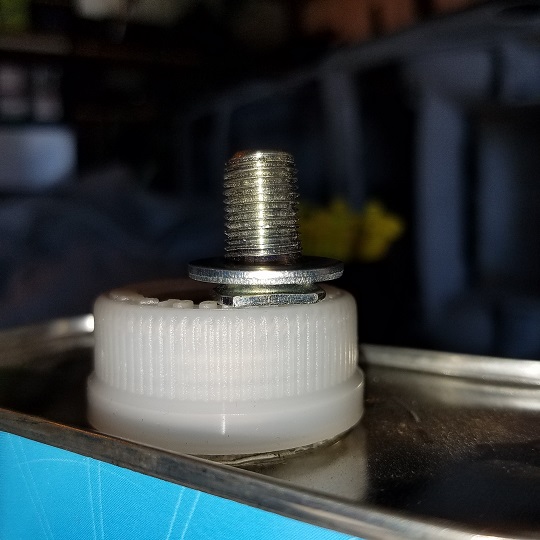 Washer needed to be enlarged just a bit. Mounted onto the mounting tube .......... 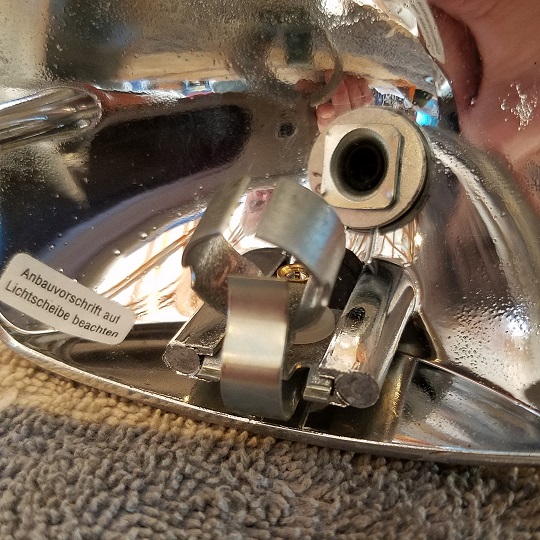 Jam nut was a little too thick too .............. 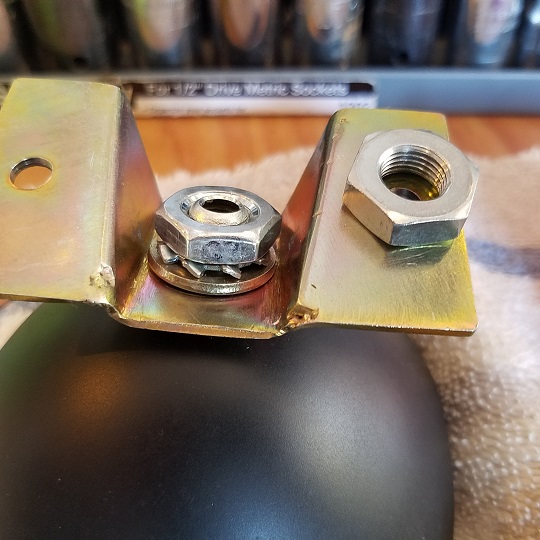 Now the lamp was mountable. Here's the low mounting location. Mount sitting on the rail. 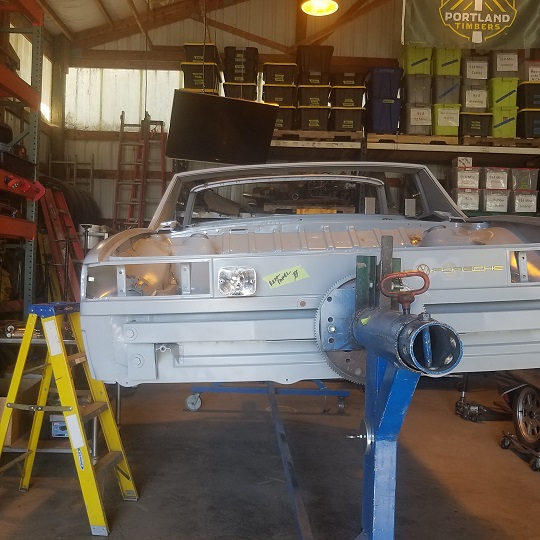 Here's the one I'm going with so far ...................... 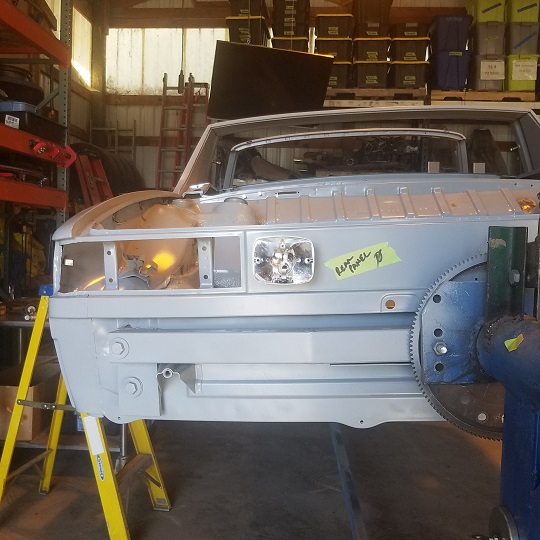 |
|
|
|
| cary |
Oct 30 2017, 10:21 PM
Post
#394
|
|
Advanced Member Group: Members Posts: 3,900 Joined: 26-January 04 From: Sherwood Oregon Member No.: 1,608 Region Association: Pacific Northwest |
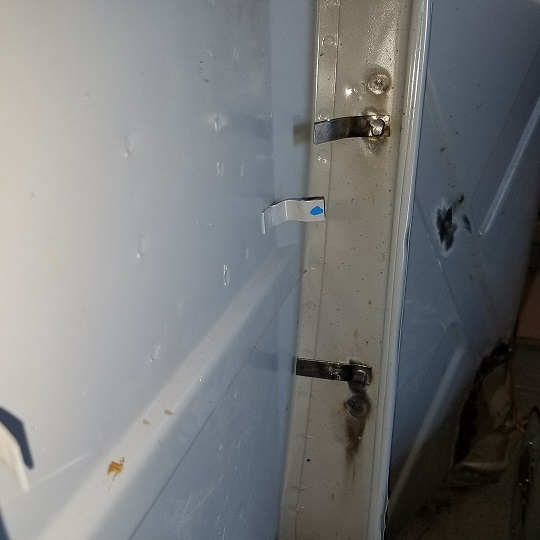
Here's the next issue. The plate is too short to be mounted like the factory did it.
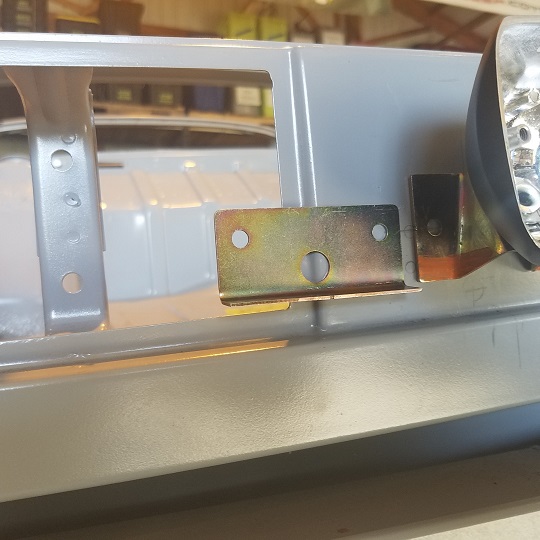 This is the plate that goes on inside the trunk. I just wanted to show where it lines up. Here's my measurement from the taillight. 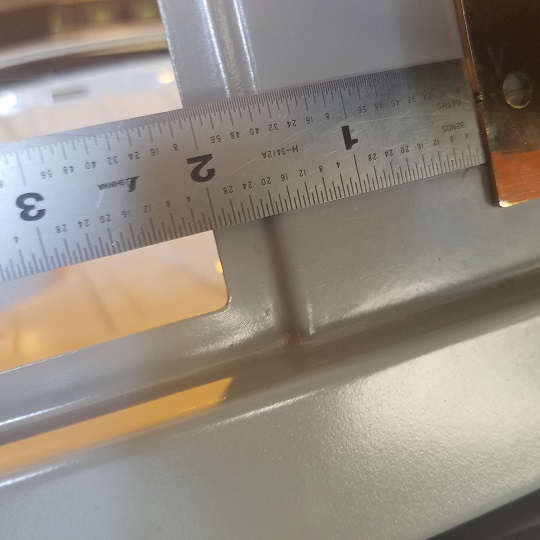 While I was tuning up the rear fog light. I was letting the aircraft stripper eat the epoxy off the frunk VIN number plate. 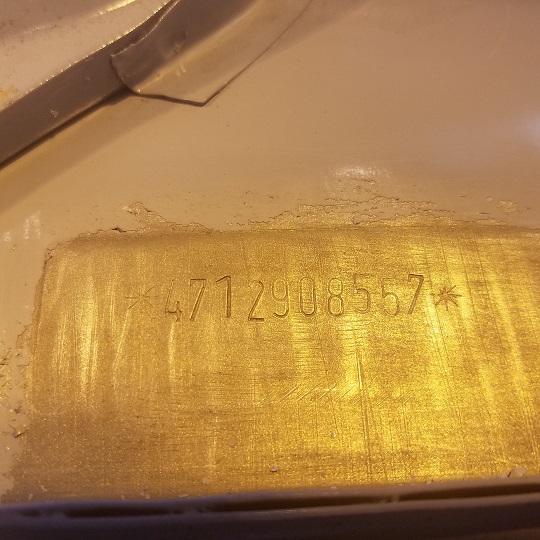 |
|
|
|
| raynekat |
Oct 30 2017, 10:21 PM
Post
#395
|
|
Advanced Member Group: Members Posts: 2,171 Joined: 30-December 14 From: Coeur d'Alene, Idaho Member No.: 18,263 Region Association: Pacific Northwest |
I like this position best too....
QUOTE(cary @ Oct 30 2017, 09:08 PM)  Here's the one I'm going with so far ...................... |
|
|
|
| cary |
Oct 30 2017, 10:38 PM
Post
#396
|
|
Advanced Member Group: Members Posts: 3,900 Joined: 26-January 04 From: Sherwood Oregon Member No.: 1,608 Region Association: Pacific Northwest |
Tomorrow I'll lay the GT lid on top to make sure the up and down is dead on.
Then I'll dial in the left to right. Needs a little more right. I'll move it to 2" and see what we have. I tried it once and didn't like it. |
|
|
|
| raynekat |
Oct 30 2017, 11:09 PM
Post
#397
|
|
Advanced Member Group: Members Posts: 2,171 Joined: 30-December 14 From: Coeur d'Alene, Idaho Member No.: 18,263 Region Association: Pacific Northwest |
Put the left tail light in.
I think that will give you a better feel where the fog light should be mounted. |
|
|
|
| cary |
Oct 31 2017, 09:17 PM
Post
#398
|
|
Advanced Member Group: Members Posts: 3,900 Joined: 26-January 04 From: Sherwood Oregon Member No.: 1,608 Region Association: Pacific Northwest |
Tuesday 10/31/17
Started the day finishing up the rear fog light install. Decided to go with 1.75" from the taillight. 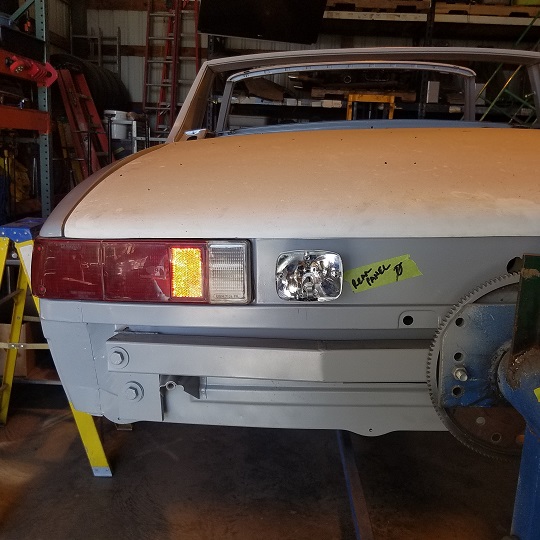 1st issue, still a little too tight to the back panel. Need a washer thats just a smidgen thicker. 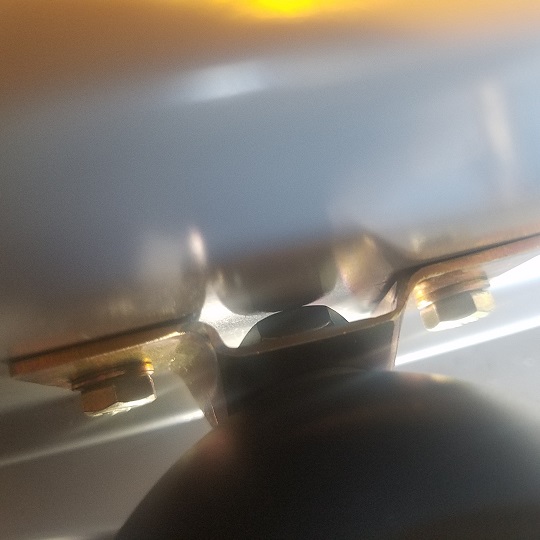 Make sure the nut is horizontal to the top. 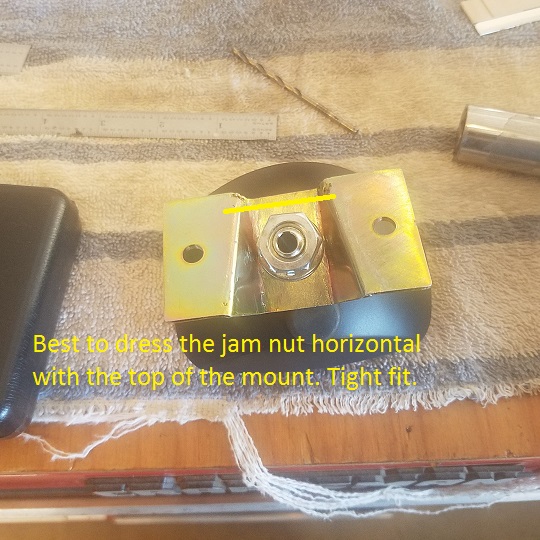 2nd. issue, need to change the location of the wiring harness grommet hole. Closer to horizontal with the bolt holes. 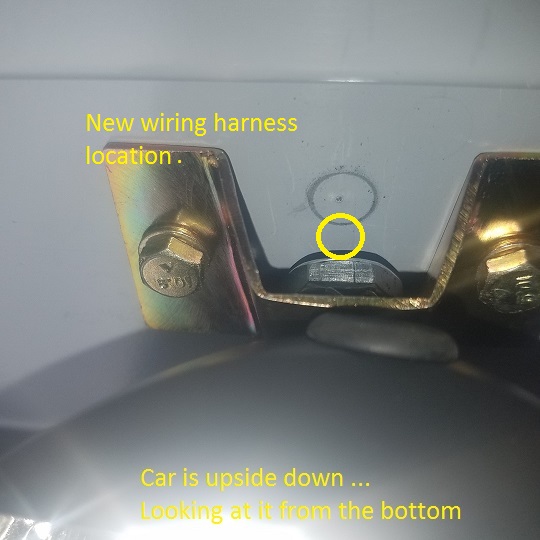 3rd issue, backing plate is too short to mount like the factory did. 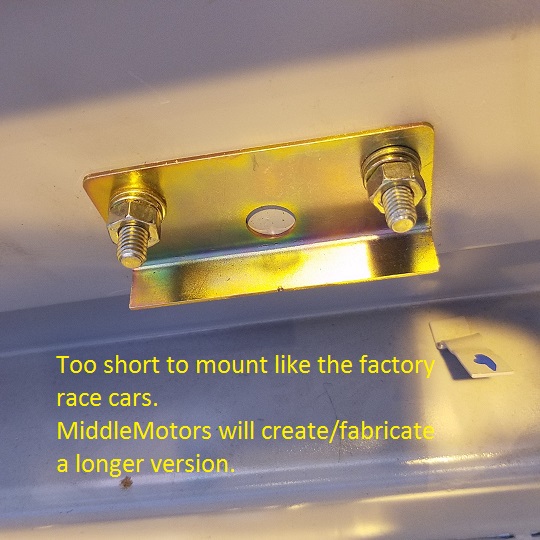 Here she is .................... 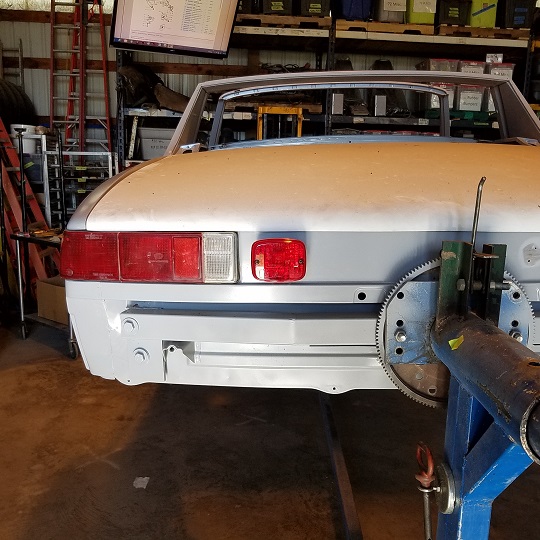 |
|
|
|
| cary |
Oct 31 2017, 09:22 PM
Post
#399
|
|
Advanced Member Group: Members Posts: 3,900 Joined: 26-January 04 From: Sherwood Oregon Member No.: 1,608 Region Association: Pacific Northwest |
Then welded in the Patrick Motorsports rear toe adjusters.
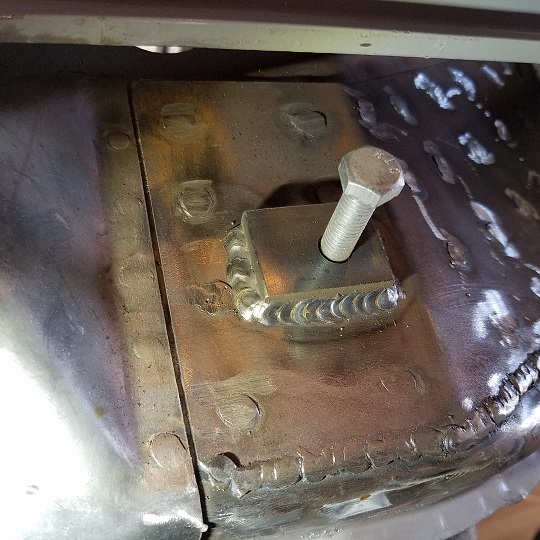 The bolt is there to protect the threads from weld splatter ............ Ready to roll ................. 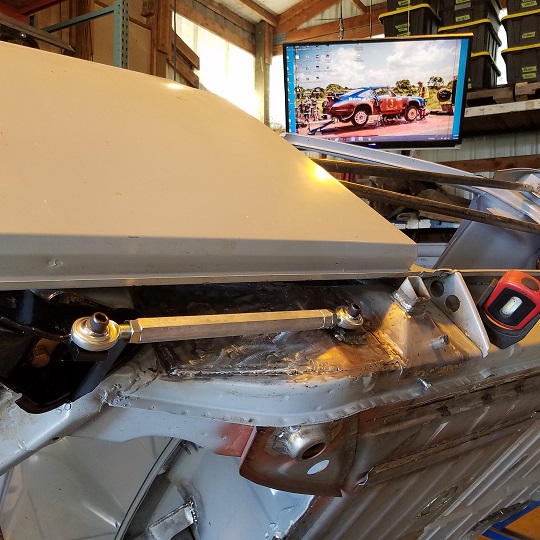 |
|
|
|
| cary |
Oct 31 2017, 09:39 PM
Post
#400
|
|
Advanced Member Group: Members Posts: 3,900 Joined: 26-January 04 From: Sherwood Oregon Member No.: 1,608 Region Association: Pacific Northwest |
Let the fun begin. I started fitting Super In Law's left cowl patch. Trimmed it to fit in the hole. You can see that I'll be reusing the original fender tip when the time comes.
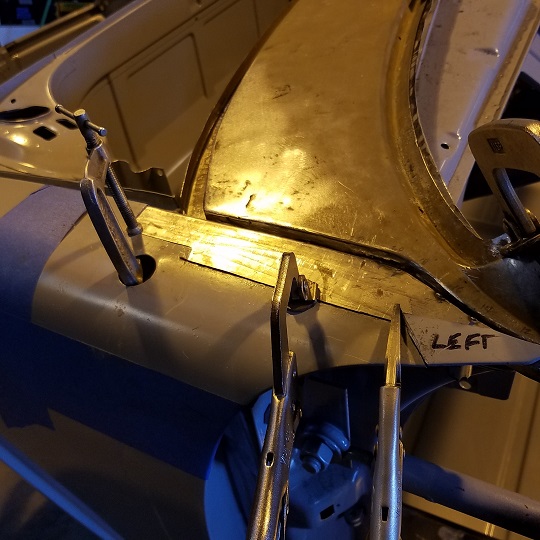 Cowl is a bit high which makes the gap look too big. I'm creating the gap with a tester and a new 914 Rubber cowl seal. While I'm tuning the left side. Super In Law is working on the right side. 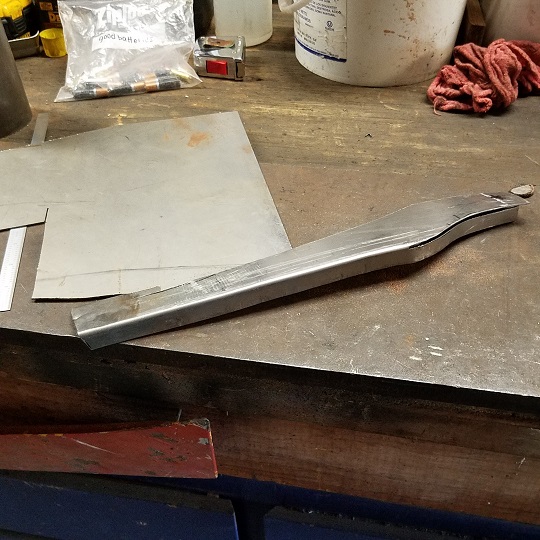 |
|
|
|
|
2 User(s) are reading this topic (2 Guests and 0 Anonymous Users)
0 Members:

|
Lo-Fi Version | Time is now: 17th July 2026 - 10:49 PM |
Invision Power Board
v9.1.4 © 2026 IPS, Inc.