|
|
|
Porsche, and the Porsche crest are registered trademarks of Dr. Ing. h.c. F. Porsche AG.
This site is not affiliated with Porsche in any way. Its only purpose is to provide an online forum for car enthusiasts. All other trademarks are property of their respective owners. |
|
|

  |

| Cairo94507 |
 Jul 7 2016, 06:51 AM Jul 7 2016, 06:51 AM
Post
#41
|
|
Michael  Group: Members Posts: 10,677 Joined: 1-November 08 From: Auburn, CA Member No.: 9,712 Region Association: Northern California |
Excellent thread. I like what I see so far.
|
   |

 
|
| mepstein |
Jul 7 2016, 09:41 AM
Post
#42
|
|
914-6 GT in waiting Group: Members Posts: 20,778 Joined: 19-September 09 From: Landenberg, PA/Wilmington, DE Member No.: 10,825 Region Association: MidAtlantic Region |
QUOTE(raynekat @ Jul 7 2016, 03:09 AM)  QUOTE(Frankvw @ Jul 6 2016, 11:27 PM) that replated hardware pics...a spot-the-difference puzzle :-) really cool pics and took some time to create, I guess that was your way of checking that all was there after the replating. Otherwise you have some disorder to do that :-) nice job ! Actually the "plater project manager" did that. I think it was his way of keeping track of all the parts so none were lost. You're right tho....fun set of pics. A lot of the better plating shops do before and after pics just to make sure every thing matches up inventory wise. Our parts may be cheap but some other project parts are unibtanium. |
|
|
|
| cary |
Jul 7 2016, 09:17 PM
Post
#43
|
|
Advanced Member Group: Members Posts: 3,900 Joined: 26-January 04 From: Sherwood Oregon Member No.: 1,608 Region Association: Pacific Northwest |
I decide its time to start using the plasma cutter for the cutting tasks its designed for.
Steve, one of my co-workers at Rothsport said changing the tip every time you use it is the primary issue I've been having. Easy Deal ....................  Big bite ......................... 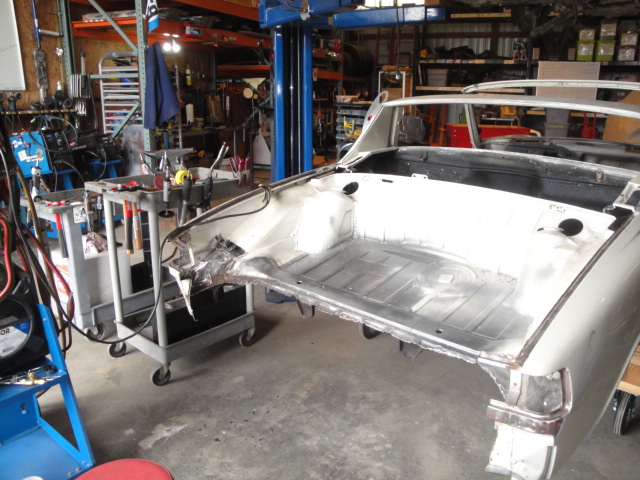 I discover that a portion of the tow hook brace is missing on the donor panel. I'll need to cut it off the original tail light panel piece. 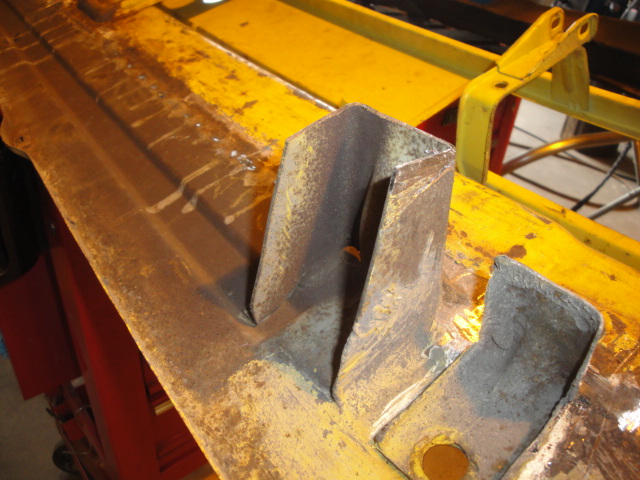 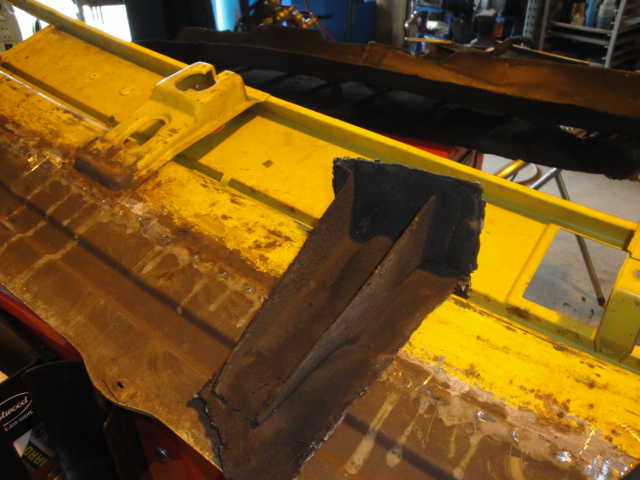 There's a couple wicked welds were the tube is welded to the support frame. I'll have to see if I can delicately cut them out with new plasma cutting skills. |
|
|
|
| cary |
Jul 7 2016, 09:41 PM
Post
#44
|
|
Advanced Member Group: Members Posts: 3,900 Joined: 26-January 04 From: Sherwood Oregon Member No.: 1,608 Region Association: Pacific Northwest |
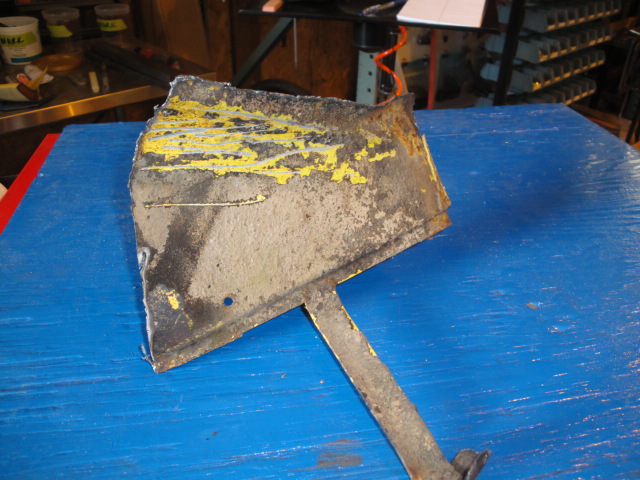
Then on to removing the exhaust shield from the old trunk panel.
 Then I discover that the last person that removed the exhaust shield didn't have a MIG welder. The supports were brazed to the bottom of the trunk panel. So they have to be separated with a torch. 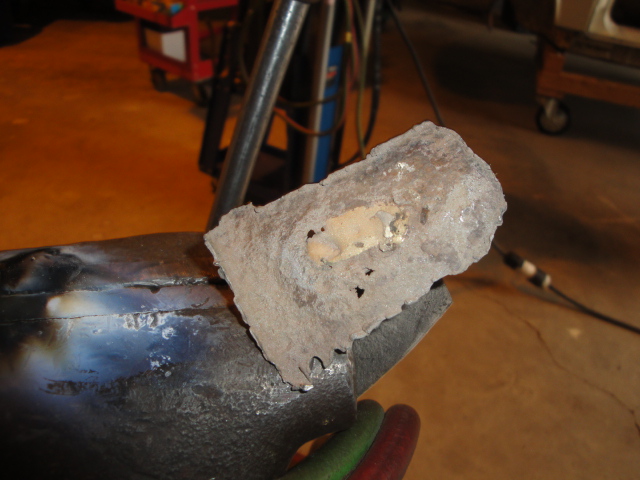 Get that done and then run the stand offs thru the bead blaster. They'll need a little refurbishing. 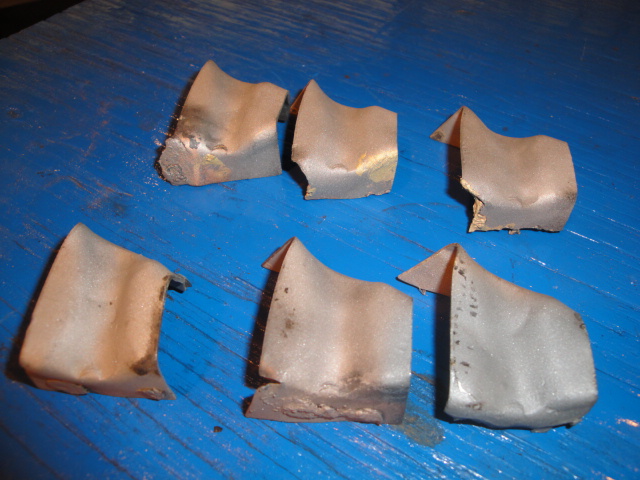 Then I decide that the exhaust shield needs to be taken outside and sand blasted. It's filthy. Covered in oil and dirt.  After the dirt and oil are removed it looks like its been beat on with a hammer.  I did remove all the odds and ends off the old tail light panel. You never know what one might need in the future. 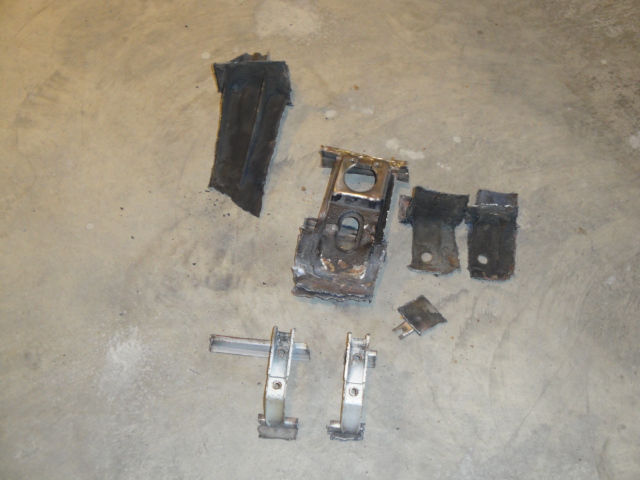 |
|
|
|
| cary |
Jul 7 2016, 10:09 PM
Post
#45
|
|
Advanced Member Group: Members Posts: 3,900 Joined: 26-January 04 From: Sherwood Oregon Member No.: 1,608 Region Association: Pacific Northwest |
We did extract the other hole plug. Have the template ready to go.
I think I'll pick up the compass gadget for the plasma cutter. 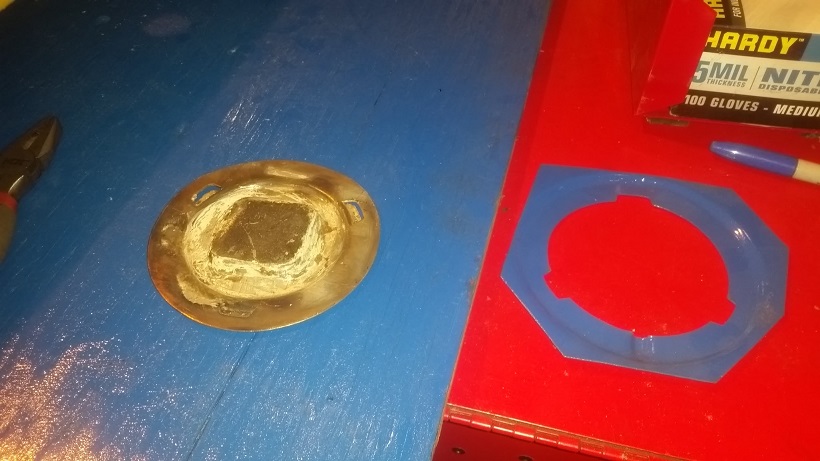 |
|
|
|
| cary |
Jul 11 2016, 09:50 PM
Post
#46
|
|
Advanced Member Group: Members Posts: 3,900 Joined: 26-January 04 From: Sherwood Oregon Member No.: 1,608 Region Association: Pacific Northwest |
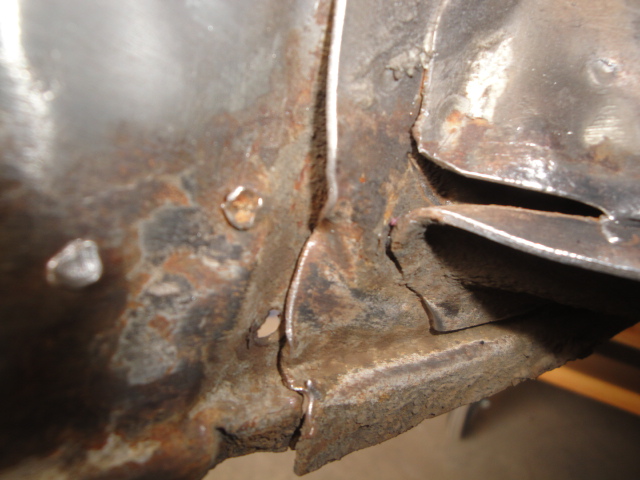
Monday AM :
Pulled out the torch cart and started with the remainder of the left tail light panel. 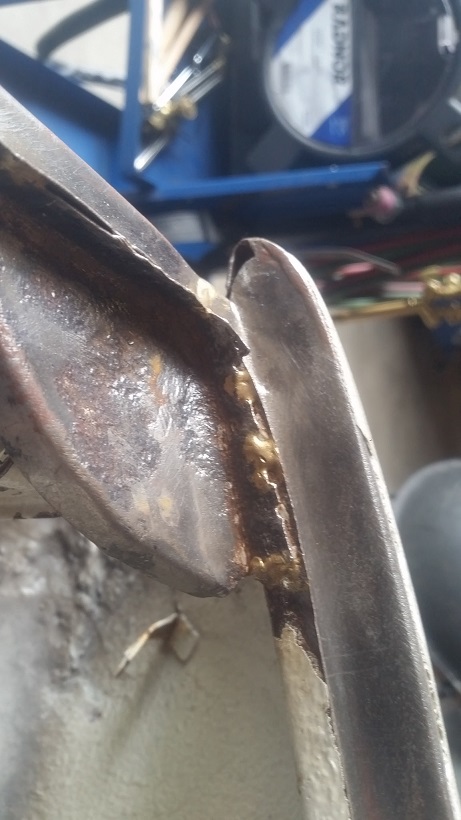 The car had been hit in the rear and been poorly repaired on the past. The entire tail light panel was brazed in, not welded. Then started working my way around the remainder of the trunk panel. 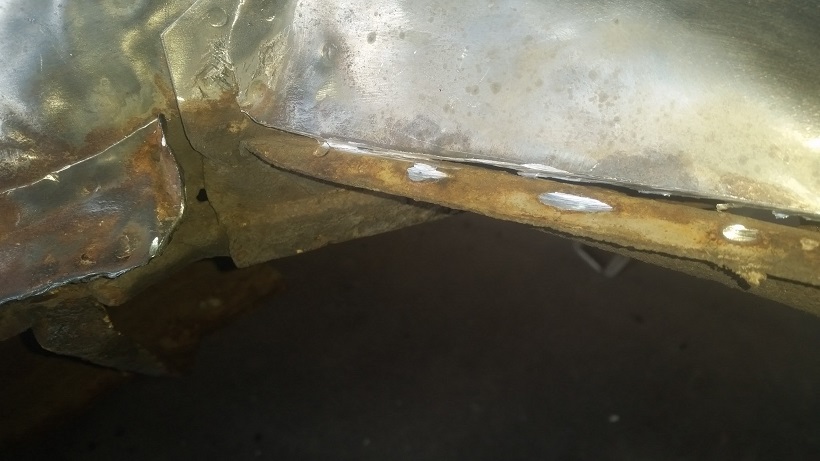 Then on to removing the center reinforcement panel. 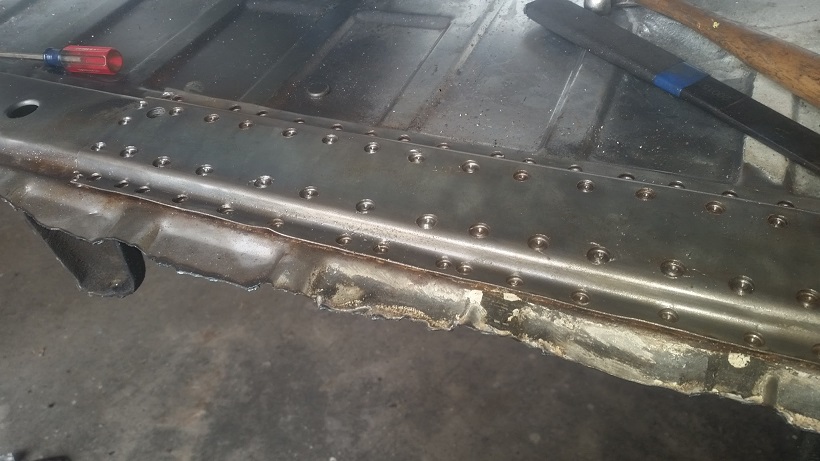 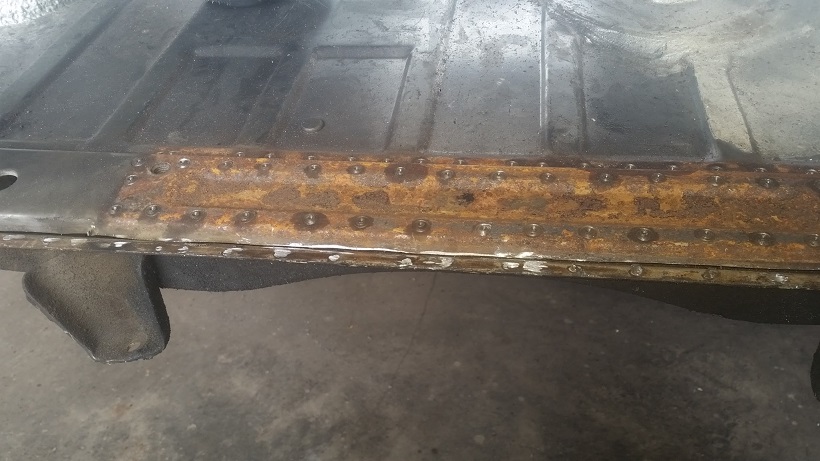 Making my way into the right corner. We're finding the inner fender above the trunk panel is pretty wrinkled on both sides. 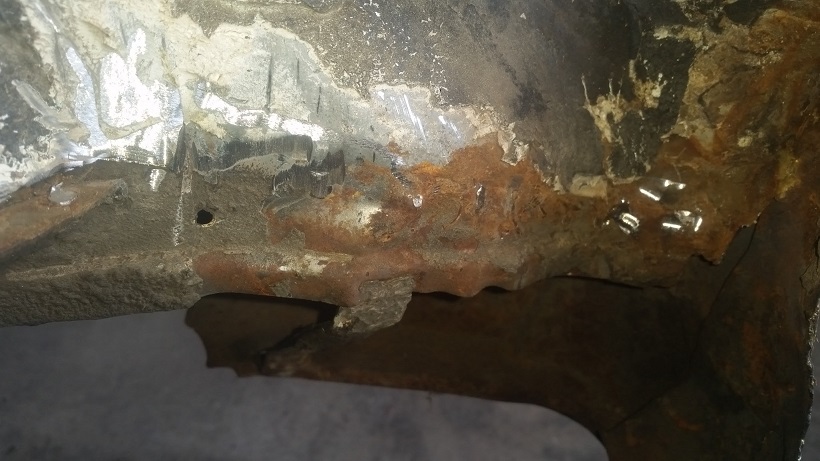 I may look at cutting both back corners out of my parts car. We need the fender support straps too. End of the day ......................... got farther than I thought I would. 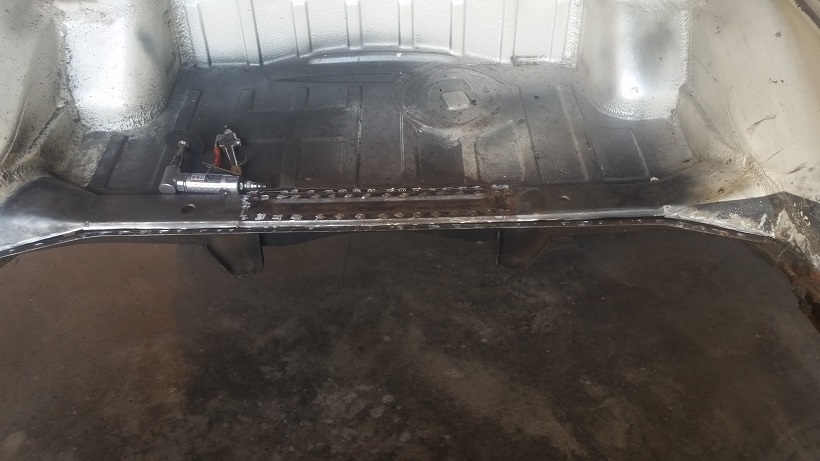 Doug stopped by to check on the progress and go out to lunch. |
|
|
|
| raynekat |
Jul 11 2016, 10:12 PM
Post
#47
|
|
Advanced Member Group: Members Posts: 2,171 Joined: 30-December 14 From: Coeur d'Alene, Idaho Member No.: 18,263 Region Association: Pacific Northwest |
Nice job Cary.
You're developing "mad" skills as they say. Mostly patience....which I would be in low supply I think. Thanks for your great work. |
|
|
|
| cary |
Jul 12 2016, 10:40 PM
Post
#48
|
|
Advanced Member Group: Members Posts: 3,900 Joined: 26-January 04 From: Sherwood Oregon Member No.: 1,608 Region Association: Pacific Northwest |
Came in this am and did some more examining of the wrinkles in the trunk corners and some magnetic testing on the qtr. panels.
  While I'm digesting my research I begin removing the corner braces and refurnishing them. This time I run into lead and brazing. 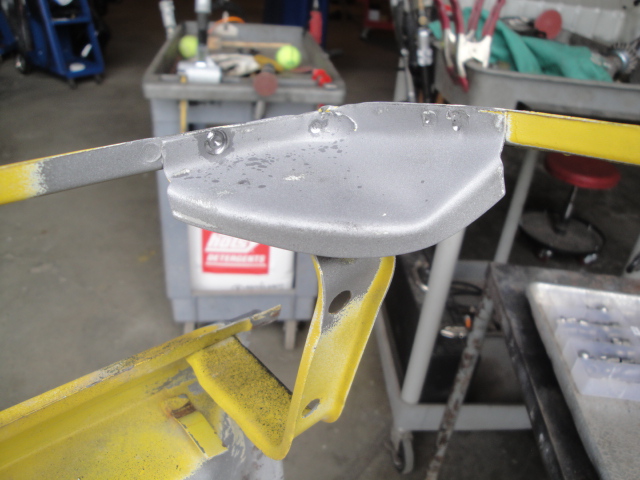 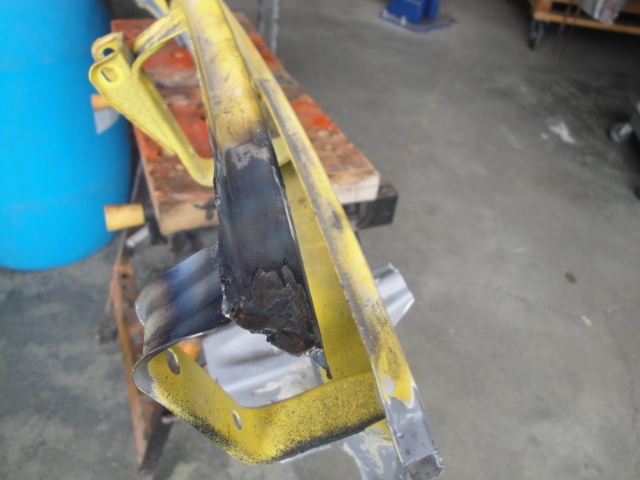  After finishing the corner braces I move onto the exhaust stand offs. Three or four needed some welding, but pretty simple stuff. All drilled and ready for welding on the nuts in the am. 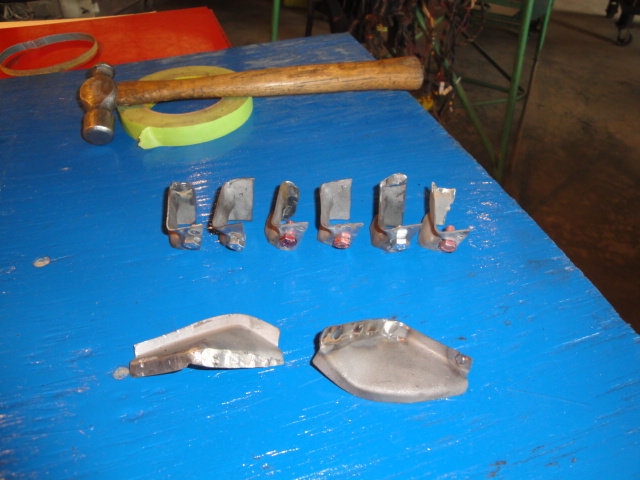 I decided before I start cutting on the trunk I'll sand down the back corners of the qtr. panels to check the less than stellar previous workmanship. From the inside of the fender it feels like the previous shop didn't own a hammer and dolly. (IMG:style_emoticons/default/mad.gif) Which means we have quite a bit of filler. Lazy ........... But only dimples, no creases. Mark stopped by so I ran out of time and sunshine ................. Super In Law finished up the rack and we filled it up. 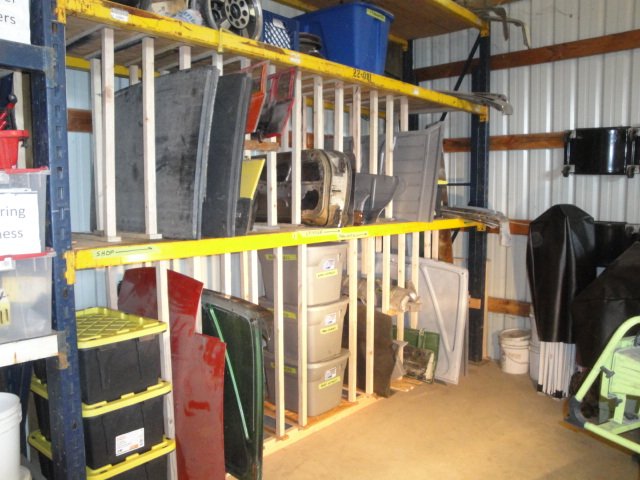 We'll need to create a wall racks for the valances. They're too wide. But other than that it turned out great. |
|
|
|
| cary |
Jul 13 2016, 09:37 PM
Post
#49
|
|
Advanced Member Group: Members Posts: 3,900 Joined: 26-January 04 From: Sherwood Oregon Member No.: 1,608 Region Association: Pacific Northwest |
Short day ...................spent the am at Rothsport doing a little housekeeping.
Got there after an early lunch and rolled her outside for some media blasting. Looks like we'll be needing a couple lower back qtr. panel corners.  Mud in the dimples .................... 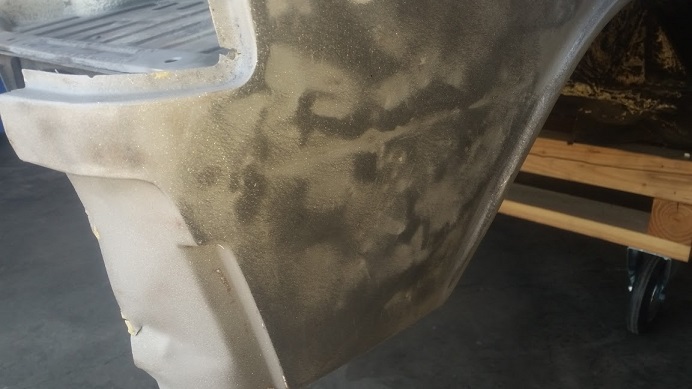 Right side, not much better. 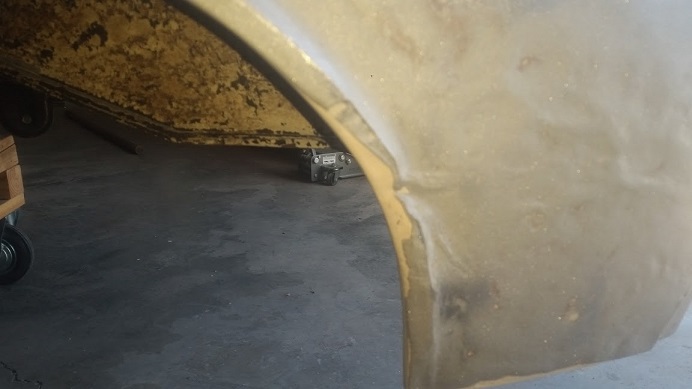 Filled with mud, rather than repairing. 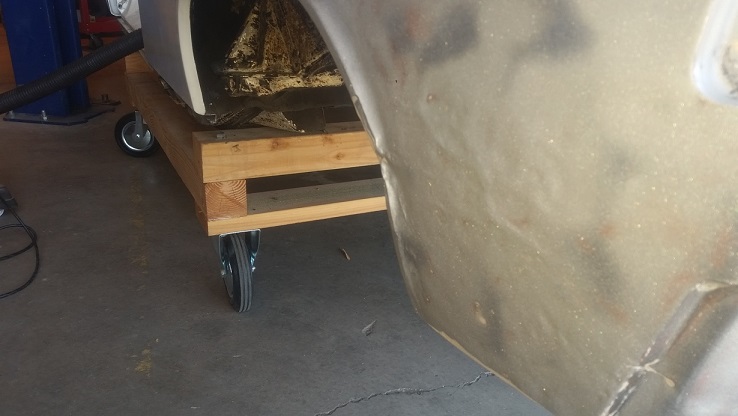 Better shot of how rippled the left fender is. 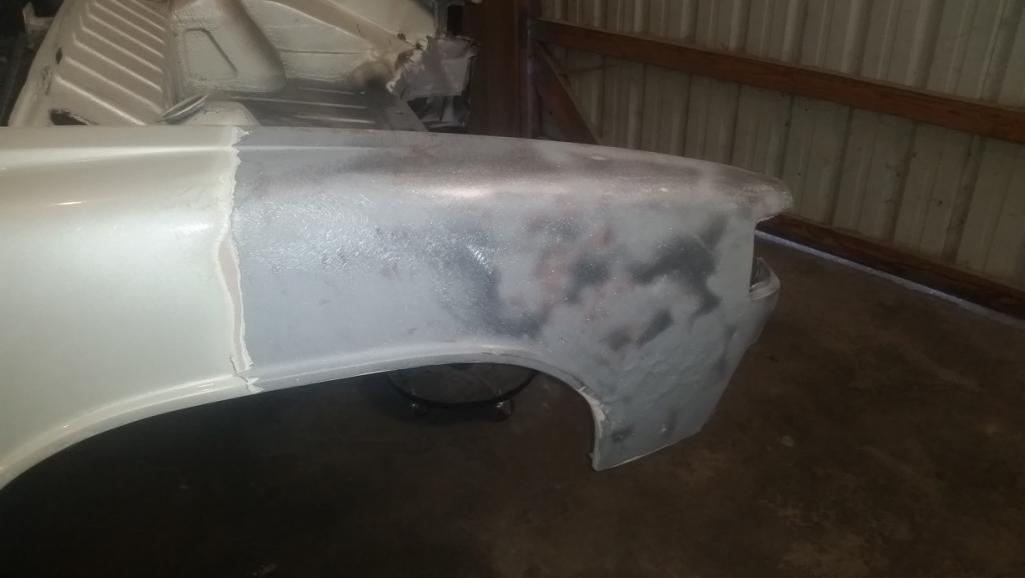 Now that I can see the entirety of the inside corners I think I should be able to doctor them up. I'll start with hammer and dolly and see if we can make them presentable. In the end they get completely smothered in seam sealer. 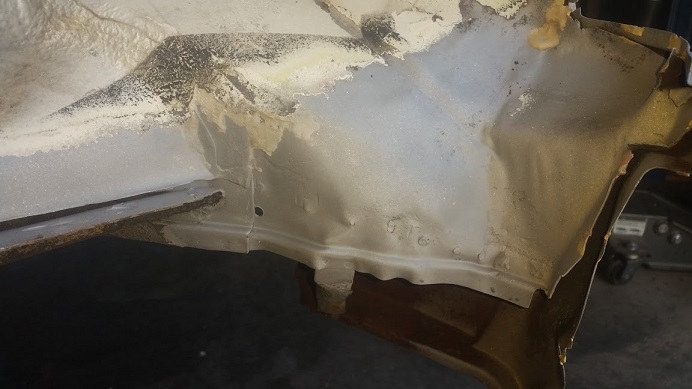 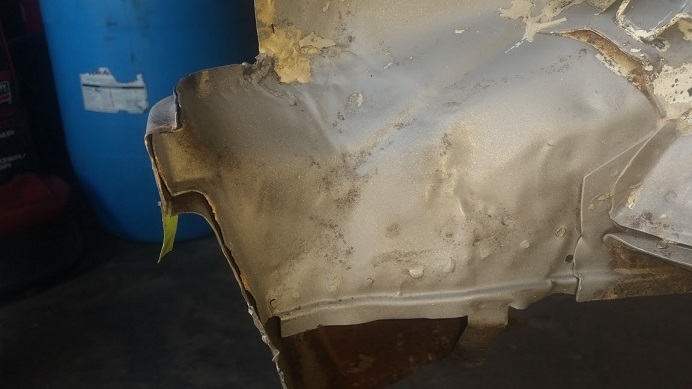 I'll let Doug look for some qtr. panel patches and I'll get back to the trunk and tail light panel. Edit : Forgot we can cut the right one off my parts car. Left was butchered for a flare install that never happened. |
|
|
|
| raynekat |
Jul 14 2016, 12:58 AM
Post
#50
|
|
Advanced Member Group: Members Posts: 2,171 Joined: 30-December 14 From: Coeur d'Alene, Idaho Member No.: 18,263 Region Association: Pacific Northwest |
QUOTE(cary @ Jul 13 2016, 08:37 PM) I'll let Doug look for some qtr. panel patches and I'll get back to the trunk and tail light panel. Bummer Dude.....you've got mail. (IMG:style_emoticons/default/smile.gif) |
|
|
|
| cary |
Jul 15 2016, 08:33 AM
Post
#51
|
|
Advanced Member Group: Members Posts: 3,900 Joined: 26-January 04 From: Sherwood Oregon Member No.: 1,608 Region Association: Pacific Northwest |
Start the day with trimming the trunk panel. Not an exact cut. I leave about 1/4 too long.
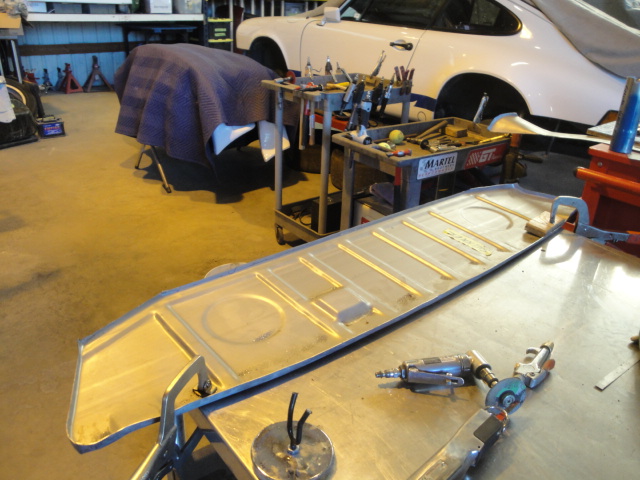 Then I give it a test fit. Left seems about like normal. 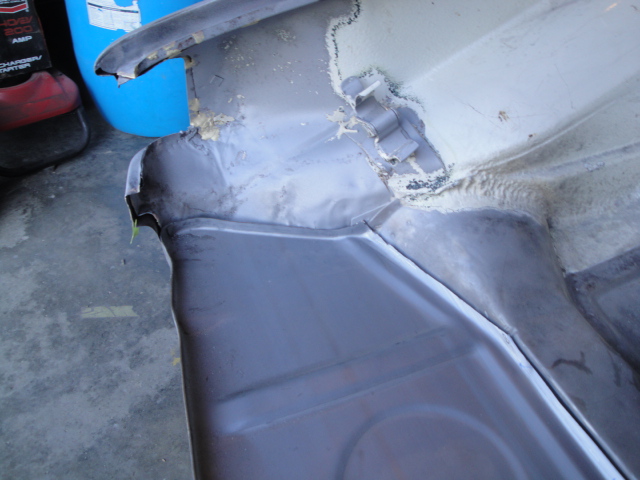 Right side, not so much. Giant hole. Poorly done repair. 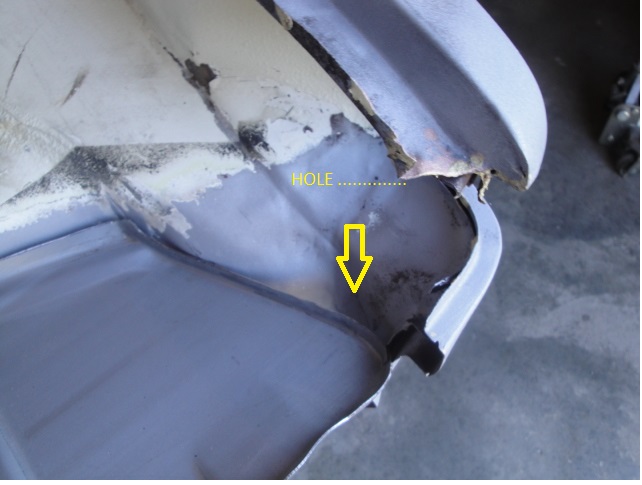 I make the decision that cutting the same section out of my parts car is the best answer. Creating the bottom lip would take too long.  Cut it out large. Then took it to the bench and removed the trunk floor portion. Trimmed off the top. 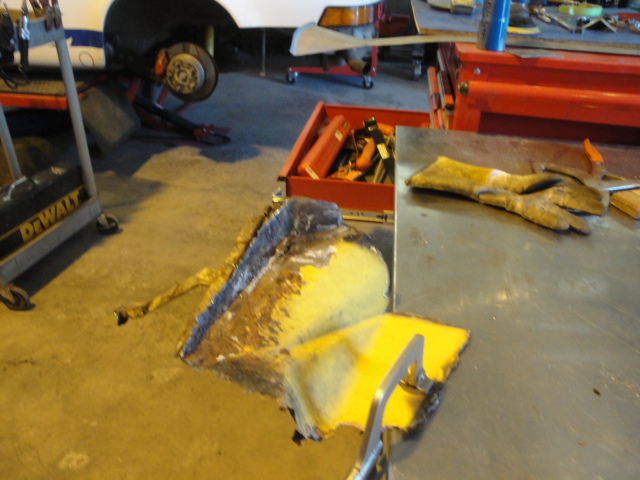 Short episode of Tool Whore. My new full size helmet. Oh baby ................ Everything I'd hope it would be. No interference from the flood lights. 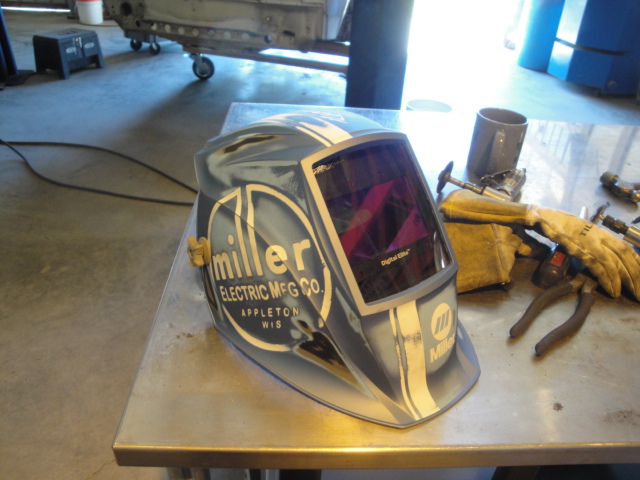 |
|
|
|
| cary |
Jul 15 2016, 09:06 AM
Post
#52
|
|
Advanced Member Group: Members Posts: 3,900 Joined: 26-January 04 From: Sherwood Oregon Member No.: 1,608 Region Association: Pacific Northwest |
Feel asleep while writing the post.
Early start and a great time with the guys at our monthly Burgers & Beer gathering. 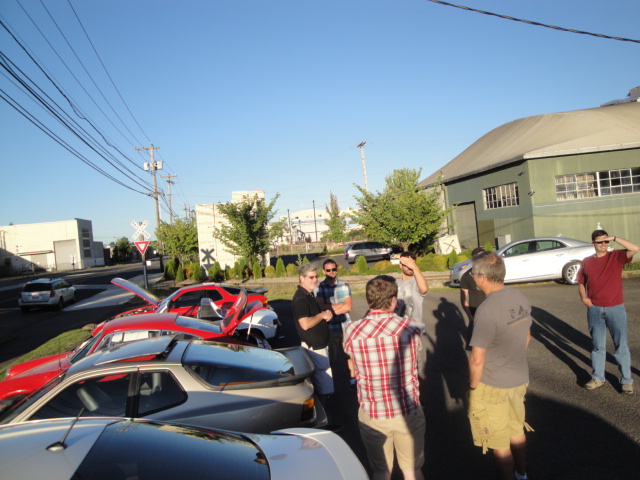 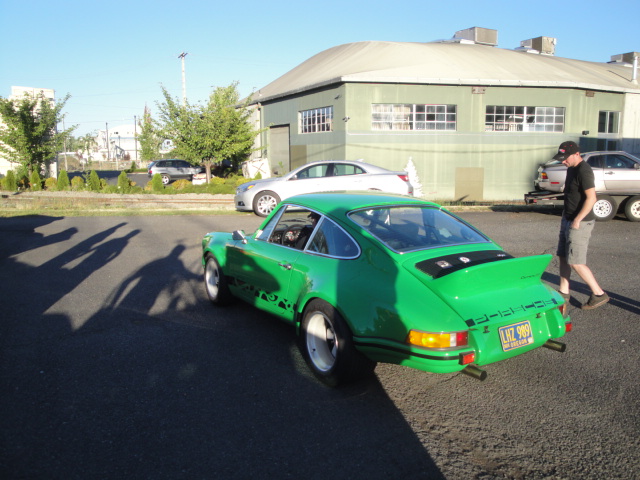 So in goes the patch after the usual fiddling and fussing. Trim, grind, repeat. Trim, grind, repeat. Had to make extra cuts to reshape the existing panel. They hammered the crap out of it. 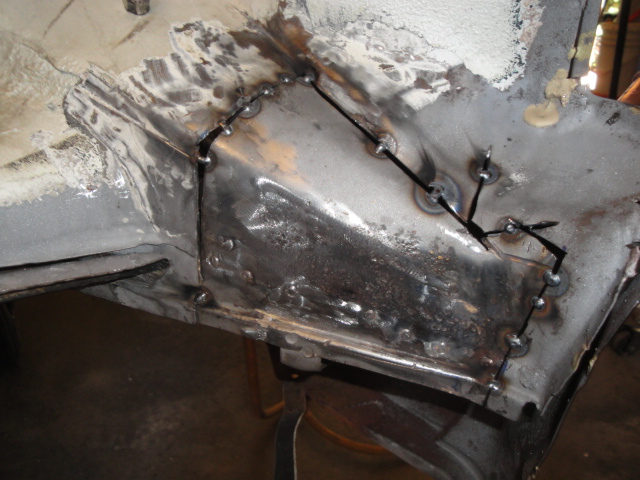 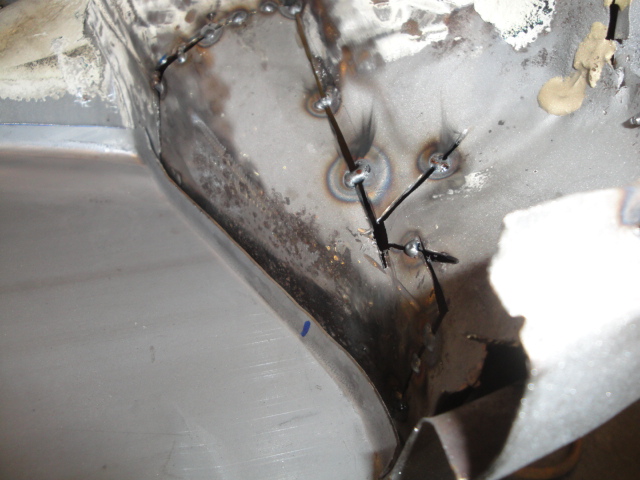 After I finish welding in the patch. Here's the next challenge.  Going to try something a little different with welding in the sides of the trunk pan this time. Rosette welds on the front portion. Then in the back where we have the gap. Instead of rebuilding them I'll bend/fold them over and tack weld the top edge. Once again, they'll be smothered in seam seam. 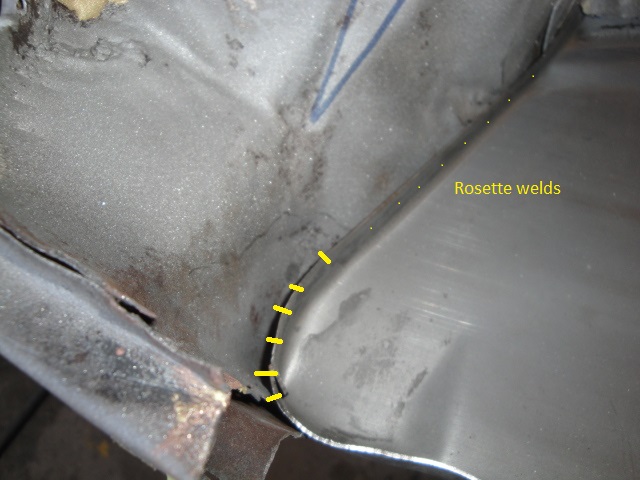 Doug asked last night if we'd be better off looking for another car. My response. These cars are 50 years and weren't cherished in their early lives. Pretty certain most every car will have some issues. X-ray vision would be nice, so you could see under the paint and seam sealer. What a dumbass ...................... I have Doug surfing the web looking for fenders and I have what we need hanging on the rack. We're only going to use the front portion of Mark's qtrs. on his car. |
|
|
|
| cary |
Jul 15 2016, 11:23 PM
Post
#53
|
|
Advanced Member Group: Members Posts: 3,900 Joined: 26-January 04 From: Sherwood Oregon Member No.: 1,608 Region Association: Pacific Northwest |
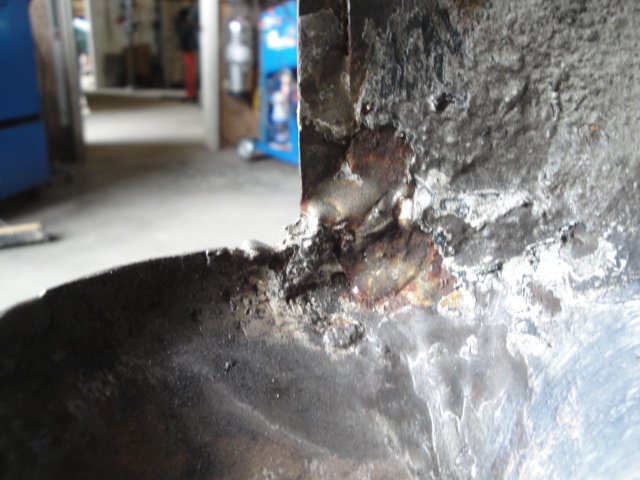
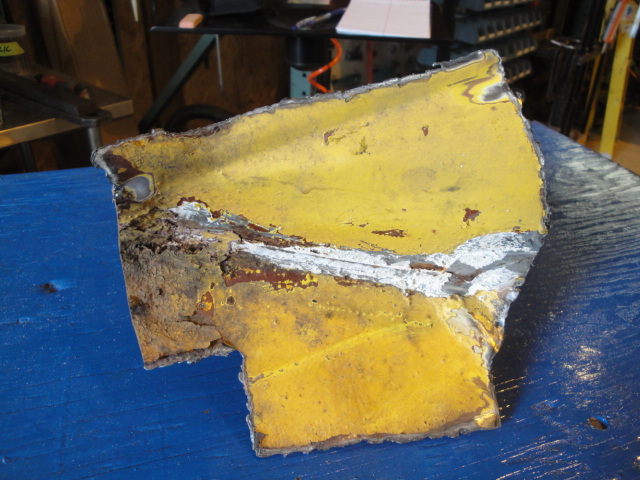
Here's a shot of the buggered up tail light panel frame.
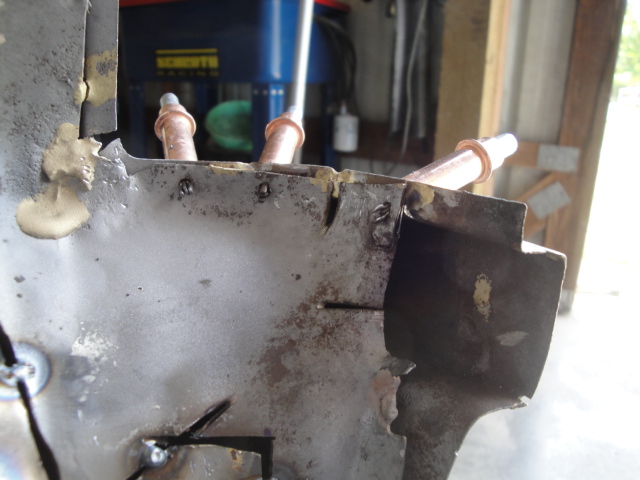 Finish welding in the donor patch. 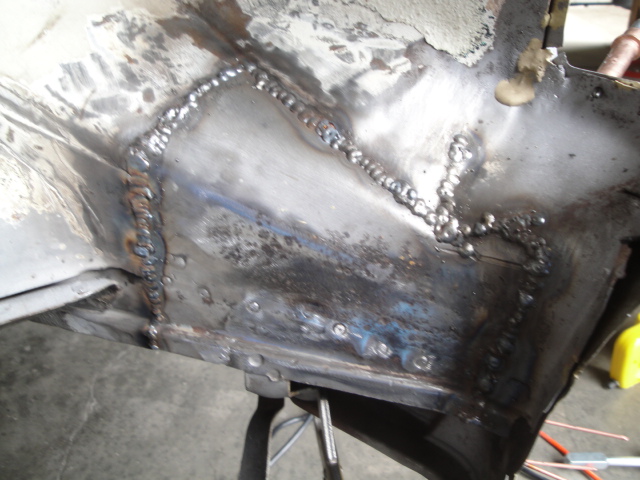 Then I do some tinkering on the back end of the qtr. panel. They hammered out the crease. (IMG:style_emoticons/default/sad.gif) . Why ? Might be changing it out too ............... 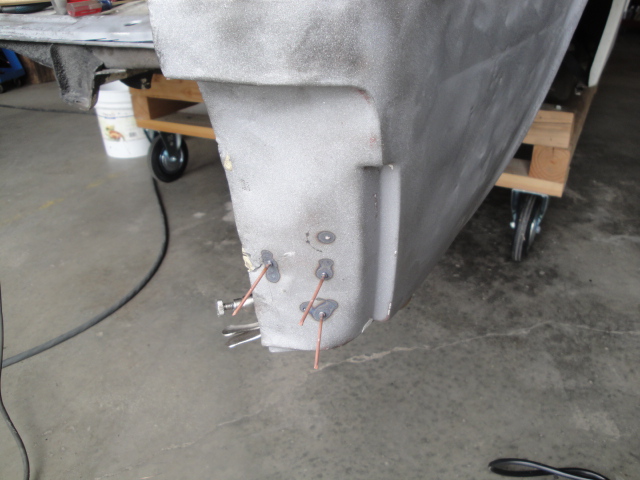 Then I test fit the tail light panel. Other than bottom portions on both sides, it fits real well. 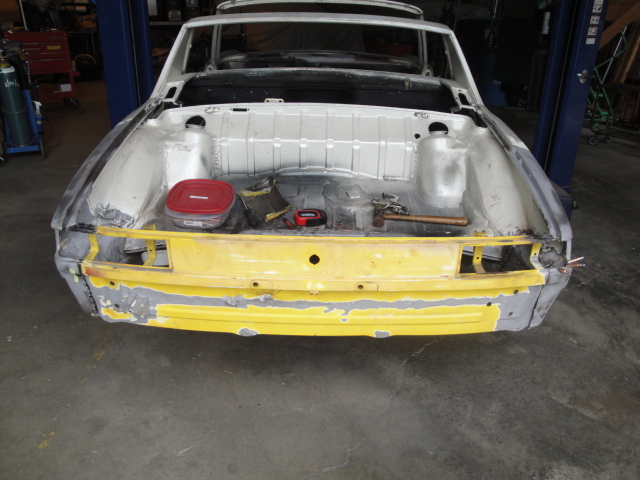 Next I cut out the trunk panel for the pan plugs. 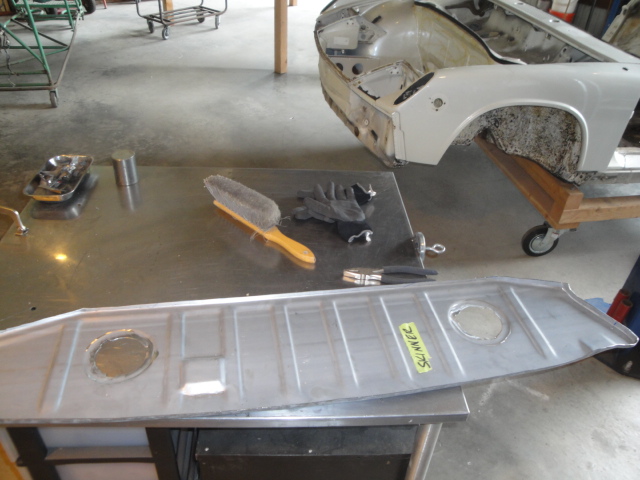 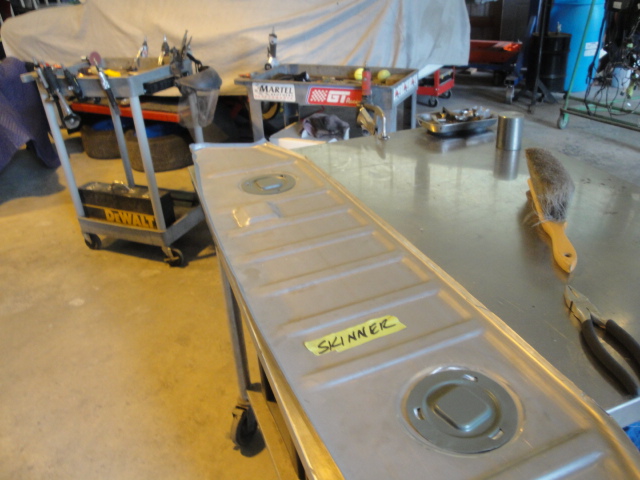 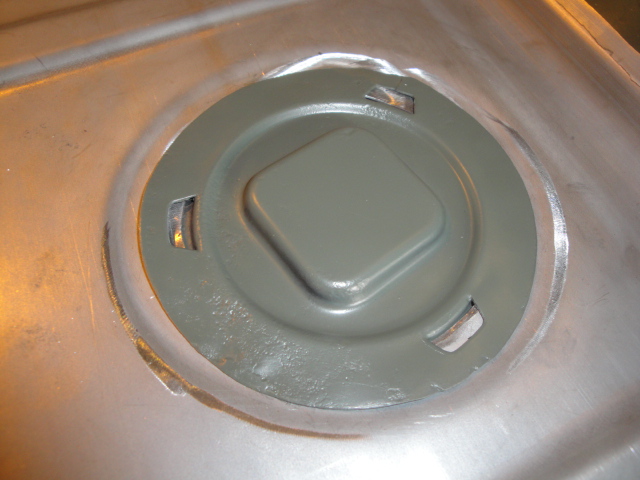 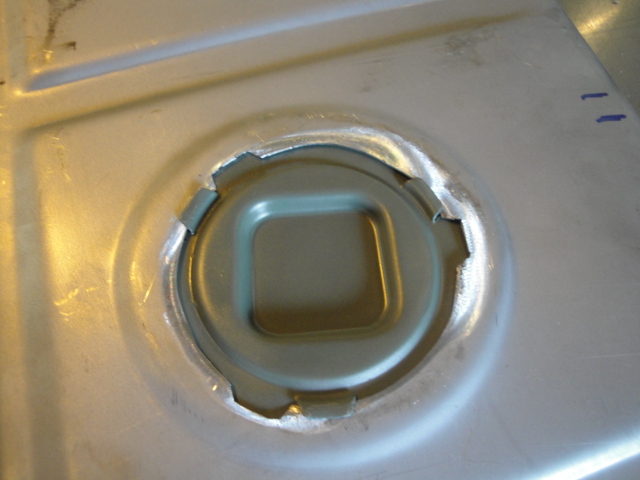 Doug stopped by after lunch to drop of the hoods. 2 old metal ones. And the new fiberglass rear trunk. Cool He ordered me a new exhaust shield. The other is too bent up. Who knows Seeings that this will be his touring car. He's looking at having the shield ceramic coated to keep the heat down in the trunk. Sent Mark an email about using the back half of the his qtr. panels hanging in the rack. |
|
|
|
| raynekat |
Jul 19 2016, 08:32 PM
Post
#54
|
|
Advanced Member Group: Members Posts: 2,171 Joined: 30-December 14 From: Coeur d'Alene, Idaho Member No.: 18,263 Region Association: Pacific Northwest |
Just got back my newly recovered steering wheel from Autobahn Interiors.
Did the double wrap in leather. Pricey but "oh-so nice." They found that part of the wheel had been broken in the past so there was some welding repair necessary that is all hidden by the new grip. Also just received from Hungary (less than 10 day shipping) a nice Hockey Puck reproduction that really looks great for the money. Total of $170 (plus shipping which wasn't bad). Got it off the "Bird" from a guy named Antony. Easy transaction (Paypal I think) and received the item pretty quick. Will definitely dress up the interior of the car when complete.... 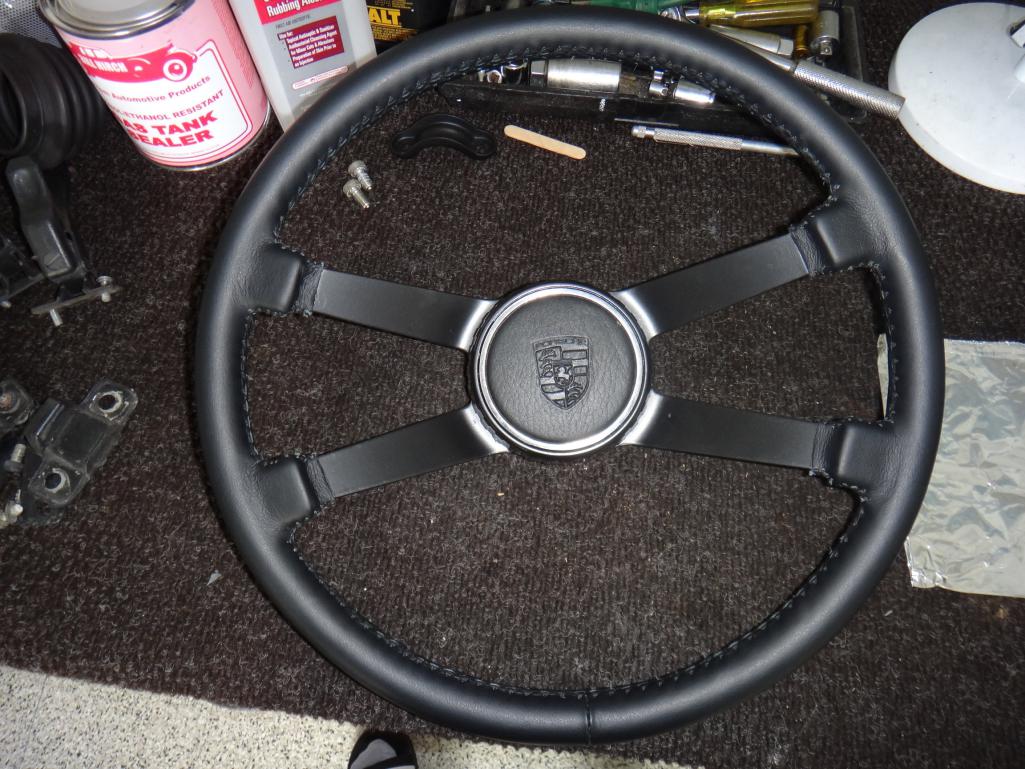 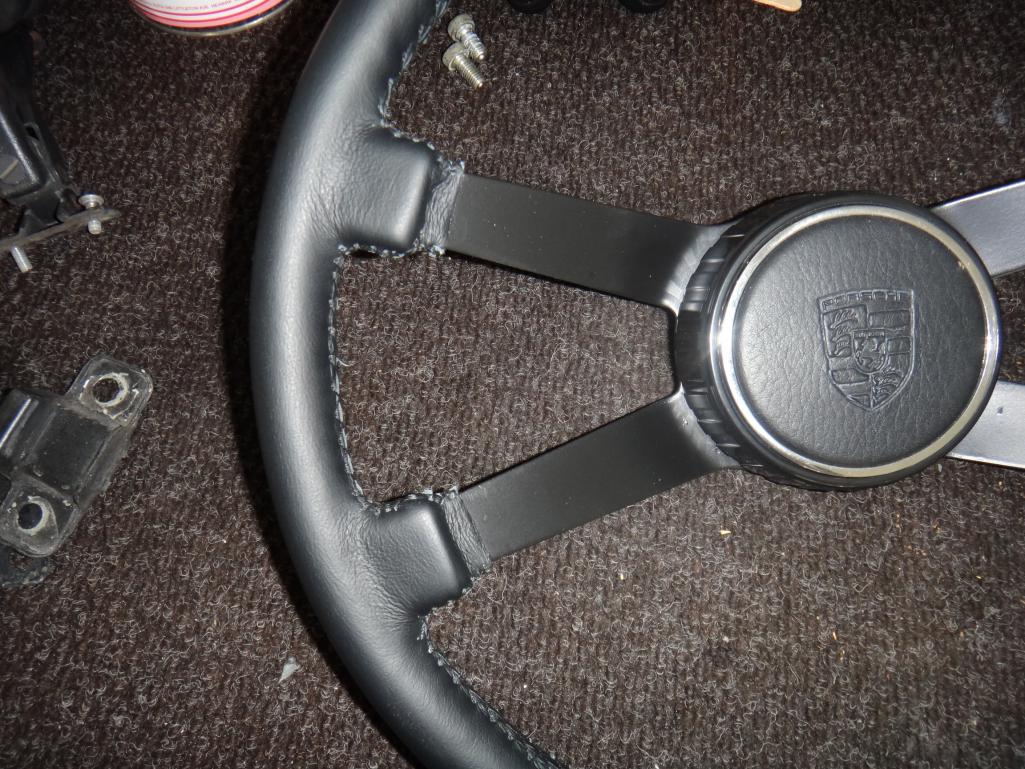 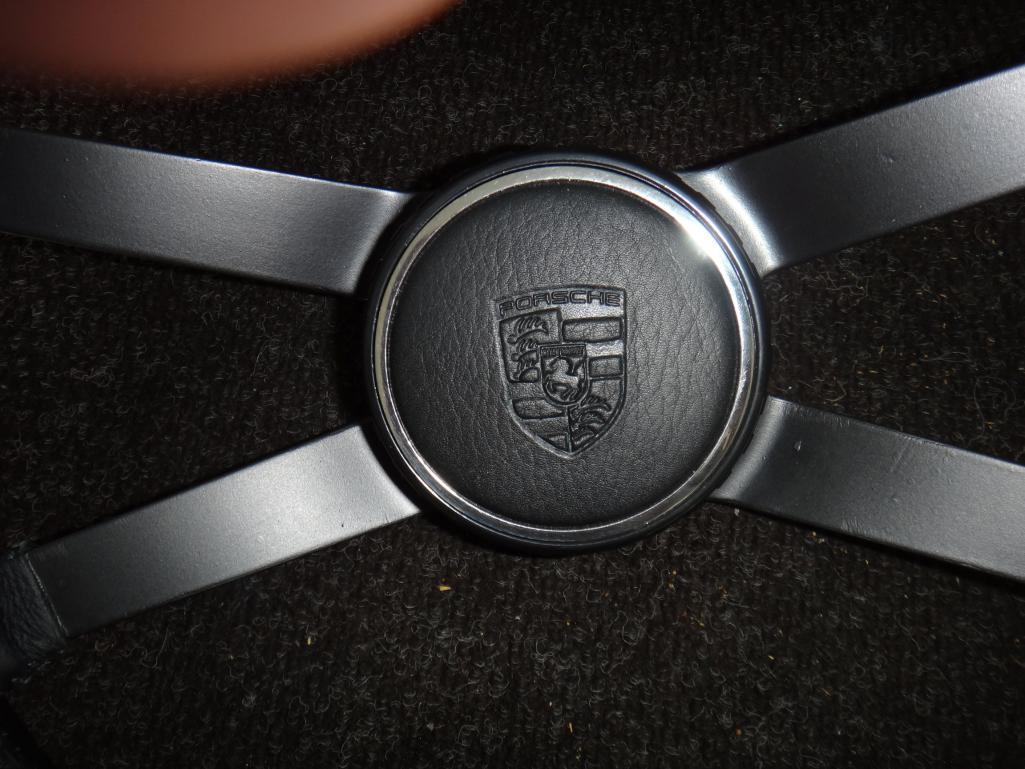 |
|
|
|
| raynekat |
Jul 20 2016, 12:56 PM
Post
#55
|
|
Advanced Member Group: Members Posts: 2,171 Joined: 30-December 14 From: Coeur d'Alene, Idaho Member No.: 18,263 Region Association: Pacific Northwest |
Latest craziness.....
Re-flocking the glove box. Why do this? I guess the best answer is because you (or I) can.... Turned out great with very little effort. A business opportunity for moi? (IMG:style_emoticons/default/welder.gif) 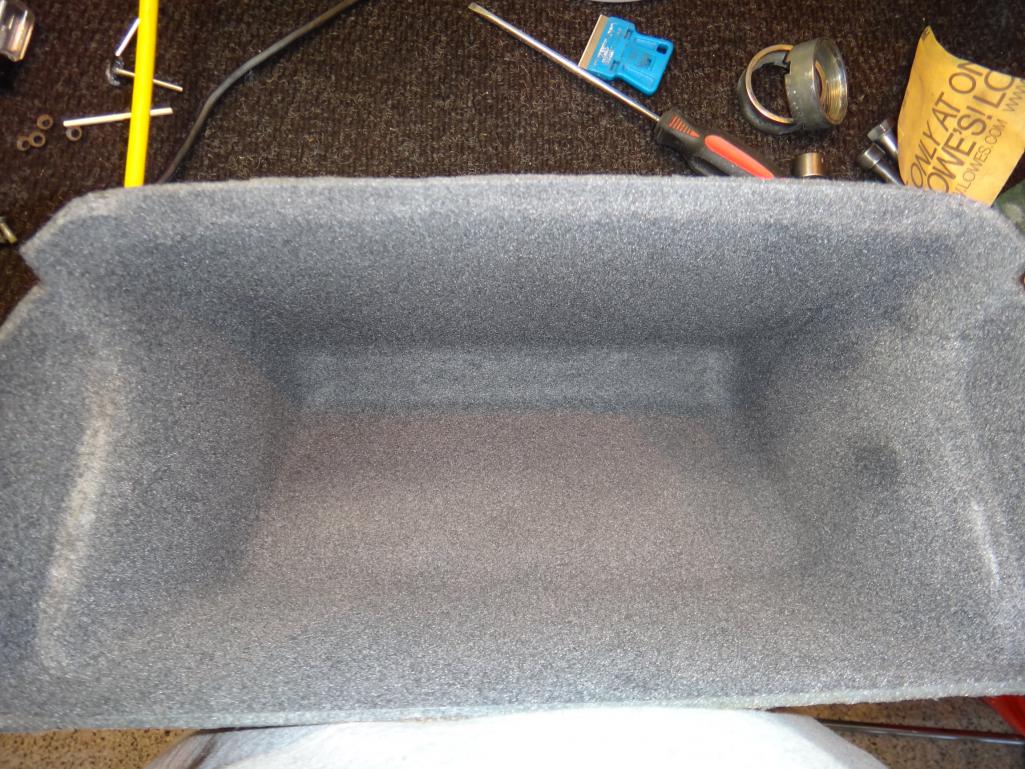 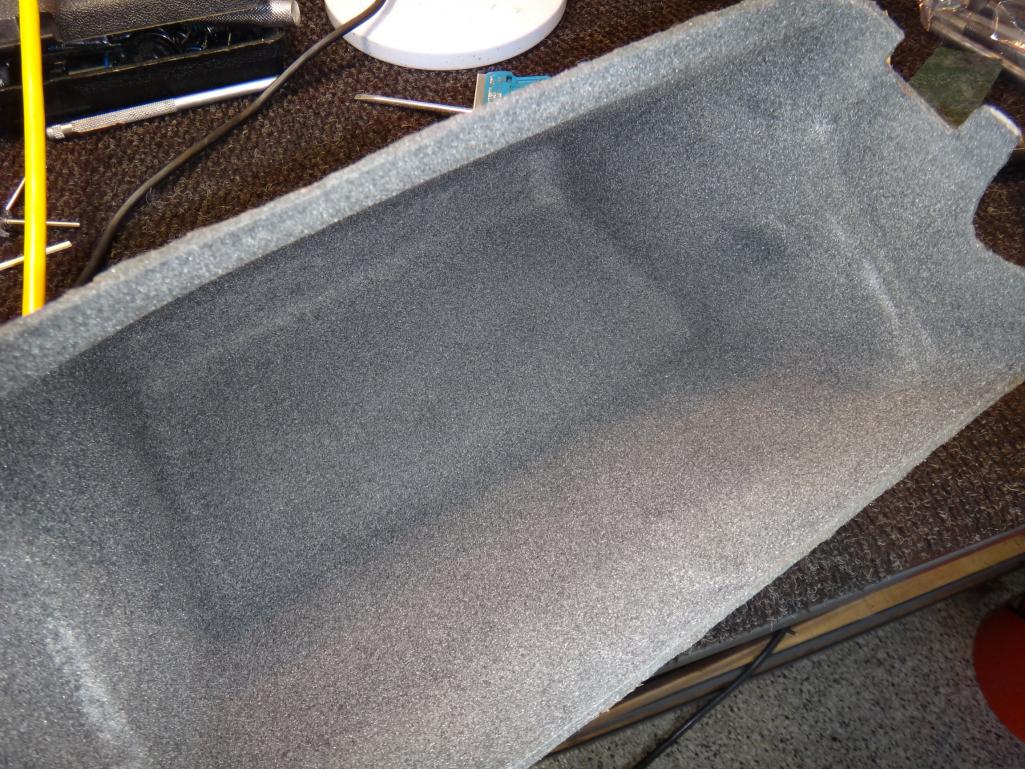 |
|
|
|
| raynekat |
Jul 20 2016, 06:08 PM
Post
#56
|
|
Advanced Member Group: Members Posts: 2,171 Joined: 30-December 14 From: Coeur d'Alene, Idaho Member No.: 18,263 Region Association: Pacific Northwest |
More fiddling today.
Tried the new Tn1-Tn2 yellow lens. Look pretty sharp. Will be a tough decision when the time comes to mount them....clear or yellow? Might alternate yearly.... 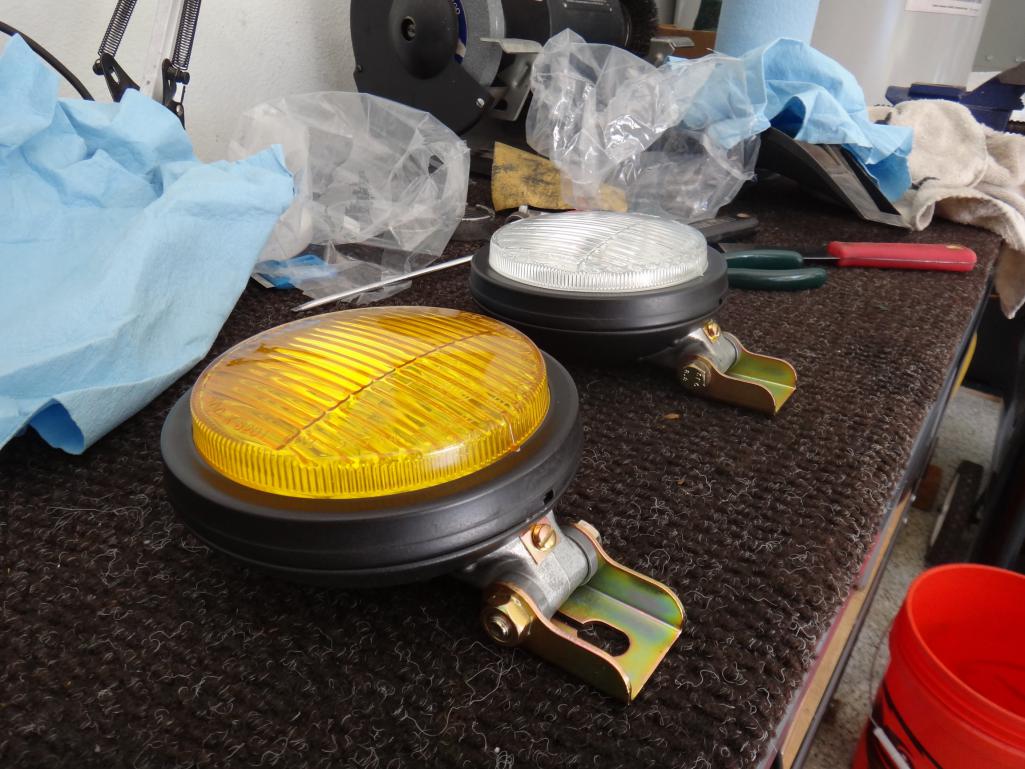 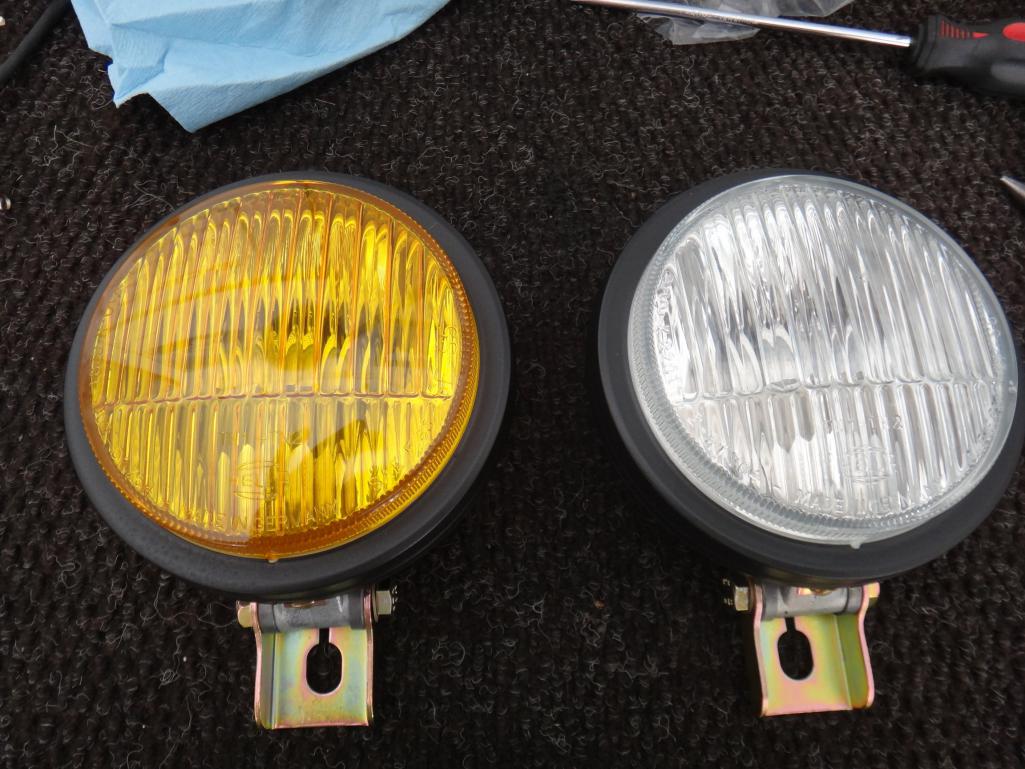 |
|
|
|
| Cairo94507 |
Jul 20 2016, 08:50 PM
Post
#57
|
|
Michael Group: Members Posts: 10,677 Joined: 1-November 08 From: Auburn, CA Member No.: 9,712 Region Association: Northern California |
Man you are moving right along. Terrific work.
I may have to look up the hockey puck guy....really want one of those on my car. OK - I sent him a PM on the Bird and told him I want one and sent him my info. A moment of weakness.... OH BTW, really love the yellow foglight lenses. |
|
|
|
| raynekat |
Jul 20 2016, 10:24 PM
Post
#58
|
|
Advanced Member Group: Members Posts: 2,171 Joined: 30-December 14 From: Coeur d'Alene, Idaho Member No.: 18,263 Region Association: Pacific Northwest |
QUOTE(Cairo94507 @ Jul 20 2016, 07:50 PM) Man you are moving right along. Terrific work. I may have to look up the hockey puck guy....really want one of those on my car. OK - I sent him a PM on the Bird and told him I want one and sent him my info. A moment of weakness.... OH BTW, really love the yellow foglight lenses. The yellow is looking good as you say. On a white car, they might be really nice. Depends on how much I will really use them...or not. The clear ones ought to work as driving/fog lamps where the yellow will be fog only. How much fog will I really be driving in? Like I said, it might be an annual change out for a different look each year. |
|
|
|
| cary |
Jul 23 2016, 09:51 AM
Post
#59
|
|
Advanced Member Group: Members Posts: 3,900 Joined: 26-January 04 From: Sherwood Oregon Member No.: 1,608 Region Association: Pacific Northwest |
QUOTE(raynekat @ Jul 20 2016, 11:56 AM) Re-flocking the glove box. A business opportunity for moi? Based on Earl's reaction when I pulled the nice glove box out of the 964 rally car project I'd say yes. But do it for all models. Bigger base. I'd add your hand painting of the heater controls too. Then you could stretch it a little further. Disassemble the heater control and have everything replated. That too could be stretched across all models. Both of these could be done world wide .................... Not going to keep you gainfully employed. But it would keep you off the golf course. (IMG:style_emoticons/default/beerchug.gif) Heading out to put a 1/2 day in on your car. I'll cut out the other inside trunk corner on the parts car and start looking at the seat belt packet cut out. |
|
|
|
| cary |
Jul 24 2016, 06:29 PM
Post
#60
|
|
Advanced Member Group: Members Posts: 3,900 Joined: 26-January 04 From: Sherwood Oregon Member No.: 1,608 Region Association: Pacific Northwest |
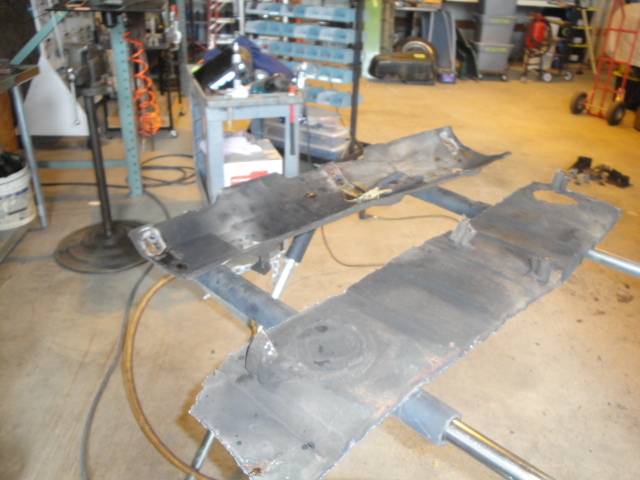
Here is the left inside trunk corner cut out from the parts car.
  Here's the ugly, over hammered and bumpy section I'm cutting out. 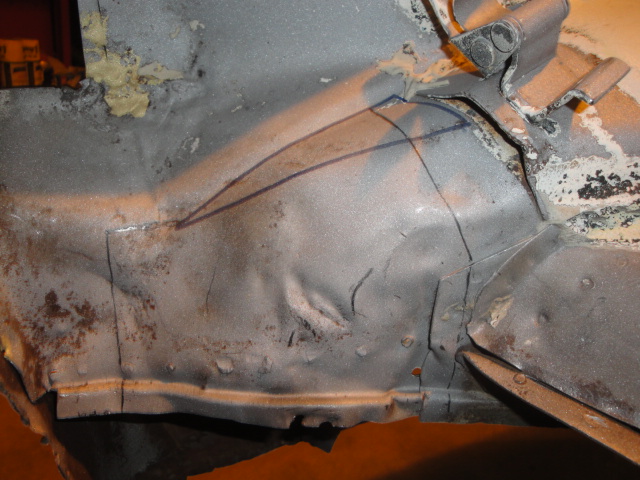 After some measuring, trimming, fiddling and fitting. Its ready to weld in on Thursday. 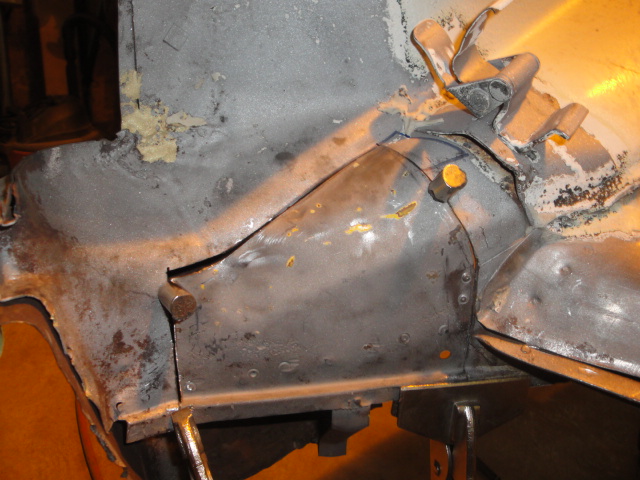 |
|
|
|
|
1 User(s) are reading this topic (1 Guests and 0 Anonymous Users)
0 Members:

|
Lo-Fi Version | Time is now: 24th June 2026 - 12:23 AM |
Invision Power Board
v9.1.4 © 2026 IPS, Inc.