|
|
|
Porsche, and the Porsche crest are registered trademarks of Dr. Ing. h.c. F. Porsche AG.
This site is not affiliated with Porsche in any way. Its only purpose is to provide an online forum for car enthusiasts. All other trademarks are property of their respective owners. |
|
|

  |

| raynekat |
 Nov 1 2017, 05:12 PM Nov 1 2017, 05:12 PM
Post
#401
|
|
Advanced Member  Group: Members Posts: 2,171 Joined: 30-December 14 From: Coeur d'Alene, Idaho Member No.: 18,263 Region Association: Pacific Northwest |
Perry Kiehl's nice custom engine wiring harness that he's put together for my 2.7 RS MFI engine/914-6 engine relay board/914-4 chassis wiring project.
He does a great job with lots of good and useful communication. Was infinitely more user friendly than trying to get a custom harness put together from over in Europe. https://www.youtube.com/watch?v=i3fRjjI8VzA...eature=youtu.be |
   |

 
|
| cary |
Nov 1 2017, 10:25 PM
Post
#402
|
|
Advanced Member Group: Members Posts: 3,900 Joined: 26-January 04 From: Sherwood Oregon Member No.: 1,608 Region Association: Pacific Northwest |
Wednesday 11/1/17
Short Day . Chris (Tygaboy) stopped by after lunch. Tidied up his shop and brought Super In Law some parts to break down to put into storage. LOL. Time for a trip to Home Depot for some more totes. Back to the cowl patches. Tuned the fender skin so that the seal fits just right. 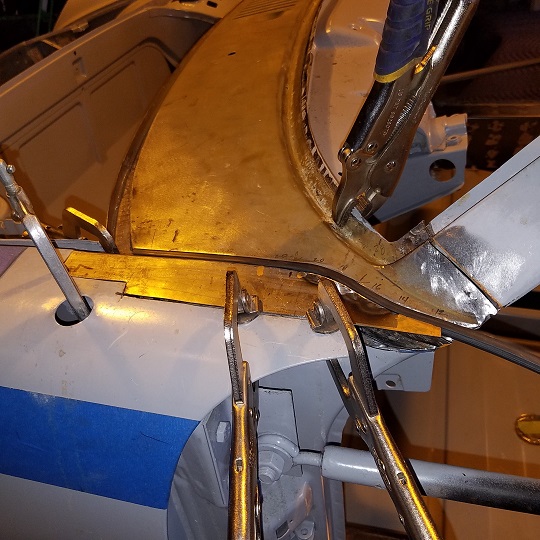 Then on to trimming the lower fender support. 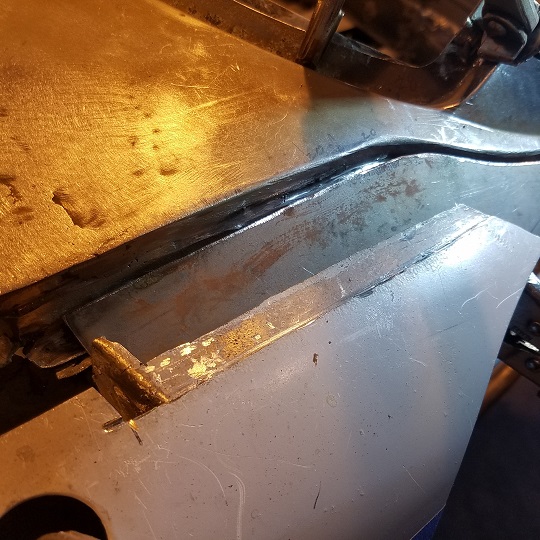 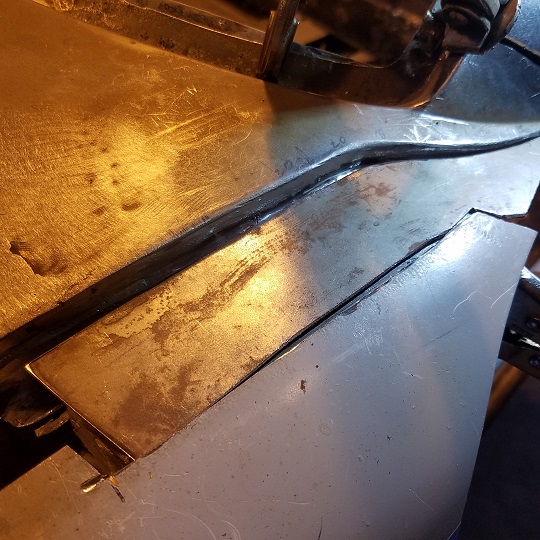 Didn't get the final shots .................Chris and I headed to the Grand Lodge for a bite to eat. Super In Law waited for Mike to drop by with some parts. Tomorrow am I'll get the same done on the right. Then I'll start the weld in. |
|
|
|
| cary |
Nov 2 2017, 09:59 PM
Post
#403
|
|
Advanced Member Group: Members Posts: 3,900 Joined: 26-January 04 From: Sherwood Oregon Member No.: 1,608 Region Association: Pacific Northwest |
Thursday 11/2/17
Started the day with checking on how the inner support spoons into the fender skin. 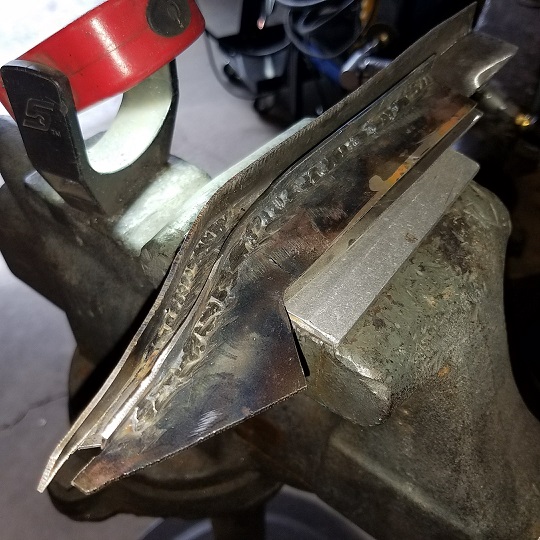 Then I flipped the car over and cleaned the excess seam sealer out from under the patch area. Need to prepare it for the seam sealer thats coming next. 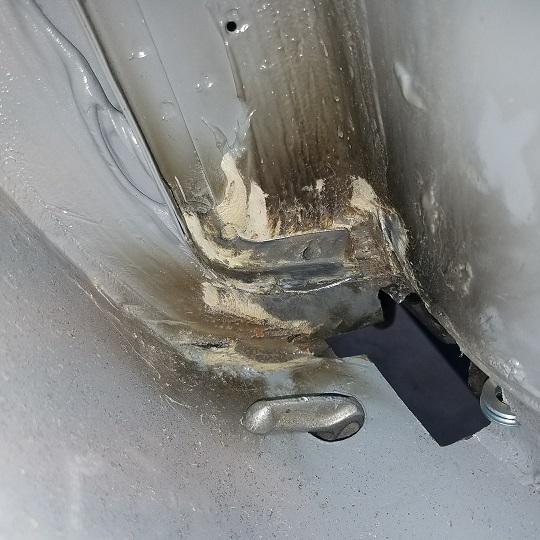 Finished tuning up the left inner fender support. Got a fit that I'm satisfied with until we weld in the cowl. 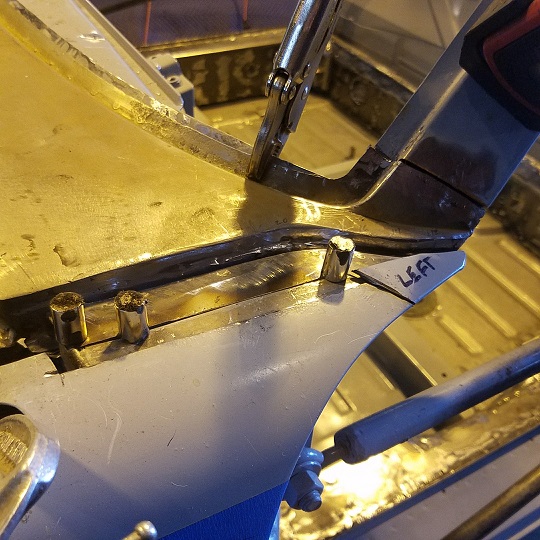 Then I turned the car around and started on the right side. Super In Law had prepped me a nice piece. 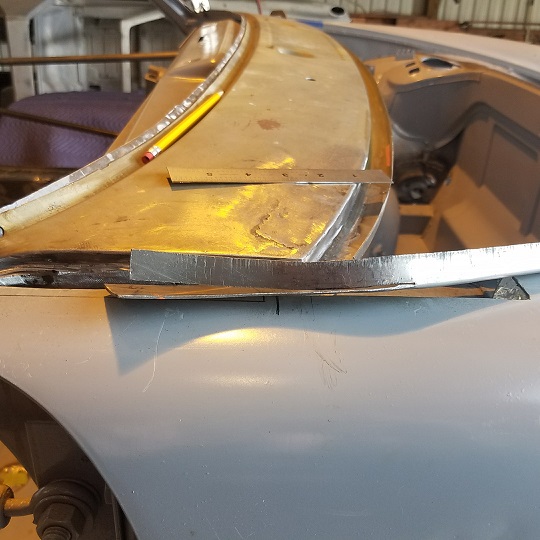 Tacked it together with my new Millermatic 141. 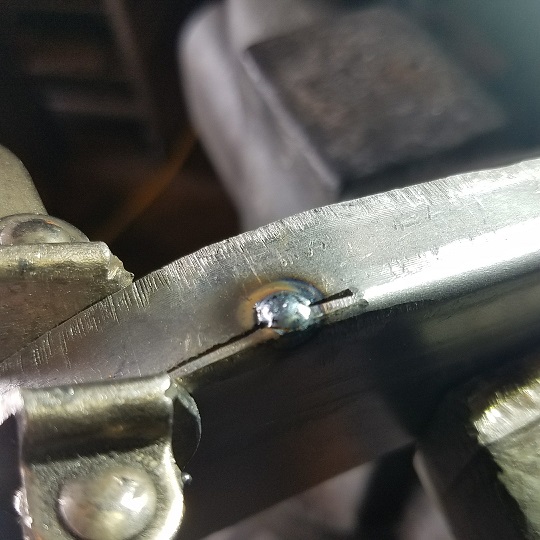 Then it was time for the tedious part. Trimming, shrinking, stretching and hammering the patch to drop into the cut out. 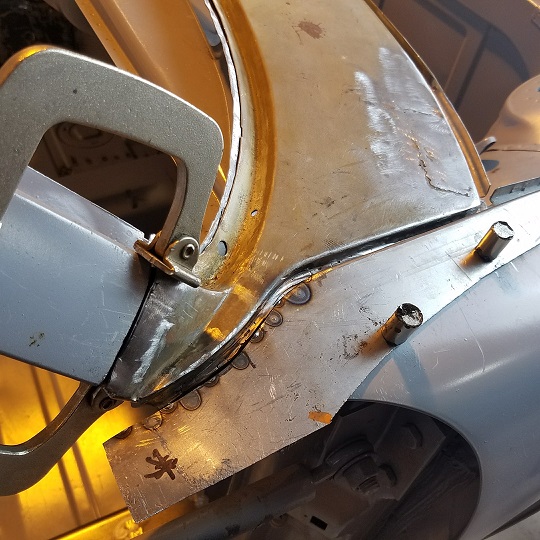 Took a while but I've got it close. I'll need to cut a couple welds and make a couple adjustments in the S curve. 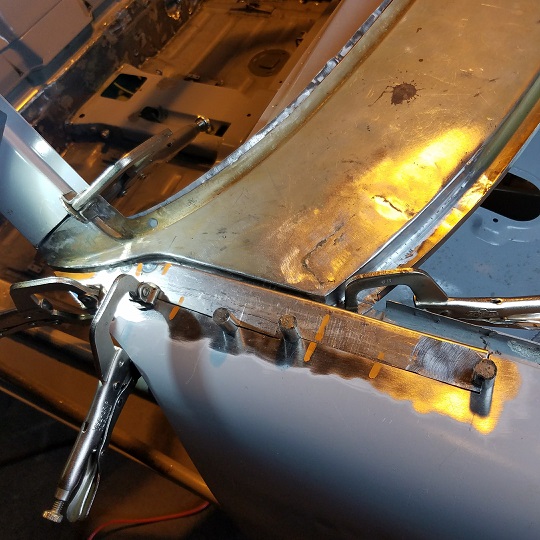 |
|
|
|
| cary |
Nov 2 2017, 10:06 PM
Post
#404
|
|
Advanced Member Group: Members Posts: 3,900 Joined: 26-January 04 From: Sherwood Oregon Member No.: 1,608 Region Association: Pacific Northwest |
Then it was time to finish the Eastwood Internal Frame Coating on the tunnel. Being upside I'll be able to coat the tunnel top.
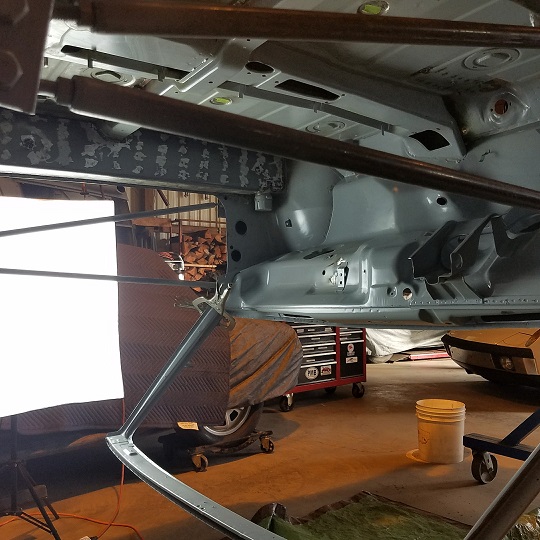 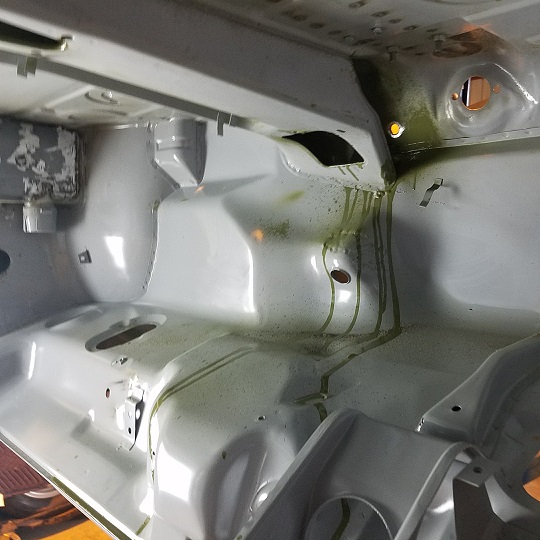 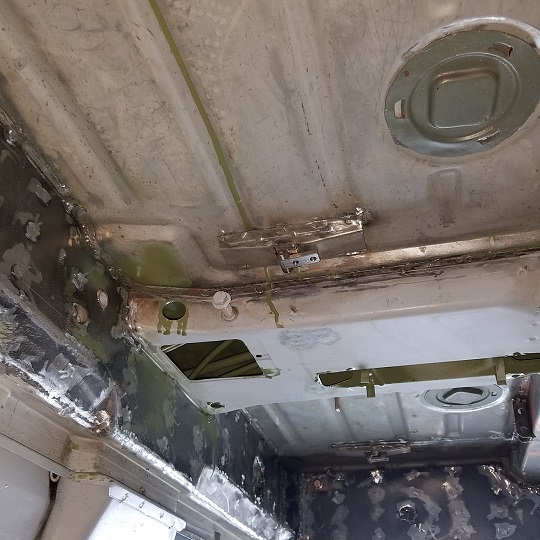 After the clean up with brake cleaner ................. 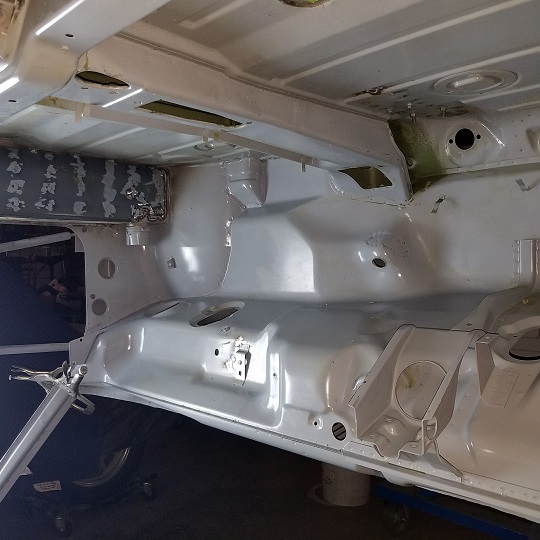 |
|
|
|
| raynekat |
Nov 2 2017, 11:18 PM
Post
#405
|
|
Advanced Member Group: Members Posts: 2,171 Joined: 30-December 14 From: Coeur d'Alene, Idaho Member No.: 18,263 Region Association: Pacific Northwest |
A bit of show and tell.
Parts, tools, etc. Fun stuff. Below you'll see some of the common plastic plugs found in the rear trunk of the 914. On left are the original ones that have come out of the car after 46 years of dirt, oil, undercoating...you name it. Your typical yellowing that this type of light colored plastic picks up from aging. In the middle, is a set of these original plugs that have been left in dilute bleach for a couple of weeks. Cleaned up nicely from the original, but still a bit dingy for my tastes. Last column are a new set of 19mm plugs I purchased from Aase Sales. About a buck each. I know which ones will be going back in my car after all the body/paint work. (IMG:style_emoticons/default/wink.gif) 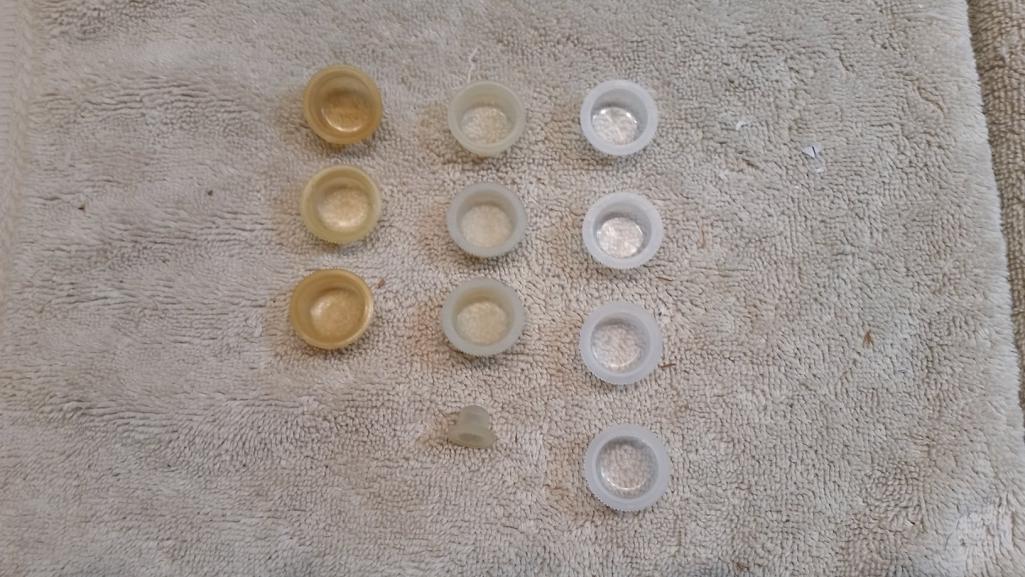 Next is an NOS radio wiring harness I found. Just the ticket for wiring up my vintage Becker stereo when the time comes. I already located the special speaker connectors needed for the radio. 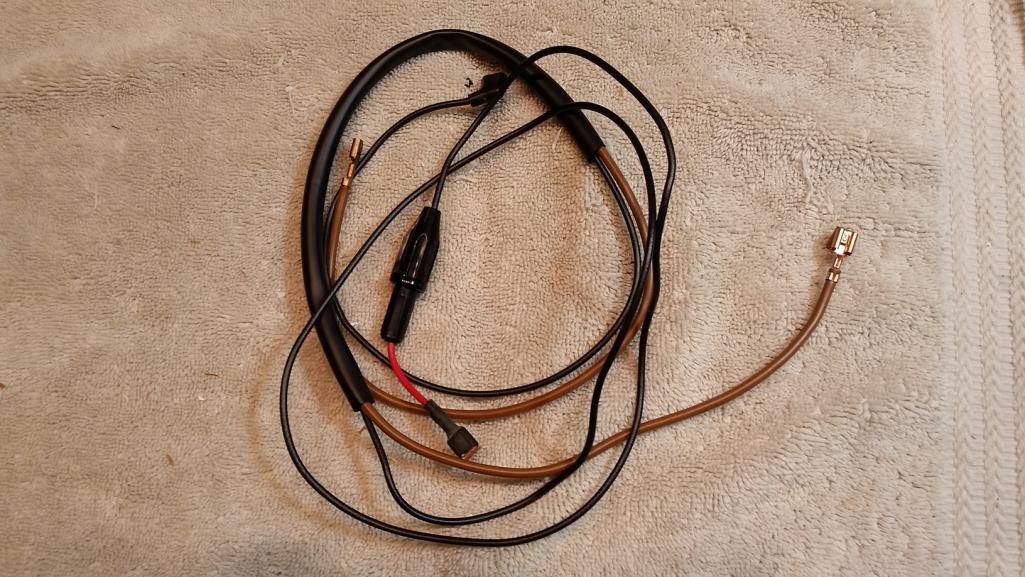 Founds these small specialty brass brushes on Ebay. Some sizes are very useful for cleaning out the terminals in the socket where the round relays go. 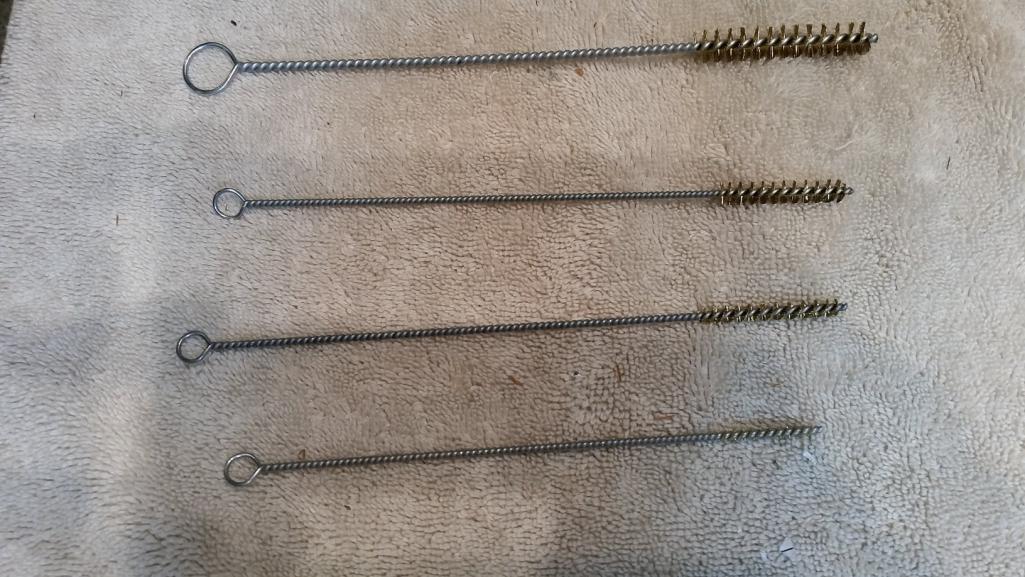 Guess this next guy is called a 964RS (993RS) hood prop rod. Porsche part numbers and not all that expensive. I'll be using at least one for my rear fiberglass GT bonnet. I'm up in the air for the front trunk lid. May use the same as here....or get a more proper GT hood prop put together. 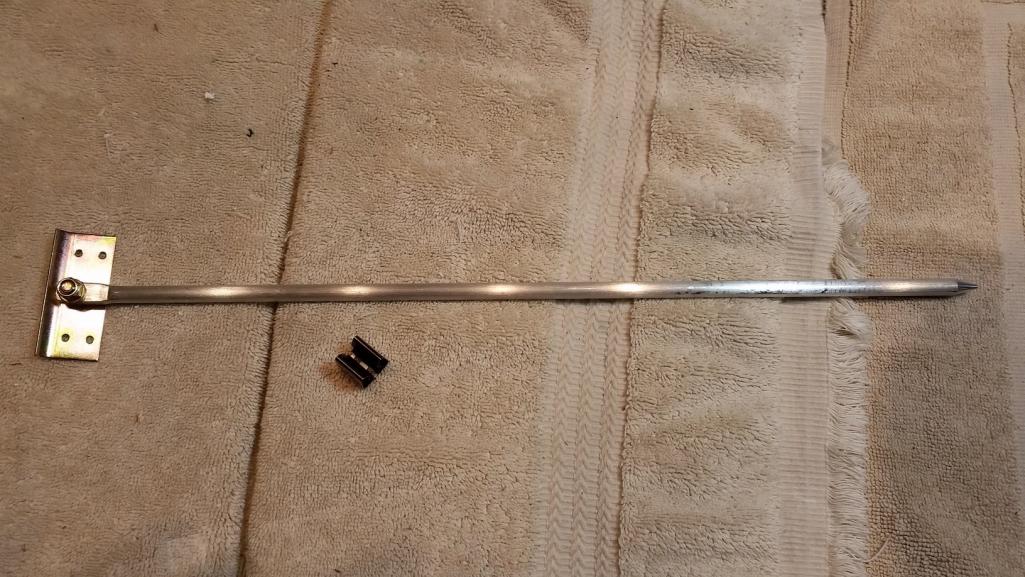 Purchased a nice shift rod bushing that gets attached at the firewire. Necessary for the side shift conversion the car will be getting. Not sure if I'll sheet metal screw it in (screws provided) or simply rivet it in place. 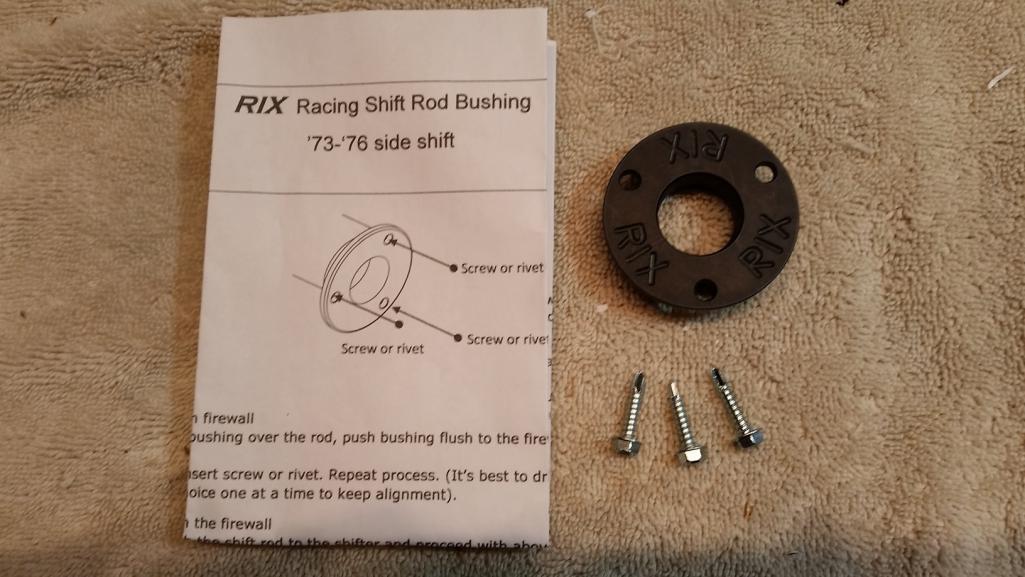 Last but not least....for my other P car, so really OT here I would think. I have a 1973 911 that over the years has been converted into an RSR hot rod. The ducktail I have came from GT Racing has never fit well, but I've lived with it for over 25 years. I've asked Santa for Christmas a very special replacement ducktail with an aluminum base that will fit much better. Instead of reinstalling a new set of Carrera RS decals on the tail, I'll be going with this metal emblem instead. A few of the original cars had these instead of the decal. Think it gives a much different look to the car. 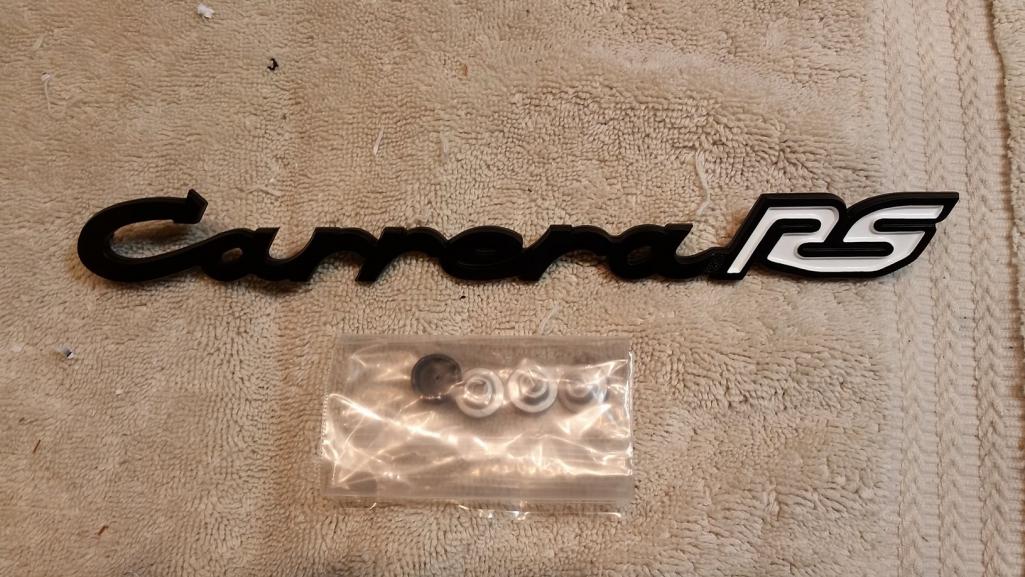 |
|
|
|
| SixerJ |
Nov 3 2017, 01:19 AM
Post
#406
|
|
Member Group: Members Posts: 451 Joined: 24-June 13 From: UK Member No.: 16,042 Region Association: England |
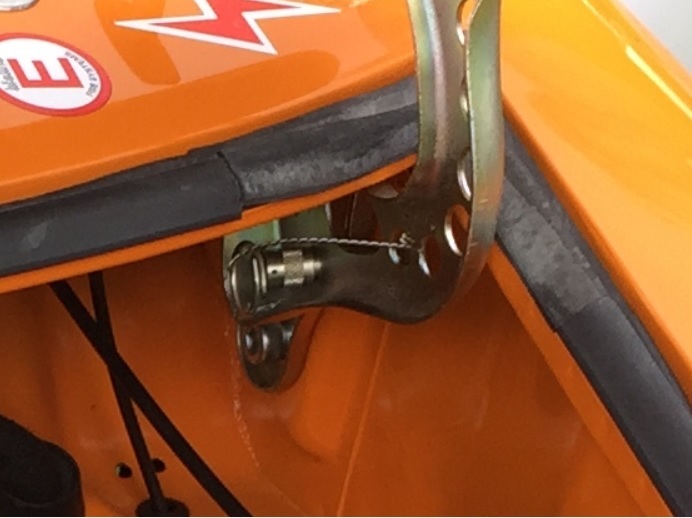
Alternative idea for the prop?
I've never seen this method of hood prop before but it seemed to work well on this GT ('71 car #0137) Not the best picture but if you zoom in to the hinge you should be able to see a knurled pin that goes through the hinge and into I think the kidney shaped bracket. Pins on both sides & wind can't catch the lid 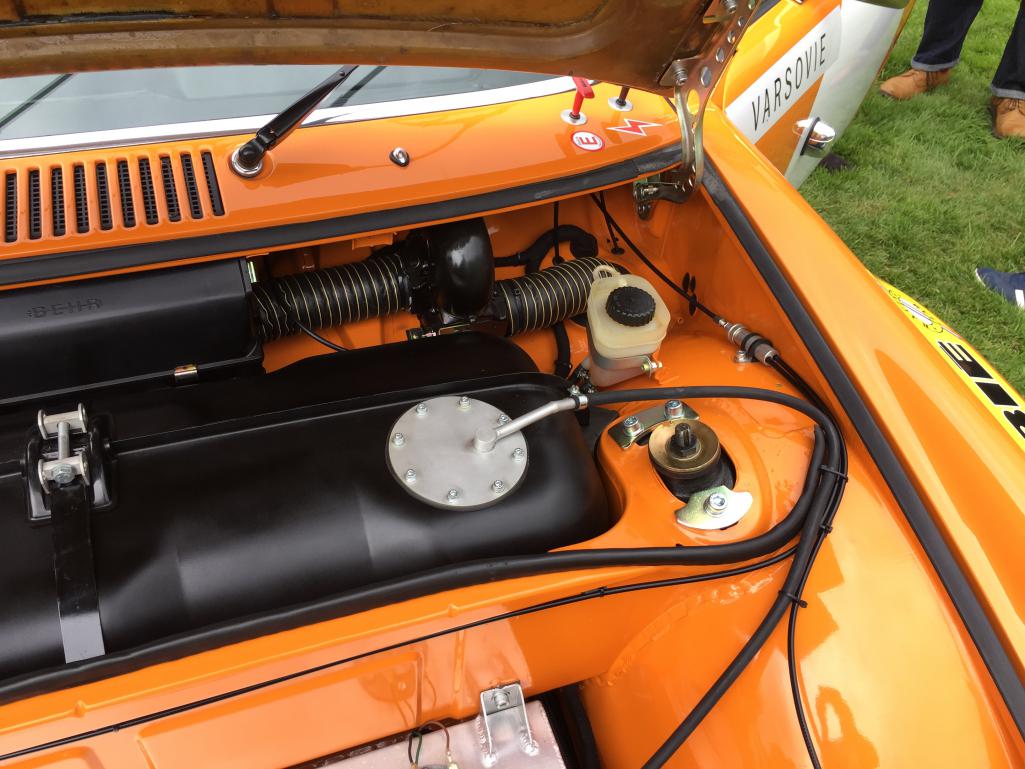 Car is looking great BTW & your going to love MFI although if she ever refuses to start or is hard to start dont overlook the removeable fuel output spigot on the MFI cold start assembly. It has a very small check valve and after so many years of service mine gave up the ghost after a winter lay up. Insufficient pressure to start the car / fuel just circulates back to the tank. Had me and the AA guy totally foxed. Swapped in a shop and the 911 now starts on the button every time whereas before it took some cranking |
|
|
|
| Cairo94507 |
Nov 3 2017, 06:48 AM
Post
#407
|
|
Michael Group: Members Posts: 10,706 Joined: 1-November 08 From: Auburn, CA Member No.: 9,712 Region Association: Northern California |
I could be mistaken but those small brass brushes look to have come straight out of a gun cleaning kit. They are great brushes.
|
|
|
|
| cary |
Nov 3 2017, 07:21 AM
Post
#408
|
|
Advanced Member Group: Members Posts: 3,900 Joined: 26-January 04 From: Sherwood Oregon Member No.: 1,608 Region Association: Pacific Northwest |
 I love the shiny stuff. Plated hinges ............ |
|
|
|
| mb911 |
Nov 3 2017, 07:56 AM
Post
#409
|
|
914 Guru Group: Members Posts: 7,794 Joined: 2-January 09 From: Burlington wi Member No.: 9,892 Region Association: Upper MidWest |
QUOTE(cary @ Nov 3 2017, 05:21 AM)  I love the shiny stuff. Plated hinges ............ I agree and now am thinking I may do that as well.. |
|
|
|
| bbrock |
Nov 3 2017, 04:31 PM
Post
#410
|
|
914 Guru Group: Members Posts: 5,269 Joined: 17-February 17 From: Montana Member No.: 20,845 Region Association: Rocky Mountains |
QUOTE(cary @ Nov 2 2017, 09:59 PM) I'm pretty sure I've seen this in one of your threads but I'm not finding it, what kind of magnets are those you are using as welding clamps, and where does one buy them? I've got a few small magnets I've tried, but they are too weak. |
|
|
|
| cary |
Nov 3 2017, 09:54 PM
Post
#411
|
|
Advanced Member Group: Members Posts: 3,900 Joined: 26-January 04 From: Sherwood Oregon Member No.: 1,608 Region Association: Pacific Northwest |
QUOTE(bbrock @ Nov 3 2017, 03:31 PM) QUOTE(cary @ Nov 2 2017, 09:59 PM) I'm pretty sure I've seen this in one of your threads but I'm not finding it, what kind of magnets are those you are using as welding clamps, and where does one buy them? I've got a few small magnets I've tried, but they are too weak. http://www.eastwood.com/stitch-weld-magnets.html On Sale ............... |
|
|
|
| cary |
Nov 5 2017, 11:37 AM
Post
#412
|
|
Advanced Member Group: Members Posts: 3,900 Joined: 26-January 04 From: Sherwood Oregon Member No.: 1,608 Region Association: Pacific Northwest |
Saturday is DIY help/coaching day ................ while I'm on that.
Super In Law was creating the last couple pieces of the cowl repair................... The fender channels. 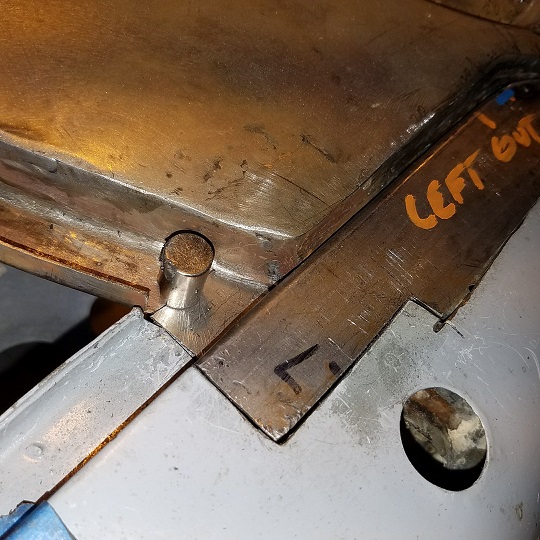 Both cowl upper corners will get just a little tune up and some file work before it get welded in. |
|
|
|
| cary |
Nov 6 2017, 10:30 PM
Post
#413
|
|
Advanced Member Group: Members Posts: 3,900 Joined: 26-January 04 From: Sherwood Oregon Member No.: 1,608 Region Association: Pacific Northwest |
Monday 11/6/17
Chassis portion of the cowl repair prepped with cold galvanizing and weld thru primer. 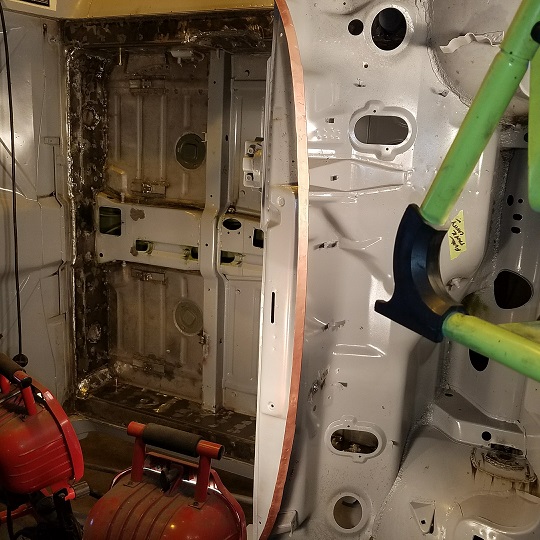 Then tuned up the window frame portion on the donor cowl. Super In Law cut out a buck pocket so I could make sure I had the correct shape. 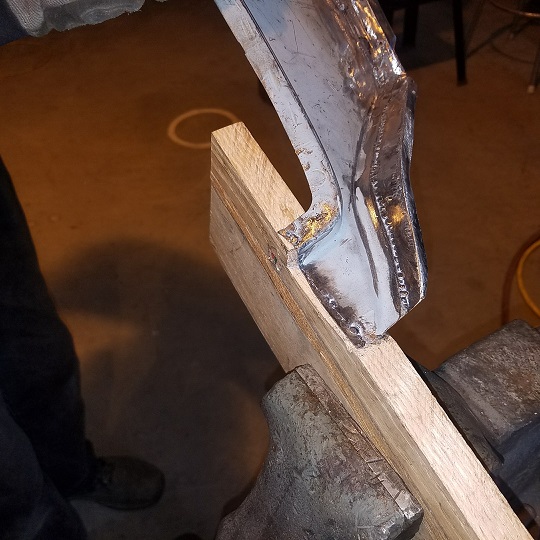 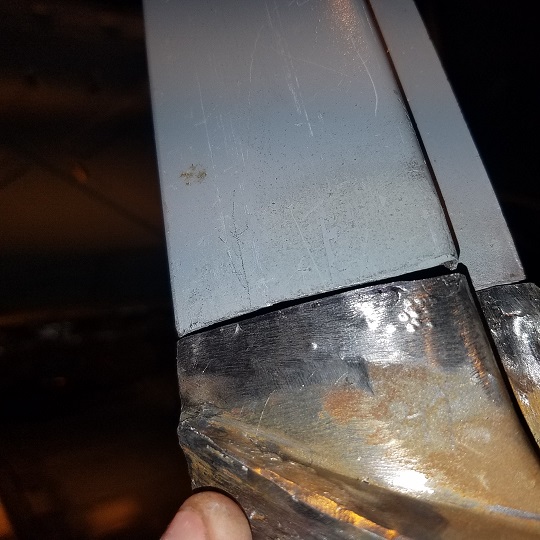 On last quadruple check .............. 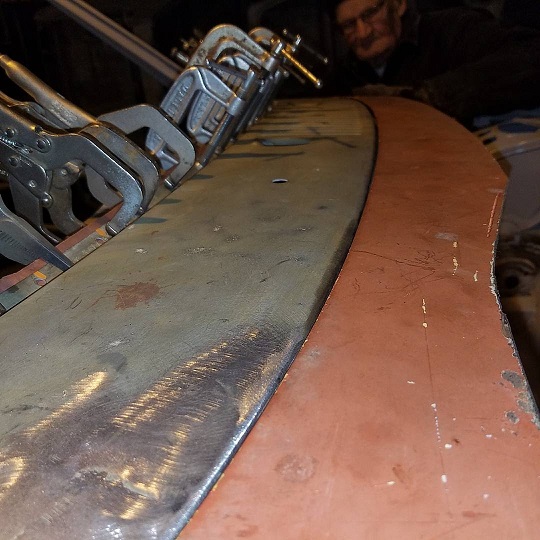 That dog will hunt ..... Gamroth cliche Super In law cut off the back end of a front hood for a jig ............ Cowl clamped down with 24 Vise Grips and C-clamps. The welding has started, but forgot to shoot and pictures. 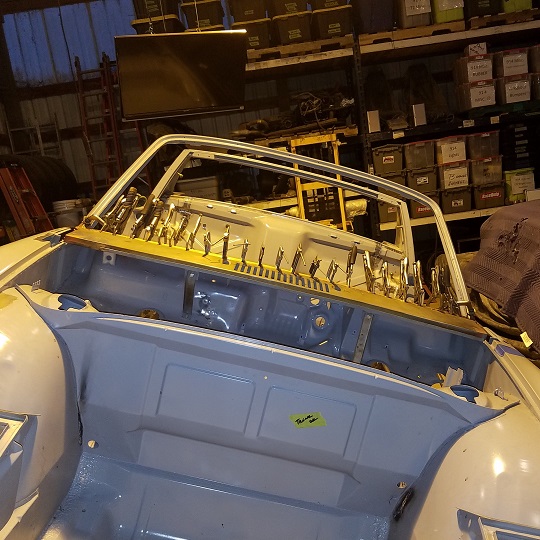 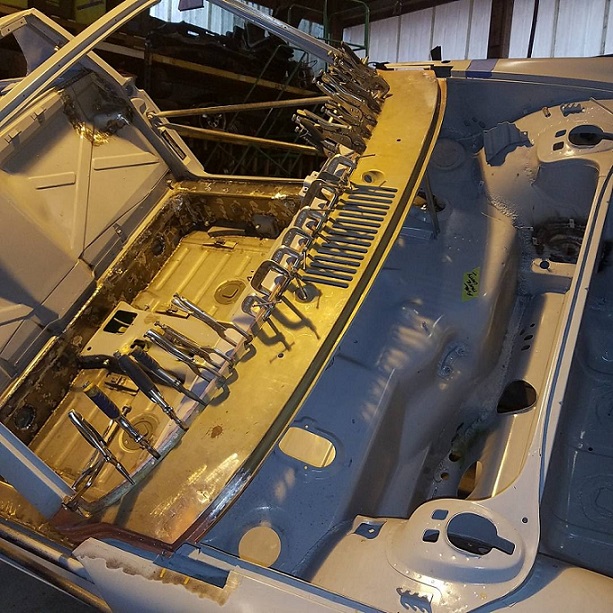 |
|
|
|
| tygaboy |
Nov 7 2017, 08:55 AM
Post
#414
|
|
914 Guru Group: Members Posts: 5,844 Joined: 6-October 15 From: Petaluma, CA Member No.: 19,241 Region Association: Northern California |
Cary -
That last series of pics just earned you a new nickname. From here on, I dub thee: Jed "Clamp-it" (IMG:style_emoticons/default/lol-2.gif) (IMG:style_emoticons/default/poke.gif) |
 |
|
| cary |
Nov 7 2017, 09:16 AM
Post
#415
|
|
Advanced Member Group: Members Posts: 3,900 Joined: 26-January 04 From: Sherwood Oregon Member No.: 1,608 Region Association: Pacific Northwest |
I hoped to use the pinch type spot welder. I borrowed it from Rothsport.
Pinchers wouldn't fit. We bought the 220v unit for engine tin reworking. When I (MiddleMotors) can afford one it will be the Miller unit that has multiple sizes of pinchers available. So every rosette has a clamp next to it. The new Miller 141 will make nice small and short rosettes. As for Clamp It, I'm going to order 6 more pairs of Vice Grips. 4 more 6SP's and 2 pair of 9LN's. |
|
|
|
| cary |
Nov 8 2017, 12:07 AM
Post
#416
|
|
Advanced Member Group: Members Posts: 3,900 Joined: 26-January 04 From: Sherwood Oregon Member No.: 1,608 Region Association: Pacific Northwest |
Tuesday 11/7/17
Welding the donor cowl to the windshield frame. 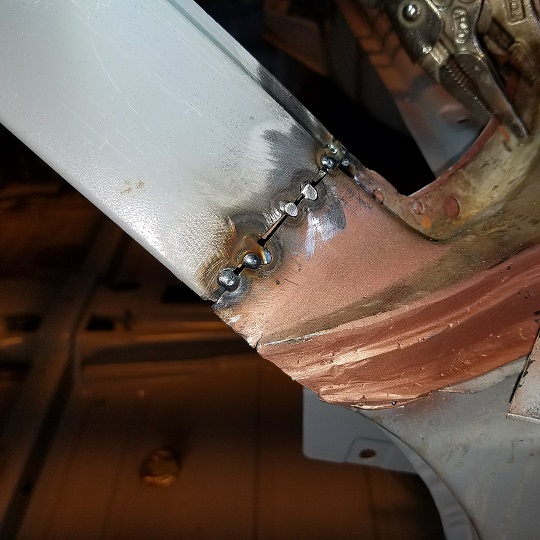 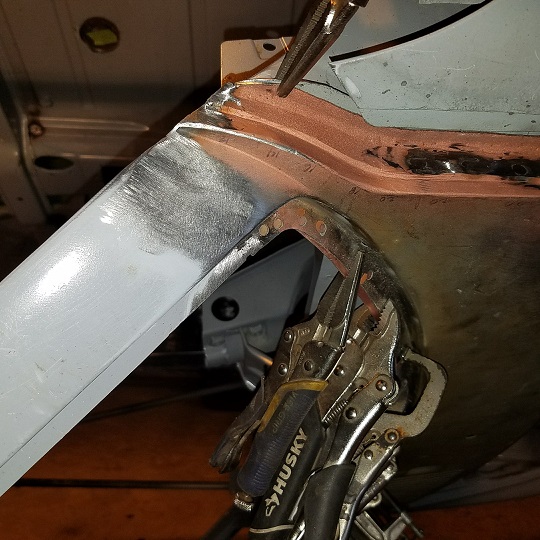 I did take up Chris's suggestion on using conditioning disks. https://www.amazon.com/3M-07480-Coarse-Surf...g/dp/B0002STR90 I little softer cut when dealing with that sharp edge on the frame. Worked great. Thanks Chris .......... |
|
|
|
| cary |
Nov 8 2017, 12:11 AM
Post
#417
|
|
Advanced Member Group: Members Posts: 3,900 Joined: 26-January 04 From: Sherwood Oregon Member No.: 1,608 Region Association: Pacific Northwest |
Getting down to business. Welding the donor cowl onto the dash flange.
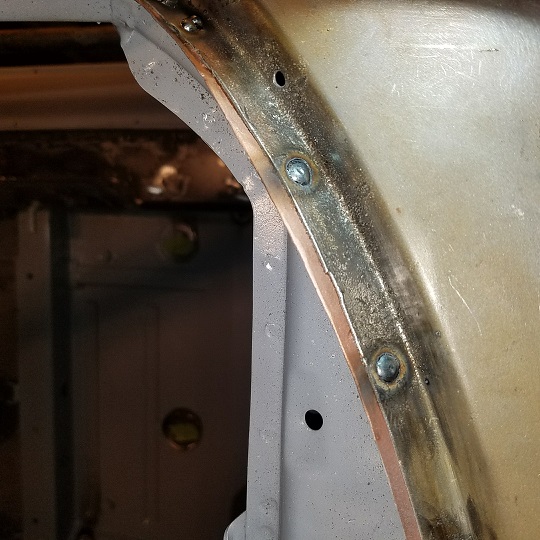 Down to the last 2 rosettes .................. 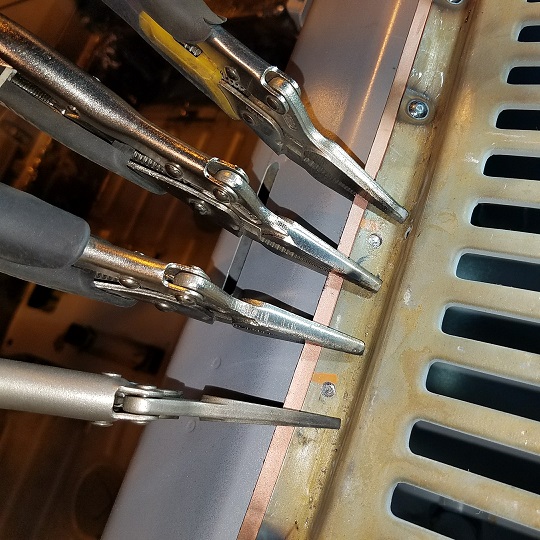 Jed Clampets pile of Vice Grips and c clamps. 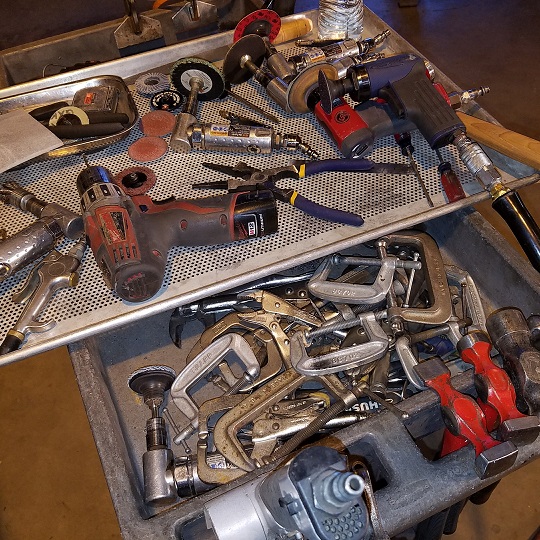 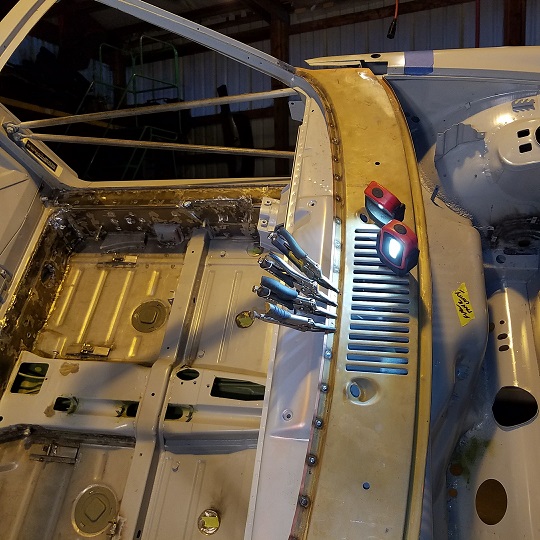 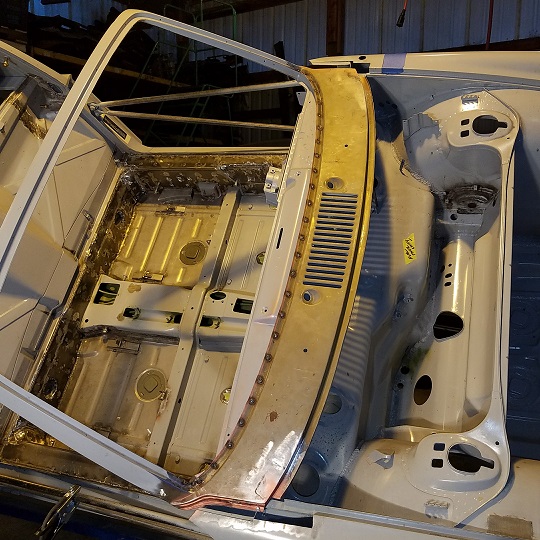 The rosettes will get a tune up first thing in the am .............. |
|
|
|
| tygaboy |
Nov 8 2017, 07:59 AM
Post
#418
|
|
914 Guru Group: Members Posts: 5,844 Joined: 6-October 15 From: Petaluma, CA Member No.: 19,241 Region Association: Northern California |
Cary - Super tidy! That looks REEEEEALLY nice! (IMG:style_emoticons/default/aktion035.gif)
Gotta say, seeing these sorts of repairs being done helps build my confidence for some of the same sort of work I have yet to do on my car. Thanks for taking time to document everything you're doing. Greatly appreciated. |
|
|
|
| raynekat |
Nov 8 2017, 06:17 PM
Post
#419
|
|
Advanced Member Group: Members Posts: 2,171 Joined: 30-December 14 From: Coeur d'Alene, Idaho Member No.: 18,263 Region Association: Pacific Northwest |
Cary and Super in Law are the best and irreplaceable.
|
|
|
|
| Cairo94507 |
Nov 9 2017, 07:09 AM
Post
#420
|
|
Michael Group: Members Posts: 10,706 Joined: 1-November 08 From: Auburn, CA Member No.: 9,712 Region Association: Northern California |
Really nice work and documentation. That's the way these builds need to be documented if you ever need/want to prove the level of work done correctly on these cars. Good clear photos of all of the steps, showing the details enhances value significantly, IMHO, of course. (IMG:style_emoticons/default/first.gif)
|
|
|
|
|
1 User(s) are reading this topic (1 Guests and 0 Anonymous Users)
0 Members:

|
Lo-Fi Version | Time is now: 17th July 2026 - 11:32 PM |
Invision Power Board
v9.1.4 © 2026 IPS, Inc.