|
|
|
Porsche, and the Porsche crest are registered trademarks of Dr. Ing. h.c. F. Porsche AG.
This site is not affiliated with Porsche in any way. Its only purpose is to provide an online forum for car enthusiasts. All other trademarks are property of their respective owners. |
|
|

  |

| cary |
 Nov 9 2017, 09:26 AM Nov 9 2017, 09:26 AM
Post
#421
|
|
Advanced Member  Group: Members Posts: 3,900 Joined: 26-January 04 From: Sherwood Oregon Member No.: 1,608 Region Association: Pacific Northwest |
QUOTE(Cairo94507 @ Nov 9 2017, 05:09 AM)  Really nice work and documentation. That's the way these builds need to be documented if you ever need/want to prove the level of work done correctly on these cars. Good clear photos of all of the steps, showing the details enhances value significantly, IMHO, of course. (IMG:style_emoticons/default/first.gif) Thanks Michael. I hope the time spent will enhance the long term value, but you never know. This car will have this thread plus a Monster photo file that I'll copy off to a flash drive for Doug. The Devil is in the details ............ Its become just a part of my day. It feels kind of odd the days I work at Rothsport. But it does help me document the work done and the time spent that day. I probably have a bit too much info on my statements. The camera in the phone sure makes it easy. |
   |

 
|
| cary |
Nov 9 2017, 10:00 AM
Post
#422
|
|
Advanced Member Group: Members Posts: 3,900 Joined: 26-January 04 From: Sherwood Oregon Member No.: 1,608 Region Association: Pacific Northwest |
Wednesday 11/8/17
Deary day here in PDX ,,,,,,,,,,,, 45 degrees, gray sky and raining. I start with tuning up the cowl to dash welds. Both front and back. 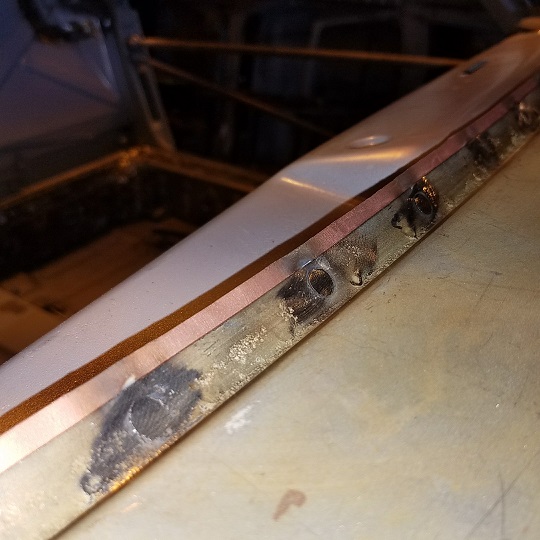 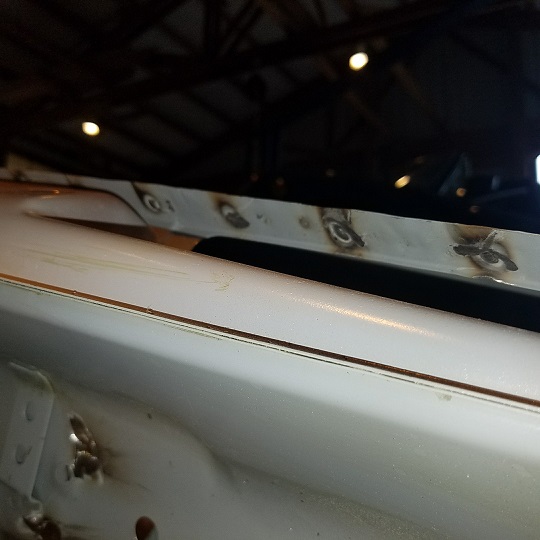 Edited 11/10/17 Then on to the home stretch. I tack the cowl to the chassis a couple more times. Simple tacks. Should be easy to find way out in the future when the car gets refreshed. 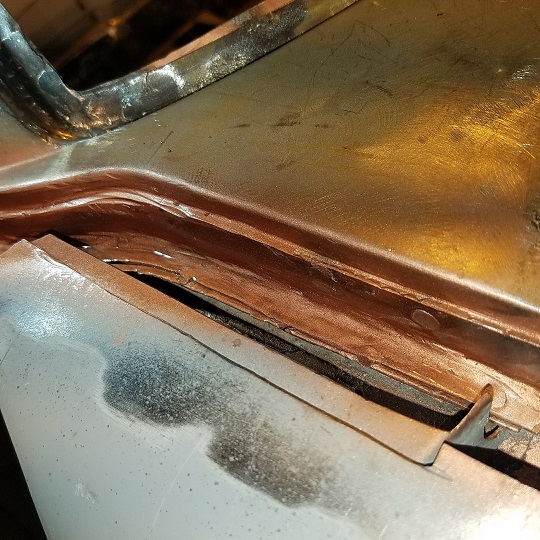 The flange to flange was seam sealed. Even though the entire area will get a serious job of both tube and spray seam sealer. It would be tough to get at the flange to flange. 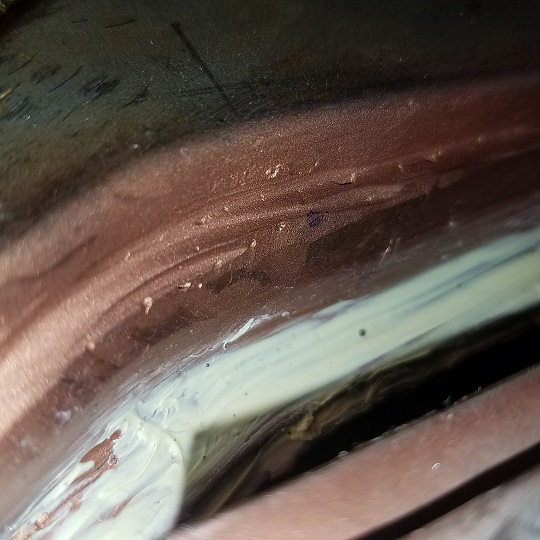 Edited 11/10/17 Then on to trimming and fitting the inner fender. 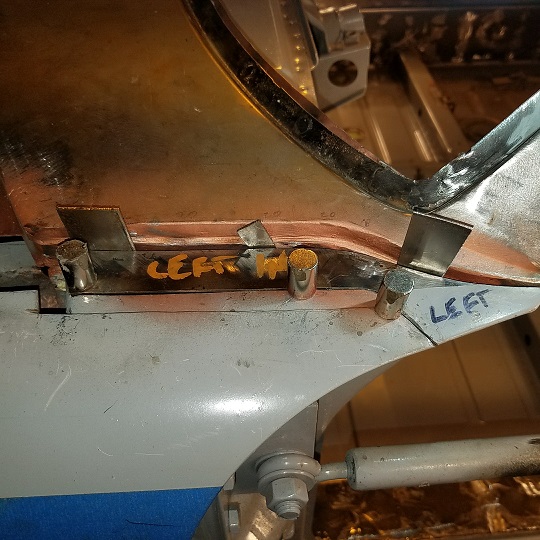 The inner layer on the backside of the fender tip (left) was removed up to the door skin fold over. (photo to follow) Location of the 3 rosettes I'll do after everything is finished. This will weld the inner to the fender skin patch. 3/16 holes. 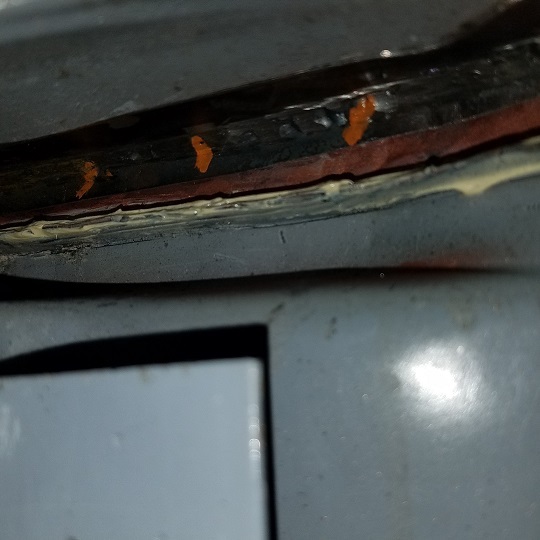 Inner support welded in. 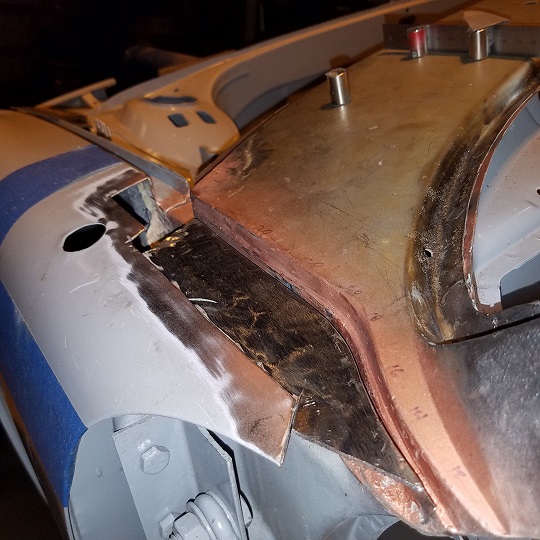 I could have used a 1" Roloc. Not a lot of room to sand down the stitches. Looks like the skin will need a little work on the shrinker/stretcher. I need it to move about 2.5mm to the left. Even then it might need to be redone, might not be wide enough. Its not as wide as the photo shows. Its standing above the seam. Needs a little more shaping now that the 2 pieces are tight together. This is one of the most important welds on the project. Because its out on the skin. It hate Bondo. My goal it to keep it to an absolute minimum. The metal finishing will be done by the body/paint shop. I consider myself Phase 1 of the project. 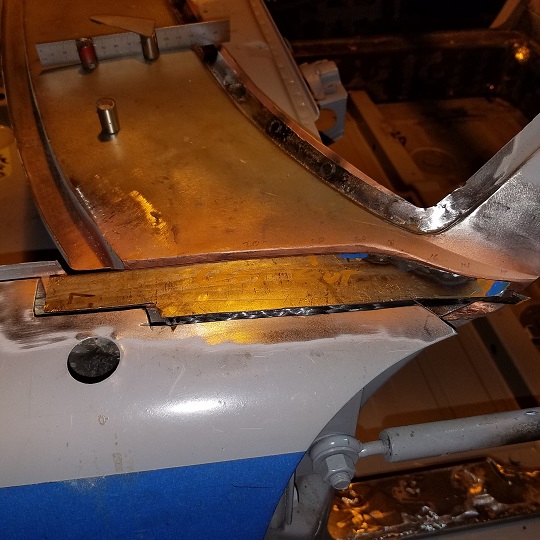 Did a test fit with car in the shop that has heat (wood). That's where I'll do the seam sealing. 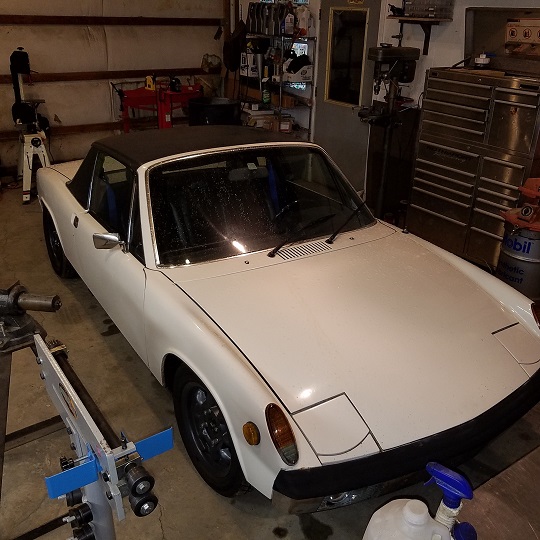 |
|
|
|
| cary |
Nov 9 2017, 12:39 PM
Post
#423
|
|
Advanced Member Group: Members Posts: 3,900 Joined: 26-January 04 From: Sherwood Oregon Member No.: 1,608 Region Association: Pacific Northwest |
The Mad Scientists here at MiddleMotors can MacGyver just about anything. But it takes patient dismantling and re-engineering. And just because you can, doesn't mean you should. This fender cowl repair might be one of those. Would have been a lot easier with a NOS cowl windshield frame and 2 new NOS fenders. Not cheaper, but easier. LOL.
And then you'd have all those spot welds to remove, straighten and repair. 2 or 3 of the parts cars that have gone thru here have had front fender replacements. (IMG:style_emoticons/default/sad.gif) 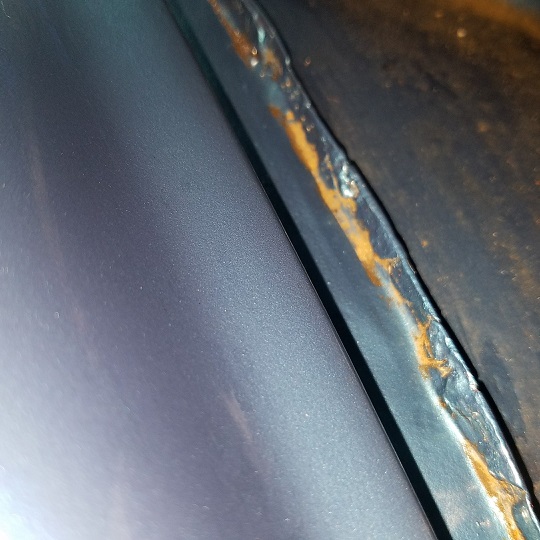 Removed and re-installed  Original, virgin Mad Scientist at Work ... 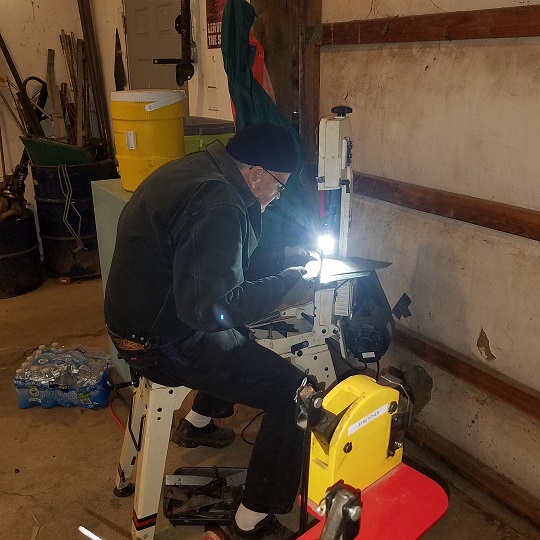 But as we dig deeper we'll just need more tools ,,,,,,,,,, (IMG:style_emoticons/default/biggrin.gif) (IMG:style_emoticons/default/biggrin.gif) 48" 16 gauge foot shear, English wheel, 16 gauge slip roller, planishing hammer and more bead roller dies ..................... Back to Work .............. (IMG:style_emoticons/default/welder.gif) |
|
|
|
| cary |
Nov 17 2017, 08:57 AM
Post
#424
|
|
Advanced Member Group: Members Posts: 3,900 Joined: 26-January 04 From: Sherwood Oregon Member No.: 1,608 Region Association: Pacific Northwest |
The mad scientists are back ..................
Right side inner/under fender is finished up and welded in. 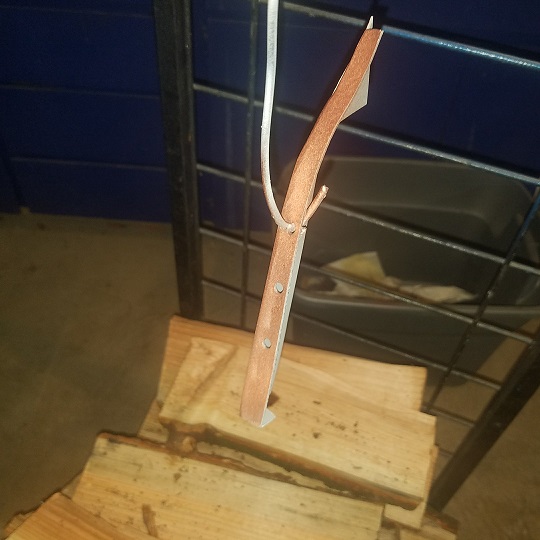 Every piece prepped for the long run . Welded on the fender tips in preparation for the final piece, the skin. 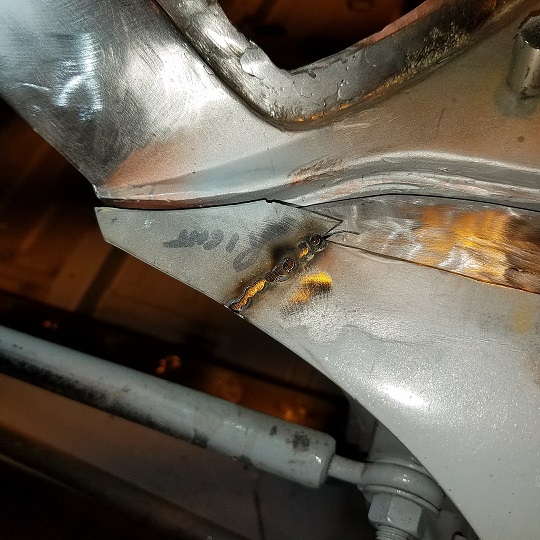 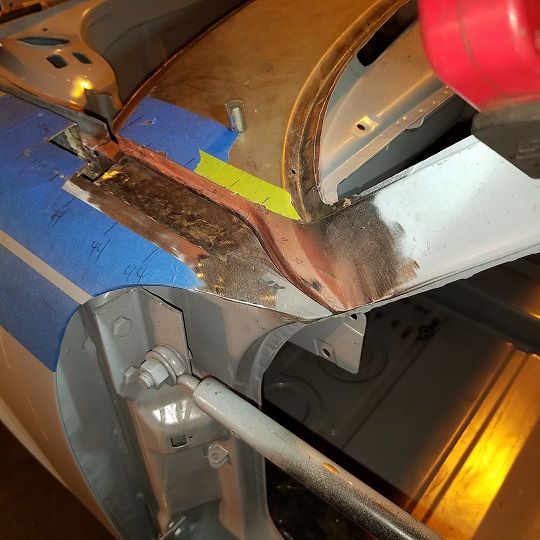 Tacked to the bottom side for the final trimming and fitting of the fender. 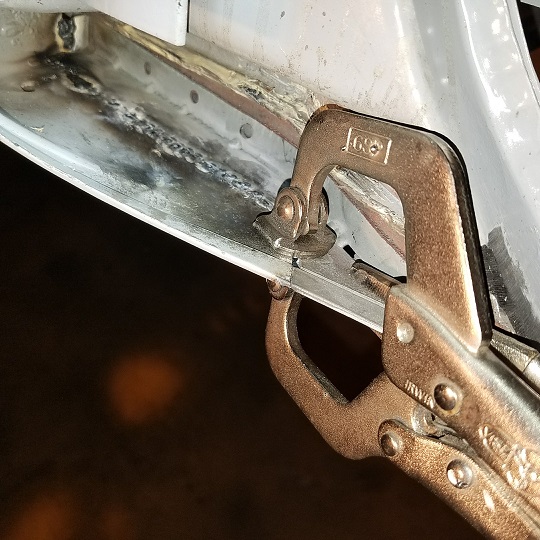 Then on to the fender channel before the skin is welded in. 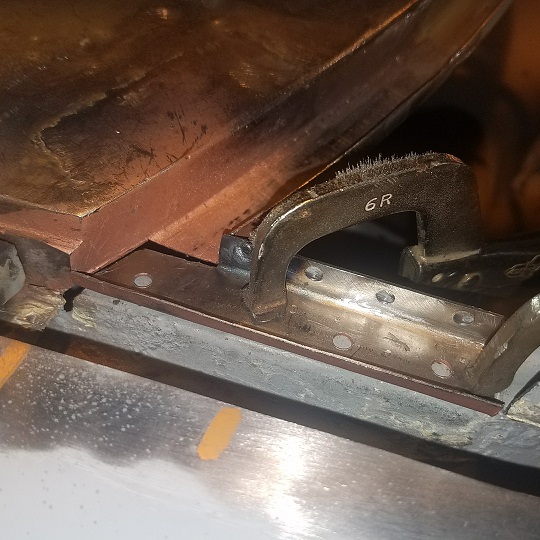 Parting shot for the end of the day ................... 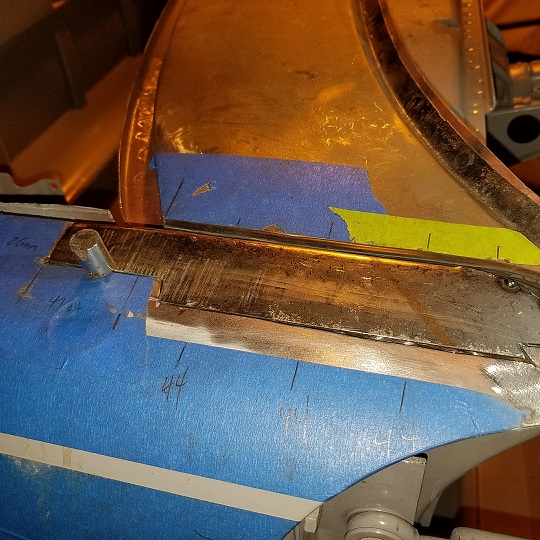 |
|
|
|
| cary |
Nov 17 2017, 09:08 AM
Post
#425
|
|
Advanced Member Group: Members Posts: 3,900 Joined: 26-January 04 From: Sherwood Oregon Member No.: 1,608 Region Association: Pacific Northwest |
There are times when I think I'm being to picky and I'm doing a little too much Rembrandting, as Gamroth puts it. Until you can see and touch a project like this.
Steve's car was delivered to Rothsport on Monday for assembly. http://forums.pelicanparts.com/9328345-post273.html  It's been at Freddie's shop for 3 years .................. |
|
|
|
| cary |
Nov 18 2017, 06:42 AM
Post
#426
|
|
Advanced Member Group: Members Posts: 3,900 Joined: 26-January 04 From: Sherwood Oregon Member No.: 1,608 Region Association: Pacific Northwest |
Friday 11/17/17
First order of the day was to harvest a MPS backing plate off one of my long motor mount sections. Pulled off two, I didn't like the backside of the first one. Worst part is, I'm almost certain I have two, somewhere. 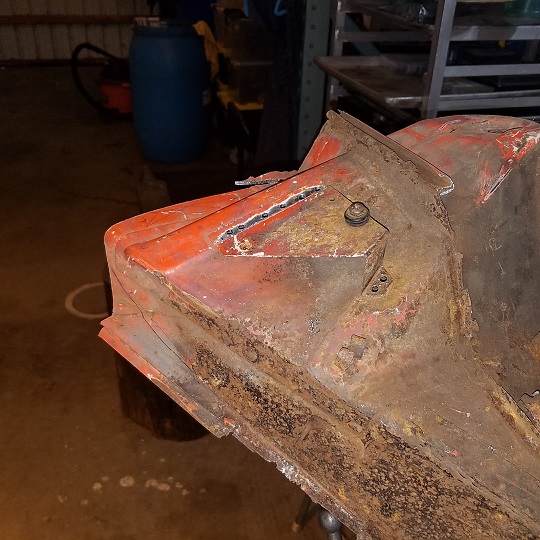 Into the blaster it goes. Garnet media.  But I find this on the backside. Looks like a little too much outdoor living. 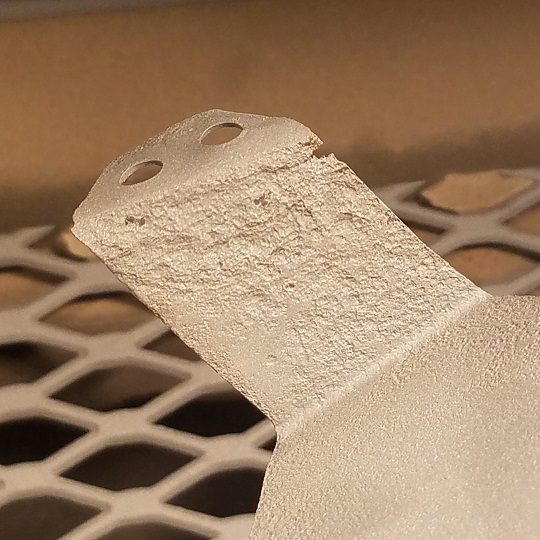 Next !!! 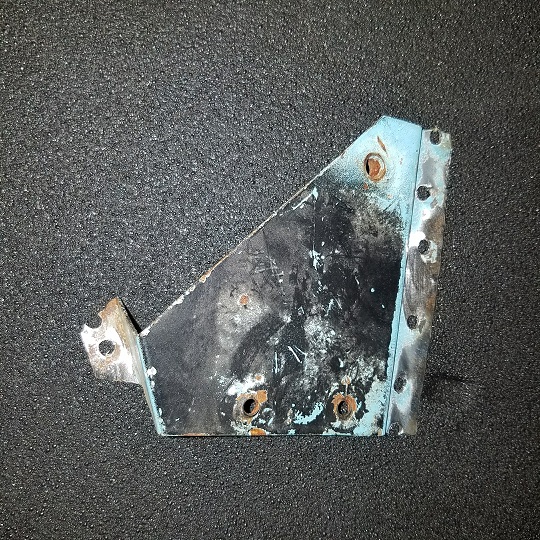 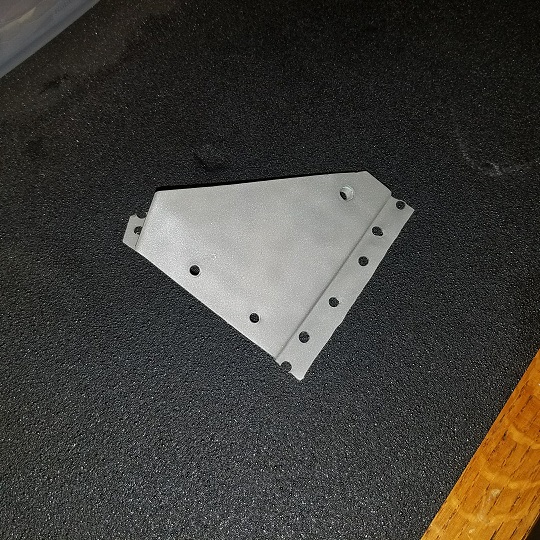 That dog will hunt .............. It's going back on. With Georges help we find out that the factory used the same mount for the MFI Micro filter. |
|
|
|
| cary |
Nov 18 2017, 07:00 AM
Post
#427
|
|
Advanced Member Group: Members Posts: 3,900 Joined: 26-January 04 From: Sherwood Oregon Member No.: 1,608 Region Association: Pacific Northwest |
Onto the left fender skin install. This shows where the welds will be. The arrows are the fender to the cowl. The upper hash marks are the inner support to the fender.
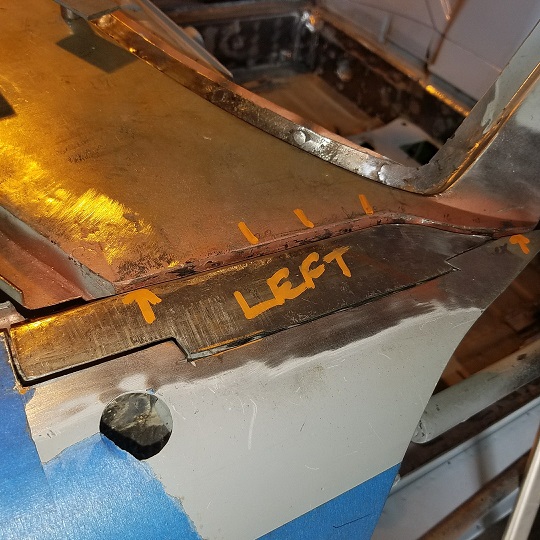 Once again long term preservation protection. 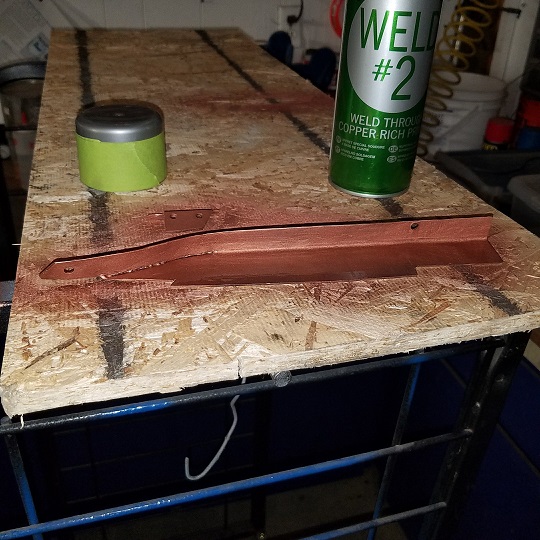 First welding is the channel corner replacement. 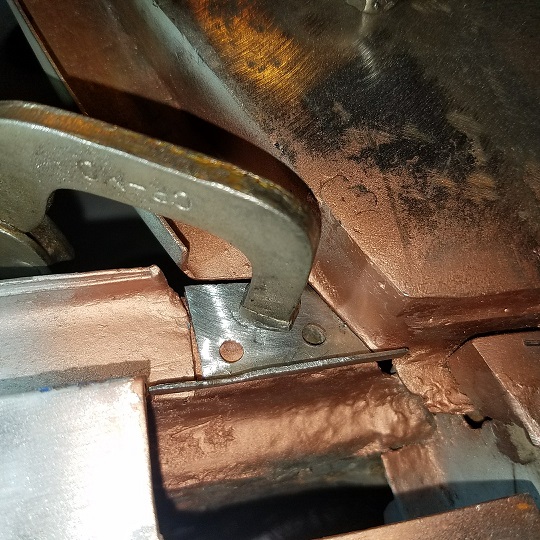 Tying the channel corner together. 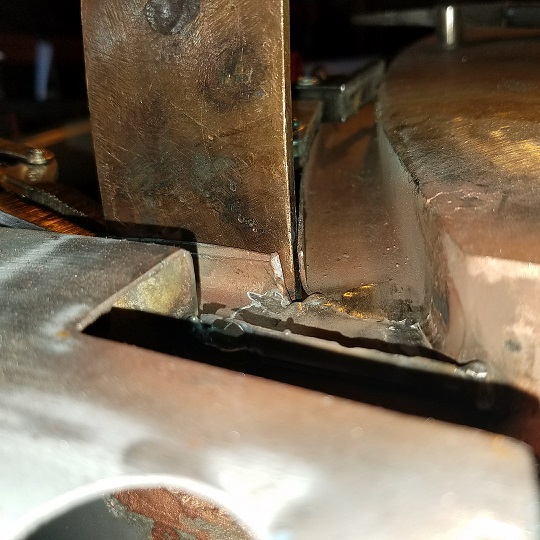 Wasn't in a picture taking mood while I was welding this in. (IMG:style_emoticons/default/dry.gif) a couple hours of tacking and straight edge work to make it come out flat. I'm reasonably happy with it. The tip end isn't quite finished. Needs to be flipped over and welded on the back side first. 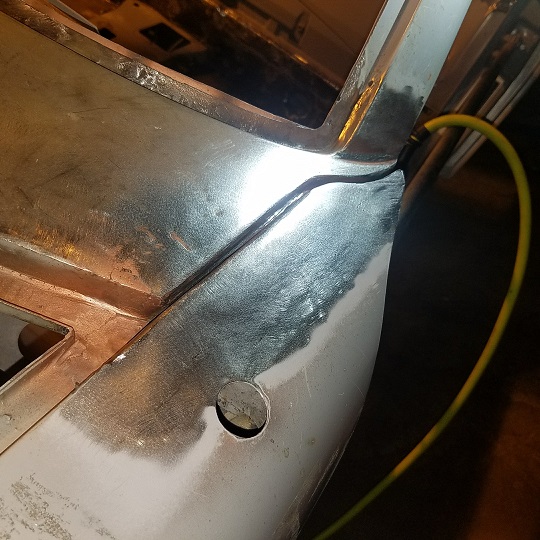 |
|
|
|
| cary |
Nov 18 2017, 07:04 AM
Post
#428
|
|
Advanced Member Group: Members Posts: 3,900 Joined: 26-January 04 From: Sherwood Oregon Member No.: 1,608 Region Association: Pacific Northwest |
While I'm welding in the left. Super In Law was finalizing the right skin.
 Pretty close. Needs to be slid to the front a bit. ................ 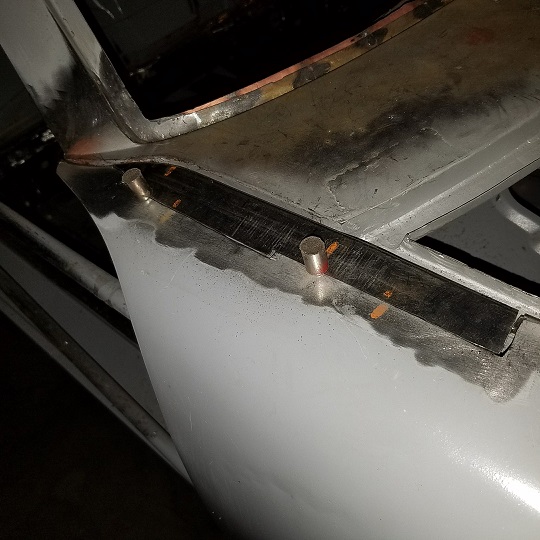 |
|
|
|
| tygaboy |
Nov 18 2017, 08:40 AM
Post
#429
|
|
914 Guru Group: Members Posts: 5,844 Joined: 6-October 15 From: Petaluma, CA Member No.: 19,241 Region Association: Northern California |
Always a pleasure watching the Dynamic Duo! (IMG:style_emoticons/default/sawzall-smiley.gif) (IMG:style_emoticons/default/smash.gif) (IMG:style_emoticons/default/welder.gif)
You're knocking it out, Mr. Cutter. Keep up the great work. |
 |
|
| cary |
Nov 18 2017, 10:42 AM
Post
#430
|
|
Advanced Member Group: Members Posts: 3,900 Joined: 26-January 04 From: Sherwood Oregon Member No.: 1,608 Region Association: Pacific Northwest |
It's a bugger trying to get both of those edges perfect and do a butt weld too.
In regards to weather sealing. That is one crappy design. Hopefully the new seam sealers will do a better job of standing the test of time. After 40 years, unless they were stored in a time capsule most cars have rust in the same area. The primary issue is to stop feeding the worm. Pretty tough place to work unless its on a rotisserie. I'm switching hats ............. Pitch man for 914 Rubber. PUT 914 RUBBER FENDER LINERS ON YOUR CAR. https://shop.914rubber.com/Fender-liners-se...riteReview=true |
|
|
|
| cary |
Nov 21 2017, 08:46 AM
Post
#431
|
|
Advanced Member Group: Members Posts: 3,900 Joined: 26-January 04 From: Sherwood Oregon Member No.: 1,608 Region Association: Pacific Northwest |
Tuesday 11/20/17
Snuck away from Rothsport after lunch and headed to Forest Grove. Finished up the under side of the left fender. 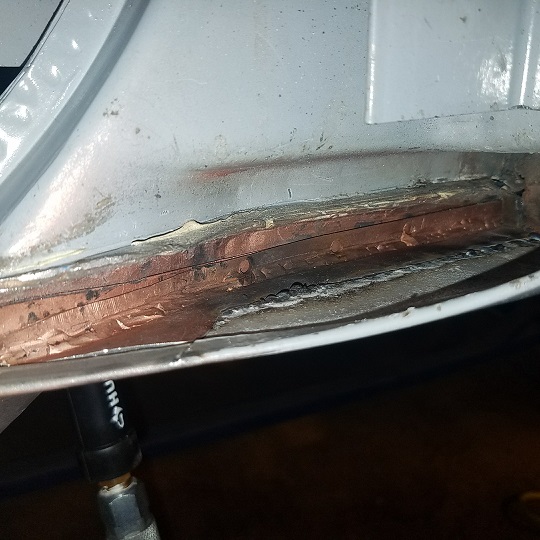  Left cold galvanized and piping fitted. (IMG:style_emoticons/default/biggrin.gif) 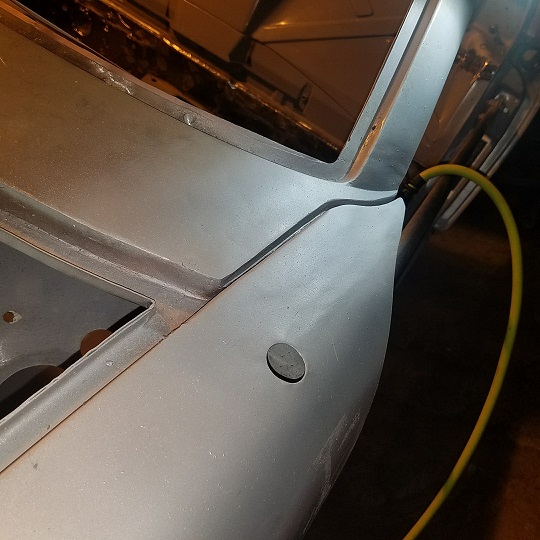 |
|
|
|
| cary |
Nov 21 2017, 08:56 AM
Post
#432
|
|
Advanced Member Group: Members Posts: 3,900 Joined: 26-January 04 From: Sherwood Oregon Member No.: 1,608 Region Association: Pacific Northwest |
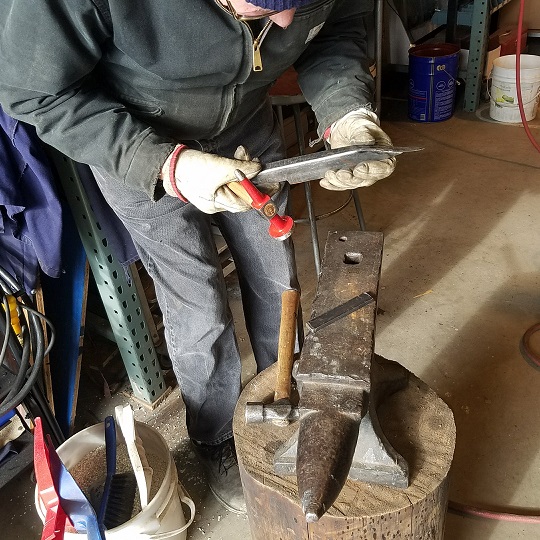
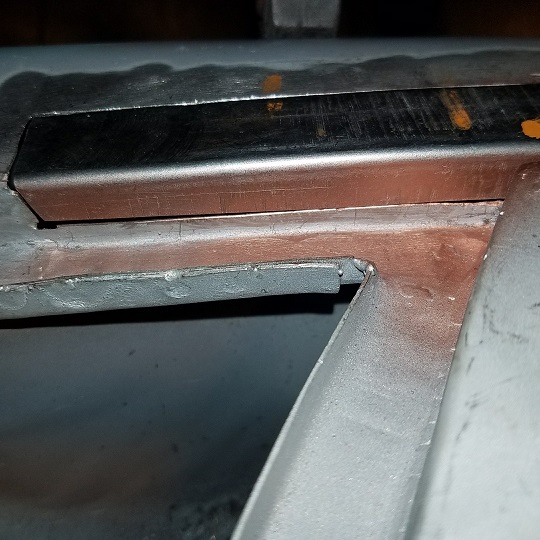
Here's the tools I use for hand leveling the free hand butt weld.
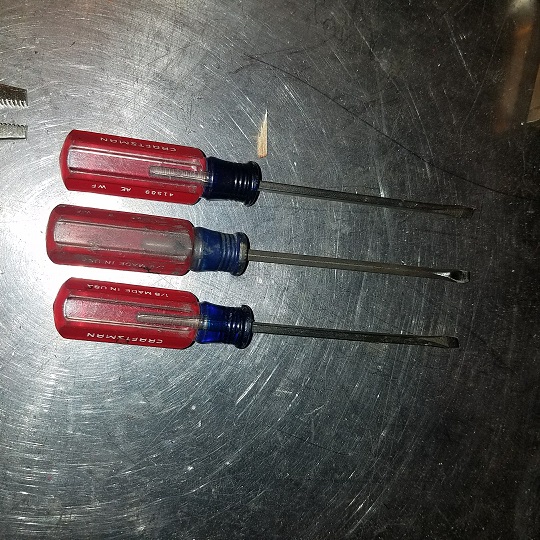 These are some of my favorite tools .......... 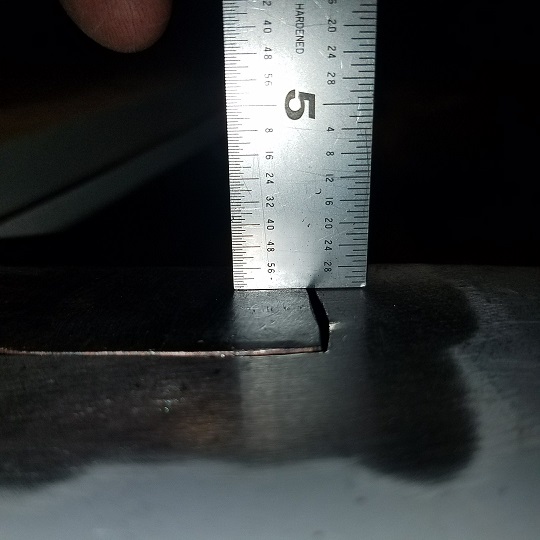 |
|
|
|
| cary |
Nov 21 2017, 09:15 AM
Post
#433
|
|
Advanced Member Group: Members Posts: 3,900 Joined: 26-January 04 From: Sherwood Oregon Member No.: 1,608 Region Association: Pacific Northwest |
Here's Super In Laws prep of the right side patch piece.
  Prepped for the duration. 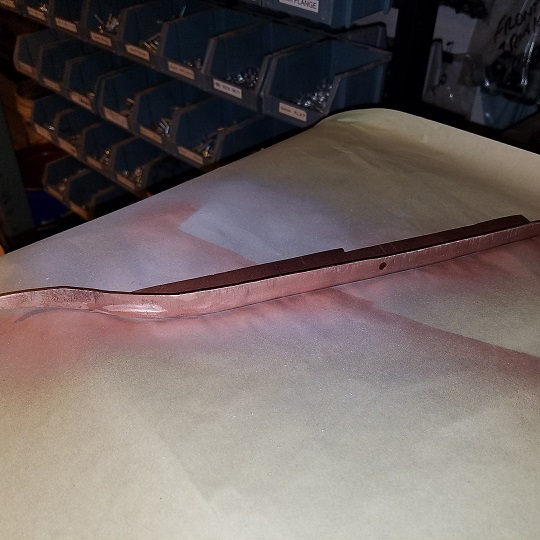 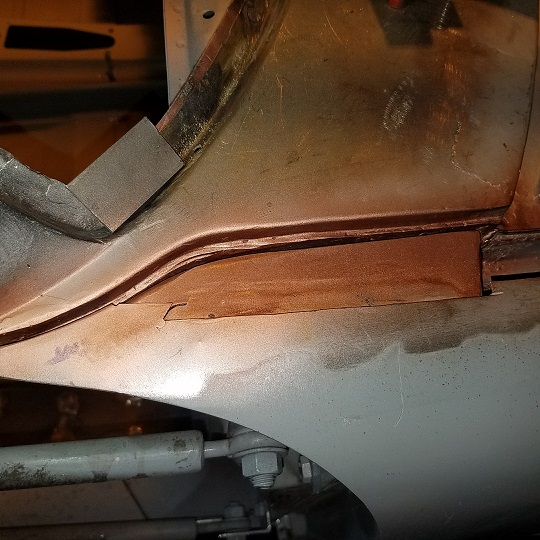 Turn up the stereo and away we go ............... 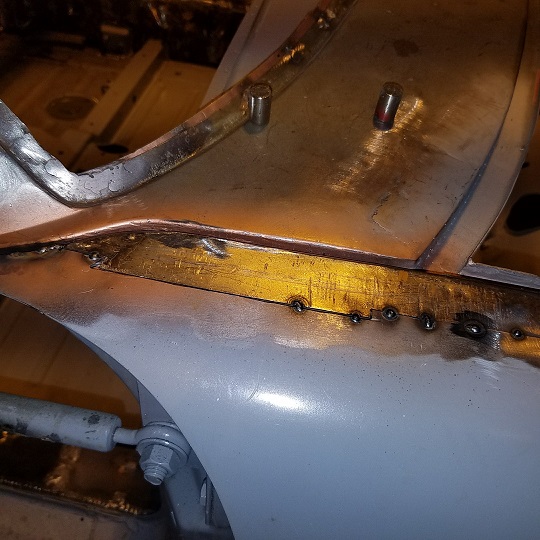 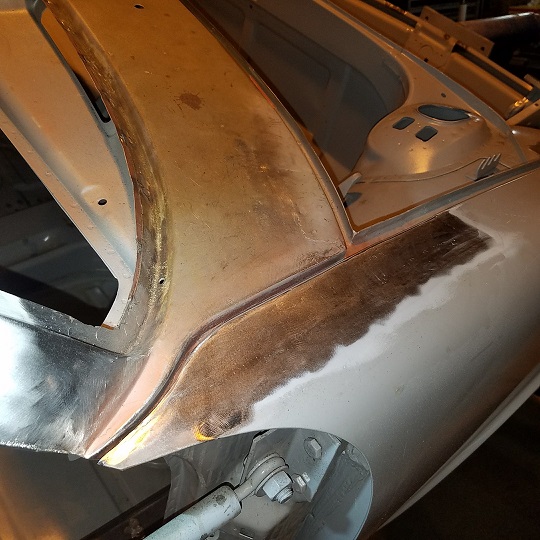 Stand the rotisserie vertical and weld in the channel. 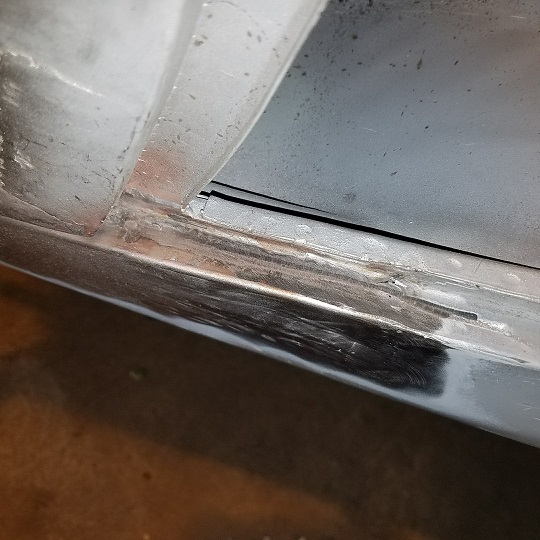 Flip it upside down and finish the bottom. 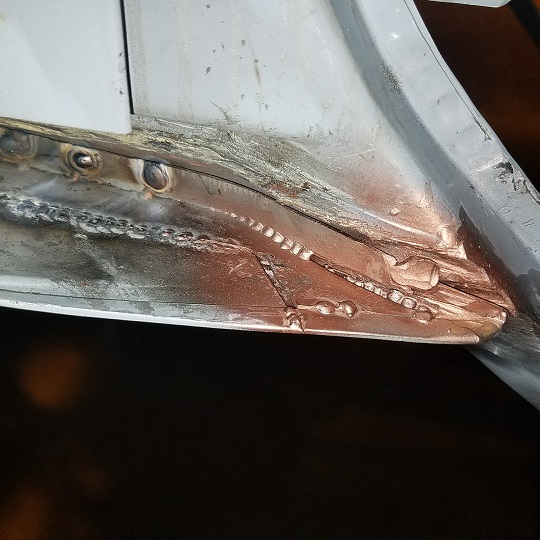 I'll add a finished shot next week Came out last night to get the cowl finished and I expect a full house this long holiday weekend. |
|
|
|
| tygaboy |
Nov 21 2017, 09:15 AM
Post
#434
|
|
914 Guru Group: Members Posts: 5,844 Joined: 6-October 15 From: Petaluma, CA Member No.: 19,241 Region Association: Northern California |
MiddleMotors. You can trust these guys. No matter the situation, they're on the level.
(IMG:style_emoticons/default/lol-2.gif) (EDIT: Cary, dang it! You're posting too fast! This was supposed to show up right after #432. You're killing my comedic flow...) (IMG:style_emoticons/default/happy11.gif) The repairs are looking great. You all have a great holiday! |
|
|
|
| cary |
Nov 23 2017, 12:28 AM
Post
#435
|
|
Advanced Member Group: Members Posts: 3,900 Joined: 26-January 04 From: Sherwood Oregon Member No.: 1,608 Region Association: Pacific Northwest |
Next ..................
Installing the MFI fuel filter mount. Didn't quite go as planned. George sent us a few shots from his 916. The shots made it look like it mounted to the MPS bracket. Not to be. Too short and the wrong angle. (IMG:style_emoticons/default/mad.gif) 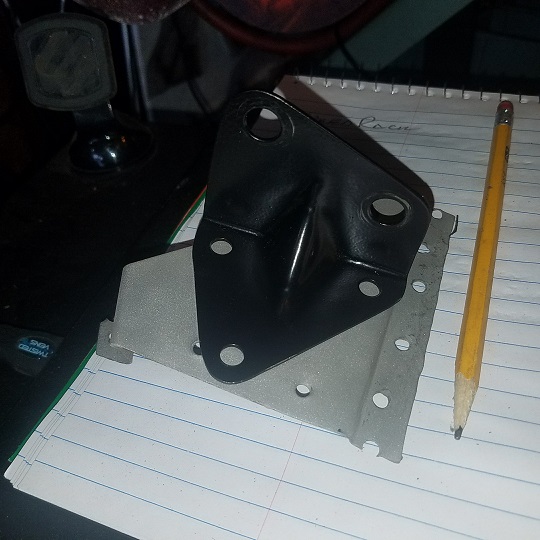 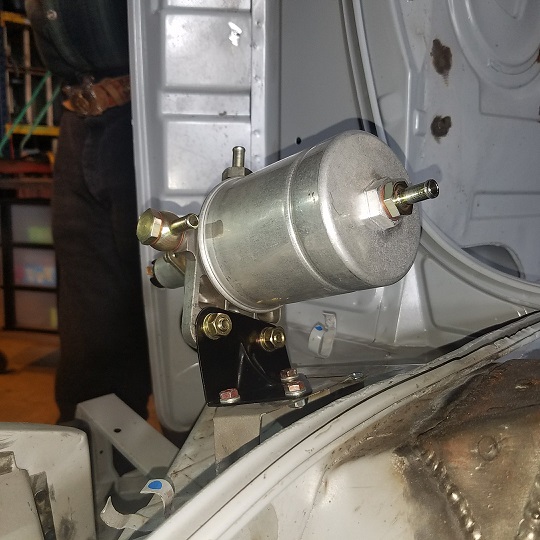 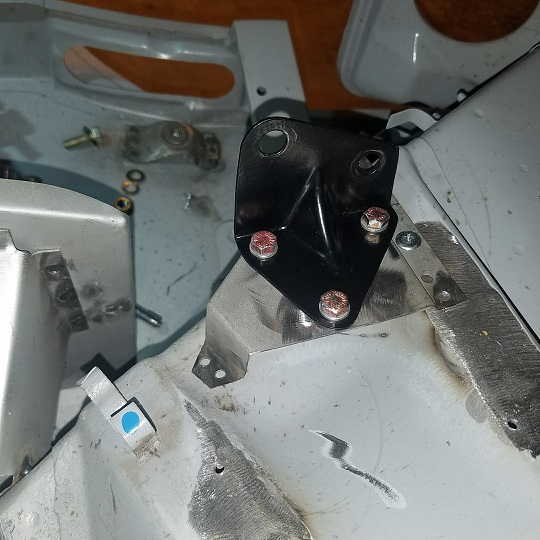 Not going to work ................. So I sent Super In Law off to create/design a new MiddleMotors MFI filter bracket. |
|
|
|
| cary |
Nov 23 2017, 12:47 AM
Post
#436
|
|
Advanced Member Group: Members Posts: 3,900 Joined: 26-January 04 From: Sherwood Oregon Member No.: 1,608 Region Association: Pacific Northwest |
Back to the project list.
Drilled the holes to give the 71 a little 73+ upgrade. Air deflectors. Mark stopped by with another new product install to work thru and record the installation instructions. I hope to get the first pair of the new air deflectors to test my holes with the new product. 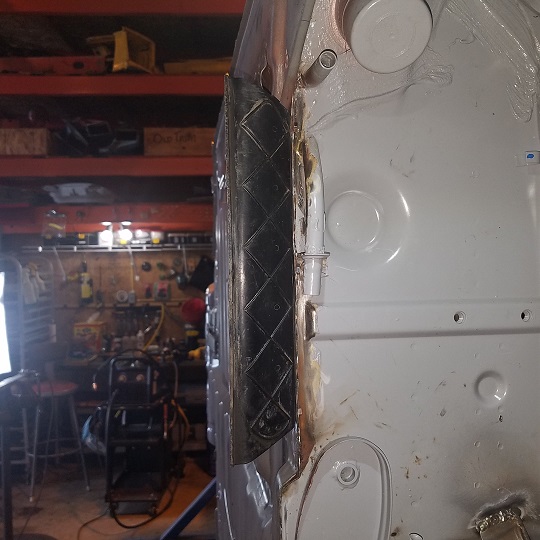 Next onto the 75+ fuel pump relocation. 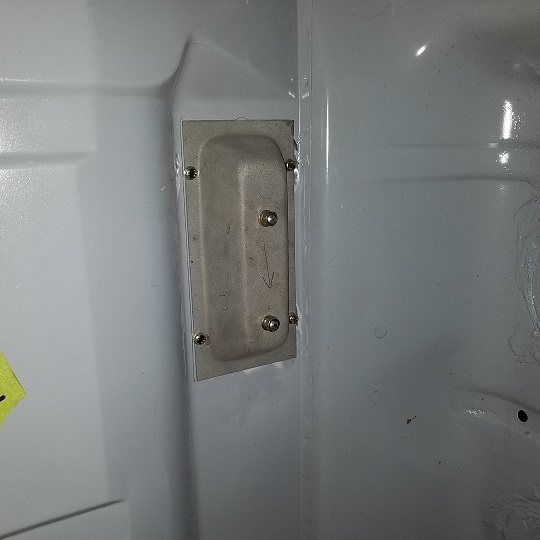 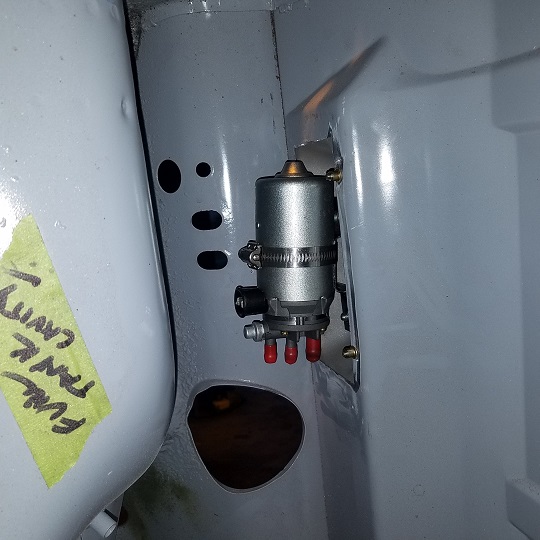 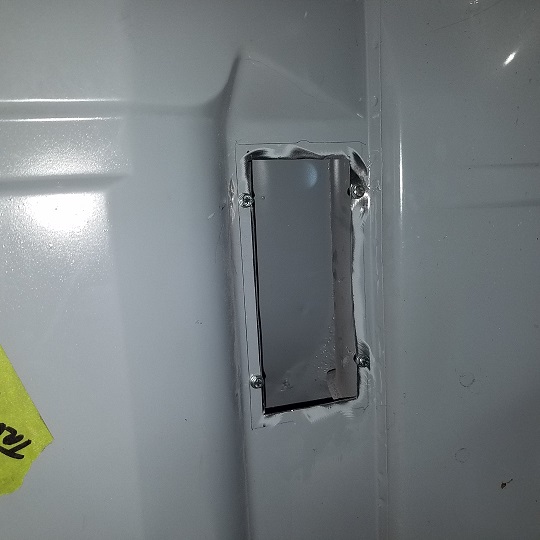 Pump comes out without any issues. Mounted with Metric nutserts. |
|
|
|
| cary |
Nov 23 2017, 12:54 AM
Post
#437
|
|
Advanced Member Group: Members Posts: 3,900 Joined: 26-January 04 From: Sherwood Oregon Member No.: 1,608 Region Association: Pacific Northwest |
1st Version of Super In Laws MFI fuel filter mounting plate.
 With factory mount. 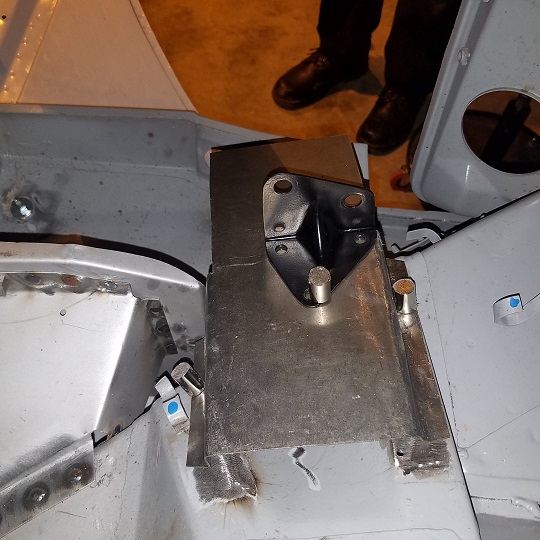 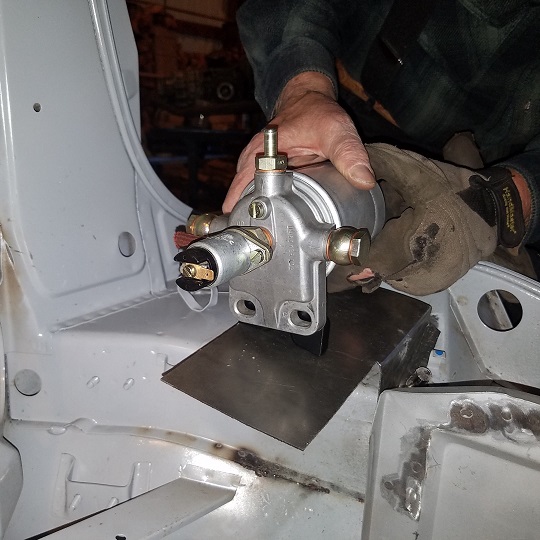 Didn't quite get the angles right. We'll get back to it on Friday. I've got a couple new ideas. |
|
|
|
| cary |
Nov 24 2017, 11:08 PM
Post
#438
|
|
Advanced Member Group: Members Posts: 3,900 Joined: 26-January 04 From: Sherwood Oregon Member No.: 1,608 Region Association: Pacific Northwest |
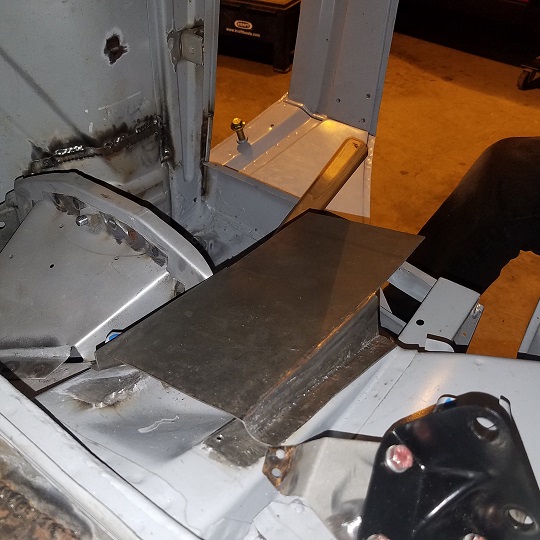
Back to the drawing board. Shorter and stiffer (16ga.) Version 2.
Still needs to be finished up. But gives you a good idea of where we're going. Not as high up as the factory 916. But I feel it will work well. 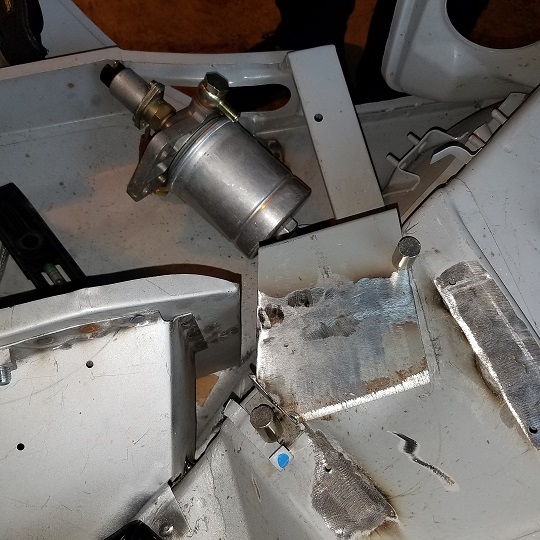 It will be stitched on the left. Three rosettes on the right. |
|
|
|
| cary |
Nov 25 2017, 09:56 AM
Post
#439
|
|
Advanced Member Group: Members Posts: 3,900 Joined: 26-January 04 From: Sherwood Oregon Member No.: 1,608 Region Association: Pacific Northwest |
Mad Scientists at work.
Woke up thinking is it tall enough to change the filter without taking it off ? Is it far enough away from the long for your hands to get around ? |
|
|
|
| raynekat |
Nov 25 2017, 03:25 PM
Post
#440
|
|
Advanced Member Group: Members Posts: 2,171 Joined: 30-December 14 From: Coeur d'Alene, Idaho Member No.: 18,263 Region Association: Pacific Northwest |
QUOTE(cary @ Nov 25 2017, 07:56 AM) Mad Scientists at work. Woke up thinking is it tall enough to change the filter without taking it off ? Is it far enough away from the long for your hands to get around ? Good thinking there Dr. Frankenstein.... ha. (IMG:style_emoticons/default/tongue.gif) |
|
|
|
|
2 User(s) are reading this topic (2 Guests and 0 Anonymous Users)
0 Members:

|
Lo-Fi Version | Time is now: 17th July 2026 - 11:33 PM |
Invision Power Board
v9.1.4 © 2026 IPS, Inc.