|
|
|
Porsche, and the Porsche crest are registered trademarks of Dr. Ing. h.c. F. Porsche AG.
This site is not affiliated with Porsche in any way. Its only purpose is to provide an online forum for car enthusiasts. All other trademarks are property of their respective owners. |
|
|

  |

| cary |
 Nov 25 2017, 11:10 PM Nov 25 2017, 11:10 PM
Post
#441
|
|
Advanced Member  Group: Members Posts: 3,900 Joined: 26-January 04 From: Sherwood Oregon Member No.: 1,608 Region Association: Pacific Northwest |
Version. 3.
Inch to inch and 1/2 taller. Spin the mounting platform around towards the intake stacks. |
   |

 
|
| cary |
Nov 27 2017, 08:58 AM
Post
#442
|
|
Advanced Member Group: Members Posts: 3,900 Joined: 26-January 04 From: Sherwood Oregon Member No.: 1,608 Region Association: Pacific Northwest |
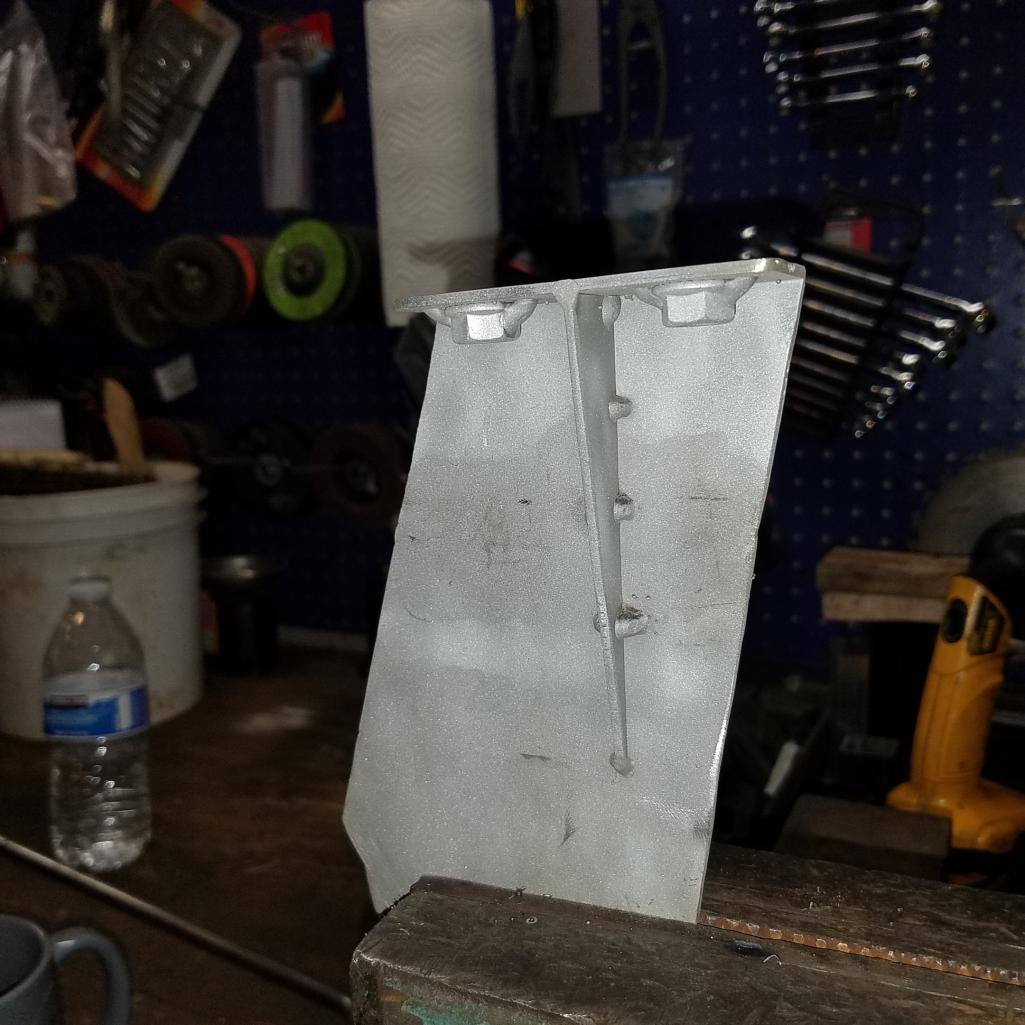
Here's Version #3.
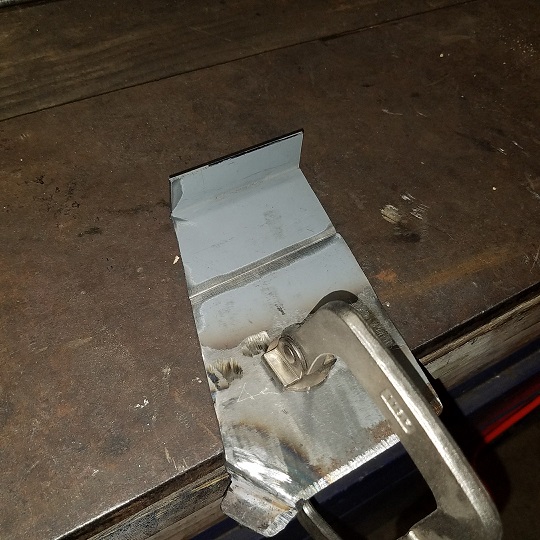 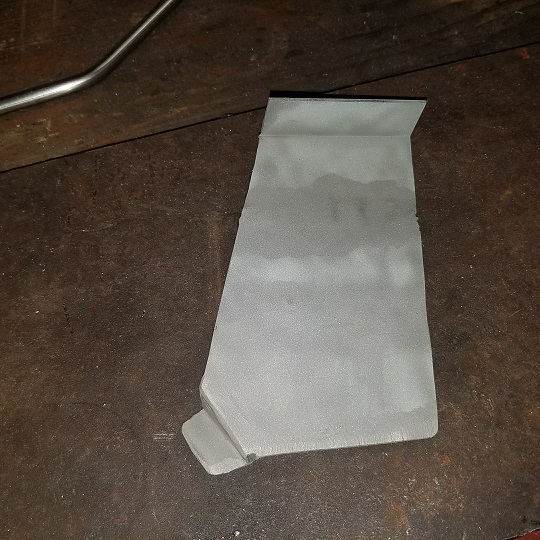 Mocked up. 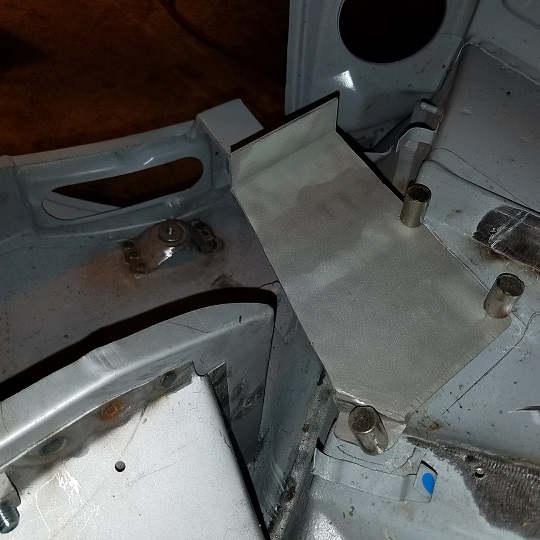 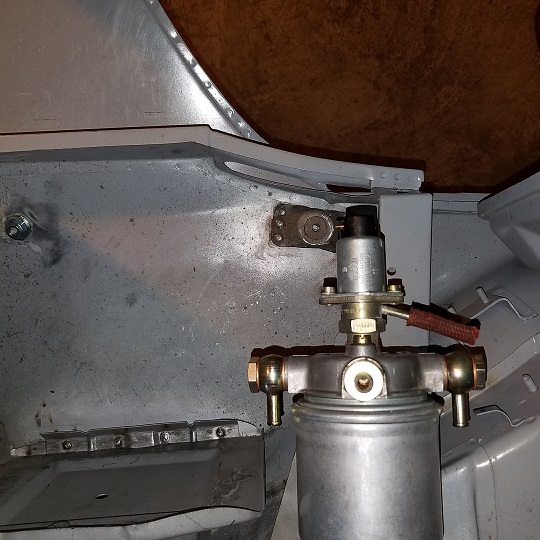 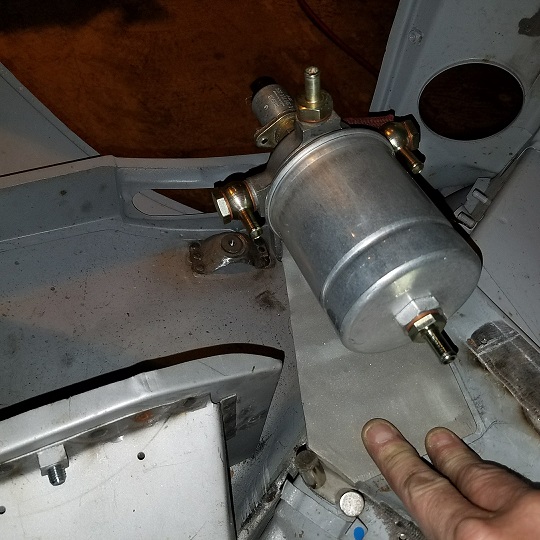 In the vice. Doug do you want me to weld on flange nuts to the bracket ?  Here's a couple factory shots .......... 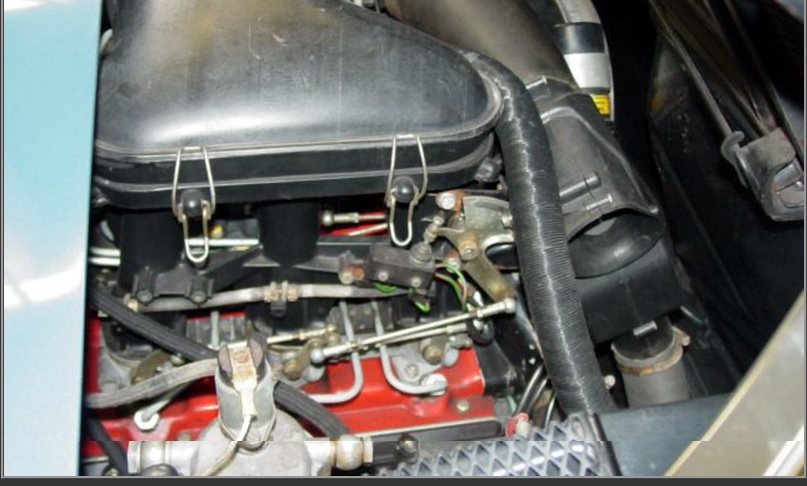 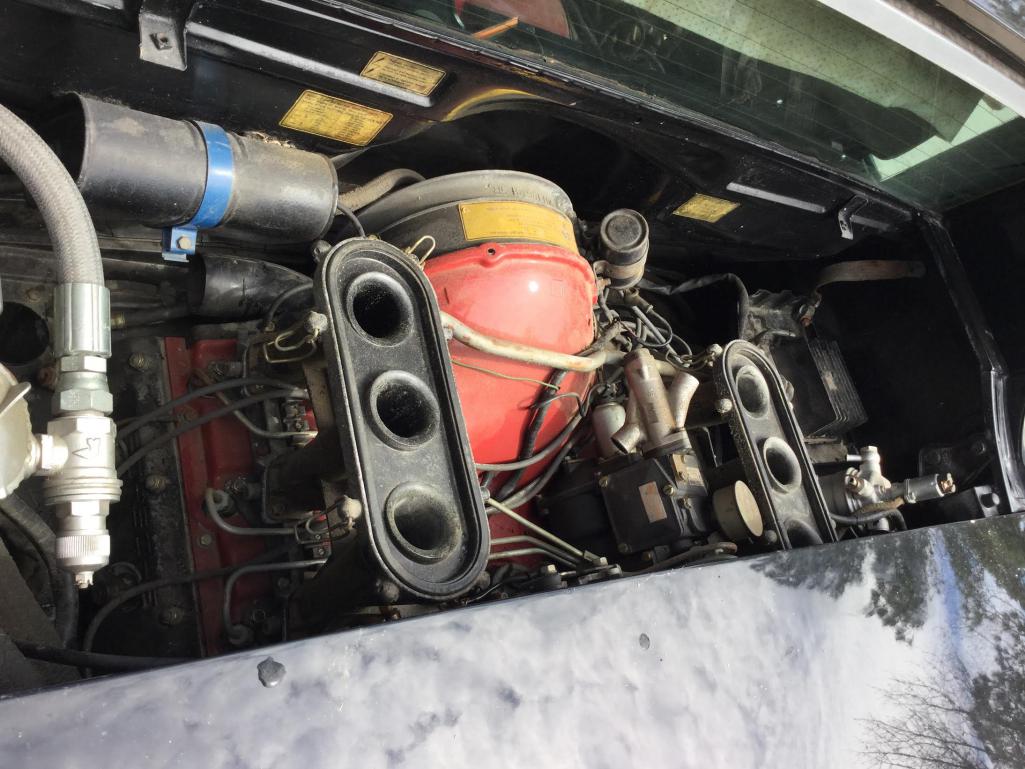 I think we're close ................... (IMG:style_emoticons/default/biggrin.gif) |
|
|
|
| raynekat |
Nov 27 2017, 01:26 PM
Post
#443
|
|
Advanced Member Group: Members Posts: 2,171 Joined: 30-December 14 From: Coeur d'Alene, Idaho Member No.: 18,263 Region Association: Pacific Northwest |
Guess so with the flange nuts. Looks like we're ditching the small factory angle bracket?
|
|
|
|
| cary |
Nov 29 2017, 01:23 PM
Post
#444
|
|
Advanced Member Group: Members Posts: 3,900 Joined: 26-January 04 From: Sherwood Oregon Member No.: 1,608 Region Association: Pacific Northwest |
Double Post
|
|
|
|
| cary |
Nov 29 2017, 04:04 PM
Post
#445
|
|
Advanced Member Group: Members Posts: 3,900 Joined: 26-January 04 From: Sherwood Oregon Member No.: 1,608 Region Association: Pacific Northwest |
  |
|
|
|
| cary |
Nov 29 2017, 04:13 PM
Post
#446
|
|
Advanced Member Group: Members Posts: 3,900 Joined: 26-January 04 From: Sherwood Oregon Member No.: 1,608 Region Association: Pacific Northwest |
 |
|
|
|
| raynekat |
Nov 29 2017, 10:25 PM
Post
#447
|
|
Advanced Member Group: Members Posts: 2,171 Joined: 30-December 14 From: Coeur d'Alene, Idaho Member No.: 18,263 Region Association: Pacific Northwest |
Looks like the 901 gearbox is already been completed.
Gordon Ledbetter is the wizard in anything Porsche transmission related. Don't have all the details yet, but this is the executive summary on the build. 904 mainshaft with a collection of short gearing to make the car accelerate Guard 930 LSD Side shift conversion All new bearings and seals I had previously sourced the 911 axle flanges that will mate up with the 911 CV's on the axles I did. Also with the help of 914World put together a 914-6 accelerator bell crank assembly. Luckily the early 901's have a hole already tapped for the bell crank shaft hidden beneath a plug.  |
|
|
|
| cary |
Nov 29 2017, 10:31 PM
Post
#448
|
|
Advanced Member Group: Members Posts: 3,900 Joined: 26-January 04 From: Sherwood Oregon Member No.: 1,608 Region Association: Pacific Northwest |
Quick pictures sent from my phone, un-resized.
Top one ............... stiffener added to the MFI filter bracket. Middle ........... rubber seal for rear fog light wires. Lower ................ created a new longer back bracket for the rear fog light. Doug can have it plated later. |
|
|
|
| raynekat |
Nov 29 2017, 10:37 PM
Post
#449
|
|
Advanced Member Group: Members Posts: 2,171 Joined: 30-December 14 From: Coeur d'Alene, Idaho Member No.: 18,263 Region Association: Pacific Northwest |
Other side projects I've been working on.
#1 - Second set of wheels and tires for auto crossing and the occasional track day or touring event. Scavenged up four 15x6 Fuchs in decent shape from varying years and sent these out to: http://www.porschewheelservices.com Turnaround was exceptional in only taking about 2 weeks to complete the work. I opted for an RSR finish. Again this wasn't a concours job, so could do my own thing. They look very nice. My only small complaint would be that the black paint needs a bit more gloss to it such that you get more of a satin finish. These are leaning more towards a flat black. Again, for my needs, they will do just fine. These wheels will likely get a set of Toyo Proxes RA1 205/50ZR15's on them. Tire Rack has these for about $170 ea. I've read they are plenty sticky and give good service life. 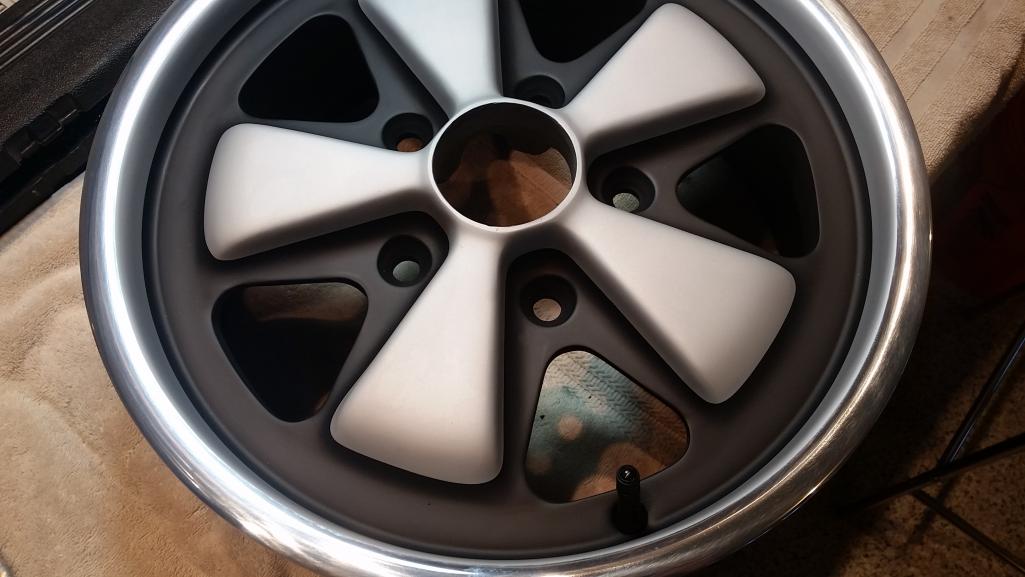 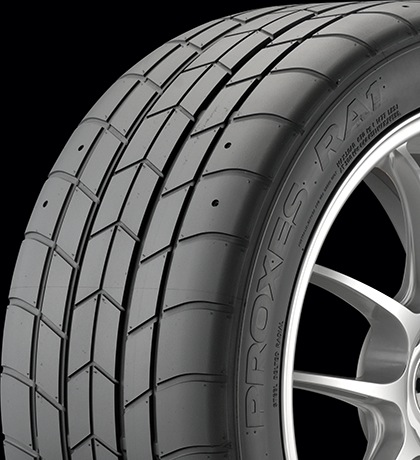 #2 - Putting together a pseudo 914-6 tool kit. I've located some of the items, some authentic, some reproduction (screwdrivers). I'll need the tool kit pouch, set of open end wrenches, lug nut wrench, pulley wrench, and a couple other misc items. But in the end, I'll have a serviceable tool kit that looks like it belongs in the boot. (IMG:style_emoticons/default/wink.gif) 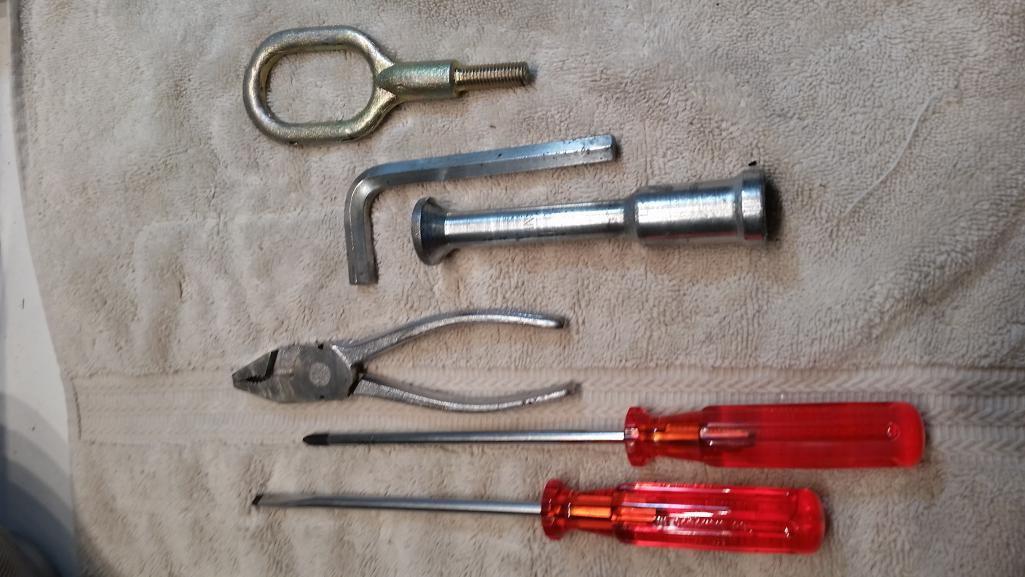 |
|
|
|
| cary |
Nov 29 2017, 11:08 PM
Post
#450
|
|
Advanced Member Group: Members Posts: 3,900 Joined: 26-January 04 From: Sherwood Oregon Member No.: 1,608 Region Association: Pacific Northwest |
Spent the remainder of the day with the hammers and dollies straightening out all the dents and creases that were uncovered after it was stripped.
    |
|
|
|
| cary |
Nov 29 2017, 11:12 PM
Post
#451
|
|
Advanced Member Group: Members Posts: 3,900 Joined: 26-January 04 From: Sherwood Oregon Member No.: 1,608 Region Association: Pacific Northwest |
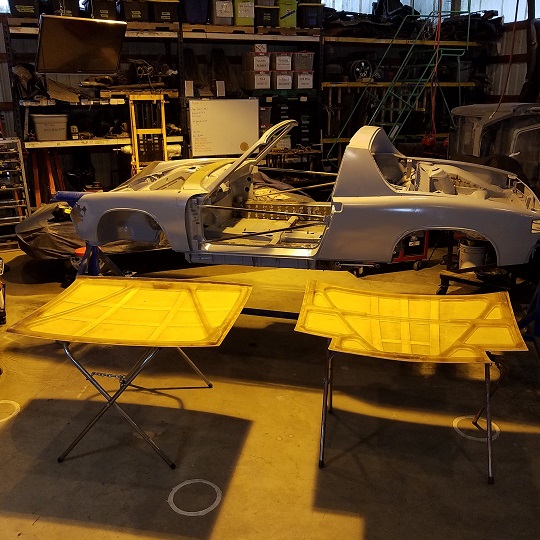
Tomorrow is the big day for my portion of the project. We're going to test fit the fiberglass hoods.
 |
|
|
|
| raynekat |
Nov 30 2017, 12:12 AM
Post
#452
|
|
Advanced Member Group: Members Posts: 2,171 Joined: 30-December 14 From: Coeur d'Alene, Idaho Member No.: 18,263 Region Association: Pacific Northwest |
QUOTE(cary @ Nov 29 2017, 09:12 PM)  Tomorrow is the big day for my portion of the project. We're going to test fit the fiberglass hoods. Probably the day I've been dreading the most.... Paid a mint for these supposedly well made exact copies of the GT hoods. I'll be pretty pxxxx'd off if they don't fit all that well and require some major reengineering. These things are paper thin and very lightweight. Just the thing for a daily driver, eh what? The plan is to leave the underneaths bare fiberglass so they'll tie in with the engine shroud and backs of my custom tartan plaid seats from GTS. Not sure if the tops will be painted body color (light ivory) or.... some close complimentary color? I'll leave that decision to the time the car is in the paint shop and we can do some test panels. |
|
|
|
| falcor75 |
Nov 30 2017, 01:39 AM
Post
#453
|
|
Senior Member Group: Members Posts: 1,579 Joined: 22-November 12 From: Sweden Member No.: 15,176 Region Association: Scandinavia |
With my fibreglass lids I've found that the front and rear bulkhead seals make the lids bend. I'm not using the front bulkhead seal and I've had to trim the rear one in height. Do check the fit with the seals inplace before you go to paint. (IMG:style_emoticons/default/bye1.gif)
|
|
|
|
| raynekat |
Dec 1 2017, 05:42 PM
Post
#454
|
|
Advanced Member Group: Members Posts: 2,171 Joined: 30-December 14 From: Coeur d'Alene, Idaho Member No.: 18,263 Region Association: Pacific Northwest |
Cary and I had a good day going over the car to see if there were any last little items to take care of.
Not many to mention. We spent some time mounting up the fiberglass front and rear bonnets. The fit on the rear was "ok" with one corner needing some tuning for sure. The front lid looked pretty good on most counts. Again, these lids are paper thin and light as a hummingbird. The filler, primer and paint will be kept to the bare minimums. Nothing on the bottom sides except possibly a single clear coat to keep the raw fiberglass happy. So next will be to get the chassis back to the blaster/primer guy (Leonard Soda Blasting here locally in Portland) to get all of Cary's raw metal work blasted and re epoxy primed. After that we'll (or Cary) will spend a couple of days in the blaster's heated shop seam sealing the entire chassis. Then it will be off to the paint shop for body work and a few coats of L80E followed by wet sanding and polishing. A major hurdle, the metal work, is finally complete. Thanks to Cary and Super-in-Law for all their great work on my car. Guess I'll be Middlemotor's 1st major "rustoration". |
|
|
|
| raynekat |
Dec 1 2017, 05:54 PM
Post
#455
|
|
Advanced Member Group: Members Posts: 2,171 Joined: 30-December 14 From: Coeur d'Alene, Idaho Member No.: 18,263 Region Association: Pacific Northwest |
Not sure if I ever showed the seats that are going into this car?
These were put together by Stefan with GTS Classics. I can't recommend him enough for the customer service, product quality and ease to work with. I picked their Watkins Glen model as it most resembled the factory seat in silhouette or profile so they'll fit into the back pad seamlessly. I opted for the raw fiberglass finish on the back (vs the standard black paint) to coordinate with the undersides of the bonnets and the engine cooling shroud. The only other option I checked was the manual lumbar support with supplied pump bulb. Definitely a "sport" seat with nice bolstering. The tartan plaid is my own choosing. It's called Robertson Modern Hunting tartan. I thought the white stripe would compliment the light ivory body color. I'm also running the dark green and blue through the car in various places....seatbelts, Porsche stripes on the side, carpeting accents, etc. The seats are quite comfortable.  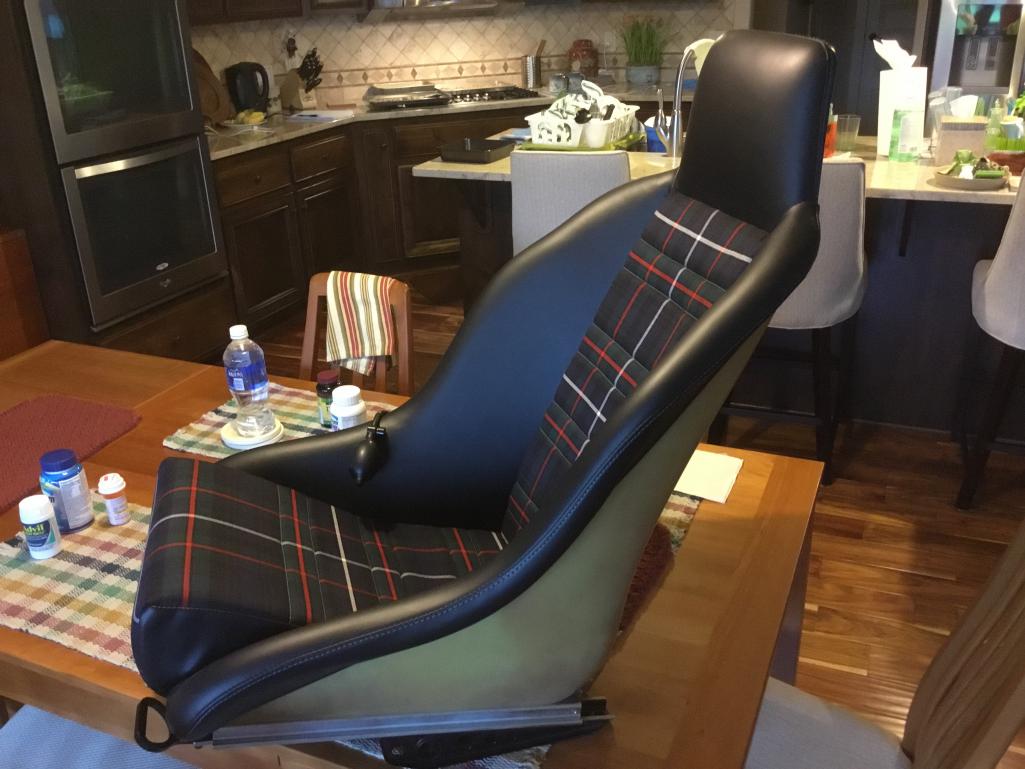 |
|
|
|
| raynekat |
Dec 1 2017, 05:58 PM
Post
#456
|
|
Advanced Member Group: Members Posts: 2,171 Joined: 30-December 14 From: Coeur d'Alene, Idaho Member No.: 18,263 Region Association: Pacific Northwest |
Some better views of the raw fiberglass seat shells.
And the fully restored seat base, hardware. The mounting flanges on the bottom of the seat bases took quite a bit of filing and sanding to get the seat sliders to sit flat and at the correct distance apart such that they would move forward and backward freely. Something you never plan for when you initially make a purchase like this. All these aftermarket fabricated pieces definitely require a certain amount of "fine tuning" as Cary would say. 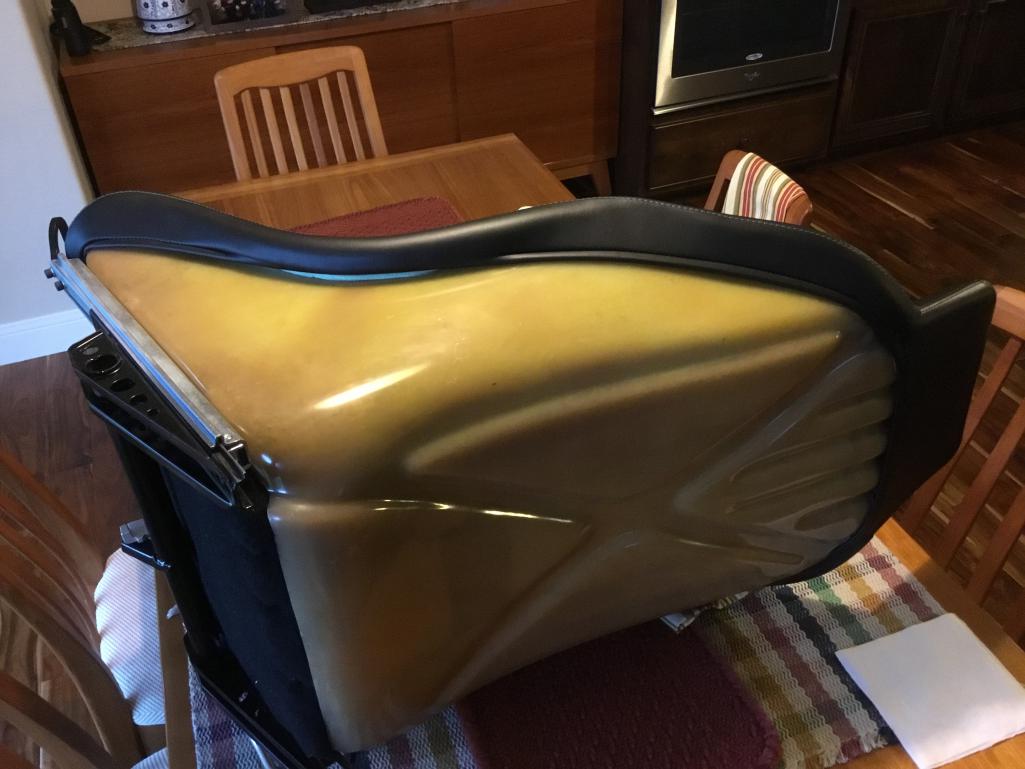 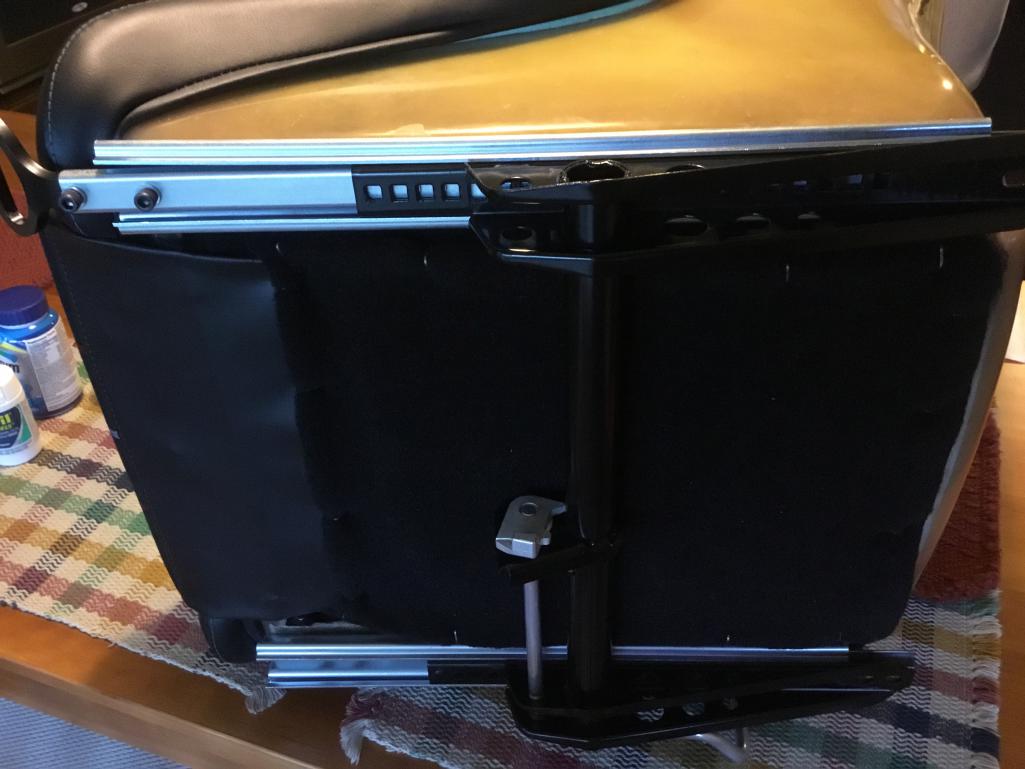 |
|
|
|
| cary |
Dec 3 2017, 10:10 AM
Post
#457
|
|
Advanced Member Group: Members Posts: 3,900 Joined: 26-January 04 From: Sherwood Oregon Member No.: 1,608 Region Association: Pacific Northwest |
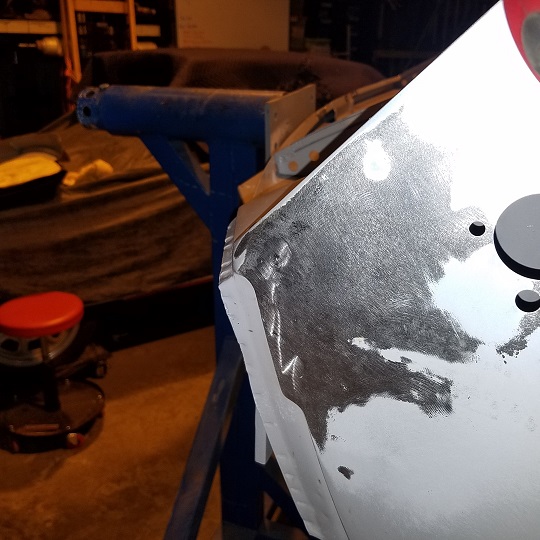
As Doug commented, the project is winding down. Yesterday I pulled out all the detached sheet metal for inspection. Looks like my Miller 141 will get a little work.
Doug you would have loved the two hammer and dolly work on the front trunk, almost comical. Got a good start before I started working with Mike.  Eyebrows and lids are OK. 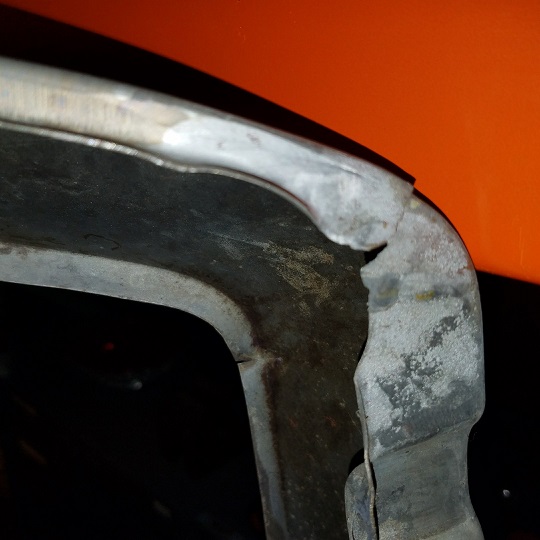 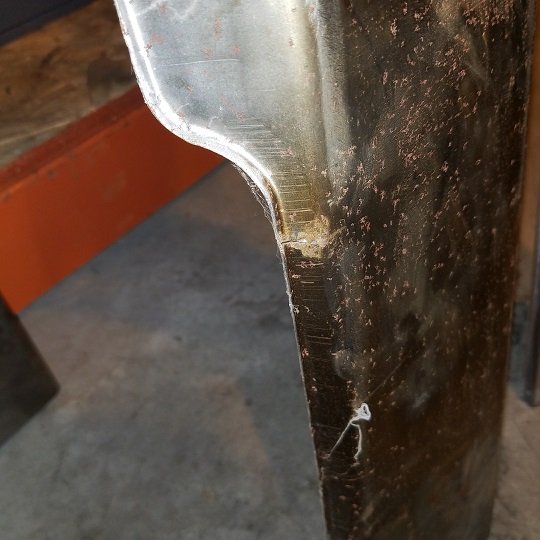 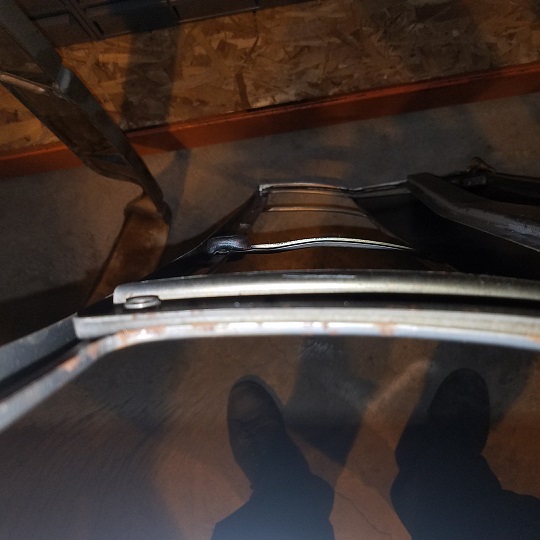 The engine lid has a little wowy in it. Super In Law continues with the rebuilding/repair of the front valence. 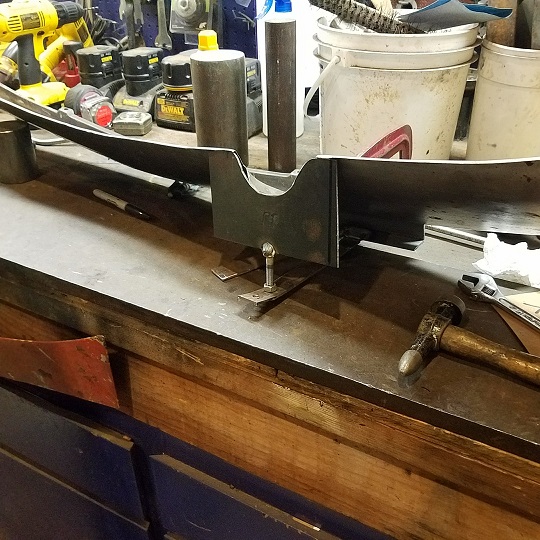 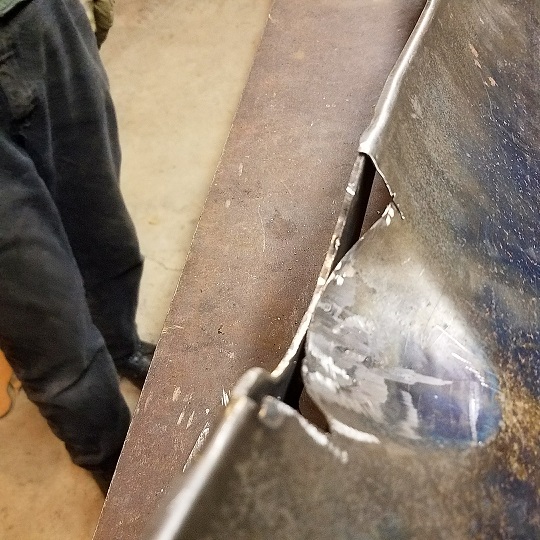 Jig first, then we'll cut an oak buck for the hammer work. |
|
|
|
| raynekat |
Dec 6 2017, 05:15 PM
Post
#458
|
|
Advanced Member Group: Members Posts: 2,171 Joined: 30-December 14 From: Coeur d'Alene, Idaho Member No.: 18,263 Region Association: Pacific Northwest |
So my early S calipers are finally done.
PMB Performance put the smack down on them with a very different finish. First one on the block with a set like these. Anodized black vs the typical clear or yellow. Reminds me of a baby 930 caliper w/o the fins. I'm very happy with how they turned out. Should fit very well with my narrow car R Gruppe build direction that I'm going. The only con is that I now have to send my freshly built 914-6GT calipers back to them to get a matching finish for the rear of the car. 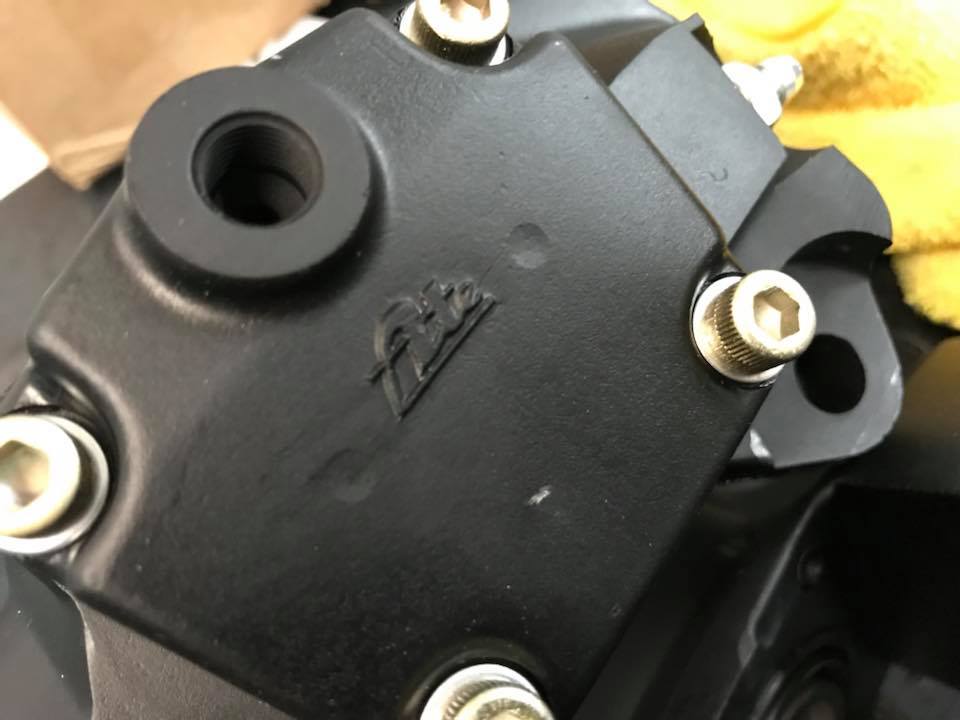 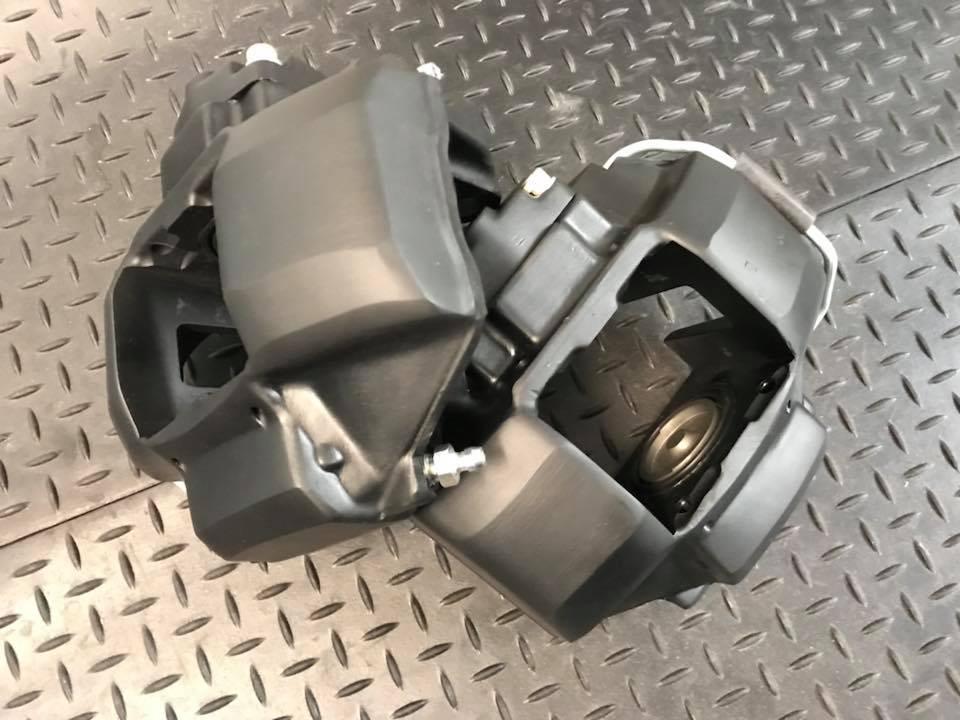 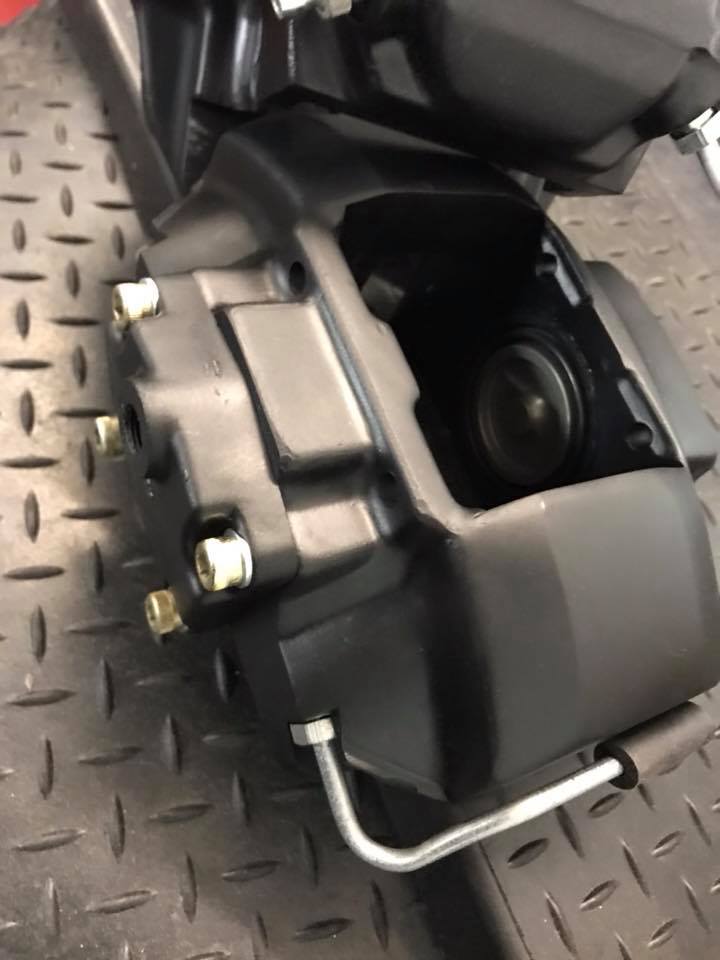 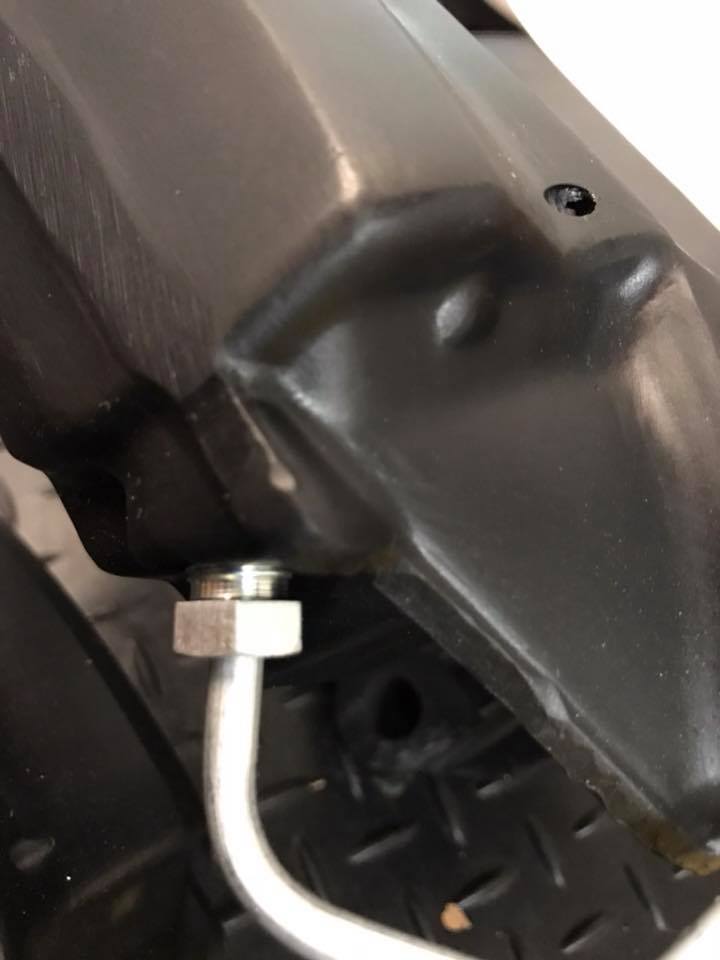 |
|
|
|
| Cairo94507 |
Dec 7 2017, 07:34 AM
Post
#459
|
|
Michael Group: Members Posts: 10,706 Joined: 1-November 08 From: Auburn, CA Member No.: 9,712 Region Association: Northern California |
Those do look cool. (IMG:style_emoticons/default/beerchug.gif)
|
|
|
|
| cary |
Dec 7 2017, 09:42 AM
Post
#460
|
|
Advanced Member Group: Members Posts: 3,900 Joined: 26-January 04 From: Sherwood Oregon Member No.: 1,608 Region Association: Pacific Northwest |
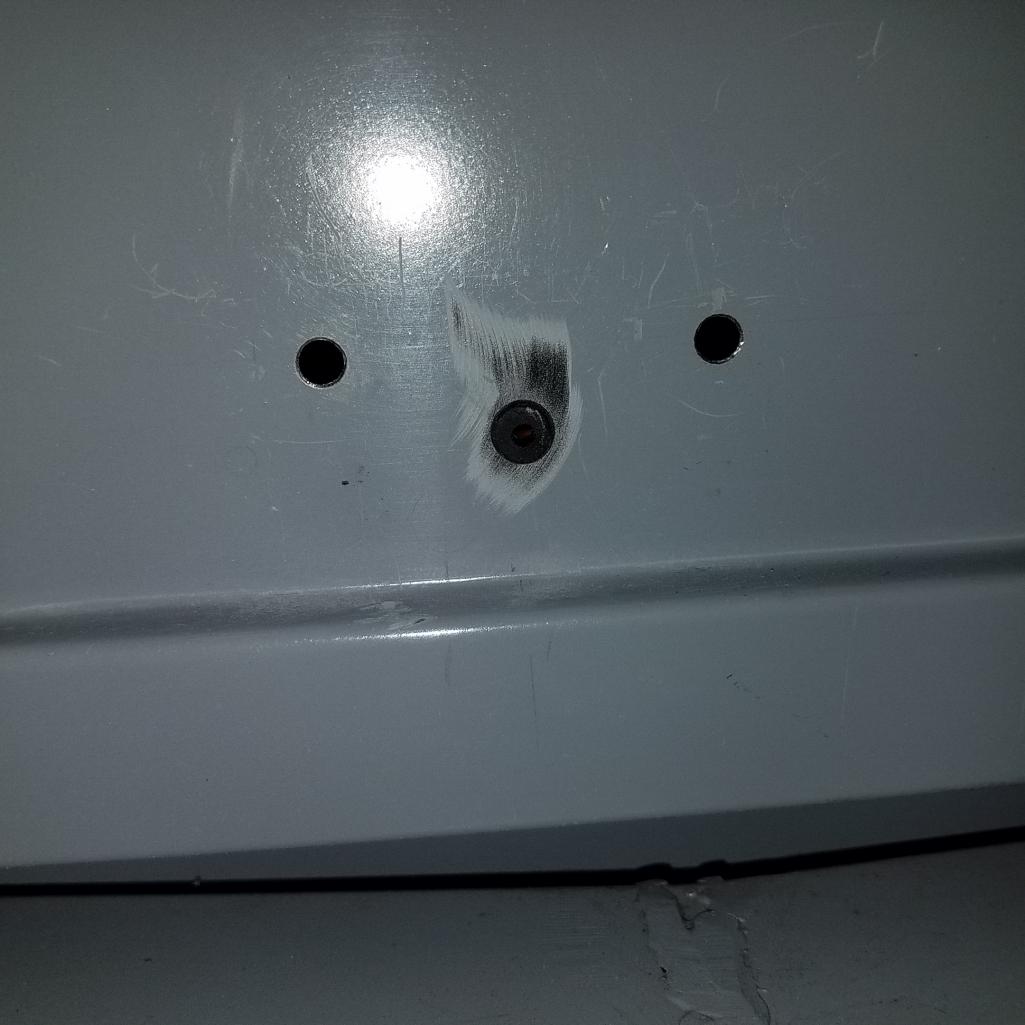
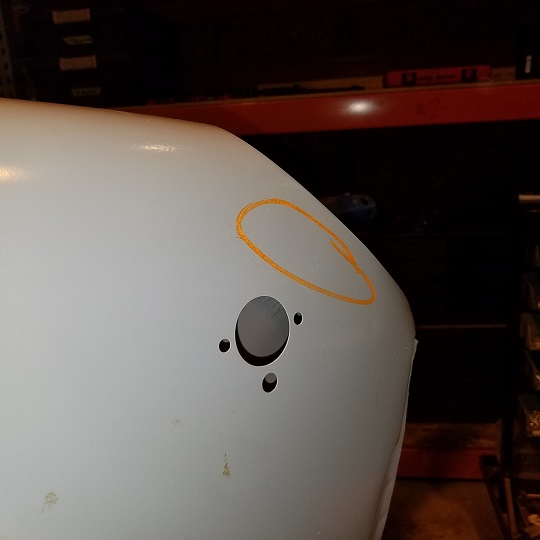
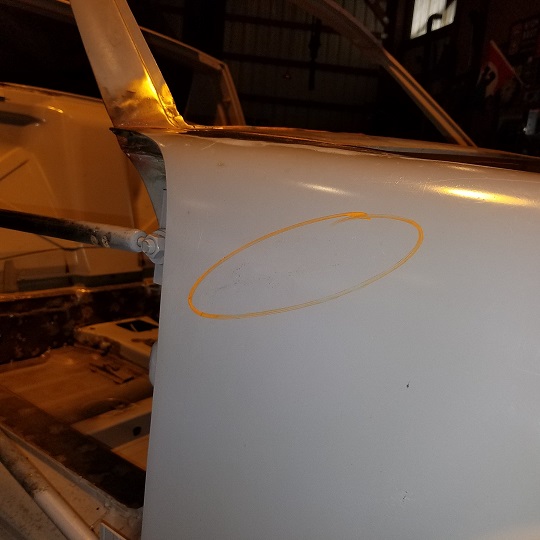
Last couple items before sending her back to the paint booth for epoxy primer touch up.
Drilled holes for the Tangerine Racing firewall bushing. 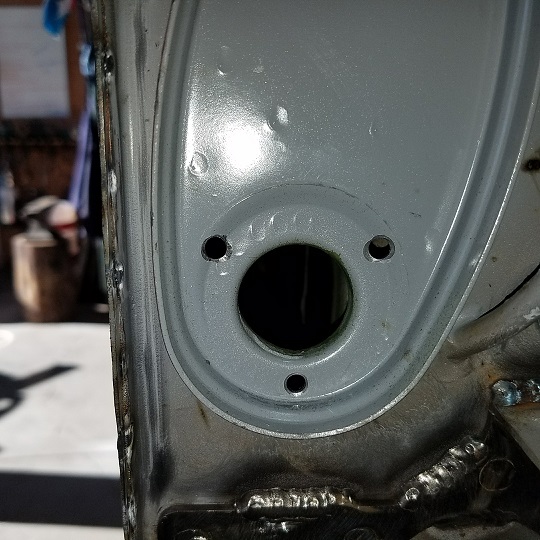 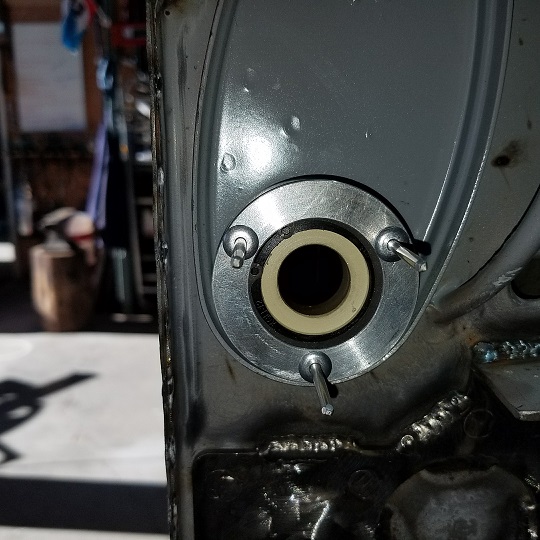 Cruised around and tuned up the excessive gobs of seam sealer. 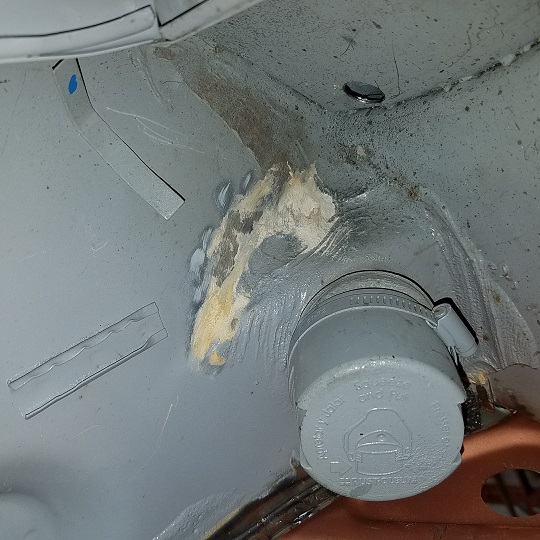 Now you see it, now you don't.  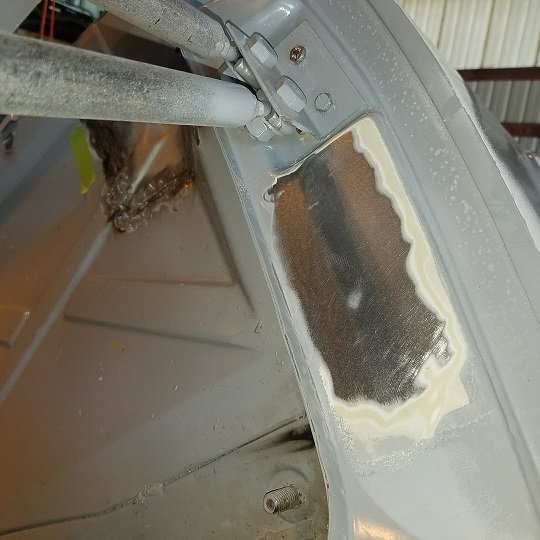 Doug has a new one ready to go after paint. All but done with the tub. I'll do just a little more hammer and dolly work on the wrinkles that were bondoed under the paint. |
|
|
|
|
1 User(s) are reading this topic (1 Guests and 0 Anonymous Users)
0 Members:

|
Lo-Fi Version | Time is now: 18th July 2026 - 12:18 AM |
Invision Power Board
v9.1.4 © 2026 IPS, Inc.