|
|
|
Porsche, and the Porsche crest are registered trademarks of Dr. Ing. h.c. F. Porsche AG.
This site is not affiliated with Porsche in any way. Its only purpose is to provide an online forum for car enthusiasts. All other trademarks are property of their respective owners. |
|
|

  |

| raynekat |
 Jul 5 2018, 12:01 AM Jul 5 2018, 12:01 AM
Post
#581
|
|
Advanced Member  Group: Members Posts: 2,171 Joined: 30-December 14 From: Coeur d'Alene, Idaho Member No.: 18,263 Region Association: Pacific Northwest |
For grins, I thought it might be good idea to "blow out" my heater tubes that run down the longitudinals.
I don't know why? But I just thought maybe some dust might come out. I just used the shop vac by putting the hose in the discharge. This is what blew out of the driver's side. Nice old shop rag and a bunch of dust and dirt.. Yuck! The passenger side was pretty clean by comparison. Glad that's not in there when I run my heat or defrost in the future. 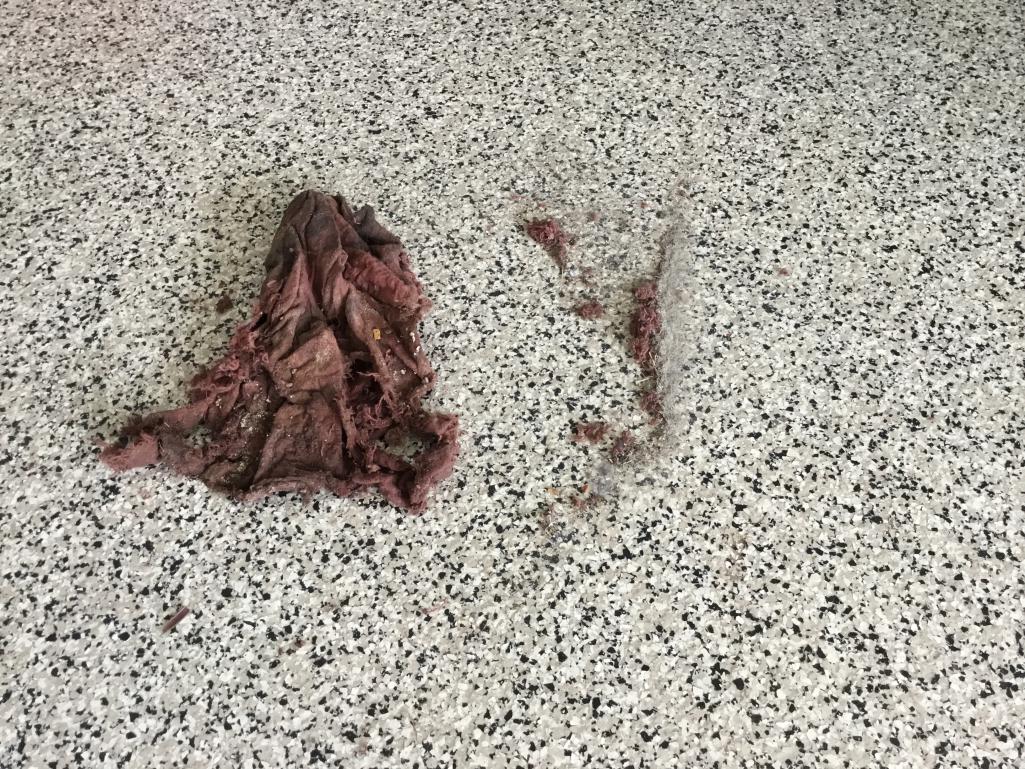 |
   |

 
|
| raynekat |
Jul 5 2018, 12:04 AM
Post
#582
|
|
Advanced Member Group: Members Posts: 2,171 Joined: 30-December 14 From: Coeur d'Alene, Idaho Member No.: 18,263 Region Association: Pacific Northwest |
Front of the car with the fog lights, horns, valence, etc installed.
Not much else to comment on here.... 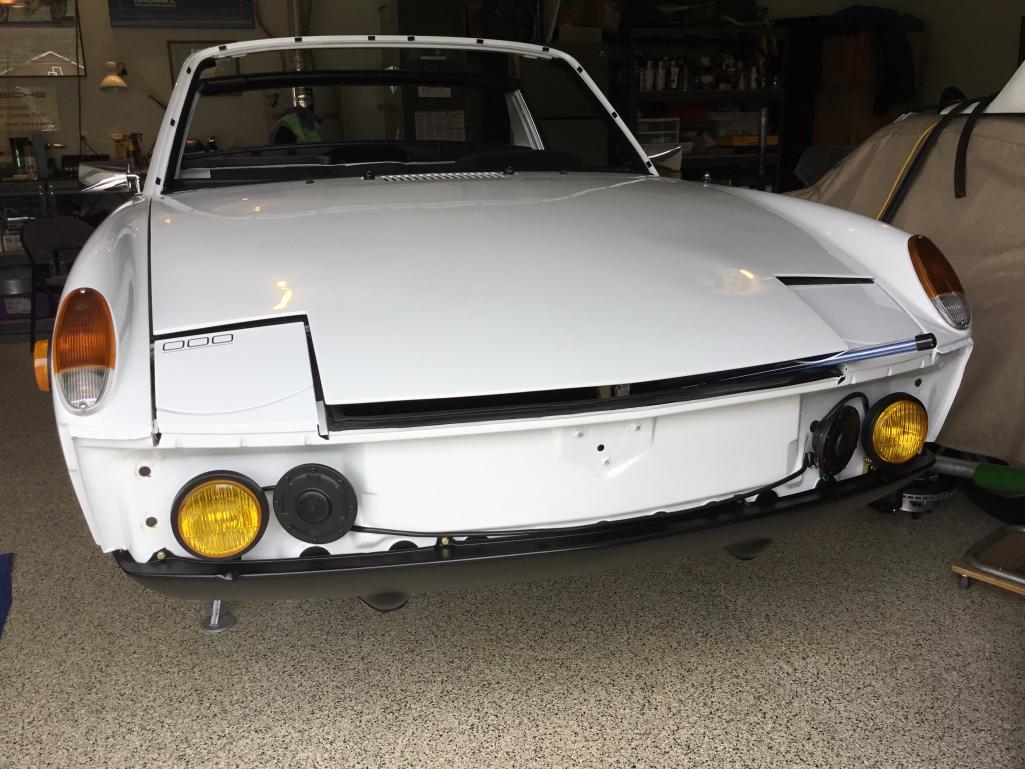 |
|
|
|
| raynekat |
Jul 5 2018, 12:05 AM
Post
#583
|
|
Advanced Member Group: Members Posts: 2,171 Joined: 30-December 14 From: Coeur d'Alene, Idaho Member No.: 18,263 Region Association: Pacific Northwest |
Sometimes you have to be creative when you're working on your own and you need a 2nd set of hands.
My wife is busy enough with our twins, so I don't bother her too much. The bungee method just came to mind and worked great. Git er done! 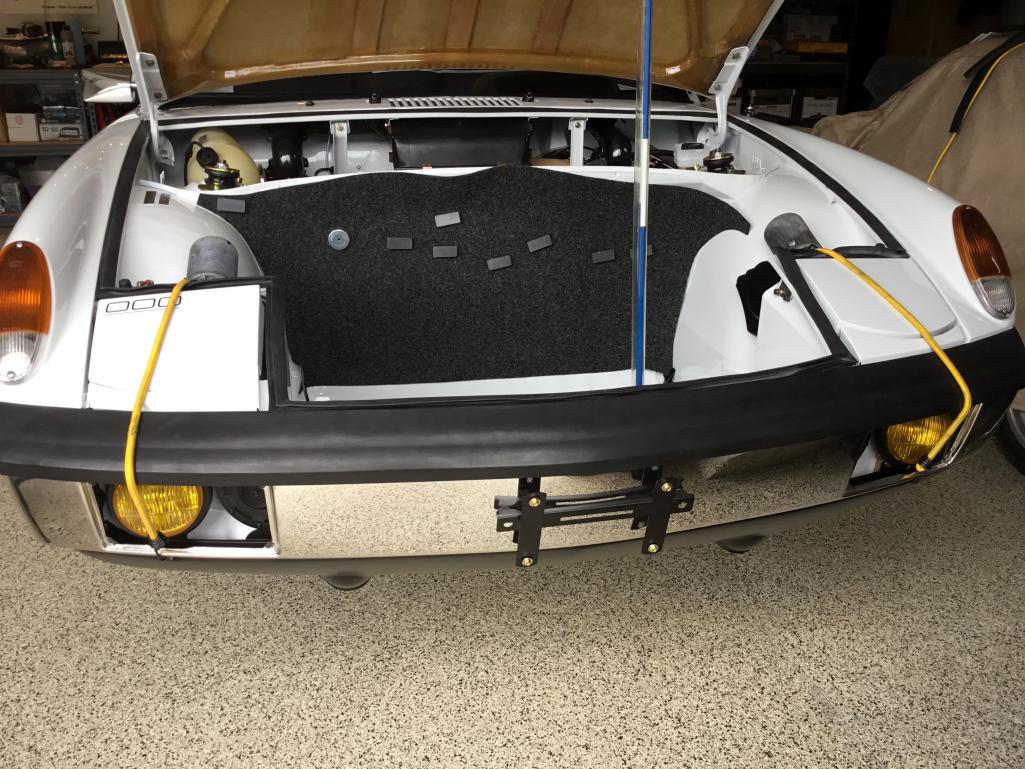 |
|
|
|
| raynekat |
Jul 5 2018, 12:08 AM
Post
#584
|
|
Advanced Member Group: Members Posts: 2,171 Joined: 30-December 14 From: Coeur d'Alene, Idaho Member No.: 18,263 Region Association: Pacific Northwest |
Front end all buttoned up....ready for killing bugs.
Those are the Harrington Group stainless steel bumpers BTW. They look decent enough. You can tell they aren't quite chrome, but they should last better in the long run. 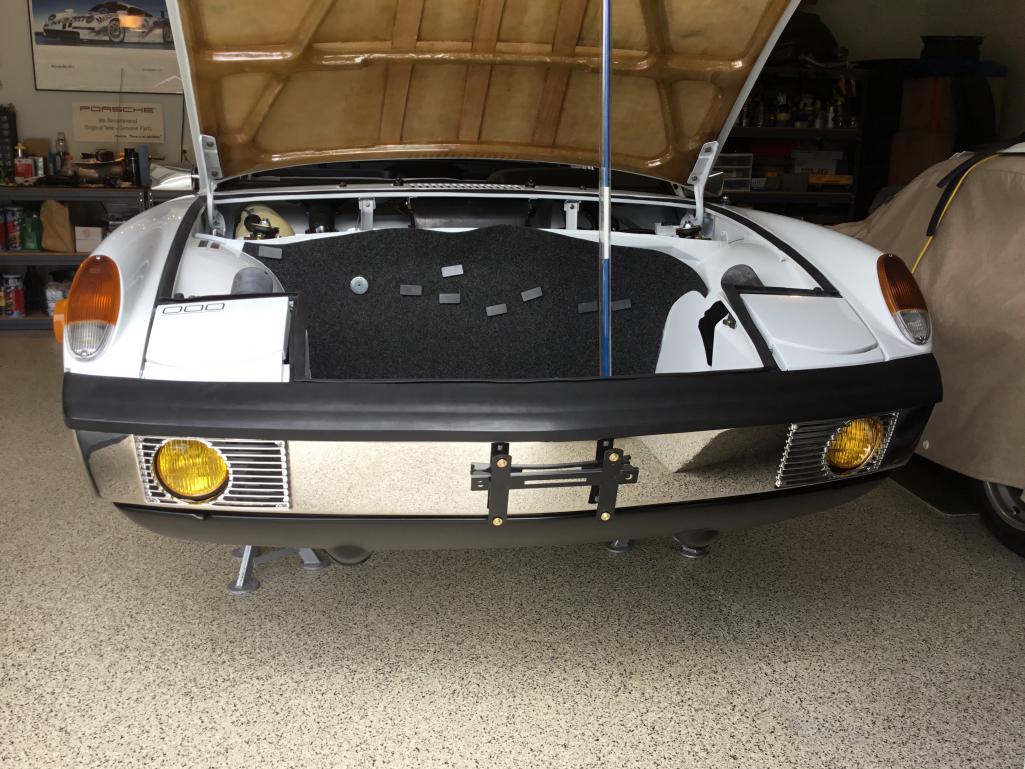 |
|
|
|
| raynekat |
Jul 5 2018, 12:12 AM
Post
#585
|
|
Advanced Member Group: Members Posts: 2,171 Joined: 30-December 14 From: Coeur d'Alene, Idaho Member No.: 18,263 Region Association: Pacific Northwest |
Decided to use extreme Dynamat on the doors.
 And superlite Dynamat on the floors. Very light weight. The extreme Dynamat wasn't all the much heavier to tell the truth. Really makes a difference when you shut the doors. 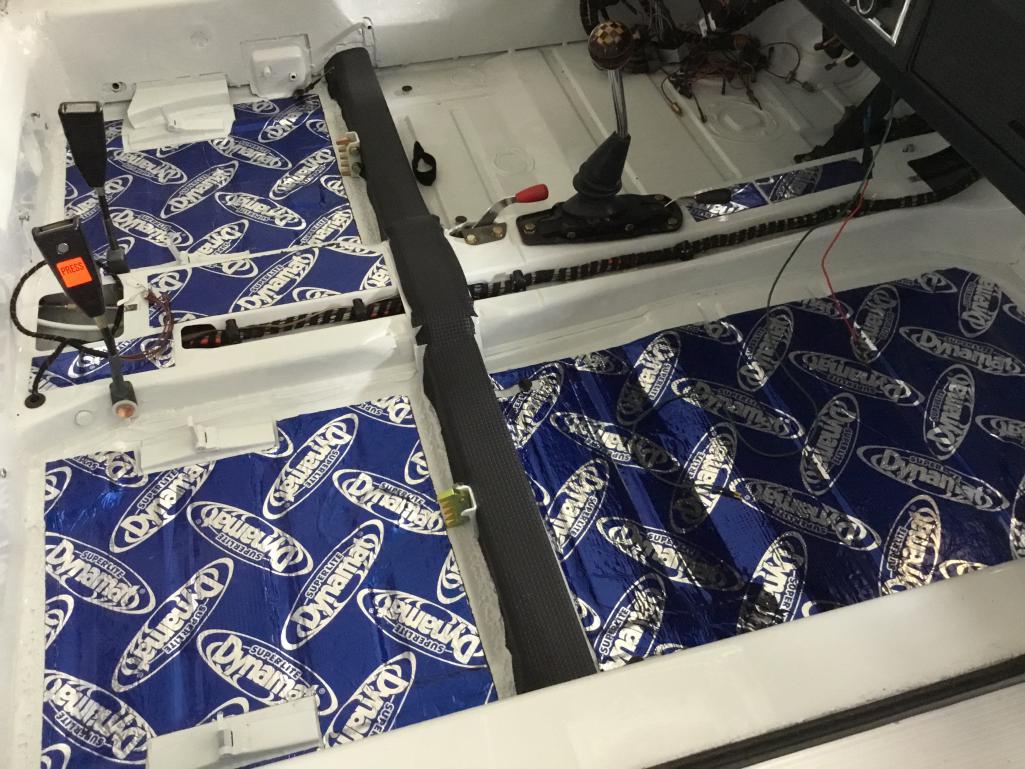 |
|
|
|
| raynekat |
Jul 5 2018, 12:16 AM
Post
#586
|
|
Advanced Member Group: Members Posts: 2,171 Joined: 30-December 14 From: Coeur d'Alene, Idaho Member No.: 18,263 Region Association: Pacific Northwest |
Went with Dynaliner on the fire wall as it's supposed to be good for heat control.
I kind of want to hear the flat six behind me so no additional noise insulation beyond the factory back pad. 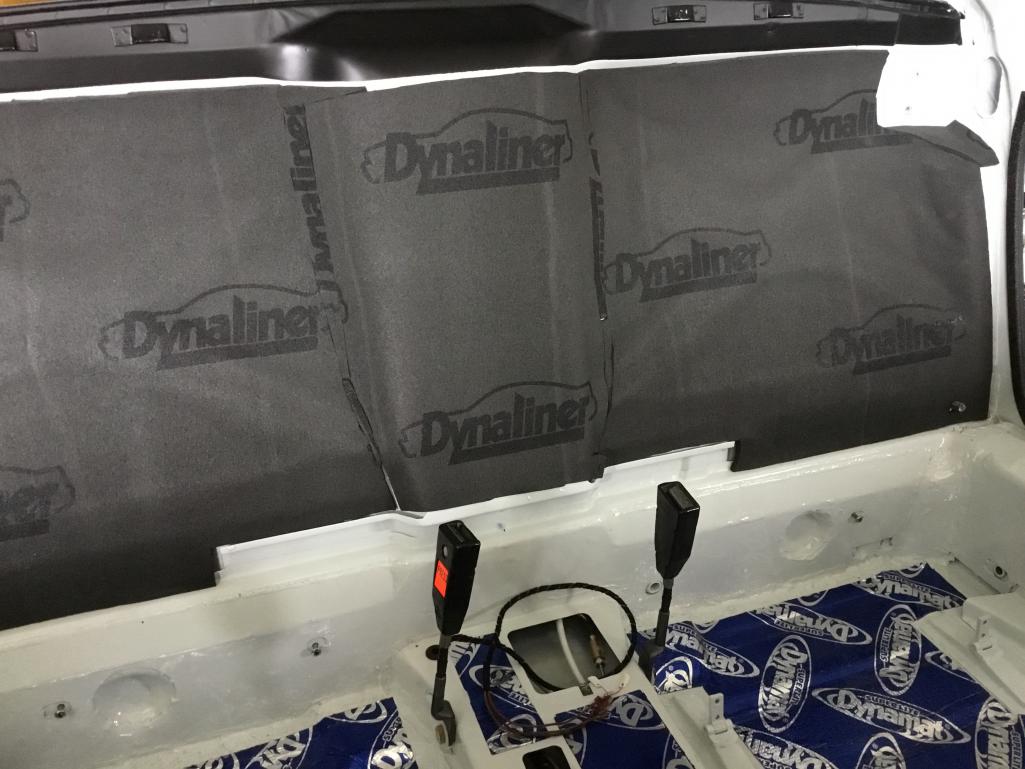 |
|
|
|
| raynekat |
Jul 5 2018, 12:20 AM
Post
#587
|
|
Advanced Member Group: Members Posts: 2,171 Joined: 30-December 14 From: Coeur d'Alene, Idaho Member No.: 18,263 Region Association: Pacific Northwest |
So that catches us up a bit.
Both front and rear suspension are installed. The entire brake system also is in place....just need to bleed the brakes and adjust the rear calipers still. Front and rear trunks as well as front and rear ends are done too. I have a bit more installation of the dash wiring to go. Then the carpeting, door/window assembly, seats, removable top. There is light at the end of the tunnel. Just a couple more weeks working around the twins needs and I should have my part of the build complete. Then it's off to Rothsport Racing for installation of the drivetrain, additional oil cooler and alignment/corner balance. Sleep well....I will tonight after the blasted neighbors quick shooting off their fireworks. |
|
|
|
| altitude411 |
Jul 5 2018, 12:23 AM
Post
#588
|
|
I drove my 6 into a tree Group: Members Posts: 1,306 Joined: 21-September 14 From: montana Member No.: 17,932 Region Association: Rocky Mountains |
|
|
|
|
| cary |
Jul 5 2018, 06:49 AM
Post
#589
|
|
Advanced Member Group: Members Posts: 3,900 Joined: 26-January 04 From: Sherwood Oregon Member No.: 1,608 Region Association: Pacific Northwest |
Well Done ...................
|
|
|
|
| bbrock |
Jul 5 2018, 07:47 AM
Post
#590
|
|
914 Guru Group: Members Posts: 5,269 Joined: 17-February 17 From: Montana Member No.: 20,845 Region Association: Rocky Mountains |
(IMG:style_emoticons/default/cheer.gif) Fantastic. Is this part of the project as fun as it looks? Great work!
|
|
|
|
| raynekat |
Jul 5 2018, 02:45 PM
Post
#591
|
|
Advanced Member Group: Members Posts: 2,171 Joined: 30-December 14 From: Coeur d'Alene, Idaho Member No.: 18,263 Region Association: Pacific Northwest |
QUOTE(bbrock @ Jul 5 2018, 06:47 AM)  (IMG:style_emoticons/default/cheer.gif) Fantastic. Is this part of the project as fun as it looks? Great work! In truth, some is fun....some incredibly aggravating. I had to re-do the new rubber bushings on the front control arms. There was some big issues to work out with the fresh air blower and ventilation system. It takes a lot of effort to get that right. 914-6 oil tank was a bit challenging as the door latch blind nuts were getting in the way. Lots of things are tough to install on your own...a helper would really help. But as you progress through each hurdle, I gave myself a thumbs up on a number of occasions. This will definitely be a project to remember. (IMG:style_emoticons/default/beer.gif) |
|
|
|
| raynekat |
Aug 5 2018, 12:17 AM
Post
#592
|
|
Advanced Member Group: Members Posts: 2,171 Joined: 30-December 14 From: Coeur d'Alene, Idaho Member No.: 18,263 Region Association: Pacific Northwest |
Time for an update.
I'm about 90% done with my part of the assembly. Main things left to complete: - installation of the front and rear glass - assembly of the windows in the doors - carpet, back pad and seats Without further ado, here are some update pics beginning with the front trunk. And yes, the installation of the fresh air box was a mutha. For some reason, the wiper assembly was not clocked backwards enough and was blocking the air box from reaching it's desired location. That took a few iterations of back out....and then back in again. The distribution boxes on either side had their own set of challenges. Many new parts, freshly plated parts, etc. Even the felt for beneath the fuel tank is new. I like the look of the "tan" hot air paper/foil tubes for sure.  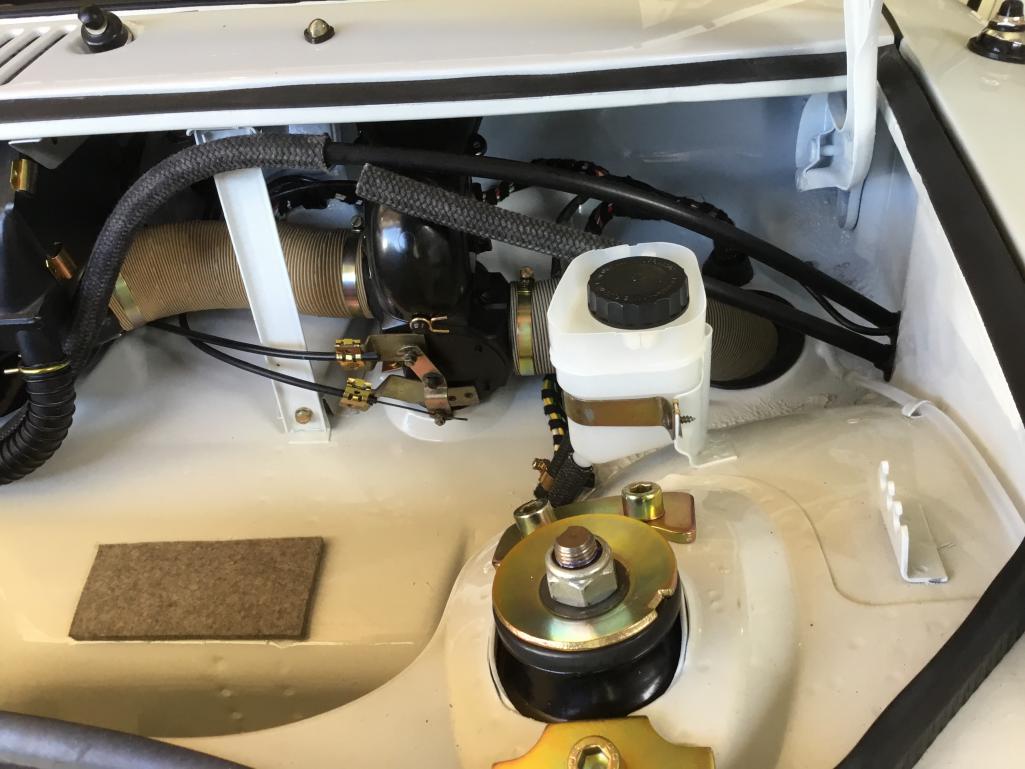 |
|
|
|
| raynekat |
Aug 5 2018, 12:24 AM
Post
#593
|
|
Advanced Member Group: Members Posts: 2,171 Joined: 30-December 14 From: Coeur d'Alene, Idaho Member No.: 18,263 Region Association: Pacific Northwest |
A couple more different angles of the front trunk/rear dash assembly.
Went through a couple of sets of the brake reservoir feed lines before I had a set I was satisfied with....including a new factory set from Porsche (that had the wrong curves). My original ones were trashed. Many times through this project I've reached out to Retro Automotive Products in the NE. They never failed to come through with a very nice set of 2nd hand parts at a most reasonable price. Such as the reservoir feed lines. 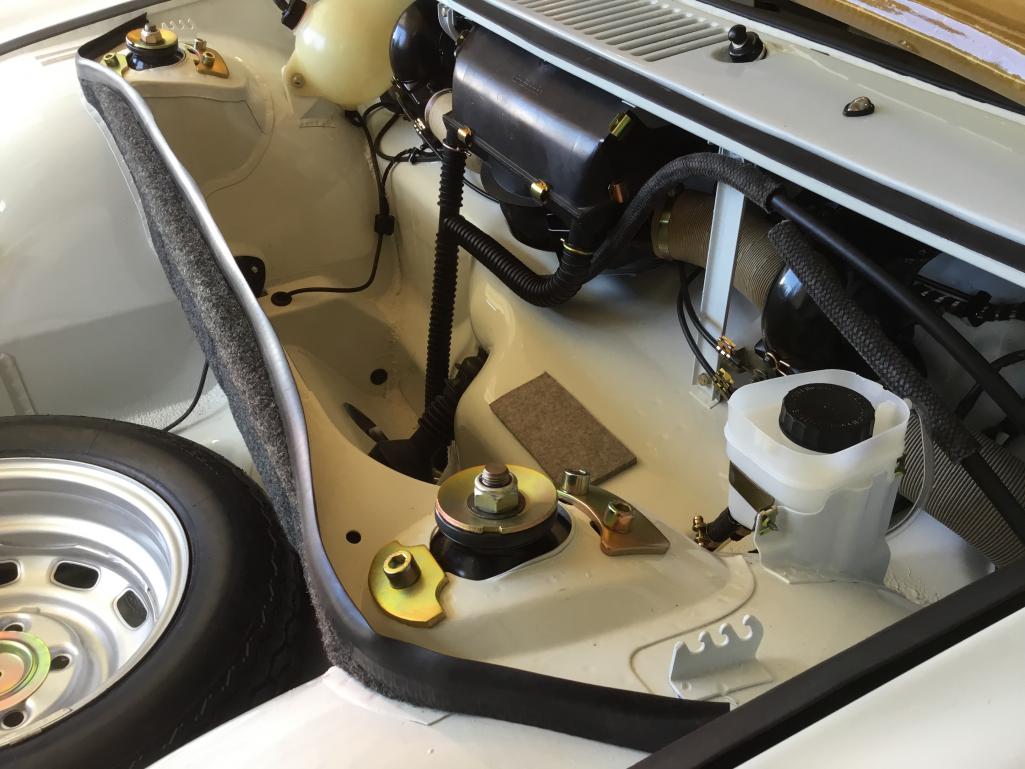 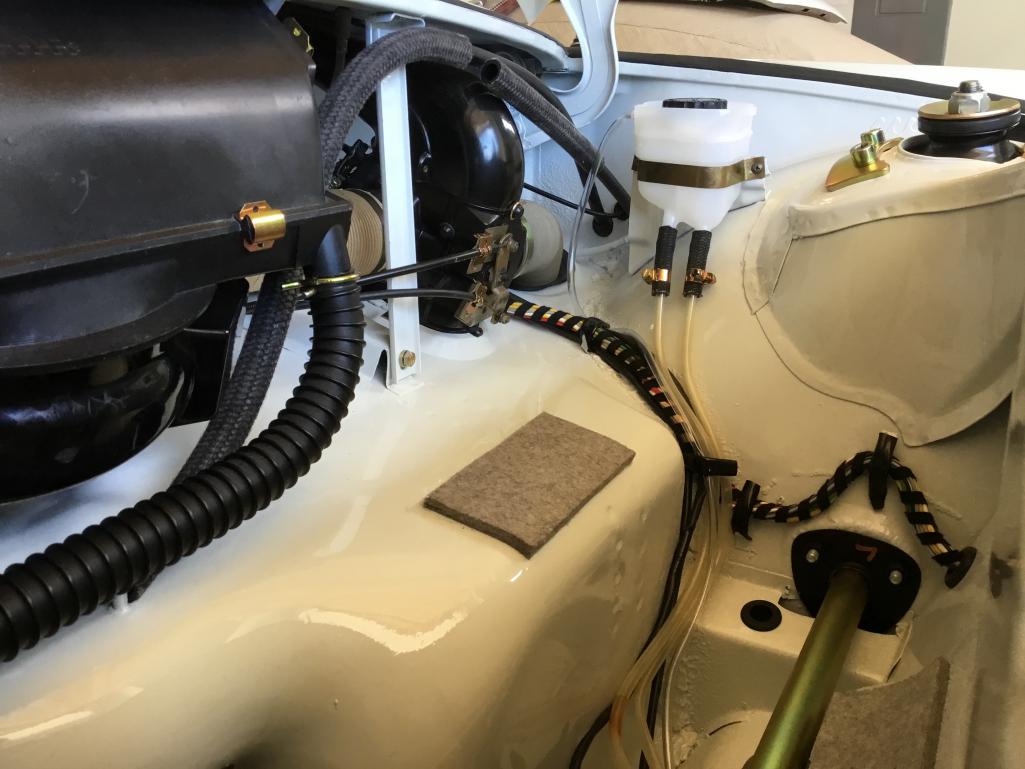 |
|
|
|
| raynekat |
Aug 5 2018, 12:28 AM
Post
#594
|
|
Advanced Member Group: Members Posts: 2,171 Joined: 30-December 14 From: Coeur d'Alene, Idaho Member No.: 18,263 Region Association: Pacific Northwest |
The perlon that goes on the front bulkhead was fun to install.....not.
I'll have to admit I went through 2 carpets to get the procedure down and be happy with the outcome. 914Rubber products shown here. 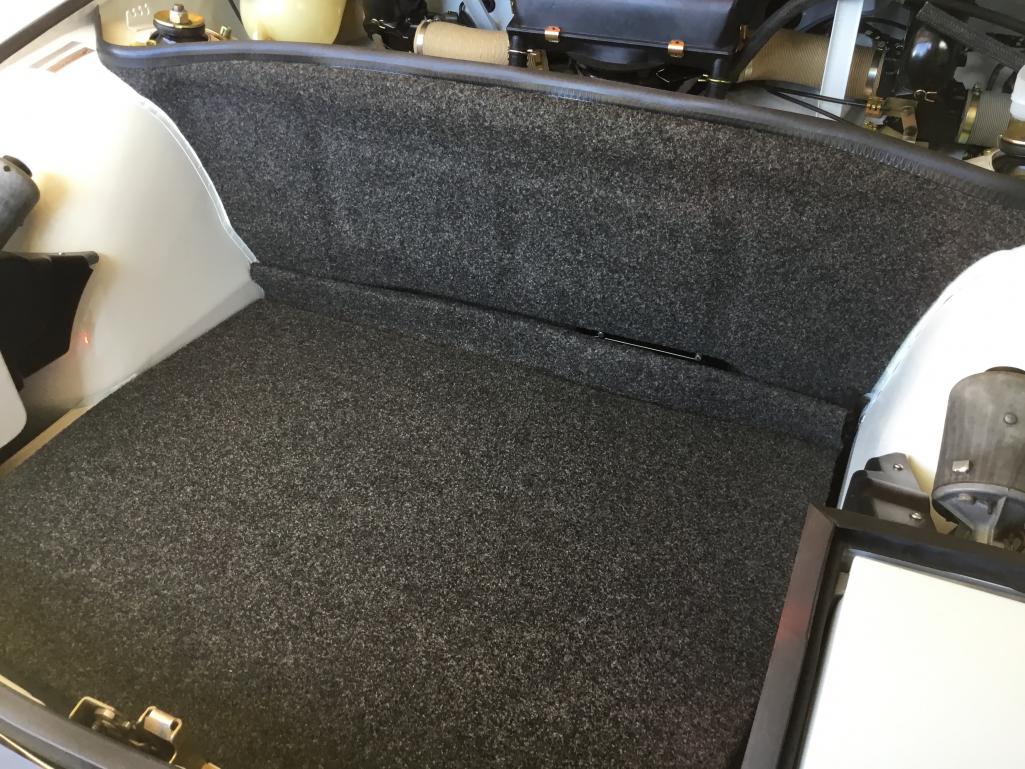 |
|
|
|
| raynekat |
Aug 5 2018, 12:32 AM
Post
#595
|
|
Advanced Member Group: Members Posts: 2,171 Joined: 30-December 14 From: Coeur d'Alene, Idaho Member No.: 18,263 Region Association: Pacific Northwest |
Below the spare tire cover board sits the spare.
You can also see the access cover for the MFI fuel feed pump that Cary took care of. I removed all the ID tags before the build, so they all went back on with fresh rivets. 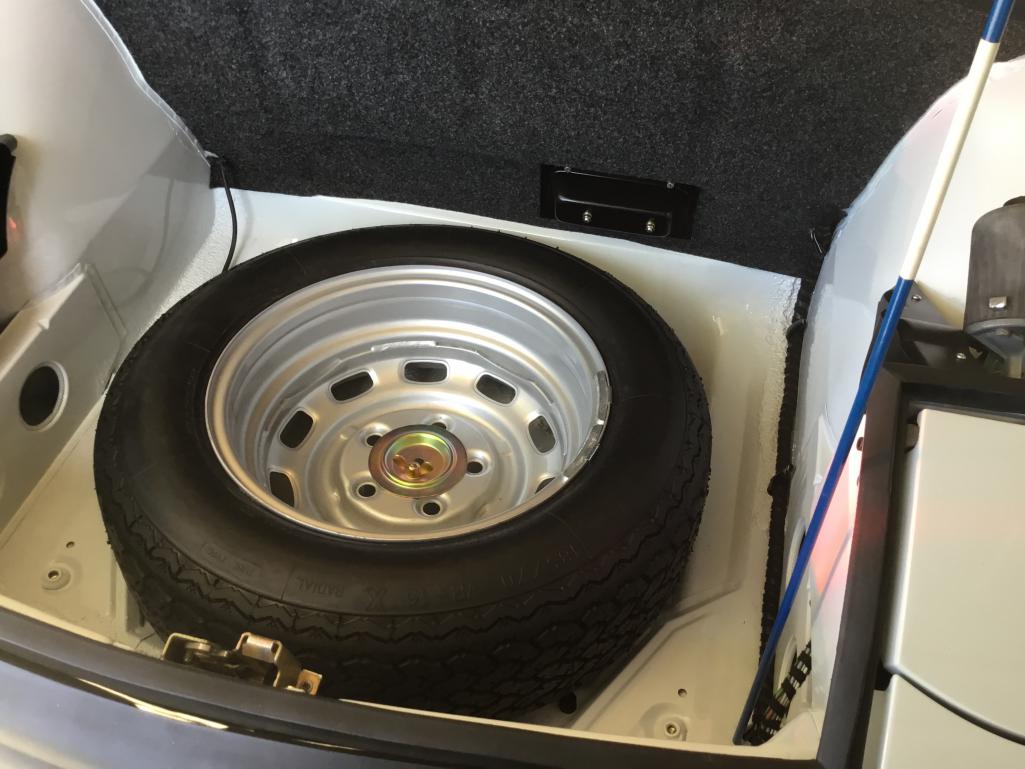 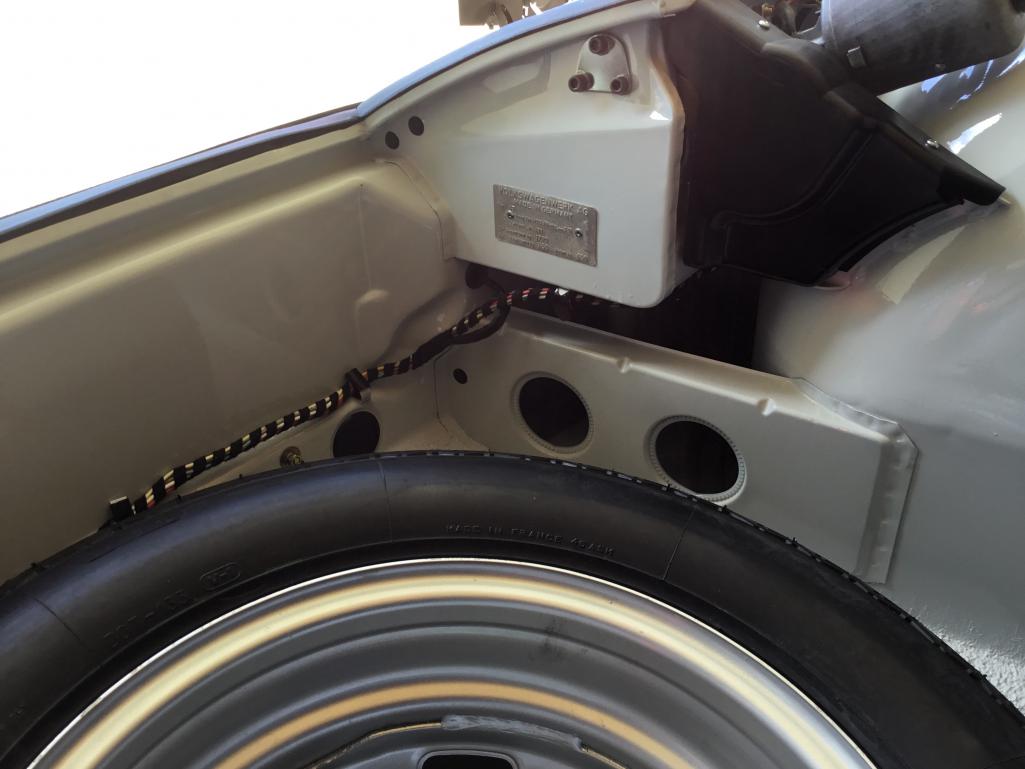 |
|
|
|
| raynekat |
Aug 5 2018, 12:37 AM
Post
#596
|
|
Advanced Member Group: Members Posts: 2,171 Joined: 30-December 14 From: Coeur d'Alene, Idaho Member No.: 18,263 Region Association: Pacific Northwest |
The detachable roof fully assembly with new seals from 914Rubber and URO rails (they fit great).
Top is very tight and fits like a glove. Probably as close to water tight as you can get I'll wager. Freshly textured and painted roof. Hard to see but new perlon headliner as well. 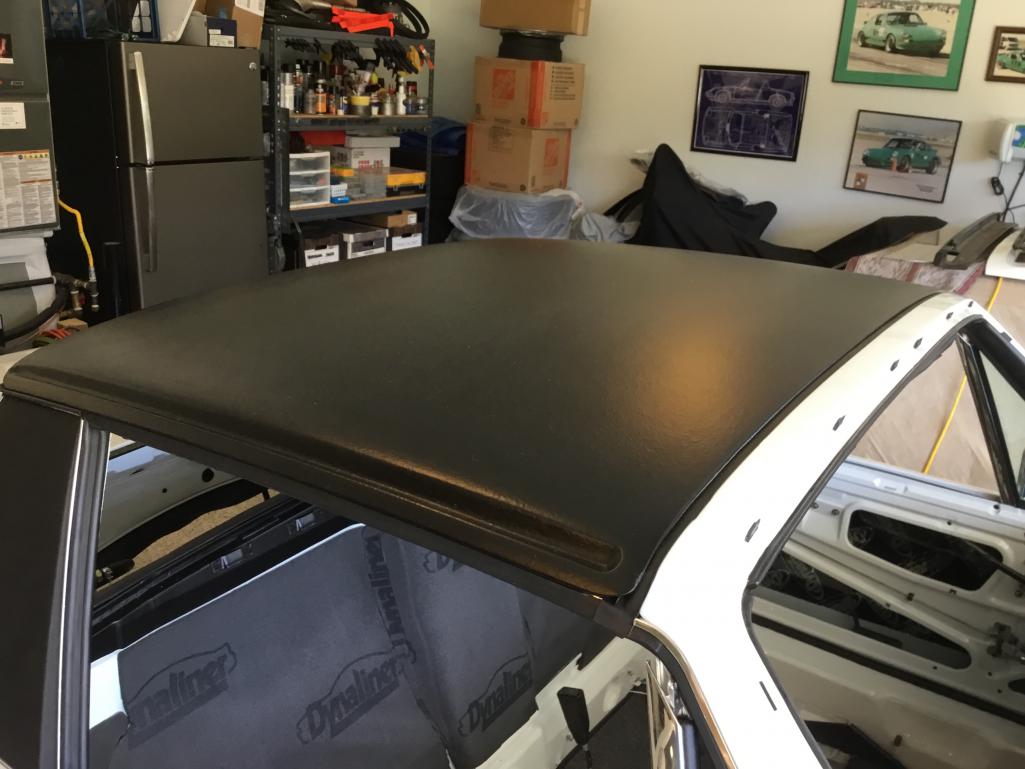 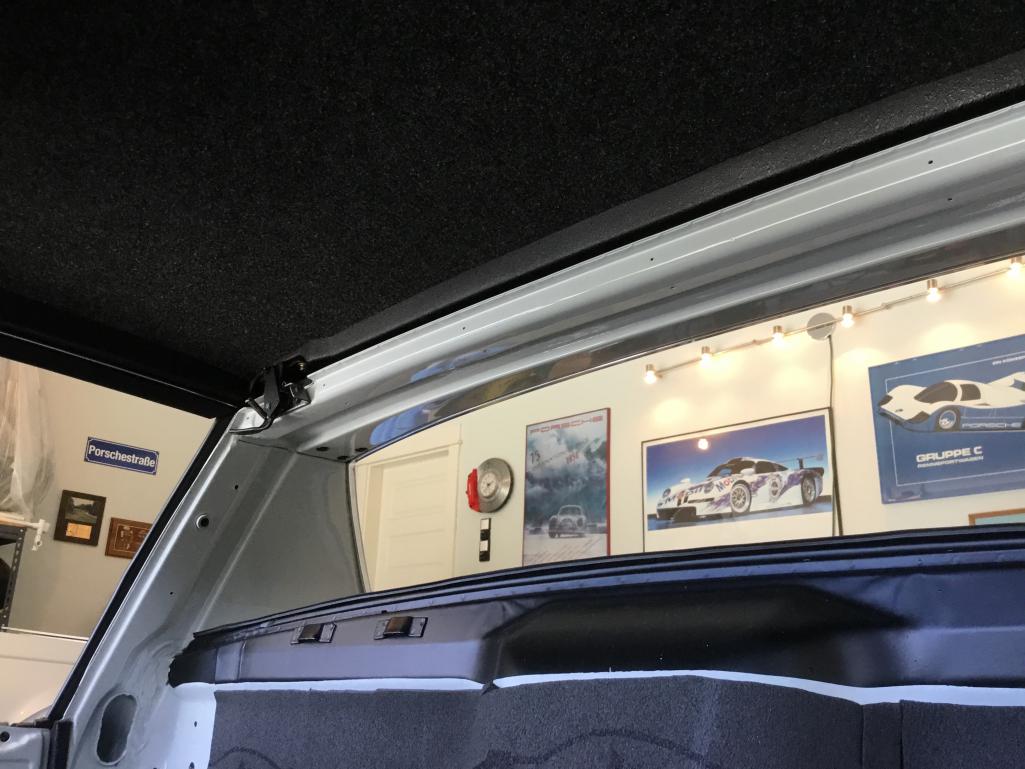 |
|
|
|
| raynekat |
Aug 5 2018, 12:42 AM
Post
#597
|
|
Advanced Member Group: Members Posts: 2,171 Joined: 30-December 14 From: Coeur d'Alene, Idaho Member No.: 18,263 Region Association: Pacific Northwest |
Couple views of the top of the dash from outside the car.
New 914Rubber dash, vinyl and dash to windshield seal. All fits very nice. Now just waiting for the install of the new Sekurit windshield in the coming days. 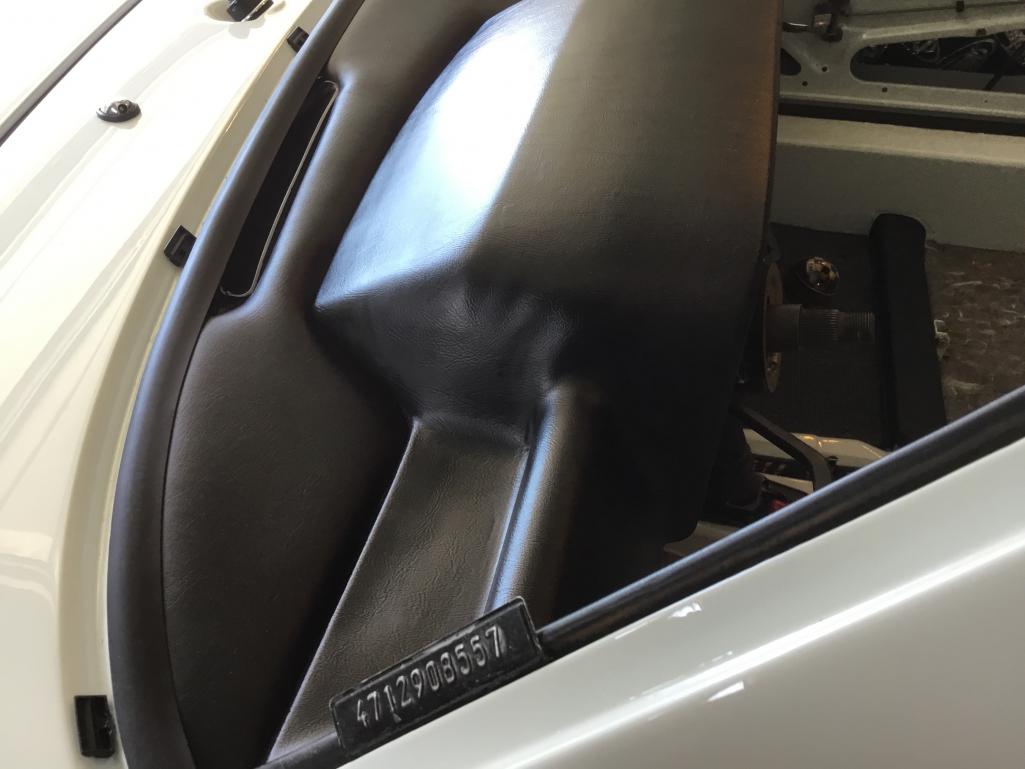 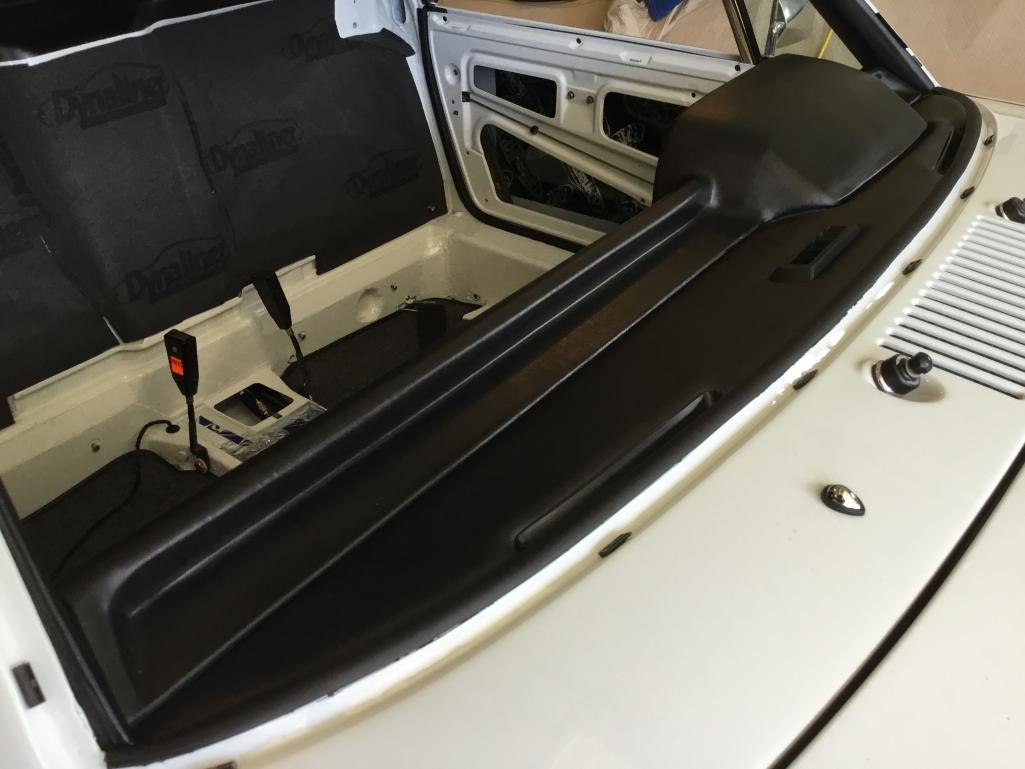 |
|
|
|
| raynekat |
Aug 5 2018, 12:53 AM
Post
#598
|
|
Advanced Member Group: Members Posts: 2,171 Joined: 30-December 14 From: Coeur d'Alene, Idaho Member No.: 18,263 Region Association: Pacific Northwest |
Forgot to post the "money shot" of the front trunk showing the fiberglass hood from underneath.
The prop rod is only temporary until a more permanent solution is obtained. 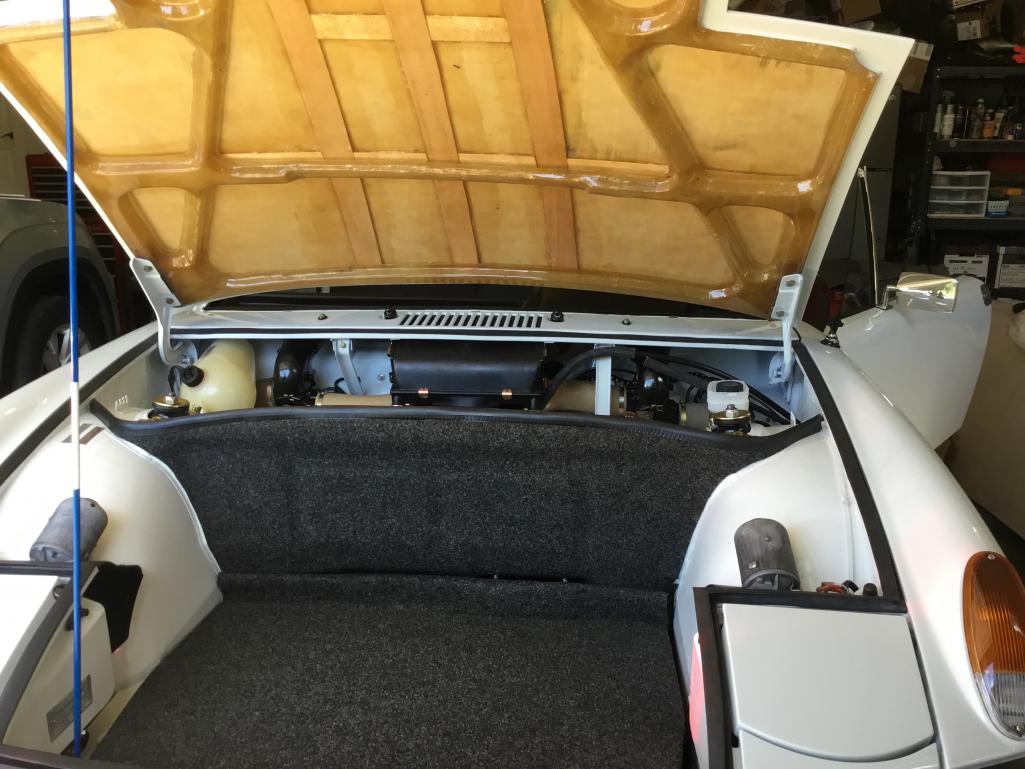 |
|
|
|
| raynekat |
Aug 5 2018, 12:57 AM
Post
#599
|
|
Advanced Member Group: Members Posts: 2,171 Joined: 30-December 14 From: Coeur d'Alene, Idaho Member No.: 18,263 Region Association: Pacific Northwest |
A couple views of the fully finished rear trunk.
Between the rear fog light and Euro VW/Porsche emblem, there is a lot going on back there. Went with a Coco mat for looks and durability. They are quite heavy though. 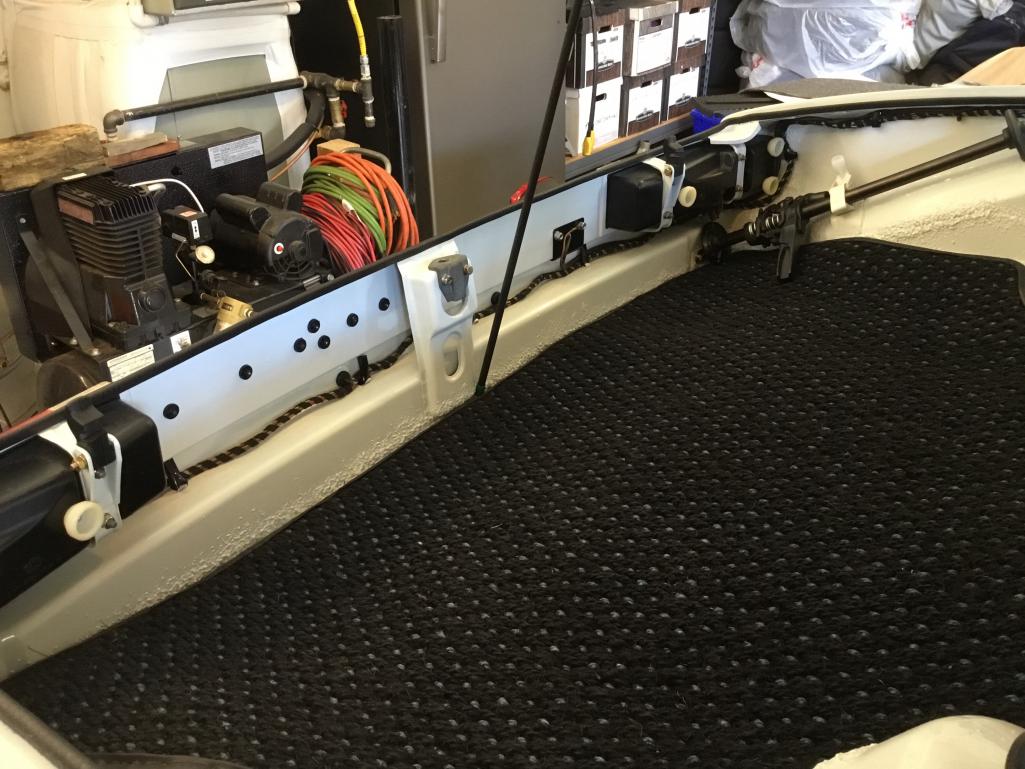 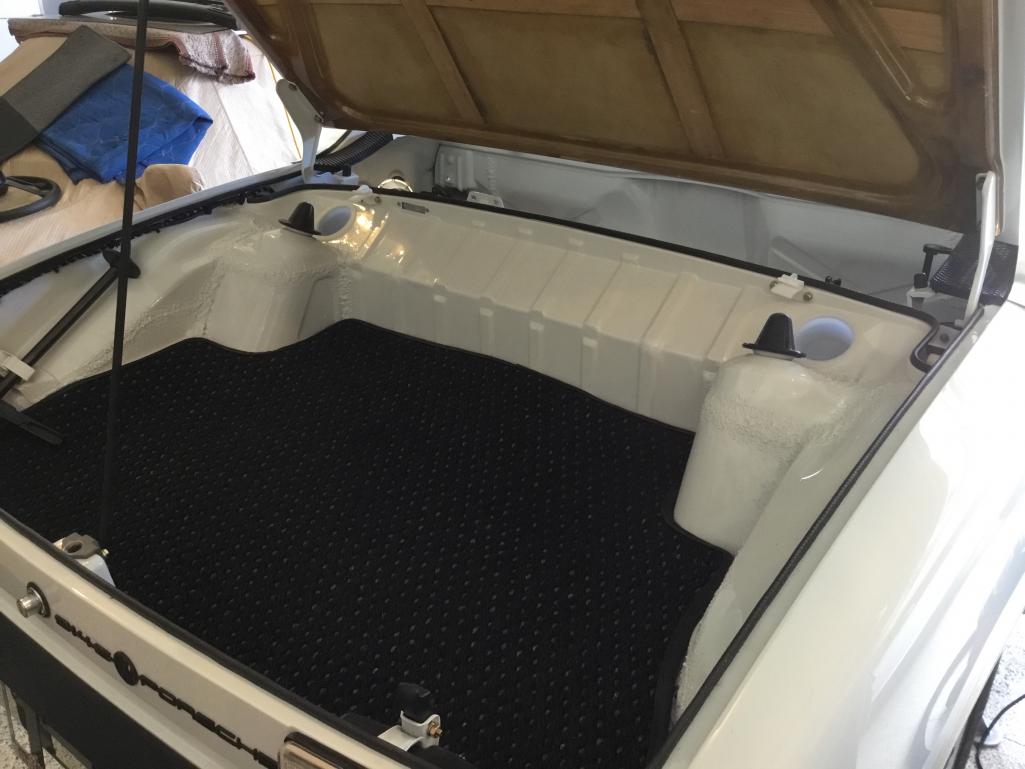 |
|
|
|
| raynekat |
Aug 5 2018, 01:00 AM
Post
#600
|
|
Advanced Member Group: Members Posts: 2,171 Joined: 30-December 14 From: Coeur d'Alene, Idaho Member No.: 18,263 Region Association: Pacific Northwest |
Better view of the underside of the rear trunk lid.
Fit is iffy at this point, but we'll give it some more time and effort before I do anything "massive" to it. Also, a view of the finished rear end. Euro all the way...... 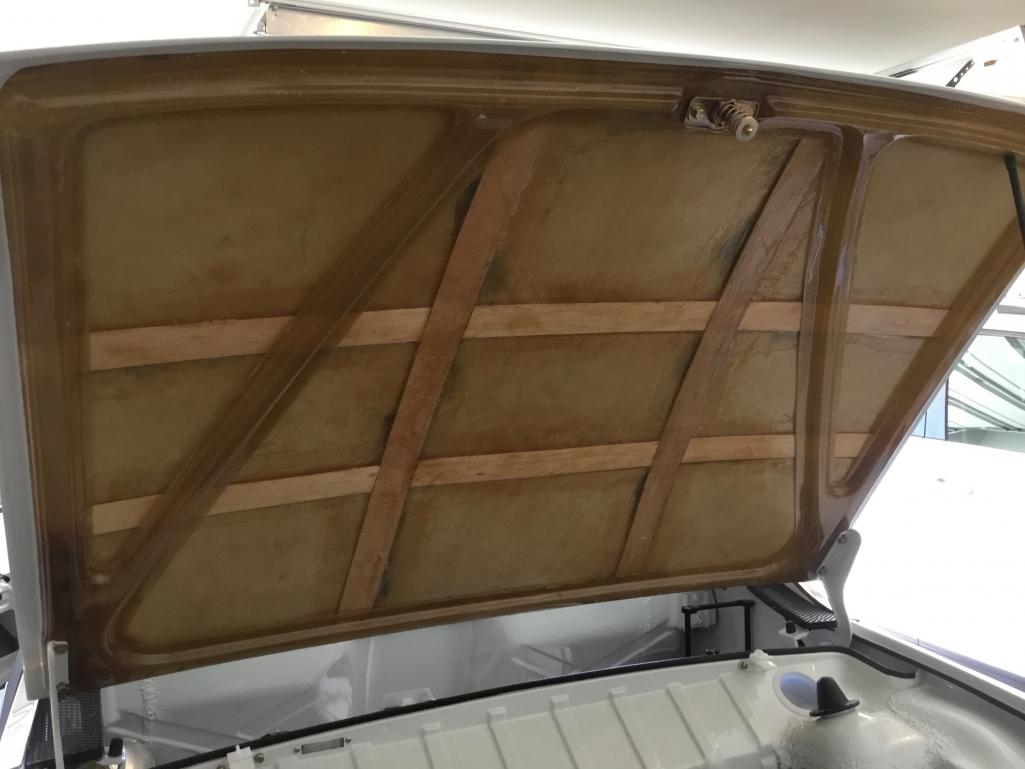 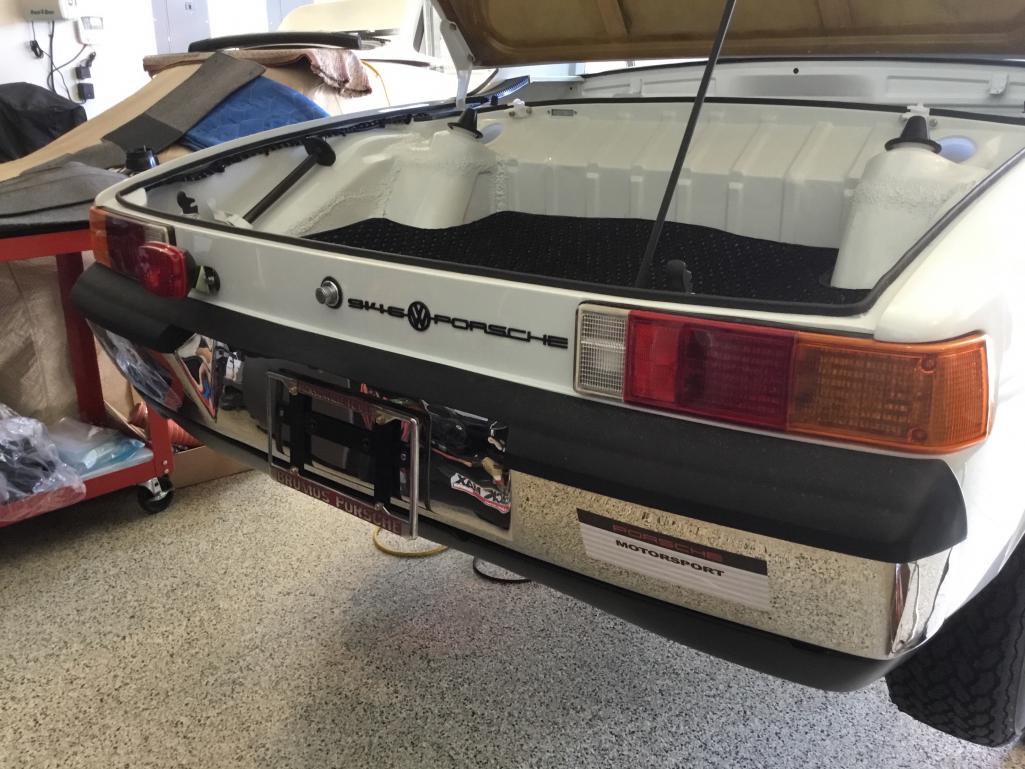 |
|
|
|
|
1 User(s) are reading this topic (1 Guests and 0 Anonymous Users)
0 Members:

|
Lo-Fi Version | Time is now: 18th July 2026 - 03:07 AM |
Invision Power Board
v9.1.4 © 2026 IPS, Inc.