|
|
|
Porsche, and the Porsche crest are registered trademarks of Dr. Ing. h.c. F. Porsche AG.
This site is not affiliated with Porsche in any way. Its only purpose is to provide an online forum for car enthusiasts. All other trademarks are property of their respective owners. |
|
|

  |

| Larmo63 |
 Dec 7 2018, 08:42 AM Dec 7 2018, 08:42 AM
Post
#701
|
|
Advanced Member  Group: Members Posts: 4,267 Joined: 3-March 14 From: San Clemente, Ca Member No.: 17,068 Region Association: Southern California |
I'm talking to Getty about both hoods too. Glad to hear they passed your inspection/fitment phase.
Your car looks great. (IMG:style_emoticons/default/smilie_pokal.gif) |
   |

 
|
| raynekat |
Mar 21 2019, 09:55 PM
Post
#702
|
|
Advanced Member Group: Members Posts: 2,171 Joined: 30-December 14 From: Coeur d'Alene, Idaho Member No.: 18,263 Region Association: Pacific Northwest |
Time for an update....it's been awhile.
At my last post, I had sent the car back to the paint shop to get the new Getty front and rear fiberglass GT hoods fit, finished and painted. Also I was waiting for PMB to put together a set of "new" 914-6GT rear calipers for the car as one of my previous calipers had a blake fluid leak that could not be eliminated. The GT calipers arrived a little while ago....completely rebuilt by PMB along with a special black coating that would match my front S calipers. Workmanship from PMB looked stellar as you would expect. 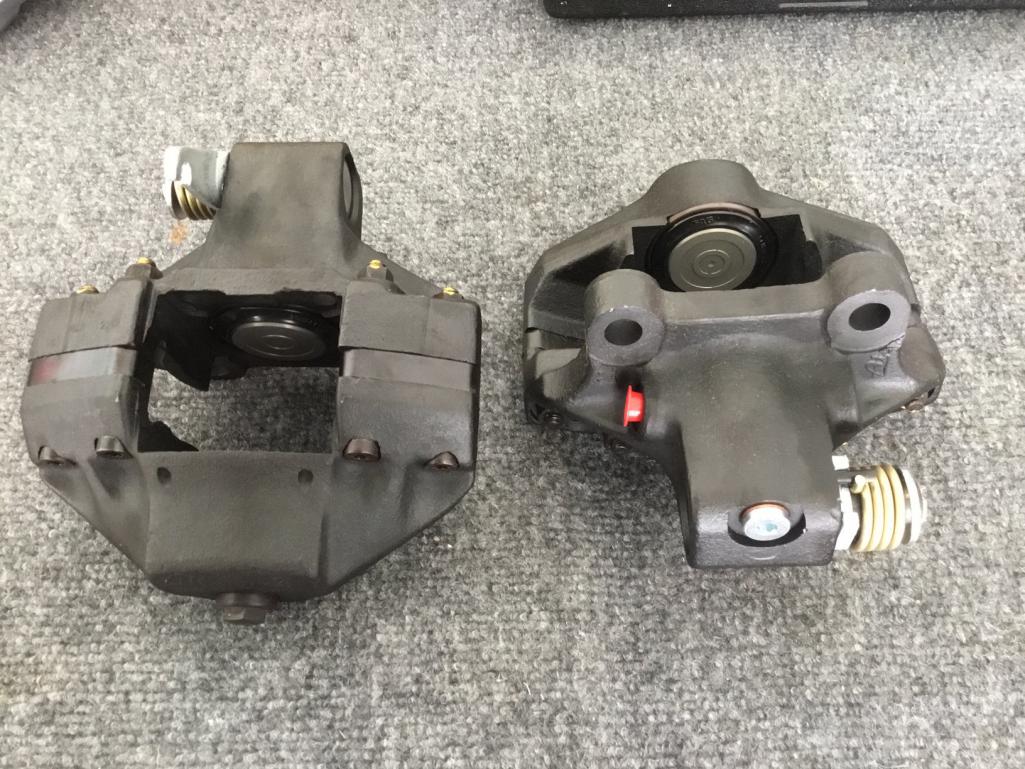 Within a couple of hours, I had both rear calipers installed and plumbed up. The spacer washers I had used with the previous calipers still worked, so I was able to use the brake backing plates. The only mod that was necessary was to open up the hole in the brake pad retaining pins such that the small little clip that keeps them in place would fit....easy fix. After hooking up the brake lines to the calipers and filling the line again to the caliper with brake fluid....wait for it....wait for it....there was nary a drop of escaping brake fluid to be seen. Success! This car should have very excellent braking capabilities now with the S calipers up front, GT calipers in the rear both working with vented discs, 19mm ATE master cylinder, all new stainless steel hardlines and a reworked proportioning valve all from the minds of PMB. 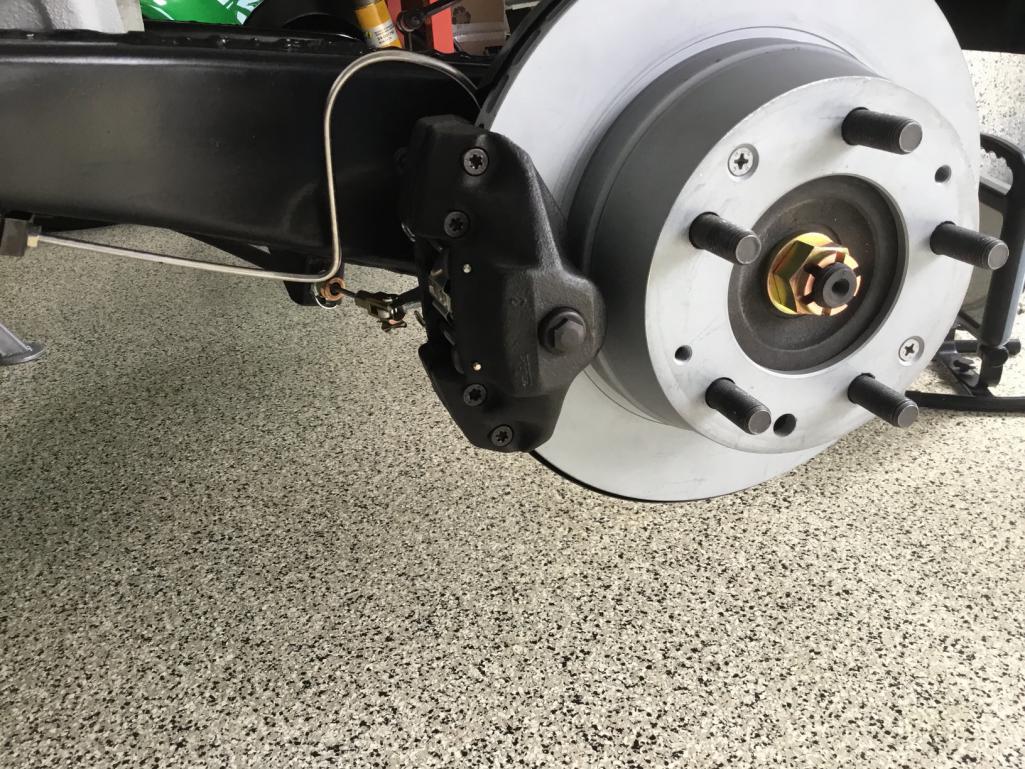 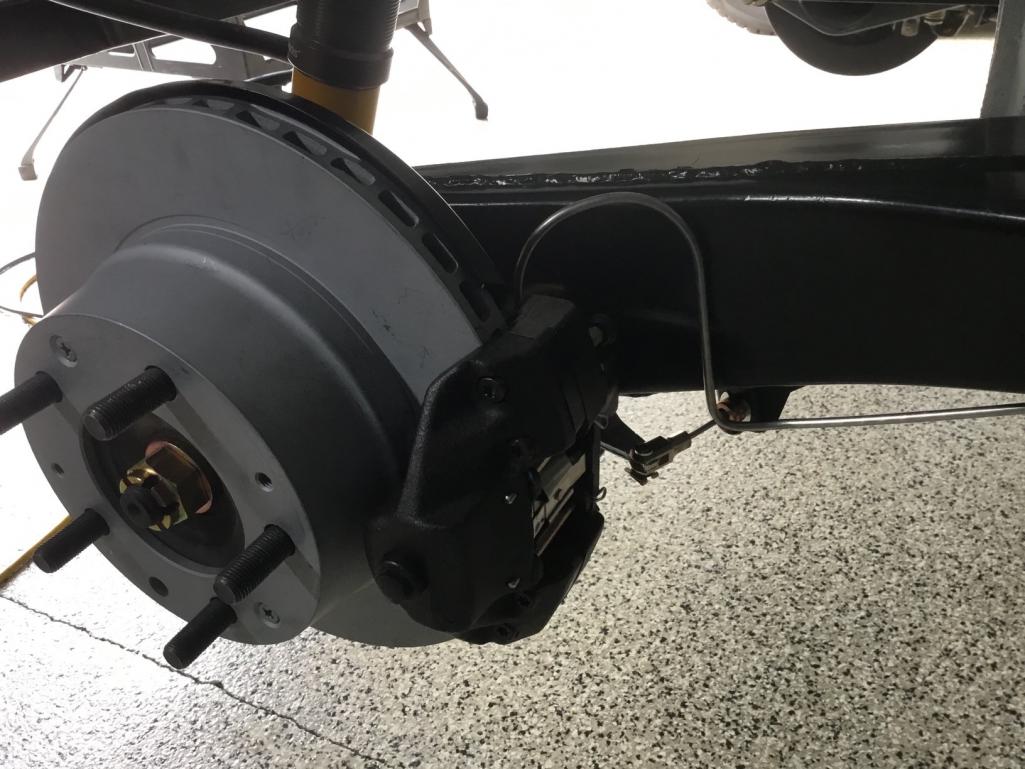 |
|
|
|
| burton73 |
Mar 21 2019, 10:07 PM
Post
#703
|
|
Senior member, and old dude Group: Members Posts: 4,050 Joined: 2-January 07 From: Los Angeles Member No.: 7,414 Region Association: Southern California |
Your car is at the highest level that I have ever seen for a 914
You should be very proud of the work on it. Bob B (IMG:style_emoticons/default/first.gif) (IMG:style_emoticons/default/smilie_pokal.gif) (IMG:style_emoticons/default/first.gif) (IMG:style_emoticons/default/smilie_pokal.gif) (IMG:style_emoticons/default/first.gif) (IMG:style_emoticons/default/smilie_pokal.gif) |
|
|
|
| raynekat |
Mar 21 2019, 10:10 PM
Post
#704
|
|
Advanced Member Group: Members Posts: 2,171 Joined: 30-December 14 From: Coeur d'Alene, Idaho Member No.: 18,263 Region Association: Pacific Northwest |
The other big job was to get the new hoods from Getty into paint.
The previous ones were just not up to the quality that I needed from street use. Getty put together a set of their GT hoods in record time...at least to me it seemed that way....a mere 2 weeks. Out of the box, these looked like they were going to fit much better. Still a good amount of body work was done along the edges of the hoods and in the corners to get the best fit/look possible. Then the Carrara Weisse was laid down again by Superior Auto Body here in Gresham, OR. Below shows the fitment and gaps are very nice. And the hood has the right curvature to follow the body from front to back. 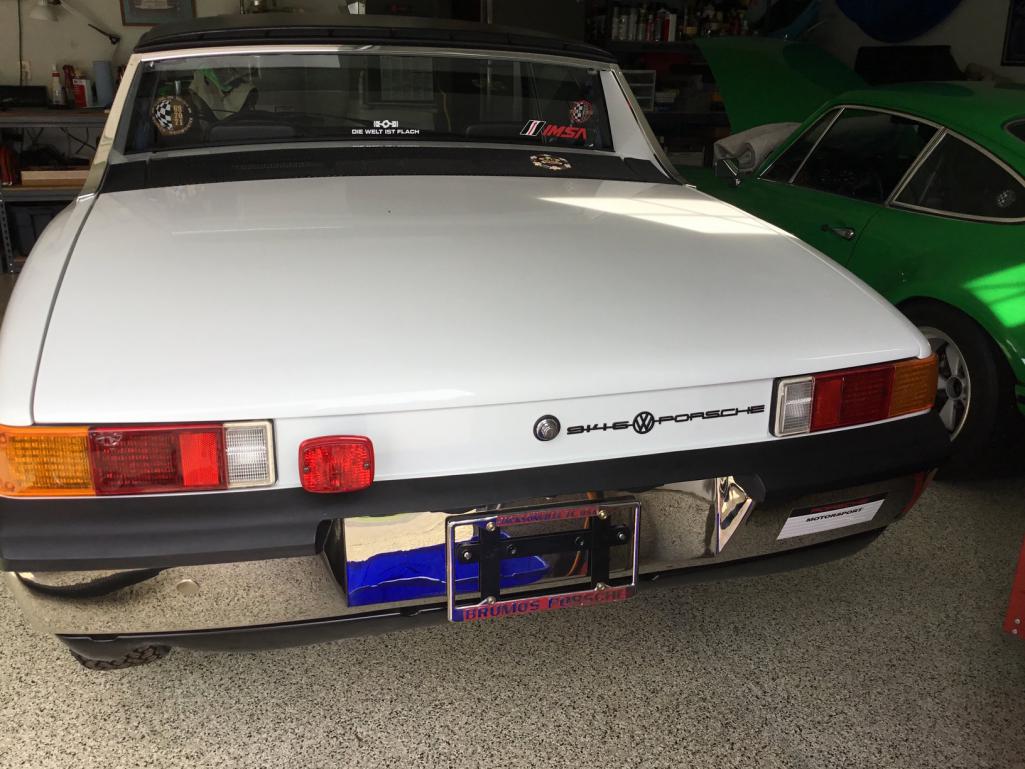 The undersides of the hood were just clear coated so that all the balsa wood reinforcing and fiberglass weave could easily be seen. 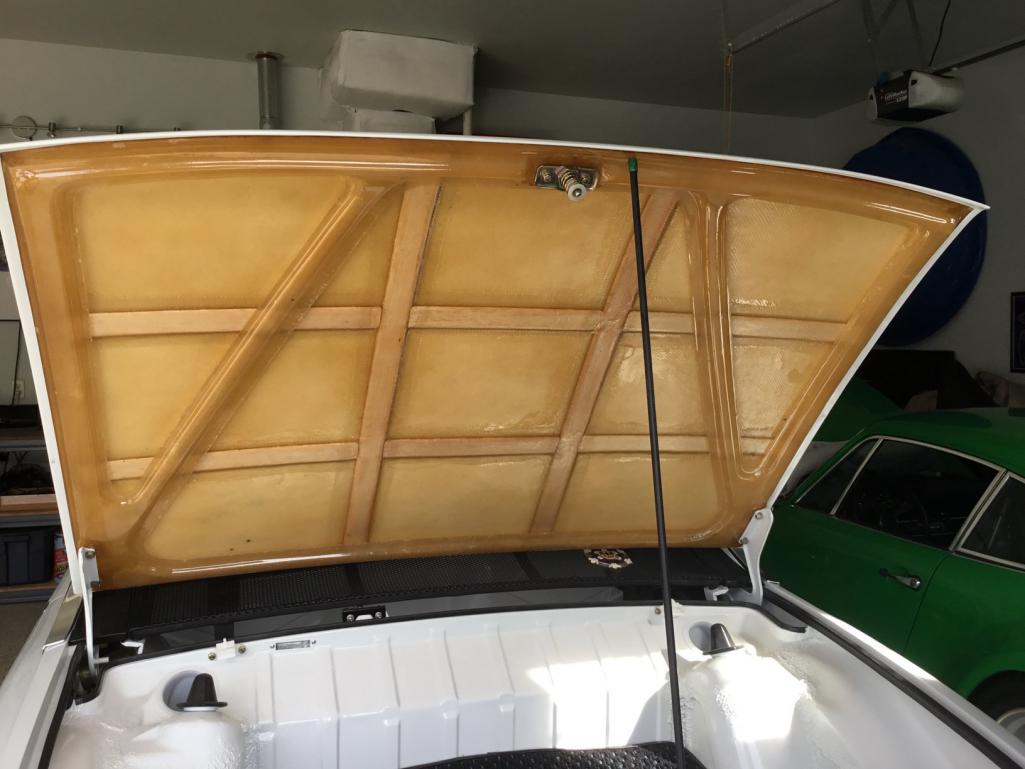 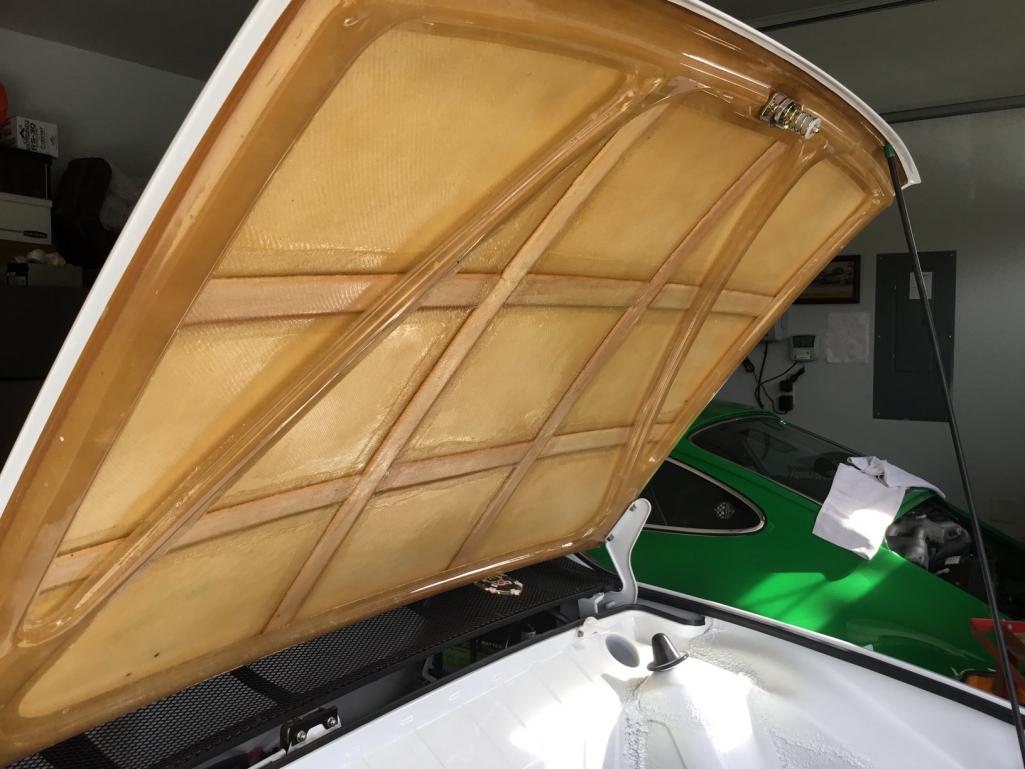 Nice freshly replated or new hardware always looks great on new paint. 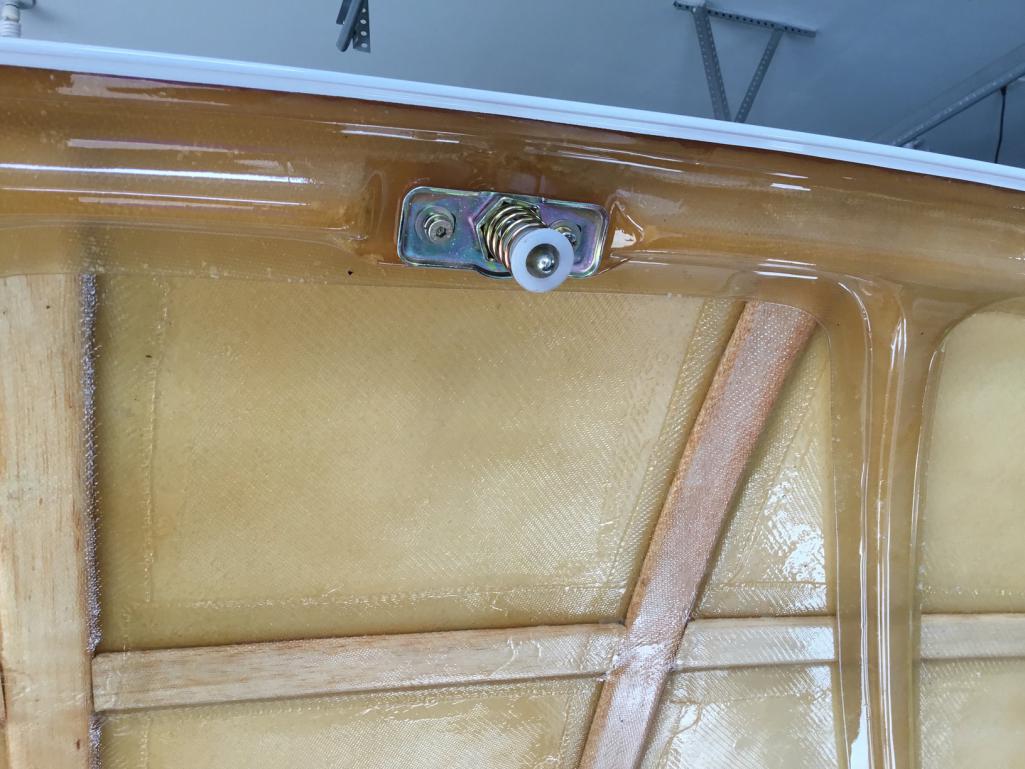 The topside paint was wrapped around to the underside just slightly. Thought this looked better than having the color end abruptly at the edge. 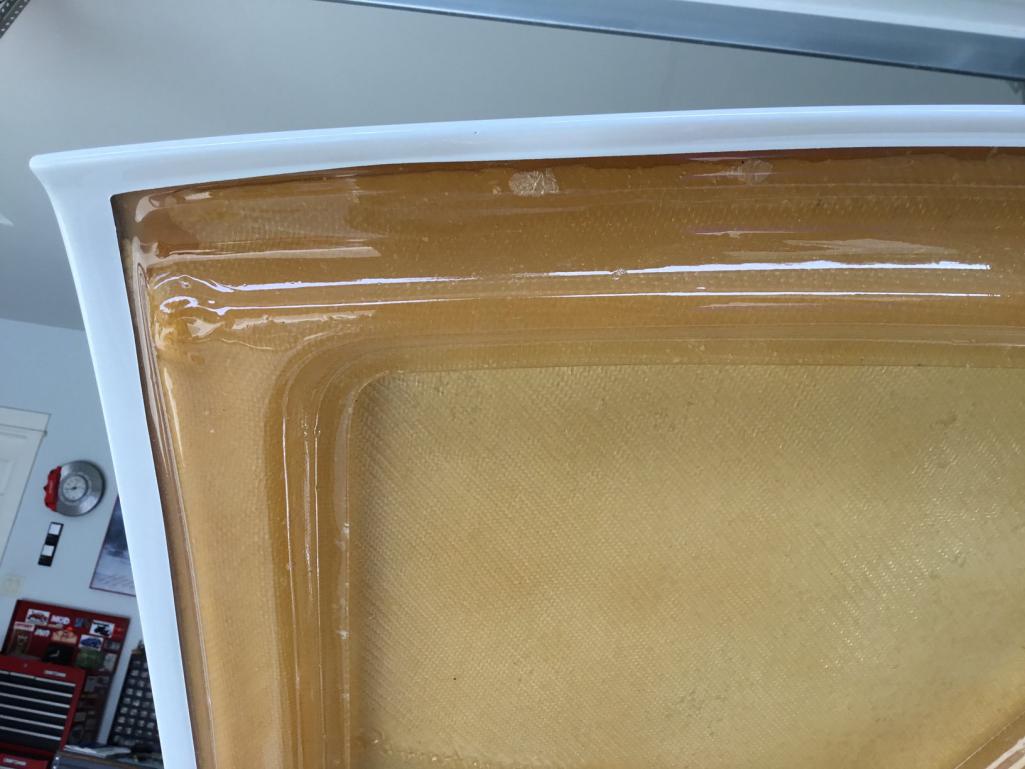 Overall I'm very happy with the rear hood now. Eventually I may try to come up with a better prop rod than the current carbon fiber unit I just kind of put together quickly. |
|
|
|
| bbrock |
Mar 21 2019, 10:11 PM
Post
#705
|
|
914 Guru Group: Members Posts: 5,269 Joined: 17-February 17 From: Montana Member No.: 20,845 Region Association: Rocky Mountains |
QUOTE(raynekat @ Mar 21 2019, 09:55 PM)  After hooking up the brake lines to the calipers and filling the line again to the caliper with brake fluid....wait for it....wait for it....there was nary a drop of escaping brake fluid to be seen. Success! (IMG:style_emoticons/default/cheer.gif) (IMG:style_emoticons/default/piratenanner.gif) Those black zinc calipers look awesome! |
|
|
|
| raynekat |
Mar 21 2019, 10:25 PM
Post
#706
|
|
Advanced Member Group: Members Posts: 2,171 Joined: 30-December 14 From: Coeur d'Alene, Idaho Member No.: 18,263 Region Association: Pacific Northwest |
Front hood...same drill.
Fit and gaps are good enough for government work.... The edges and corners did take some body work. Think the shop used something called Corvette filler to build up the edges a smidgeon. In this pic you can see the clear side marker lens I thought I might like with the Euro turn signals and white paint. Plans are changing on the side marker lenses. Also with a nod to the 73 RS lightweights, a Porsche hood crest decal. 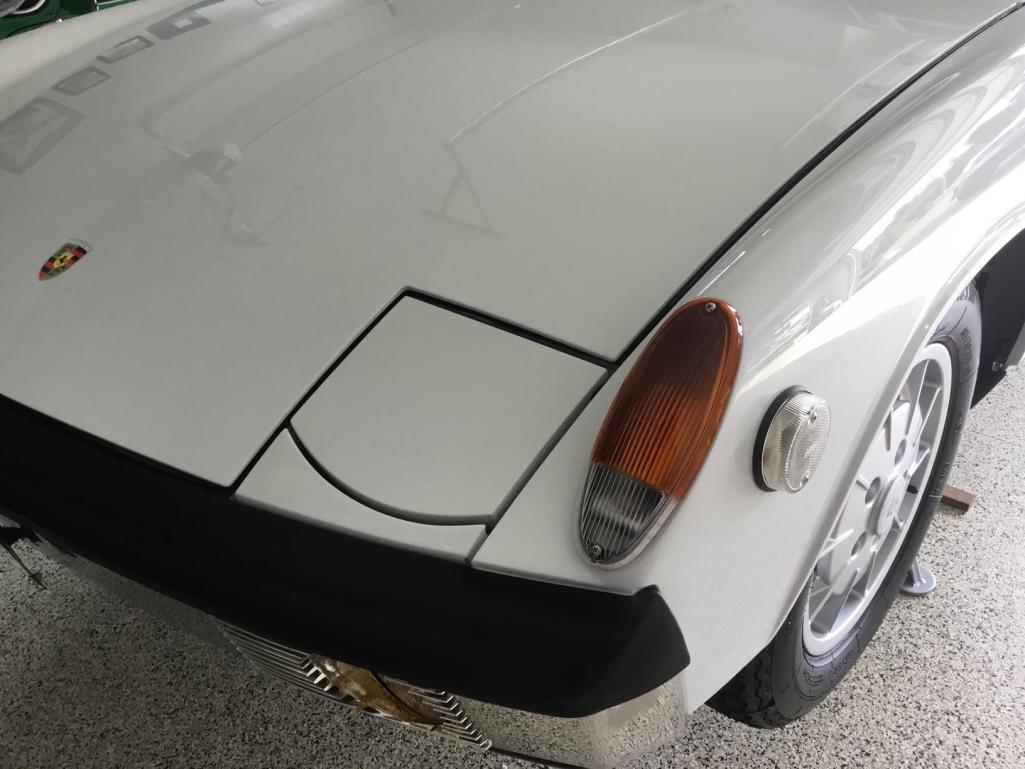 A good look at the clear coat on the bottom side of the hood. Eventually the golf alignment rod will give way to a proper GT hood prop. 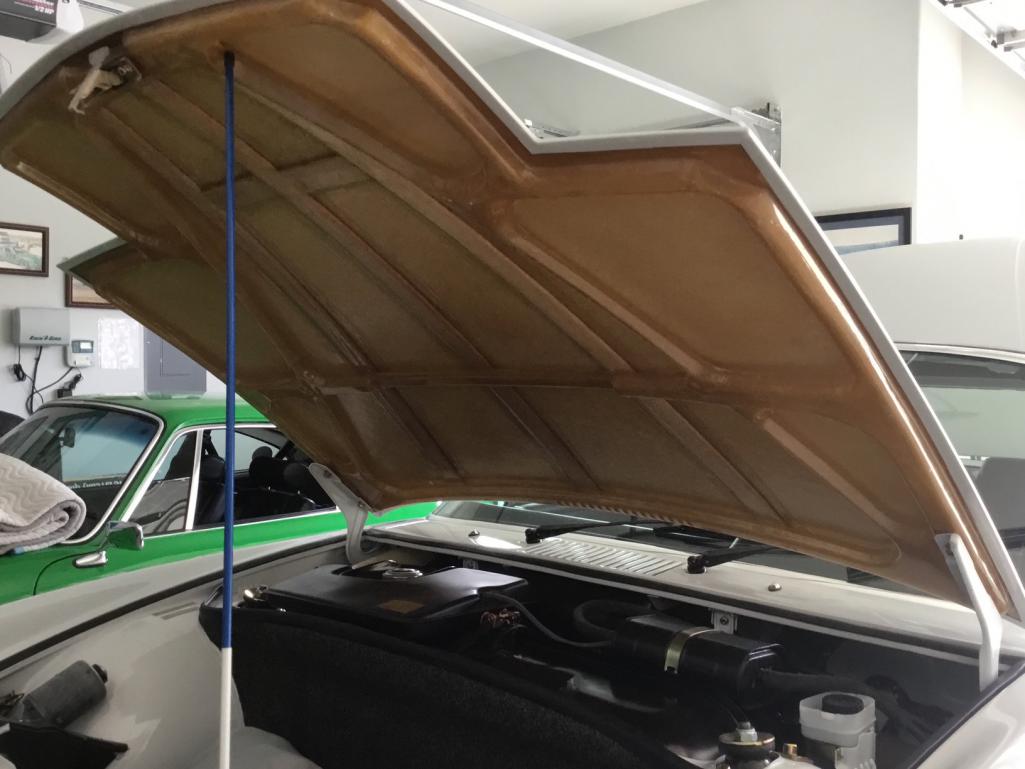 More newly plated or new hardware. 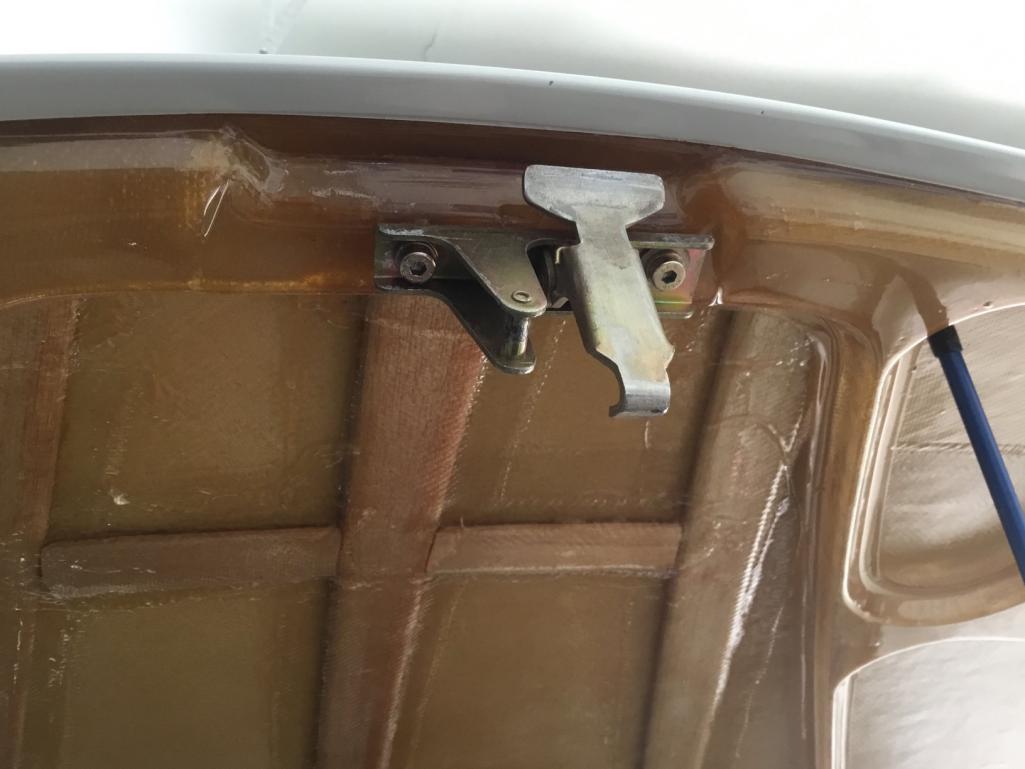 The allen head bolts were some special bolts I found on-line that are used to mount the seat bases of 911's if I remember correctly. Love the look of the balsa wood reinforcing. 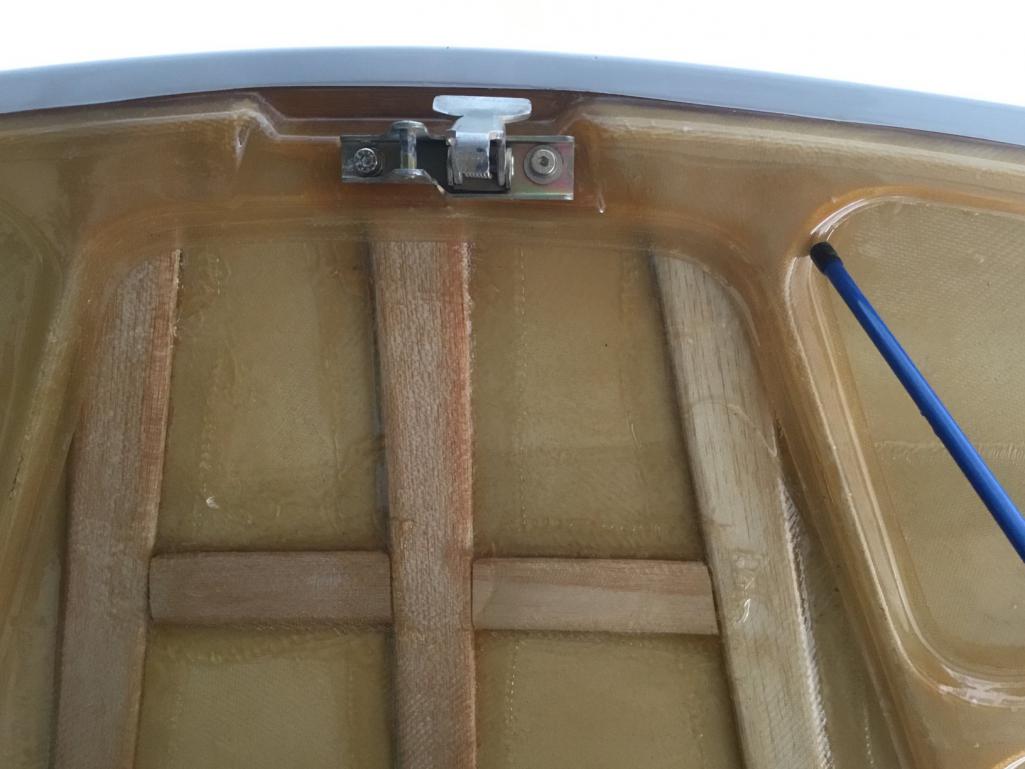 Another detail shot of how the topside paint was wrapped around to the underneath. 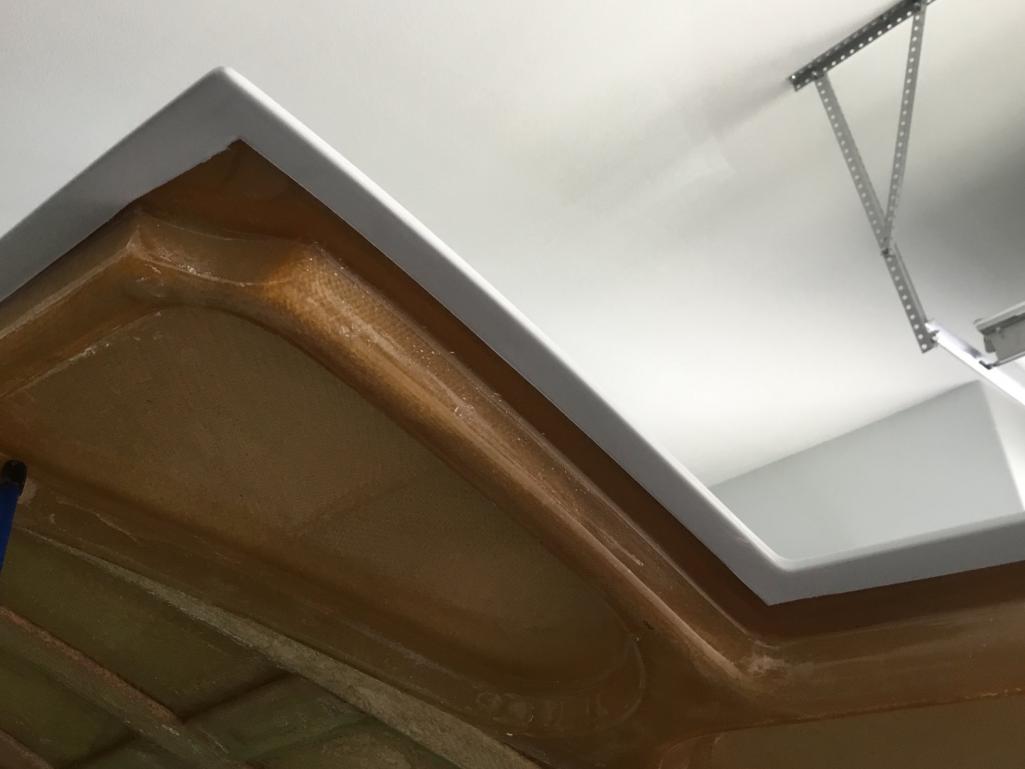 |
|
|
|
| raynekat |
Mar 21 2019, 10:33 PM
Post
#707
|
|
Advanced Member Group: Members Posts: 2,171 Joined: 30-December 14 From: Coeur d'Alene, Idaho Member No.: 18,263 Region Association: Pacific Northwest |
Close up of the hood decal.
Believe I got this from Early 911 S Registry. 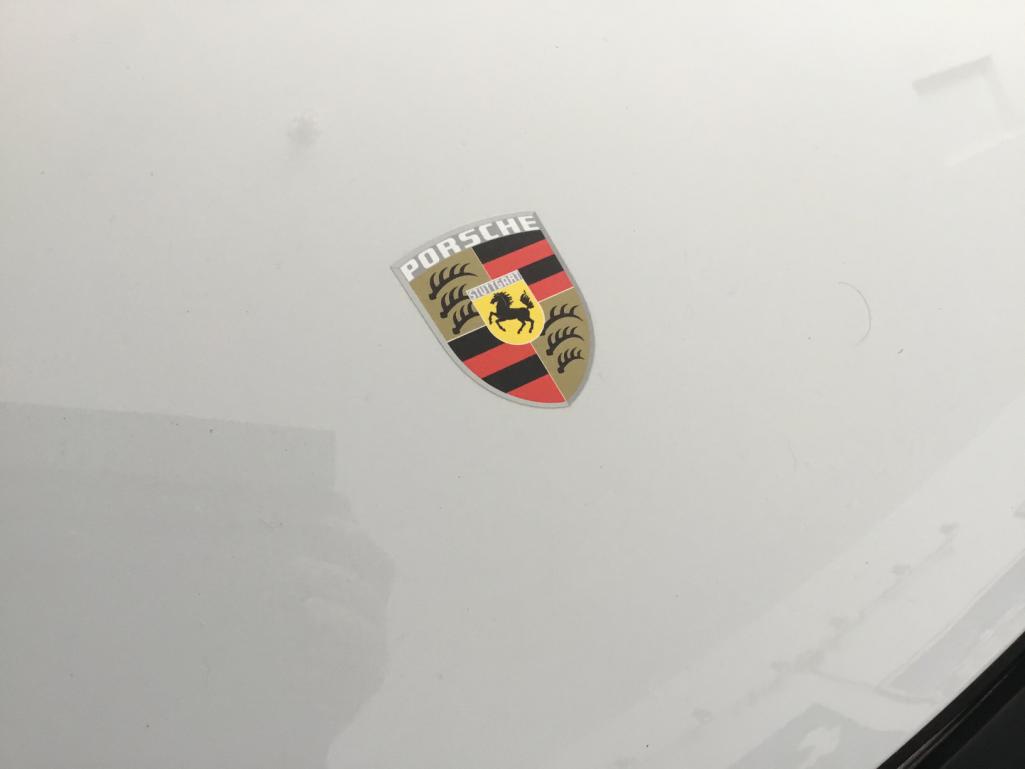 Here is the side marker look I'm going for.... It's all Italian baby...as they say. It is quite bit better looking with the vertical fluting and darker orange than the US version. This is proving to be the most difficult thing to track down. I've got the right/passenger side covered with an NOS unit I picked up on Ebay over the winter. The left/driver side is tough to locate. I've got a couple of folks in Europe trying to locate me one....buy no luck yet. There's a WTB ad on our website here that I bump every month or so. Hopefully this unicorn will land in my backyard one day. 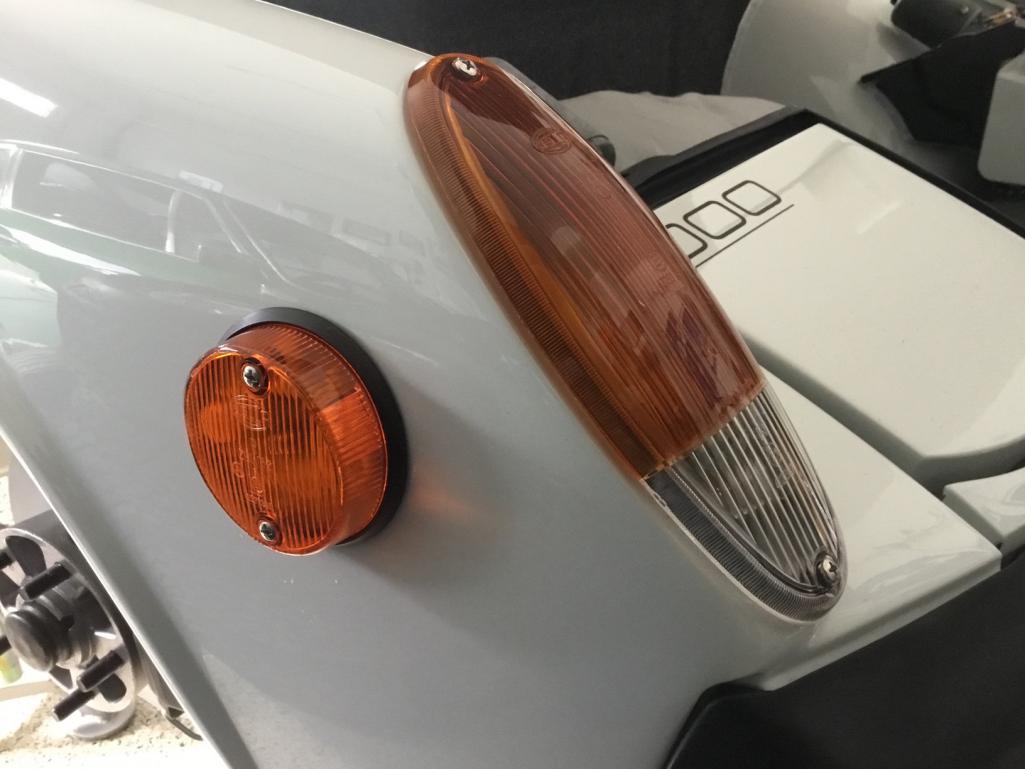 US side marker lens: 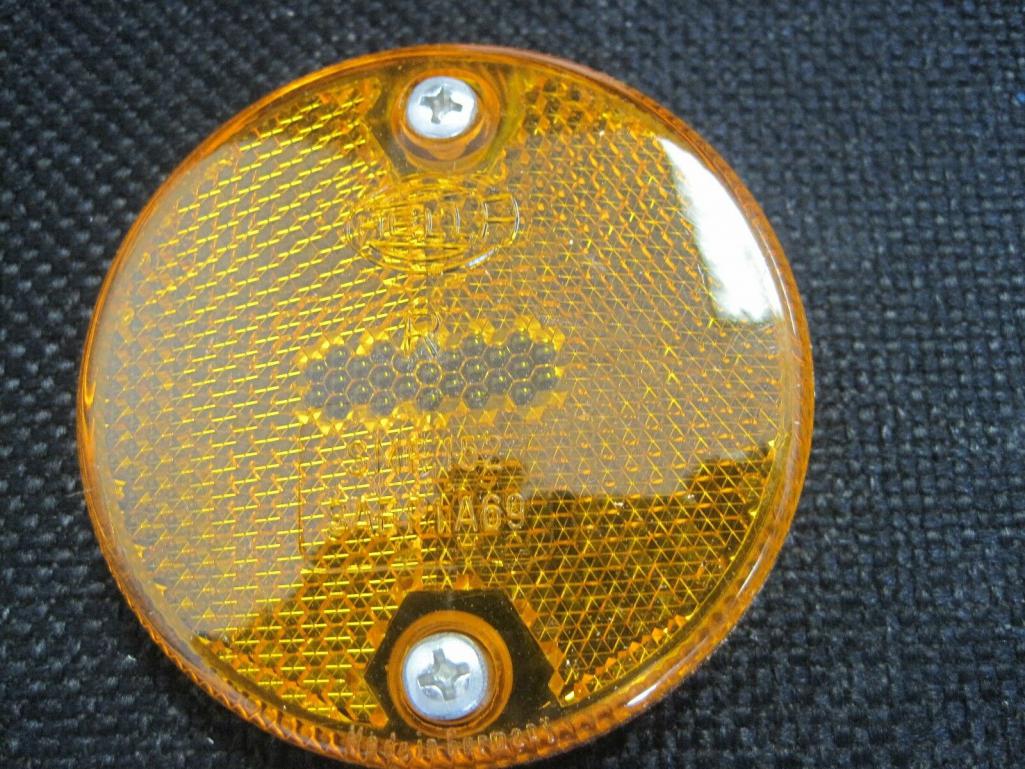 Italian side marker lens: 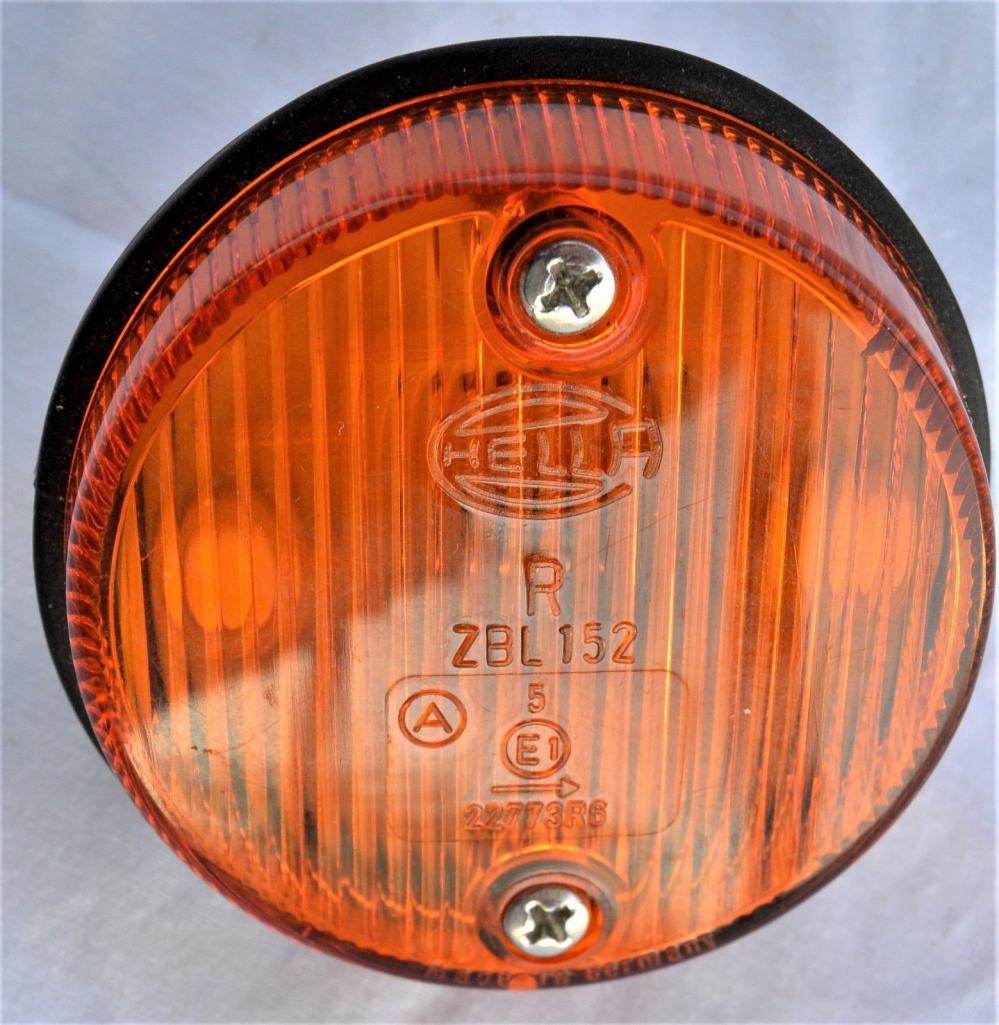 |
|
|
|
| raynekat |
Mar 21 2019, 10:38 PM
Post
#708
|
|
Advanced Member Group: Members Posts: 2,171 Joined: 30-December 14 From: Coeur d'Alene, Idaho Member No.: 18,263 Region Association: Pacific Northwest |
What's next?
1) Need to bleed the brake lines next. And possibly install the axles so they can be torqued...then I can adjust the parking brake. 2) Just Dashes is shipping back to me now a newly restored main targa trim piece and also the one at the top of the windshield. The vinyl grain pattern should be close enough. When I get them in hand, I'll post some pics of the end result. 3) Adjust the driver door/window for better fitment. Then I'm done with my part of the project. Next will be off to Rothsport Racing for installation of the drivetrain. 2.7 MFI RS spec engine (230hp) and rebuilt/upgraded 901 with 904 mainshaft, Guard 930 LSD, close ratio gearing, etc. |
|
|
|
| Cairo94507 |
Mar 22 2019, 06:03 AM
Post
#709
|
|
Michael Group: Members Posts: 10,706 Joined: 1-November 08 From: Auburn, CA Member No.: 9,712 Region Association: Northern California |
Your car is looking absolutely beautiful. I really like the Italian warts too; if you happen upon a stash of those.......... (IMG:style_emoticons/default/beerchug.gif)
|
|
|
|
| mepstein |
Mar 22 2019, 06:34 AM
Post
#710
|
|
914-6 GT in waiting Group: Members Posts: 20,819 Joined: 19-September 09 From: Landenberg, PA/Wilmington, DE Member No.: 10,825 Region Association: MidAtlantic Region |
QUOTE(raynekat @ Mar 22 2019, 12:38 AM) What's next? Then I'm done with my part of the project. Next will be off to Rothsport Racing for installation of the drivetrain. 2.7 MFI RS spec engine (230hp) and rebuilt/upgraded 901 with 904 mainshaft, Guard 930 LSD, close ratio gearing, etc. Just a bare bones drivetrain huh? (IMG:style_emoticons/default/laugh.gif) |
|
|
|
| cary |
Mar 22 2019, 07:52 AM
Post
#711
|
|
Advanced Member Group: Members Posts: 3,900 Joined: 26-January 04 From: Sherwood Oregon Member No.: 1,608 Region Association: Pacific Northwest |
|
|
|
|
| Ferg |
Mar 22 2019, 10:51 AM
Post
#712
|
|
914 Guru Group: Members Posts: 5,948 Joined: 8-January 03 From: Boulder CO Member No.: 116 Region Association: None |
Love Love Love this build. So well done!
|
|
|
|
| raynekat |
Apr 10 2019, 12:09 AM
Post
#713
|
|
Advanced Member Group: Members Posts: 2,171 Joined: 30-December 14 From: Coeur d'Alene, Idaho Member No.: 18,263 Region Association: Pacific Northwest |
Although I put together one set of wheels/tires for this car already (Mahle gas burner with 185/70VR15 Michelin XWX), I thought I needed a set of "performance" tires as well.
Slowly I purchased the four 15x6 Fuchs and had them refinished in a quasi RSR style with petals and inner appearing frosted with a polished lip. The tires from Tire Rack just showed up today. I went with the Toyo Proxes R1R in 195/55R15 size. These are directional tires. Nothing super low profile or quite R compound, although the UTQG rating is still a fairly sticky 200. Should be fine for the street along with the occasional auto-x or track day. 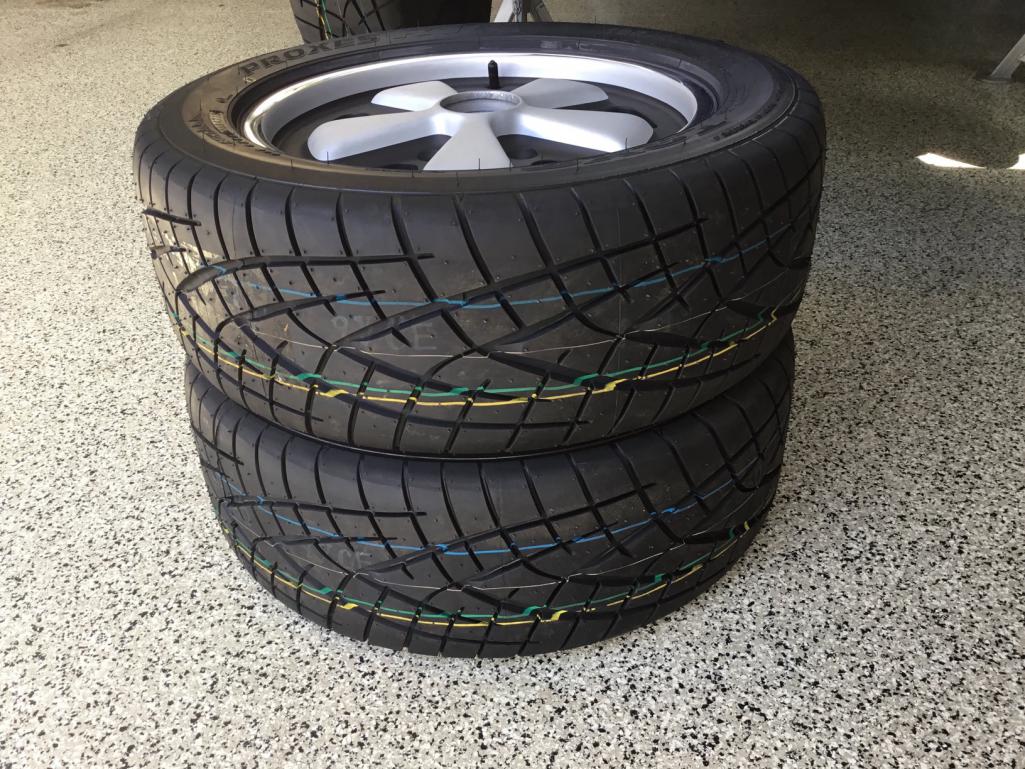 Hard to argue the look of Fuchs on a 914. (IMG:style_emoticons/default/pray.gif) 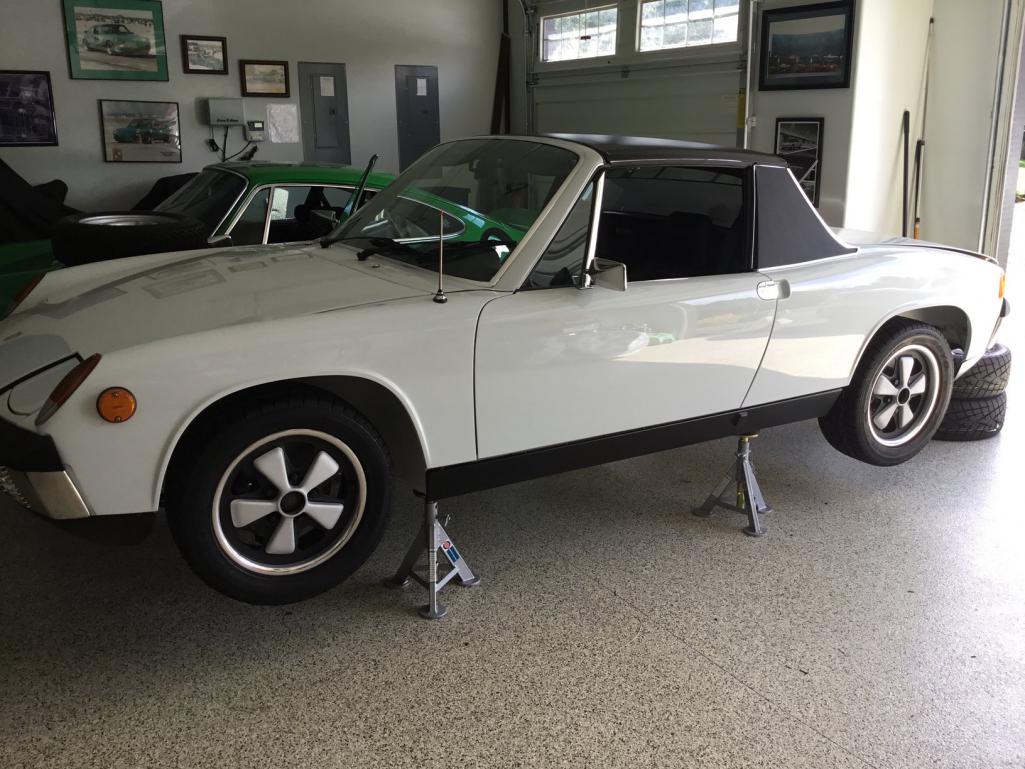 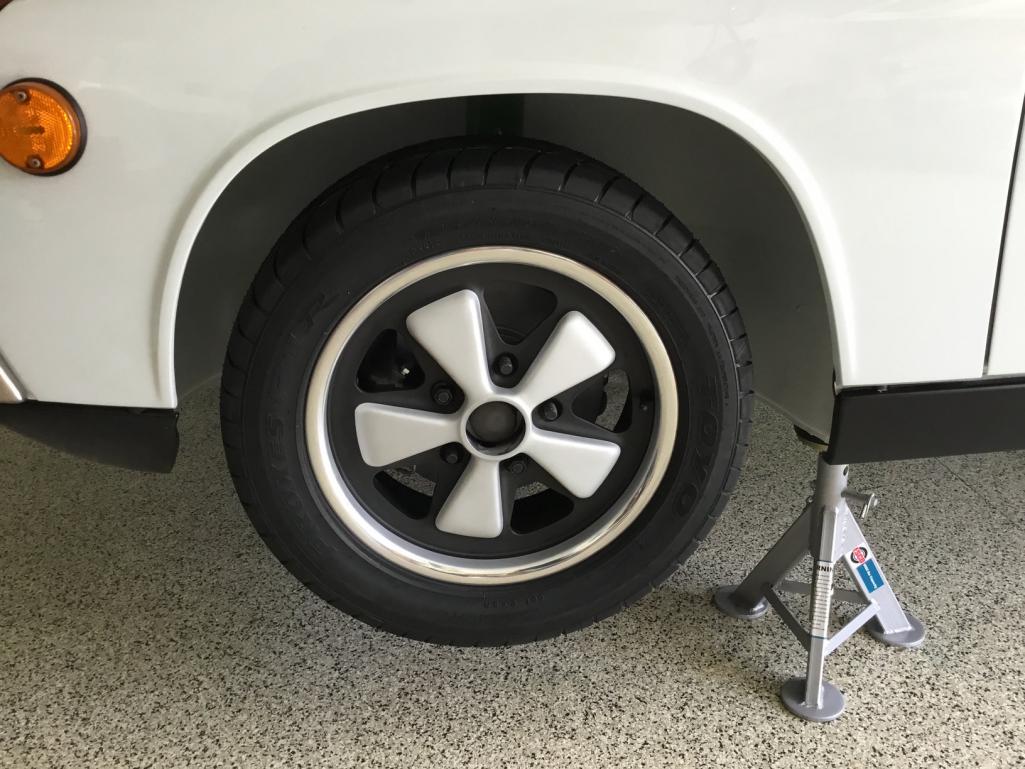 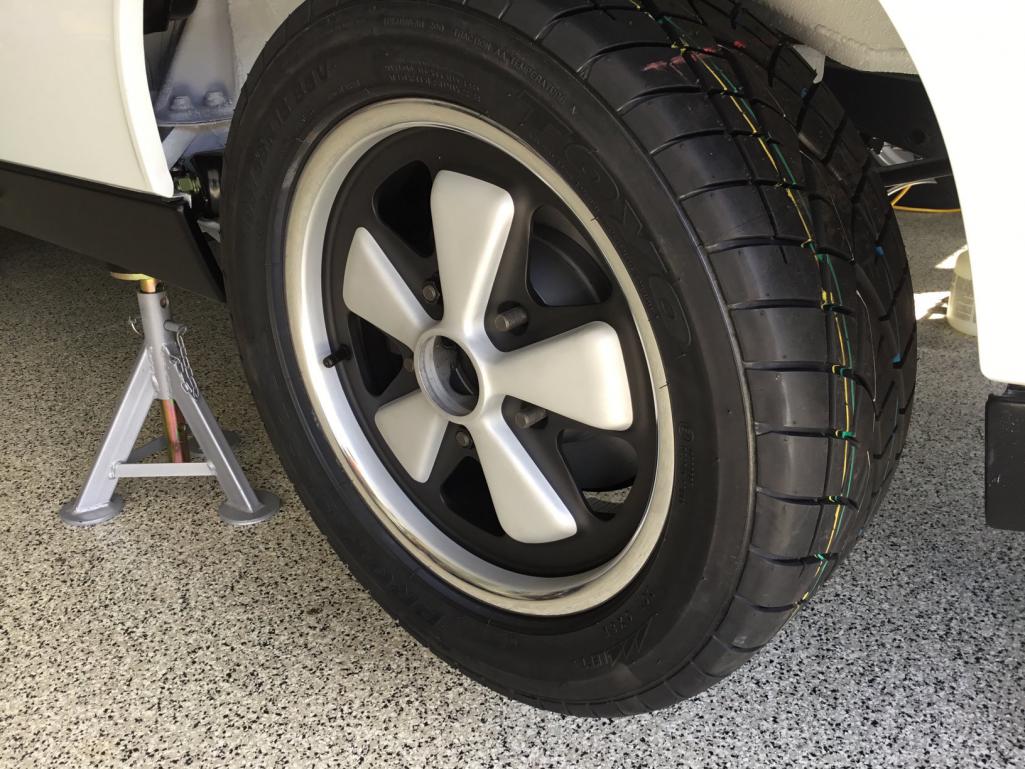 |
|
|
|
| raynekat |
Apr 10 2019, 12:47 AM
Post
#714
|
|
Advanced Member Group: Members Posts: 2,171 Joined: 30-December 14 From: Coeur d'Alene, Idaho Member No.: 18,263 Region Association: Pacific Northwest |
My little experiment with getting some of the interior trim refinished just was delivered to me the other day.
I sent out my main targa pad and the piece of vinyl that is behind the sun visors to Just Dashes in California for a makeover. I did this for 2 reasons. 1) All the so called 2nd hand "nice" targa pads still had issues (cracks, sun damage, etc) and cost at least $400. 2) "New" replacements either had the wrong vinyl pattern or were still in the conceptual phase with no delivery date in sight. The price from Just Dashes was similar to the best used ones, but the delivery schedule was long (+4 months). Shipped mine out and waited.... This is what mine looked like and was typical of all the used ones I saw. Cracks, etc. Do notice the opening for the hole where the mounting screws go in. It has a fairly square or sharp edge. You'll want to remember that when you see what returned from Just Dashes. 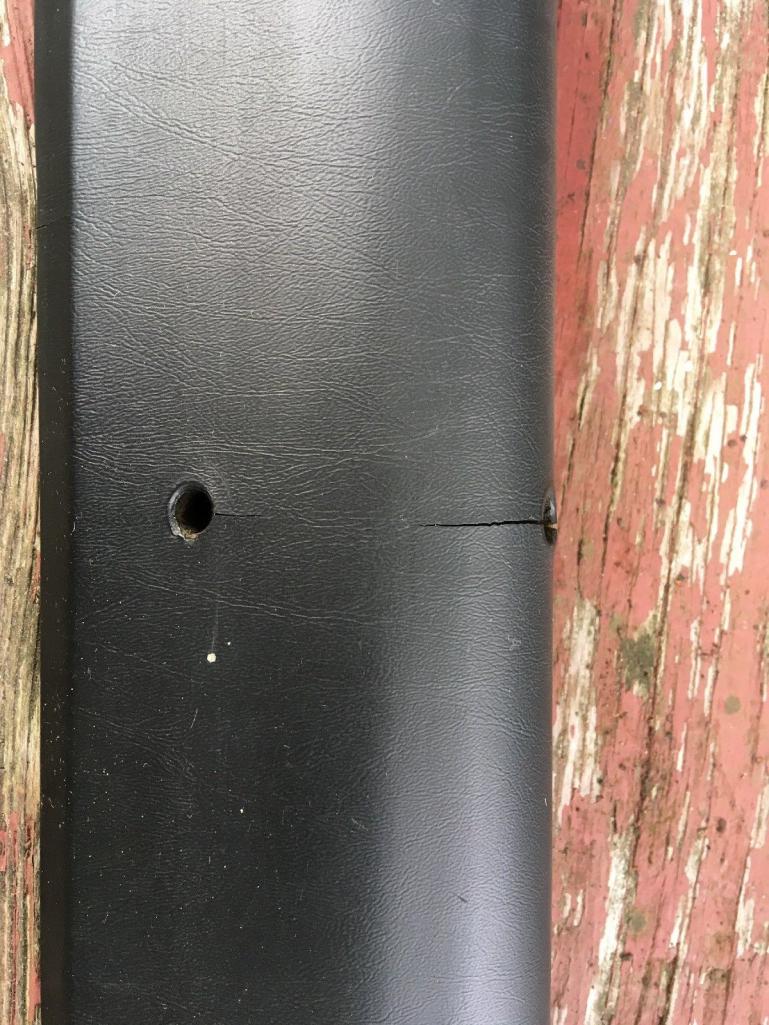 Factory style plug for the mounting holes. Again keep this in mind. 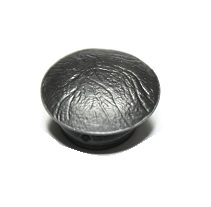 |
|
|
|
| raynekat |
Apr 10 2019, 01:07 AM
Post
#715
|
|
Advanced Member Group: Members Posts: 2,171 Joined: 30-December 14 From: Coeur d'Alene, Idaho Member No.: 18,263 Region Association: Pacific Northwest |
Pics are so-so, as I can't roll the car out in the daylight yet, but you'll get the idea.
Although the vinyl pattern is not an exact match with the factory, it is still very nice and close enough for my needs. If you are a hard core serious concours type...maybe not. Still need to paint that hardware (did so in later pics). 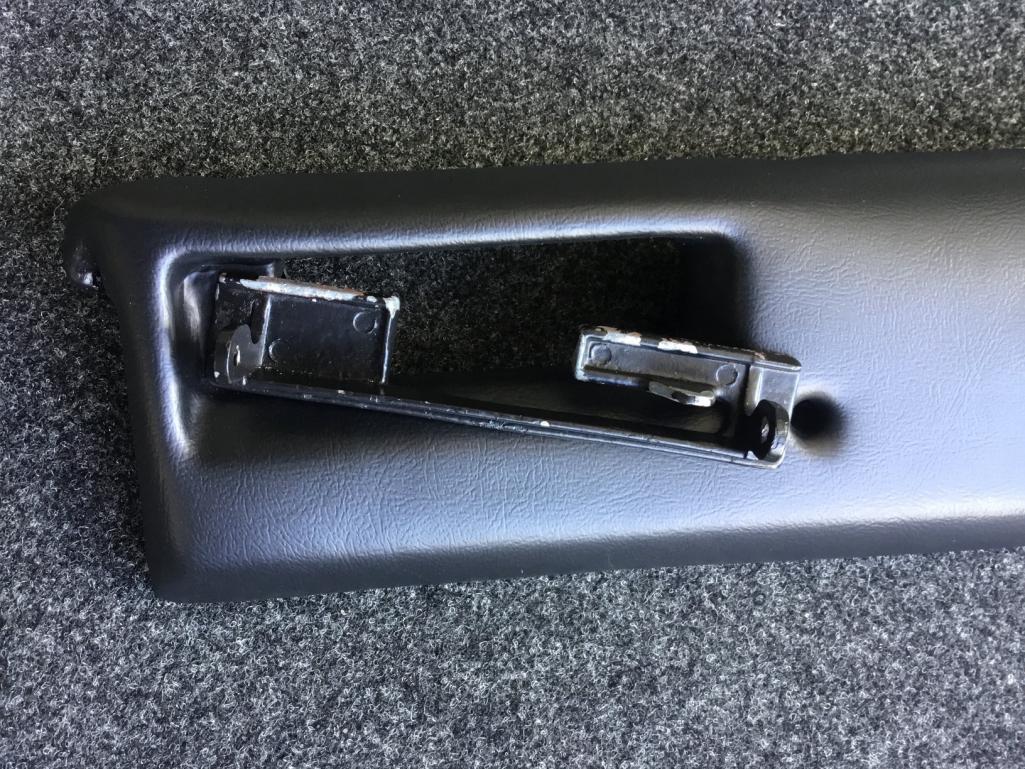 Here is what all the screw holes looked like from Just Dashes. Remembering the very square/sharp edge to the factory holes, these were much more rounded at the edge. So much so that using the factory plugs was not going to happen. 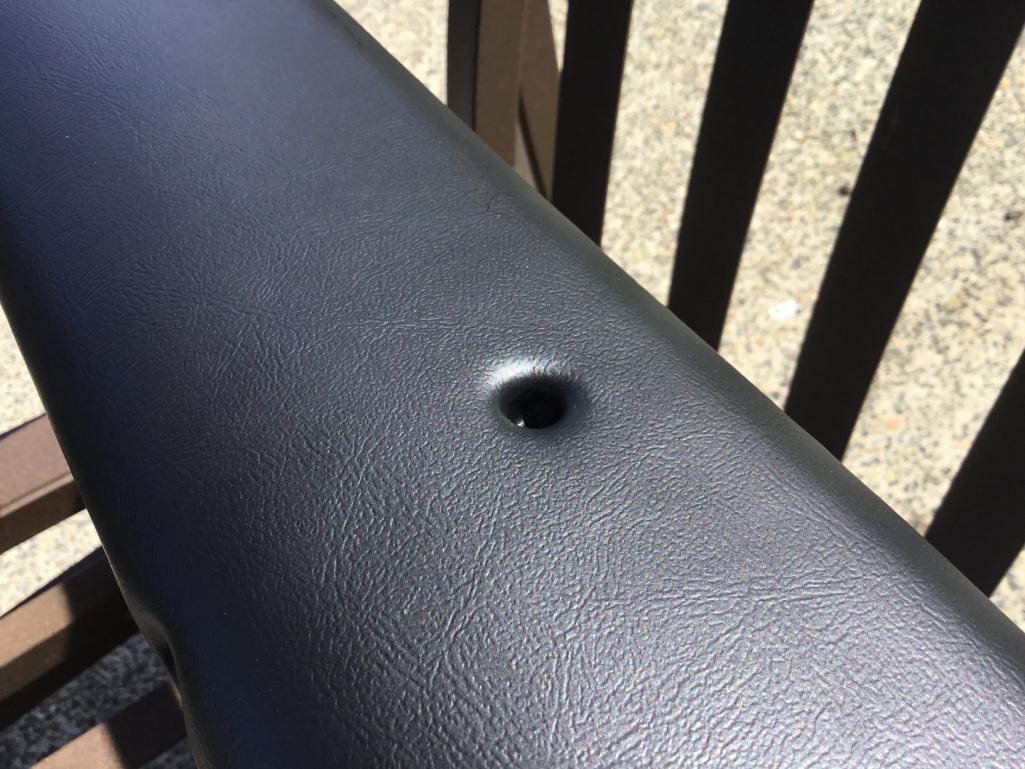 Here's what the piece that goes behind the sun visors looked like. Again, I'm happy with the vinyl and finished product. Not so much with the profile of the mounting holes. I did come up with a solution. 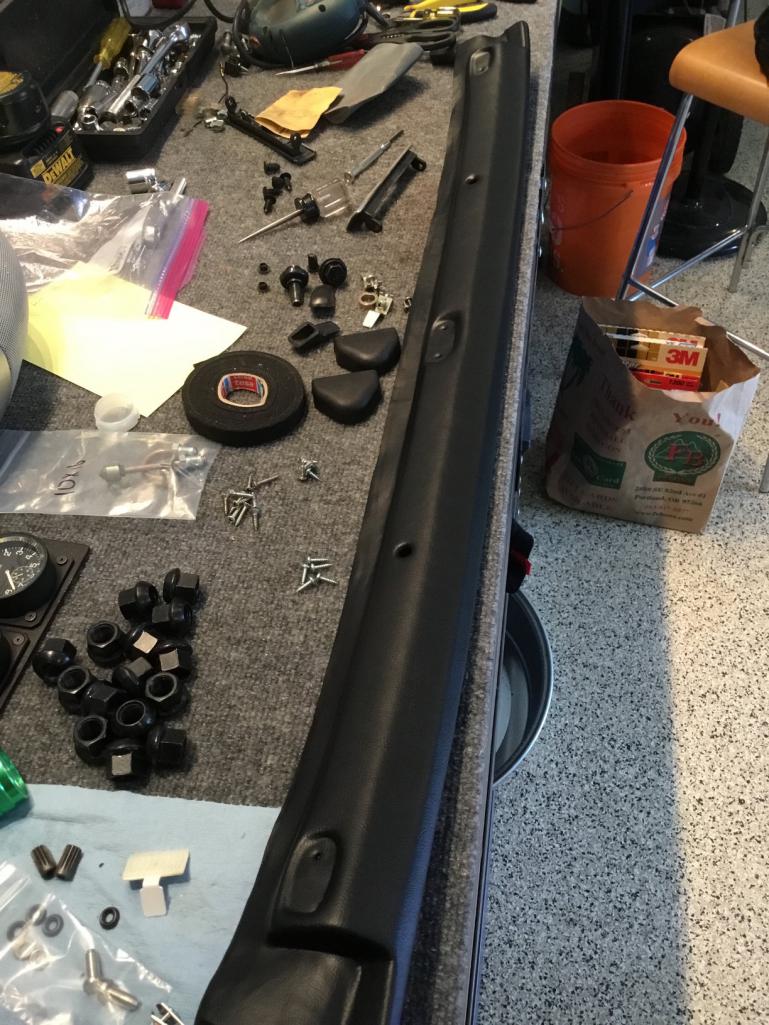 I needed to cut a hole on each end of this vinyl piece for the front latch to get access to it's fastening cleat in the roof. The hole is not yet cut in this pic. 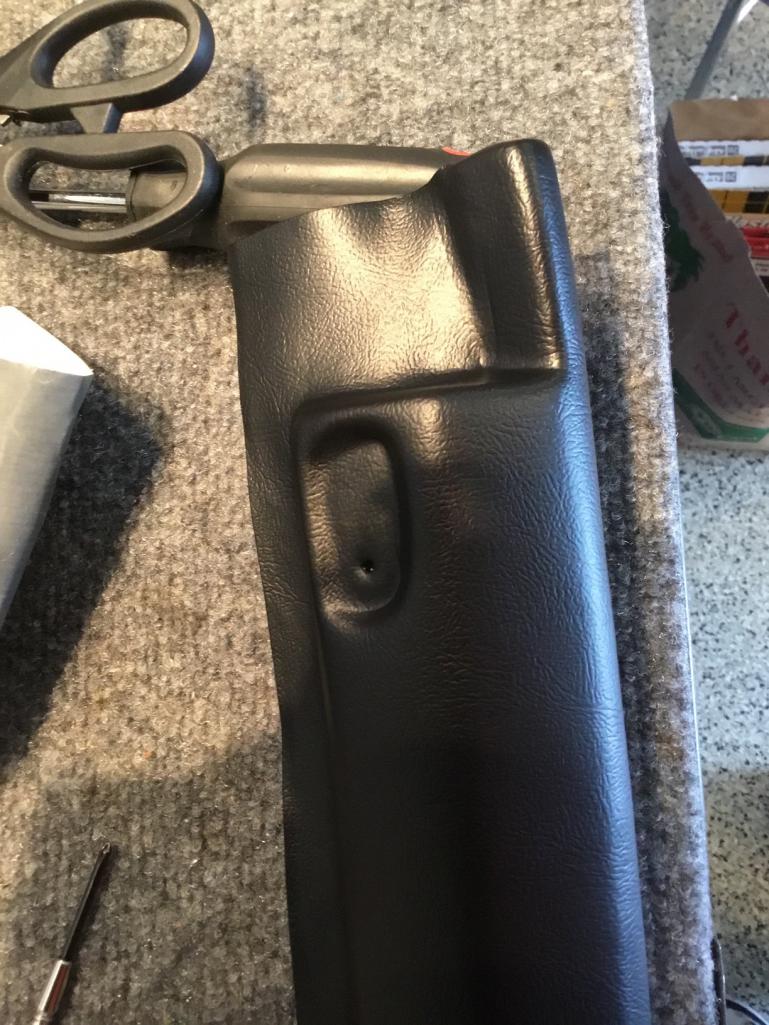 Again those pesky rounded holes for the mounting screws. 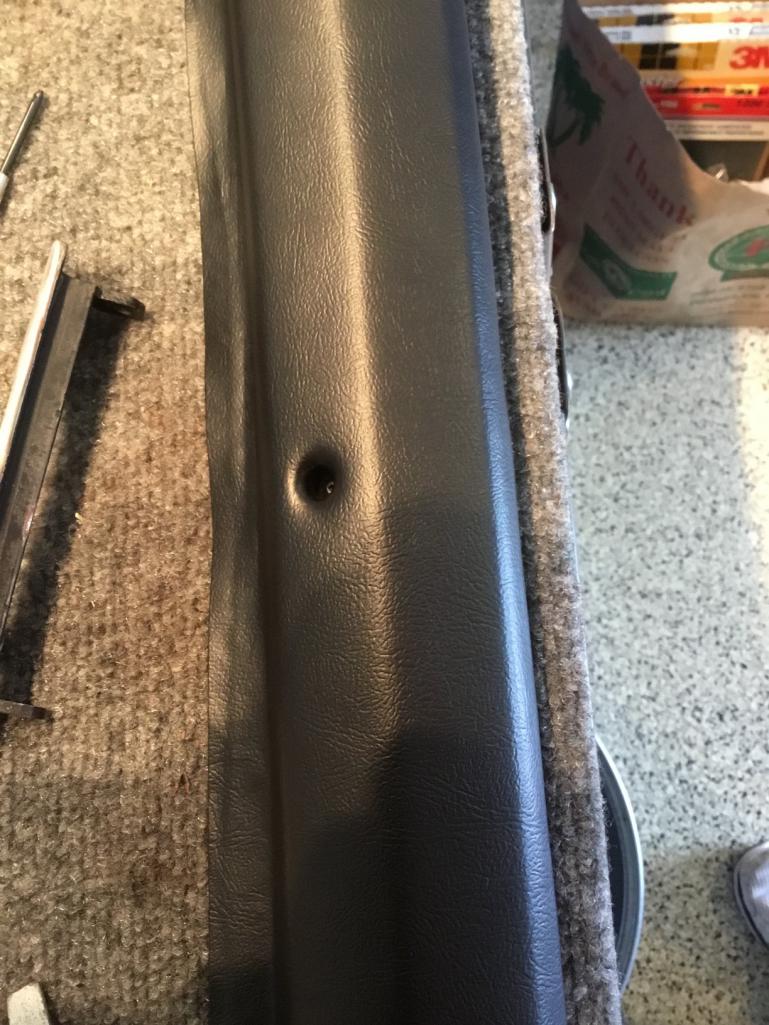 |
|
|
|
| raynekat |
Apr 10 2019, 01:23 AM
Post
#716
|
|
Advanced Member Group: Members Posts: 2,171 Joined: 30-December 14 From: Coeur d'Alene, Idaho Member No.: 18,263 Region Association: Pacific Northwest |
Pics of the targa pad installed.
Amazingly all the mounting holes matched up...worried that would be a problem. I didn't really want to drill a bunch of new mounting holes to put this piece in place. The hardware has been repainted at this point now. 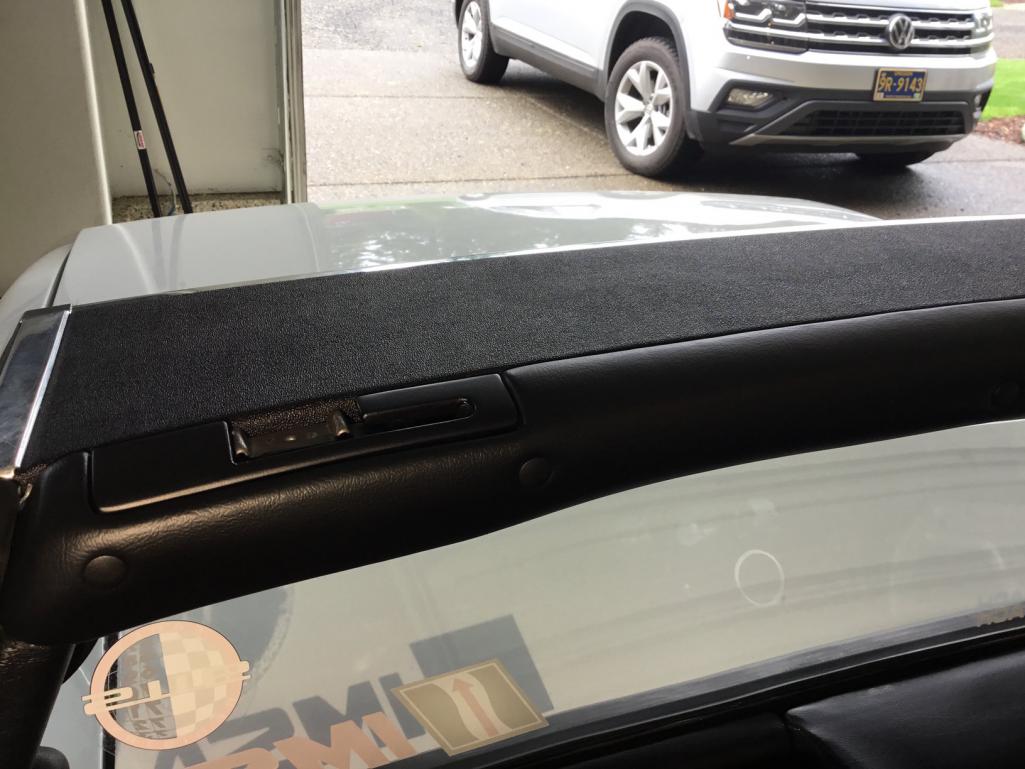 The other side. Again, sorry for the pics. When I get the brakes bled this week, I'll get the car off the jack stands and out in the light of day for better pics. Oh yeah...there are plugs/caps installed as you can see. More on that later. 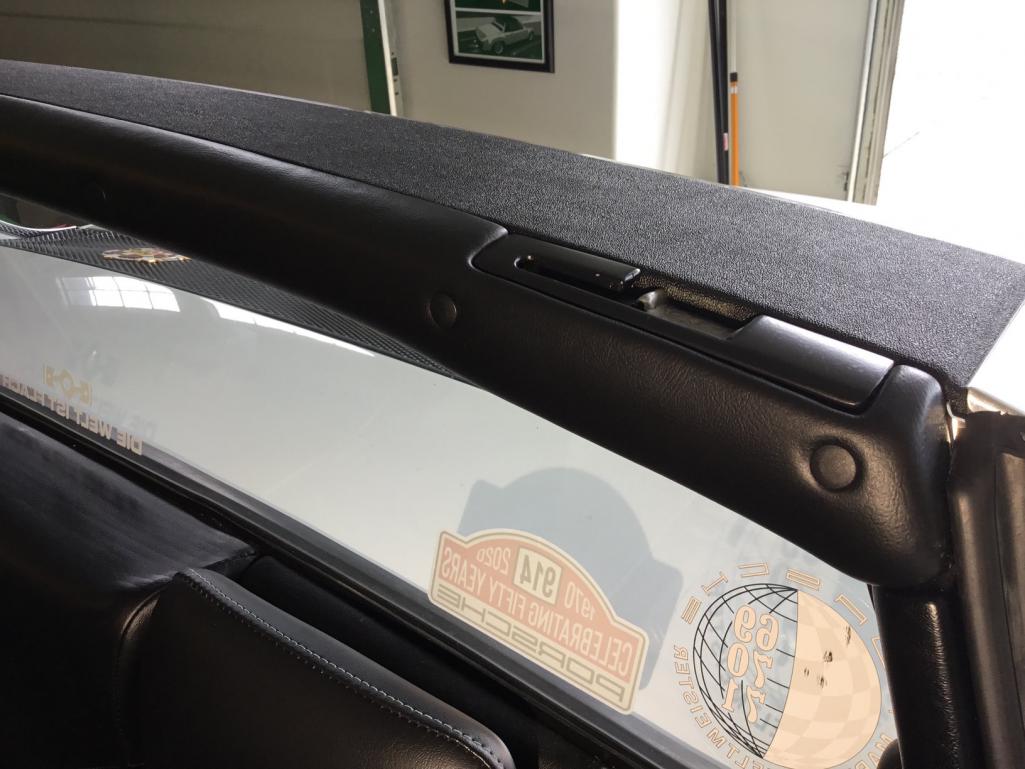 So nice to have a fresh looking non-cracked targa trim piece. This really is one of the focal points of the car when the roof is off. 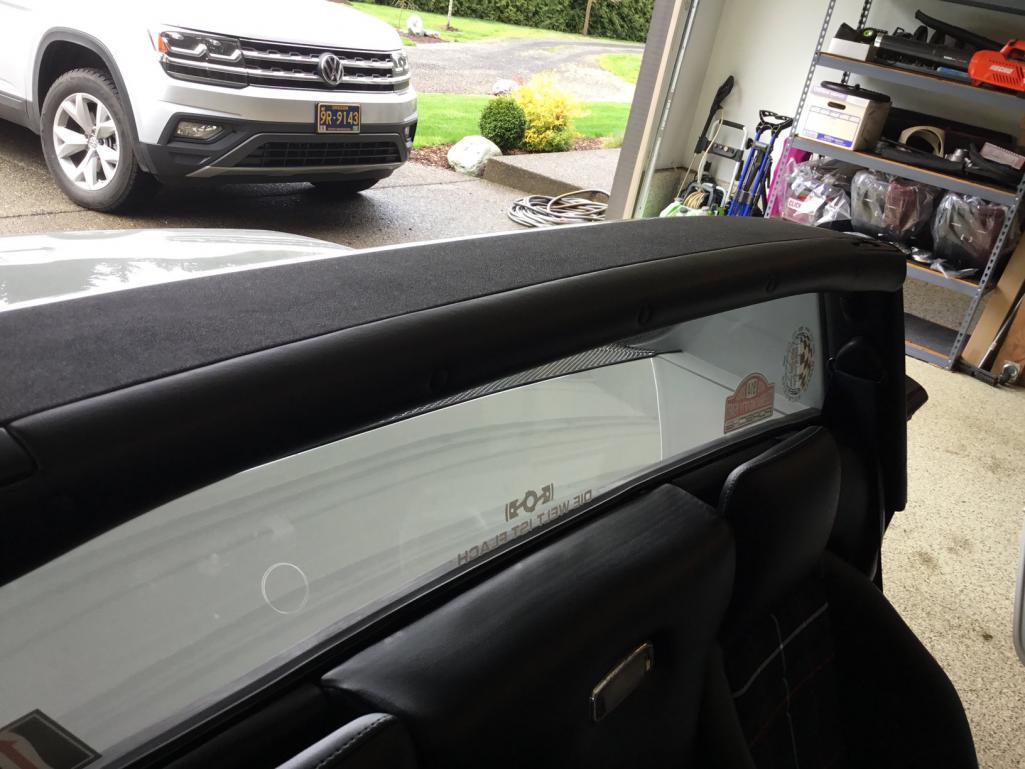 A view from underneath. Nice pretty caps all along the length.  So my solution for not being able to use the factory caps that cover the mounting screws. These little guys that I saw at my local FLAPS (3 for $5!!!) that I ended up buying them on Ebay for something like 50 for $7. Deal. It was necessary to shorten them a tad which I did with a set of wire snippers. Also I wrapped the teeth with the same cloth covered tape I used when I redid my chassis wiring harness. This made the part that shoved into the hole just a bit larger. My modified plugs fit nice and snug and look as good as the factory ones. Likely fit much better. If they ever get loose....just put another wrap of the cloth harness tape around the base of the plug. 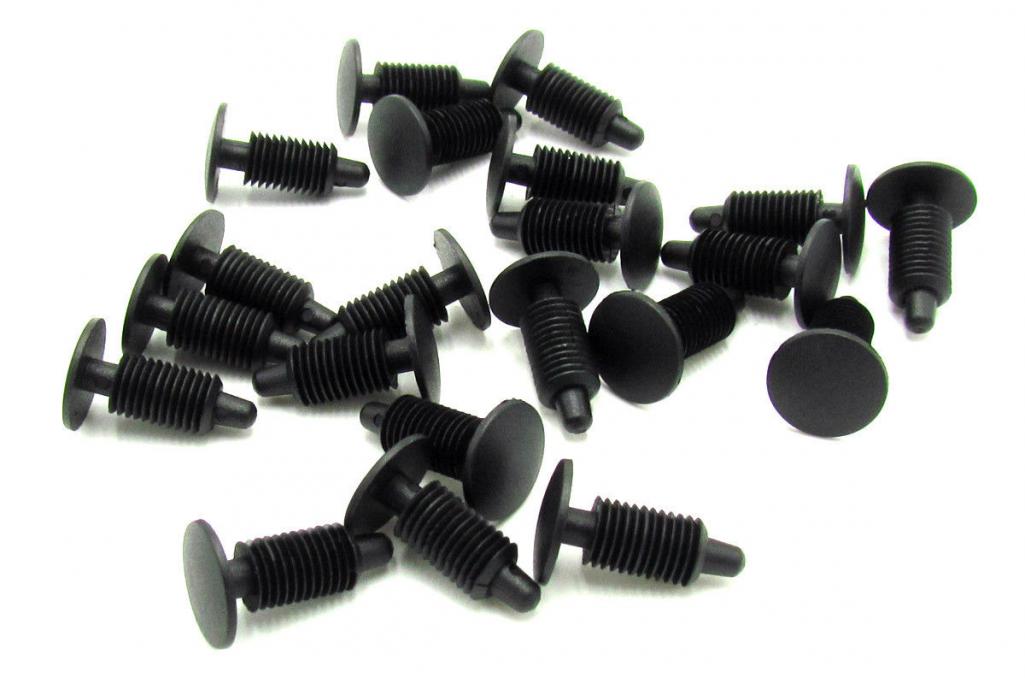 In the end, I am very happy with the result. The refinished targa vinyl piece looks really great inside of the car. Few people will ever know that this is not the way the car came from the factory....it's that nice. The vinyl piece that went behind the sun visors went in without a hitch. Just had to cut the access hole on each end for the 2 front targa latches. Interior is complete at this point. Only 2 things left on my list: 1) Bleed brakes 2) Make some adjustments to the driver door/window for better closure. |
|
|
|
| defianty |
Apr 10 2019, 02:00 AM
Post
#717
|
|
Senior Member Group: Members Posts: 659 Joined: 9-August 06 From: Essex, UK Member No.: 6,621 Region Association: None |
Absolutely stunning work. Such a beautiful car.
Really like those black caps. I'll look into those as a few of the mount holes in mine have enlarged and work hold the original caps in place. Thanks for the tip. |
|
|
|
| Cairo94507 |
Apr 10 2019, 07:15 AM
Post
#718
|
|
Michael Group: Members Posts: 10,706 Joined: 1-November 08 From: Auburn, CA Member No.: 9,712 Region Association: Northern California |
Thanks for the tip re the plugs for the Targa pad, etc. I also had Just Dashes re-do my stuff and we may have to use your "fix". Looks perfect IMHO. (IMG:style_emoticons/default/beerchug.gif)
|
|
|
|
| mepstein |
Apr 10 2019, 07:28 AM
Post
#719
|
|
914-6 GT in waiting Group: Members Posts: 20,819 Joined: 19-September 09 From: Landenberg, PA/Wilmington, DE Member No.: 10,825 Region Association: MidAtlantic Region |
Looks terrific. Did you use factory screws for the targa pad. I was going to try to find something with a small allen head. Anything would be better than the little phillips head screws. Or maybe you just have more patience than me.
|
|
|
|
| bbrock |
Apr 10 2019, 07:50 AM
Post
#720
|
|
914 Guru Group: Members Posts: 5,269 Joined: 17-February 17 From: Montana Member No.: 20,845 Region Association: Rocky Mountains |
Nice solution on those plugs. It really does look beautiful. It won't be long now! (IMG:style_emoticons/default/white914.jpg)
|
|
|
|
|
1 User(s) are reading this topic (1 Guests and 0 Anonymous Users)
0 Members:

|
Lo-Fi Version | Time is now: 18th July 2026 - 06:07 AM |
Invision Power Board
v9.1.4 © 2026 IPS, Inc.