|
|
|
Porsche, and the Porsche crest are registered trademarks of Dr. Ing. h.c. F. Porsche AG.
This site is not affiliated with Porsche in any way. Its only purpose is to provide an online forum for car enthusiasts. All other trademarks are property of their respective owners. |
|
|

  |

| Bruce Hinds |
 Jan 12 2018, 08:53 PM Jan 12 2018, 08:53 PM
Post
#721
|
|
V-8 madness  Group: Members Posts: 759 Joined: 27-December 06 From: Port Orchard, WA Member No.: 7,391 Region Association: Pacific Northwest |
QUOTE(Unobtanium-inc @ Jan 12 2018, 06:33 PM)  Made some progress today finished out all the front cowl metal. I also got to try out my new metal brake, that was cool. Ran out of day when a guy came to pick up a 911 but happy with the progress I made. Wow, what great junk you got laying around. Of course the 550 hanging from the lift is just awe inspiring! |
   |

 
|
| Unobtanium-inc |
Jan 25 2018, 02:44 PM
Post
#722
|
|
Advanced Member Group: Members Posts: 2,381 Joined: 29-November 06 From: New York Member No.: 7,276 Region Association: None |
QUOTE(Bruce Hinds @ Jan 12 2018, 06:53 PM) QUOTE(Unobtanium-inc @ Jan 12 2018, 06:33 PM) Made some progress today finished out all the front cowl metal. I also got to try out my new metal brake, that was cool. Ran out of day when a guy came to pick up a 911 but happy with the progress I made. Wow, what great junk you got laying around. Of course the 550 hanging from the lift is just awe inspiring! Thanks Bruce! The 550 is turning into a fun one. Made some good progress on the build today. Start working on the inner fenders as well as the metal around the shock mount. The first piece came out pretty nice but it was only one curve. The next piece was a lot of banging, shrinking, stretching, and more shaping. I ended up cutting it in two piece which helped get the curves better. So far so good. Attached image(s) 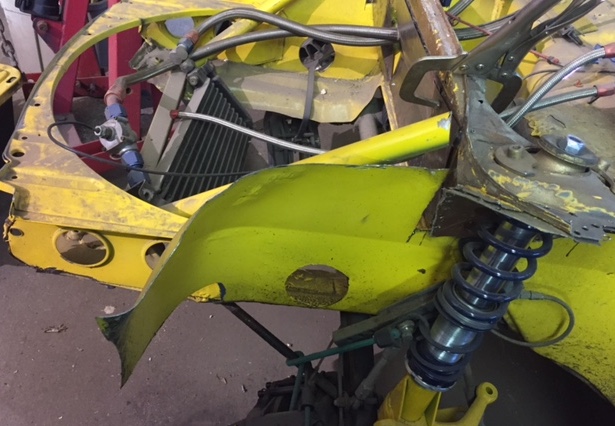 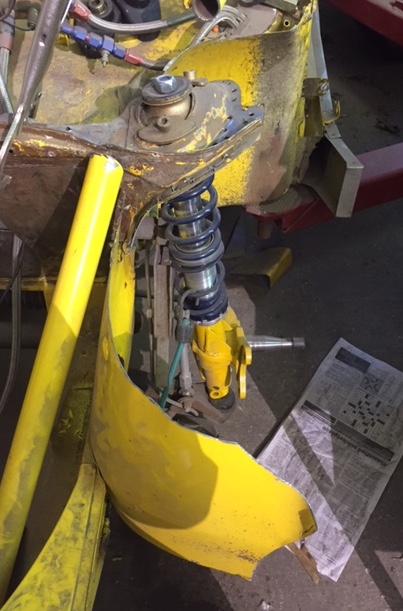  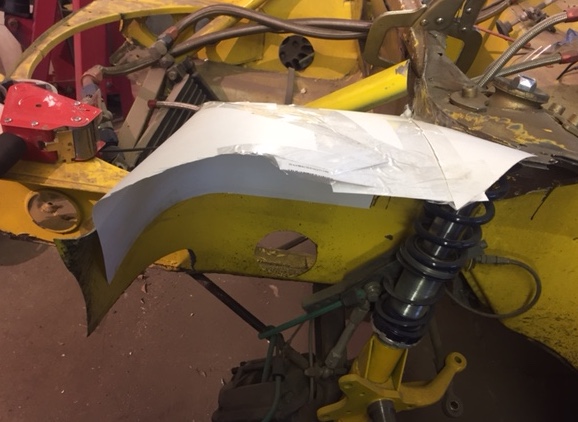   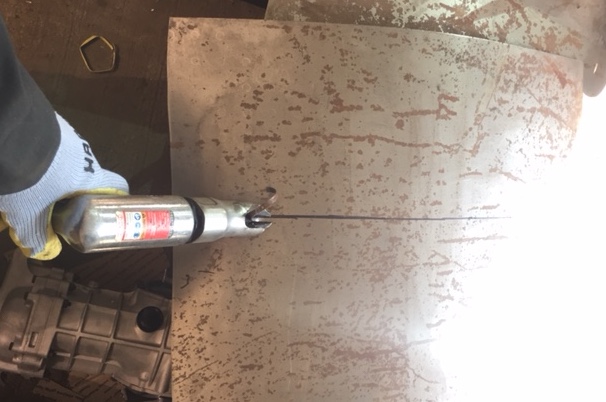 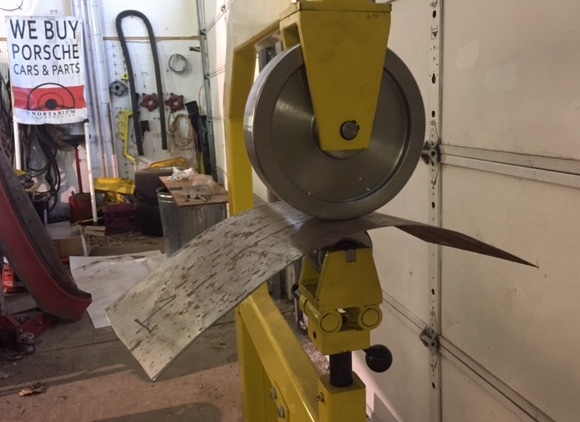 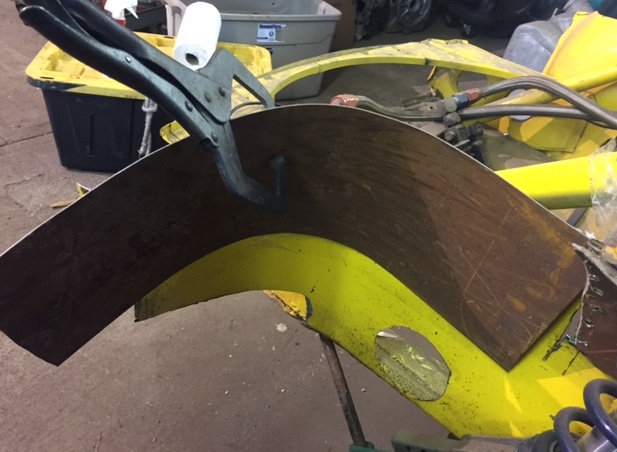 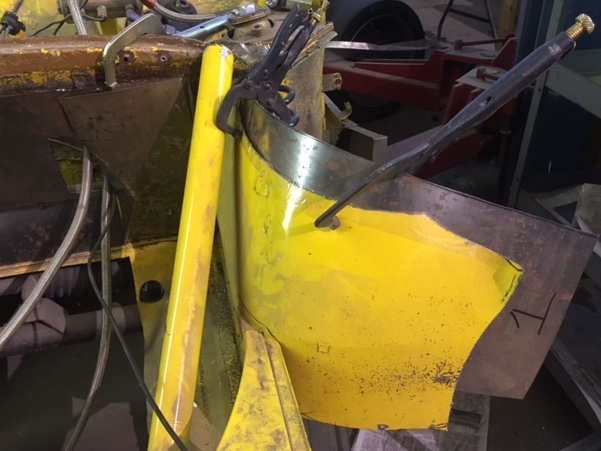 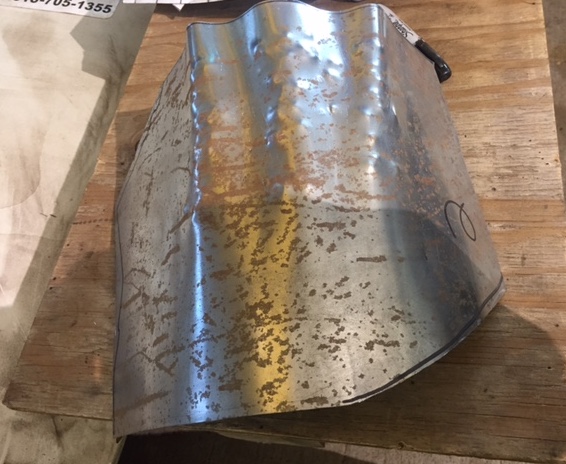 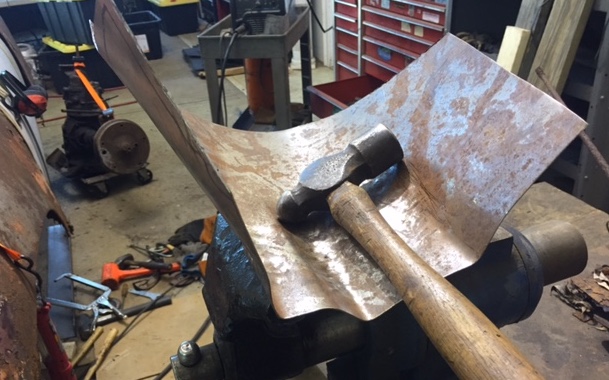 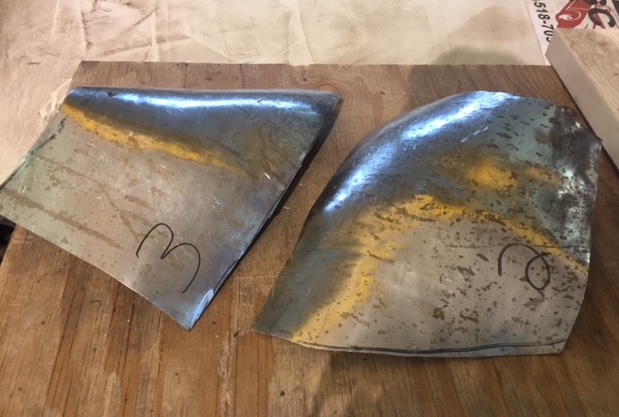 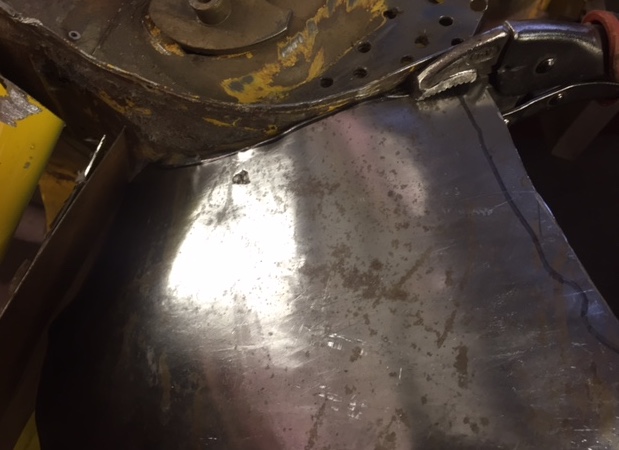 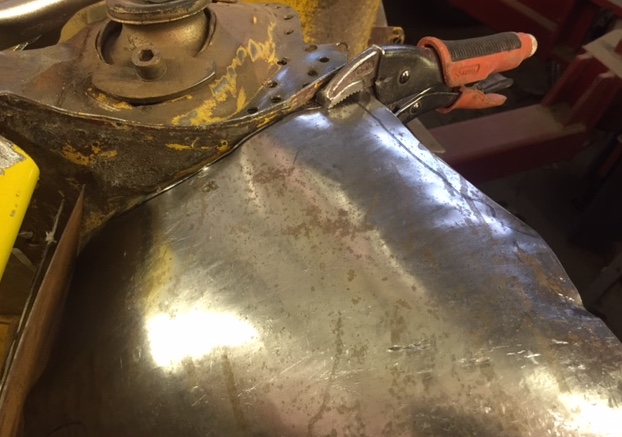
|
|
|
|
| IronHillRestorations |
Jan 25 2018, 07:50 PM
Post
#723
|
|
I. I. R. C. Group: Members Posts: 6,887 Joined: 18-March 03 From: West TN Member No.: 439 Region Association: None |
I've never used an english wheel, or really see one used. So you beat a wrinkle in the metal and then smooth it out?
|
|
|
|
| tygaboy |
Jan 25 2018, 08:17 PM
Post
#724
|
|
914 Guru Group: Members Posts: 5,699 Joined: 6-October 15 From: Petaluma, CA Member No.: 19,241 Region Association: Northern California |
It's all about how you want to shrink the metal. The example just photo'd above is using tuck shrinking. You can tuck shrink by creating a high spot that put a V into the material then hammer the metal back into itself, which shrinks it and creates a compound curve. You're left with the proverbial "bag of walnuts". Then you can employ the English Wheel to smooth it out.
Depending on how much pressure you use when wheeling, you can either just smooth things out or you can stretch/thin the material, which causes the compound curve to raise up more. Here's a simple hood scoop I made. The compound curve area was all done on the English wheel. It started as a flat piece and I "wheeled up" the curved area by stretching it. It's fun stuff! Attached thumbnail(s) 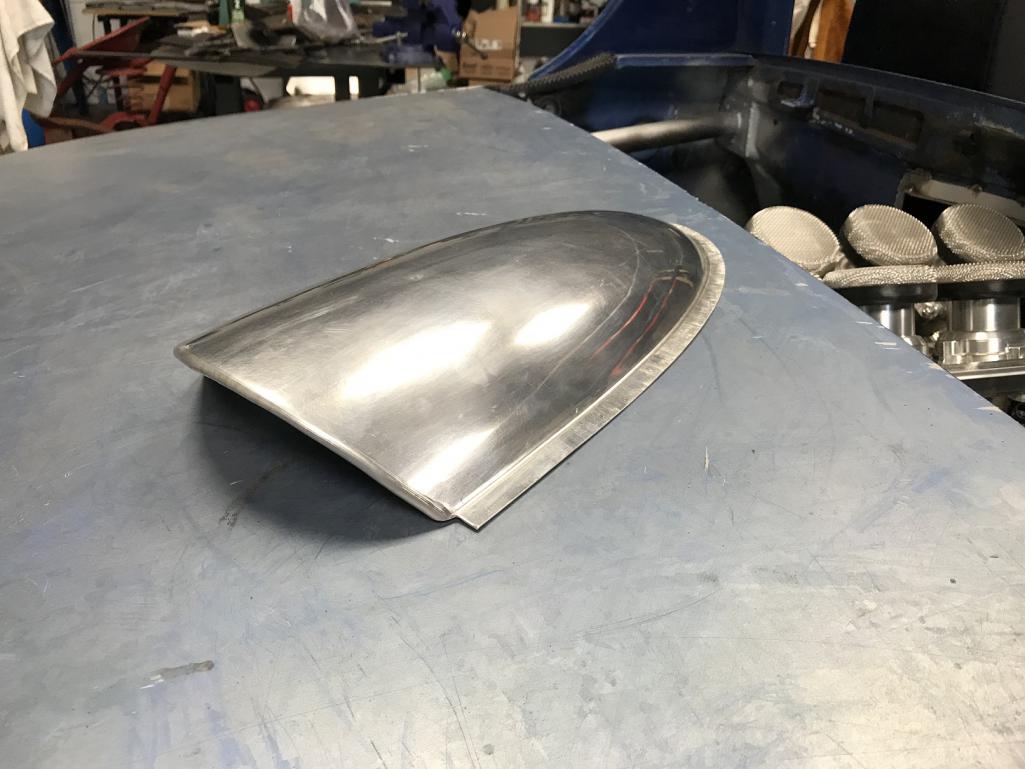
|
|
|
|
| PlaysWithCars |
Jan 25 2018, 09:45 PM
Post
#725
|
|
Senior Member Group: Members Posts: 537 Joined: 9-November 03 From: Southeast of Seattle Member No.: 1,323 Region Association: Pacific Northwest |
Fascinated by metal shaping and wish I had the room for the equipment. I would be out there playing all of the time. The 'tuck shrink' just doesn't seem plausible unless your folding the metal back on itself. But then you'd need to heat it to forge it back together. I'm off to YouTube to see what I can find.
Just fascinating. |
|
|
|
| Unobtanium-inc |
Jan 25 2018, 09:56 PM
Post
#726
|
|
Advanced Member Group: Members Posts: 2,381 Joined: 29-November 06 From: New York Member No.: 7,276 Region Association: None |
QUOTE(plays with cars @ Jan 25 2018, 07:45 PM) Fascinated by metal shaping and wish I had the room for the equipment. I would be out there playing all of the time. The 'tuck shrink' just doesn't seem plausible unless your folding the metal back on itself. But then you'd need to heat it to forge it back together. I'm off to YouTube to see what I can find. Just fascinating. The guy that taught me said you have to think of the metal like clay, it can be molded, it just takes time and patience. |
|
|
|
| bretth |
Jan 25 2018, 10:01 PM
Post
#727
|
|
Senior Member Group: Members Posts: 899 Joined: 23-June 15 From: Central TX Member No.: 18,882 Region Association: Southwest Region |
Coolio. Trying make some real progress on my own car. Damn cold in the garage.
|
|
|
|
| jd74914 |
Jan 26 2018, 07:01 AM
Post
#728
|
|
Its alive Group: Members Posts: 4,862 Joined: 16-February 04 From: CT Member No.: 1,659 Region Association: North East States |
What not use grommets for those oil cooler hoses? I'd sure look a lot cleaner if you removed them, added a solid panel, and ran them back through some holes in it.
|
|
|
|
| Unobtanium-inc |
Jan 26 2018, 08:29 AM
Post
#729
|
|
Advanced Member Group: Members Posts: 2,381 Joined: 29-November 06 From: New York Member No.: 7,276 Region Association: None |
QUOTE(jd74914 @ Jan 26 2018, 05:01 AM) What not use grommets for those oil cooler hoses? I'd sure look a lot cleaner if you removed them, added a solid panel, and ran them back through some holes in it. I'm still playing with that panel, and haven't decided on a new fuel cell yet so not 100% sure how many lines and what size will be going through the panel. And if I do decide to go with this one it will be one panel once it's all welded up. |
|
|
|
| worn |
Jan 26 2018, 11:16 AM
Post
#730
|
|
Winner of the Utah Twisted Joint Award Group: Members Posts: 3,501 Joined: 3-June 11 From: Madison, WI Member No.: 13,152 Region Association: Upper MidWest |
QUOTE(Unobtanium-inc @ Jan 12 2018, 06:33 PM) Made some progress today finished out all the front cowl metal. I also got to try out my new metal brake, that was cool. Ran out of day when a guy came to pick up a 911 but happy with the progress I made. I am wondering if part of the purpose of the multi panel approach is to avoid disconnecting the oil and fuel lines? Are they frozen in place? |
|
|
|
| Bruce Hinds |
Jan 26 2018, 11:29 AM
Post
#731
|
|
V-8 madness Group: Members Posts: 759 Joined: 27-December 06 From: Port Orchard, WA Member No.: 7,391 Region Association: Pacific Northwest |
QUOTE(tygaboy @ Jan 25 2018, 06:17 PM) It's all about how you want to shrink the metal. The example just photo'd above is using tuck shrinking. You can tuck shrink by creating a high spot that put a V into the material then hammer the metal back into itself, which shrinks it and creates a compound curve. You're left with the proverbial "bag of walnuts". Then you can employ the English Wheel to smooth it out. Depending on how much pressure you use when wheeling, you can either just smooth things out or you can stretch/thin the material, which causes the compound curve to raise up more. Here's a simple hood scoop I made. The compound curve area was all done on the English wheel. It started as a flat piece and I "wheeled up" the curved area by stretching it. It's fun stuff! Curious to know what's below those intake stacks in the picture. They look to be on an angle like it may be something other than a flat 6 . . . This was supposed to appear under the scoop picture. The scoop is sitting on a black teener trunk lid. |
|
|
|
| tygaboy |
Jan 26 2018, 11:45 AM
Post
#732
|
|
914 Guru Group: Members Posts: 5,699 Joined: 6-October 15 From: Petaluma, CA Member No.: 19,241 Region Association: Northern California |
QUOTE(Bruce Hinds @ Jan 26 2018, 09:29 AM) QUOTE(tygaboy @ Jan 25 2018, 06:17 PM) It's all about how you want to shrink the metal. The example just photo'd above is using tuck shrinking. You can tuck shrink by creating a high spot that put a V into the material then hammer the metal back into itself, which shrinks it and creates a compound curve. You're left with the proverbial "bag of walnuts". Then you can employ the English Wheel to smooth it out. Depending on how much pressure you use when wheeling, you can either just smooth things out or you can stretch/thin the material, which causes the compound curve to raise up more. Here's a simple hood scoop I made. The compound curve area was all done on the English wheel. It started as a flat piece and I "wheeled up" the curved area by stretching it. It's fun stuff! Curious to know what's below those intake stacks in the picture. They look to be on an angle like it may be something other than a flat 6 . . . This was supposed to appear under the scoop picture. The scoop is sitting on a black teener trunk lid. Don't want to hijack this thread. It's an LS3 w/8 stack injection. Pics here on my build thread: http://www.914world.com/bbs2/index.php?sho...6900&st=520 See post #537 forward |
|
|
|
| Unobtanium-inc |
Jan 26 2018, 02:19 PM
Post
#733
|
|
Advanced Member Group: Members Posts: 2,381 Joined: 29-November 06 From: New York Member No.: 7,276 Region Association: None |
QUOTE(worn @ Jan 26 2018, 09:16 AM) QUOTE(Unobtanium-inc @ Jan 12 2018, 06:33 PM) Made some progress today finished out all the front cowl metal. I also got to try out my new metal brake, that was cool. Ran out of day when a guy came to pick up a 911 but happy with the progress I made. I am wondering if part of the purpose of the multi panel approach is to avoid disconnecting the oil and fuel lines? Are they frozen in place? No, it just had several conflicting angles to conform to the existing body lines. I'm trying to go with as much of the original body lined internally as possible, figure it would add strength to weld as many points as possible. I could have run a flat sheet across the front but I was doing it a little different. |
|
|
|
| Unobtanium-inc |
Mar 2 2018, 04:56 PM
Post
#734
|
|
Advanced Member Group: Members Posts: 2,381 Joined: 29-November 06 From: New York Member No.: 7,276 Region Association: None |
So we are getting about a foot of wet snow today. Why is that good news? Because no one will show up at the shop except me, and the hearty UPS man, can't stop him!
But I got to set up a bunch of new equipment and try to out. I was able to get the new Planishing Hammer going, only a couple of strange fittings and stuff, but it's now fully operational. I also set up the shrinker/stretcher which came with a cool mount that mounts to the vise, so I can put it away when I'm not using it. That's handy for a tool you might only use a couple times a month, it isn't taking up valuable floor space. Between the P Hammer, English Wheel, shrinker, and hand hammer, I am getting the curves I need. Metal work is slow, but you can see progress. I think I'm going to try and head in this weekend so stay tuned! Attached thumbnail(s) 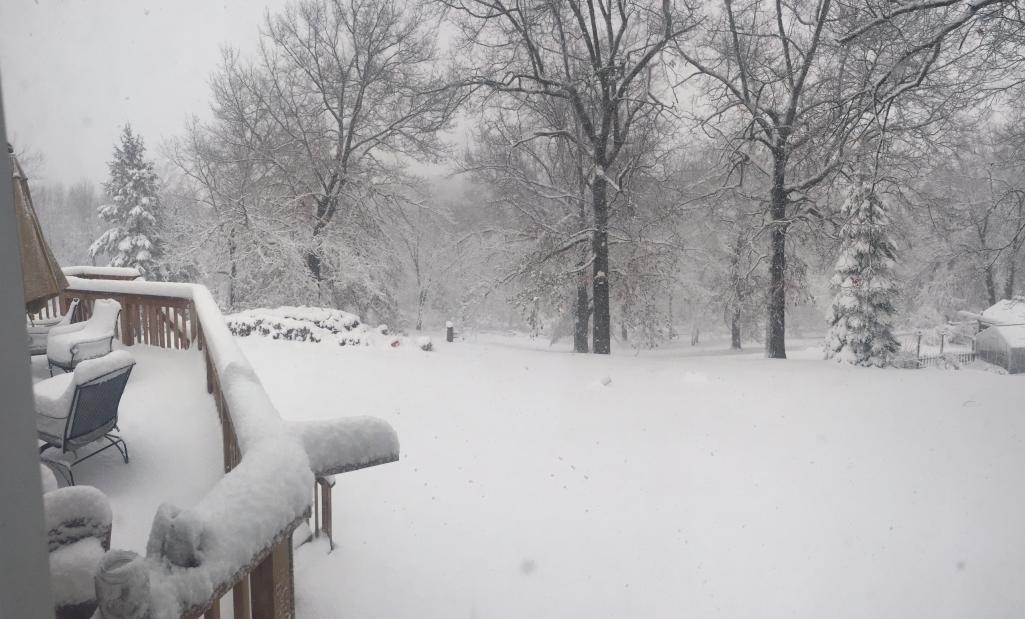 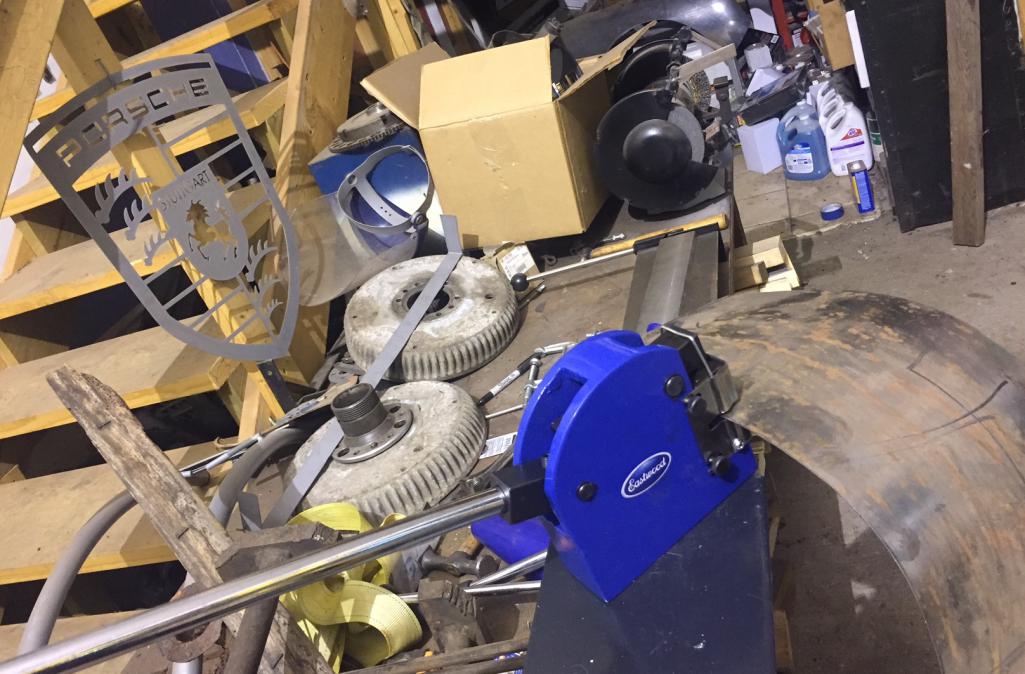 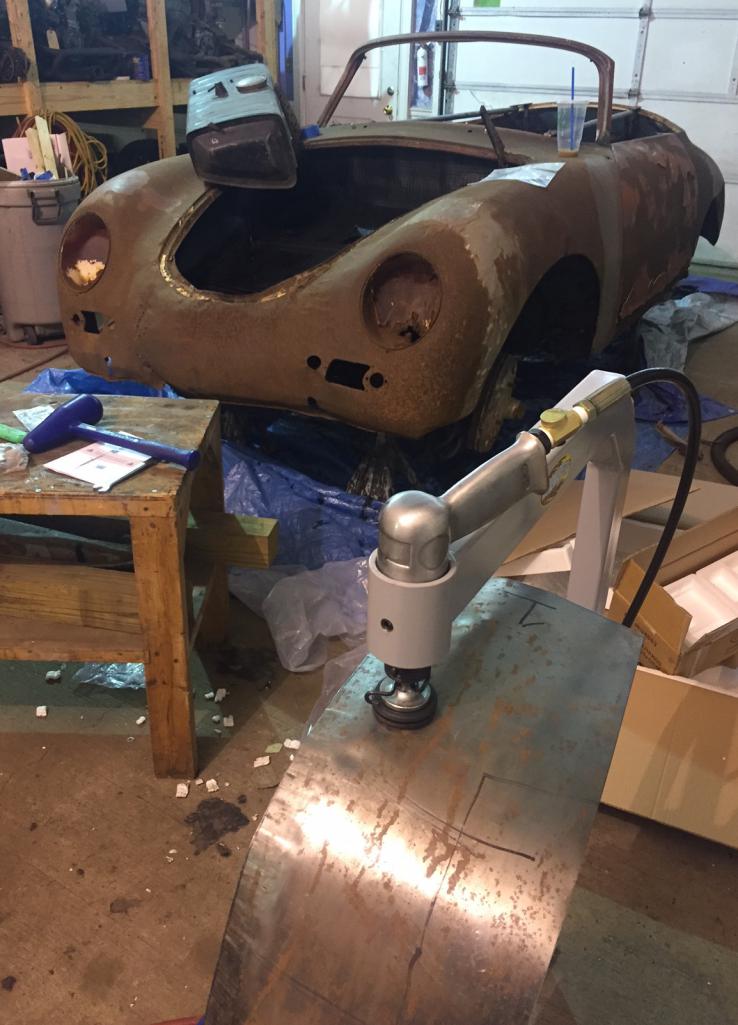 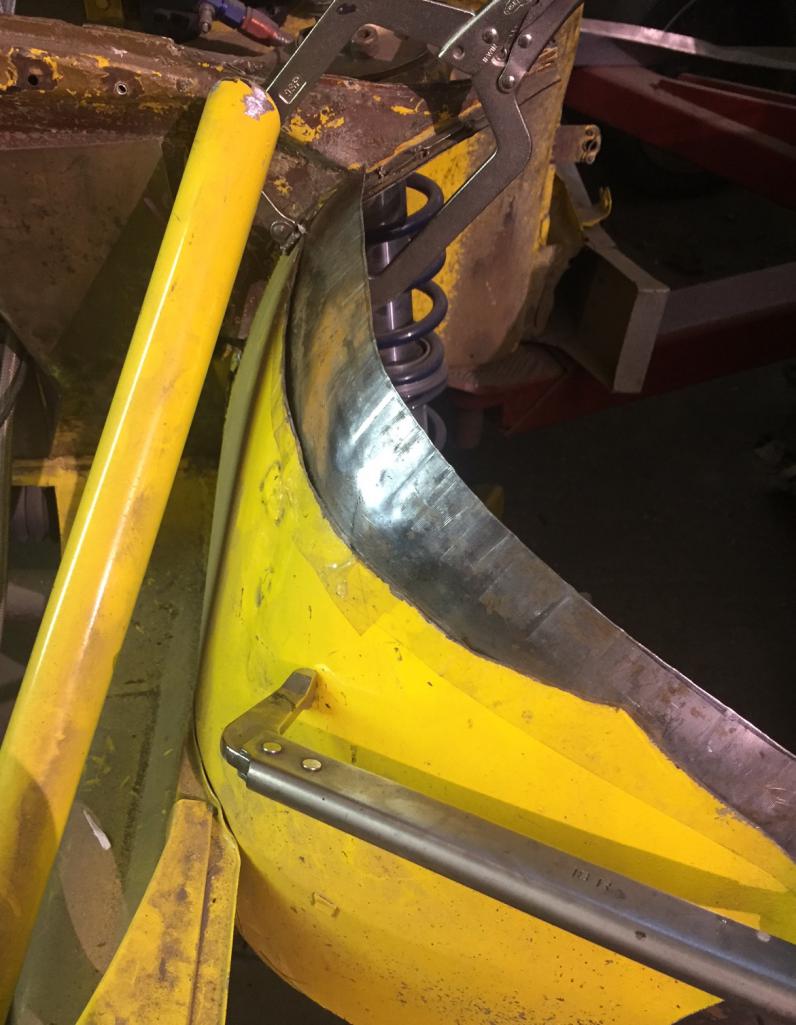 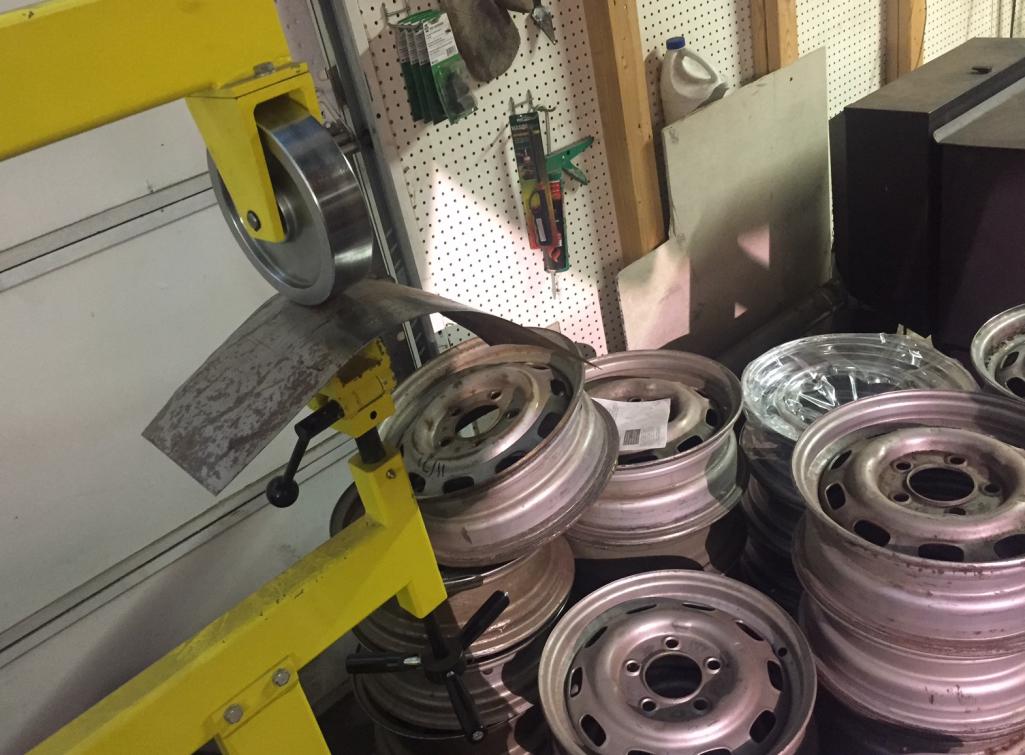
|
|
|
|
| Unobtanium-inc |
Mar 2 2018, 04:56 PM
Post
#735
|
|
Advanced Member Group: Members Posts: 2,381 Joined: 29-November 06 From: New York Member No.: 7,276 Region Association: None |
Final pics.
Attached thumbnail(s) 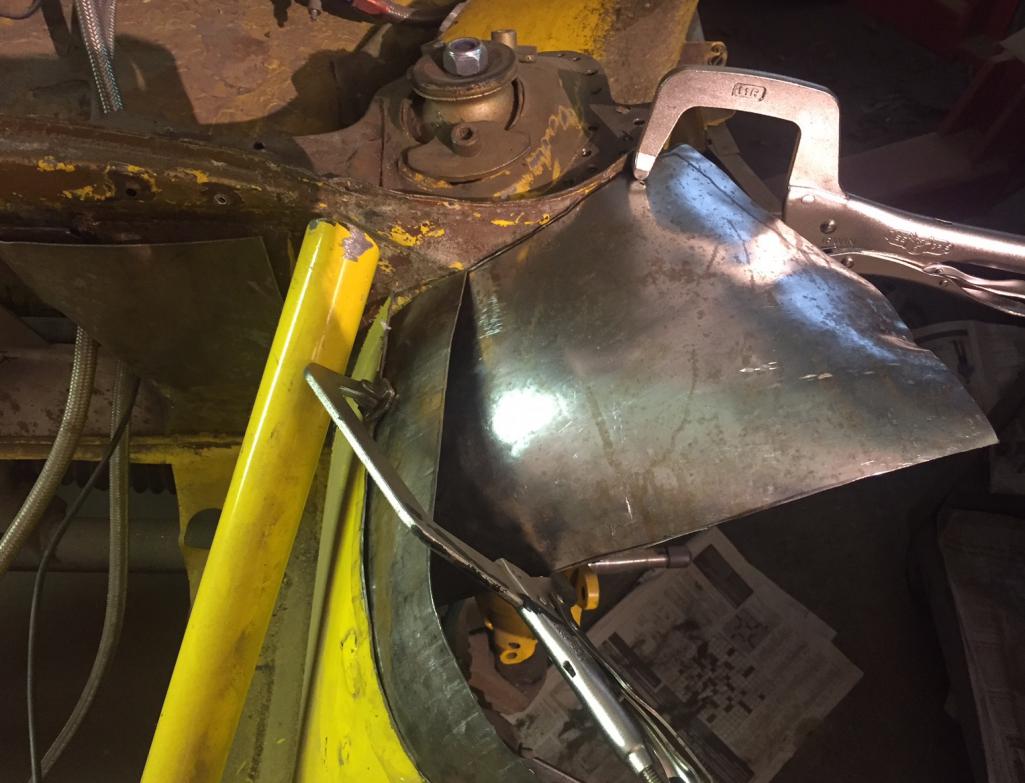 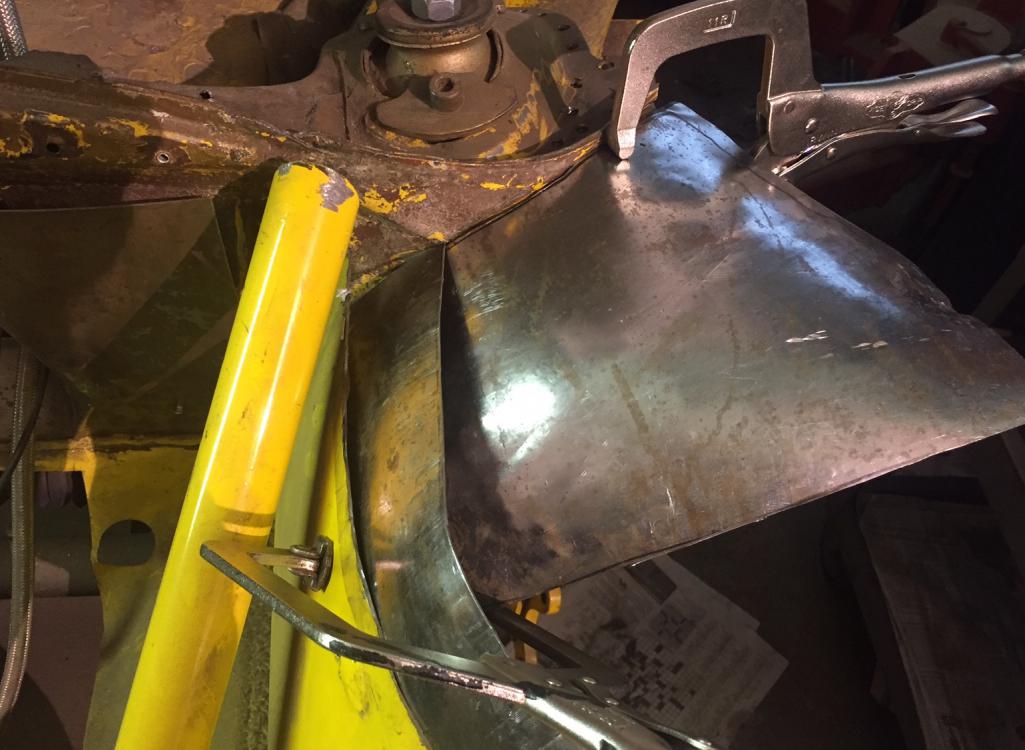
|
|
|
|
| Garland |
Mar 2 2018, 10:04 PM
Post
#736
|
|
Restoration Fanatic Group: Members Posts: 1,417 Joined: 8-January 04 From: ......Michigan...... Member No.: 1,535 Region Association: Upper MidWest |
Looks like fun! (IMG:style_emoticons/default/welder.gif)
|
 |
|
| mb911 |
Mar 3 2018, 07:16 AM
Post
#737
|
|
914 Guru Group: Members Posts: 7,682 Joined: 2-January 09 From: Burlington wi Member No.: 9,892 Region Association: Upper MidWest |
Adam,
I am struggling to see /invision what you are fabbing right now. Can you help explain it? |
|
|
|
| Unobtanium-inc |
Mar 3 2018, 09:06 AM
Post
#738
|
|
Advanced Member Group: Members Posts: 2,381 Joined: 29-November 06 From: New York Member No.: 7,276 Region Association: None |
QUOTE(mb911 @ Mar 3 2018, 05:16 AM) Adam, I am struggling to see /invision what you are fabbing right now. Can you help explain it? I think you have to go back a few pages to see the mockup, I'm doing the driver's side inner fender. Attached image(s)  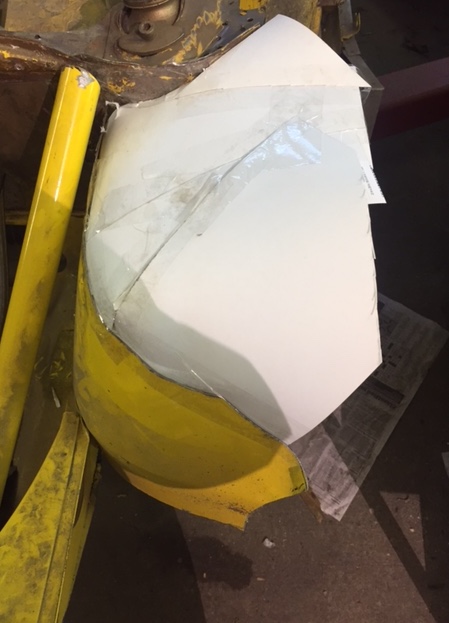
|
|
|
|
| Unobtanium-inc |
Mar 4 2018, 12:11 PM
Post
#739
|
|
Advanced Member Group: Members Posts: 2,381 Joined: 29-November 06 From: New York Member No.: 7,276 Region Association: None |
Very satisfying day today. Up at 6AM on a Sunday is strange but you do what you have to do for the project, right?
I brought in some reinforcements on this one because I was making too many guesses with the front suspension so my mechanic Rick from Bavarian Rocket Science was kind enough to make an early morning cameo. Sure enough in a little over an hour his skill was on full display, setting up the front suspension beam as well as figuring out we needed to shorten the front sway bar in order for the shock to clear. Not only has Rick been racing for decades he also worked on these cars when they were new, so his eye can quickly do what would take me days of trail and error to figure out. Now that the suspension was set I got to work on the inner fender well and it went really well, sorry, bad pun. But the metal really flowed the way I wanted it to. It was a combination of shrinking, pounding, wheeling, and P-Hammering, then repeat. I got the piece within about 80% of where I want it before I ran out of time. I told my kids I would be home by noon to hit the flea market and spend the day working on craft projects. I got back at 12:11, off to the Flea Market!! Attached thumbnail(s) 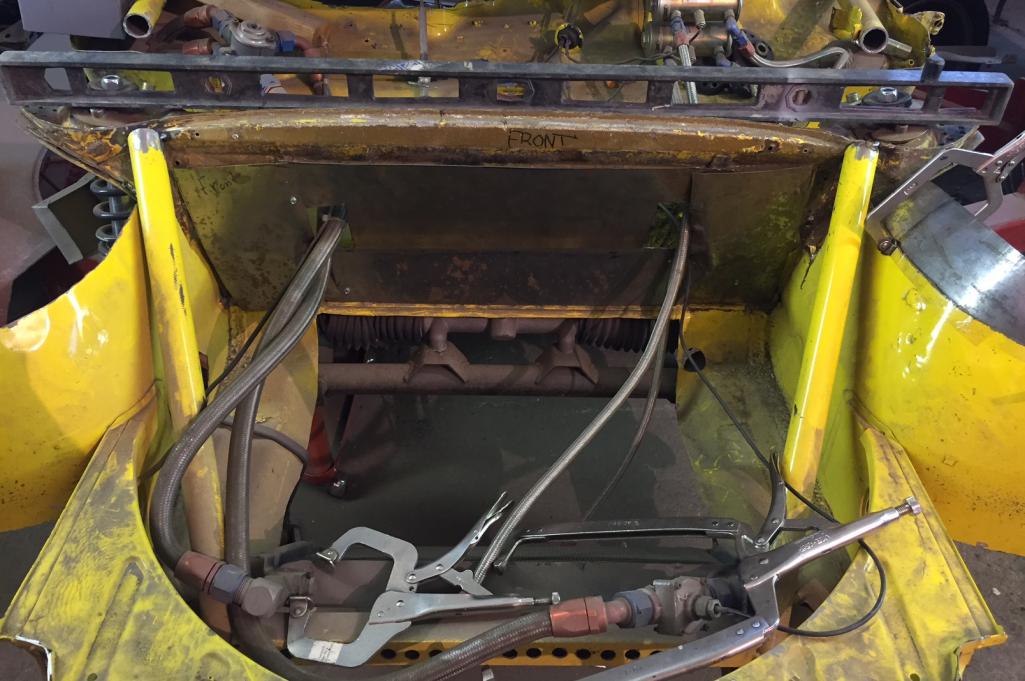 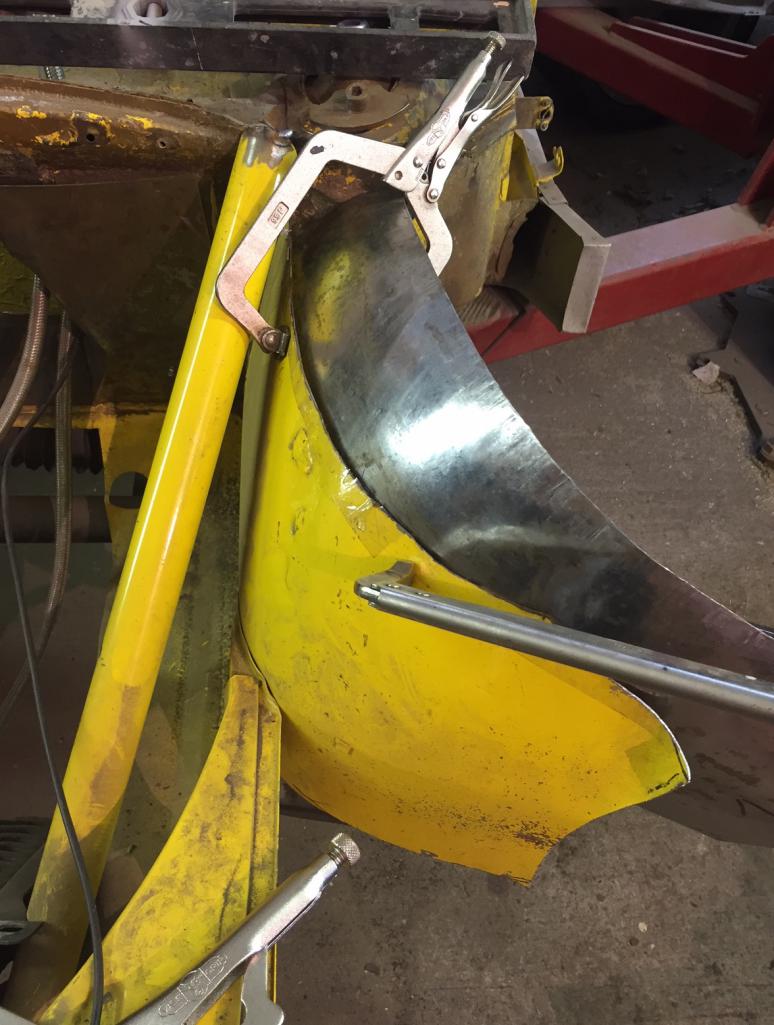 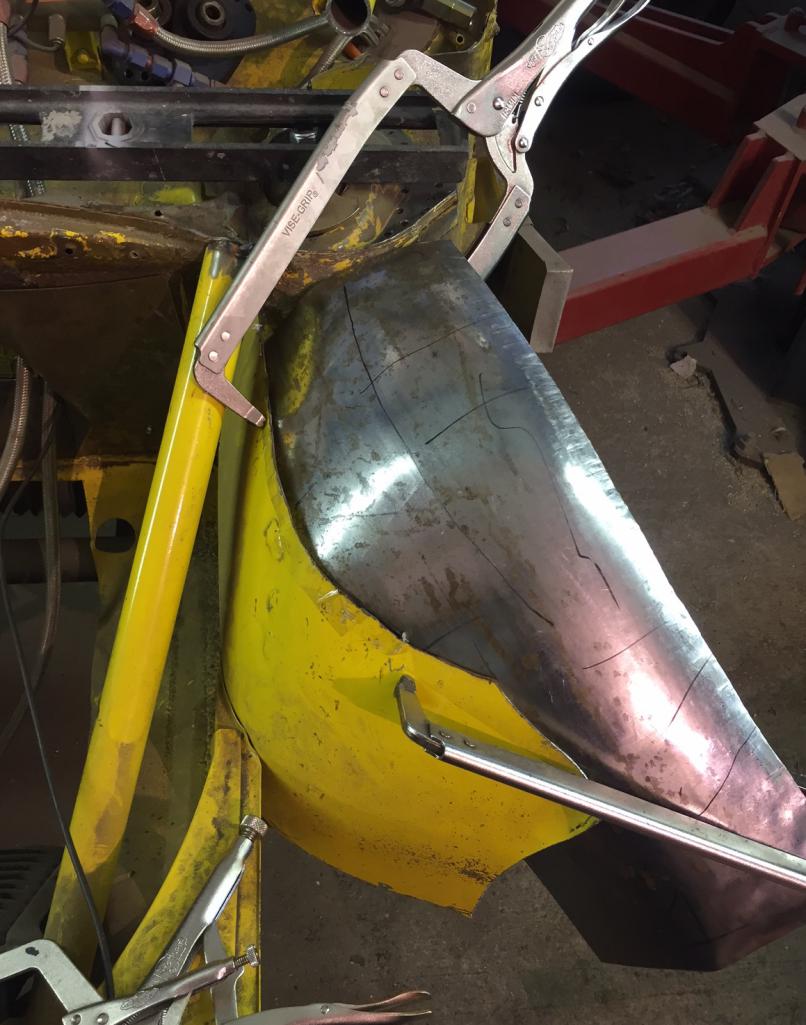 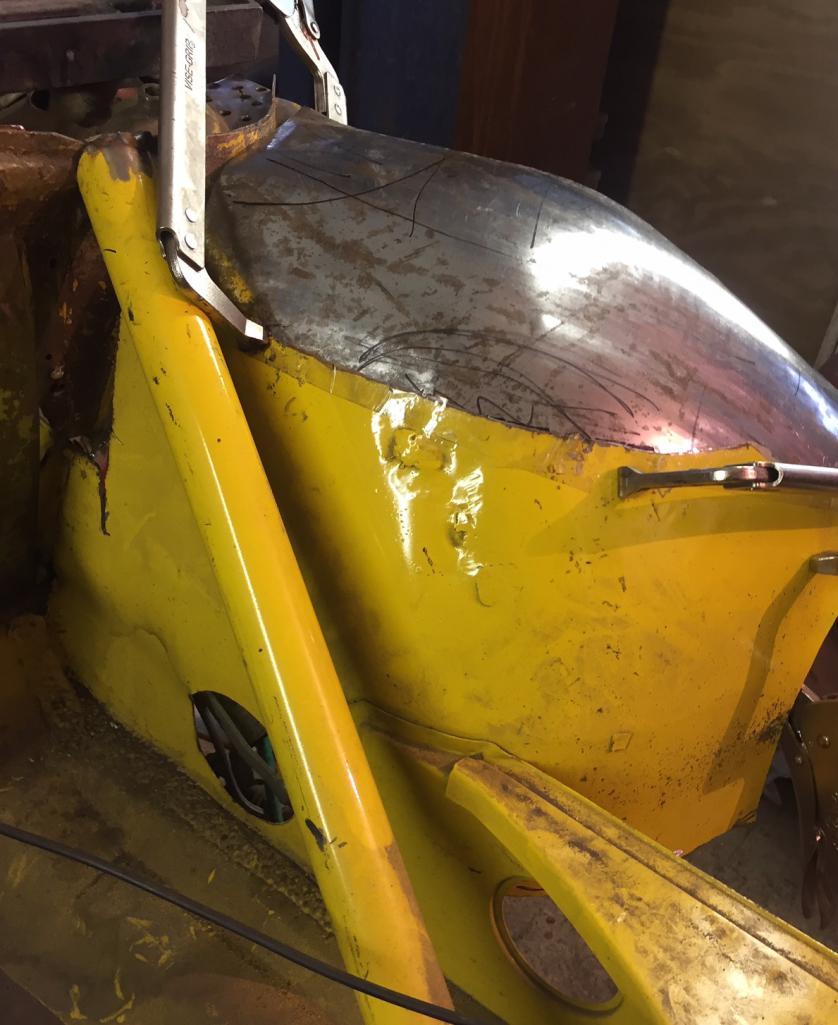
|
|
|
|
| bretth |
Mar 4 2018, 12:37 PM
Post
#740
|
|
Senior Member Group: Members Posts: 899 Joined: 23-June 15 From: Central TX Member No.: 18,882 Region Association: Southwest Region |
Nice! was near your shop yesterday wondering if you were (IMG:style_emoticons/default/smash.gif)
|
|
|
|
|
3 User(s) are reading this topic (3 Guests and 0 Anonymous Users)
0 Members:

|
Lo-Fi Version | Time is now: 17th November 2025 - 10:04 PM |
Invision Power Board
v9.1.4 © 2025 IPS, Inc.