|
|
|
Porsche, and the Porsche crest are registered trademarks of Dr. Ing. h.c. F. Porsche AG.
This site is not affiliated with Porsche in any way. Its only purpose is to provide an online forum for car enthusiasts. All other trademarks are property of their respective owners. |
|
|

  |

| jmitro |
 Feb 13 2017, 09:42 PM Feb 13 2017, 09:42 PM
Post
#82
|
|
Senior Member  Group: Members Posts: 713 Joined: 23-July 15 From: Oklahoma Member No.: 18,986 Region Association: None |
YES!! Finally got some color and clearcoat on the interior and front trunk!! Ravenna Green (IMG:style_emoticons/default/biggrin.gif)
(IMG:http://www.914world.com/bbs2/uploads_offsite/i75.photobucket.com-18986-1487043736.1.jpg) (IMG:http://www.914world.com/bbs2/uploads_offsite/i75.photobucket.com-18986-1487043737.2.jpg) (IMG:http://www.914world.com/bbs2/uploads_offsite/i75.photobucket.com-18986-1487043737.3.jpg) (IMG:http://www.914world.com/bbs2/uploads_offsite/i75.photobucket.com-18986-1487043737.4.jpg) Next is the exterior bodywork, final paint, and reassembly (IMG:style_emoticons/default/beerchug.gif) |
   |

 
|
| jmitro |
Jul 29 2017, 03:17 PM
Post
#83
|
|
Senior Member Group: Members Posts: 713 Joined: 23-July 15 From: Oklahoma Member No.: 18,986 Region Association: None |
the last 5 months have been lots of bodywork; sand/fill/sand and repeat. Had to source a new passenger side door due to a big dent.
Attached thumbnail(s) 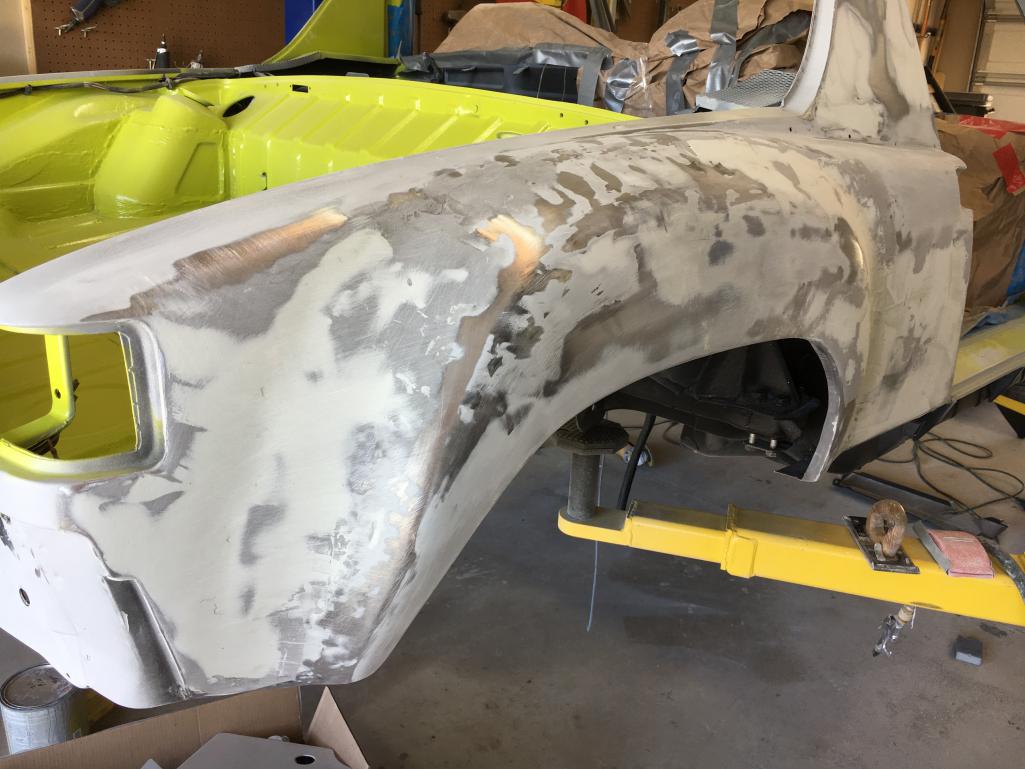
|
|
|
|
| jmitro |
Jul 29 2017, 03:31 PM
Post
#84
|
|
Senior Member Group: Members Posts: 713 Joined: 23-July 15 From: Oklahoma Member No.: 18,986 Region Association: None |
more body work; new (used) passenger side door.
After getting almost finished with body filler on the flares, I realized I probably didn't do it correctly, so it all came off and I started all over again. First layers with metal-impregnated filler, then regular filler, then featherweight. Sounds like a lot of filler but in truth it's 1/8" at the deepest and in most places much less. Attached thumbnail(s) 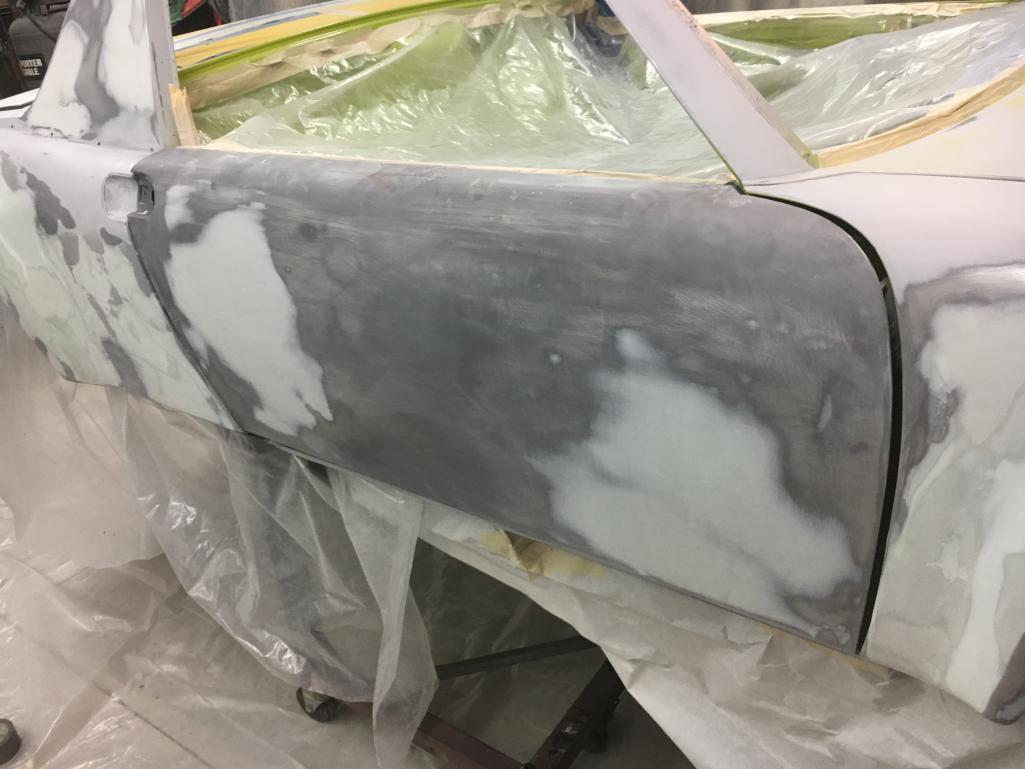 
|
|
|
|
| jmitro |
Jul 29 2017, 03:33 PM
Post
#85
|
|
Senior Member Group: Members Posts: 713 Joined: 23-July 15 From: Oklahoma Member No.: 18,986 Region Association: None |
high build primer. Several coats required to get it perfectly straight (correction, I actually sprayed some parts of the body with 4-5 coats, sanded, then REPEATED the process again). Needless to say this was a lot of work for a one man job; then add in the masking and prepping. Many many hours represented here.
Attached thumbnail(s)  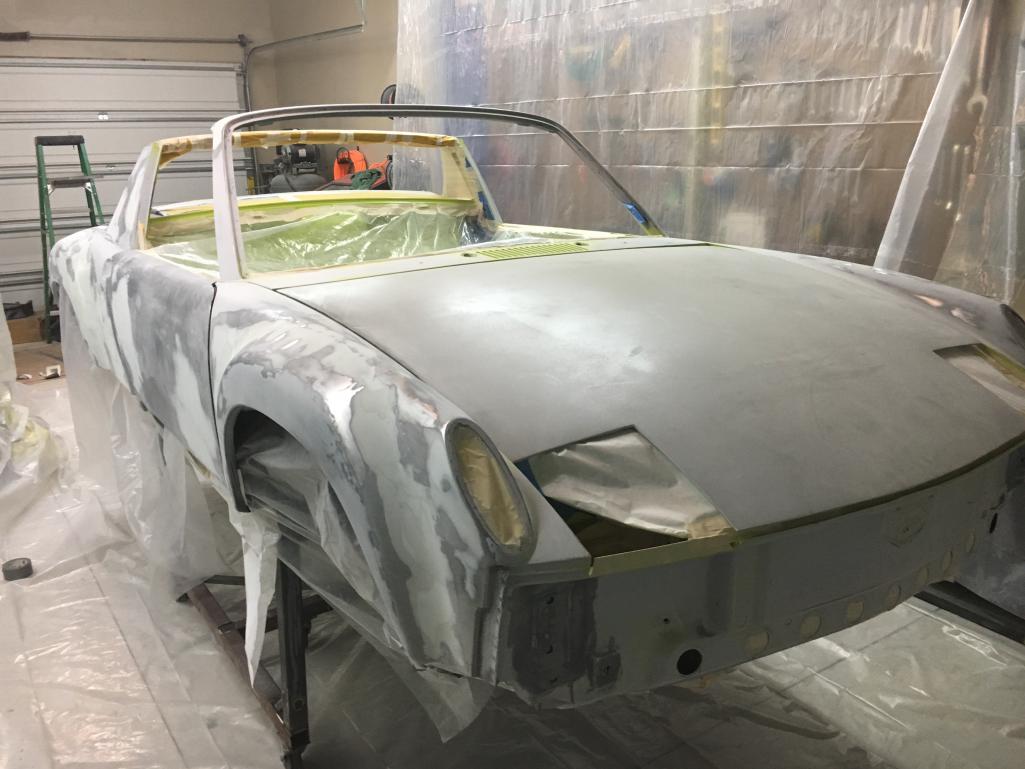
|
|
|
|
| jmitro |
Jul 29 2017, 03:37 PM
Post
#86
|
|
Senior Member Group: Members Posts: 713 Joined: 23-July 15 From: Oklahoma Member No.: 18,986 Region Association: None |
And FINALLY, nearly two years to the month since buying the car, I have the body finally painted. (IMG:style_emoticons/default/beerchug.gif) Three coats of Ravenna Green followed by 3-5 coats of urethane clearcoat.
The body came out really straight. Needs a good wetsanding from small crap in the air that adhered to the clear coat, but I'm happy with it. Hood, trunk, front and rear bumpers and the rocker panel covers are all fiberglass. Valances too if I use them. Hopefully that will save a small amount of weight to compensate for the chassis stiffening. Attached thumbnail(s) 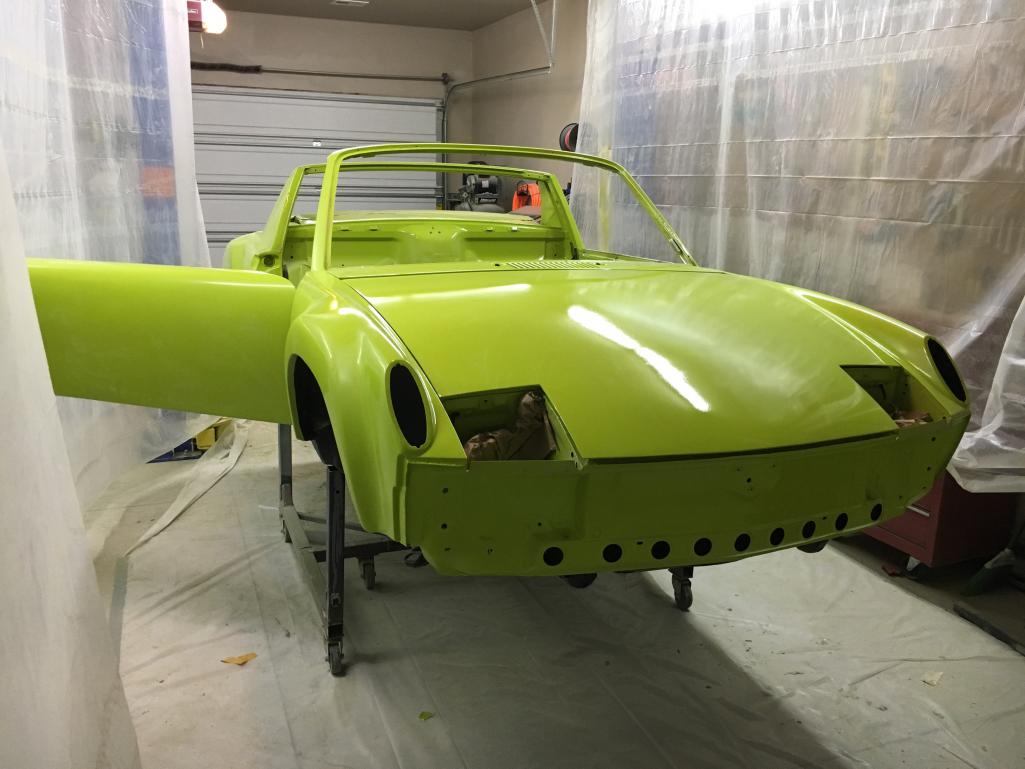 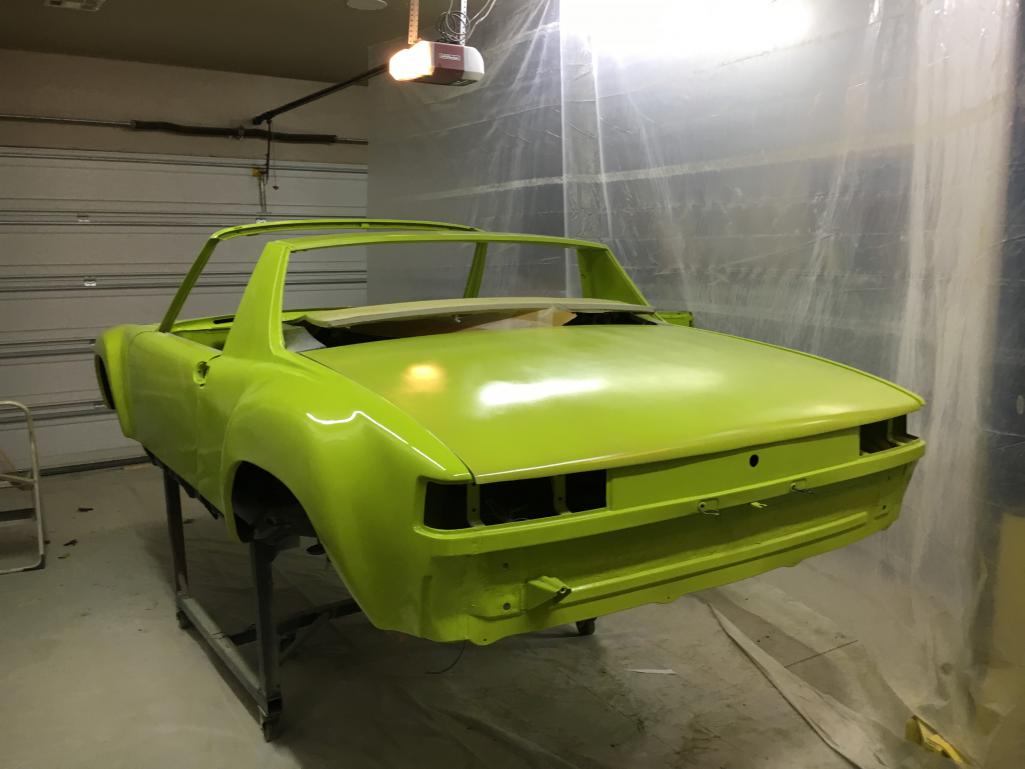
|
|
|
|
| Larmo63 |
Jul 29 2017, 03:42 PM
Post
#87
|
|
Advanced Member Group: Members Posts: 4,267 Joined: 3-March 14 From: San Clemente, Ca Member No.: 17,068 Region Association: Southern California |
Damn, that roll bar looks great. (IMG:style_emoticons/default/beerchug.gif)
I suppose you could still use the top seatbelt holes for the seatbelt end and just bolt it in over those roll bar tabs? Or no? |
|
|
|
| 74ravenna |
Jul 29 2017, 03:44 PM
Post
#88
|
|
Member Group: Members Posts: 479 Joined: 19-October 14 From: nh Member No.: 18,032 Region Association: North East States |
Looking great!
|
|
|
|
| jmitro |
Jul 29 2017, 04:17 PM
Post
#89
|
|
Senior Member Group: Members Posts: 713 Joined: 23-July 15 From: Oklahoma Member No.: 18,986 Region Association: None |
QUOTE(Larmo63 @ Jul 29 2017, 04:42 PM)  Damn, that roll bar looks great. (IMG:style_emoticons/default/beerchug.gif) I suppose you could still use the top seatbelt holes for the seatbelt end and just bolt it in over those roll bar tabs? Or no? Yes, that's my plan. credits to Chris at Tangerine for making a perfectly bent hoop. (IMG:style_emoticons/default/biggrin.gif) |
|
|
|
| simonjb |
Jul 30 2017, 09:23 PM
Post
#90
|
|
KiwiMan Group: Members Posts: 574 Joined: 18-October 16 From: Stamford, Connecticut Member No.: 20,505 Region Association: North East States |
Fantastic build story ! Thanks for sharing
|
|
|
|
| jmitro |
Jan 22 2018, 11:33 PM
Post
#91
|
|
Senior Member Group: Members Posts: 713 Joined: 23-July 15 From: Oklahoma Member No.: 18,986 Region Association: None |
Seems like slow progress, but a lot of work has happened in the last 8 months. Basically all suspension is installed, all brakes are installed, fuel tank installed with fuel lines, pump relocation, filter, and stainless steel tunnel and engine compartment lines.
Suspension: Front - stock torsion bars, stock sway bar, stock A arms, new Elephant Racing rubber bushings, new ball joints, 19mm raised spindle 911T strut bodies with new Bilstein inserts; polyurethane upper strut mounts, 914 Rubber rebuilt steering rack, Rebel Racing spherical tie rod ends with adjustable bump steer and double sheer mounts Rear - Bilstein yellow shocks, 140 Weltmeister springs, stock rear sway bar, Elephant Racing rubber rear bushings and upper mounts Brakes PMB rebuilt 914 rear calipers, 911 M front calipers, new lines and hoses, new 19mm master cylinder and reservoir lines, PMB rebuilt proportioning valve, new Ebrake cables, Porterfield R4S pads F/R; new solid R rotors (PMB 5 lug conversion), new vented 20mm F rotors, new inner/outer bearings Attached thumbnail(s) 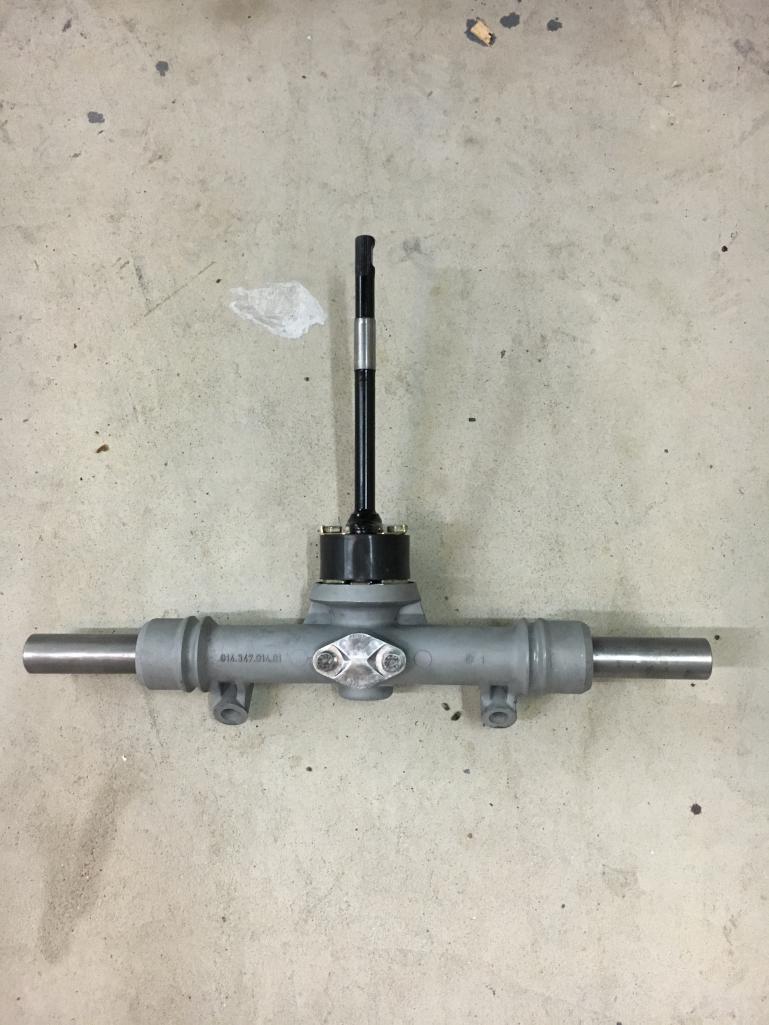 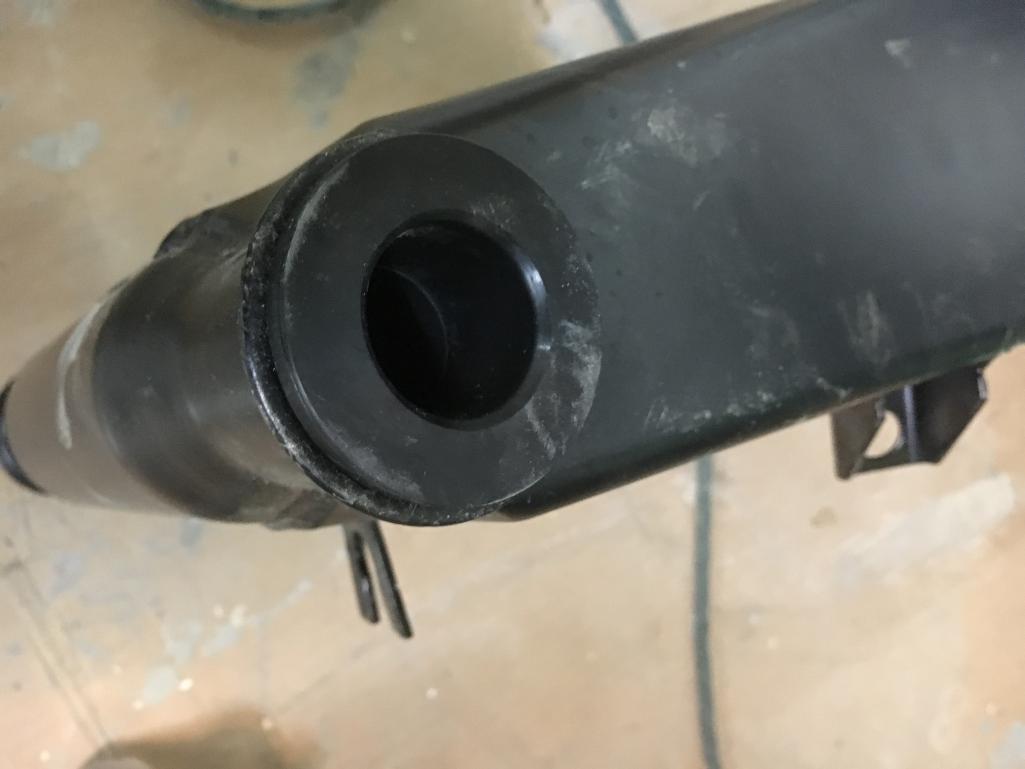
|
|
|
|
| jmitro |
Jan 22 2018, 11:35 PM
Post
#92
|
|
Senior Member Group: Members Posts: 713 Joined: 23-July 15 From: Oklahoma Member No.: 18,986 Region Association: None |
19mm MC with grommets and rebuilt 914 rear caliper
Attached thumbnail(s) 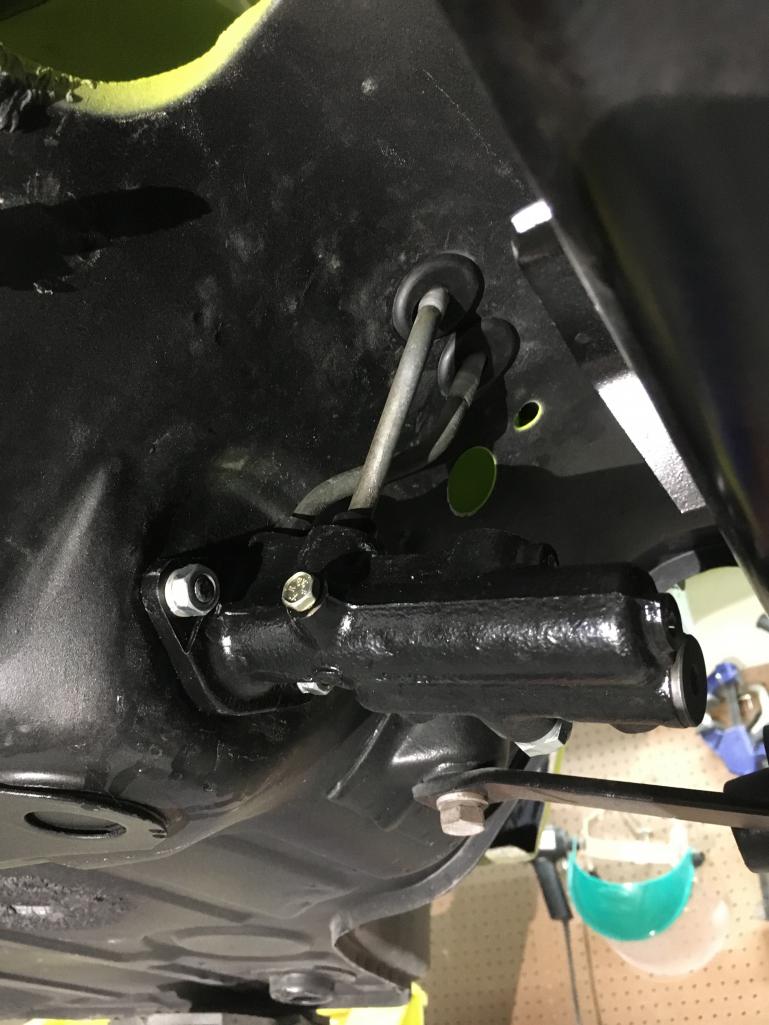 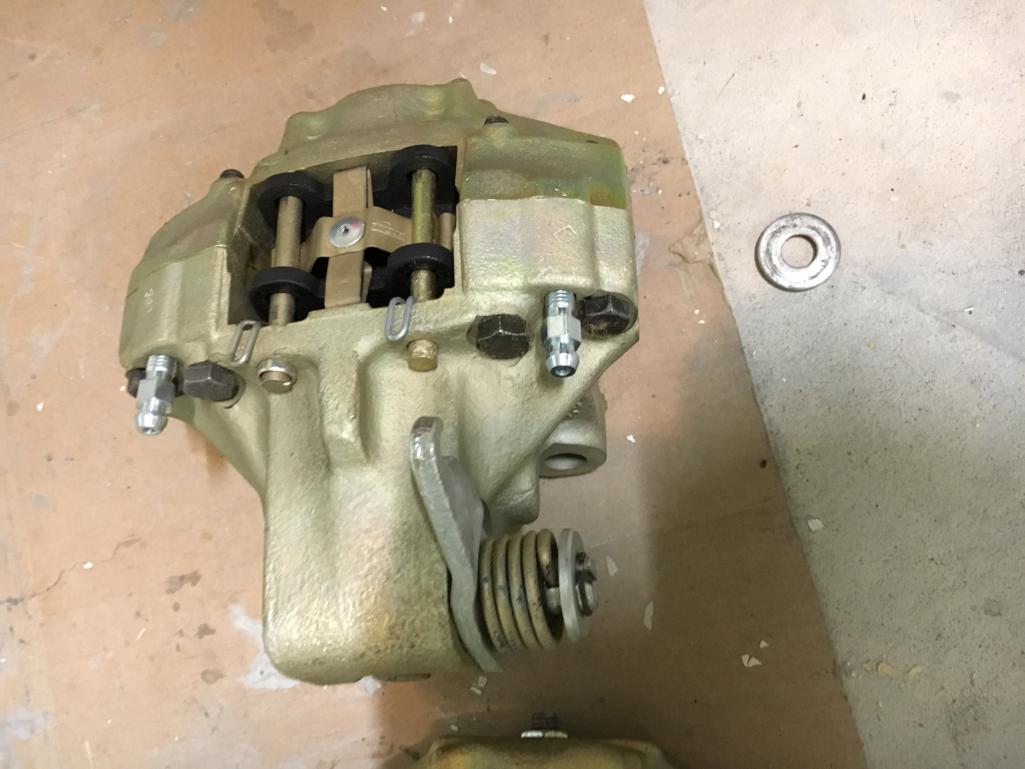
|
|
|
|
| jmitro |
Jan 22 2018, 11:39 PM
Post
#93
|
|
Senior Member Group: Members Posts: 713 Joined: 23-July 15 From: Oklahoma Member No.: 18,986 Region Association: None |
19mm DIY raised spindle 911 struts with Bilstein inserts and double sheer steering arm mounts; installed in place with 911 rotor dust shields in place.
It's notable in this photo the bump steer has not been set and therefore the nuts remain loose. Credits to Rebel Racing for their bump steer kit. Attached thumbnail(s) 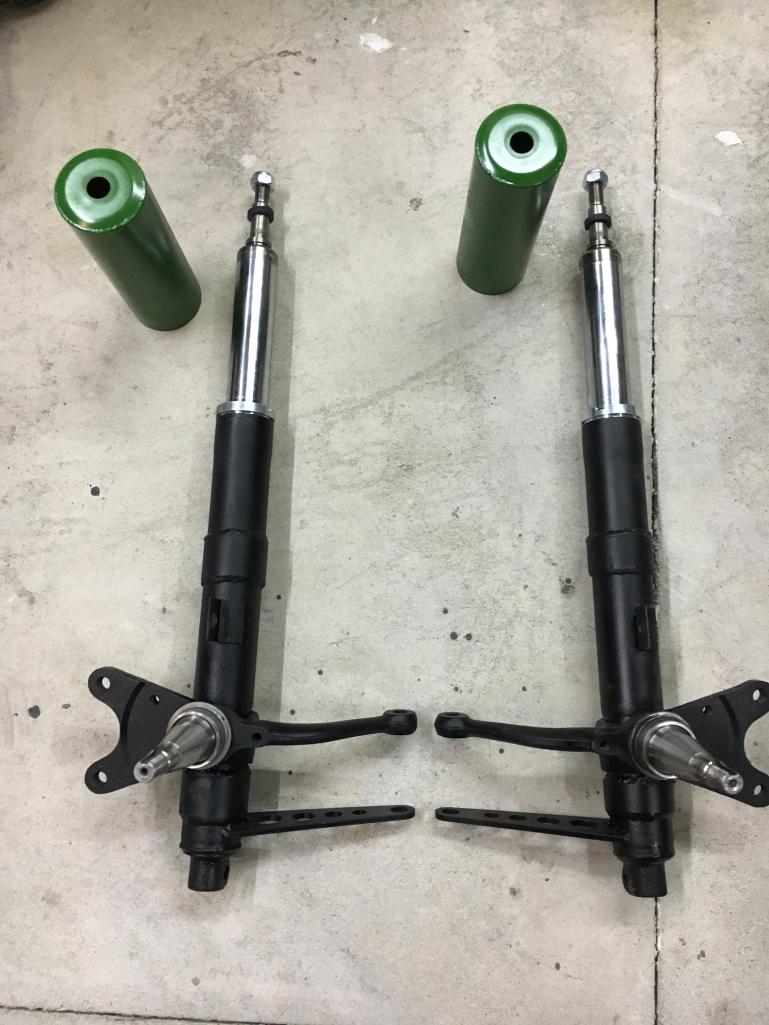 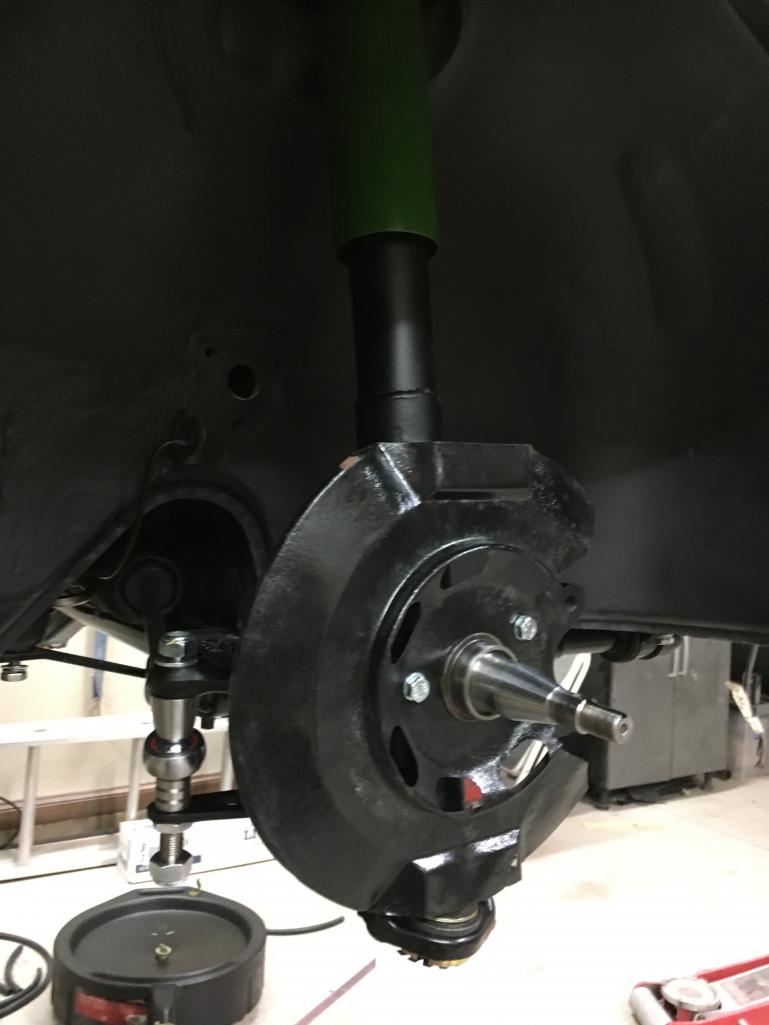
|
|
|
|
| jmitro |
Jan 22 2018, 11:42 PM
Post
#94
|
|
Senior Member Group: Members Posts: 713 Joined: 23-July 15 From: Oklahoma Member No.: 18,986 Region Association: None |
I also managed to get the fuel tank installed with SS fuel lines. This was a PITA.
Also ordered the full rubber seal package from 914 rubber and have started installing a few such as the bulkhead seals here Attached thumbnail(s) 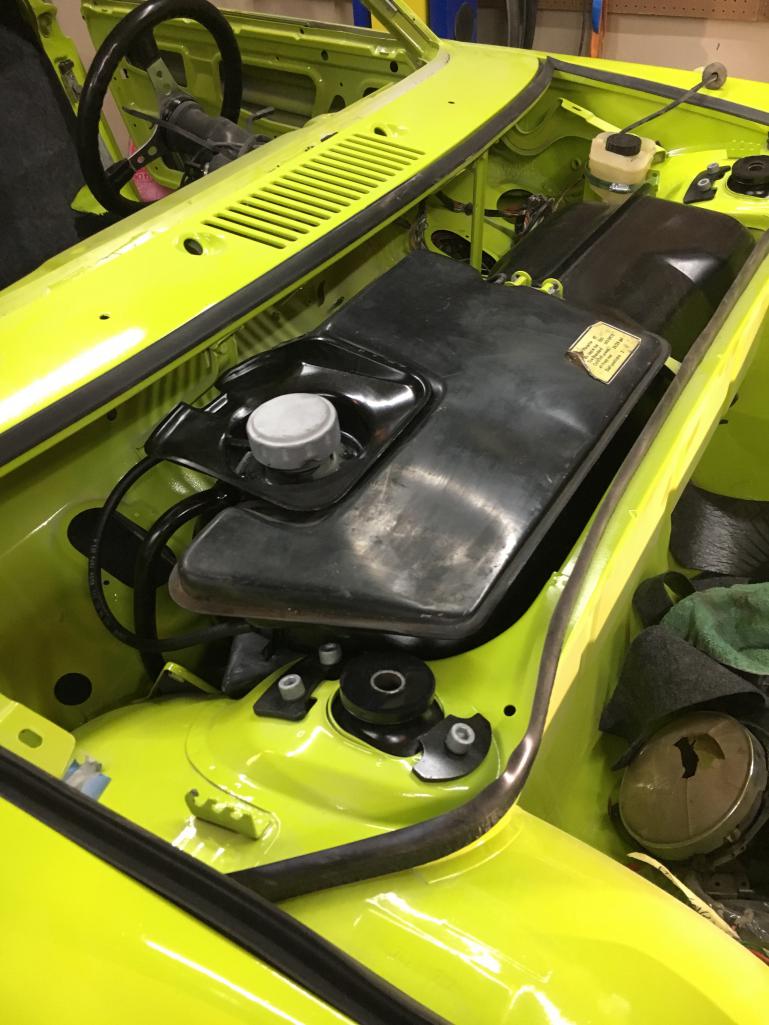
|
|
|
|
| jmitro |
Jan 22 2018, 11:44 PM
Post
#95
|
|
Senior Member Group: Members Posts: 713 Joined: 23-July 15 From: Oklahoma Member No.: 18,986 Region Association: None |
new LED front turn signals, rear turn signals, and rear brake lights from "spoke". I debated about using the original halogen style bulbs and maintaining the car's classic character, but decided that safety and high visibility was justification for altering the original classic character of the car.
Attached thumbnail(s) 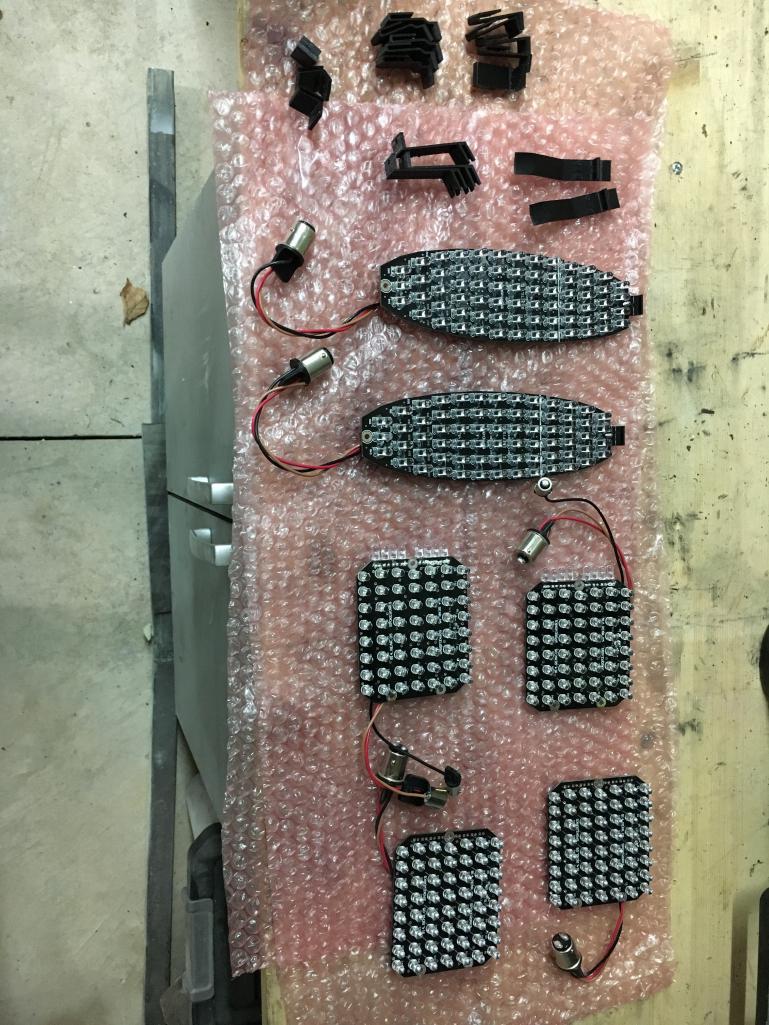
|
|
|
|
| jmitro |
Jan 22 2018, 11:45 PM
Post
#96
|
|
Senior Member Group: Members Posts: 713 Joined: 23-July 15 From: Oklahoma Member No.: 18,986 Region Association: None |
LED tails
Attached thumbnail(s) 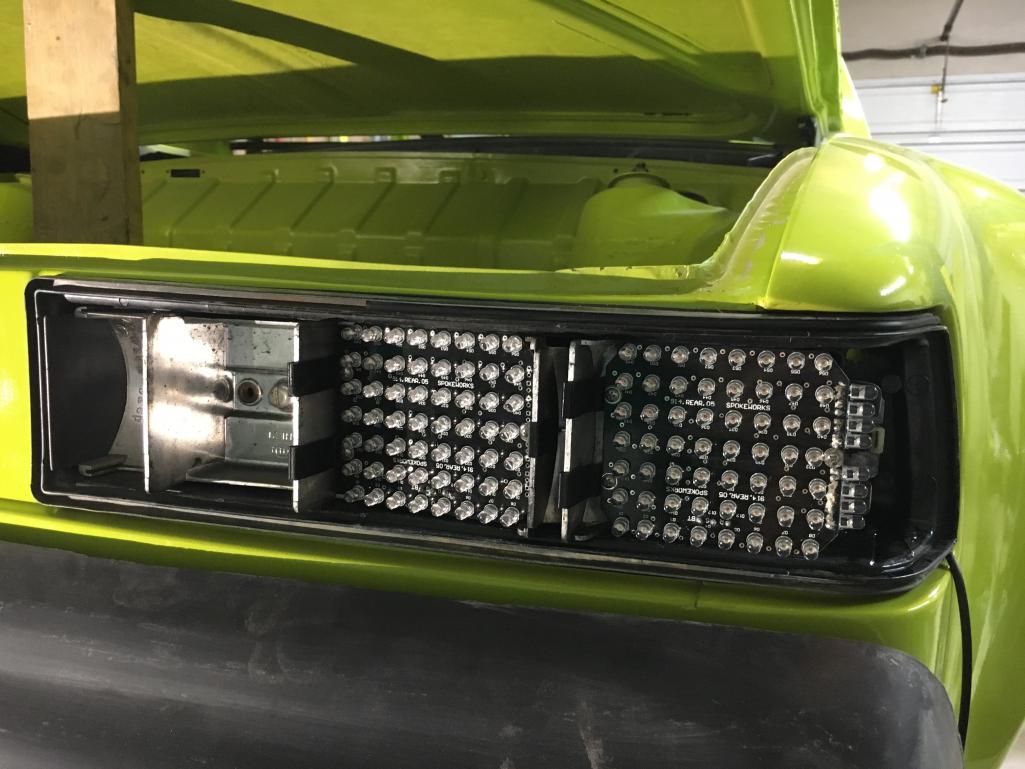
|
|
|
|
| pete000 |
Jan 22 2018, 11:46 PM
Post
#97
|
|
Senior Member Group: Members Posts: 1,887 Joined: 23-August 10 From: Bradenton Florida Member No.: 12,094 Region Association: South East States |
Looking great !
|
|
|
|
| jmitro |
Jan 22 2018, 11:47 PM
Post
#98
|
|
Senior Member Group: Members Posts: 713 Joined: 23-July 15 From: Oklahoma Member No.: 18,986 Region Association: None |
914 rubber lenses and seals
Attached thumbnail(s) 
|
|
|
|
| jmitro |
Jan 22 2018, 11:58 PM
Post
#99
|
|
Senior Member Group: Members Posts: 713 Joined: 23-July 15 From: Oklahoma Member No.: 18,986 Region Association: None |
The fun part is putting all the new parts back on!
Attached thumbnail(s) 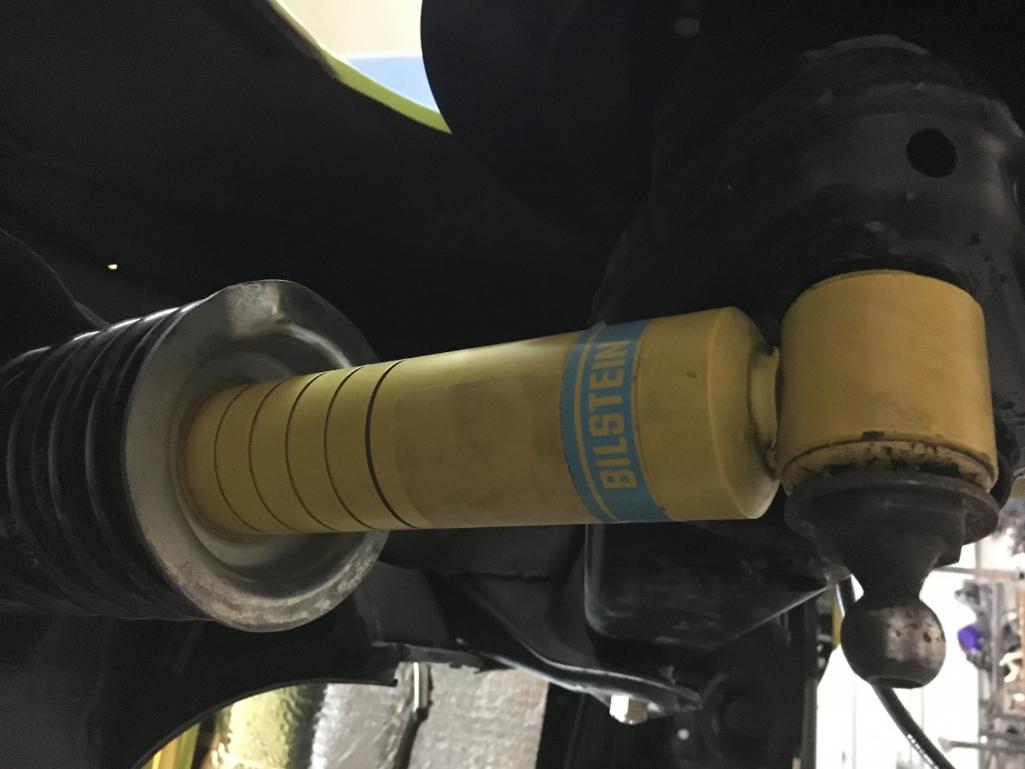 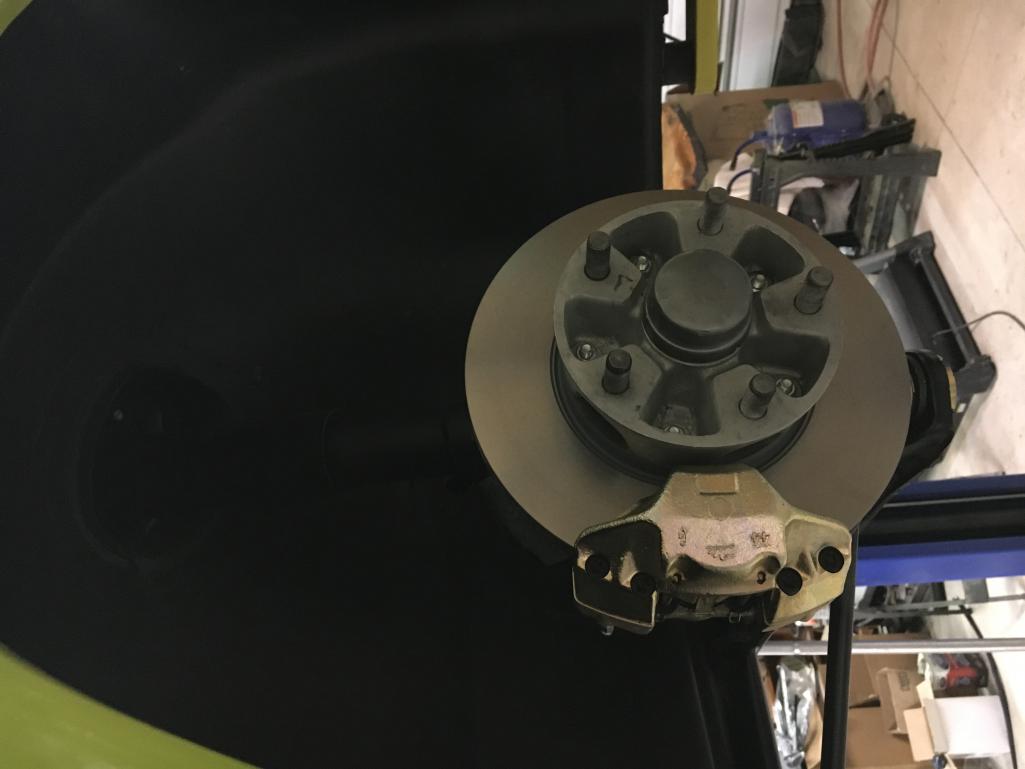
|
|
|
|
| jmitro |
Jan 22 2018, 11:59 PM
Post
#100
|
|
Senior Member Group: Members Posts: 713 Joined: 23-July 15 From: Oklahoma Member No.: 18,986 Region Association: None |
Rear brakes
Attached thumbnail(s) 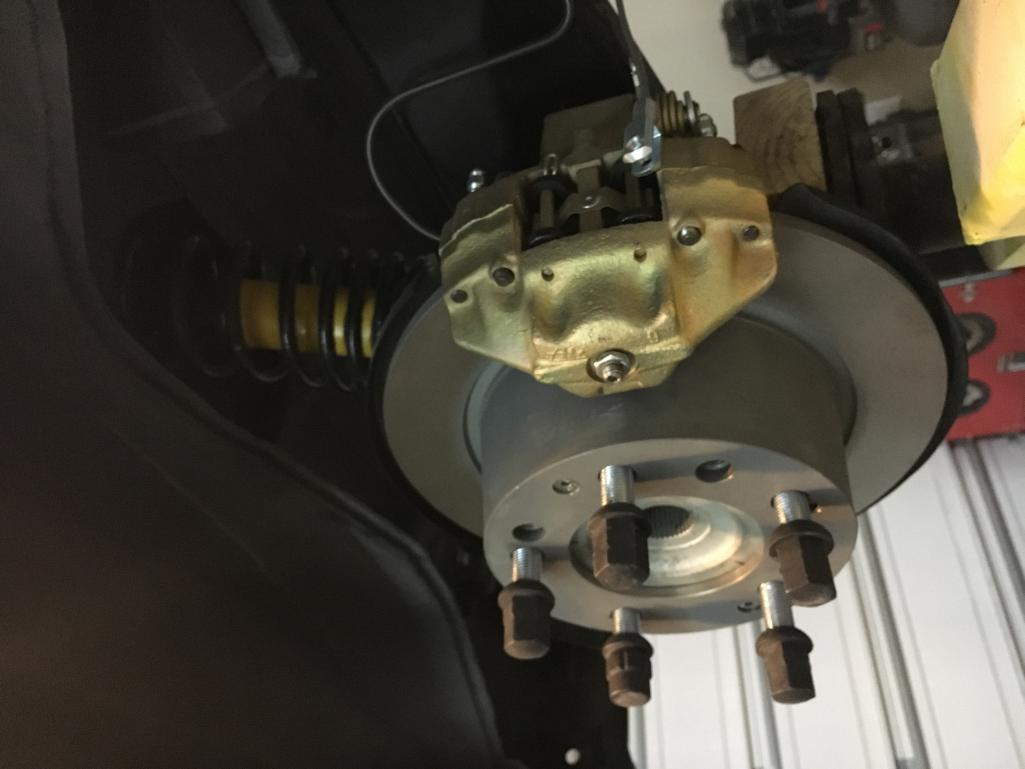
|
|
|
|
|
1 User(s) are reading this topic (1 Guests and 0 Anonymous Users)
0 Members:

|
Lo-Fi Version | Time is now: 30th June 2026 - 06:11 PM |
Invision Power Board
v9.1.4 © 2026 IPS, Inc.